How to disable PlayStation VR2 headset vibration

The PlayStation VR2 headset features a rumble motor, which is designed to add an extra layer of immersion when combined with the haptic feedback coming from the left and right PlayStation VR2 Sense controllers. The vibration may also help with preventing motion sickness and nausea in some cases.

If you don’t find that the headset rumble to be immersive at all, or even somewhat annoying, then you can check out this tutorial at Seeking Tech to see how you can properly disable this feature.

Method #1

For the first method, you can use the Quick Settings menu when playing a virutal reality game on your PS5 or PS5 Digital Edition system by taking the following steps:

1. Press the PS logo button on either the left or right PlayStation VR2 Sense controller in order to open the Control Center quick menu.

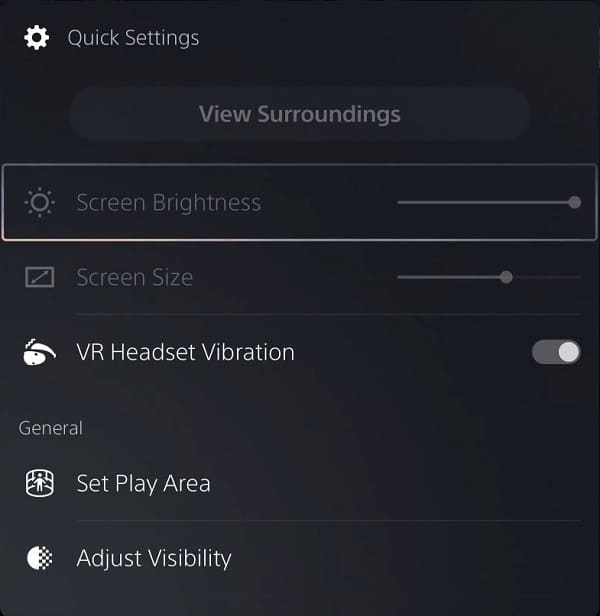
2. In the Control Center quick menu, you need to select Quick Settings card.

3. After getting to the Quick Settings menu, make sure that the VR Headset Vibration setting is disabled.
Method #2

For the second method, you can disable the rumble motor from the Settings menu of your PlayStation 5 or PlayStation 5 Digital Edition console by taking the following steps:

1. First, you need to head over to the home screen, which you can do by pressing and holding the PS button on the left or right PlayStation VR2 Sense controller. You can also quick press the same PS button and then select the home icon.

2. In the home screen, select Settings from the top right side of the screen.

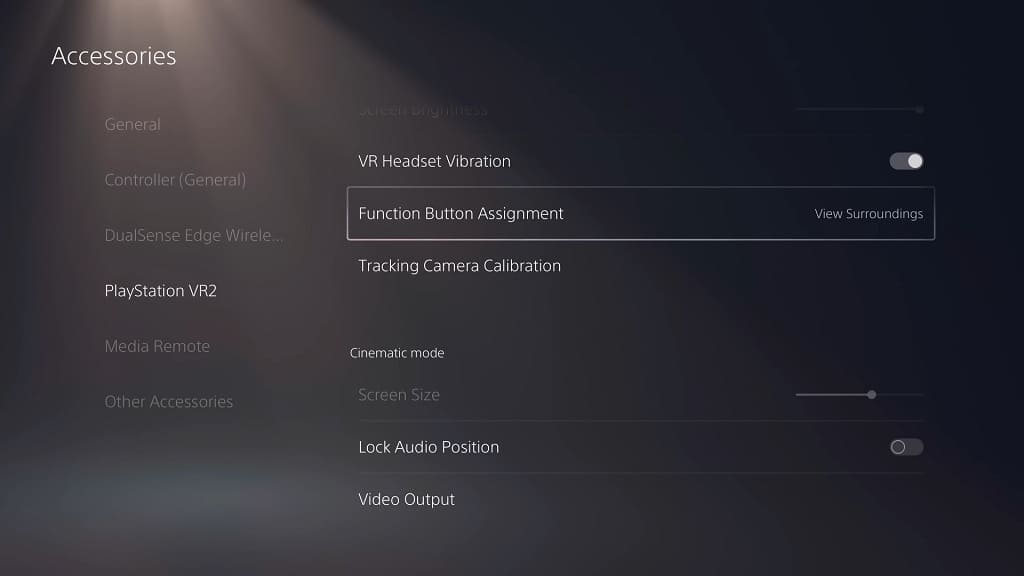
3. From the front page of Settings, you first need to head over to the Accessories section.

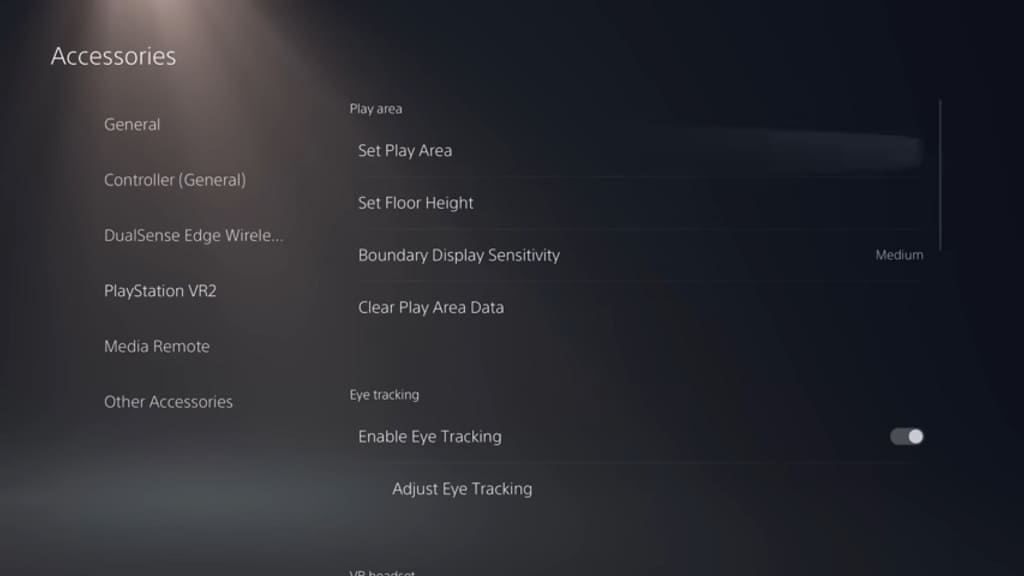
4. Inside the Accessories section, you then need to select PlayStation VR2 on the left column.

5. On the right side of the same screen, you should make sure that the VR Headset Vibration setting is disabled.
Method #3

Some games that support the headset force feedback feature may also come with the option to completely disable it. Therefore, you may want to look through the in-game menus while playing a particular title that you want to turn off this feature for.

By using this method, you will still be able to use headset rumble for other supported virtual reality games.

How to prevent PlayStation VR2 from fogging up

When playing a PS5 game in PlayStation VR2, you may notice that the lens will eventually fog up. To see how you can prevent condensation from getting inside the virtual reality headset, you can take a look at this guide from Seeking Tech.

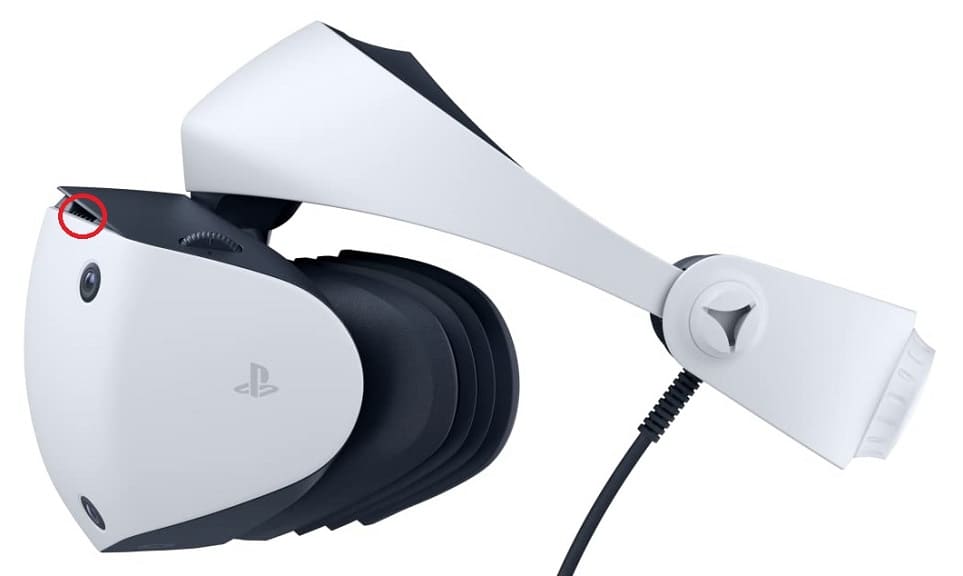
1. It is important to note that the PlayStation VR2 features vents located at the top of the scope. Along with a built-in fan, these vents help add air circulation when you are wearing the headset, which should prevent condensation from building up. Due to these new features, the PS VR2 is better equipped at handling fogging when compared to the original PS VR1.

So, for the first potential solution, you should make sure that the vents aren’t covered up. If it looks dusty, then you need to clean it so that there won’t be any moisture build up.

2. We also recommend having a fan blow directly to your face. By doing so, you will be able to keep your body cool, which means less sweating during the more intensive sessions. Of course, the fan should also add more air circulation to the headset as well.

Another major benefit of using a fan is that it should help with motion sickness. If you are new to VR gaming or haven’t played with a virtual reality headset in a long time, then you will need to build up your tolerance level. Using a fan should keep your mind situated to the real world, which should help with preventing nausea.

3. Furthermore, we suggest that you wear a headband or other head wear that will absorb the sweat from your forehead. If you don’t then the sweat could end up dripping down and into the headset, which will cause the VR screen to fog up quickly.

A headband you should prevent any temporary marks on your forehead that you may get from wearing the PlayStation VR2 headset.

4. It is a good idea to take frequent breaks when playing the PlayStation VR2 during long gaming sessions.

When taking a break, we recommend that you take off the headset so that it can get more airflow. You should also wipe the sweat from your face and/or headset to prevent any potential fogging when you resume your gaming session.

How to fix Gran Turismo 7 crashing issues when playing with PlayStation VR2

Gran Turismo 7 recently added support for the PlayStation VR2 headset. When playing this racing game in virtual reality, you may notice that it keeps crashing, especially when you load into a race. To see how you can prevent GT7 from hard locking in VR mode, you can take a look at this troubleshooting article from Seeking Tech.

1. If your PS5 has crashed, then you can try pressing and holding its power button to see if you can properly shut it down.

If the console can’t be turned off by using the aforementioned method, then you need to unplug it from the power outlet.

2. If you have Gran Turismo 7 installed on a M.2 SSD instead of the Console Storage, then that may be causing the crashing problems. Therefore, you can try moving the game from the M.2 SSD to the Console Storage.

In order to do so, go to the home screen of your PS5 console, which you can do by pressing and holding the PS button on the DualSense or PlayStation VR2 Sense controller. Afterwards, select Settings and then Storage. You should then be able to move games between different storage options from there.

3. If Gran Turismo 7 is still hard locking even if you have it installed on the Console Storage, then you can try rebuilding the database of your PlayStation 5 or PlayStation 5 Digital Edition console by doing the following:

  • Turn off the PS5.
  • Press and hold the power button on the console for around 7 seconds. You should hear one beep immediately and then a second beep a short while later. You can let go of the power button after the second beep.
  • On the television screen, you should see a message asking you to plug a controller into the USB port and then press the PS button.
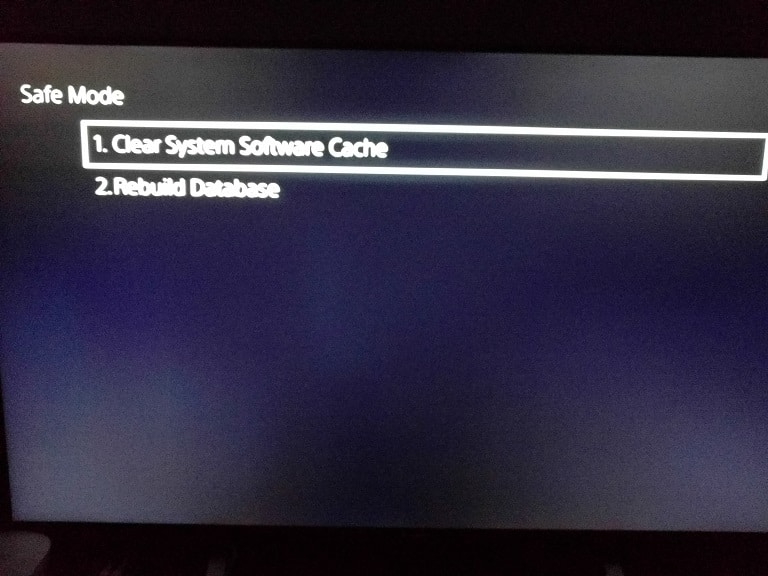
  • If you did the previous step correctly, then you should now be in the Safe Mode menu. Here, you need to select Clear Cache and Rebuild Database.
  • Afterwards, select Rebuild Database.

4. If you haven’t done so already, make sure you have the latest patch installed for GT7. A new update may fix the crashing issue in the VR mode.

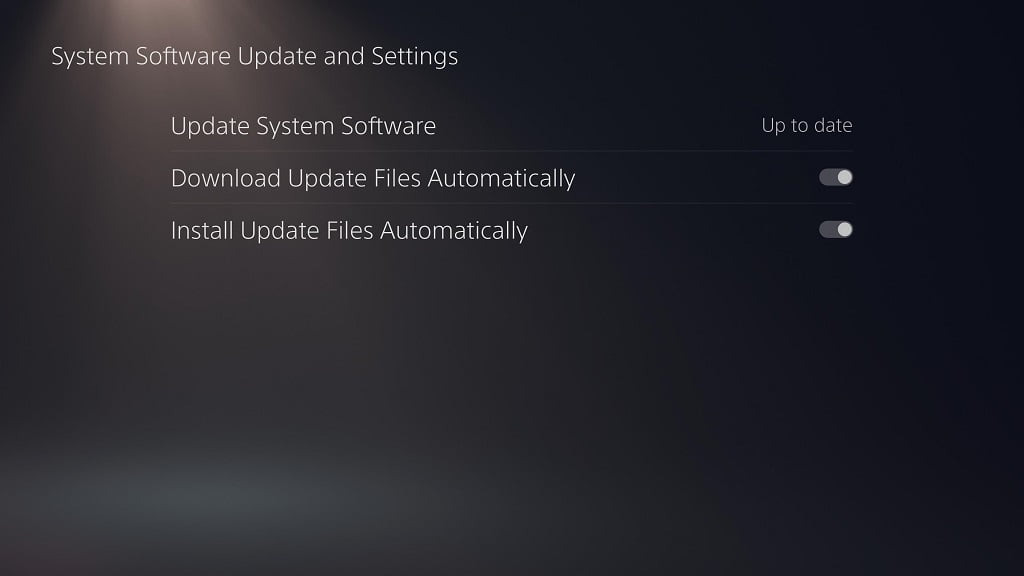
5. New firmware updates for the PS5 usually come with stability improvements. Therefore, you should make sure that you have the latest software version installed.

6. Both the PlayStation VR2 headset and PlayStation 5 console can overheat. Therefore, you should make sure that your room is well ventilated and is below 95 °F or (35 °C).

If the PS VR2 and/or PS5 feels hot when touched, then we recommend that you turn the devices off and then wait until they cool down before you turn them back on again.

To learn more about how you can prevent this virtual reality headset from overheating, you can take a look at this article.

7. If none of the aforementioned steps have worked so far when it comes to preventing GT7 from crashing when being played with the PS VR2, then we suggest that you try contacting the PlayStation Support team for additional help.

How to fix PlayStation VR2 ‘something went wrong’ error

When trying to use the PlayStation VR2 headset on your PlayStation 5 or PlayStation 5 Digital Edition console, you can see the following error message:

  • “Something went wrong, and your PlayStation VR2 has restarted.”

To see how you can get rid of this notification and get your virtual reality headset to work as intended, you can take a look at this troubleshooting article from Seeking Tech.

1. For the first step, you can try unplugging and then re-plugging the headset into the USB Type-C port of your PS5. When re-plugging the cable, make sure you flip it around from the previous position to see if doing so will fix this problem.

2. Furthermore, you can try blowing compressed air to the USB connector on the USB cable of the PS VR2 as well as the USB Type-C port of the console to see if you are able to clear out any dust particles that may have been causing the connection problems.

3. You can also try clearing the cache or rebuilding the database of your PlayStation 5 by doing the following:

  • Turn off your PS5 if you haven’t done so already.
  • Press and hold the power button on the PS5 for approximately 7 seconds until you hear a second beep.
  • Connect a DualSense controller to the PS5 by using a USB cable.
  • Press the PS button on the controller.
  • In the Safe Menu, you need to select Clear Cache and Rebuild Database.
  • Afterwards, you need to select Clear System Software Cache.
  • You can then select Rebuild Database.

4. A factory reset of your PlayStation 5 or PlayStation 5 Digital Edition console may also help fix the “something went wrong” problem.

To do so, you should first back up your data by heading over to the Settings menu of your PS5 console. Afterwards, select System > System Software > Back Up and Restore > Back Up Your PS5.

You can then start the factory resetting process by heading over to the first page of Settings and then selecting System > System Software > Reset Options > Reset Your Console.

Once the factory reset process has been completed, return to the front page of Settings. This time, you need to select System > System Software > Back Up and Restore > Restore Your PS5.

5. If your virtual reality headset feels hot, then it could be overheating.

6. If none of the aforementioned potential solutions worked, then we suggest contacting PlayStation for additional support.

There is a possibility that your PlayStation VR2 is defective. Therefore, you may need to send the virtual reality headset in to get it repaired or replaced.

How to prevent the PlayStation VR2 from overheating

If you aren’t careful, then your PlayStation VR2 headset could end up overheating. To see how you can prevent this from happening, you can check out this Seeking Tech article.

1. The PS VR2 has an operating temperature range of 41 °F to 95 °F (or 5 °C to 35 °C).

If your room temperature is above 95 °F or (35 °C), then we suggest that you turn off both the virtual reality headset and your PlayStation 5 console. Otherwise, the device can easily overheat.

Afterwards, you can either wait for the room to cool down or move the PS5 and PS VR2 into a cooler room.

2. Furthermore, you should also avoid playing in a very humid environment as the extra moisture could end up causing your PlayStation VR2 and/or PlayStation 5 to malfunction.

3. Avoid playing near a heat source as the extra heat could end up causing the internal temperature of the headset to rise.

Of course, you should avoid exposing the accessory to direct sunlight as it can not only cause overheating, but also tracking issues.

4. You should make sure that your room is well ventilated as well to disperse the heat.

We recommend using a fan as it is also helpful at calming your motion sickness as well as keeping your own body cool during intensive VR sessions.

5. Avoid blocking the ventilation shafts located at the top of the headset. Otherwise, the heat generated by the headset and your face will be trapped.

6. When playing the PS VR2 for many consecutive hours, we suggest that you take frequent breaks to give the virtual headset some time to cool off. Once you remove the accessories from your head, it should automatically turn off its screen.

You may also want to consider turning off your PS5 too if you hear the fans of the console getting audibly louder.

7. If you decide to push through and keep playing PlayStation VR2 even with the rising temperature, then you may eventually see a warning message appear on the screen saying that the device is overheating.

At this point, we recommend turning off the headset and your console as soon as possible. Otherwise, you could end up causing hardware damage to both the PS VR2 and PS5.

How to fix PlayStation VR2 chromatic aberration

When playing a PlayStation VR2 game, you may notice some chromatic aberrations as objects may appear slightly blurry and /or have a colored border. This can be really apparent if you are looking at a white text over a black background.

To see how you can get rid of this color bleeding, you can take a look at this troubleshooting article from Seeking Tech.

Chromatic aberration is usually a sign that you haven’t found the “sweet spot” of the virtual reality headset where the image is displayed at the sharpest. Therefore, you need to adjust the position of the PS VR2 on your head by taking the following steps:

1. First off, we recommend that you press and hold the PS button to open the home menu of your PlayStation 5 or PlayStation 5 Digital Edition console as it should be easier to see the chromatic aberration from this screen.

Of course, you can also look at a white text in the game you are currently playing as well.

2. Concentrate on a specific word or string of text.

3. If the color of the white text is bleeding off, or the text is becoming blurrier, in a specific direction, then you need to move the scope of the headset to the same direction.

For instance, if you see a blue or red border of a white text on the right side, then you need to move the PS VR2 to the right.

During this process, you may need to re-adjust the headband if the new position starts to feel uncomfortable and/or wouldn’t stay in place.

4. You may also need to use the Adjust Visibility menu.

To get there, press the PS button, select Quick Settings and then select Adjust Visibility.

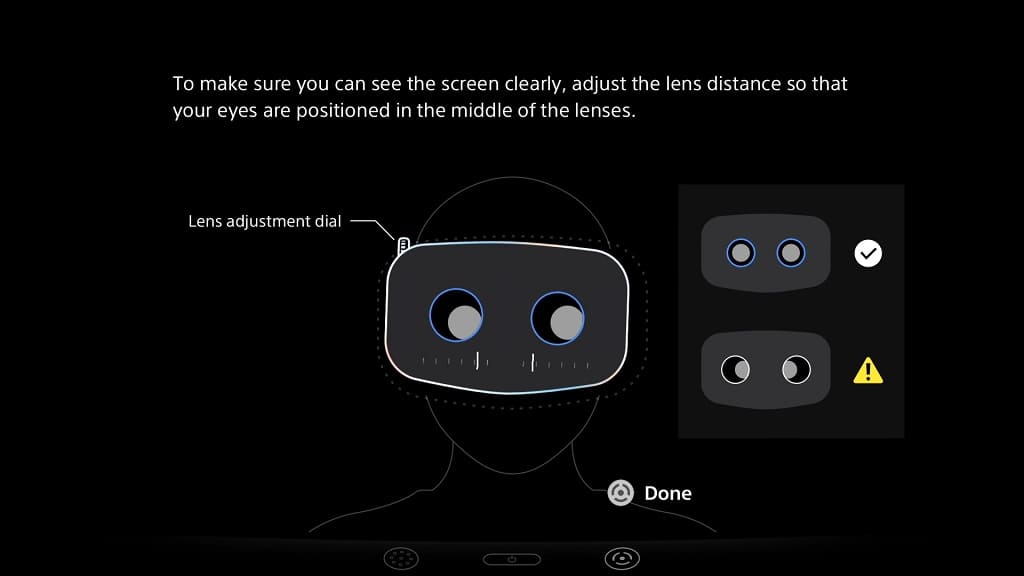
Alternatively, you can open the Settings menu from the home screen of your PS5 and then select Accessories > PlayStation VR2 > Adjust Lens Distance and VR Headset Position.

If you need to adjust the Lens Distance, then you need to use the Lens Adjustment Dial located at the top of the headset.

5. Moreover, you may want to re-calibrate your eye-tracking.

In order to do so, press the PS button and then select Quick Settings > Eye Tracking.

As an alternate method, you can go back to the home menu of the PS5 and then select Accessories > PlayStation VR2 > Adjust Eye Tracking.

6. Once you find the sweet spot, you should no longer see chromatic aberration on the home screen of your PlayStation 5 or PlayStation 5 Digital Edition console.

It is important to note that you may need to re-adjust the headset position again from a game-by-game basis. For some titles, you may also be able to disable chromatic aberration from the in-game menus if the developer has that option built in.

7. If you still can’t get your headset aligned properly to get rid of the chromatic aberration, then we recommend contacting PlayStation for additional help.

How to find best selling and most popular PlayStation VR2 games

You are probably wondering what are currently the best selling and most popular games for the PlayStation VR2. To see how you can find these listings from the PlayStation Store of your PlayStation 5 or PlayStation 5 Digital Edition console, you can follow the steps laid out in this article from Seeking Tech.

1. To start off, power on your PS5 if you haven’t done so already.

2. Next, head to the home screen, which is the main menu where you can pick which game to launch.

If you are somewhere else on your PS5 currently, then you can simply press and hold the PS button to open the home screen. As an alternate method, you can also press the same PS button to open the Control Center menu, where you can then select the home icon.

3. Afterwards, select the blue shopping bag icon with white PS logo to open the PlayStation Store App.

4. Inside of the shopping application, you should make sure that you are in the Latest, Collections or Deals tab.

To change tabs, you can use the L1 and R1 buttons.

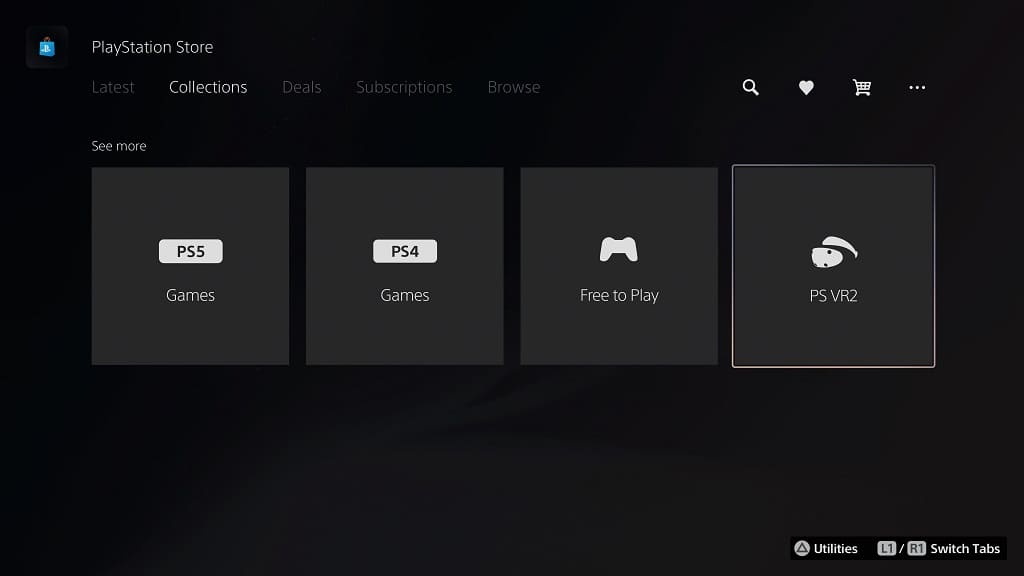
5. From the Latest, Collections or Deals tab in the PS Store, scroll to the very bottom until you get to the See More section, which is where you can select PS VR2.

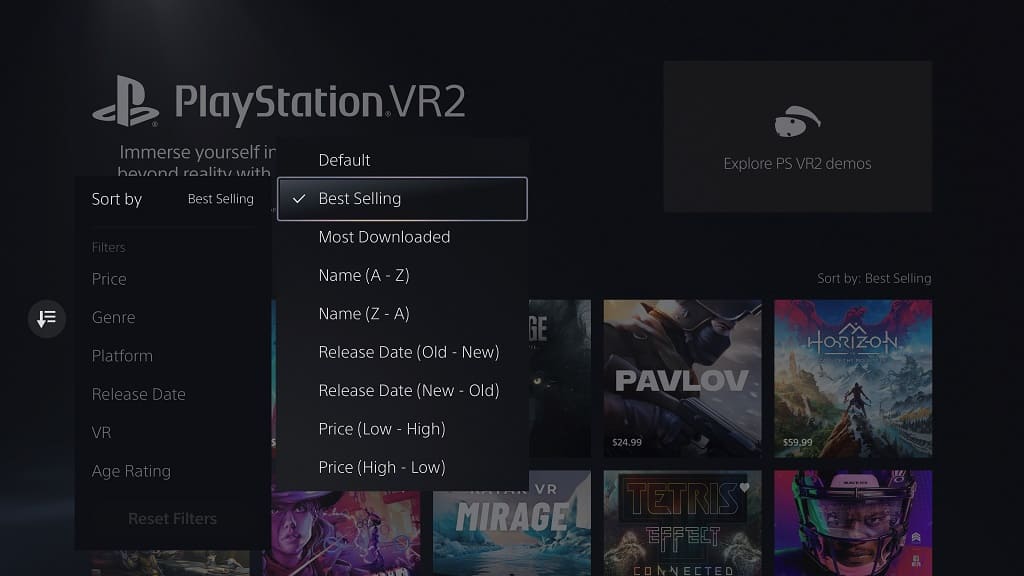
6. You should now be in the PlayStation VR2 menu screen, which shows a list of games that you can play with the virtual reality headset. Here, you need to select the Sort and Filter option, which is the icon with the down-pointing arrow with three horizontal lines.

7. In the pop-up window, select the Sort By option.

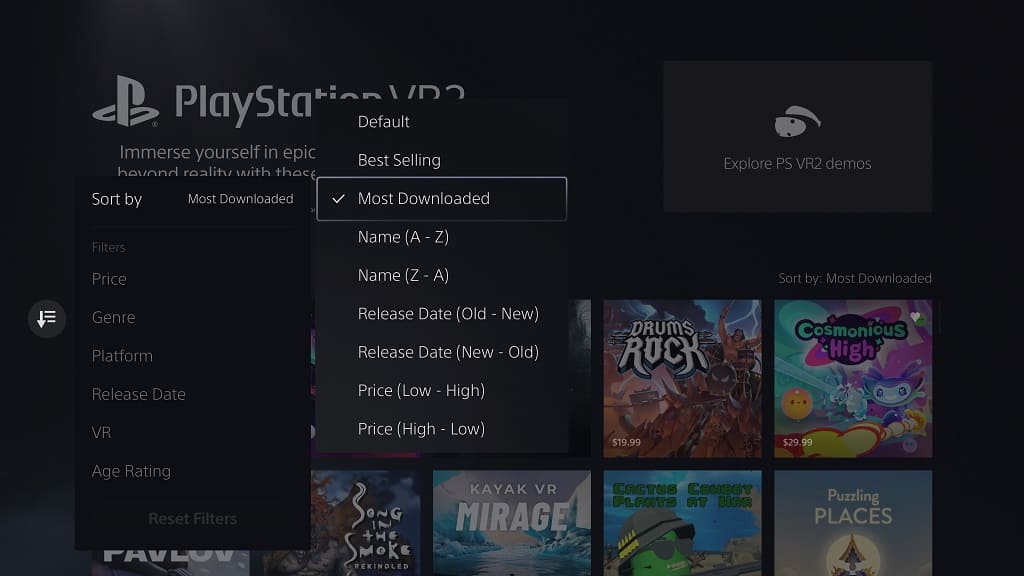
8. You can then choose to sort the listing by Best Selling or Most Downloaded.

The Best Selling list should sort the PlayStation VR2 games by which title sold the most units on the digital PlayStation Store.

The Most Downloaded list should sort the listing based on which titles were downloaded the most often from this digital shop.

9. The PlayStation VR2 menu should now be sorted based on your sorting criteria. You should find the best selling/most downloaded game on the top left. The listing should then order the rest of the games from left to right and then top to bottom.

How to find the file size for a PlayStation VR2 game

PlayStation VR2 games can take up a lot of free space on the storage of your PlayStation 5 or PlayStation 5 Digital Edition console. To see how you can find the file size for a specific virtual reality game before you buy and download it, you can take a look at this tutorial from Seeking Tech.

1. For the first step, you need to turn on your PS5 system if you haven’t done so already.

2. You should then head over to the home screen, which is the menu you used to pick which game to start up.

If you are doing something else on the system at this moment, then you can head home by pressing and holding the PS logo button on the DualSense for approximately 1 second. You can also press the PS button to open the Control Center quick menu, where you can then select the house icon at the bottom left side.

3. From the home screen, head over to the PlayStation Store by selecting the blue shopping bag icon with the white PS logo.

4. Inside of the PlayStation Store, you should make sure that you open the Latest, Collections or Deals tab.

5. In any of the aforementioned tabs, scroll all the way down to the See More section.

6. Select PS VR2 option from the See More section.

7. You should see a list of games that either require PlayStation VR2 or support the virtual reality headset optionally.

If you would like to sort and filter this list in order to make it easier to browse, then you can select the icon that features three horizontal lines with a down-point arrow located to the left side. You should then see multiple options to sort and/or filter the listing.

8. Select a game from the PlayStation VR2 menu that you are interested in.

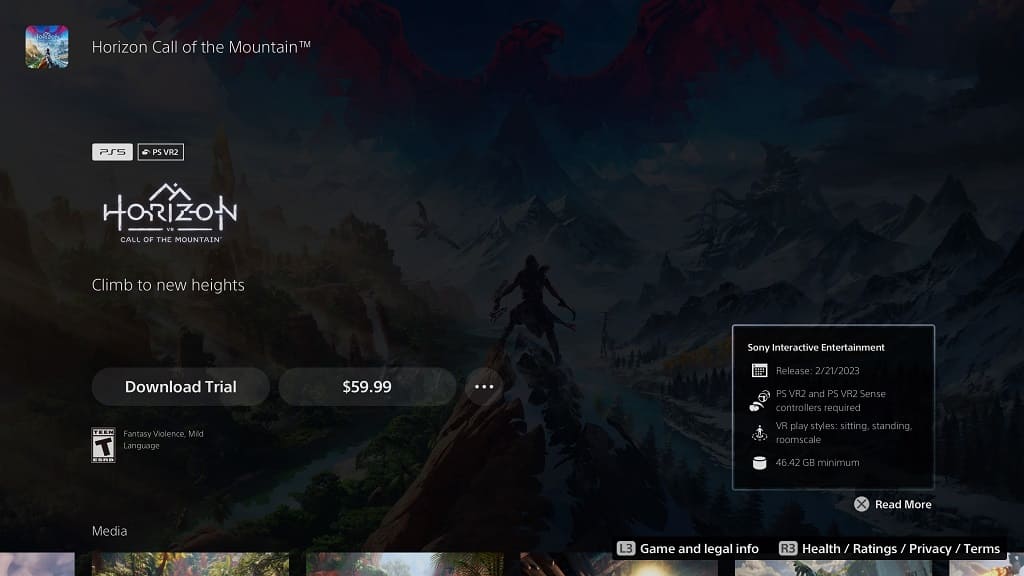
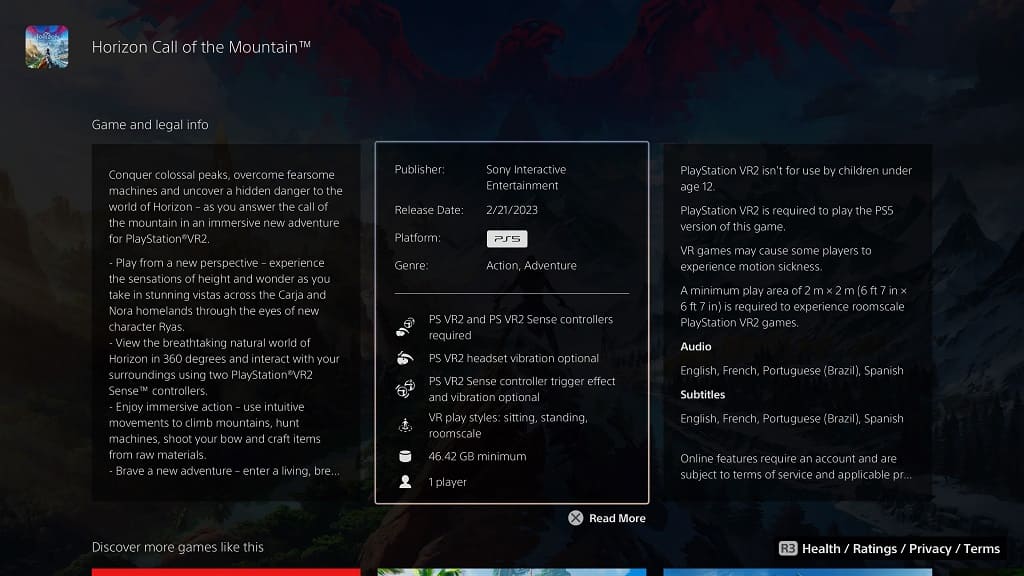
9. On the product page of the VR game, you should be able to find the file size located on the bottom right corner box on the top side.

You can also find the same information located by scrolling down to the middle box in the Game and Legal Info section.

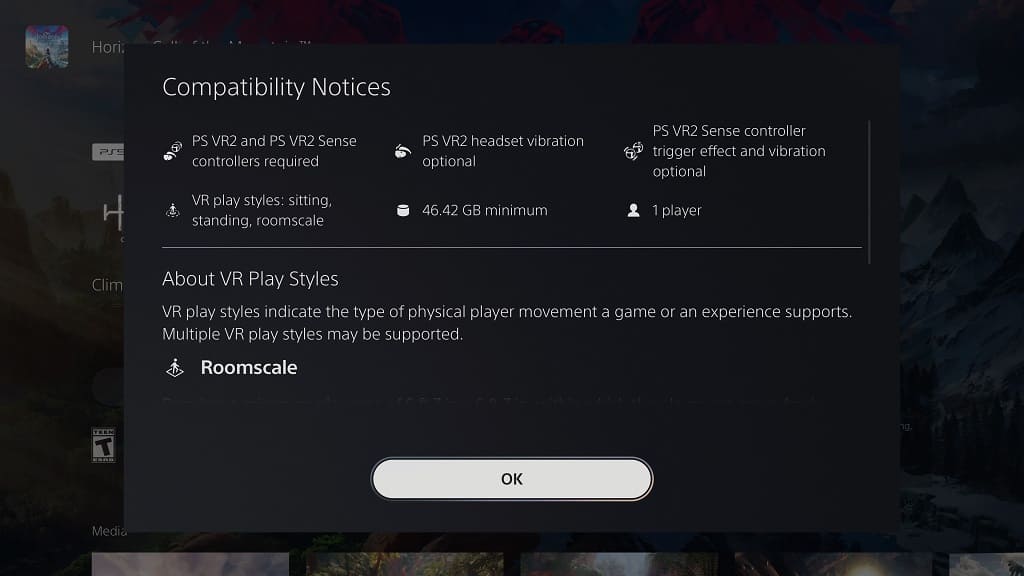
By selecting either of the aforementioned boxes, you should bring up the Compatibility Notices menu, which will also show the file size of the game.

How to fix PlayStation VR2 Sense Controller X button issues

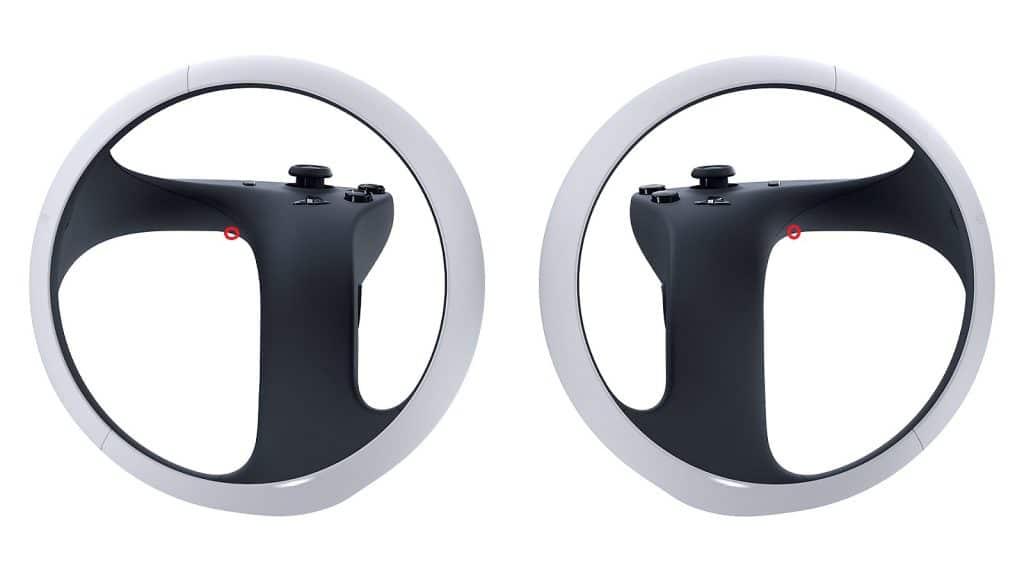
When playing a PlayStation VR2 game, you may find that the X button on the right Sense Controller is not working correctly. In virtual reality games that require you to press the X button in order to start, you may not be able to play these titles at all.

To see how you can get this button to function normally, you can take a look at this troubleshooting article from Seeking Tech.

1. For the first step, we recommend using testing to see if the button works in the system menus of your PlayStation 5 or PlayStation 5 Digital Edition console.

If the X button on the PlayStation VR2 Sense Controller works fine in the system menus but not while you are playing games, then we recommend that you restart your system as doing so may fix any temporary glitches.

If a system restart does not work, then you can try starting the problematic game with a DualSense controller first and then switch to the PlayStation VR2 Sense Controller. You can also turn off and then turn back on the Sense with the game opened.

2. There is also a possibility that the X button may be sticky.

In order to loosen it, try to mash the button repeatedly. You can also press down on it with force and then rub it in a circular motion. Furthermore, try to blow some compress air into the seams of the button to see if you are able to loosen any dust and other particles that may be causing the unresponsiveness.

3. Make sure that your VR2 Sense Controller still has some battery life. If the battery charge gets too low, then it may be less responsive when you press the X and other buttons.

In this case, we recommend charging the motion control fully before using it again. If you don’t want to wait that long, then a 15-minute charge should be good enough to get a decent battery life to test out the X button.

4. Resetting the motion control and then pairing it to your PS5 again may also help. To find out how you can properly do so, you can follow the steps laid out in this tutorial.

5. The X button issues may be software related.

If you think that this is the case, then you should make sure that you have the latest patch installed for the PlayStation VR2 game where you are experiencing this problem.

Furthermore, you should also make sure that the PlayStation VR2 headset, PlayStation VR2 Sense Controller and PlayStation 5 console have the latest firmware releases installed.

6. If none of the aforementioned steps helped with getting the X button to work, then you may have a hardware problem.

In this case, you most likely need to send your PS VR2 in for repair or exchange.

How to fix Wo Long: Fallen Dynasty brightness issues on PS5, Xbox Series X and S

You may notice that some areas in Wo Long: Fallen Dynasty are too dark to see while others can be overly bright. To see how you can fix the brightness with this action role-playing game on the PlayStation 5, PlayStation 5 Digital Edition, Xbox Series X and Xbox Series S, you can take a look at this troubleshooting guide from Seeking Tech.

1. Before we begin, it is important to note that HDR is automatically disabled by default. If you have a TV that is capable of displaying goo quality HDR output, then we recommend turning it on in this game.

If you want to enable this feature, as well as calibrate its settings to get an accurate brightness output, then we recommend that you check out this article.

2. If you decide to leave HDR disabled, then your televisions or console may be converting the SDR picture into HDR. The conversion may lead to brightness issues and other color accuracy problems in the game.

In order to disable this tone mapping, look through the menus of your TV to see if there is an option to do so.

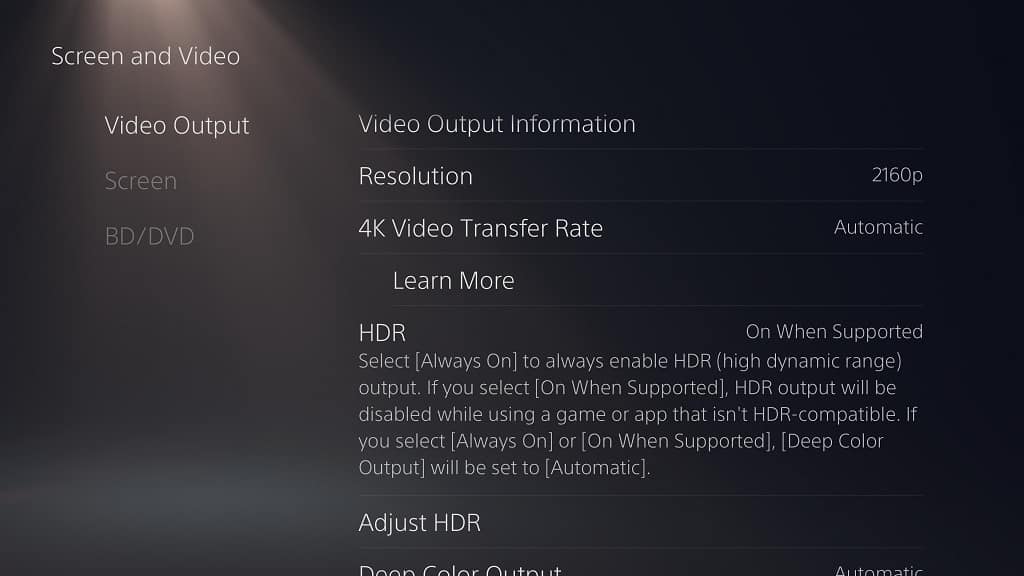
On the PS5 and PS5 Digital Edition, you then need to head over to the console’s Settings menu and select Screen and Video > Video Output. From this menu, make sure that HDR is set to On When Supported.

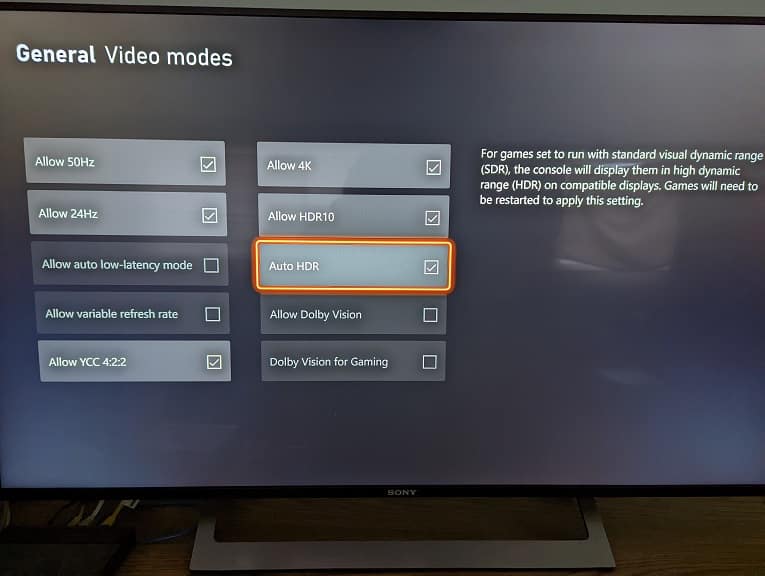
For the Series X and S, you need to navigate to the system’s Settings menu and then select General > TV & display options > Video modes. In this screen, you need to make sure that Auto HDR is not selected.

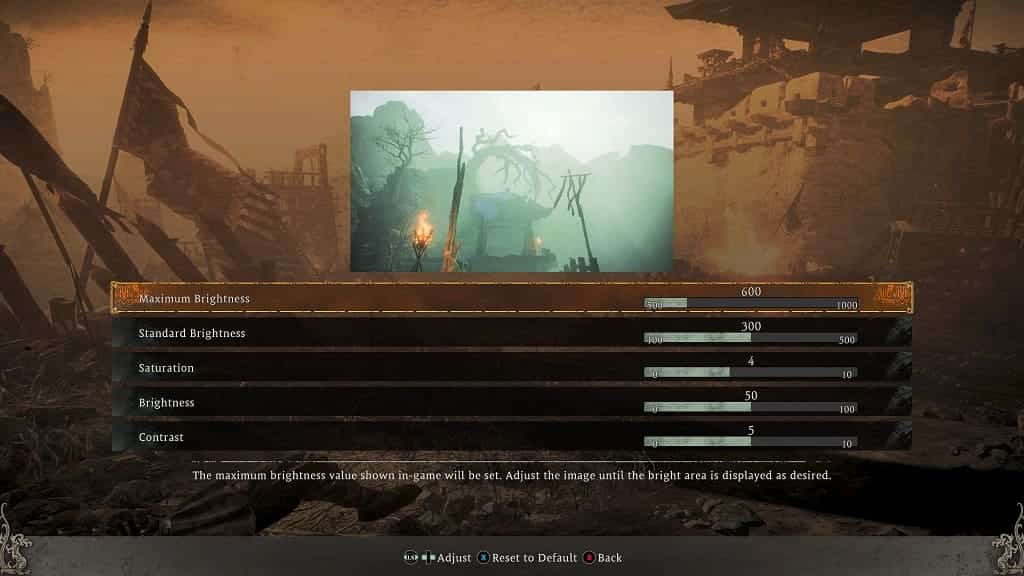
3. If you decide to only play Wo Long in SDR, then you are able to adjust its brightness setting by taking the following steps:

In the Title Screen, select System and then Graphics Settings. If you are currently playing the game, you need to press the Options button on the PS5 or the Menu button on the Xbox Series to bring up the quick menu, where you can select Settings and then Graphics Settings.

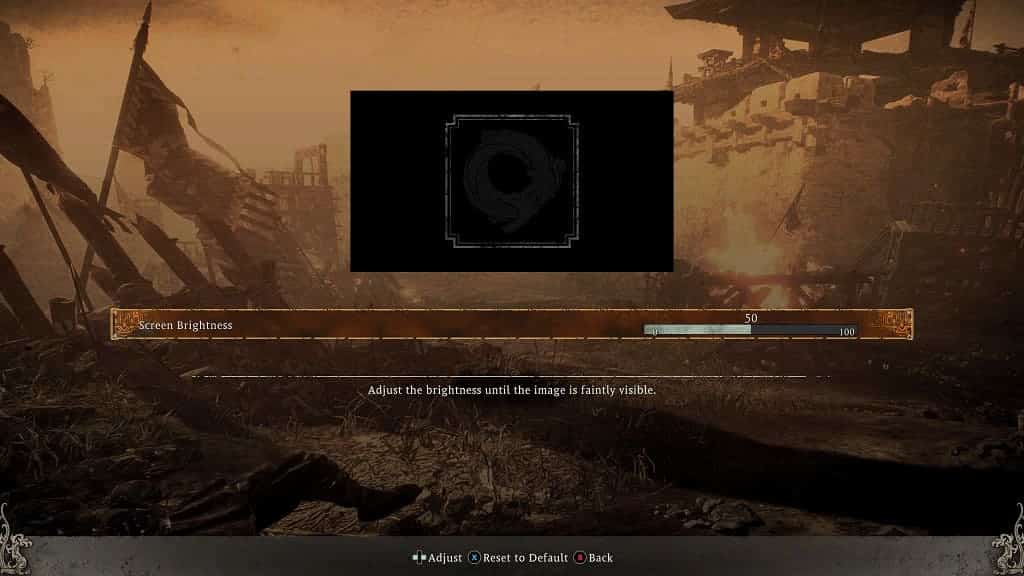
Inside of the Graphics Settings menu, you need to select Screen Brightness. If this option is grey out, then make sure that HDR is set to Disabled.

You should now be able to use a slider to adjust the brightness level for this game. To make the graphics darker, move it to the left. If you want the picture quality to be brighter, then you need to move to the right.

By default, the screen brightness value is set to 50. You will be able to change the value, in increments of 1, from a range of 0 to 50.

You may need to go back to this screen occasionally when moving from a dark area to a light area and vice versa, especially if your television set is not bright and/or isn’t great at displaying true blacks.

If you are getting some input lag when playing this action-packed title, then you can take a look at this troubleshooting post to see how you can potentially reduce the latency on the PS5, Xbox Series X and Xbox Series S.