What’s the difference between the Outcast: A New Beginning difficulty modes?

Outcast: A New Beginning features four difficulty modes. So, what are the main differences between Story, Easy, Normal and Hard? You can find out in this article from Seeking Tech.

Story Mode

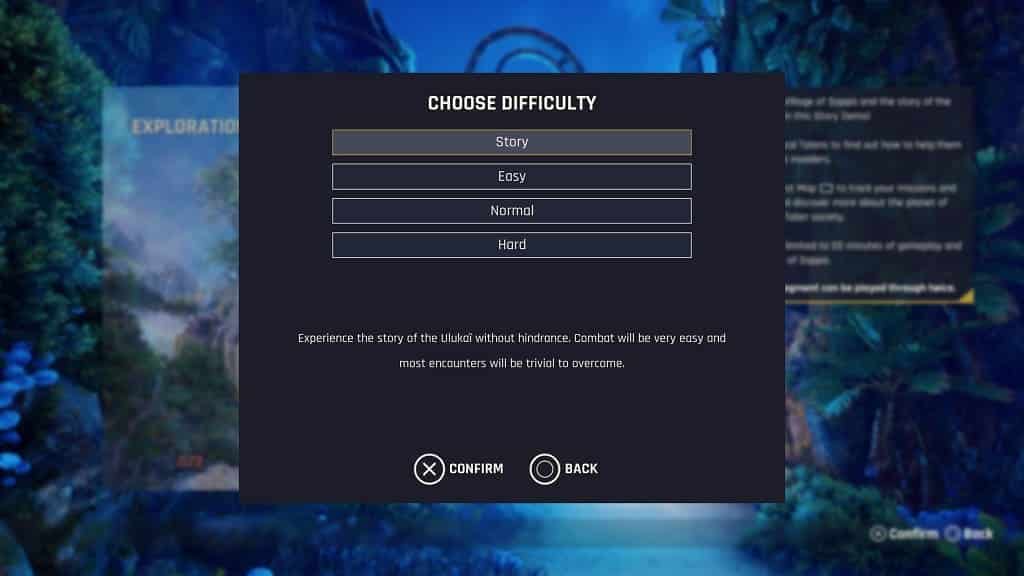
The story mode is the easiest difficulty in the game. By using this setting, combat will be a breeze and most of the encounters can be completed very quickly. It is designed for those who only want to play Outcast: A New Beginning for the story.

Easy Mode

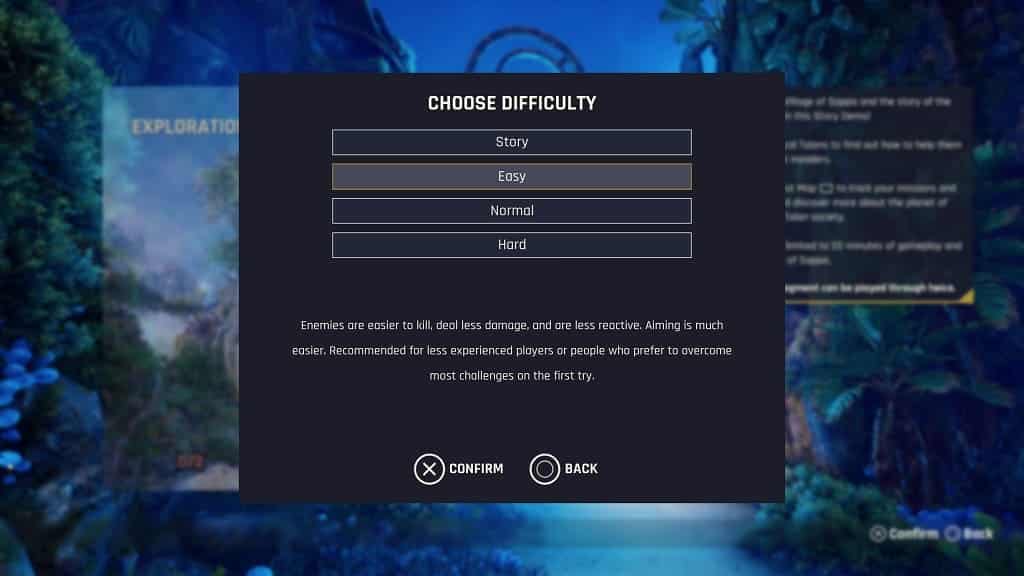
Easy Mode should be a little bit harder than Story Mode but should pose little challenge. Your attacks are stronger while you should take less damage. Aiming your weapon should be easier as well. This is designed for players who want to beat a vast majority of the encounters on their first try.

Normal Mode

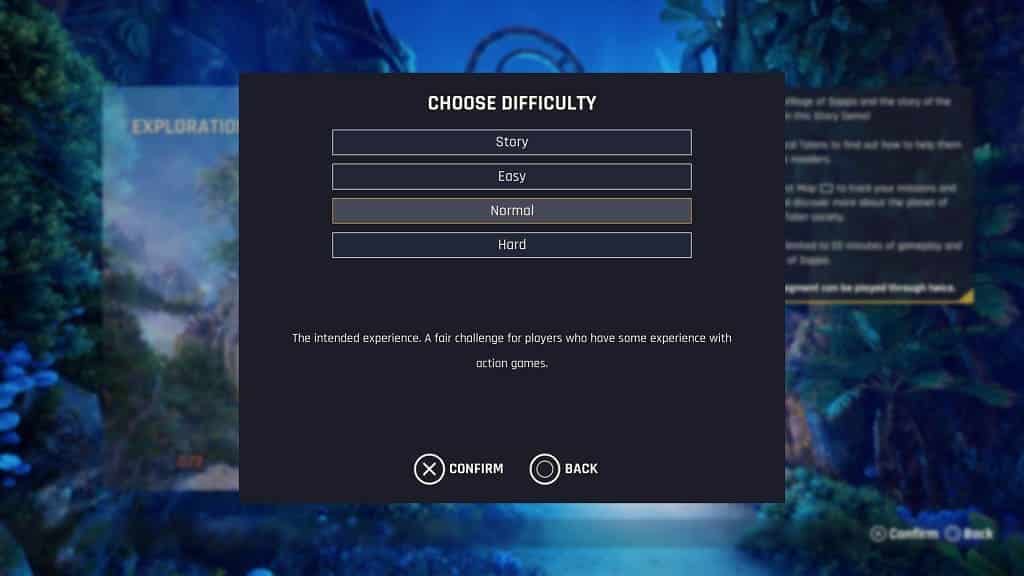
Normal Mode is how the developer intends for players to play this game. You should expect some challenge and may even die several times.

Hard Mode

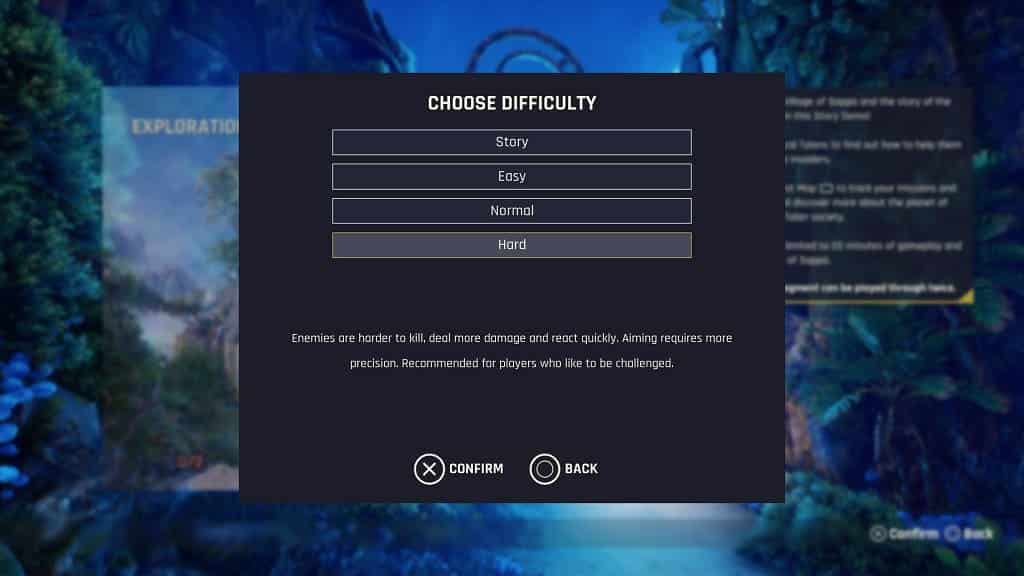
This is the most difficult mode. The enemies take more damage to be defeated while they deal more in return. They also are a lot more alert. Last but not least, you are required to be more accurate with your aim.

How to change the voice language in Persona 5 Tactica

Persona 5 Tactica supports English and Japanese voice overs. To see how you can switch between the two, you can check out this tutorial from Seeking Tech.

1. If you haven’t done so already, you need to go to the title screen in the game. Otherwise, you won’t be able to change the voice acting language.

If you are currently playing, then you can bring up the pause screen and then select the Return to Title option.

2. From the title screen, select Settings.

3. Next, you need to select Audio Settings.

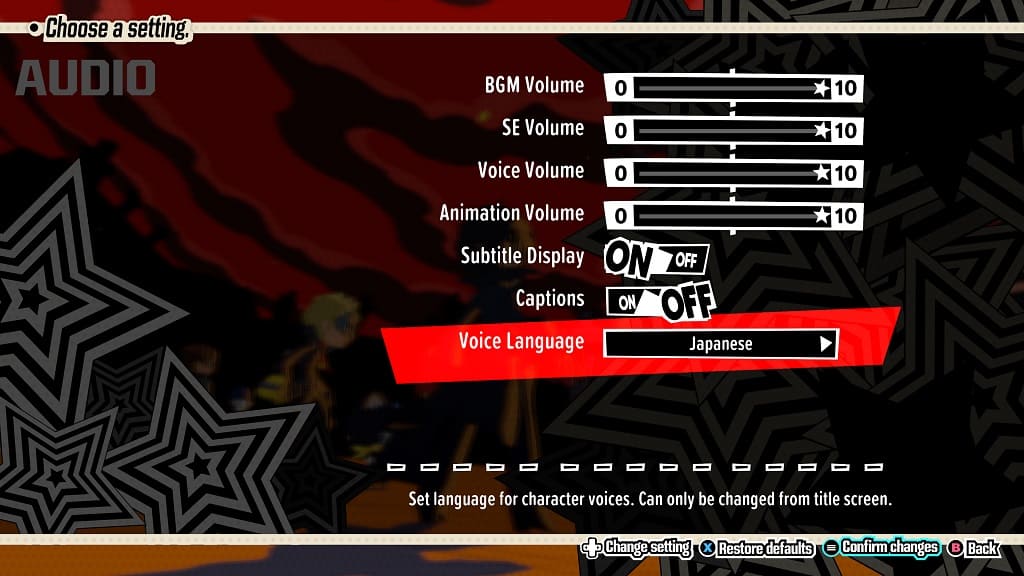
4. In Audio Settings, move the cursor down to Voice Language. It should have the following description:

Set language for character voices. Can only be changed from title screen.

Note: If this option is blocked out, then it indicates that you aren’t viewing the Settings > Audio Settings from the title screen.

5. Use the left analog or directional pad button to switch from English to Japanese or vice versa.

6. Confirm the voice language change by pressing the + button if you are playing with a Nintendo Switch controller, Options button on a PlayStation controller or menu button on an Xbox controller.

When you start playing Persona 5 Tactica, you should be able to hear the new language when a character speaks.

Diablo 4 Battle Pass vs. Premium Battle Pass vs. Accelerated Battle Pass

As a live service game, Diablo IV offers seasonal battle passes where you can earn additional rewards. You can check out this comparison guide to see what the main differences are between the Battle Pass, Premium Battle Pass and Accelerated Battle Pass.

Diablo IV Battle Pass vs. Premium Battle Pass vs. Accelerated Battle Pass Comparison Chart

You can check out our comparison table for the Battle Pass, Premium Battle Pass and Accelerated Battle Pass below:

Diablo IV Battle PassDiablo IV Premium Battle PassDiablo IV Accelerated Battle Pass
Free Tiers272727
Premium Tiers06363
Tier Skips0020
Special Cosmetic001
Update FrequencyAround every 3 monthsAround every 3 monthsAround every 3 months
PricingFree1,000 Platinum (or around $9.99)2,800 Platinum (or around $24.99)

Free Tiers

The regular Battle Pass is completely free as you will be able to unlocked 27 free tiers. The unlocks include cosmetic items as well as Smoldering Ashes.

For the uninformed, Smoldering Ashes can be used to activities Season Blessings, which could give you additional XP, Gold or Obols.

These freebies are also included if you decide to get the Premium Battle Pass or Accelerated Battle Pass.

Premium Tiers

Exclusive to the two paid battle passes are premium tiers, which adds another 63 bonuses that you can unlock. These extras include cosmetic items that are unique to that season; therefore, you may not want to miss out on completing these tiers if you see something you really want.

Tier Skips

The Accelerated Battle Pass is the only one out of these three to offer tier skips. These will allow you to instantly earn a reward without having to grind. So, if you find yourself running out of time when a season is ending, then you can use this feature.

The Accelerated Battle Pass comes with 20 tier skips.

Special Cosmetic

You will also get an exclusive special cosmetic by purchasing the Accelerated Battle Pass.

Update Frequency

According to Activision Blizzard, each new season in Diablo IV will come with a new Battle Pass, Premium Battle Pass and Accelerated Battle Pass. Thus, you can expect new passes around every three months.

Pricing

As we mentioned above, the Battle Pass is completely free.

With the Premium Battle Pass, you will have to pay 1,000 Platinum, which is around $9.99 in USD.

For the Accelerated Battle Pass, the price is 2,800 Platinum, which is approximately $24.99 in USD.

Recap

The Diablo IV Battle Pass is completely free as you will be able to unlock up to 27 items, which includes cosmetics as well as Smoldering Ashes.

By spending 1,000 Platinum (or $9.99), you can get the Premium Battle Pass, which unlocks an additional 63 bonuses for you to unlock.

The Accelerated Battle Pass is the most expensive version as it is priced at 2,800 Platinum (or $24.99). With this bundle, you will get everything from the Battle Pass and Premium Battle Pass to go along with 20 tier skips as well as a special cosmetic item.

If don’t want to miss out on any time limited seasonal cosmetics, then the Accelerated Battle Pass is the best option. Not to mention that you will also get 20 instant unlocks in case you don’t have a lot of time to play Diablo IV during the season.

If you don’t mind the extra grind and/or missing out on the Accelerated Battle Pass exclusive cosmetic item, then the Premium Battle Pass costs a lot less.

If you don’t mind missing out on the Premium tier exclusive cosmetics, then you can just play Diablo IV with the regular Battle Pass.
What’s the difference between SF6 Drive Tickets, Fighter Coins and Zenny?

In Street Fighter 6, you will encounter three different kinds of currency. To see what the major differences are between Drive Tickets, Fighter Coins and Zenny, you can take a look at this comparison article from Seeking Tech.

What are Drive Tickets?

A Drive Ticket is an in-game virtual currency that you can earn by completing specific challenges in Street Fighter VI. You can find these challenges by going to the Rewards section in the Multi Menu. Afterwards, switch over to the Challenges tab.

With Drive Tickets, you can purchase many of the same in-game items from the Goods Shop, such as costumes and emotes, as Fighter Coins. With that said, the same items usually cost more in tickets than coins.

There is currently no way you can use real-life money to purchase Drive Tickets in Street Fighter 6. However, you will get these as bonuses by purchasing the yearly character pass or season pass.

What are Fighter Coins?

As we mentioned above, many of the same items from the Goods Shop can also be bought with Fighter Coins. Furthermore, this virtual currency can only be used to purchase certain premium content in SF6 such as new DLC characters.

The main way to acquire these virtual coins is by spending real money to purchase them in increments. The following are available based on the pricing in the U.S region:

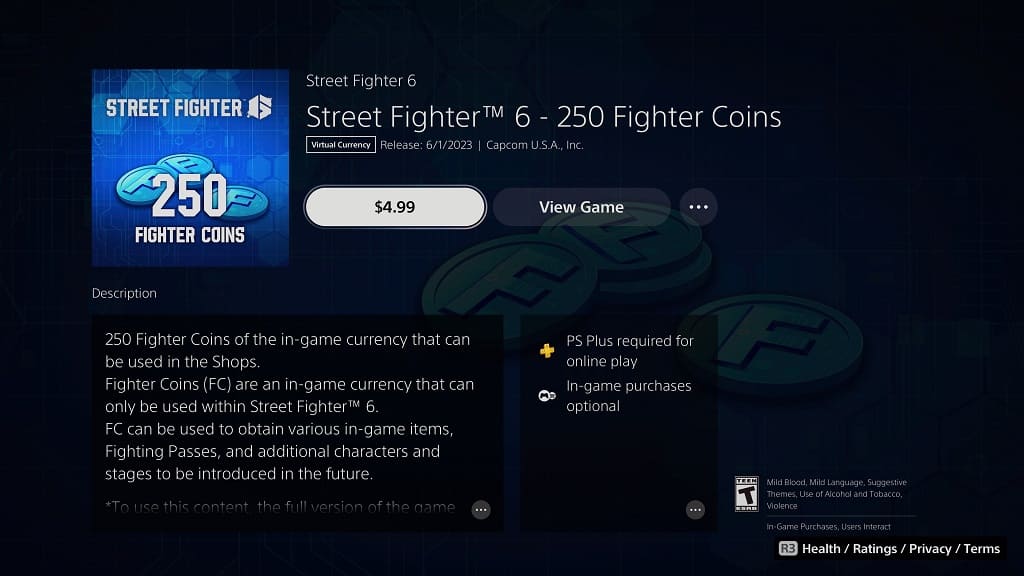
  • 250 Fighter Coins – $4.99
  • 610 Fighter Coins – $11.99
  • 1,250 Fighter Coins – $23.99
  • 2,750 Fighter Coins – $49.99

To find out more about these microtransactions, you can take a look at this post.

Fighter Coins can also be obtained as rewards for completing certain objects in the Fighters Pass. At launch, the Fighters Pass rewards aren’t currently available; therefore, these coins can only be purchased with real cash.

What is Zenny?

Zenny is a virtual currency that is exclusive to the World Tour mode. For the uninformed, this is a new single-playing campaign that lets you explore the locations and meet legendary characters from the Street Fighter franchise via your user created avatar.

You can use these to buy gear, cosmetics as well as food and drinks.

Zenny can be acquired through the following methods:

  • Complete missions and quests
  • Fulfill the listed conditions in fights
  • Selling items in your inventory in shops
  • Partake in part-time minigame jobs
  • Open chests
  • Found in the environment

What’s the difference between the SF6 Year 1 Character Pass and Year 1 Ultimate Pass?

If you want to get the first four DLC characters for Street Fighter 6, you may want to consider purchasing the Year 1 Character Pass or Year 1 Ultimate Pass. So, what are the main differences between these two downloadable contents? You can find out in this comparison article from Seeking Tech.

Street Fighter 6: Year 1 Character Pass vs. Year 1 Ultimate Pass Comparison Chart

You can find our comparison table for these two DLC packs below:

Street Fighter 6 Year 1 Character PassStreet Fighter 6 Year 1 Ultimate Character Pass
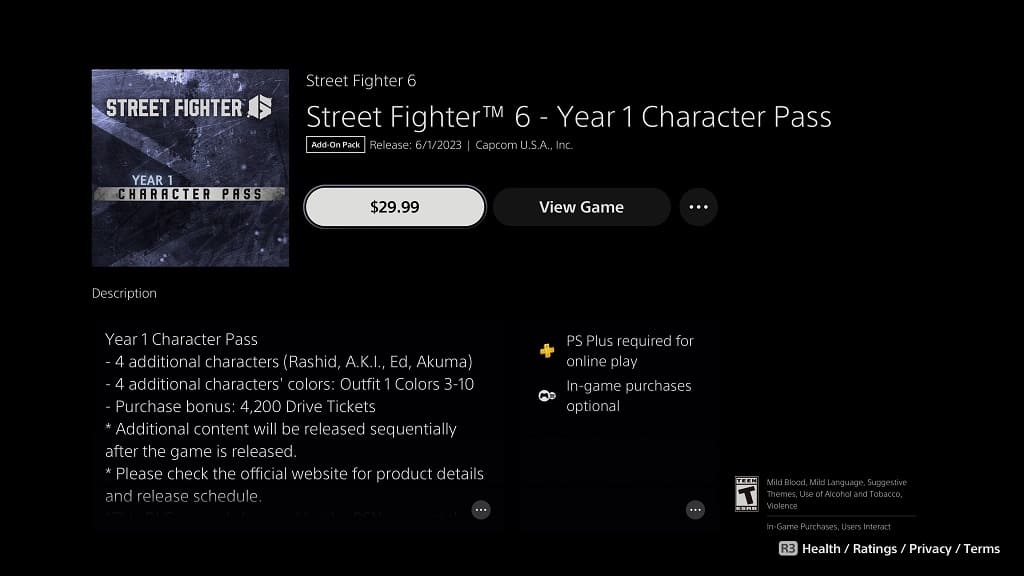
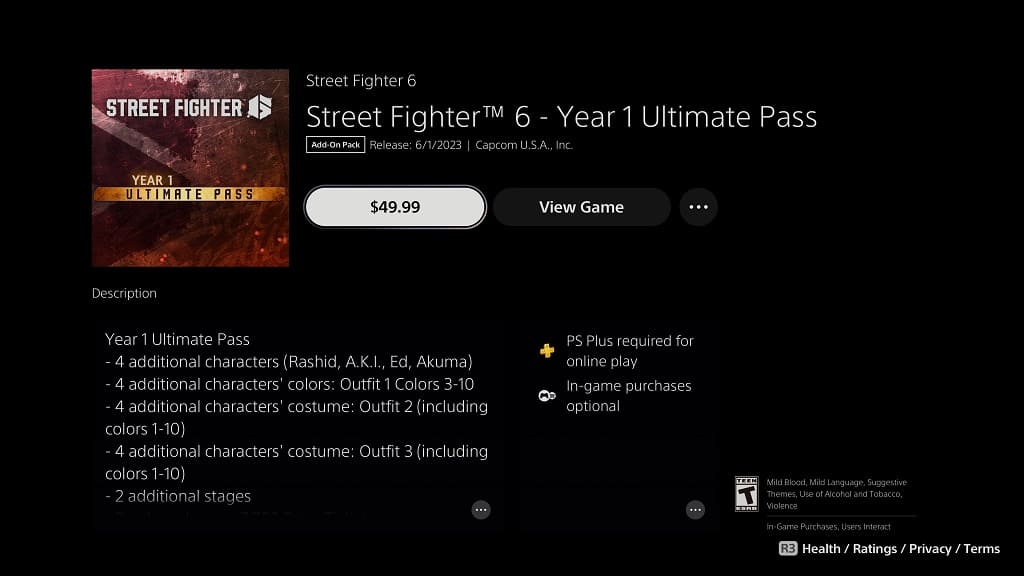
Standalone Pricing$29.99$49.99
Included withStreet Fighter 6 Deluxe EditionStreet Fighter 6 Ultimate Edition
DLC CharactersRashid

A.K.I.

Ed

Akuma
Rashid

A.K.I.

Ed

Akuma
DLC Character Outfit #1Included with 10 different color variantsIncluded with 10 different color variants
DLC Character Outfit #2Not includedIncluded with 10 different color variants
DLC Character Outfit #3Not includedIncluded with 10 different color variants
DLC StagesNot included2
Drive Tickets4,200 Drive Tickets7,700 Drive Tickets

Bundles

The Year 1 Character Pass comes with the Street Fighter 6 Deluxe Edition bundle which has a MSRP of $84.99 in USD.

The Year 1 Ultimate Pass is included with the Street Fighter 6 Ultimate Edition, which has a standard pricing of $104.99.

Standalone Pricing

Of course, you can also purchase both DLC packs as standalone.

The Year 1 Character Pass is priced at $29.99 while the Year 1 Ultimate Pass is a lot more expensive at $49.99.

If you purchase Street Fighter 6 Deluxe Edition or Street Fighter 6 Ultimate Edition instead of buying the standard version of the game and then the DLC pack, then you will save around $5 in both scenarios.

DLC Characters

Both of these passes will come with the first four DLC characters in SF6. The following fighters have already been confirmed by Capcom to appear within a year of the initial launch for this game:

  • Rashid
  • A.K.I.
  • Ed
  • Akuma

DLC Character Costumes

Furthermore, both packs also include Colors #1 through #10 for the Outfit #1 costumes of Rashid, A.K.I., Ed and Akuma.

Exclusive to the Year 1 Ultimate Pass is the second and third outfits for the four DLC characters. You will also get Colors #1 through #10 from these outfits.

DLC Stages

The Year 1 Ultimate Pass also comes with two additional stages. As of this posting, Capcom has not revealed where these new locations are.

Drive Tickets

With the standard Year 1 Character Pass, you will get 4,200 Drive Tickets. For the Year 1 Ultimate Pass, 7,700 Drive Tickets will be added to your account.

For the uninformed, Drive Tickets are free virtual currency that you can earn by completing daily challenges as well as doing any other activities in SF6. You can use these to buy specific items from the in-game shop.

Recap

The Year 1 Character Pass comes with four characters: Rashid, A.K.I., Ed and Akuma. Each of these fighters includes one costume with 10 different color variants. This bundle also includes 4,200 Drive Tickets that you can use to buy in-game items.

The Year 1 Ultimate Pass comes with everything from the Year 1 Character Pass while also adding two more costumes (each of which have 10 color variants). Furthermore, you will also get two new DLC stages to go along with 7,700 Drive Tickets.

If all you care about are the new playable characters, then the Year 1 Character Pass is the cheaper option of the two DLC packs. If you want more outfits, stages and/or Drive Tickets, then you might want to consider picking up the Year 1 Ultimate Pass instead.

Modern vs. Dynamic vs. Classic Street Fighter 6 controls

Street Fighter 6 comes with three different control types that you can choose from. To see what the main differences are between all three setups, you can take a look at this comparison guide from Seeking Tech.

Modern Street Fighter 6 controls

The default control type for Street Fighter 6 is Modern. Unlike the Classic option, the Modern option does not offer different buttons for punches and kicks.

You will also get a Special Move button that makes performing Super Arts a lot easier than having to memorize and input the correct button sequences. By holding down the R2/RT button, you can easily perform assisted combo attacks.

Last but not least, there are also dedicated buttons for Dive Parry and Drive Impact.

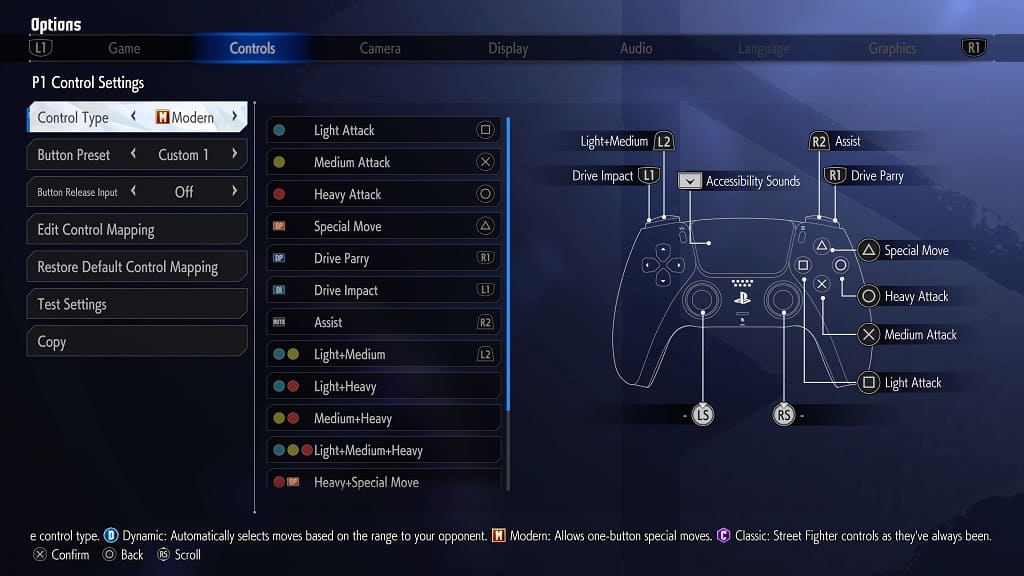
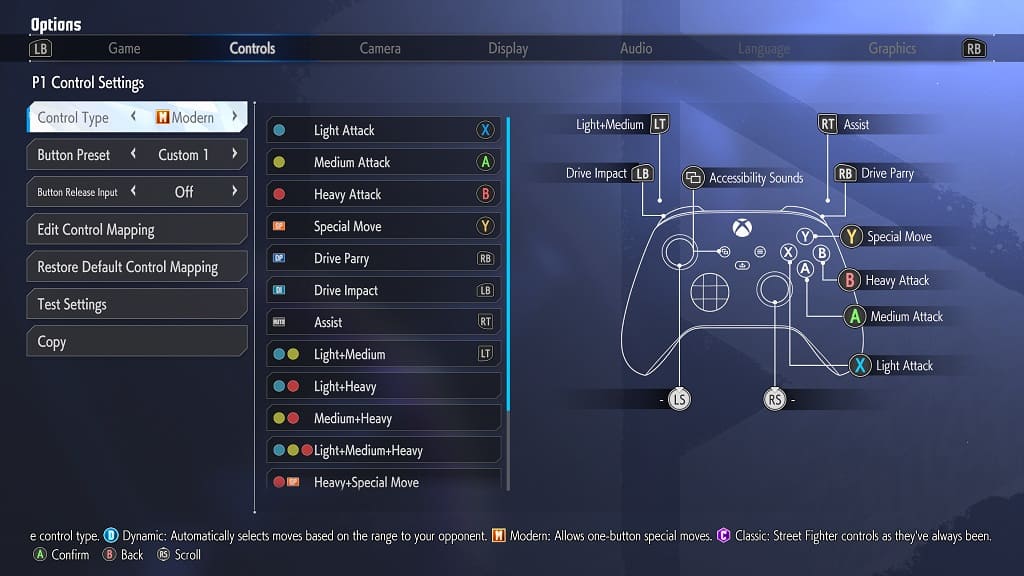
You can find the default button layout for the PlayStation and Xbox controllers when playing with Modern controls below:

DualShock 4 and DualSense:

  • Triangle Button: Light Attack
  • X Button: Medium Attack
  • Circle Button: Heavy Attack
  • Triangle Button: Special Move
  • R1 Button: Dive Parry
  • L1 Button: Drive Impact
  • R2 Button: Assist
  • L2 Button: Light Attack and Medium Attack

Xbox:

  • X Button: Light Attack
  • A Button: Medium Attack
  • B Button: Heavy Attack
  • Y Button: Special Move
  • RB Button: Dive Parry
  • LB Button: Drive Impact
  • RT Button: Assist
  • LT Button: Light and Medium

Dynamic Street Fighter 6 controls

The Dynamic control type is designed for causal players who want to play a quick match with each other or breeze through the single-player fights. This option can’t be used online or in some of the Fighting Ground modes.

For this setup, kicks and punches have also been combined. The game will also automatically choose what it thinks will be the best attack based on the distance between your character and the opponent.

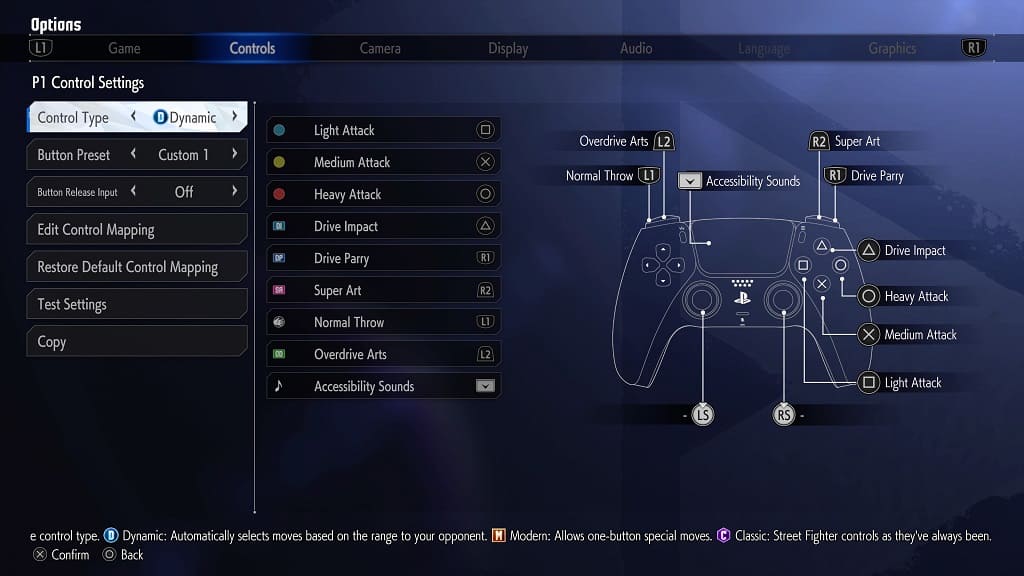
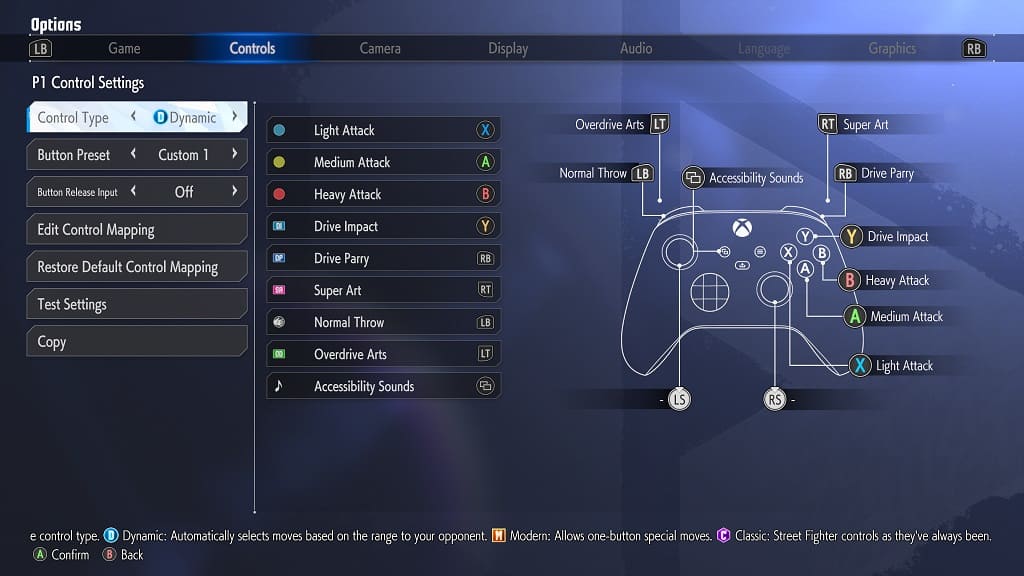
There are also dedicated buttons for Dive Impact, Dive Parry, Super Art, Normal Throw and Override Arts.

You can find the default PlayStation and Xbox button layouts for the Street Fighter VI Dynamic control type below:

DualShock 4 and DualSense:

  • Square Button: Light Attack
  • X Button: Medium Attack
  • Circle Button: Heavy Attack
  • Triangle Button: Dive Impact
  • R1 Button: Dive Parry
  • R2 Button: Super Art
  • L1 Button: Normal Throw
  • L2 Button: Override Arts
  • Touch Pad Button: Accessibility Sounds

Xbox:

  • X Button: Light Attack
  • A Button: Medium Attack
  • B Button: Heavy Attack
  • Y Button: Dive Impact
  • RB Button: Dive Parry
  • RT Button: Super Art
  • LB Button: Normal Throw
  • LT Button: Override Arts
  • View Button: Accessibility Sounds

Classic Street Fighter 6 controls

The Classic type is made for those who are familiar with the control scheme from Street Fighter V and other older releases in the long-running series.

As a result, you will get dedicated buttons for kicks and punches. You also need to manually input a sting of commands in order to perform special attacks and actions. These include Dive Impact, Dive Parry, Override Arts and Special Arts.

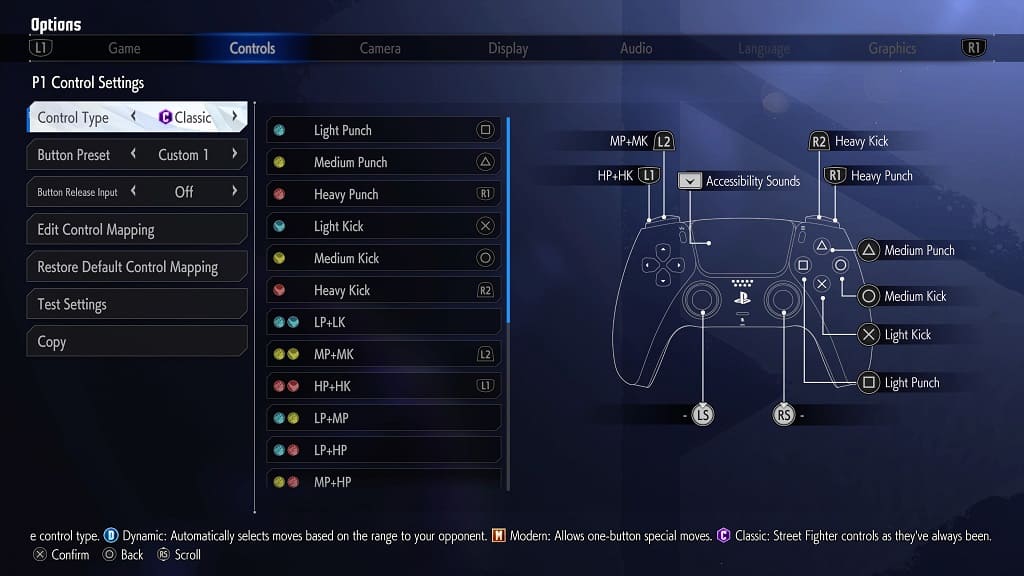
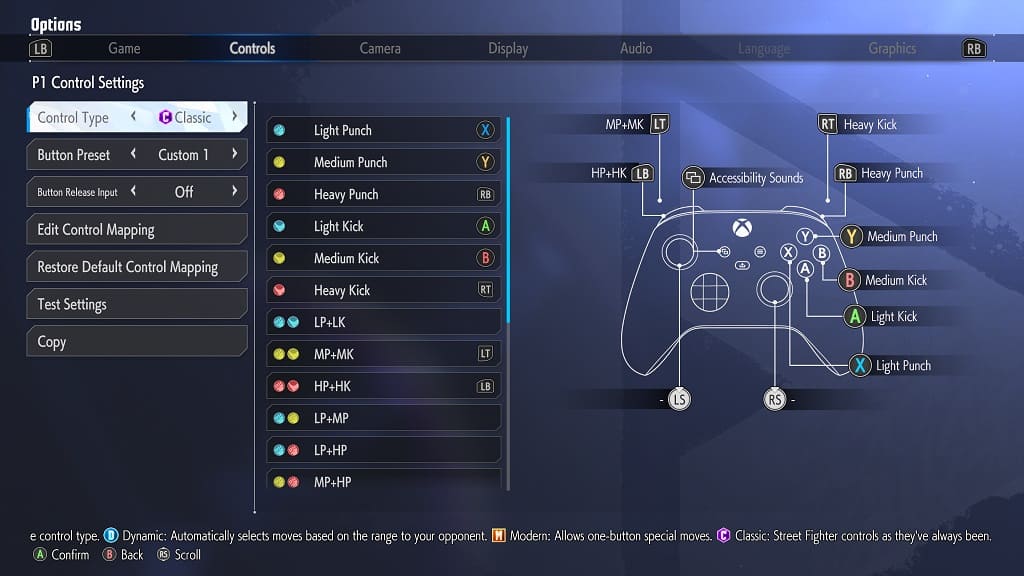
You can find the classic button layout for the PlayStation and Xbox controllers below:

DualShock 4 and DualSense:

  • Square Button: Light Punch
  • Triangle Button: Medium Punch
  • R1 Button: Heavy Punch
  • X Button: Light Kick
  • Circle Button: Medium Kick
  • R2 Button: Heavy Kick
  • L2 Button: Medium Punch and Medium Kick
  • L1 Button: Heavy Punch and Heavy Kick

Xbox:

  • X Button: Light Punch
  • Y Button: Medium Punch
  • RB Button: Heavy Punch
  • A Button: Light Kick
  • B Button: Medium Kick
  • RT Button: Heavy Kick
  • LT Button: Medium Punch and Medium Kick
  • LB Button: Heavy Punch and Heavy Kick

Recap

The Modern control type in Street Fighter 6, which is the default option, is made for gamers who have a hard time memorizing and/or performing button combinations. If you fall into this category, then we suggest that you try out this simplified option first as you don’t have to worry about inputting long lines of commands.

The Dynamic control type is designed for complete newcomers. If you simply want to button mash with friends or in the single player modes, then this is a good option. Keep in mind that you can’t use the Dynamic scheme when fighting against others online or in some of the modes in Fighting Ground.

If you are already familiar with the button combinations in the series, then you can switch back to the Classic control type. This option uses dedicated kick and punch buttons; moreover, you need to input a string of commands in order to perform special attacks and actions.

Star Wars Jedi Survivor difficulty settings comparison

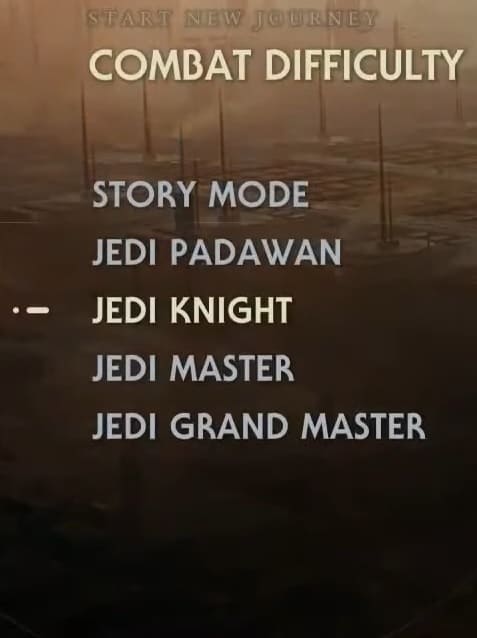
In Star Wars Jedi: Survivor, you will be able to pick between the Story Mode, Jedi Padawan, Jedi Knight, Jedi Master and Jedi Grand Master difficulties. To see what the main differences are between these modes, you can take a look at this guide from Seeking Tech.

Story Mode vs. Jedi Padawan vs. Jedi Knight vs. Jedi Master vs. Jedi Grand Master

You can take a look at our comparison chart for the five difficulty modes in Jedi Survivor below:

Story Mode DifficultyJedi Padawan DifficultyJedi Knight DifficultyJedi Master DifficultyJedi Grand Master Difficulty
Parry Timing Length100%70%50%30%10%
Damage Taken10%40%50%70%100%
Enemy Attack Frequency10%40%50%70%100%
Change Difficulty in Game?YesYesYesYesYes
Earn Trophies or Achievements?YesYesYesYesYes

About the Difficulty Settings in Star Wars Jedi: Survivor

The difficulty modes in Star Wars Jedi: Survivor are entirely combat based. There are three main components that are affected when you change settings.

The first of which is parry timing, which is the amount of time you have to successfully parry an incoming attack from an enemy. The higher value this component is, the bigger window you will have when it comes to performing a counterattack.

The second main component is incoming damage, which determines how much damage you will take if you get hit. The higher this value is, the more health bar you will lose when an enemy hit you.

The last main component is enemy aggression, which refers to how often the enemy will be attacking you. The higher the value, the more you will see the enemy attacking.

Story Mode Difficulty

The Story Mode in Star Wars Jedi: Survivor is the easiest difficulty setting as you should have all the time in the world to parry an enemy attack. Furthermore, both the incoming damage and enemy aggression components have are reduced to the absolute minimum.

As the name suggests, this difficulty mode is designed for those who want to play the game simply for the story as there won’t be any combat challenge.

Jedi Padawan Difficulty

Jedi Padawan is the second easiest mode. You will be given a healthy timing window when it comes to parrying. The incoming damage and enemy aggression components will also be slightly reduced.

If you are struggling in the Jedi Knight difficulty mode, then you can drop down to Jedi Padawan as it will give you better parry windows in addition to having lower damage taken and less enemy aggression.

Jedi Knight Difficulty

Jedi Knight is the normal mode in Star Wars Jedi: Survivor. When compared to the other settings, this one offer average rates when it comes to parry timing, incoming damage and enemy aggression.

Jedi Master Difficulty

If you are looking for more of a challenge, then you can try the Jedi Master hard mode difficulty. This setting reduces the parry timing while also making the enemy hit harder and more frequently.

Jedi Grand Master Difficulty

Jedi Grand Master is the hardest mode in this game. If you are playing with this setting, you will have a minimal parry timing window. The enemy attack power and frequency will also be at the highest.

Can you change difficulty settings in Star Wars Jedi: Survivor?

The good news is that you can change difficulty modes at any time in Star Wars Jedi: Survivor. As a result, you can play around with any of the settings before finding one that fits your skill level.

Dose difficulty affect trophies or achievements?

The difficulty modes in Star Wars Jedi: Survivor have no affect when it comes to earning trophies on PlayStation 5 or achievements on PC, Xbox Series X and Xbox Series S. Therefore, you can still earn these merits even if you are playing the game in the story mode difficulty.

MLB The Show 23 difficulty modes explained

MLB The Show 23 features up to 9 difficulty modes. To see what the major differences are between these levels, you can take a look at this guide from Seeking Tech.

What are the easy difficulties?

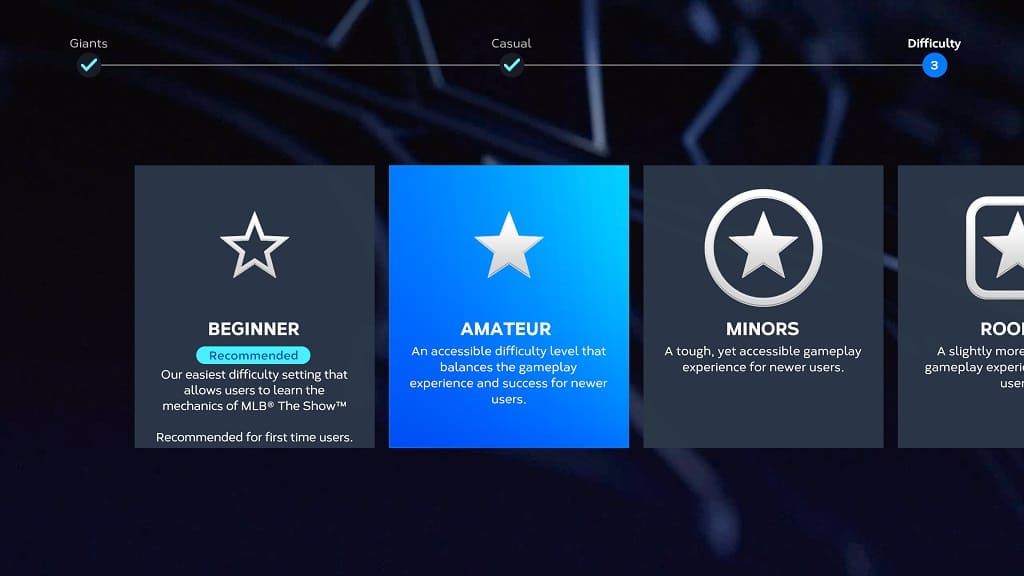
If you want to play MLB The Show 23 in easy mode, then you can pick between Beginner, Amateur, Minors or Rookie.

The Beginner difficulty is the easiest out of this group, followed by Amateur, Minors and then Rookie. You can find the descriptions for each below:

Beginner:

  • “Our easiest difficulty setting that allows users to learn the mechanics of MLB The Show. Recommended for first time users.”

Amateur:

  • “As accessible difficulty level that balances the gameplay experience and success for newer users.”

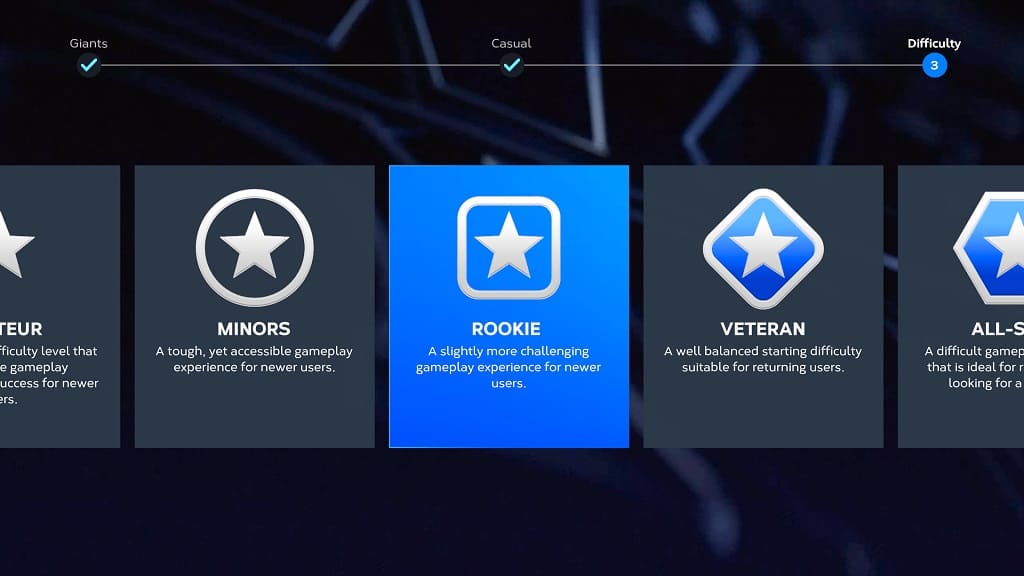
Minors:

  • “A tough, yet accessible gameplay experience for newer users.”

Rookie:

  • “A slightly more challenging gameplay experience for newer users.”

What are the normal difficulties?

There are two normal difficulty levels in MLB The Show 23. Veteran, which is the easier one, is designed for returning players. On the other hand, the All-Star level is made for those who are looking for a slightly more difficult challenge.

You can find the in-game descriptions for these modes below:

Veteran:

  • “A well balanced starting difficulty suitable for returning users.”

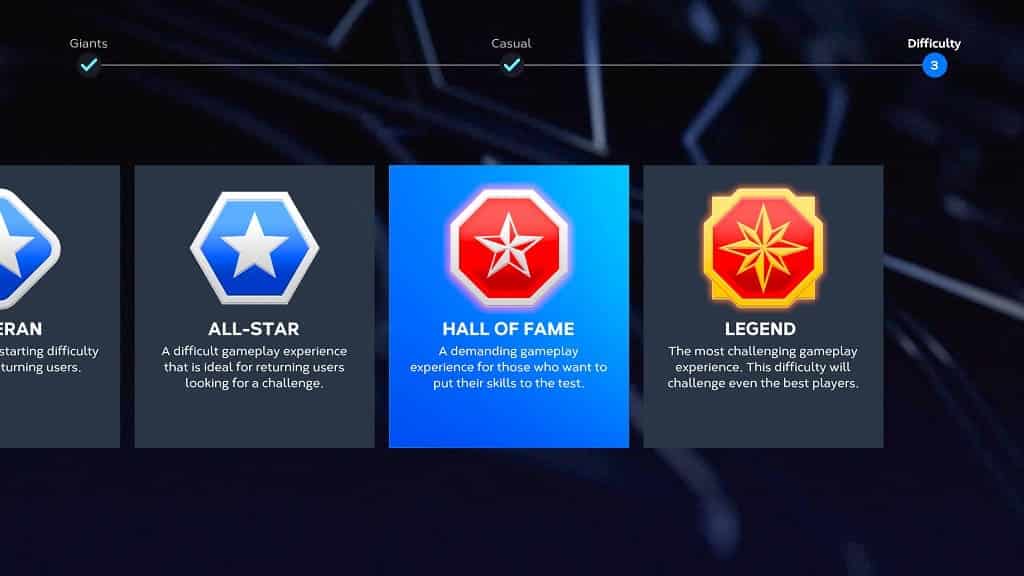
All-Star:

  • “A difficult gameplay experience that is ideal for returning users looking for a challenge.”

What are the hard difficulties?

You also have two options when it comes to the harder difficulties in MLB The Show 23. Hall of Fame is for players who want to test their skills while Legend offers the ultimate challenge.

You can find the description for both below:

Hall of Fame:

  • “A demanding gameplay experience for those who want to put their skills to the test.”

Legend:

  • “The most challenging gameplay experience. This difficult will challenge even the best players.”

What is Dynamic difficulty in MLB The Show 23?

The last difficulty option in this game is Dynamic.

With this mode, you will start at the Beginner level. Once you start to become more successful, the difficulty will automatically increase until the game determines the right balance when it comes to your skill level and challenge level.

Our Recommendation

If you are new to the series, then we recommend going with the Dynamic difficulty level as it will start at the Beginner level.

Once you improve your skills, the game will adjust its difficulty without any manual input, which should offer you a balanced experience.

How to change batting and pitching difficulties in MLB The Show 23

If you want to change the difficulties for the batting and/or pitching aspects of MLB The Show 23, then you need to do the following:

1. To start off, head over to the Settings menu from either the main menu or pause screen.

2. From the Settings menu, select Gameplay and then head over to the General tab. You can change tabs with the shoulder buttons on your controller.

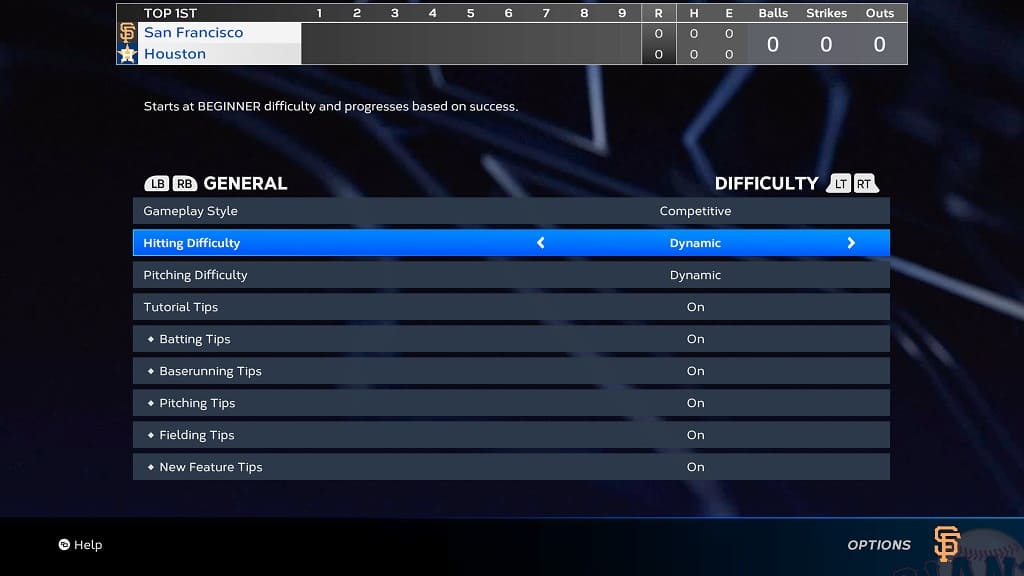
3. In the General tab, you should see Hitting Difficulty and Pitching Difficulty.

4. Use the directional pad or left analog stick to change the difficulty levels for these two settings. These don’t have to be the same; therefore, you can make hitting easier and pitching harder or vice versa.

5. Once you are done making these changes, you need to back out of the Gameplay menu.

6. You should see a message appear. Here, you need to select Apply Changes.

7. The new difficulty settings should now be enabled when you play a game.

What’s the difference between MLB The Show 23 gameplay styles?

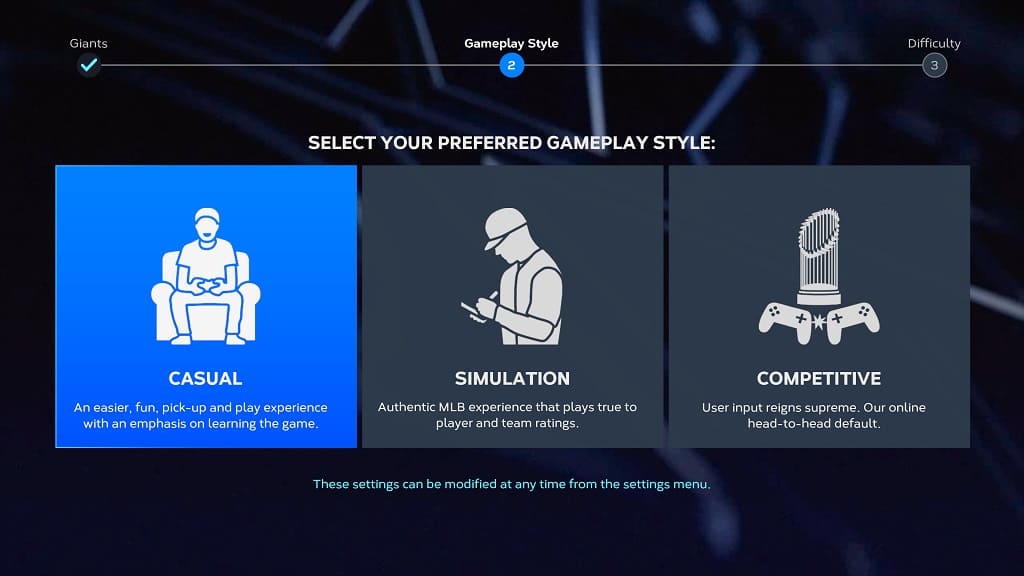
In MLB The Show 23, you can choose between the Casual, Simulation or Competitive gameplay styles. So, what are the main differences between these three modes? You can find out in this comparison guide at Seeking Tech.

What is the Casual gameplay style?

The Casual gameplay style is designed for players who are new to the series and/or would like to pick-up and play without needing to learn any complicated mechanics. It has the following description:

  • “An easier, fun, pick-up and play experience with an emphasis on learning the game.”

What is the Simulation gameplay style?

The Simulation gameplay style is for players who are looking to an authentic experience as player and team statistics matter when it comes to determining the outcome. This setting has the following description:

  • “Authentic MLB experience that plays true to the player and team rating.”

What is the Competitive gameplay style?

The Competitive gameplay style places the emphasis on user inputs. Therefore, the timing of your button presses matters. You can find its description below:

  • “User input reigns supreme. Our online head-to-head default.”

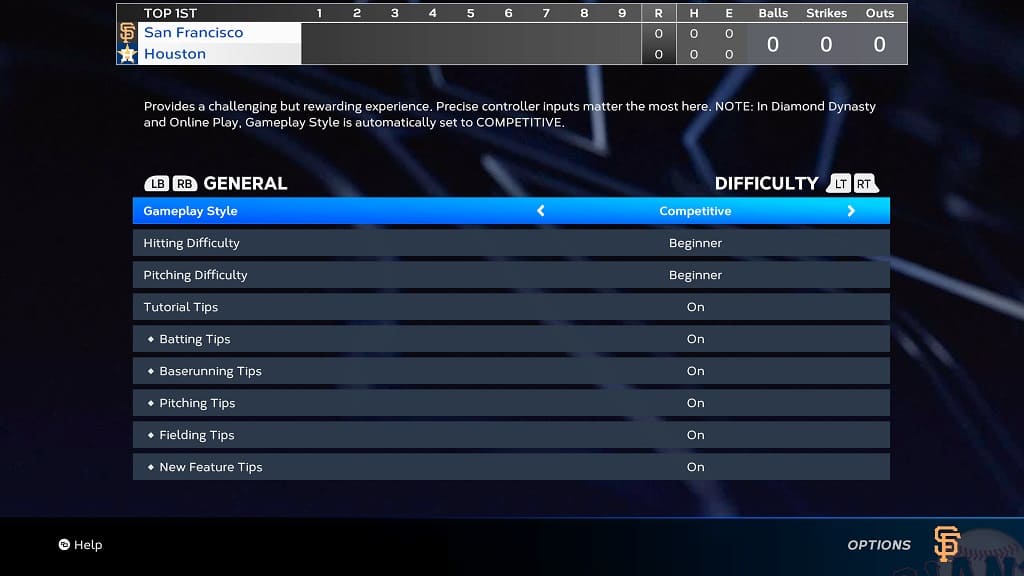
If you are planning to play MLB The Show 23 in Diamond Dynasty and/or Online Play, then the gameplay style is automatically set to Competitive. If you want a consistent experience between all the available game modes, then we recommend that you use the Competitive play style.

How to change gameplay styles in MLB The Show 23

In order to change gameplay styles in MLB The Show 23, you need to take the following steps:

1. First off, you need to head to the Settings menu from either the main menu or in-game pause menu.

2. From Settings, you need to select Gameplay.

3. In the Gameplay section, make sure you are in the General tab. You can use the shoulder buttons on the controller in order to switch tabs if you need to.

4. After getting to the General tab, move the cursor to Gameplay Style.

5. You can then use the left directional button, right directional button or left analog stick in order to switch between the different gameplay styles.

6. Once you have changed the gameplay style, press the B or circle button.

7. You should see a message saying that the settings configurations have been modified. Here, you need to select Apply Changes in order to confirm the change in gameplay style.

The next time you play a game in MLB The Show 23, you should be able to notice the new gameplay style you previously selected.

What’s the difference between RE4 Remake Assisted, Standard, Hardcore and Professional difficulties?

The Resident Evil 4 Remake offers four difficulty modes as you can choose between Assisted, Standard, Hardcore or Professional when starting a new game. You can check out this comparison guide at Seeking Tech to see what the major gameplay differences are between these four options.

Resident Evil 4 Remake Assisted vs. Standard vs. Hardcore vs. Professional

You can check out our comparison chart for these four difficulty modes below:

Resident Evil 4 Remake Assisted ModeResident Evil 4 Remake Standard ModeResident Evil 4 Remake Hardcore ModeResident Evil 4 Remake Professional Mode
Unlock RequirementsAvailable at the startAvailable at the startAvailable at the startBeat the campaign once
Changing to a different difficulty?Not supportedDrop down to Assisted in game over screenNot supportedNot supported
Aim AssistOn by defaultOff by defaultOff by defaultOff by default
Crafting Ammo RateExtra amountNormal amountNormal amountNormal amount
Ammo Drop RateNormal amountNormal amountNormal amountLower amount
Automatic Health Recovery?YesNoNoNo
Merchant Pricing?Lower rate for certain itemsNormal rateHigher rate for certain itemsHigher rate for certain items
Enemy StrengthNormalNormalStrongerStrongest

Unlock Requirements

The Assisted, Standard and Hardcore difficulties are unlocked from the very start.

In order to unlock Professional difficulty, you need to beat the main campaign of the game at least once in any of the three aforementioned modes.

Changing to a different difficulty

You can only change to a different difficulty mode if you started a new game in Standard difficulty mode.

If ran out of health, then you will get a game over screen saying that “You Are Dead.” Here, you may see the option to drop the difficult level down to Assisted.

Aim Assist

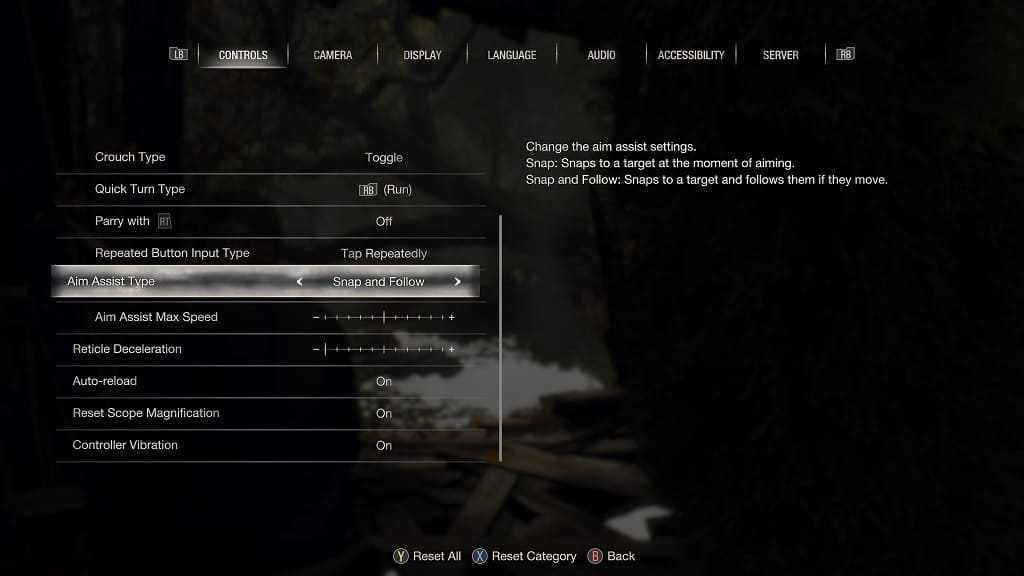
If you are playing in Assisted difficulty, then aim assist is automatically enabled. For the three higher difficulties, you need to turn this setting on in the Controls tab of the Options menu.

Crafting Ammo Rate

You will get extra ammo when crafting if you are playing in the Assisted difficulty mode.

Ammo Drop Rate

The ammunition drop rate from enemies is scarcer in the Professional when compared to the other three modes.

Automatic Health Recovery

If your health dropped to the “Danger” level in Resident Evil 4 Remake, you will automatically recover some health without using any healing items while playing in the Assisted difficulty mode.

Merchant Pricing

Some items sold by the merchant will be discounted if you are playing in the Assited difficulty when compared to Standard.

On the other hand, some of the items from this seller will be priced higher, when compared to Standard, if you decide to start a new game in either the Hardcore or Professional mode.

Enemy Strength

The enemy strength should be identical for the Assisted and Standard difficulties.

The Hardcore mode makes the enemy stronger while the Professional mode makes them the strongest.

Recap

The Assisted Mode is the easiest difficulty available in Resident Evil 4 Remake as it adds extra ammo bonuses when crafting, automatically heals your character when his health gets low as well as features discounted prices on certain items sold by the merchant.

The Standard Mode is the normal difficulty setting. We recommend that you try playing RE4 Remake in this mode first as it offers the most balance in terms of challenge. If you ended up dying a lot, then you will be able to lower the difficulty to Assisted in the “You Are Dead” screen.

The Hardcore Mode is for players who have already played the original Resident Evil 4 in 2005 a bunch of times and are very familiar with how the game works. This difficulty level features stronger enemies and higher prices on the goods sold by the merchant.

The Professional Mode is the ultimate challenge in RE4 Remake as the enemies are even stronger than the ones you encountered in Hardcore mode. You can only unlock the highest difficulty setting by beating the campaign once on any of the easier modes.