Samsung Q60D wall mount specs

The Q60D is an entry level QLED television set released by Samsung in 2024. If you are planning to mount this screen up on a wall, then you can check out this guide at Seeking Tech to see what important specifications you need to pay attention to in order to find a compatible wall mount.

Screen Sizes

This article should cover all eight screen size variants of the Q60D. You can find the names and model numbers for each below:

  • 32″ Class QLED 4K Samsung Q60D TV (Model Number: QN32Q60DAF or QN32Q60DAFXZA)
  • 43″ Class QLED 4K Samsung Q60D TV (Model Number: QN43Q60DAF or QN43Q60DAFXZA)
  • 50″ Class QLED 4K Samsung Q60D TV (Model Number: QN50Q60DAF or QN50Q60DAFXZA)
  • 55″ Class QLED 4K Samsung Q60D TV (Model Number: QN55Q60DAF or QN55Q60DAFXZA)
  • 65″ Class QLED 4K Samsung Q60D TV (Model Number: QN65Q60DAF or QN65Q60DAFXZA)
  • 70″ Class QLED 4K Samsung Q60D TV (Model Number: QN70Q60DAF or QN70Q60DAFXZA)
  • 75″ Class QLED 4K Samsung Q60D TV (Model Number: QN75Q60DAF or QN75Q60DAFXZA)
  • 85″ Class QLED 4K Samsung Q60D TV (Model Number: QN85Q60DAF or QN85Q60DAFXZA)

Dimensions (without Stand)

Dimensions without Stand (in inches):

  • 32″ Samsung Q60D: 28.5 inches x 16.6 inches x 1.2 inch
  • 43″ Samsung Q60D: 38.0 inches x 22.0 inches x 1.0 inch
  • 50″ Samsung Q60D: 44.0 inches x 25.4 inches x 1.0 inch
  • 55″ Samsung Q60D: 48.5 inches x 27.9 inches x 1.0 inch
  • 65″ Samsung Q60D: 57.1 inches x 32.7 inches x 1.0 inch
  • 70″ Samsung Q60D: 61.4 inches x 35.5 inches x 1.0 inch
  • 75″ Samsung Q60D: 66.0 inches x 37.8 inches x 1.0 inch
  • 85″ Samsung Q60D: 74.8 inches x 42.7 inches x 1.1 inch

Dimensions without Stand (in millimeters):

  • 32″ Samsung Q60D: 724 mm x 422 mm x 30 mm
  • 43″ Samsung Q60D: 965 mm x 559 mm x 25 mm
  • 50″ Samsung Q60D: 1118 mm x 645 mm x 25 mm
  • 55″ Samsung Q60D: 1232 mm x 709 mm x 25 mm
  • 65″ Samsung Q60D: 1450 mm x 831 mm x 25 mm
  • 70″ Samsung Q60D: 1560 mm x 902 mm x 25 mm
  • 75″ Samsung Q60D: 1676 mm x 960 mm x 25 mm
  • 85″ Samsung Q60D: 1900 mm x 1085 mm x 25 mm

Dimensions without Stand (in centimeters):

  • 32″ Samsung Q60D: 72.4 cm x 42.2 cm x 3.0 cm
  • 43″ Samsung Q60D: 96.5 cm x 55.9 cm x 2.5 cm
  • 50″ Samsung Q60D: 111.8 cm x 64.5 cm x 2.5 cm
  • 55″ Samsung Q60D: 123.2 cm x 70.9 cm x 2.5 cm
  • 65″ Samsung Q60D: 145.0 cm x 83.1 cm x 2.5 cm
  • 70″ Samsung Q60D: 156.0 cm x 90.2 cm x 2.5 cm
  • 75″ Samsung Q60D: 167.6 cm x 96.0 cm x 2.5 cm
  • 85″ Samsung Q60D: 190.0 cm x 108.5 cm x 2.5 cm

Weight (without Stand)

Weight without Stand (in pounds):

  • 32″ Samsung Q60D: 11.7 lbs.
  • 43″ Samsung Q60D: 18.5 lbs.
  • 50″ Samsung Q60D: 25.4 lbs.
  • 55″ Samsung Q60D: 34.2 lbs.
  • 65″ Samsung Q60D: 46.1 lbs.
  • 70″ Samsung Q60D: 62.8 lbs.
  • 75″ Samsung Q60D: 69.2 lbs.
  • 85″ Samsung Q60D: 91.5 lbs.

Weight without Stand (in kilograms):

  • 32″ Samsung Q60D: 5.3 kg
  • 43″ Samsung Q60D: 8.4 kg
  • 50″ Samsung Q60D: 11.5 kg
  • 55″ Samsung Q60D: 15.5 kg
  • 65″ Samsung Q60D: 20.9 kg
  • 70″ Samsung Q60D: 28.5 kg
  • 75″ Samsung Q60D: 31.4 kg
  • 85″ Samsung Q60D: 41.5 kg

VESA Mounting Pattern

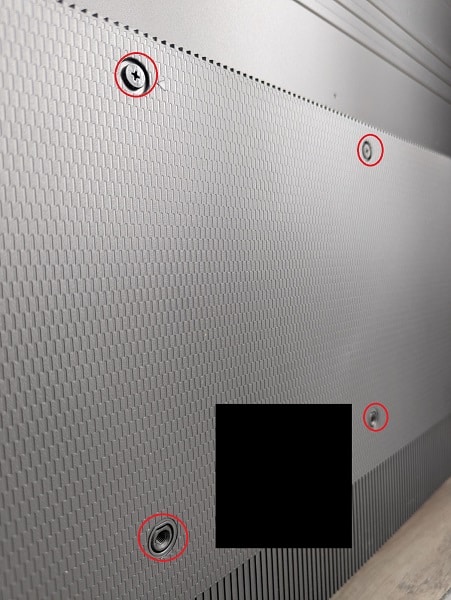
For the uninformed, the VESA Mounting Pattern refers to the horizontal and vertical distances of the screw holes located on the backside of the Samsung Q60D. These are used to attach the mount to the screen.

  • 32″ Samsung Q60D: 100 mm x 100 mm
  • 43″ Samsung Q60D: 200 mm x 200 mm
  • 50″ Samsung Q60D: 200 mm x 200 mm
  • 55″ Samsung Q60D: 200 mm x 200 mm
  • 65″ Samsung Q60D: 400 mm x 300 mm
  • 70″ Samsung Q60D: 400 mm x 300 mm
  • 75″ Samsung Q60D: 400 mm x 400 mm
  • 85″ Samsung Q60D: 600 mm x 400 mm
VESA Mounting Pattern (example from different TV).

Screw Size

  • 32″ Samsung Q60D: M4
  • 43″ Samsung Q60D: M8
  • 50″ Samsung Q60D: M8
  • 55″ Samsung Q60D: M8
  • 65″ Samsung Q60D: M8
  • 70″ Samsung Q60D: M8
  • 75″ Samsung Q60D: M8
  • 85″ Samsung Q60D: M8

Screw Depth

  • 32″ Samsung Q60D: 19-22
  • 43″ Samsung Q60D: 11-13
  • 50″ Samsung Q60D: 11-13
  • 55″ Samsung Q60D: 11-13
  • 65″ Samsung Q60D: 11-13
  • 70″ Samsung Q60D: 11-13
  • 75″ Samsung Q60D: 11-13
  • 85″ Samsung Q60D: 11-13

What wall mounts are compatible with the Samsung Q60D?

When picking a wall mount for the Q60D, you should find one that is strong enough to hold the weight of the TV, which can weigh as much as 91.5 pounds, or 41.5 kilograms.

The mounting bracket should be able to support the VESA Mounting Pattern of your Samsung TV, which varies depending on the screen size.

The 32-inch version uses 100 mm x 100 mm.

The 43-inch, 50-inch and 55-inch variants support 200 mm x 200 mm.

The 65-inch and 70-inch sizes utilizes 400 mm x 300 mm.

If you have the 75-inch Q60D, you will need to find a mount that supports 400 mm x 400 mm.

If you have the biggest size, the 85-incher, then you will need a bracket that supports 600 mm x 400 mm.

If you are looking for a specific product recommendation when it comes to picking a fixed, tilting or full motion wall mount for your Q60D, then you can check out this buyer’s guide.

Recommended TCL S470G settings for PS5, Xbox Series X and S

If you got the 2023 TCL S4, which has a model number that ended with S470G, then you can check out this Seeking Tech guide to see how you can set up this TV when it comes to playing PlayStation 5, Xbox Series X and Xbox Series S games.

Supported Gaming Features

The S470G is pretty limited when it comes to gaming features. You can play games in HDR10 at 4K and 60 frames per second. Auto Low Latency Mode is also supported.

Other than that, the TV isn’t compatible with some of the more advanced features of the new consoles such as 120 frames per second, Variable Refresh Rate or Dolby Vision.

How to set up the S470G for gaming

In order to optimize the S470G for these gaming systems, we recommend that you take the following steps:

1. If you haven’t done so already, connect your console to the HDMI port of your TCL TV. For best compatibility, use the HDMI cable that came with your PS5, Xbox Series X or Xbox Series S.

You can connect to any of the three HDMI ports of the S470G.

2. Next, use the TV remote to open the Settings menu, where you need to make your way over to the Picture Modes screen. Once you get there, make sure that you have Game Mode selected.

By doing so, you will be able to play games at lower input lag when compared to other display modes of the screen.

3. Next, head over to the Inputs screen in the Settings menu and make sure that Auto Low Latency Mode is activated.

4. Now turn on your console and head over to its Settings menu.

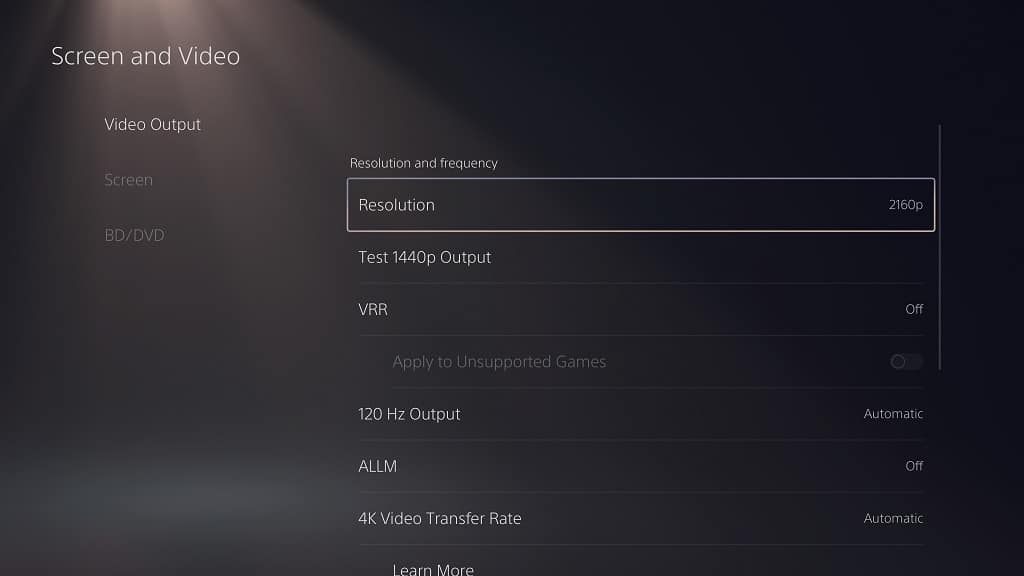
On the PS5, go to Screen and Video > Video Output. On this screen, set Resolution to 2160p and HDR to On When Supported. Afterwards, double check to see if the ALLM, 4K Transfer Rate, Deep Color Output and RGB Range settings are all set to Automatic.

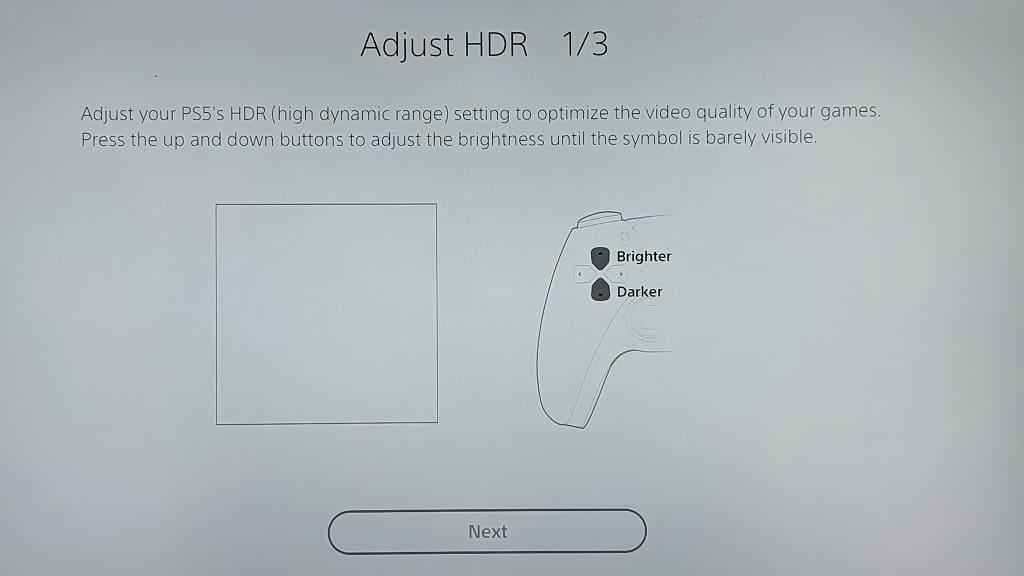
Finally, select Adjust HDR and then follow the instructions on the screen to calibrate the HDR brightness output of the PS5 to the TCL S470G.

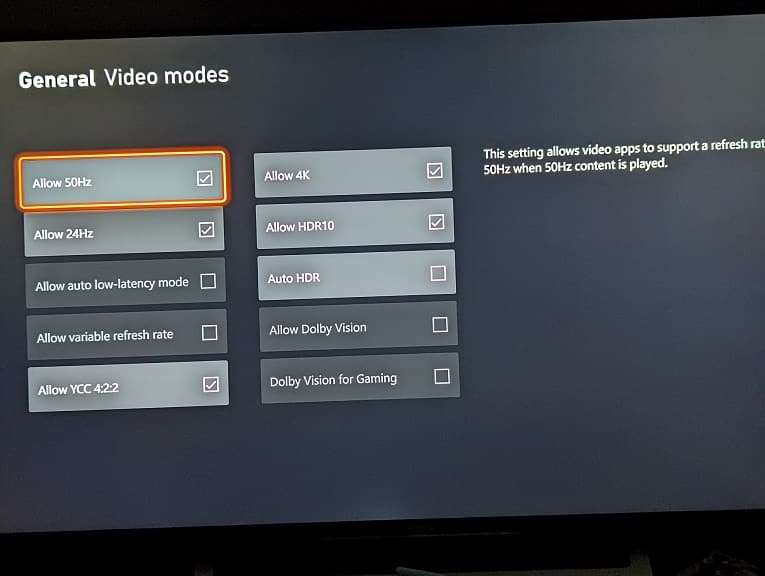
On the Xbox consoles, head over to General > TV & display options > Video modes. From there, check the following boxes:

  • Allow auto low-latency mode
  • Allow 4K Allow
  • HDR10

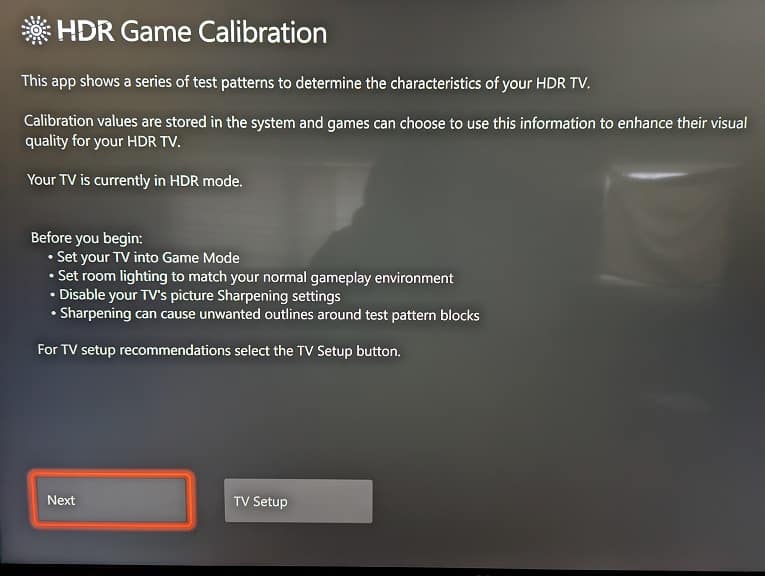
Head back to the General > TV & display options screen and then set Resolution to 4K UHD. Afterwards, select “Calibrate HDR for gaming” and then follow the on-screen tutorial to sync your Series X or Series S HDR brightness output with the S470G.

Your TCL television set should now be fully optimized for your PlayStation 5, Xbox Series X or Xbox Series S console.

Recommended Hisense U7K settings for PS5, Xbox Series X and S

If you got yourself the Hisense U7K, then you can check out this guide at Seeking Tech to see how you can best optimize it for the PlayStation 5, Xbox Series X and/or Xbox Series S.

Supported PS5 Features

The U7K fully supports all of the display features of the PlayStation 5 as you will be able to play games at a maximum frame rate of 120 at a maximum resolution of 4K. The TV also supports Auto Low Latency Mode, HDR10 and Variable Refresh Rate.

Supported Xbox Series X and Xbox Series S Features

The Hisense U7K is also fully compatible with the display features of the Xbox consoles as you can play Series X and Series S games at up to 120 fps in 4K. Also supported are ALLM, HDR10, Dolby Vision and VRR.

How to set up the U7K for gaming

To get the most out of the television set for your PS5, Series X or Series S, we recommend that you take the following steps:

1. Connect your console to the television if you haven’t done so already. Make sure you use the HDMI cable that came with your gaming system and connect to either the third or fourth HDMI ports of the U7K.

2. Using the TV remote, open the Settings menu and then select HDMI Format. You should then select the HDMI port that is connected to your console. Afterwards, make sure that Enhanced Format is selected.

This format should unlock full video bandwidth, allowing you to use all of the display features of your console.

3. In the same Settings menu of your U7K, go to Display & Sound > General > Picture Mode and then select Game.

By using Game Mode, you will reduce the input lag when playing videogames on a HDMI-connected device such as the PlayStation 5, Xbox Series X and Xbox Series S.

4. Next, go to Settings > Display & Sound > Game Settings > Instant Game Response.

By turning this feature on, you will enable Auto Low Latency Mode, which automatically puts your U7K in Game Mode when it detects that you are playing a videogame.

5. You should be done on the TV side; however, there is still some more work to do on the console side. So, make sure you turn on your PS5, Xbox Series X and/or Xbox Series S and then head over to its Settings menu.

On the PlayStation 5, navigate to Screen and Video > Video Output. Over there, set Resolution to 2160p and HDR to On When Supported. You should also set VRR, 120 Hz, ALLM, 4K Transfer Rate, Deep Color Output and RGB Range to Automatic.

Next, select the Adjust HDR option. Over the next three screens, the PS5 will then guide you to adjusting the console’s HDR output to sync up with the U7K.

For the Xbox Series X and Xbox Series S, navigate to General > TV & display options > Video modes and then make sure that the following options are enabled: Allow Auto-Low Latency Mode, Allow 4K, Allow HDR10, Allow Dolby Vision and Allow Dolby Vision for Gaming. You should then set Variable Refresh Rate to Gaming Only.

Afterwards, return to the Settings > General > TV & display options. From there, make sure that Resolution is set to 4K UHD and Refresh Rate set to 120 Hz. Finally, select Calibrate HDR for Gaming. Your Xbox will then guide you through how to sync up the console’s HDR display with your U7K.

You should now be done with setting up your Hisense U7K TV to get the most out of your PlayStation 5, Xbox Series X and/or Xbox Series S.

Sony A75L wall mount specs

If you bought the Sony A75L and would like to hang it high up on a wall, then you can check out this Seeking Tech guide to see what specifications you need to know to find a compatible wall mount.

Sony A75L Screen Sizes

This article will cover the 55-inch and 65-inch variants of the OLED series. You can find the names and model numbers for both below:

  • Sony BRAVIA XR 55” Class A75L OLED 4K HDR Google TV (Model Number: XR-55A75L)
  • Sony BRAVIA XR 65” Class A75L OLED 4K HDR Google TV (Model Number: XR-65A75L)

Sony A75L Dimensions (without Stand)

Dimensions without Stand (in inches):

  • 55” Sony A75L: 48.4 inches x 28.1 inches x 2.1 inches
  • 65” Sony A75L: 57.1 inches x 33.0 inches x 2.1 inches

Dimensions without Stand (in millimeters):

  • 55” Sony A75L: 1227 mm x 712 mm x 53 mm
  • 65” Sony A75L: 1448 mm x 836 mm x 53 mm

Dimensions without Stand (in centimeters):

  • 55” Sony A75L: 122.7 cm x 71.2 cm x 5.3 cm
  • 65” Sony A75L: 144.8 cm x 83.6 cm x 5.3 cm

Sony A75L Weight (without Stand)

Weight without Stand (in pounds):

  • 55” Sony A75L: 39.3 lbs.
  • 65” Sony A75L: 50.5 lbs.

Weight without Stand (in kilograms):

  • 55” Sony A75L: 7.8 kg
  • 65” Sony A75L: 22.9 kg

Sony A75L VESA Mounting Pattern

If you look at the back of the A75L, you should see four visible screw holes. Known as the VESA Mounting Pattern, these are used to attach the wall mount to the television set.

Both variants use the 300 mm x 300 mm, which is the horizontal and vertical distances in between the screws.

VESA Mounting Pattern (example from different TV).

What wall mounts are compatible with the Sony A75L?

To recap, a wall mount needs to be strong enough to hold the weight of the A75L, which can weigh as much as 50.5 pounds or 22.9 kilograms.

Furthermore, it must support the VESA Mounting Pattern of the OLED. For both the 55-inch and 65-inch screen sizes, the mounting screw hole distances are 300 mm x 300 mm.

For specific fixed, tilting and full motion wall mount recommendations that may be compatible with the Sony A75L, you can check out this buyer’s guide.
Resource:

TCL Q550G wall mount specs

If you purchased the 2023 TCL Q5, which has a model number that ends with Q550G, then you can check out this compatibility guide at Seeking Tech to see what specifications you should know about when picking out a supported wall mount.

Screen Sizes

All three screen size variants of the Q550G will be covered in this post. You can find the names and model numbers of each version below:

  • TCL 50″ Q Class 4K QLED HDR Smart TV (Model Number: 50Q550G)
  • TCL 55″ Q Class 4K QLED HDR Smart TV (Model Number: 55Q550G)
  • TCL 65″ Q Class 4K QLED HDR Smart TV (Model Number: 65Q550G)

TCL Q550G Dimensions (without Stand)

Dimensions without Stand (in inches):

  • 50” TCL Q550G: 43.8 inches x 25.4 inches x 3.2 inches
  • 55” TCL Q550G: 48.3 inches x 28.0 inches x 3.2 inches
  • 65” TCL Q550G: 56.9 inches x 32.8 inches x 3.2 inches

Dimensions without Stand (in millimeters):

  • 50” TCL Q550G: 505 mm x 645 mm x 81 mm
  • 55” TCL Q550G: 1227 mm x 711 mm x 81 mm
  • 65” TCL Q550G: 1445 mm x 833 mm x 81 mm

Dimensions without Stand (in centimeters):

  • 50” TCL Q550G: 50.5 cm x 64.5 cm x 8.1 cm
  • 55” TCL Q550G: 122.7 cm x 71.1 cm x 8.1 cm
  • 65” TCL Q550G: 144.5 cm x 83.3 cm x 8.1 cm

TCL Q550G Weight (without Stand)

Weight without Stand (in pounds):

  • 50” TCL Q550G: 19.0 lbs.
  • 55” TCL Q550G: 24.2 lbs.
  • 65” TCL Q550G: 33.7 lbs.

Weight without Stand (in kilograms):

  • 50” TCL Q550G: 8.6 kg
  • 55” TCL Q550G: 11.0 kg
  • 65” TCL Q550G: 15.3 kg

TCL Q550G VESA Mounting Pattern

The VESA Mounting Pattern refers to the four screw holes you find on the back of the Q550G. These are used to attach the mounting bracket to the screen. It is measured in millimeters as horizontal distance by vertical distance.

VESA Mounting Pattern (example from different TV).

Wall mounts support a range of patterns, so make sure you pick one that fits.

You can find the specs for all three screen sizes below:

  • 50” TCL Q550G: 200 mm x 200 mm
  • 55” TCL Q550G: 200 mm x 300 mm
  • 65” TCL Q550G: 300 mm x 300 mm

TCL Q550G Mounting Screw Size

When it comes to the screw size you should be using to attach a wall mount to the Q550G, TCL recommends that you use M6 x 12 mm for all three variants.

What wall mounts are compatible with the TCL Q550G?

To recap, when picking a wall mount for your TCL Q550G, you need to make sure that it is strong enough to hold the weight of the screen. Fortunately, this series is extremely lightweight as the biggest unit weighs no more than 33.7 pounds (or 15.3 kilograms).

The mount also needs to fit the four mounting screw holes on the back of your Q550G, so you need to know the VESA Mounting Pattern. The 50-inch version uses 200 mm x 200 mm while the 55-inch variant utilizes 200 mm x 300 mm. The biggest size, the 65-incher, supports 300 mm x 300 mm.

You can check out our fixed, tilting and full motion wall mount recommendations guide with this link if you one to find one that is compatible with the weight and VESA Mounting Pattern of your Q550G.

Resource:

Roku Plus Series wall mount specs

If you picked up the Roku Plus Series television set and would like to hang it up on a wall, then you can check out this compatibility guide at Seeking Tech to see what you specfications should look out for when choosing a wall mount.

Screen Sizes

This article will cover all three available screen sizes of this series, you can find the names and model numbers of these variants below:

  • 55-inch Roku Plus Series 4K QLED TV (Model Number: 55R6A5R)
  • 65-inch Roku Plus Series 4K QLED TV (Model Number: 65R6A5R)
  • 75-inch Roku Plus Series 4K QLED TV (Model Number: 75R6A5R)

Dimensions (without Stand)

Dimensions without Stand (in inches):

  • 55” Roku Plus Series: 48.4 inches x 28.3 inches x 4.0 inches
  • 65” Roku Plus Series: 57.0 inches x 33.1 inches x 4.0 inches
  • 75” Roku Plus Series: 65.8 inches x 38.1 inches x 3.5 inches

Dimensions without Stand (in millimeters):

  • 55” Roku Plus Series: 1229 mm x 719 mm x 102 mm
  • 65” Roku Plus Series: 1448 mm x 841 mm x 102 mm
  • 75” Roku Plus Series: 1671 mm x 968 mm x 89 mm

Dimensions without Stand (in centimeters):

  • 55” Roku Plus Series: 122.9 cm x 71.9 cm x 10.2 cm
  • 65” Roku Plus Series: 144.8 cm x 84.1 cm x 10.2 cm
  • 75” Roku Plus Series: 167.1 cm x 96.8 cm x 8.9 cm

Weight (without Stand)

Weight without Stand (in pounds):

  • 55” Roku Plus Series: 30.0 lbs.
  • 65” Roku Plus Series: 36.7 lbs.
  • 75” Roku Plus Series: 49.9 lbs.

Weight without Stand (in kilograms):

  • 55” Roku Plus Series: 13.6 kg
  • 65” Roku Plus Series: 16.6 kg
  • 75” Roku Plus Series: 22.6 kg

VESA Mounting Pattern

If you look at the backside of your Roku Plus television set, you should see four screw holes. The wall mount needs to match up with these screw openings; otherwise, you won’t be able to attach it to the back side of the screen.

VESA Mounting Pattern (example from different TV).

All three screen sizes of this series use the 400 mm x 300 mm VESA Mounting Pattern. The first number refers to the horizontal distance while the second one refers to the vertical distance.

What wall mounts are compatible with the Roku Plus TV?

For a wall mount to be compatible with the 55-inch, 65-inch and 75-inch Roku Plus TV, it needs to hold more than 50 pounds. Furthermore, the mounting bracket must fit the 400 mm x 300 mm VESA Mounting Pattern on the backside of the screen.

If you are looking for specific fixed, tilting or full motion wall mount recommendations, then you can check out this article.

Resource:

Recommended 2023 LG QNED80 settings for PS5, Series X and Series S

If you bought the 2023 version of the LG QNED80 settings, then you can check out this set up guide from Seeking Tech to see what are the best settings to use for this television set when it comes to the PlayStation 5, Xbox Series X and Xbox Series S consoles.

Supported PS5 Features

The 2023 QNED80 supports all of the display features of the PlayStation 5:

  • 120 Hz
  • HDR10
  • Variable Refresh Rate starting at 48 Hz
  • Auto Low Latency Mode

Supported Xbox Series X and Xbox Series S Features

The 2023 QNED80 is compatible with the following display features on both Series X and Series S:

  • 120 Hz
  • HDR10
  • Variable Refresh Rate starting at 40 Hz
  • Auto Low Latency Mode

Unfortunately, this LG television screen does not support the Dolby Vision HDR format.

How to set up the 2023 QNED80 for gaming

We recommend that you take the following steps to optimize your 2023 LG QNED80 for the PS5, Series X and/or Series S:

1. First off, make sure you connect your console to either the third or fourth HDMI ports of the QNED80.

If you have a PlayStation 5 or Xbox Series X, then you should use the HDMI 2.1 cable that came packed into the console box.

If you have an Xbox Series S, then you can use the HDMI 2.0 cable that came with the system or use a HDMI 2.1 cable.

2. Next, use the LG remove to open the Settings menu of the QNED80 and then go to the General tab. From there, make sure you enable Game Optimizer.

3. Afterwards, go to Game menu and then make sure that VRR and ALLM is enabled.

If you would like a quick shortcut to the Game menu, then you can enable the Game Dashboard here as well.

4. While there are other settings in the Game menu of the QNED80, we recommend that you leave them alone. Instead, open the Settings menu on your console.

On the PS5, you need to do the following:

  • Make your way to Video and Screen > Video Output.
  • Double check to see if you set Resolution to 2160p and HDR is set to On When Supported.
  • You should also make sure that VRR, 120 Hz, ALLM, 4K Transfer Rate, Deep Color Output and RGB Range are set to Automatic as well.
  • On the same screen select Adjust HDR. Afterwards, follow the instructions to calibrate the HDR light and dark levels for your 2023 QNED80.

On the Xbox Series X and Xbox Series S, you should take the following steps:

  • Maneuver over to General > TV & display options > Video modes.
  • Make sure that the following settings have a check mark next to it: Allow Auto-Low Latency Mode, Allow Variable Refresh Rate, Allow 4K and Allow HDR10.
  • Go back to General > TV & display options menu screen and then double check if you have Resolution set to 4K UHD and Refresh Rate set to 120 Hz.
  • On the same screen, select “Calibrate HDR for gaming” and then follow the on-screen instructions to synchronize the HDR brightness output of your Xbox to the QNED80.

You should now be done setting up the LG 2023 QNED80 to get the most out of playing PlayStation 5, Xbox Series X and/or Xbox Series S games.

Recommended Hisense U6K settings for PS5, Xbox Series X and S

If you bought the 2023 Hisense U6, which has a model number that ends with U6K, then you can check out this guide at Seeking Tech to see how you can optimize the TV for playing videogames on the PlayStation 5, Xbox Series X and/or Xbox Series S consoles.

Compatible PS5 Features

When it comes to the PlayStation 5, the U6K is able to display games at a 60 Hz refresh rate with Auto Low Latency Mode, HDR10 and Variable Refresh Rate (starting at 48 Hz).

While this television set supports 120 Hz, this refresh rate limits the resolution to 1080p while also having several other display issues. Therefore, we suggest going with 60 Hz.

Compatible Xbox Series X and Xbox Series S Features

For the two Xbox Series consoles, the U6K is also capable of displaying videogames at 60 frames per second with ALLM, HDR10 and VRR. Dolby Vision is also supported as well.

While the Variable Refresh Rate for these Xbox consoles kicks in at 40 Hz, the minimum is raised to 48 Hz with the U6K.

How to optimize the Hisense U6K for gaming

To get the most out of this entry level television for your PS5, Xbox Series X and/or Xbox Series S, we suggest that you take the following steps:

1. If you haven’t done so already, connect your console to any of the available HDMI 2.0 ports of the U6K. To unlock all of the compatible features, we suggest that you use the HDMI cable that came packaged with your console.

2. Next, pick up the television remote and then select Settings > Display & Sound > Picture > Picture Mode > Game.

Turning on Game Mode will reduce input latency when compared to the other picture modes.

3. Afterwards, make your way to Settings > Display & Sound > Picture > Advanced Settings and then enable Instant Game Response.

This action will make the U8K ready for Auto Low Latency Mode, which automatically switches the picture mode to Game whenever you start playing a videogame on your PS5, Series X or Series S.

4. To enable Variable Refresh Rate, go to Settings > Display & Sound > Picture > Advanced Settings and then turn on FreeSync.

5. Next, head over to the Settings screen of your game console.

On the PlayStation 5, you need to do the following:

  • Navigate to Screen and Video > Video Output.
  • Set Resolution to 4K and HDR to On When Supported.
  • Make sure that VRR, ALLM, 4K transfer Rate, Deep Color Output, RGB Range all are set to Automatic.
  • Select Adjust HDR to open the HDR brightness calibration menu. Follow the directions to ensure that the light and dark color outputs don’t look off on the U6K.

For the Xbox Series X and Xbox Series S, you should do the following:

  • Head over to General > TV & display options > Video modes.
  • Make sure the following are selected: Allow auto low-latency mode, Allow 4K, Allow HDR10, Allow Dolby Vision and Allow Dolby Vision for Gaming.
  • Back out to the General > TV & display options menu. From there, double check to see if you have Resolution set to 4K UHD and Refresh Rate set to 60 Hz.
  • From the same menu, select “Calibrate HDR for gaming” to bring up several screens with directions. Follow them to sync up the light and dark HDR output of your console to the U6K.

You should now be done with setting up your Hisense U6K when it comes to getting the most out of your PS5, Series X and/or Series S videogames.

Recommended Sony X95L settings for PS5, Xbox Series X and S

If you bought Sony’s 2023 flagship TV, the X95L, then you can check out this optimization guide to see how you can properly set up this screen to get the most out of playing PlayStation 5, Xbox Series X and/or Xbox Series S games.

Supported PS5 Features

With the X95L, you can play PlayStation 5 games at up to 120 frames per second at 1080p or 4K resolutions. If you decide to use 1440p, however, then the maximum fps will be limited to 60 fps.

Also supported are Auto Low Latency Mode, HDR10 and Variable Refresh Rate.

Supported Xbox Series X and Xbox Series S Features

When it comes to the Series X and Series S, the X95L can display at 120 Hz at 1080p and 4K. For 1440p, the refresh rate is limited to 60 Hz. While this Sony TV can display Dolby Vision content, the refresh rate will also be limited to 60 Hz.

The other compatible features include Auto Low Latency Mode, HDR10 and Variable Refresh Rate.

How to optimize the Sony X95L for gaming

To properly set up your X95L for playing videogames on the new consoles, we suggest that you take the following steps:

1. To start off, make sure you correctly connected your PS5, Xbox Series X or Xbox Series S to the Sony TV.

The X95L features four HDMI ports. HDMI Port #3 and HDMI Port #4 are where you need to connect your PlayStation 5 and Xbox Series X consoles. When doing so, make sure you use the HDMI 2.1 cable that came with your gaming system.

For the Xbox Series S, you can either use the HDMI 2.0 cable that came with the lesser powered console or get your own HDMI 2.1 cable to connect to the third or fourth HDMI port.

2. Next, open the Settings menu of the X95L and then navigate over to the HDMI Signal Format screen. From there, select the HDMI port that is connected to your console.

Next, we recommend that you select Enhanced Format (VRR). You should see the following details:

Select this option only if your game console supports Variable Refresh Rate (VRR). Picture mode is fixed in [Game] and some picture settings are restricted.

If you want to play a game or watch a video in Dolby Vision on the Xbox Series X or Xbox Series S, then you need to select Enhanced Format (Dolby Vision) instead. Since the majority of games don’t use this HDR format, we recommend using Enhanced Format (VRR) as the default and then switch over to Enhanced Format (Dolby Vision) when necessary.

3. Next, head over to the Picture section in the X95L’s Settings menu. Here, double check to see if Picture Mode is set to Game and Auto Picture Mode is set to On.

By enabling game mode, you should automatically activate Variable Refresh Rate as well as reduce the input delay.

4. Next, boot up your console if you haven’t done so already and then visit its Settings menu.

On the PS5, you need to do the following:

  • Navigate to Screen and Video > Video Output.
  • Set Resolution to 2160p, VRR to Automatic, 120 Hz Output to Automatic, ALLM to Automatic, 4K transfer Rate to Automatic, HDR to On When Supported, Deep Color Output to Automatic and RGB Range to Automatic.
  • From the same menu, select Adjust HDR. This will take you to several screens with directions that will help you calibrate the HDR brightness output of the PS5 to the X95L.

For the Xbox Series X and Xbox Series S, you can take the following steps:

  • Go to General > TV & display options > Video modes.
  • Make sure you select Allow auto low-latency mode, Allow 4K and Allow HDR10.
  • If you want to watch Dolby Vision movies and/or play Dolby Vision games, you need to select Allow Dolby Vision and Allow Dolby Vision for Gaming.
  • Return to the General > TV & display options and make sure that Resolution is set to 4K UHD. The refresh rate should also be set to 120 Hz unless you are using Dolby Vision.
  • From the same screen, select “Calibrate HDR for gaming.” Afterwards, follow the steps shown on screen to sync up the brightness output of your Xbox to the Sony X95L.

You should now be done with setting up this Mini LED for your PS5, Series X and/or Series S console.

Recommended TCL S450G settings for PS5, Xbox Series X and S

If you got your hands on the 2023 TCL S4, which has a model number that ends with S450G, then you can check out this optimization guide at Seeking Tech to see how you can set up this LED television for PlayStation 5, Xbox Series X and/or Xbox Series S.

Supported PS5 Features

The S450G only supports a few of the PlayStation 5 display features as the screen is capable of outputting at 60 Hz, HDR10 and Auto Low Latency Mode.

It is not compatible with 120 Hz or Variable Refresh Rate.

Supported Xbox Series X and Xbox Series Features

The TCL S450G is also quite limited when it comes to Series X and Series S support. The frame rate maxes out at 60 fps while only HDR10 and ALLM are compatible.

Moreover, this LED does not support 120 Hz, Dolby Vision or VRR.

How to optimize the TCL S450G for console gaming

To properly set up the S450G to get the most out of playing videogames on console, we suggest that you take the following steps:

1. To start off, make sure that you properly connected the PS5, Xbox Series X or Xbox Series S to the TCL.

All three of the HDMI ports of the S450G are 2.0; so, you can connect to any of them. When doing so, make sure you use the HDMI 2.1 cable that came with your PS5/Xbox Series X or HDMI cable that came with your Xbox Series S.

2. Next, pick up the TV remote. Open the Settings menu and then make your way to Picture Modes menu. From there, you need to select Game.

Game Mode is going to reduce the input lag when you are playing a videogame on your HDMI-connected device.

3. In the same Settings menu of the S450G, head over to Inputs and then make sure that Auto Low Latency Mode is enabled.

By doing so, the TV will automatically turn on Game Mode everything it detects that a game console is turned on.

4. Afterwards, head over to the Settings menu on your console.

On the PS5, you should do the following:

  • Go to Settings > Screen and Video > Video Output.
  • Set Resolution to 2160p and HDR to On When Supported.
  • Make sure that ALLM, 4K Transfer Rate, Deep Color Output and RGB Range to Automatic.
  • Head over to Settings > Screen and Video > Video Output > Adjust HDR and then follow the instructions to sync the HDR brightness output of the PS5 to the S450G.

If you have your Series X or Series S connected, then you need to take the following steps:

  • Head to Settings > General > TV & display options > Video modes.
  • Make sure that the following are enabled: Allow auto low-latency mode, Allow 4K Allow and HDR10.
  • Return to Settings > General > TV & display options and then make sure that Resolution is set to 4K UHD.
  • You should then select “Calibrate HDR for gaming” in the same menu. Over the course of the next three screens, follow the directions to sync up the HDR output of your Xbox to the TCL LED.

Your S450G should now be fully set up to get the most out of the PS5, Xbox Series X and/or Xbox Series S.