How to enable or disable crossplay in Headbangers

When you first start up Headbangers: Rhythm Royale, you will get a message saying whether or not you want to turn on cross network play. If you changed your mind after the initial setup, then you can check out this guide from Seeking Tech to see how you can enable or disable crossplay.

1. In the main menu, you need to head over to the Settings screen.

This can be done by switch tabs, which you can do by pressing the L1 and R1 buttons on PlayStation, L and R buttons on Switch or LB and RB buttons on Xbox.

2. From the Settings screen, move the cursor down to Crossplay.

Tilt the left analog stick to the left or right side, or use the left or right directional pad buttons, to set this option to either “On” or “Off.”

3. You can then exit the Settings menu.

When you play online again, you should only be matched up with players on the same network platform if you set the Crossplay option to “Off.” If you set it to “On” instead, then you will be matched up with players on other networks.

How to fix Star Ocean: The Second Story R HDR and brightness issues

You may find that some scenes in Star Ocean: The Second Story R to be too dark while others are overly bright. The colors may also appear washed out in some instances.

To see how you can potentially fix these HDR and brightness issues, you can take a look at this troubleshooting article from Seeking Tech.

1. If you are playing the game with HDR on a PlayStation 4, PlayStation 4 Pro or PlayStation 5, then you should make sure that the console has been properly calibrated for HDR brightness.

In order to do so on the PS4, head to the console’s Settings menu. From there, select Sound and Screen > Video Output Settings > Adjust HDR.

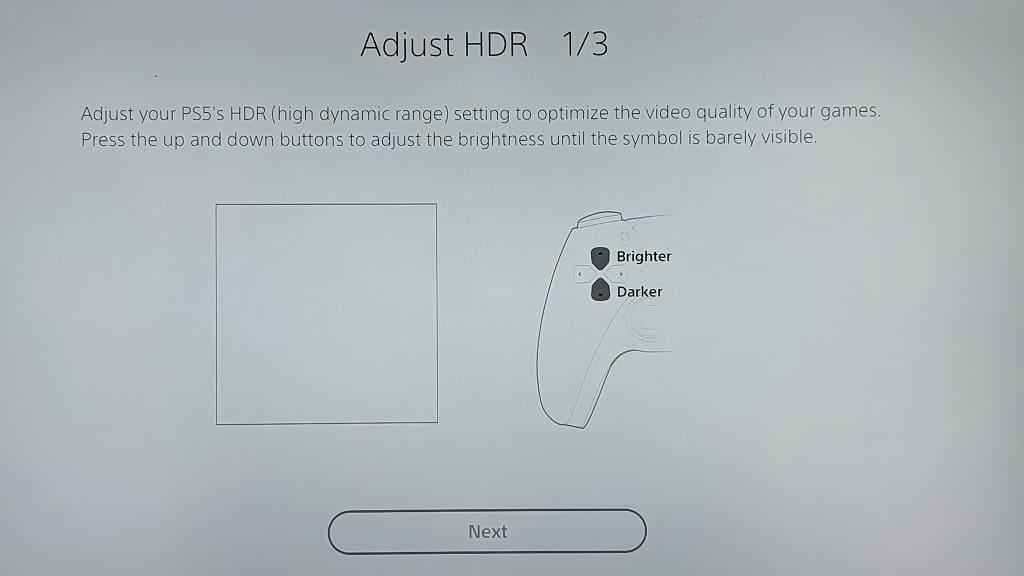
On the PS5, make you way to the console’s Settings menu and then select Screen and Video > Video Output > Adjust HDR.

Next, follow the on-screen steps to calibrate the HDR brightness output.

2. You can also try turning off HDR on your PS4 or PS5. Depending on your screen, the brightness may end up looking better in SDR.

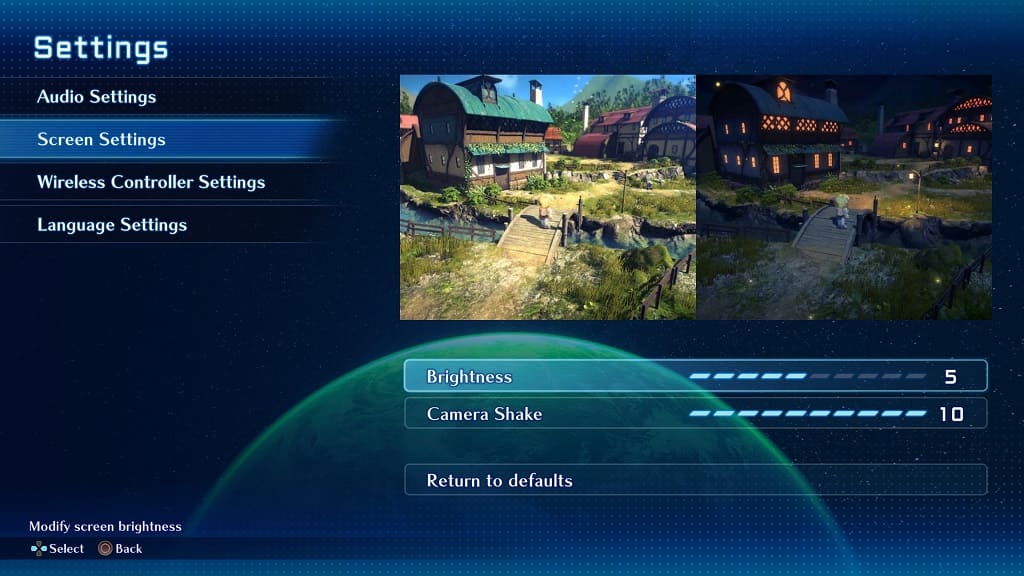
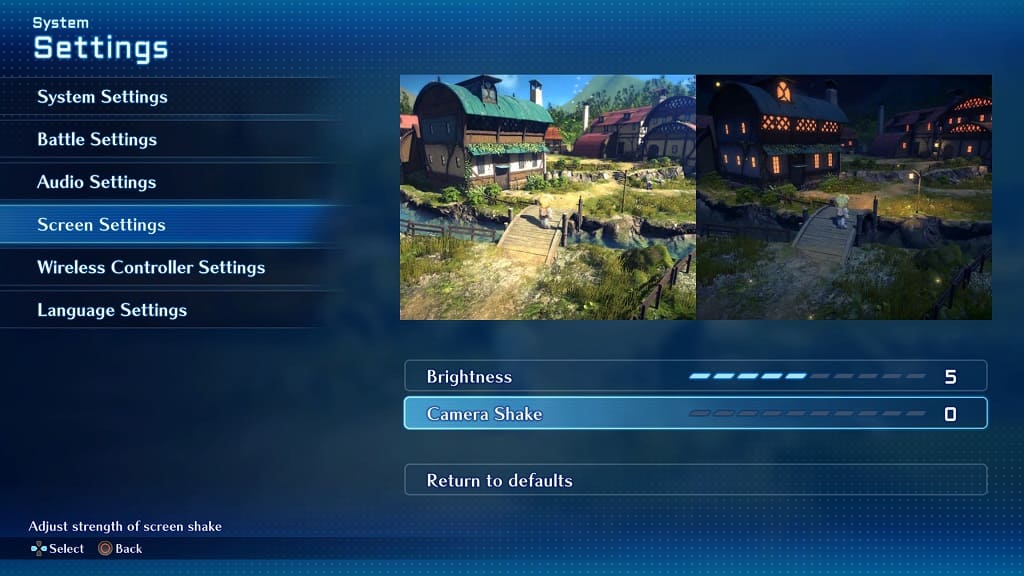
3. There is an in-game brightness slider that you can use as well. To find it, open the Camp Menu by pressing the Triangle button on the PlayStation controller or X button on the Switch controller while exploring the field. Afterwards, select System > Settings > Screen Settings.

By default, the Brightness slider is set to a value of 5. You can use the left directional analog or left and right directional buttons to adjust anywhere between a range of 1 to 9. Make sure you use the two images above as a reference.

4. One last solution is to adjust the brightness and contrast of your television set or monitor.

If you are playing Star Ocean: The Second Story R on the Nintendo Switch via portable mode, then you can try adjusting the screen brightness.

How to turn off controller vibrations in Star Ocean: The Second Story R

The rumble is set to the maximum in Star Ocean: The Second Story R. If you find that the vibrations in this Japanese role-playing game to be too strong, then you can check out this Seeking Tech guide to see how you can lower its intensity or completely disable haptic feedback.

1. You need to open the System menu if you haven’t done so already. In order to do so, open the Camp Menu from the field by pressing the Triangle button on the DualSense/DualShock or X button on the Nintendo Switch controller.

2. Head into Settings from the System screen.

In the System Settings menu, select Wireless Controller Settings on the left side.

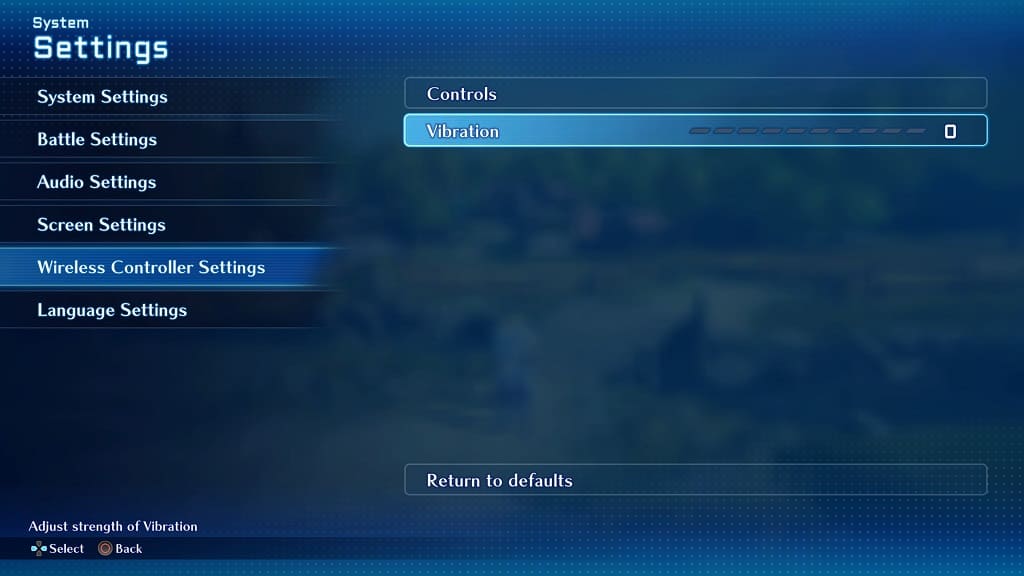
3. On the right side, you should see the Vibration slider, which is set to a maximum value of 10 by default.

Tilt the left analog stick to the left or use the left directional pad to reduce the rumble intensity. To completely disable haptic feedback, make sure that the Vibration slider is set to 0.

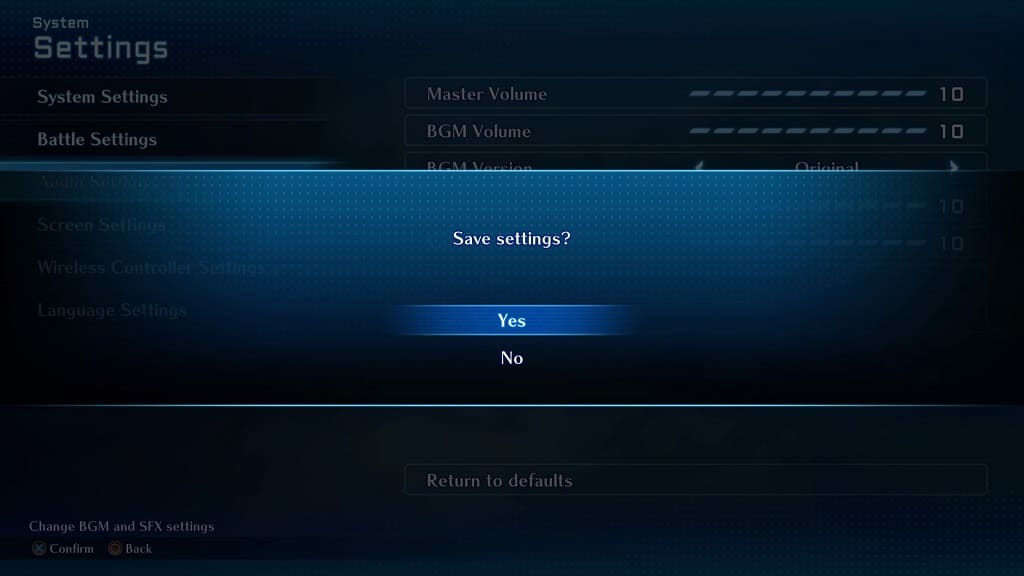
4. Once you are done, you need to back out of the System Settings menu. When asked to save your new vibration intensity settings, make sure you select Yes.

How to disable camera shake in Star Ocean: The Second Story R

You may notice that the camera will occasionally shake around in Star Ocean: The Second Story R. If you find that this visual effect to be a little too distracting, then you can check out this guide from Seeking Tech to see how you can lessen or completely disable it.

1. First off, you need to head over to the System Settings menu.

You can get there by pressing the Triangle button on PlayStation or X button on Switch to open the Camp Menu. From there, you can then navigate over to System and then Settings.

2. Once you get to System Settings, select Screen Settings from the left column.

3. On the right side, you should see the Camera Shake setting, which is set to a maximum value of 10 by default.

4. Use the left analog stick or left directional pad to reduce the Camera Shake effect. To completely disable it, make sure that the value is set to 0.

5. Exit the System Settings menu. When you see a message asking if you want to save the change you just made, you need to select Yes.

How to change the voice type in Star Ocean: The Second Story R

Star Ocean: The Second Story was first released for the PS1 and later ported to the PSP under the name of Star Ocean: Second Evolution. For the portable remaster, Square Enix changed the voice acting to the game.

The latest iteration, Star Ocean: The Second Story R, also features new voice overs. To see how you can switch between the voice acting of the latest version to Star Ocean: Second Evolution, you can check out this guide at Seeking Tech.

1. Start off by opening the Camp Menu in The Second Story R and then making your way to System > Settings.

2. You should now be in the System Settings menu. Here, you need to select Language Settings. Afterwards, make sure that Voice Language is set to Japanese.

If you are using English voice overs, then you are limited to using the recordings that were made for The Second Story R.

3. From the same System Settings menu, you need to select Audio Settings.

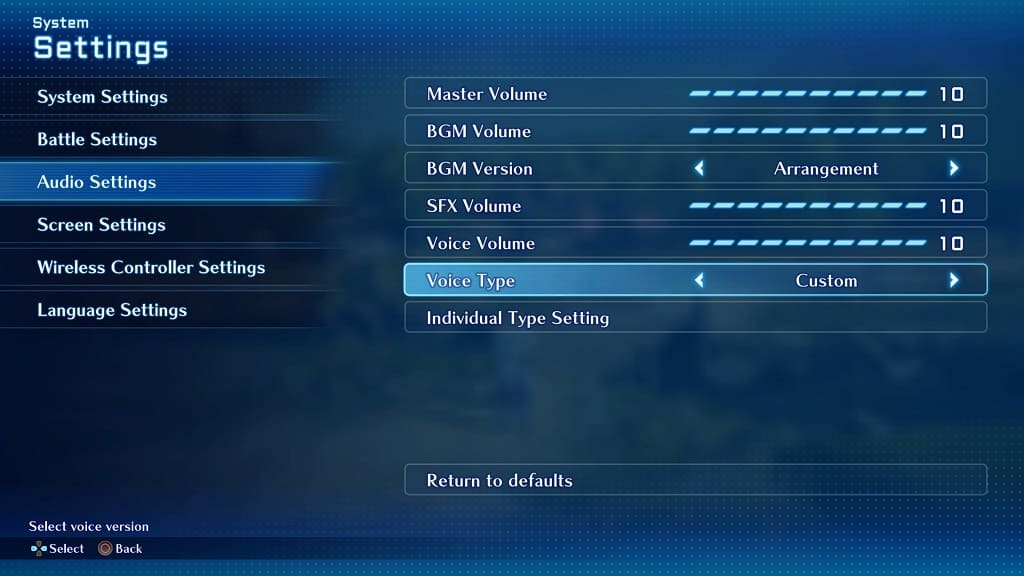
4. Afterwards, move the cursor down to Voice Type. If this is greyed out, then you need to change the Voice Language to Japanese.

5. With Voice Type, you will be able to pick between the following:

  • SOR2
  • SO2SE
  • Custom

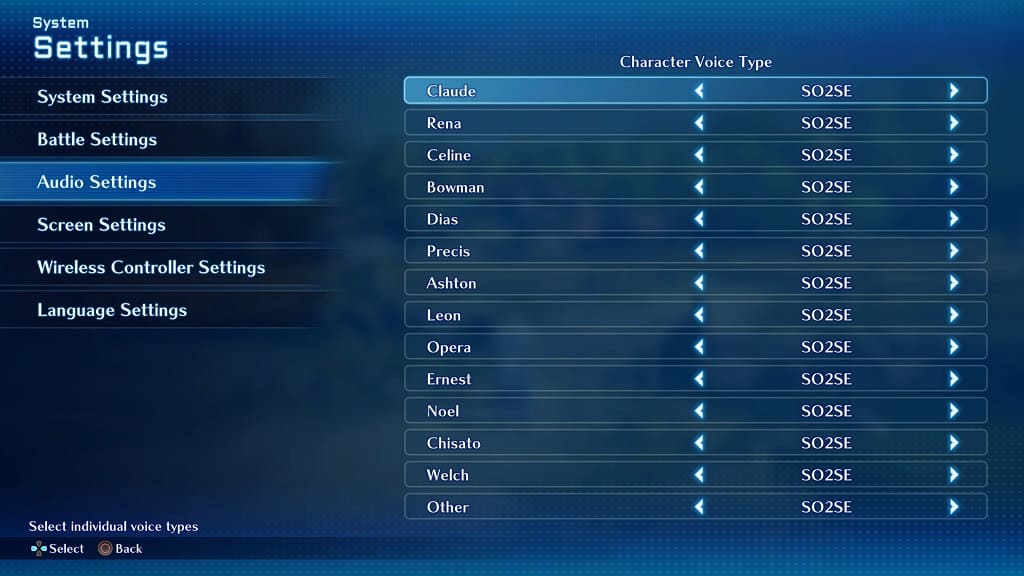
If you chose Custom, the Individual Type Setting becomes selectable. If you select it, you will be taken to a Character Voice Type screen where you can select the voice over for an individual character. The options here include the following:

  • SOR2
  • SO2SE
  • Off

The “Off” option will mute the voice of the individual character.

6. Once you are done, you can exit the System Settings menu and then save your new voice type customization options when asked.

How to automatically skip spell animations in Star Ocean: The Second Story R

While some of the bigger spells in Star Ocean: The Second Story R may look spectacular, these magic attacks will also take a lot of time to animate.

If you are tired of seeing the same animations over and over again, then you can check out this Seeking Tech tutorial to see how you can automatically skip them in battles.

1. To start off, you need to open the Camp Menu. You can do so during exploration by pressing Triangle on a PlayStation pad or X on a Nintendo Switch pad.

2. From the Camp Menu, select System and then head into Settings in the proceeding screen.

3. Once you get to the System Settings menu, select Battle Settings on the left side.

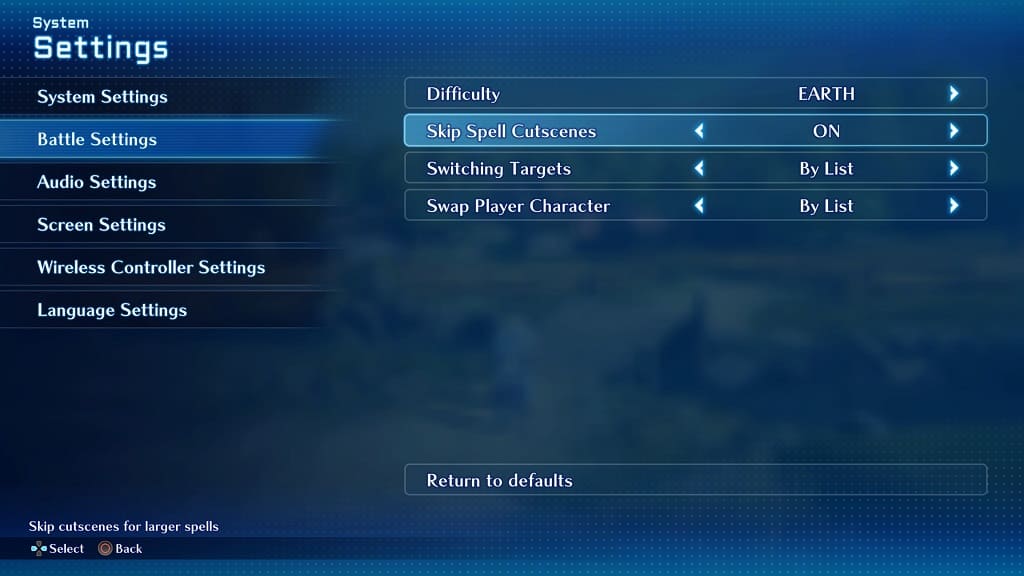
4. On the right side, you should see the Skip Spell Cutscenes setting. By default, this is set to “Off.”

Use the left analog or directional pad settings to change it to “On” instead.

5. You can then close the System Settings screen. When you do, make sure you select Yes when the game asks if you want to save your new settings.

How to change the voice language in Star Ocean: The Second Story R

Star Ocean: The Second Story R supports both English and Japanese voice-overs. To see how you can change the voice language in the remake of the classic JRPG, you can check out this article from Seeking Tech.

1. Start off by heading over to the System Settings menu.

If you have already loaded into your save file, then you need to press Triangle on a PlayStation gamepad or X on a Nintendo Switch gamepad to open the Camp Menu during exploration.

2. From there, navigate over to System and then Settings.

3. Next, you need to select Language Settings from the left column of the System Settings screen.

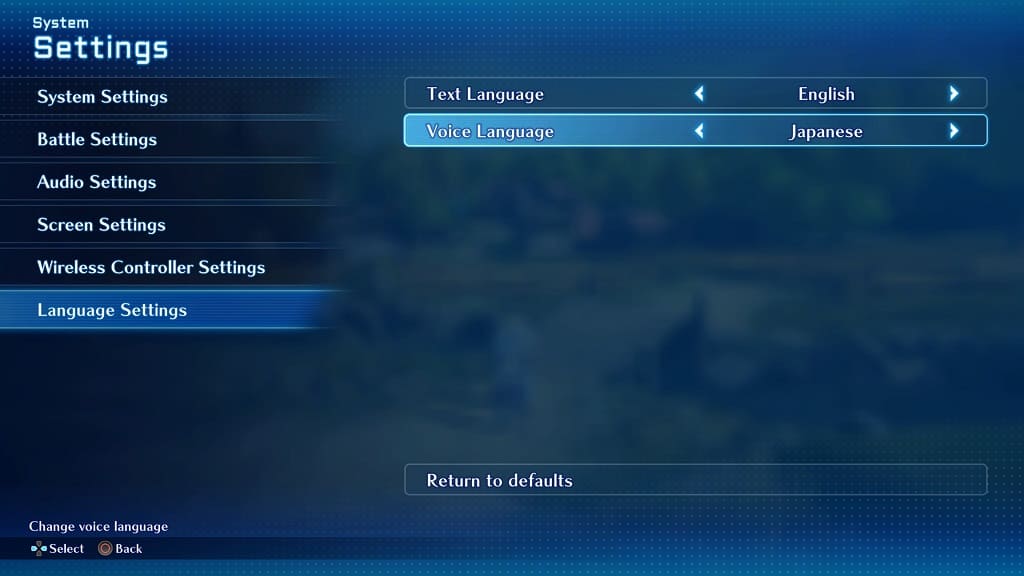
4. On the right side, you should be able to find Voice Language.

Use the left analog stick, or left and right directional pad buttons, to switch between English and Japanese voice overs.

5. After you are done changing the voice language, exit out of the System Settings menu. When prompted to save your changes, make sure you select Yes.

How to lower the background music volume in Star Ocean: The Second Story R

You may find that the background music to be a little too loud in Star Ocean: The Second Story R. The BGM may even drown out the voices in the dialogue. To see how you can lower its volume, you can check out this guide from Seeking Tech.

1. For the first step, you need to head over to the System Settings menu.

To do so, open the Camp Menu while exploring the field by pressing the Triangle button on the PlayStation controller or X button on the Nintendo Switch controller.

From the Camp Menu, select System and then Settings.

2. In the System Settings screen, select Audio Settings on the left side.

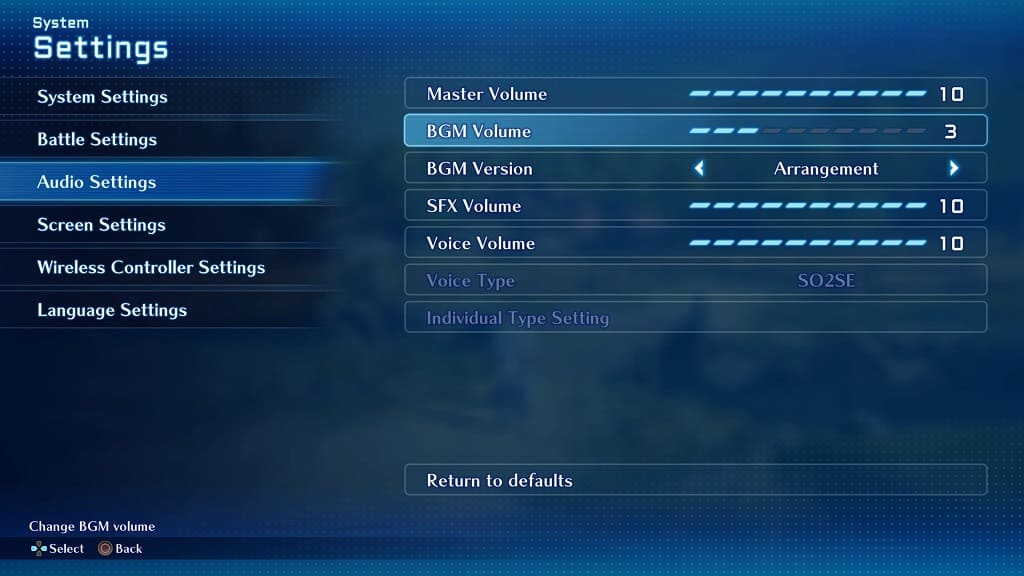
3. On the right side, move the cursor to BGM Volume.

4. By default, the BGM Volume is set to the maximum value of 10.

You need to use the left directional button, or tilt the left analog stick to the left, to decrease the loudness of the background music.

To mute the soundtrack completely, move the slider all the way to 0.

5. Afterwards, back out of the System Settings menu.

Make sure you save your new settings when asked to apply the new volume level for the background music.

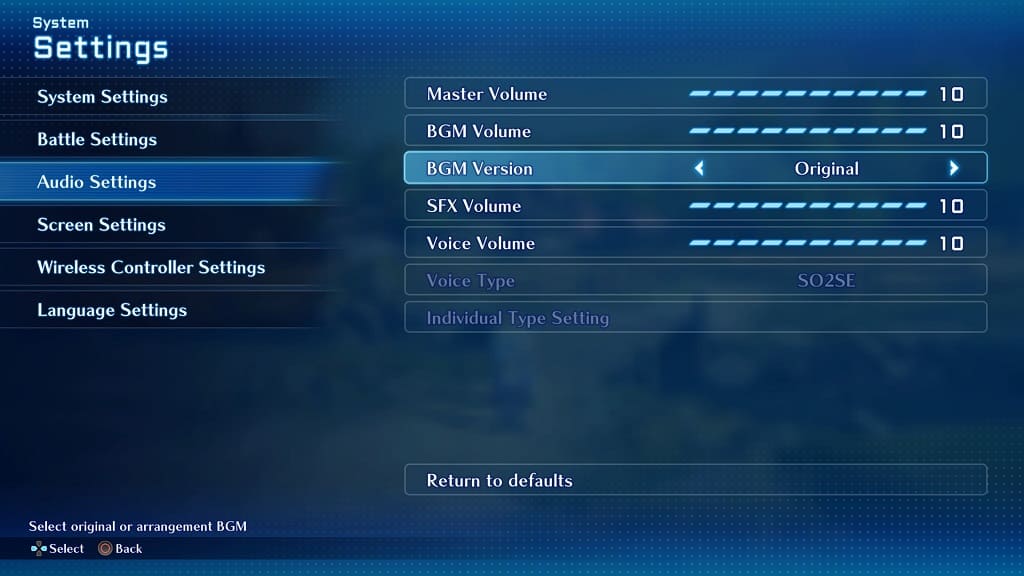
How to change the soundtrack in Star Ocean: The Second Story R

While Star Ocean: The Second Story R uses the re-arranged soundtrack by default, you will be able to switch back to the original OST. To find out how you can properly change the BGM in this role-playing game, you can take a look at this tutorial from Seeking Tech.

1. For the first step, open the in-game Camp Menu. This can be done by pressing the Triangle button on the PlayStation controller or X button on the Nintendo Switch controller while exploring the field.

2. From the Camp Menu, select System and then Settings in the following screen.

3. In the System Settings menu, select Audio Settings from the left column.

4. On the right side, you should then see BGM Version.

5. By default, BGM Version is set to “Arrangement” in Star Ocean: The Second Story R.

You can tilt the left analog stick to the left or right, or use the left and right directional pad, to change it back to the “Original” soundtrack.

You should hear the background music changed in real-time as you switch between the two options.

6. After you are done, exit out of the System Settings menu. Make sure you select Yes when asked if you want to save your recently changed settings.

Recommended Samsung Q80C settings for PS5, Xbox Series X and S

If you bought a 2023 Samsung Q80, Q80C or Q80CD series television set, then you can check out this Seeking Tech guide to see how you can best optimize it for playing PlayStation 5, Xbox Series X and/or Xbox Series S games.

Q80C Console Capabilities

On the PlayStation 5, the Q80, Q80C and Q80CD should be capable of providing the following features:

  • Up to 120 frames per second
  • Up to 4K resolution
  • Variable Refresh Rate between 48 fps to 120 fps
  • HDR10

For the Xbox Series X and Xbox Series S, this TV series supports the following:

  • Up to 120 frames per second
  • Up to 4K resolution
  • Variable Refresh Rate between 40 fps to 120 fps
  • Low Frame Rate Compensation
  • HDR10

Unfortunately, this TV does not support Dolby Vision.

How to optimize the Q80 for console gaming

To get the most out of the new consoles with the Q80, Q80C or Q80CD, we recommend that you take the following steps:

1. If you haven’t done so already, update your Samsung television to the latest available firmware. The new update may include new features, improved performance and/or bug fixes.

2. Next, make sure that your console is connected to your television screen.

All four ports of the Q80 series are HDMI 2.1. So, you need to use the HDMI 2.1 cables, which came with the PS5 and Xbox Series X consoles.

The Xbox Series S console only comes with an HDMI 2.0, which should be good enough. With that said, you can also get your own HDMI 2.1 cable for the Series S if you want to take full advantage of the video transfer bandwidth.

3. Next, open the Settings menu of your Q80, Q80C or Q80CD. From there, go to the External Device Manager and then check to see that Input Signal Plus is enabled for the HDMI port that is connected to your console.

4. From the same External Device Manager screen, head to the Game Mode Settings and then enable Game Mode.

This picture setting will reduce the input lag for videogames. It is applicable to all consoles that use the HDMI connection, including the PC, PlayStation 4, Xbox One, Nintendo Switch as well as the PlayStation 5, Xbox Series X and Xbox Series S.

By enabling Game Mode of the 2023 Q80 series, Variable Refresh Rate support will automatically be turned on for the TV as well.

The Game Mode Settings have several other options that you can adjust, such as Dynamic Black Equalizer and Game Motion Plus. We suggest that you leave these alone for now. If the game you are playing is too dark, then you can use Dynamic Black Equalizer. If the game appears to be running at an unstable frame rate, then you can try using the Game Motion Plus features.

5. Afterwards, head over to the Expert Settings section and set Color Tone to Warm 2.

6. You should be done setting up the Q80, Q80C or Q80CD for playing games. With that said, there may still be more work to do on your console.

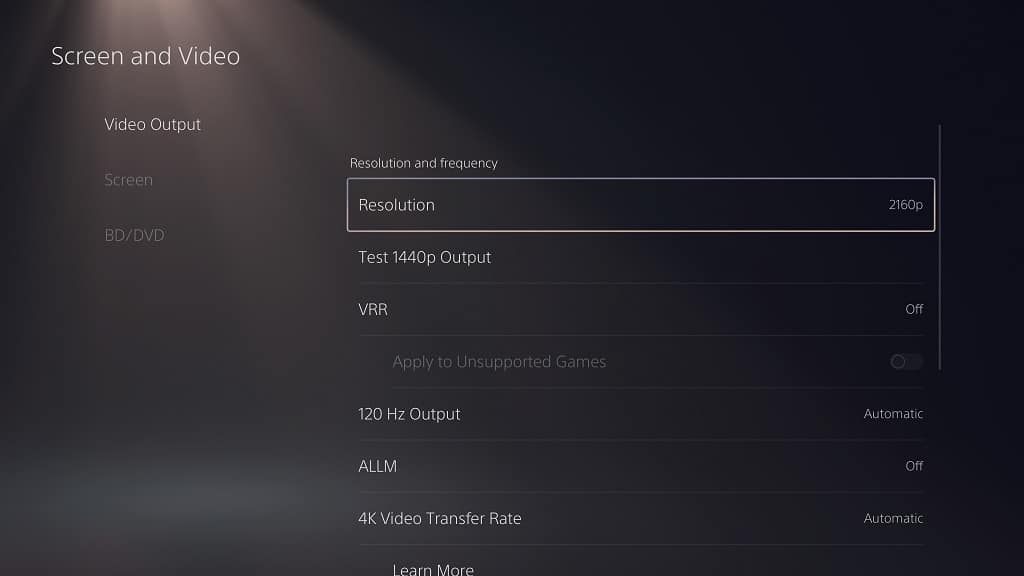
On your PS5, open its Settings menu and then head over to Screen and Video > Video Output. On this screen, make sure you do the following:

  • Resolution: 2160p
  • VRR: Automatic
  • 120 Hz: Automatic
  • ALLM: Automatic
  • HDR: On When Supported
  • 4K Transfer Rate: Automatic
  • Deep Color Output: Automatic
  • RGB Range: Automatic

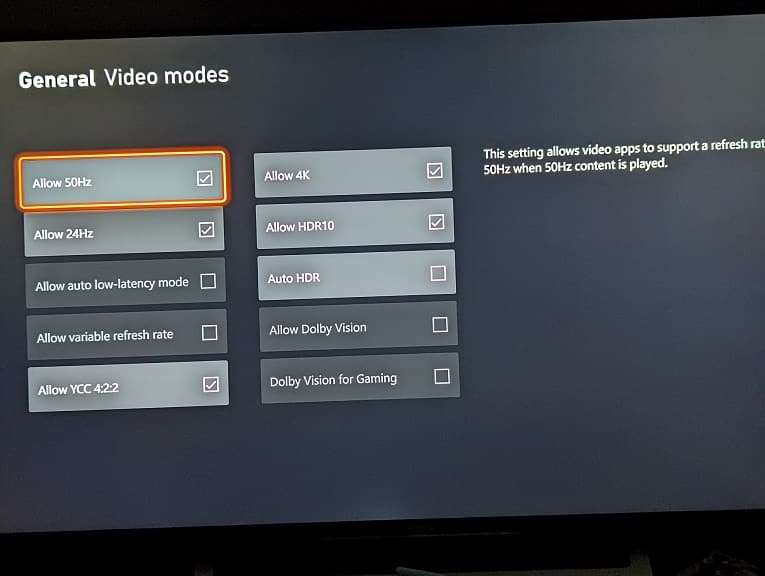
On the Series X or Series S, head over to the console’s settings menu and then select General > TV & Display Options. From there, make sure that Resolution is set to 4K UHD and then head over to the Video Modes section. Afterwards, tick the following boxes:

  • Allow Auto-Low Latency Mode
  • Allow Variable Refresh Rate
  • Allow 4K
  • Allow HDR10

7. One last step is to optimize the HDR brightness output on your console.

You can do so on the PS5 by going to Settings > Screen and Video > Video Output > Adjust HDR. On Xbox, go to Settings > General > TV & Display Options > Calibrate HDR for Games.

Afterwards, follow the on-screen instructions to properly calibrate the console’s HDR brightness to match the capabilities of your Q80, Q80C or Q80CD television set.