Is the Q60A a suitable TV for PS5, Xbox Series X and other consoles?

The Q60A is one of several Samsung 4K television sets released in 2021. So, how does this TV fare when it comes to playing games on the PlayStation 5, Xbox Series X, Xbox Series S as well as other gaming consoles?

You can find out in this Seeking Tech guide.

Quick Summary

The Q60A does not come with any HDMI 2.1 ports or local dimming zones. The 2021 television set also does not support 120 fps, 1440p, Dolby Vision or Variable Refresh Rate.

With subpar HDR brightness levels as well, the Q60A is lacking when it comes to taking advantage of the graphical features of the new PS5, Xbox Series X and Xbox Series S consoles.

The TV does have low input lag when you use its game mode, however. So, it is a decent set to play non-HDR games.

Q60A Screen Sizes

The Samsung Q60A is available in the following screen sizes:

  • 43″: QN43Q60AAFXZA
  • 50″: QN50Q60AAFXZA
  • 55″: QN55Q60AAFXZA
  • 60″: QN60Q60AAFXZA
  • 65″: QN65Q60AAFXZA 
  • 70″: QN70Q60AAFXZA
  • 75″: QN75Q60AAFXZA
  • 85″: QN85Q60AAFXZA

Does the Q60A have HDMI 2.1 ports?

The Samsung Q60A does not have any HDMI 2.1 ports. Instead, this television comes equipped with three HDMI 2.0 ports.

HDMI 2.0 will allow you to play games at up to 60 frames per second in 1080p and 4K.

You won’t be able to use the Q60A to play games at 120 frames per second or 1440p.

Legacy Consoles Support

The Q60A does not include a composite input, which means that you need to purchase an adapter to connect consoles like the PS1, PS2, Nintendo 64, GameCube, Wii and Xbox.

This Samsung 2021 TV does include a cable/antenna tuner that you can use to directly connect retro systems like the NES, Super NES and Sega Genesis.

HDR Features

The Q60A supports HDR10, HDR10+ and wide color gamut. The TV does not support Dolby Vision nor does it come with any local dimming zones.

The HDR10 format is used by consoles like the PS4, PS4 Pro, PS5, Xbox One S, Xbox One X, Xbox Series S and Xbox Series X.

The Xbox Series consoles also supports Dolby Vision.

Q60A’s HDR Brightness in Game Mode

The Q60A is a little below average when it comes to HDR brightness levels. For HDR to begin to stand out, we recommend getting a television that can produce at least 500 nits.

According to tests done by RTINGS.com, Q60A isn’t able to hit that minimum threshold in any of the scenarios that were tested. Overall, the 2021 Samsung television has a Real Scene Highlight of 468 nits.

You can check out the HDR brightness level test results for the Q60A below (via RTINGS):

  • Real Scene Highlight: 468 nits
  • HDR Peak 2% Window: 214 nits
  • HDR Peak 10% Window: 489 nits
  • HDR Peak 25% Window: 488 nits
  • HDR Peak 50% Window: 487 nits
  • HDR Peak 100% Window: 487 nits
  • HDR Sustained 2% Window: 211 nits
  • HDR Sustained 10% Window: 488 nits
  • HDR Sustained 25% Window: 487 nits
  • HDR Sustained 50% Window: 487 nits
  • HDR Sustained 100% Window: 486 nits
  • HDR ABL: 0.054

Adaptive Sync Support

The Q60A does not support any of the three adaptive sync features: FreeSync, GSYNC orVariable Refresh Rate. These are used to prevent any stutters and tearing associated with games that have inconsistent frame rates.

Variable Refresh Rate is currently supported by the Xbox Series S and X. The same adaptive sync feature is also expected to be added to the PlayStation 5 in the future.

Q60A’s Input Lag

The Samsung Q60A has excellent input lag reduction when you use its game mode.

For a low-latency gaming experience, we suggest getting a television set that has less than 30 ms of lag.

According to tests done by RTINGS, this Samsung TV model was able to fall way below that upper limit at 1080p as well as 4K resolution.

You can find the input lag test results for the Q60A below (via RTINGS):

  • 1080p resolution and 60 Hz refresh rate (Game Mode Enabled): 10.1 ms
  • 4K resolution and 60 Hz refresh rate (Game Mode Enabled): 10.2 ms
  • 4K resolution and 60 Hz refresh rate + 10 bit HDR (Game Mode Enabled): 10.0 ms
  • 4K resolution and 60 Hz at 4:4:4: 10.0 ms
  • 1080p resolution and 60 Hz refresh rate (Game Mode Disabled): 76.3 ms
  • 4K resolution and 60 Hz refresh rate (Game Mode Disabled): 59.7 ms
  • 4K resolution and 60 Hz refresh rate With Interpolation: 26.3 ms

Is the Q60A good for PS5, Xbox Series X and Xbox Series S?

We don’t recommend getting a Q60A for the PlayStation 5, Xbox Series X or Xbox Series S if you want to take advantage of the new consoles.

The television set does not come with any HDMI 2.1 ports. It also does not support 120 frames per second, 1440p, Dolby Vision or Variable Refresh Rate.

Due to the lack of local dimming zones and the lack of acceptable HDR brightness levels, the TV is also subpar for HDR gaming.

Is the Q60A good for Switch, PS4, PS4 Pro, Xbox One, Xbox One S and Xbox One X?

The Q60A does come with great input lag reduction when you are using its game mode. So, it is a pretty good television set for older HDMI consoles like the PS3, PS4, Wii U, Switch and Xbox One.

As we stated above, the Q60A is below average at displaying HDR content. So, we don’t recommend using it on HDR-enabled games on the PS4, PS4 Pro, Xbox One S and Xbox One X.

How to format SSD-PG, SSD-PUT and MiniStations for PlayStation 5

The Buffalo MiniStation, MiniStation Extreme NFC, MiniStation Thunderbolt, SSD-PG and SSD-PUT are compatible with the PlayStation 5 and PlayStation 5 Digital Edition.

You can follow this step-by-step tutorial from Seeking Tech to see how you can format these portable hard disk drives and solid state drives for the PS5.

PS5 Compatible Buffalo External HDDs and SSDs

You can find a list of PlayStation 5 compatible external Buffalo storage drives, as well as the associated model numbers, below:

Buffalo MiniStation Portable Hard Disk Drive:

  • 1 TB: HD-PCF1.0U3BB
  • 2 TB: HD-PCF2.0U3GB

Buffalo MiniStation Extreme NFC Portable Hard Disk Drive:

  • 1 TB: HD-PZN1.0U3B
  • 2 TB: HD-PZN2.0U3B

Buffalo MiniStation Thunderbolt Portable Hard Disk Drive:

  • 1 TB: HD-PA1.0TU3
  • 2 TB: HD-PA2.0TU3

Buffalo SSD-PG Rugged and Portable Solid State Drive:

  • 500 GB: SSD-PG500U3B
  • 1 TB: SSD-PG1.0U3B

Buffalo SSD-PUT Rugged and Portable Solid State Drive Stick:

  • 500 GB: SSD-PUT500U3B
  • 1 TB: SSD-PUT1.0U3B

Do you need to format your Buffalo drive for PS5?

If you already formatted your Buffalo storage drive on the PlayStation 4 or PlayStation 4 Pro, then you do not need to format it again for the PlayStation 5 as long as you are using the same PlayStation Network account on both systems.

If you are using a brand-new Buffalo drive, then you need to format it for PS5.

If you are using a Buffalo drive that was previously used for something else other than a PlayStation 4 system, then you also need to format it for the PlayStation 5.

What can you do with an external Buffalo drive on PlayStation 5?

With the MiniStation, MiniStation Extreme NFC, MiniStation Thunderbolt, SSD-PG or SSD-PUT, you will be able to store PlayStation 4 and PlayStation 5 games. This will free up space on the console storage.

The PS5 only comes with an 825 GB internal drive, a good chunk of which will be taken up by the system files. Therefore, you have a limited amount of space to work with.

The MiniStation, MiniStation Extreme NFC, MiniStation Thunderbolt, SSD-PG and SSD-PUT also provide an easy way to play your games on another PlayStation 5 system. This is because you can bring your portable drive with you and then connect to another console. By using the same PlayStation Network user account, you can log into the other console and then use the external drive.

With these Buffalo portable drives, you can also play backwards compatible PS4 games directly off of the external drives.

In order to play PS5 games that are stored on these external storage drives, you need to transfer the game files back to the internal console storage.

How to format Buffalo SSD-PG, SSD-PUT and MiniStations for PS5

To format your Buffalo external storage for the PlayStation 5, you need to take the following steps:

1. First off, make sure that you backup any important files you have on your Buffalo external storage drive. This is because formatting the HDD or SSD will delete everything that was previously store on it.

2. After making sure that you won’t lose any important files due to formatting, connect your external drive to one of the two USB ports located on the back of the PlayStation 5 system.

3. Turn on the PlayStation 5 and then select the PlayStation Network user you want to associate with the external drive.

4. In the home screen, which is the main menu where you can select which game to play, go to Settings. You will find the Settings option on the top right corner, with the gear cog icon, of the home screen.

5. In Settings, select Storage from the list of available options.

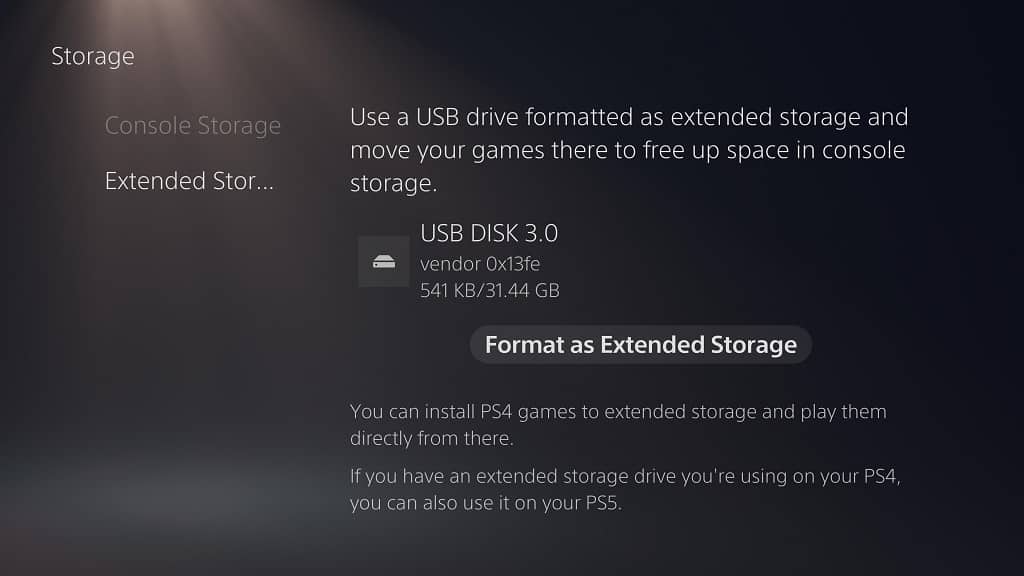
6. In Storage, select Extended Storage from the left side.

7. On the right side of the same Storage menu, you should see the name of your Buffalo storage drive as well as the Format as USB Extended Storage option.

Select the “Format as USB Extended Storage” to begin the formatting process for your Buffalo MiniStation, MiniStation Extreme NFC, MiniStation Thunderbolt, SSD-PG or SSD-PUT.

If you want to move PS4 and PS5 games from the console storage to the Buffalo external drive or vice versa, then you can check out this tutorial.

To safely disconnect a Buffalo HDD or SSD from the PlayStation 5 console, you can take a look at this guide.

How to fix Ratchet and Clank: Rift Apart crashes and freezes

Ratchet and Clank: Rift Apart is a PlayStation 5 game that may crash or freeze.

If you are experiencing any of these issues, then you can check out this troubleshooting guide at Seeking Tech to find some potential fixes for the latest Ratchet and Clank videogame.

What causes Ratchet and Clank: Rift Apart to crash?

Based on our experience, the auto-save feature of a Rift Apart is causing the videogame to crash.

You can tell that this game is auto saving as a wrench symbol should appear briefly on the bottom right corner of the screen during gameplay.

If that wrench symbol remains permanently on screen, then that could be a sign that the game will crash soon. This may occur when you try to exit the game, move to another planet, warp to another area from within the planet and other scenarios. You may also get a black screen as you won’t be able to load into the next area.

How to close Ratchet and Clank: Rift Apart when it freezes

If you believe that Rift Apart has crashed or frozen, you can first try to closing the PS5 game.

To do so, you need to do the following:

1. Press and hold the PS button on your DualScreen to go to the home screen on the PlayStation 5.

2. On the game selection screen, make sure that Ratchet and Clank: Rift Apart is highlighted.

3. Press the Options button on your DualSense controller.

4. In the pop-up menu, select Close Game.

If you managed to close the game successfully, then you most likely experience a soft crash. Therefore, you shouldn’t have to fix anything.

Try to launch the game again to see if you are experiencing any issues.

How to shut down the PS5 when Ratchet and Clank: Rift Apart crashes

If you can’t close the Ratchet and Clank: Rift Apart for any reason (such as the game refusing to close after a minute or too), then the next step is to try shutting down the PlayStation 5 console.

To do so, you can do the following:

1. Press and hold the power button on the PS5 system.

You should hear a being noise almost immediately and then a second beeping noise shortly after. This indicates that the console will attempt to power off. You should also get a “Preparing to turn off PS5” being displayed on the screen.

2. If your system remains unresponsive, press and hold the power button on the PlayStation 5 again.

This time you need to hold onto the button for much longer as you need to hear three beeping sounds before letting go. This may take 30 seconds or possibly longer.

3. After the third beeping noise, you can let go of the power button. In our experience, the system should then be forced to shut down even if it was previously unresponsive.

Should you unplug the PlayStation 5 when Ratchet and Clank: Rift Apart crashes?

We don’t recommend unplugging the PlayStation 5 from the power outlet while it is powered on when Ratchet and Clank: Rift Apart crashes. Doing so may cause hardware damage to the system.

From our experience, holding the power button until you hear three beeps will most likely force the PS5 to forcibly turn off.

You should only try to unplug the PS5 as a last resort when none of the aforementioned methods are working.

How to fix Ratchet and Clank: Rift Apart crashes

To fix the crashes in Rift Apart, you need to do the following:

1. After successfully shutting down the PlayStation 5 after Ratchet and Clank: Rift Apart crashed, turn on the system again.

2. When booting up, you should get a message saying that the PS5 is repairing console storage.

3. Afterwards, you should also get another message saying that your PS5 wasn’t turned off properly. Here, you need to press the PS button on your DualSense controller and then select the OK option to go to the home screen.

4. You may also get yet another message. This time the system will ask rather or not you want to send the crash report to Sony.

5. In the home screen, launch into Ratchet and Clank: Rift Apart.

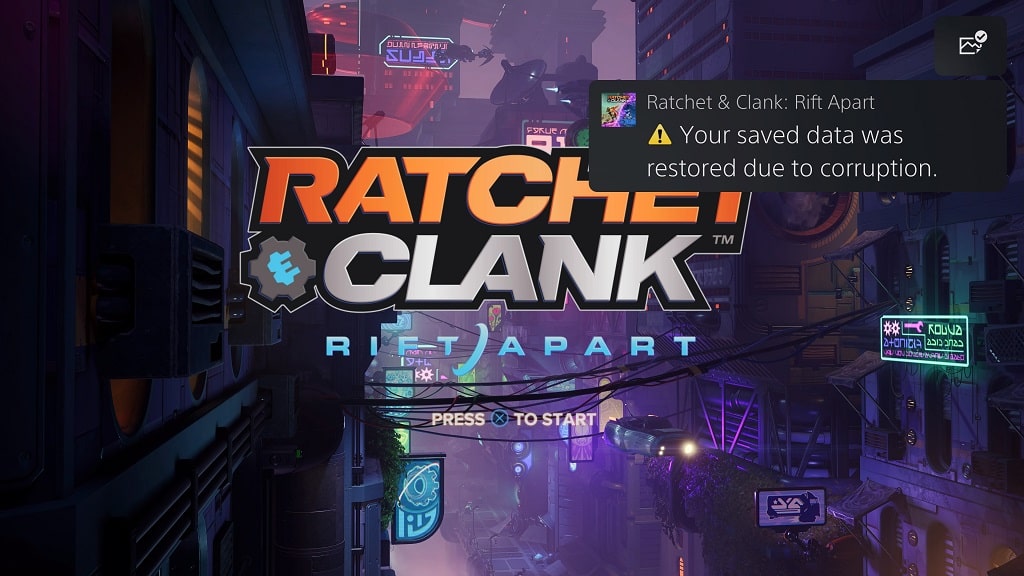
6. In the title screen, you should get a message saying that your saved data was restored due to corruption.

7. Press the X button on your DualSense and then select your save file in the Select Save Slot Screen.

8. In the Continue Game screen, select Resume.

Unfortunately, you will most likely lose some progress due to the game crashing.

How to prevent Ratchet and Clank: Rift Apart from crashing and freezing

In order to prevent Rift Apart from crashing and freezing, you can try doing the following:

1. Make sure that Ratchet and Clank: Rift Apart is patched to the latest version.

You can manually update Rift Apart from the home screen by pressing the Options button on your DualSense when the game is highlighted.

In the pop-up menu, select Check for Update.

2. You should also make sure that the PlayStation 5 has been updated to the latest firmware.

You can manually update the system, by going to Settings from the home screen.

In the Settings menu, select System.

In the System menu, select System Software on the left side of the menu and then System Software Update and Settings on the right side of the menu.

In the System Software Update and Settings menu, select Update System Software to being the firmware update process.

3. The PlayStation 5 has issues when its rest mode is used. So, you can try to avoid putting your system to rest when playing Ratchet and Clank: Rift Apart.

4. The PS5 also has problems with external storage drives. So, we recommend safely disconnecting the hard disk drive or solid state drive you have connected to your system.

What’s the difference between the Razer Opus and Opus X?

Razer recently released the Opus X wireless headset. So, how does it compare to the older Opus? You can find out in this comparison guide.

Quick Summary

While the Razer Opus X is strictly a Bluetooth headset, you can connect the Razer Opus using wired (via the included 3.5 mm audio cable) or Bluetooth wireless.

The older Opus is also the only headset to come with a carrying case and airline headphone adapter. Furthermore, this headset is also the only one of the two products to by certified by THX in addition to coming with the automictic pause and play feature.

Not to mention that the Opus uses more advanced active noise cancellation and features a longer battery life, with noise cancellation enabled, when compared to the Opus X.

So, while the Opus is more expensive, you will be getting a better headset than the Opus X.

The two headsets have the same frequency ranges. Both also feature a Gaming Mode and Quick Attention Mode in addition to having the same warranty length.

Opus vs. Opus X Comparison Chart

You can take a look at Seeking Tech’s comparison table between the Opus and Opus X below.

Razer Opus Wireless HeadsetRazer Opus X Wireless Headset
Color OptionsBlack

Midnight Blue
Green

Mercury

Quartz
Weight270 grams270 grams
What’s in the BoxRazer Opus Headset

Carry Case

1.3 m length 3.5 mm analog cable

Airline headphone adapter

0.5 m length USB-A to USB-C charging cable
Razer Opus X Headset

0.5m length USB-A to USB-C charging cable
Connection Options3.5 mm audio cable

Bluetooth
Bluetooth
Ear CupsCircumauralCircumaural
Earpads MaterialsNylon with foam

Protein leather
Nylon with foam

Protein leather
Driver Type2x 40 mm dynamic drivers2x 40 mm dynamic drivers
Frequency Response20 Hz to 20 kHz20 Hz to 20 kHz
Impedance12 ohm at 1 kHzN/A
Sensitivity105 dB/mW by HATS at 1 kHzN/A
Microphone Setup4x mics for hybrid noise cancellation technology

2x mics for voice chat
2x mics for active noise cancellation technology

2x mics for voice chat
Active Noise CancellationHybridFeedforward
Microphone Frequency Response100 Hz to 10 kHzN/A
Microphone Sensitivity at 1 kHz-38 dBV/PaN/A
THX CertificationYesNo
Gaming ModeYesYes
Quick Attention ModeYesYes
Auto Pause/PlayYesNo
Battery Life with Active Noise CancellingUp to 32 hoursUp to 30 hours
Battery Life without Active Noise CancellingUp to 40 hoursUp to 40 hours
Warranty2-year warranty2-year warranty
PricingCheck price on Amazon.(#CommissionsEarned)Check price on Amazon.(#CommissionsEarned)

Color Options

You can check out the available colors for the two headsets below:

Razer Opus:

  • Black
  • Midnight Blue

Razer Opus X:

  • Green
  • Mercury
  • Quartz

Weight

Both of the products in this versus showdown weigh around 270 grams.

What’s in the Box

The regular Opus is the only one of the two headsets to come with a 3.5 mm audio cable. The Razer Opus also includes a carrying case and airline headphone adapter.

You can find a breakdown of the included content inside each box below:

Razer Opus:

  • Razer Opus Headset
  • Carry Case
  • 1.3 m length 3.5 mm analog cable
  • Airline headphone adapter
  • 0.5 m length USB-A to USB-C charging cable

Razer Opus X:

  • Razer Opus X Headset
  • 0.5m length USB-A to USB-C charging cable

Connection Options

You can connect the Opus wirelessly over Bluetooth in addition to over a wired connection using the aforementioned 3.5 mm audio cable.

The Razer Opus X can only be connected wirelessly via Bluetooth.

Ear Cups

Both of these Razer headsets are equipped with circumaural ear cups.

Earpads Materials

The earpads for the Opus and Opus X are built with nylon with foam in addition to protein leather.

Driver Type

Both of these products are equipped with two 40 mm dynamic drivers.

Frequency Response

The two headsets have the same frequency response at 20 Hz to 20 kHz.

Impedance

The Razer Opus is the only one of the two to have a listed impedance specification, which is 12 ohm at 1 kHz.

Sensitivity

The Opus is also the only version to have a listed sensitivity spec, which is 105 dB/mW by HATS at 1 kHz.

Microphone Setup

When it comes to microphone, the Razer Opus uses two additional mics for noise cancellation. Both headsets do use two mics for voice chatting.

You can check out the microphone setup below:

Razer Opus:

  • 4 mics for hybrid noise cancellation technology
  • 2 mics for voice chat

Razer Opus X:

  • 2 mics for active noise cancellation technology
  • 2 mics for voice chat

Active Noise Cancellation

The Razer Opus uses a more advanced hybrid active noise cancellation method when compared to the feedforward noise cancellation of the Razer Opus X.

Microphone Frequency Response

The Opus is the only headset in this versus showdown to have a listed frequency range for its microphone, which is at 100 Hz to 10 kHz.

Microphone Sensitivity at 1 kHz

Furthermore, the Razer Opus is the only one to have a microphone sensitivity specification listed, which is -38 dBV/Pa.

THX Certified

The Opus is the only one of the two wireless headsets to be certified by THX, which ensures that you are getting an optimized listening experience.

Gaming Mode

These headsets feature a gaming mode, which provides low latency so that you will experience very little noticeable audio delay when playing a videogame.

For the best experience, you should make sure that your headset is as close to its connected device as possible.

Quick Attention Mode

Both Opus products also feature a Quick Attention Mode that you can use to instantly raise the level of ambient noise so that you will be more aware of your surroundings.

Auto Pause/Play

The Opus is the only one of the two headsets to feature Auto Pause/Play. With this feature, removing the headset will automatically pause the media (audio and video) while putting it back on will automatically play the media again.

Battery Life with Active Noise Cancelling

The Razer Opus has a slightly longer battery life if you are using active noise cancelling.

You can find the lengths below:

  • Razer Opus: Up to 32 hours
  • Razer Opus X: Up to 30 hours

Battery Life without Active Noise Cancelling

With active noise cancellation disabled, both of the headsets should have a battery life of up to 40 hours.

Warranty

The Razer Opus Wireless Headset and Razer Opus X Wireless Headset each comes with a 2-year warranty.

Resources:

What is the ‘4K Transfer Rate’ option on PS5?

If you are experiencing issues with your television or/monitor properly displaying the video outputted from PlayStation 5, then you may have to use the “4K Transfer Rate” option from the system menu.

So, what does changing the “4K Transfer Rate” setting on the PS5 help with? You can find out in this guide at Seeking Tech.

What is 4K Transfer Rate?

4K Transfer Rate is also known as chroma subsampling, a feature that compresses the colors from the video output signal on your PlayStation 5.

How to find the “4K Transfer Rate” setting on PS5

To find the “4K Transfer Rate” setting on the PlayStation 5, you need to take the following steps:

1. First off, make sure you are in the home screen main menu of the PS5. This is the place where you can select which game to play, head to the PlayStation Store and perform other actions.

2. From the home screen, select the gear cog symbol, which represents the “Settings” menu, on the top right corner.

3. In the “Settings” menu, select “Screen and Video” from the list of available options.

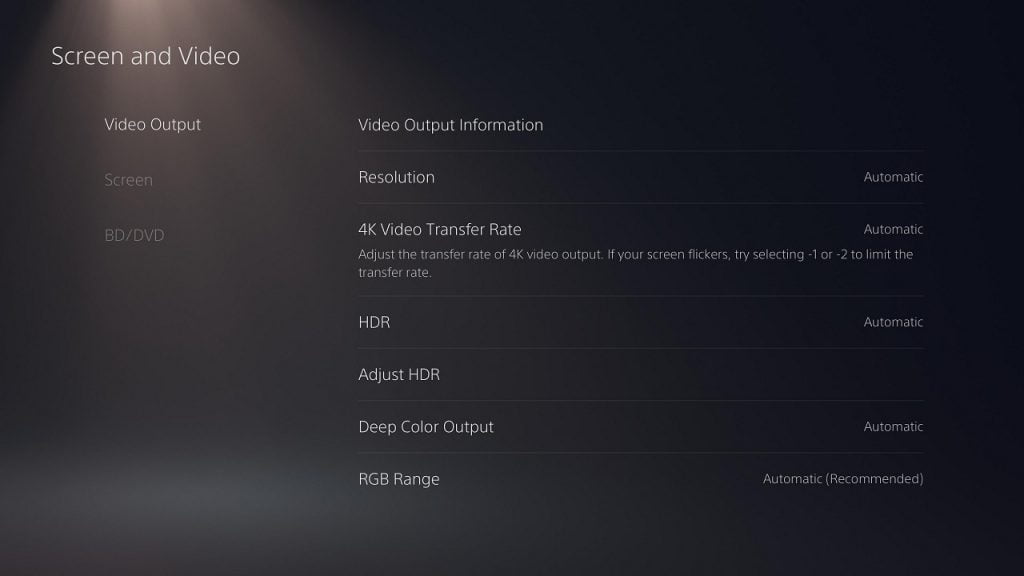
4. In the “Screen and Video” menu, select the “Video Output” option on the left side of the screen.

5. On the right side, you will see the “4K Video Transfer Rate” option.

What happens when you set “4K Transfer Rate” to Automatic on PS5

By default, the “4K Transfer Rate” option is set to Automatic on the PlayStation 5.

This means that the system will automatically choose which of the 0, –1 or –2 options is best suited for the television or monitor it is connected to.

What happens when you set “4K Transfer Rate” to -1 on PS5

If you are experiencing issues, such as flickering or HDR not displaying correctly, then you can try manually setting the “4K Transfer Rate” on the PlayStation 5.

By setting the “4K Transfer Rate” to –1, you will restrict the video output bandwidth to the HDMI 2.0 specification, which is 18 Gbps. This means that you can only display the following in 4K video settings:

  • 4K HDR at 60 Hz with YUV420
  • 4K HDR at 60 Hz with YUV422
  • 4K HDR at 50 Hz with YUV420
  • 4K HDR at 50 Hz with YUV422

With the “4K Transfer Rate” set to -1, you won’t be able to use the following video output settings:

  • 4K and 120 Hz
  • 4K and 50 Hz/60 Hz with RGB/YUV444 DeepColor

What happens when you set “4K Transfer Rate” to -2 on PS5

If you decide to set the “4K Transfer Rate” to –2, restrict the video output bandwidth to the HDMI 1.4 specification, which is 10.2Gbps. As a result, you can only display the following 4K settings:

  • 4K HDR at 60 Hz with YUV420
  • 4K HDR at 50 Hz with YUV420

With the “4K Transfer Rate” at –2, you won’t be able to use the following video output settings:

  • 4K and 120 Hz
  • 4K and 50 Hz/60 Hz with RBG/YUV444

What is the best “4K Transfer Rate” setting on PS5?

The best setting to start with is to leave “4K Transfer Rate” to Automatic as the PS5 should be able to detect the HDMI spec of your TV or monitor.

If you are experiencing issues with screen flickering and/or HDR looking not looking correct, then you can manually change the setting to –1 or –2 to see if either of these options will resolve your issues.

How to change download location on PS5

With the PlayStation 5, as well as the PlayStation 5 Digital Edition, you can change the location to download your games.

You can check out this guide from Seeking Tech to see how you can do so.

Connecting a Compatible USB storage drive to PS5

Before we being, it is important to note that you can currently only switch the download location to between the Console Store or USB Extended Storage.

For the Extended Storage, the minimum interface requirement is SuperSpeed USB 5 Gbps (which is USB 3.0, USB 3.1 Gen1 and USB 3.2 Gen1). If you are using an USB 3.2 Gen1x2 interface USB storage drive, then the speed will be limited to 5 Gbps.

The maximum supported interface speed is SuperSpeed USB 10 Gbps (which is USB 3.1 Gen2, USB 3.2 Gen2 and USB 3.2 Gen1x2). If you are using an USB 3.2 Gen2x2 interface USB storage drive, then the speed will be limited to 10 Gbps.

When it comes to capacity, you need at least 250 GB. The maximum supported capacity for the PlayStation 5 is 8 TB.

If you have a compatible USB external drive, connect it to one of the USB ports on the PS5. If your storage drive requires an additional power supply, make sure you plug that in to the power source and then turn on your drive.

How to format the USB Extended Storage on PS5

If you haven’t formatted your USB drive for the PS5, then you will have to do so before being able to use it.

If you want to format the external storage drive, you need to do the following:

1. First off, you should copy any important data off of the USB Extended Storage as formatting the drive for the PlayStation 5 will remove all previously data that have been stored.

2. Plug the external drive to the PS5 system.

3. On the PlayStation 5, make sure that you are in the home screen, which is the main menu where to can pick which game to play.

4. In the home screen, go to “Settings,” which you can find on the top right corner of the screen.

5. In the “Settings” menu, go to “Storage.”

6. In the “Storage” menu, select “USB Extended Storage” on the left side.

7. On the right side in the same “Storage” menu, select the “Format as USB Extended Storage” option.

How to change the download location for PS4 games

Currently, you can only change the download location for PlayStation 4 games on the PlayStation 5.

In order to do so, you need to do the following:

1. Connect your USB Extended Storage to the PlayStation 5.

2. From the home screen of the PS5, head to “Settings.”

3. Under the “Settings” menu, head to “Storage.”

4. From the “Storage” menu, select “USB Extended Storage” from the list of options on the left side.

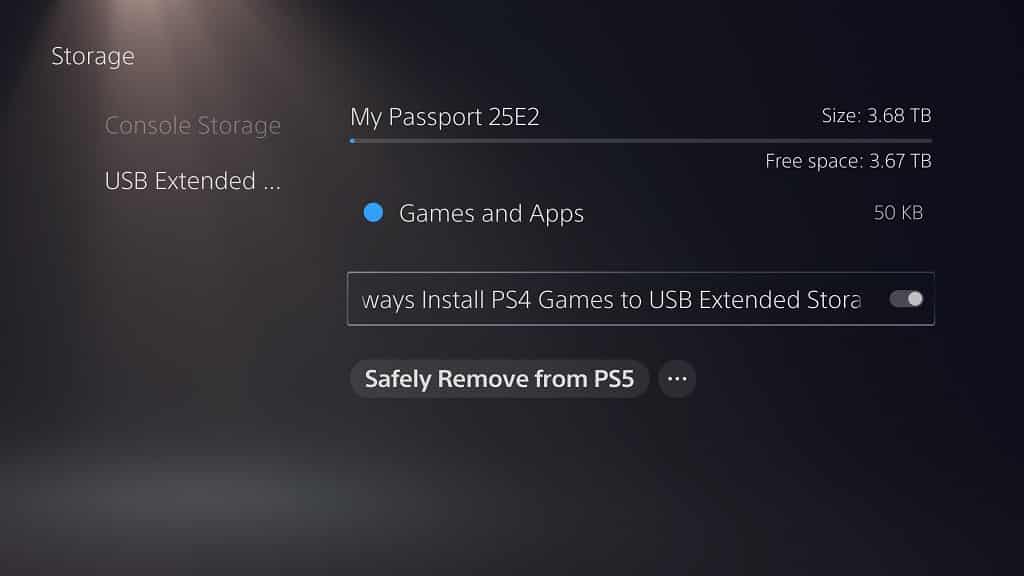
5. On the right side from the same “Storage” menu, you will see the “Always Install PS4 Games to USB Extended Storage” option.

If the circle to the right of the option is black, then that means that your PS4 game downloads will be sent to the console storage of the PS5.

To change the circle from black to white, simply select the “Always Install PS4 Games to USB Extended Storage” option. The white circled indicates that all PS4 game downloads will be sent to the “USB Extended Storage.”

How to change the download location for PS5 games

Unfortunately, you currently can’t change the download location for PlayStation 5 games.

Instead, you first have to download the PS5 game onto the console storage. You can then transfer the game from the console storage to the USB Extended Storage.

Keep in mind that, although you can play PS4 games on the PlayStation 5 directly from the external HDD or SSD, you won’t have the same luxury with PS5 games.

So, if you want to play a PS5 game that you have stored on the USB Extended Storage, you need to move the game from the USB Extended Storage to the console storage.

If you want to move PS5 games from the USB Extended Storage to the console storage, as well as from the console storage to the USB Extended Storage, you can check out our previous tutorial.

How to pair DualShock 4, DualSense and Xbox controllers with 2021 Apple TV

With the 2021 Apple TV, you will be able to connect to PlayStation and Xbox wireless controller. You can follow this guide from Seeking Tech to see how you can connect these gamepads to your media player.

Supported 2021 Apple TV Models

This guide will cover the following models of the Apple TV:

  • 2021 32GB Apple TV HD (MHY93LL/A)
  • 2021 32GB Apple TV 4K (MXGY2LL/A)
  • 2021 64GB Apple TV 4K (MXH02LL/A)

How to pair DualShock 4 to 2021 Apple TV

In order to pair the DualShock 4, which is the official controller of the PlayStation 4, to a 2021 Apple TV, you need to do the following:

1. Turn on your 2021 Apple TV.

2. Press the PS and Share button at the same time until the light bar of the controller begins to flash.

3. Follow the on-screen instructions on the Apple TV to pair the DualShock 4 to media device.

How to pair DualSense to 2021 Apple TV

To pair the DualSense, which is the official controller of the PlayStation 5, you need to do the following:

1. Make sure that your 2021 Aple TV is turned on.

2. Press and hold the PS and Create button at the same time until the light indicator of the DualSense beings to flash.

3. Follow the on-screen instructions on your Apple TV to pair the DualSense.

How to pair Xbox controllers to 2021 Apple TV

You will be able to pair the following Xbox controllers to your 2021 Apple TV:

  • Xbox Wireless Controller with Bluetooth (Model Number: 1708) for Xbox One, Xbox One S and Xbox One X
  • Xbox Elite Wireless Controller Series 2
  • Xbox Adaptive Controller
  • Xbox Wireless Controller for Xbox Series S and Xbox Series X

To pair any of these Xbox controllers, you need to take the following steps:

1. Turn the Apple TV on if you haven’t done so already.

2. Press the Xbox button on the controller to turn the gamepad on.

3. With the Xbox controller turned on, press and hold the Pairing button on the gamepad for a few seconds.

4. Follow the on-screen instructions on your 2021 Apple TV to pair your Xbox controller.

How to fix PS and Xbox controller pairing issues with 2021 Apple TV

If you are experiencing issues with connecting, pairing or using a PlayStation and/or Xbox controller on your 2021 Apple TV, then you can find some possible fixes below:

1. First off, we recommend checking to see if your controller still have any battery life.

2. You should also check to see if your gamepad and 2021 Apple TV have been updated to the latest firmware.

3. Next, you can try moving your controller closer to your Apple TV.

4. You should also make sure that there aren’t any physical obstructions that may be interfering with the Bluetooth signals.

The list of objects that may weakened the signal that connects your gamepad to your media player include bricks, bulletproof glass, concrete, glass, marble, metal, plaster, water, wood as well as synthetic materials.

5. You should also avoid using your Apple TV nearby any of the following objects: cordless phones, fluorescent lights, microwave ovens, Wi-Fi router and wireless video cameras.

6. Turn off other Bluetooth or Wi-Fi devices that you aren’t using.

Both Bluetooth and Wi-Fi utilize the 2.4 GHz band. If your Wi-Fi router supports 5.0 GHz band as well, you can try moving some of your Wi-Fi connected devices from the 2.4 GHz band to the 5.0 GHz band so that you can get a better Bluetooth connection.

How to unpair PS and Xbox controllers on 2021 Apple TV

If you are still experiencing problems with connecting and/or using your PlayStation and/or Xbox controllers with your 2021 Apple TV, you can try unpairing the controller and then pairing it back again.

In order to unpair the controller, you need to do the following:

1. On your 2021 Apple TV, go to Settings.

2. Next, you should select Remotes and Devices.

3. Afterwards, select Bluetooth.

4. Select the controller you want to unpair from your 2021 Apple TV.

5. Select Unpair Device.

To pair your controller to your Apple TV again, you can follow the aforementioned instructions earlier in this guide.

How to view hidden trophies on PS5

A recent firmware update for the PlayStation 5 and PlayStation 5 Digital Edition makes it easier to view hidden trophies.

You can follow this guide at Seeking Tech to see you can do so.

Why trophies are hidden on PlayStation 5

Before we begin, it is important to note that game developers hide trophies in order to prevent spoilers. So, if you are sensitive to being spoiled, we don’t recommend viewing hidden trophies until you at least beat the main campaign of a game.

How to view hidden PS5 trophies from the system menu

In order to view hidden trophies from the system menu on the PlayStation 5, you need to do the following:

1. First off, you need to access the Trophies menu.

To access the Trophies menu from the home screen, which is the main menu you use to select a videogame to play, you need to select your profile picture that is located on the top right corner of the screen.

To access the Trophies menu while playing a game, press the PS button on your DualSense to bring up the control center quick menu. In the control center, navigate down and then to the right. You need to select your profile picture, which should be between the controller and power icons. Alternatively, you can simply press and hold the PS button while playing a game to got to the home screen.

3. In the Profile pop-up menu, select the Trophies option.

4. In the Trophies menu, you will see a list of games that you must recently played in descending order. Here, you need to select the game in which you want view to its hidden trophies.

5. In the game’s trophy menu, you will see its trophies. You will be able to sort, by selecting the “Sort by” option or pressing the square button on your DualSense, with the following criteria:

  • Game Default
  • Not Earned
  • Rarity (from Ultra Rare to Common order)
  • Earned Date (from New to Old order)
  • Grade (from Platinum to Bronze order)

Select the hidden trophy that you want to view with the X button on your DualSense.

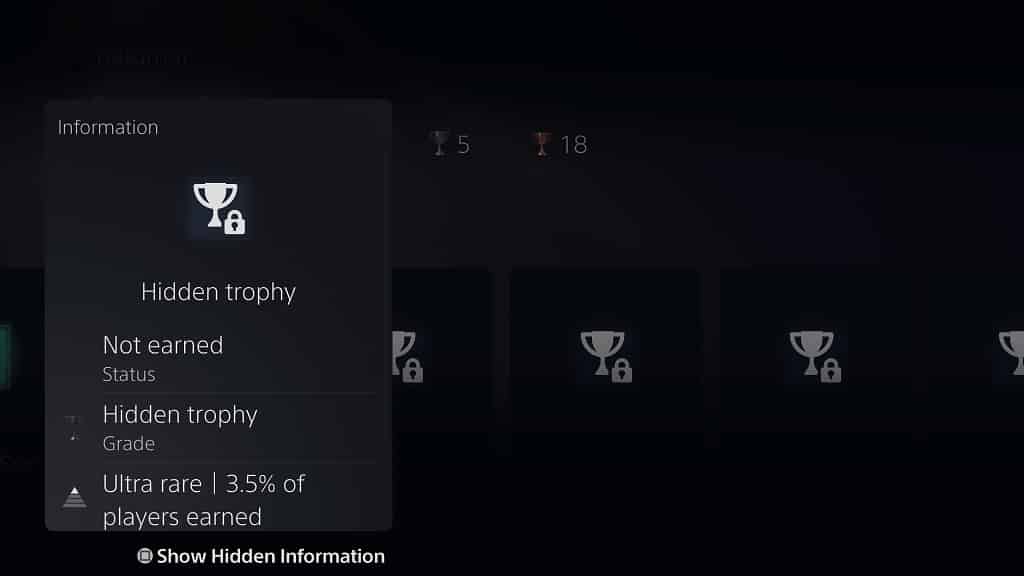
6. In the pop-up menu, press the square button on your DualSense to shown the hidden trophy information.

You should be able to see the trophy’s title, description and grade.

How to turn off a crashed or frozen PS5

When playing the PlayStation 5, or PlayStation 5 Digital Edition, the system may crash and freeze. If you can’t turn your system off in this situation, then you can follow this troubleshooting guide from Seeking Tech.

How to turn off a frozen PS5 with your controller

In order to turn off a PlayStation 5 with your controller, you need to do the following:

1. Press the PS button on your DualSense controller. This will bring up the Control Center quick menu.

2. In the Control Center, navigate downwards until you get to the list of options at the bottom.

3. In the list of options, navigate all the way to the right until you see the Power option.

4. Select the Power option.

5. In the pop-up menu, select the Turn Off PS5 option. You will get a “Preparing to turn off PS5” message on screen.

How to turn off a frozen PS5 using the power button

If your crashed or frozen PlayStation 5 is not responding to your DualSense controller, you can try using the power button on the system to shut it down.

To do so, you need to take the following steps:

1. Locate the power button on your PS5, which is found on the middle black-colored part of the system. On the PlayStation 5 Digital Edition, it is right next to the disc eject button. On the standard PlayStation 5, the power button is the only button that can be pressed.

2. Press and hold the power button on your PS5 system. You should hear a beeping noise almost immediately. After around three more seconds, you should hear a second beeping noise and then get a “Preparing to turn off PS5” message on screen.

3. If your system is not responding, then we recommend pressing and holding the power button again. This time, you should hold the power button for as long as possible (at least 20 seconds if not longer) to forcibly shut down your PlayStation 5.

Can you unplug a frozen PS5?

Unplugging a PlayStation 5 system may cause hardware damage that may require you to send your PS5 to Sony for repair.

Therefore, we don’t recommend unplugging the system until you exhausted all of the aforementioned methods to turning off a frozen and unresponsive system.

What to do after shutting down a frozen PS5?

After successfully shutting down a PlayStation 5 that has crashed, we recommend turning it back on again to see if it is functioning normally.

The system may attempt to self-diagnose and fix itself.

You may also get an error message where you can send a crash report to Sony.

As an extra precaution, you might want to consider clearing the cache of your PlayStation 5. If you are interested in doing so, then you can check out this tutorial.

You may also want to rebuild the database and/or reinstall the firmware of your PS5. In order to do so, you can check out this guide.

If you are constantly experiencing crashing and freezing with your PlayStation 5, then you should consider contacting PlayStation Support to possibly send your system in for repair.

How to find list of videogames that support the PS5 Game Help feature

The PlayStation 5 and PlayStation 5 Digital Edition come with the Game Help feature, which is designed to provide tips to certain sections of a video game. Not all PS5 games support this feature, however.

You can check out this guide from Seeking Tech to see how you can find a list of videogames that support Game Help.

PlayStation Plus Requirement

In order to use the Game Help feature, you need to be a subscriber to PlayStation Plus. This service also offers other benefits such as online multiplayer, exclusive discounts in addition to a list of games you can download and play at no additional costs.

If you aren’t a member, you can purchase a one-year subscription to the PlayStation Plus on Amazon with this link. (#CommissionsEarned).

How to find the PlayStation Plus App on PS5

The PlayStation Plus has its own app on the PlayStation 5.

To find this application, you need to do the following:

1. First off, make sure you are in the home screen. This is the main menu of the system where you can select a game to open and play.

2. You should also make sure that you are in the Games section of the home screen. If you are in the Media section, press the L1 button on your DualSense to go to the Games section.

3. In the Games section of the home screen, find and select the yellow plus symbol, which represents the PlayStation Plus App.

4. If you can’t find the app on the home screen, you can select the blue shopping bag symbol, which represents the PlayStation Store App.

5. In the PlayStation Store, press the R1 button on your DualSense until you get to the Subscription section.

6. In the Subscription section of the PlayStation Store, select PlayStation Plus to launch into the PS Plus app.

How to view PS5 Game Help feature list

Now that you are in the PlayStation Plus App, you need to take the following steps:

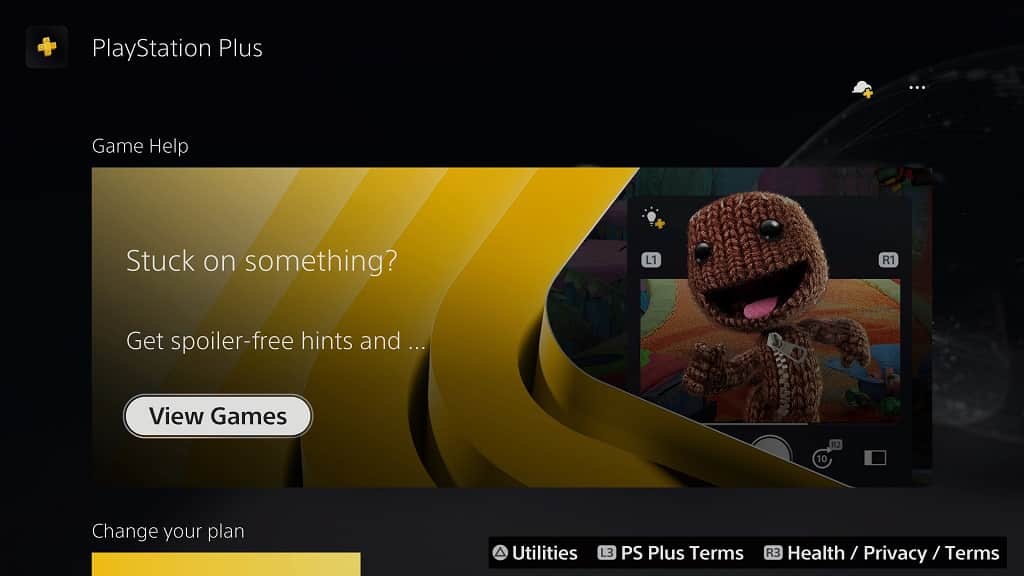
1. From the first screen inside the application, scroll down until you see the Game Help section. Select the View Games option.

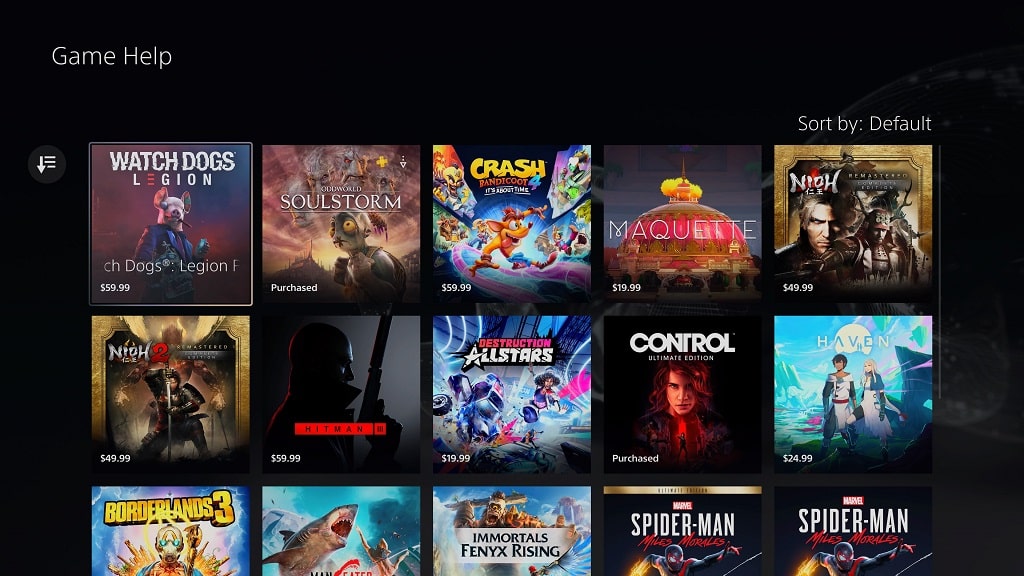
2. In the Game Help menu, you will see a list of games that currently support the feature.

3. You can sort the list based on certain criteria by selecting the symbol, which has three horizontal lines and a down pointing arrow, to the left of the listing.

You have the following sorting options:

  • Default
  • Name (A – Z)
  • Name (Z – A)
  • Release Date (Old – New)
  • Release Date (New – Old)
  • Price (Low – High)
  • Price (High – Low)

You can also use the following filters:

Price:

  • Free
  • Under $1.99
  • $10.00 – $19.99
  • $20.00 – $39.99
  • $40.00 – $59.99
  • $60.00 – $79.99

Genre:

  • Action
  • Adventure
  • Role-Playing Games
  • Unique
  • Puzzle
  • Driving/Racing
  • Shooter

Platform:

  • PS5
  • PS4

Age Rating:

  • Everyone
  • Everyone 10+
  • Teen
  • Mature

Last but not least, you can also select the Reset Filters option, which will remove all of the previously applied filters.

What games support the PS5 Game Help feature?

As of this writing, the following videogames support the Game Help feature on the PlayStation 5:

  • Astro’s Playroom
  • Borderlands 3
  • Bugsnax
  • Control Ultiamte Edition
  • Crash Bandicoot 4: It’s About Time
  • Demon’s Souls
  • Destrcution AllStars
  • Devil May Cry 5 Special Edition
  • Haven
  • HITMAN 3
  • Immortals Fenyx Rising
  • Maneater
  • Marquette
  • Marvel’s Spider-Man: Miles Morales
  • Nioh Remastered – The Complete Edition
  • Nioh 2 Remastered – The Complete Edition
  • Oddworld: Soulstorm
  • Ratchet and Clank: A Rift Apart
  • Sackboy: A Big Adventure
  • Watch Dogs: Legion