Is the Crucial P5 Plus with Heatsink worth it for PS5?

If you are looking for a compatible M.2 solid state drive where you can store and play PlayStation 5 games, then you might want to consider getting the Crucial P5 Plus.

You can check out Seeking Tech’s review for this storage drive, when it is being used with the PS5 console, to see if the product is good enough.

Meeting the PS5 M.2 SSD Requirements

The Crucial P5 Plus meets all the requirements to be used as an additional storage option for PlayStation 5 games.
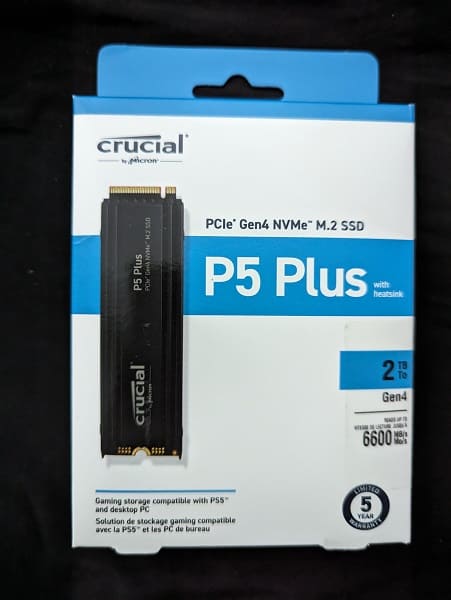
The SSD uses the M.2 2280 form factor, PCI-Express Gen4x4 NVMe interface in addition to a Socket 3 (Key M) connector.

With the heatsink installed, it is also small enough to fit within the 25 mm maximum width, 110 mm maximum length and 11.25 mm maximum height of the M.2 dock bay of the PS5.

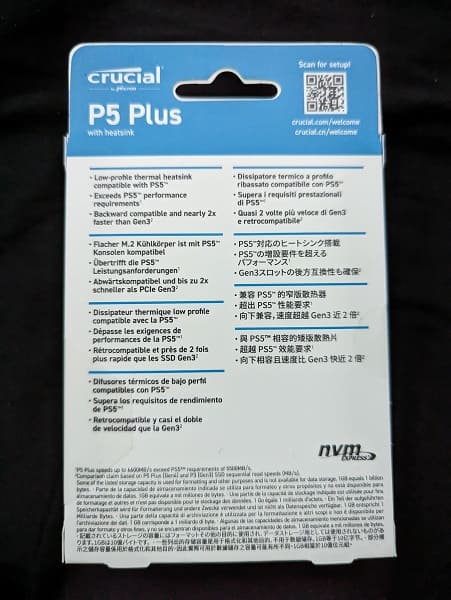
The P5 Plus is also advertised with a reading speed of up to 6,600MB/s, which is more than the recommended 5,500MB/s for a compatible PS5 M.2 solid state drive.
Heatsink

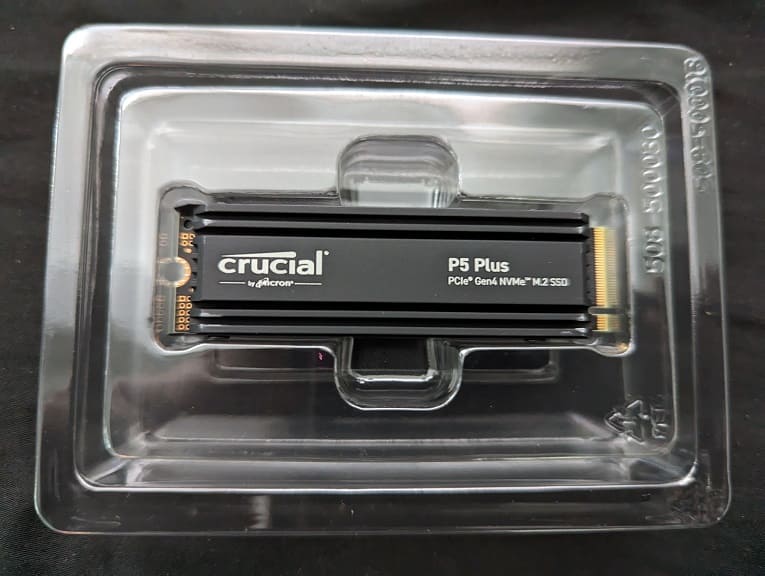
The Crucial P5 Plus comes with a variant that has a heatsink already pre-installed right out of the box. This saves you the trouble of finding a compatible heat reduction add-on as well as having to carefully install it on the solid state drive.
Installation

Inserting this SSD in our PlayStation 5 proved to be a little troublesome for us although most of the issues may be from our lack of experience.

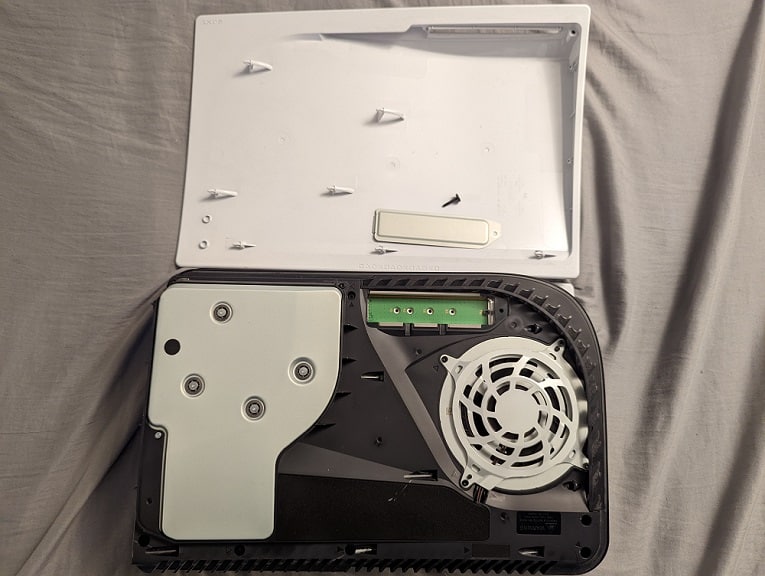
To install the Crucial P5 Plus, you need to take off the top cover of the PlayStation 5, remove the metal cover of the M.2 expansion bay and then insert the SSD into the slot.

To insert the P5 Plus, you have to do so from a diagonally upwards position at around a 30 degree angle. You should be able to feel and hear it click into the slot. This process took us several tries to get right with the storage drive.
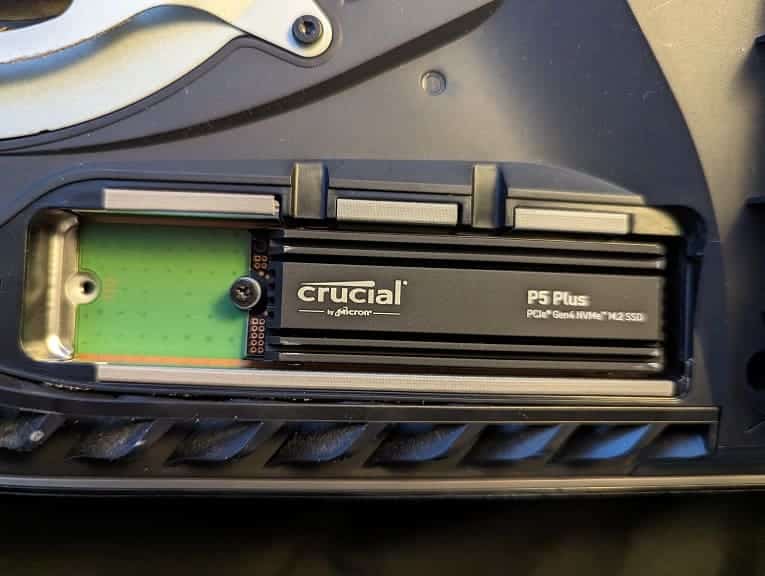
If you inserted the drive incorrectly, then you may end up seeing the “Can’t access your M.2 SSD” error message. To see how you can make this message go away, you can check out this troubleshooting article.

Formatting

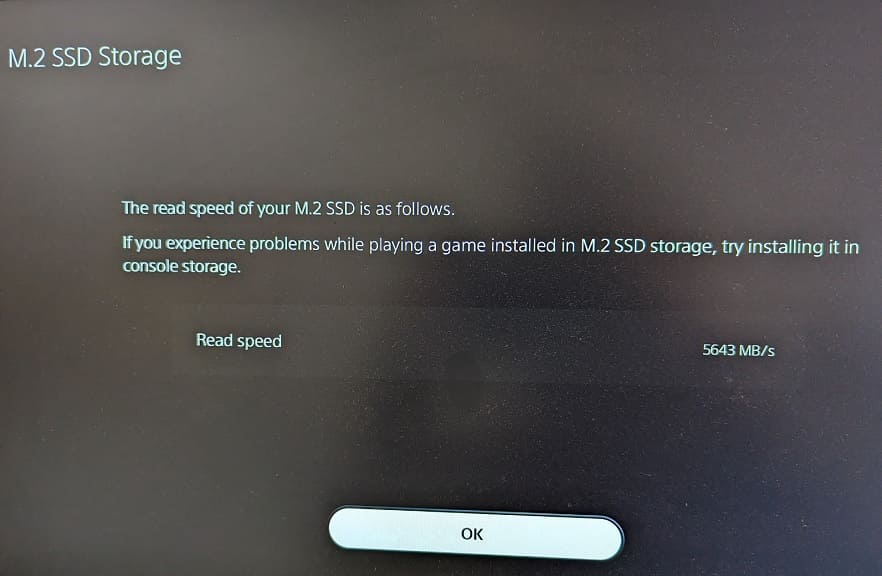
Once you inserted the drive correctly, the PlayStation 5 should let you know that you need to format it before you can start using the SSD as a storage option.

This process is automated. Once it is done, you should see the reading speed as detected by the PlayStation 5. The number can be somewhat different every time you do a reformat. In our initial setup, the speed was 5,623MB/s, which is faster than the recommended 5,500MB/s to be able to play PS5 games.
Storage Space

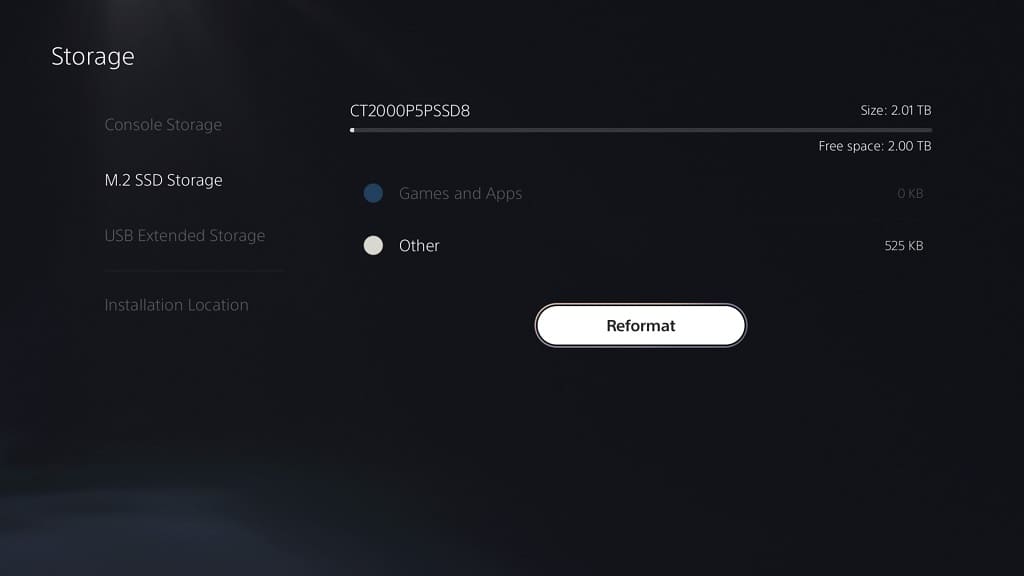
We installed the Crucial P5 Plus 2TB Gen4 NVMe M.2 SSD Internal Gaming SSD with Heatsink in our PlayStation 5. If you open the console’s Settings menu and then navigate over to Storage > M.2 SSD Storage, you should be able to see the total size and free space of the P5 Plus.

In our case, the 2TB P5 Plus (which is referred to as CT20000P5PSSD8 in the PS5 menus) has a total size of 2.01 TB with a free space of 2.00 TB with nothing installed.
Performance

So far, the Crucial P5 Plus SSD with Heatsink has worked flawlessly when playing the PlayStation 5 games that we have installed on it. The loading times, at least in our eyes, appear to be the same as when running the same game using the console’s internal storage.

When transferring games to and from the P5 Plus to the PS5’s console storage and vice versa, the progress was lighting quick as well.

By going to Settings > Storage > Installation Location, you will be able to tell the PS5 to download and install future games directly to the P5 Plus. We recommend doing this so that you don’t wear down the console’s solid state drive as these are soldiered directly to the motherboard and can’t be removed. So, if the console’s SSD is no longer working, then you need to replace the entire console as opposed to simply inserting a new M.2 solid state drive.

For the uninformed, every solid state drive has a Terabytes Written (or TBW for short) limit, which is the maximum amount of data that can be written on the drive over its lifetime. This is a general specification as the SSD may die off sooner or last longer.

Recap

Once you get past the installation phrase, which can be somewhat difficult if you have never inserted a M.2 SSD on your PlayStation 5, then the Crucial P5 Plus SSD with Heatsink should work without any noticeable performance issues.

So, if you are looking to expand the storage of your console, then we suggest that you pick up the Crucial P5 Plus SSD. If you are interested, you can purchase the PS5-compatible storage drive on Amazon via this link (#CommissionsEarned).

How to install and format the PNY XLR8 CS3140 for PS5

The PNY XLR8 CS3140 is a M.2 NVMe Gen4 x4 Solid State Drive with a sequential reading speed of up to 7,500 MB. Thus, it is compatible with the PlayStation 5 and PlayStation 5 Digital Edition systems as you will be able to store and play both PS4 and PS5 games directly off of the SSD.

To see how you can install and format the XLR8 CS3140 to your console, you can take a look at this tutorial from Seeking Tech.

This guide will be based on the following PS5-compatible solid state drives:

  • 1TB PNY XLR8 CS3140 M.2 NVMe SSD (M280CS3140-1TB-RB)
  • 2TB PNY XLR8 CS3140 M.2 NVMe SSD (M280CS3140-2TB-RB)
  • 4TB PNY XLR8 CS3140 M.2 NVMe SSD (M280CS3140-4TB-RB)

What PS5-comaptilbe heatsink should you get for the PNY XLR8 CS3140?

The PNY XLR8 CS3140 does not come with a heatsink, which is required for the PlayStation 5 and PlayStation 5 Digital Edition.

Fortunately, PNY has made a PS5 SSD Cover that comes with an integrated heatsink. If you are interested, you can purchase the product, which we will be using for this tutorial, on Amazon with the following link:

How to install the PNY XLR8 CS3140 for PS5

In order to inset the PNY XLR8 CS3140 into your PlayStation 5 or PlayStation 5 Digital Edition system, you need to take the following steps:

1. If you have any important files stored on the XLR8 CS3140, then you need to move then to another storage. Otherwise, these data will be deleted when you format the SSD for the PS5.

2. Once you are ready, start by turning off your PlayStation 5 console if you haven’t done so already.

3. With the PS5 shut down, remove all cables and accessories attached to it.

4. You should also remove the stand as well.

5. Lay the console down, with the side that has the PS logo facing downwards, on to a soft surface.

6. Position the console so that its backside, which has the HDMI port, is facing you.

7. From your vantage point, put your left hand on the top left corner of the outer cover as well as your right hand on the bottom right corner of the outer cover.

8. Next, you need to lift the bottom right corner of the outer cover with your right hand and then slide it to the left.

You may need to use some force to slide the outer cover off. Make sure that your left hand remains on the top left corner of the outer cover. Otherwise, the cover may come flying off to the left.

9. With the other cover removed, you should see a rectangular metal cover of the M.2 SSD docking bay.

10. Use a crosshead screwdriver to remove the screw and then the metal cover from the docking bay.

11. Inside the docking bay, use a crosshead screwdriver to remove the screw and spacer.

12. Place the spacer you previously removed into the “80” hole of the dock bay.

13. Afterwards, insert the PNY XLR8 CS3140 from a diagonally upwards position into the M.2 slot of your PS5 console.

14. Use a crosshead screwdriver and the screw you previously removed in Step #11 to secure the other end of the XLR8 CS3140 into the “80” hole.

15. Remove the films from the top and bottom of the PNY XLR8 PS5 SSD Cover with Integrated Heatsink.

16. Place the PNY XLR8 PS5 SSD Cover where the metal cover used to be.

17. Use a crosshead screwdriver and the screw you previously removed in Step #10 to secure the new SSD cover.

18. Slide the outer cover back into your console.

If you need a video guide to insert your PNY XLR8 CS3140, then you can check out the official PNY tutorial below:

How to format the PNY XLR8 CS3140 for PS5

After inserting the PNY XLR8 CS3140 into your console, you can format the solid state drive for your PlayStation 5 console by taking the following steps:

1. Turn on your system.

2. You should get a screen regarding the M.2 SSD Storage.

3. Press the PS button on your controller to use it for navigation.

4. You then need select the Format M.2 SSD option.

5. After the formatting has completed, you should see the sequential reading speed test results.

6. Select the OK option to head to the home screen.

Where to find PNY XLR8 CS3140 in the system menus

After inserting and formatting the PNY XLR8 CS3140, you will be able to find its location in the system menus by doing the following:

1. Head to Settings from the home screen, which you can get to by select the gear icon on the top right.

2. From Settings, select Storage.

3. In the Storage menu, you need to select M.2 SSD Storage on the left side.

4. You should find the PNY XLR8 CS3140 on the right side in the same menu.

5. You can also use the Storage menu to transfer games between different storage options, reformat the CS3140, delete games off of the CS3140 as well as change the default game installation storage option.

How to install and format the Nextorage PS5 SSD

Nextorage has released a M.2 solid state drive, with built-in heat sink, that is compatible with the PlayStation 5 and PlayStation 5 Digital Edition systems. You can check out this tutorial from Seeking Tech to see how you can install and format this SSD for your Sony game console.

Before we start, it should be noted that this guide is going to be based on the following internal storage drives:

  • 1 TB Nextorage PCIe Gen 4.0 NVMe M.2 2280 PS5 SSD with Heatsink (NEM-PA1TB/N SYM)
  • 2 TB Nextorage PCIe Gen 4.0 NVMe M.2 2280 PS5 SSD with Heatsink (NEM-PA2TB/N SYM)

How to insert the Nextorage PS5 SSD

You can take the following steps in order to insert the Nextorage PS5 SSD:

1. If you have any important files currently stored on your Nextorage SSD, then we recommend that you transfer it over to another storage before doing anything else.

This is because you will need to format the drive before you can use it on your PS5 or PS5 Digital Edition console. The formatting process will delete all data you have on the Nextorage SSD.

2. Once you are ready, start by turning off your game console.

3. With the system powered down, remove the stand, cables as well as other accessories you have connected.

4. Next, you need to lay your console down, preferably over a soft surface like a bed or sofa, with the side that has the PS logo facing down.

5. The back side of the PS5 system, which has the HDMI and power ports should be facing you.

6. From your point of view, position your right hand on the bottom right corner of the outer case and then your left hand on the top left corner of the outer case.

7. With your right hand, lift the bottom right corner of the outer case up and then slide it to the left. You may have to use a little force. Make sure you keep your left hand on the top left corner of the outer cover as it may otherwise fly straight off, potentially hurting others or causing damage to other objects.

8. With the outer case removed, you should see a rectangular metal cover for the M.2 docking bay of your PlayStation 5 or PlayStation 5 Digital Edition system. Here, you need a cross-head screwdriver to remove the screw and then the metal cover.

9. Now that docking bay is fully accessible, you need to use the cross-head screwdriver to remove the screw and space inside of it.

10. Take the spacer you removed in the previous step and place it into the hole that has been marked with “80.”

11. Afterwards, insert the Nextorage SSD into the M.2 slot starting from a diagonally upwards position.

12. After inserting the storage drive, gently push the other end of it down and then screw it in place in the “80” hole.

13. Once you are done with the installation, you can screw back in the metal cover of the M.2 docking back and then slide the outer case back into place (starting from the left side).

14. Re-attach the stand, cables and any other accessories you previously removed.

How to format the Nextorage PS5 SSD

After inserting the Nextorage PS5 SSD, you can format it for use with your PlayStation 5 or PlayStation 5 Digital Edition by doing the following:

1. Turn on your game system.

2. You should eventually arrive at the M.2 SSD Storage notification screen. Here, you need to press the PS button on the DualSense controller to be able to use it.

3. After gaining control, you need to select Format M.2 SSD.

4. Wait until the formatting process is completed.

5. Once the formatting has completed, you should see the sequential reading speed of your 1 TB or 2 TB Nextorage PCIe Gen 4.0 NVMe M.2 2280 PS5 SSD.

6. Afterwards, select OK to continue to the home screen.

Where to find Nextorage PS5 SSD in the system menus

After formatting the Nextorage PS5 SSD, you can find it in the system menus by taking the following steps:

1. Inside the home screen menu, select the gear symbol located on the top right side to enter into Settings.

2. In Settings, you need to go to Storage.

3. From the Storage menu, you then need to select M.2 SSD Storage from the left column.

4. On the right side, you should find your Nextorage PS5 SSD.

5. With the Storage menu, you can also reformat your Nextorage PS5 SSD, delete game data and move game data between different storage options.

What’s the difference between the Samsung T7, T7 Shield and T7 Touch?

Samsung recently released the T7 Shield Portable Solid State Drive. So, how does it compare to the standard T7 and the T7 Touch?

You can find out in this versus guide between these external storage drives at Seeking Tech.

Quick Summary

The new Samsung T7 Shield features a rubberized grip, which should make it easier to hold when compared to the Samsung T7 and Samsung T7 Touch.

The Shield version of the T7 series is also the only one to offer dust and water protection with an IP67 rating. Furthermore, it is able to withstand longer drop distances when compared to the T7 and T7 Touch.

The Touch version of the T7 is the only one to come with a finger sensor, which you can use for fingerprint recognition security.

The T7, T7 Shield and T7 Touch have the same USB interface, maximum sequential reading and maximum sequential writing speeds.

T7 vs. T7 Shield vs. T7 Touch Comparison Chart

You can take a look at our comparison table between the T7, T7 Shield and T7 Touch below.

Samsung T7 Portable SSDSamsung T7 Shield Portable SSDSamsung T7 Touch Portable SSD
Size Options500 GB

1 TB

2 TB
1 TB

2 TB
500 GB

1 TB

2 TB
What’s in the BoxPortable SSD

USB Type-C to USB Type-C cable

USB Type-C to USB Type-A cable

Quick Start Guide

Warranty Statement
Portable SSD

USB Type-C to USB Type-C cable

USB Type-C to USB Type-A cable

Quick Start Guide

Warranty Statement
Portable SSD

USB Type-C to USB Type-C cable

USB Type-C to USB Type-A cable

Quick Start Guide

Warranty Statement
Dimensions3.4 inches in width x 2.2 inches in height x 0.3 inches in depth3.5 inches in width x 2.3 inches in height x 0.5 inches in depth3.4 inches in width x 2.2 inches in height x 0.3 inches in depth
Weight57 grams98 grams57 grams
USB InterfaceUSB 3.2 Gen2USB 3.2 Gen2USB 3.2 Gen2
Maximum Sequential Reading SpeedUp to 1050 MB per secondUp to 1050 MB per secondUp to 1050 MB per second
Maximum Sequential Write SpeedUp to 1000 MB per secondUp to 1000 MB per secondUp to 1000 MB per second
IP RatingNoneIP65None
Drop ResistanceUp to 2 feetUp to 3 feetUp to 2 feet
SecurityPassword protectionPassword protectionPassword protection

Fingerprint recognition
SoftwareSamsung Portable SSD Software 1.0

Samsung Magician Software
Samsung Portable SSD Software 1.0

Samsung Magician Software
Samsung Portable SSD Software 1.0

Samsung Magician Software
EncryptionAES 256-bit hardware encryptionAES 256-bit hardware encryptionAES 256-bit hardware encryption
Rubberized GripNoYesNo
Operating Temperature Range0°C to 60°C0°C to 60°C0°C to 60°C
Non-Operating Temperature Range-40°C to 85°C-40°C to 85°C-40°C to 85°C
Non-Operating Shock Resistance1,500G, 0.5 ms duration and 3 axis1,500G, 0.5 ms duration and 3 axis1,500G, 0.5 ms duration and 3 axis
Non-Operating Vibration Resistance10~2,000 Hz, 20G20~2,000 Hz, 20G10~2,000 Hz, 20G
CertificationsCE

BSMI

KC

VCCI

C-tick

FCC

IC

UL

TUV

CB

EAC

UKCA

BIS
CE

BSMI

KC

VCCI

C-tick

FCC

IC

UL

TUV

CB

EAC

UKCA

BIS
CE

BSMI

KC

VCCI

C-tick

FCC

IC

UL

TUV

CB

EAC

UKCA

BIS
Warranty3-year limited warranty3-year limited warranty3-year limited warranty
PricingCheck price on Amazon.(#CommissionsEarned)Check price on Amazon.(#CommissionsEarned)Check price on Amazon.(#CommissionsEarned)

Size Options

The new Samsung T7 Shield is available in the 1 TB and 2 TB capacities. Both the T7 and T7 Touch SSDs offer a 500 GB option to go along with the 1 TB and 2 TB options.

What’s in the Box

Along with the solid state drive, each product also comes with the following in the box:

  • USB Type-C to USB Type-C cable
  • USB Type-C to USB Type-A cable
  • Quick Start Guide
  • Warranty Statement

Dimensions

When it comes to the physical size of the portable SSD, the new T7 Shield is slightly wider and longer than the other two storage drives. The Sheild version is also nearly twice as thick as the other two products.

You can take a look at the full measurements, which is shown as Width x Height x Depth, below:

  • T7: 3.4 inches in width x 2.2 inches in height x 0.3 inches in depth
  • T7 Shield: 3.5 inches in width x 2.3 inches in height x 0.5 inches in depth
  • T7 Touch: 3.4 inches in width x 2.2 inches in height x 0.3 inches in depth

Weight

The T7 and T7 Touch weigh the same at around 57 grams. The Shield version is nearly twice as heavy, weighing in at around 98 grams.

USB Interface

All three external solid state drives use the USB 3.2 Gen2 interface, which provides a transfer speed of up to 10 Gbps.

Maximum Sequential Reading Speed

The T7, T7 Shield and T7 Touch portable storage state drives have a maximum sequential read speed of up to 1050 MB per second.

Maximum Sequential Write Speed

All three external drives also have a maximum sequential write speed of up to 1000 MB per second.

IP Rating

When it comes to dust and water resistance, the Samsung T7 Shield Portable Solid State Drive is the only one to offer any protection.

With an IP65 rating, the Shield version is fully dust tight in addition to being able to be submerged underwater at a maximum depth of 1 meter for up to 30 minutes.

Drop Resistance

The Samsung T7 and Samsung T7 Touch offer a drop resistance of up to 2 meters. The Samsung T7 Shield is even better in this category as it offers a drop resistance of up to 3 meters.

Security

When it comes to security, all three external storage drives in this comparison provide password protection.

The T7 Touch is the only variant to offer fingerprint recognition as you can use its fingerprint sensor to offer additional security in order to keep the content stored on the SSD from being accessed.

Software

All three versions of the Samsung T7 support the Samsung Portable SSD Software 1.0 and Samsung Magician Software.

Encryption

As for the encryption, these portable solid state drives use AES 256-bit hardware encryption.

Rubberized Grip

The Samsung T7 Shield Portable Solid State Drive is the only product from the T7 series to feature a rubberized grip, which should make it easier to hold when compared to the other variants.

Operating Temperature Range

The operating temperature range are the same for these three SSDs at 0°C to 60°C.

Non-Operating Temperature Range

When it comes to the non-operating temperature, all three have a recommended range of -40°C to 85°C.

Non-Operating Shock Resistance

These portable storage drives have the same non-operating shock resistance specifications at 1,500G, 0.5 ms duration and 3 axis.

Non-Operating Vibration Resistance

You can find the non-operating vibration resistance specs for the T7, T7 Sheild and T7 Touch below:

  • T7: 10~2,000 Hz, 20G
  • T7 Shield: 20~2,000 Hz, 20G
  • T7 Touch: 10~2,000 Hz, 20G

Certifications

All three variants of the Samsung T7 series have received the following certifications:

  • CE
  • BSMI
  • KC
  • VCCI
  • C-tick
  • FCC
  • IC
  • UL
  • TUV
  • CB
  • EAC
  • UKCA
  • BIS

Warranty

The Samsung T7 Portable Solid State Drive, Samsung T7 Shield Portable Solid State Drive and Samsung T7 Touch Portable Solid State Drive each comes with a 3-year limited warranty.

How to fix Samsung X5’s disabled write access error

When using the Samsung X5, you may encounter an issue where you can no longer write data on the solid state drive. Instead, you can only read data off of the external storage drive.

If you are encountering this type of issue, then you can follow this troubleshooting guide.

Before we being, we should note that this guide will be covering the 500 GB Samsung X5 Portable Solid State Drive (Model Number: MU-PB500B), 1 TB Samsung X5 Portable Solid State Drive (Model Number: MU-PB1T0B) and 2 TB Samsung X5 Portable Solid State Drive (Model Number: MU-PB2T0B).

How to fix Samsung X5’s disabled write access error on Mac and PC

If you use the exFAT format with the Samsung X5, you could run into write access issues if you are switching between connecting the SSD to a Mac and a Windows PC.

To fix this issue, you can take the following steps:

1. Connect your Samsung X5 Portable Solid State Drive to your Mac.

2. Make sure that the LED on your X5 is displaying a solid white color. If the LED is blinking, then it means that the SSD is busy currently reading or writing data.

3. Once the LED on the X5 is solid white, you need to eject the external drive from your Mac. You can do so with the following methods:

Locate the X5 icon from the desktop and then drag it over to the Trash.

Click on the X5 icon from the desktop. Select File and then Disconnect.

Click on the Finder sidebar, select your X5 storage drive and then Eject.

4. With your X5 SSD disconnected from your Mac, you can safely unplug the drive.

5. Plug your X5 into your Windows PC computer.

6. You may get a dialogue box stating that write access has been disabled. Click on the “Scan and fix” option, which will let your Windows PC perform the Check Disk (CHKDSK) fix.

7. If you don’t see a pop-up dialogue box, you can manually enable Check Disk by first locating your X5 either on the desktop or though File Explorer.

Next, you need to right click on the icon of your X5. Select Properties, then Tools and, finally, Check.

8. Once the Check Disk process has been completed, re-test your X% on your Windows PC and Mac to see if the write access issues have been fixed.

Using the right file format

If the aforementioned solution that not fix the write access errors, the next step we recommend taking is to make sure you are using the correct format.

By default, the Samsung X5 uses exFAT, which is compatible with both the Windows and Mac operating systems. With exFat, you should be able to read and write data on the two OS platforms.

If your external drive uses NTFS, then you can read and write with Windows. For Mac, however, you can only read off of the SSD.

If the X5 is using HFS, then you can read and write with Mac. However, the Windows operating system won’t be able to recognize the external SSD at all.

If your Samsung X5 is not compatible with your operating systems when it comes to writing data, then you might want to consider reformatting your external solid state drive to a compatible format.

However, it is important to note that reformatting will erase all the data you have stored on the drive. So, you should backup any important files you have on the SSD before changing the format.

Contacting Samsung

If none of the fixes worked, then you might want to consider contacting Samsung for additional support.

If your X5 is still covered under warranty, then you might be able to get a replacement if the write access error ended up being a hardware issue.

How to fix slow read, transfer and write speeds of Samsung T5, T7 and T7 Touch

When using the Samsung T5 Portable Solid State Drive, Samsung T7 Portable Solid State Drive or Samsung T7 Touch Portable Solid State Drive, you may experience slow speeds.

If you think your external SSD is too slow when it comes to reading, transfer and writing, then you can check out this tutorial at Seeking Tech for some potential fixes.

Before we being, we should note that this guide is intended for all capacity versions of the Samsung T5, T7 and T7 Touch. The list should include the following model numbers:

Samsung T5:

  • MU-PA250B
  • MU-PA500B
  • MU-PA1T0B
  • MU-PA2T0B

Samsung T7:

  • MU-PC500H
  • MU-PC500R
  • MU-PC500T
  • MU-PC1T0H
  • MU-PC1T0R
  • MU-PC1T0T
  • MU-PC2T0H
  • MU-PC2T0R
  • MU-PC2T0T

Samsung T7:

  • MU-PC500
  • MU-PC500S
  • MU-PC1T0
  • MU-PC1T0S
  • MU-PC2T0
  • MU-PC2T0S

Potential Solution #1: Using a Different USB Cable and/or USB Port.

The slowdown issues with your T5, T7 or T7 Touch could be related to the USB cable and/or USB port.

For the USB cable, we recommend that you use the same cable that came packed into the retail box of your external solid state drive.

If you don’t have the USB cable that came with your Samsung SSD, then you need to find one that is compatible with USB 3.1 Gen2 interface of the Samsung T5 Portable Solid State Drive or the USB 3.2 Gen2 interface of the Samsung T7 Portable Solid State Drive and Samsung T7 Touch Portable Solid State Drive.

You should also try using another USB port on the connected device. This is because the USB port that you are currently using may be a lower USB specification (which will result in slower speed) or potentially damaged. The USB port should match the aforementioned USB interfaces, which is USB 3.2 Gen2 for the T5 or USB 3.2 Gen2 for the T7 and T7 Touch.

If using a different USB cable or USB port does not make your SSD faster, you can try using your external drive with another device as the current device you are connecting your solid state drive to may have speed bottlenecks that prevent your external SSD from reaching its full performance potential.

Potential Solution #2: Freeing Up Space

Your Samsung T5 Portable Solid State Drive, Samsung T7 Portable Solid State Drive or Samsung T7 Touch Portable Solid State Drive will perform slower if they are near full capacity due to how solid state drives access data. Therefore, we recommend leaving at least 15% of free space on your SSD.

Thus, you need to delete or transfer any of the files you don’t plan on using on your external storage drive until you meet our recommended percentage of free space.

Afterwards, you can try testing the speed of your SSD again to see if it is no longer slow during reading, transferring and/or writing.

Potential Solution #3: Enabling Write Cache on Windows 10

If you are experience slow writing speeds when you connect your external Samsung storage drive on a Windows 10 computer, then you can try enabling Write Cache.

In order to enable write cache, you need to do the following:

1. Locate the icon that represents your Samsung solid state drive in Windows 10.

2. Right click the icon.

3. In the pop-up menu, select Properties.

4. Next, you need to select the Policies tab.

5. Check the box right next to Enable write caching on the device.

6. Select OK to confirm the change.

Enabling write caching should help speed up the performance of your SSD when it comes to writing data. However, you may experience corrupted and/or loss data if the writing process gets interrupted (such as during a power outage or USB cable being disconnected).

Potential Solution #4: Updating the Firmware for T5, T7 or T7 Touch

Updating the firmware for your T5, T7 or T7 Touch may also help improve performance.

You can only update the firmware of your Samsung external storage drive through the Samsung Portable SSD Software. When updating, you should make sure that your SSD isn’t busy reading, writing or transferring data.

To find out how you can upgrade the firmware for the Samsung T5 Portable Solid State Drive, Samsung T7 Portable Solid State Drive or Samsung T7 Touch Portable Solid State Drive, you can check out this guide.

Potential Solution #5: Contacting Samsung

If you are still having speed issues even after trying all of the aforementioned fixes and your Samsung external drive, and you are still covered under warranty, then you can try contacting Samsung to see if they are willing to fix your problems.

How to install the Thermal Grizzly NVMe M.2 SSD Cooler for PS5

The Thermal Grizzly NVMe M.2 SSD Cooler can be used as a heatsink for a PlayStation 5 compatible M.2 solid state drive.

To see how you can properly install this product, along with a SSD, for your PS5 or PS5 Digital Edition system, you can take a look at this tutorial at Seeking Tech.

How to install the Thermal Grizzly NVMe M.2 SSD Cooler on PS5-compatible M.2 SSD

In order to install the Thermal Grizzly heat sink on to your PlayStation 5 compatible M.2 solid state drive, you need to take the following steps:

1. Start by peeling the protective film from the 0.5 mm pad and then placing it on the bottom housing of the heatsink. Make sure that the pad is aligned with the housing and isn’t blocking the screw hole opening.

2. Next, you need to remove the protective film from the top side of the 0.5 mm pad.

3. Afterwards, carefully slide in the PS5-compatible M.2 SSD into the bottom housing and then make sure that it is aligned perfectly with the heat sink.

4. You then need to remove the protective film from the bottom of the 1.0 mm pad and then place it on top of the M.2 solid state drive in the bottom housing.

5. Remove the protective film from the top side of the 1.0 mm pad.

6. Finally, snap on the top housing of the Thermal Grizzly NVMe M.2 SSD Cooler to complete the installation.

How to insert the Thermal Grizzly NVMe M.2 SSD Cooler to the PlayStation 5

Once you installed the PS5-compatible M.2 SSD onto the Thermal Grizzly NVMe M.2 SSD Cooler, you can insert it to your game console by taking the following steps:

1. Turn off your PlayStation 5 console.

2. Remove the stand, cables and other accessories you have attached to your PS5.

3. Place your game console in a position where the PS logo is facing downwards and the back side (which has the HDMI port) is facing you.

4. From your vantage point, place your left hand on the top left side of the top outer case.

5. You then need to place your right hand on the bottom right corner of the top outer case.

6. Lift the bottom right corner of the top outer case by using your right hand and the slide the rest of the case to the left.

7. With the top outer case removed, you should see a metal cover shielding the M.2 docking bay of your PlayStation 5.

Use a crosshead screwdriver to remove the screw and then remove the metal cover.

8. Inside the bay, you will find another screw. Use a crosshead screwdriver again to remove the screw and the spacer.

9. Place the spacer you removed in Step #8 into the “80” hole of the docking bay.

10. Next, you need to insert the Thermal Grizzly NVMe M.2 SSD Cooler into the M.2 slot of the PS5 system starting from a diagonally upwards position.

11. You then need to use a screwdriver and the screw you previously removed in Step #8 to fasten the other end of the Thermal Grizzly NVMe M.2 SSD Cooler down into the “80” hole.

12. Afterwards, reattach the metal cover of the docking bay.

13. Finally, slide back in the top outer cover on the PS5 starting from the left side.

With the Thermal Grizzly NVMe M.2 SSD Cooler installed on your PlayStation 5, turn on your game console. You should see a screen where you can format the M.2 solid state drive for use with the PS5.

What’s the difference between the PS5 console storage, M.2 SSD and external SSD?

Although you can use an external solid state drive with your PlayStation 5 or PlayStation 5 Digital Edition, it is limited in features when compared to the other SSD types that the game console supports.

You can take a look at this comparison guide at Seeking Tech to see what are the main differences between the console storage, M.2 SSD and external SSD.

Quick Summary

The internal console storage of the PlayStation 5 offers the most features as you can store and play both PS4 and PS5 games. Furthermore, it is also the only storage option that can store system data, save files as well as screenshots and videos captured when playing games.

With a PS5-compatible M.2 solid state drive, you can also store and play both PS4 and PS5 videogames although the save files, screenshots and recorded videos will be stored on the internal console storage instead.

For an external solid state drive, you can also store PS4 and PS5 games. However, only PS4 games can be played directly from the external storage. Furthermore, the save files, screenshots and video clips will be saved on the internal console storage.

So, if you are looking to expand the storage capacity of your PlayStation 5 or PlayStation 5 Digital Editon system, then we recommend getting a M.2 solid state drive as you will be able to play PS4 and PS5 games directly off of it.

If you are only planning to use an expansion drive for PS4 games, then you can get an external SSD instead.

PS5 Internal Console Storage vs. M.2 SSD vs. External SSD

You can take a look at our comparison table for the internal PS5 console SSD, M.2 SSD and External SSD below.

PS5 Internal Console StoragePS5-Compatible M.2 SSDPS5-Compatible External SSD
ConnectivitySoldered on to the motherboardM.2 slot of PS5USB port of PS5
Sequential Reading Speed5,500 MB per second5,500 MB per secondUp to 2,000 MB per second
Storage Space825 GB250 GB to 4 TB250 GB to 8 TB
Storage ContentPS4 games

PS5 games

System files

Save files

Saved screenshots

Saved videos
PS4 games

PS5 games
PS4 games

PS5 games
Playable GamesPS4 games

PS5 games
PS4 games

PS5 games
PS4 games

Connectivity

When it comes to the console storage, the default internal solid state drive of the PS5 is completely soldered on to the motherboard of the game console. As a result, it can’t be removed.

For the M.2 solid state drive, you need to use the M.2 slot of the game console, which you can find by removing the outer case. For this storage option, you will also need a heatsink that will fit inside of the docking bay of your PS5 or PS5 Digital Edition.

An external solid state drive can be connected to the PlayStation 5 system through the USB port.

Sequential Reading Speed

The External SSD option has the disadvantage when it comes to reading speed.

The console storage, as well as a PS5-compatible M.2 solid state drive, have read speeds of 5,500 MB per second.

In comparison, the fastest external solid state drives usually top out at around 2,000 MB per second. Not to mention that the reading speed of the external drive could also be slowed down due to other bottlenecks on the PS5.

Storage Space

You can take a look at the storage capacity ranges for all three PS5-compatible solid state drive types below:

  • Internal Console Storage: 825 GB
  • M.2 SSD: 250 GB to 4 TB
  • External SSD: 250 GB to 8 TB

Storage Content

The internal console storage, external solid state drive and M.2 solid state drive can store both PlayStation 4 games and PlayStation 5 games.

The console storage is the only drive that can also store the system data, save files and the media gallery.

Playable Games

You can play both PlayStation 4 and PlayStation 5 games directly off of the internal console storage and M.2 solid state drive.

With an external solid state drive, you can only play PlayStation 4 games. To play a PlayStation 5 game you have stored on the external SSD, you will need to transfer the game data over to either the internal console storage or the M.2 SSD.

How to install and format the T-Force CARDEA A440 for PS5

The TEAMGROUP T-Force CARDEA A440 is a M.2 solid state drive that is compatible with the PlayStation 5 and PlayStation 5 Digital Edition systems.

To see how you can install and format this storage drive so that you can store and play PS5 games directly off of it, you can take a look at this tutorial from Seeking Tech.

Before we begin, it should be noted that this guide will be based on the following solid state drives:

  • 1 TB TEAMGROUP T-Force CARDEA A440 M.2 SSD with Graphene & Aluminum Heatsink (TM8FPZ001T0C327)
  • 2 TB TEAMGROUP T-Force CARDEA A440 M.2 SSD with Graphene & Aluminum Heatsink (TM8FPZ002T0C327)

Both of these products use the PCI-Express Gen4x4 interface and have a sequential reading speed of up to 7000 MB per second, which meets the requirements of the PS5 and PS5 Digital Edition.

These M.2 SSDs also come with graphene and aluminum heatsinks. The graphene heatsink should fit easily into the docking bay of the PlayStation 5 console. With the aluminum heatsink, you will need to keep the metal cover off of the PS5’s docking bay in order to fit the storage drive.

How to insert the T-Force CARDEA A440 to PS5

In order to insert the T-Force CARDEA A440 to your PlayStation 5 and PlayStation 5 Digital Edition system, you need to take the following steps:

1. If you previously used your T-Force CARDEA A440 to store files, then we recommend that your move any important data you have on the solid state drive before starting. This is because you will need to format the SSD for PlayStation 5, which will erase all the current data stored on it.

2. You should also make sure that you either have the graphene heatsink or aluminum heatsink installed on your A440.

To see how you can install these, you can take a look at the instructional video from the TEAMGROUP YouTube channel below:

3. Once you are ready, turn off your console and then remove the cables, stand as well as any other accessories you have attached to it.

4. Next, you need to lay your console down so that the side with the PS logo is at the bottom.

5. You then need to make sure that the backside of your PS5 is facing towards you.

6. From your perspective, you then need to put you left hand on the top left corner of the outer case and then your right hand on the bottom right corner of the outer case.

7. Lift the bottom right corner of the outer case to unlock it and then slide the case off to the left.

8. With the outer case removed, you should see the metal cover of the M.2 docking bay. Use a crosshead screwdriver to remove the screw holding the metal cover in place and then remove the metal cover.

9. With the docking bay opened, you need to use a crosshead screwdriver again to remove the screw and spacer inside.

10. Take the spacer you removed in the previous step and put it in the “80” hole.

11. Now you need to insert your T-Force CARDEA A440 into the M.2 SSD slot in the docking bay starting from a diagonally upwards position.

12. After inserting the storage drive, use a crosshead screwdriver and the screw you previously removed in Step #9 to fasten the other end of the SSD down to the “80” hole.

13. If you installed the graphene heatsink to your T-Force CARDEA A440, then you also need to screw back in the metal cover of the docking bay.

If you installed the aluminum heatsink to your T-Force CARDEA A440, then you need to leave the metal cover off.

14. Finally, slide the outer case of your PlayStation 5 back in starting from the left.

How to format the T-Force CARDEA A440 to PS5

After inserting the T-Force CARDEA A440 into the M.2 slot of your PlayStation 5 or PlayStation 5 Digital Edition system, you then need to format the drive by taking the following steps:

1. Reattach the stand, cables and other accessories you previously removed from the system if you haven’t done so already.

2. Turn on your game console.

3. During the boot up process, you will eventually arrive to the M.2 SSD Storage screen.

4. Plug in your DualSense controller via the USB port of your PS5 system.

5. Press the PS button on the gamepad.

6. Now that you have control, select the Format M.2 SSD option.

7. Once the formatting process has been completed, you will see a sequential reading speed test result page. Here, you need to select the OK option to go to the home screen.

Where to find T-Force CARDEA A440 in the PS5 menus

After formatting your T-Force CARDEA A440, you will be able to find the storage drive in the system menus of your PlayStation 5 by taking the following steps:

1. From the home screen menu, select the gear icon that appear on the top right side.

2. After getting to the Settings menu, you need to select Storage.

3. In the Storage menu, you first need select M.2 SSD Storage from the left column.

4. On the right side of the same Storage menu, you should see the information for your T-Force CARDEA A440.

5. You can also use the Storage menu to transfer games between the T-Force CARDEA A440 and the internal SSD storage. Furthermore, you can also reformat the M.2 SSD as well as change the default location when it comes to installing a new game.

How to safely remove the PS5 M.2 SSD

After you installed your M.2 solid state drive on your PlayStation 5 or PlayStation 5 Digital Edition home console, you may decide to remove it for one reason or another. To see how you can safely take out the expansion SSD, you can take a look at this guide from Seeking Tech.

How to transfer games from M.2 SSD Storage to Console Storage

If you don’t plan on using the M.2 for your PlayStation 5 for a long time, or ever again, then you might want to consider moving any games you have installed on storage to the internal storage drive. Otherwise, you have to download and/or reinstall these games if you want to play them again.

To move transfer the games you have installed on the M.2 SSD Storage over to the Console Storage, you need to take the following steps:

1. Head to the Settings menu, which you can do by selecting the gear icon from the home screen.

2. In Settings, select Storage.

3. In the Storage menu, select M.2 SSD Storage from the left column.

4. On the right side in the same Storage menu, select Games and Apps.

5. From the Games and Apps in M.2 SSD Storage menu, select a game that you want to move over.

6. In the pop-up menu, select the “Select Items to Move” option.

7. In the next screen, select the games that you want to transfer to the Console Storage.

8. Finally, select the Move option at the bottom right side of the screen to start the transfer process.

How to remove the PS5 M.2 SSD

In order to remove the M.2 solid state drive from your PlayStation 5 or PlayStation 5 Digital Edition system, we recommend that you take the following steps:

1. Turn off your game console completely.

2. Remove the HDMI cable, power cable and any other cables/accessories attached to your PS5.

3. You should also detach the stand.

4. Next, lay the system down with the side that has the PS logo at the bottom.

5. You should also make sure that you are facing the backside of the console, which has the HDMI port and power cable port.

6. From your vantage point, place your left hand on the top left corner of the outer case and then your right hand on the bottom corner of the outer case.

7. Lift the bottom right corner of the outer case upwards and then slide the rest of the case off to the left.

8. Next, use a crosshead screwdriver to remove the screw and M.2 metal bay cover.

9. Afterwards, you need to use the same screwdriver to remove the screw and spacer holding the M.2 SSD down.

10. With the screw and spacer removed, gently lift up and then pull away the M.2 solid state drive from the M.2 slot of your PlayStation 5 system.

11. With the M.2 SSD removed, you can reassemble all the parts you previously had to remove in order to gain access to the M.2 docking bay.

12. You can then reattach the stand, cables and other accessories that you previously had to detach.