Kingston DataTraveler Kyson USB 3.2 Metal Flash Drive review

When looking for a USB thumb drive that you can carry with you on the go, you may have found the Kingston DataTraveler Kyson High Performance USB 3.2 Metal Flash Drive during your search. You can check out this review article from Seeking Tech to see whether or not this product is worth getting.
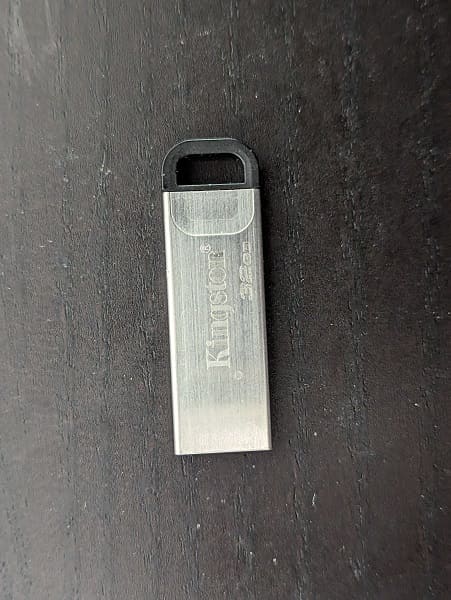
Capacity

This review is based on the 32 GB version. There are also 64 GB, 128 GB and 256 GB variants. You can find the model number for each product below:

  • 32 GB: DTKN/32GB
  • 64 GB: DTKN/64GB
  • 128 GB: DTKN/128GB
  • 256 GB: DTKN/256GB

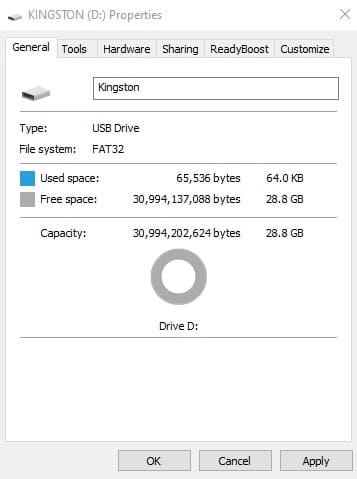
The actual capacity is slightly smaller due to formatting and other installations on the drive. For our 32 GB stick, for example, the amount of free space was 28.8 GB for us with no files being stored.
Compatibility

The Kingston DataTraveler Kyson is compatible with USB 2.0, USB 3.0, USB 3.1 and USB 3.2 Gen 1 ports.

In terms of operating systems, it supports Windows 10, Windows 8.1, Windows 8, MacOS 10.12.X or later, Linux 2.6.X or later as well as Chorme OS.

Weight and Dimensions

The Kingston DataTraveler Kyson is extremely light, weighing in at just 4 grams.

The USB thumb drive is also very small as it measures in at 39 mm in length, 12.6 mm in width and 4.9 mm in depth.

Key Ring

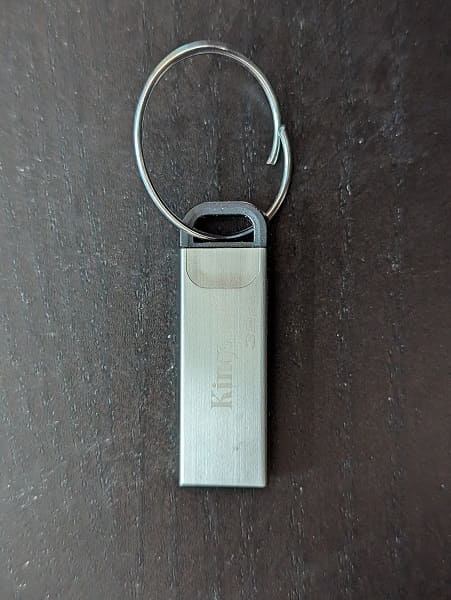
The top of the DataTraveler Kyson you will find a key ring loop that you can use to attach the thumb drive to your key chain or other objects.
Casing

This USB drive uses a metal casing, which feels a little cheap and is a bit slippery. However, it does seem sturdy enough.
Cap

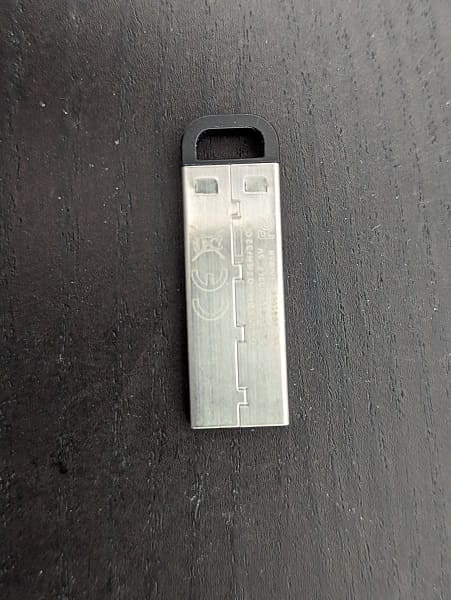
Unfortunately, the DataTraveler Kyson does not come with a cap. So, if you expose the connector to water and other potentially harmful substances, then you risk damaging it.

Speed

The Kingston DataTraveler Kyson USB 3.2 Metal Flash Drive has a reading speed of up to 200 MB/s for all capacities. The actual speed depends on a lot of other factors such as USB connection, number of files and size of files.

Temperature

When using the Kyson, Kingston recommends that you do so within a range of 0°C to 60°C (or 32°F to 140°F). For storage, you should store this device within a range of -20°C to 85°C (or -4°F to 185°F).

Warranty

This product comes with a 5-year warranty.

Overall

The Kingston DataTraveler Kyson is a very affordable USB thumb drive that you can attach to your key chain. While we don’t like the cheap and slippery feel of the casing, it does seem solid enough to protect the internal components. With that said, the device does not include a cap to protect its connector; therefore, you need to be careful not to expose it to water and other potentially harmful substances.

If you are interested, you can purchase this product on Amazon with the following link:

Is the Franklin Sensors Pro Sensor 710+ worth it as a stud finder?

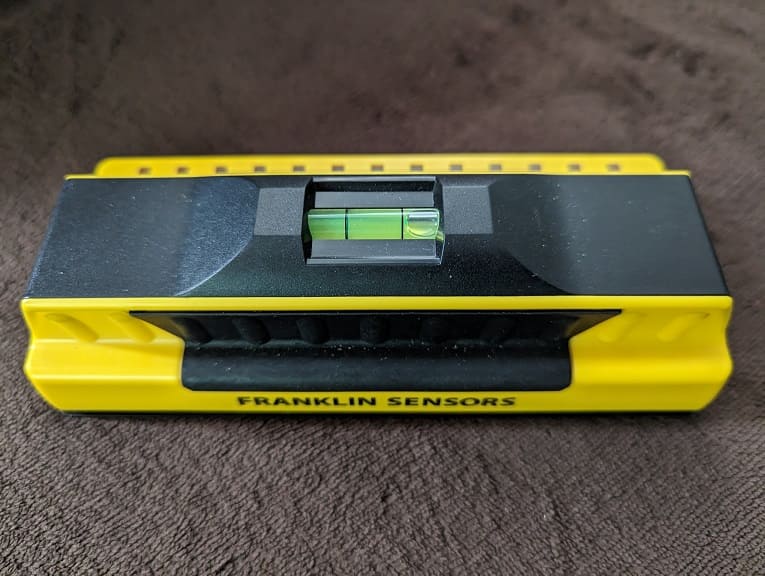
If you would like to screw in a TV wall mount on a dry wall, then you need to look for the solid areas that are backed by studs. To find these easily, you can use a stud finder such as the Franklin Sensors ProSensor 710+. To see if this product is worth getting, you can take a look at this review article from Seeking Tech.

Instructions

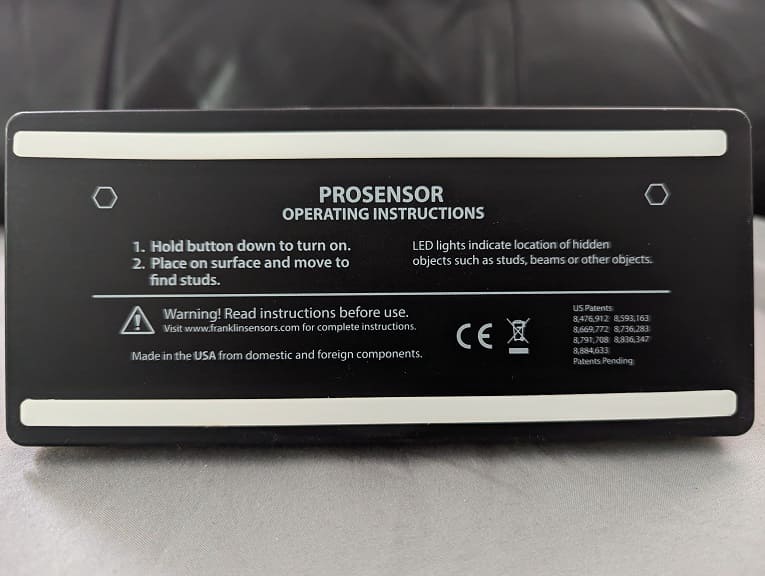
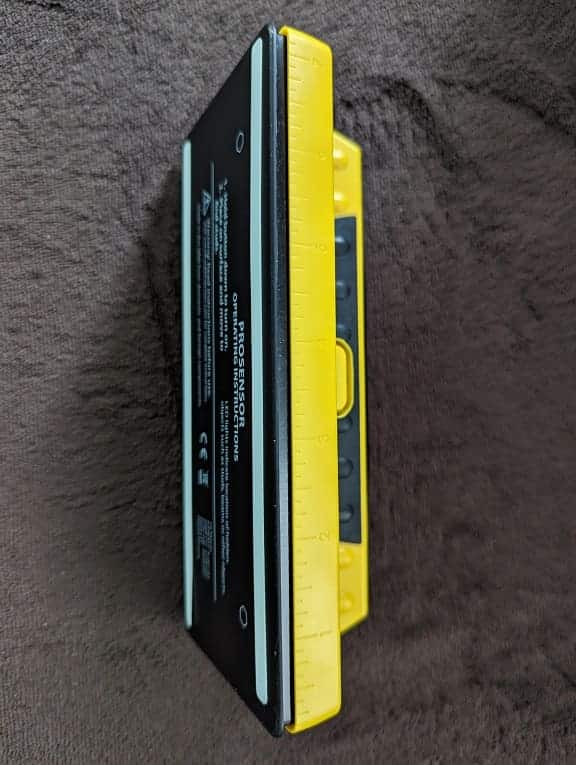
The instructions are extremely easy to follow. First off, they are printed at the bottom of device where the sensors are located; so, you don’t nee to look up the steps every time.

Secondly, you simply have to press and hold a button located at the top of the finder. When holding the button glide the device horizontally across the wall or surface in order to find any solid objects such as studs located behind the wall. When lit up, the LED lights show where the hidden object is located as well as how wide it is.

Sensors

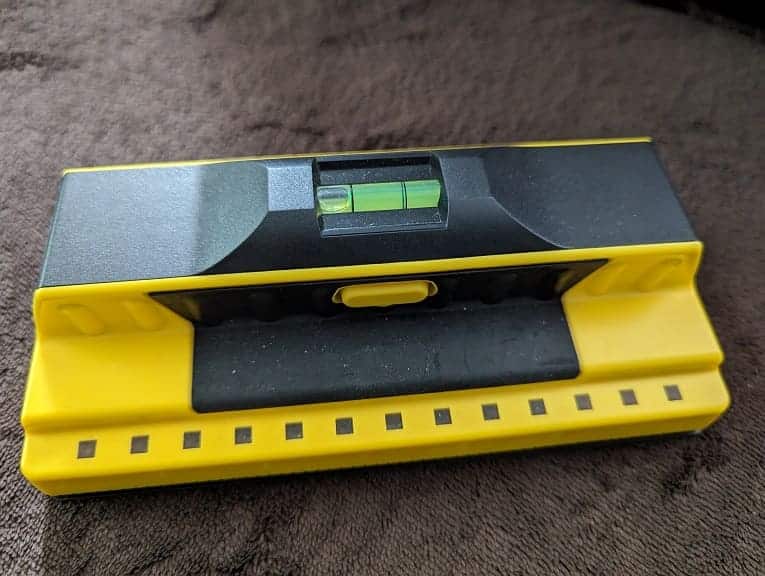
The ProSensor 710 Plus comes with 13 sensors spread across 7 inches, which should be plenty wide enough for a vast majority of studs. Even if it is too short, you can simply glide the stud finder further.

Battery

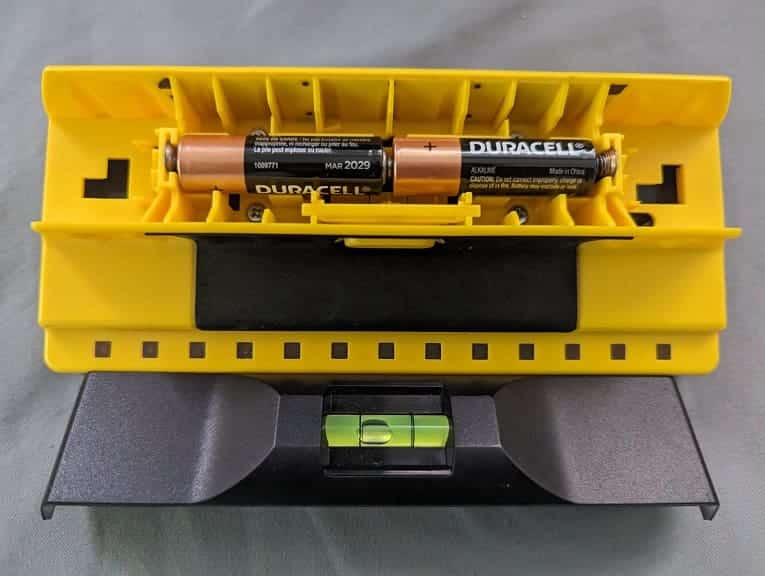
This device requires a pair of AA batteries in order for the sensors to work and the LED light indicators to light up. You should see an arrow on the black handle, which shows how you can slide it off so that you can open the battery compartment.

Handle

The handle feels comfortable to hold thanks to the grooves that give your hands a good grip. This is especially true when you need to glide the stud finder across a wall.

Bubble Level

As an added bonus, the top handle also includes a small bubble level. You can use it to identify whether or not the current position of the finder is straight.

When marking with the stud finder, it is very important to keep it as straight as possible; otherwise, the wall mount and television screen may end up looking crooked. Thus, the built-in bubble level is a good addition that saves you the trouble of getting a standalone leveler.

Integrated Ruler

If you look over the edge of where the LED lights are located, you should see a 7-inch long integrated ruler.

However, it is not as helpful as the bubble level due to it being harder to see clearly since you most likely need to view it under bright lights; otherwise, the lines and numbers blend into the yellow-colored casing.

The Franklin Sensors FS710PRO ProSensor 710+ Professional Stud Finder 3.

Recap

Overall, we found the Franklin Sensors Pro Sensor 710+ to be an excellent stud finder when we needed to locate the hidden studs on our dry wall so that we can install the wall mount and television screen. Despite being a little on the expensive side, it is one of the best options available in the market. You can find our Pros and Cons for the device below:

Pros:

  • Easy-to-follow instructions
  • 13 sensors help with identifying the start and end points for must studs
  • Grips that make it very easy and comfortable to handle
  • Built-in bubble level
  • Cons:
  • Integrated ruler can be hard to see in dim lighting
  • A little bit pricey if you don’t plan on using it often

If you are interested, you can purchase the stud finding device on Amazon with the following link:

J-Tech Digital Wireless Vertical Ergonomic Mouse (V638) review

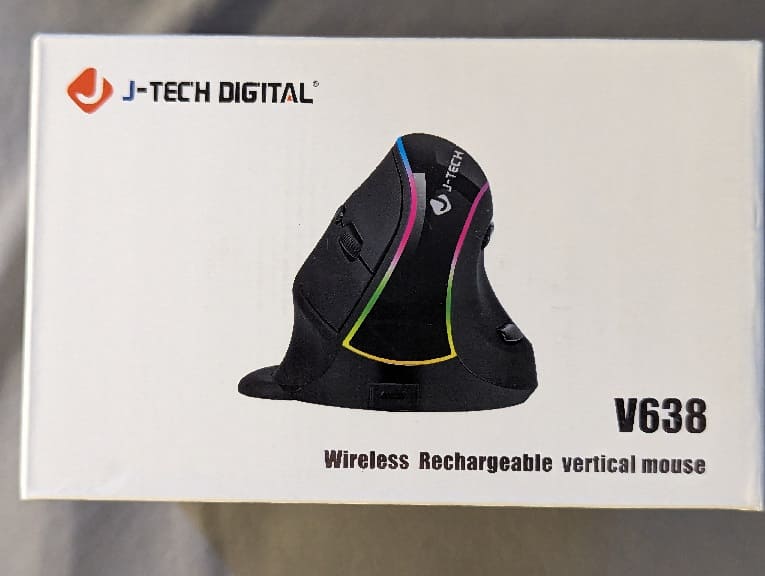
If you are looking for an affordable wireless vertical mouse, then you may have found the J-Tech Digital V638 mouse during your search. You can check out this review article from Seeking Tech to see if this product is worth getting.

What’s in the Box

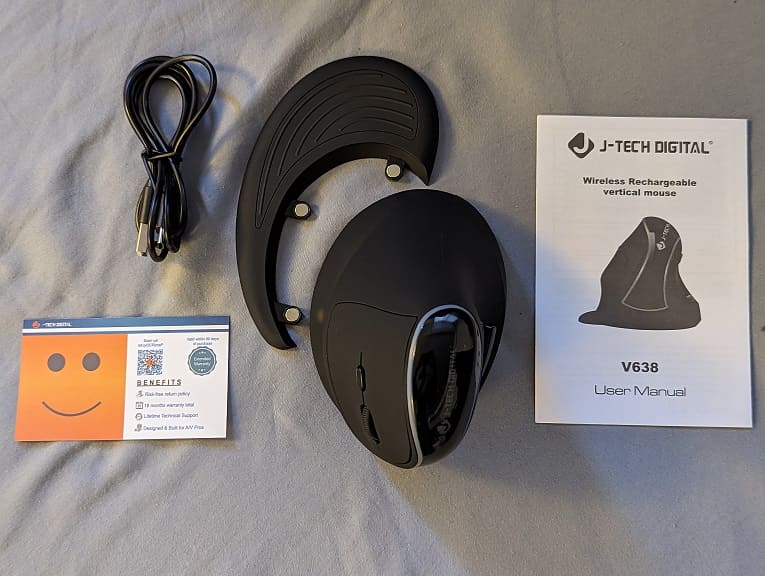
The J-Tech Digital Wireless Vertical Ergonomic Mouse (V638) comes with the following included in the box:

  • Wireless Vertical Ergonomic Mouse
  • Optional Palm Rest
  • User Manual
  • Business Card Insert
  • USB Nano Receiver
  • USB Charging Cable

Dimensions

Like other vertical computer mouses, the V638 is bulky. It measures around 5.8 inches in length, 3.7 inches in width and 3.9 inches in height.

Comfort

We previously used the Anker Ergonomic Optical USB Wired Vertical Mouse before moving over to the J-Tech Digital Wireless Vertical Ergonomic Mouse. We found that the V638 is more comfortable due to the extra groove that gives less strain to our right pinky finger. It is more rounded overall; so, you don’t have to worry about having your fingers straightened out for long hours.

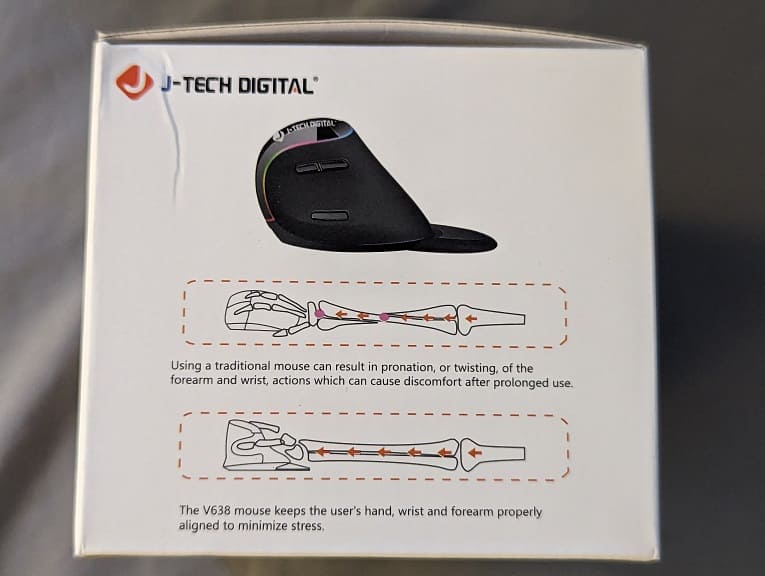
If you are transitioning from a traditional flat mouse to a vertical mouse, then it may take some time to get used to bulky shape. With that said, you should eventually experience less strain and discomfort on your hand, wrist, forearm and elbow with a vertical mouse.

Palm Rest

The J-Tech Digital V638 comes with a palm rest that can be attached to the bottom of the mouse. Based on our experience, the rest does not stay connected even if the magnets are aligned; instead, it would come off rather easily. Not to mention that it makes the mouse harder to glide due to the added weight.

In our case, we ended up removing the optional part relatively quickly and, instead, used the mouse with a gel-based wrist rest.

Installation

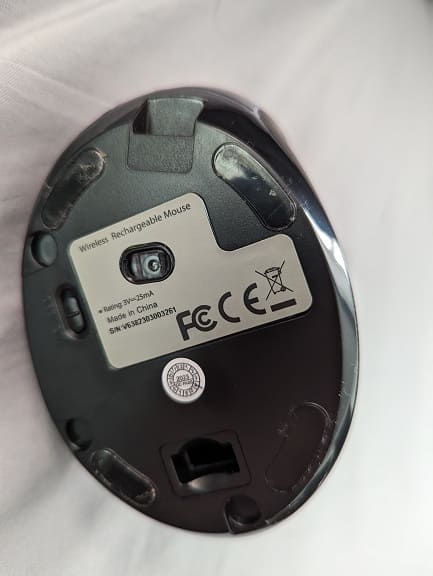
To install this device, you first need to charge its battery right out of the box for at least 2 hours. Afterwards, remove the USB Nano Receiver located at the bottom of the mouse and then insert it into one of the USB slots on your computer.

At this point, you can choose whether or not to attach the palm rest to the bottom of the mouse.

Once you have everything set up, flip the power switch located at the bottom of the mouse from Off to On. The computer should automatically detect the mouse and you should be able to use it right away.

Wireless Range

The V638 uses 2.4G wireless to communicate with your computer via the USB Nano Receiver. It has a range of around 15 feet. With that said, obstacles and other nearby wireless devices could weaken the wireless connection. Thus, you should make sure that the line of sight is clear while also avoiding putting any wireless devices from within the path if possible.

We have no issues so far as the mouse is within two feet of the USB Nano Receiver that is connected to our PC.

Buttons

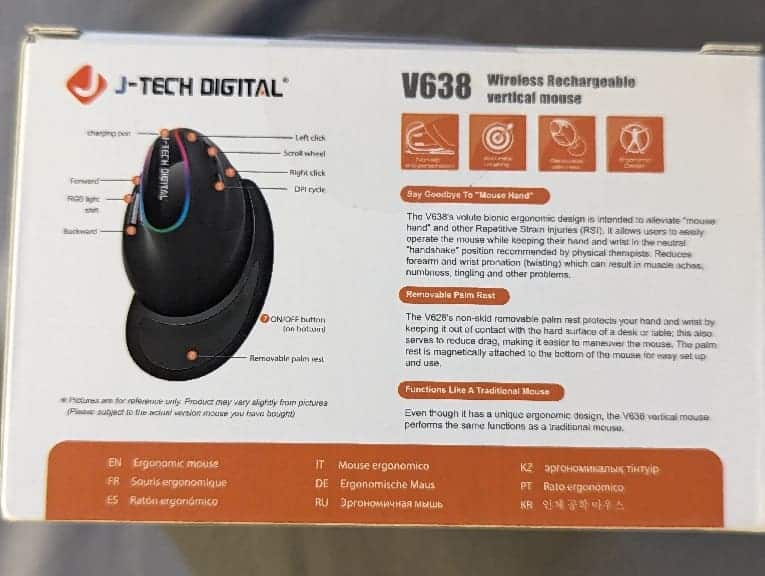
On the thumb side, you will have access to the Forward, Backward and RGB Light Shift buttons. On the right side of this vertical mouse, you have access to the Left Click, Right Click, Scroll Wheel and DPI Cycle buttons.

So far, the buttons have worked well so far as they feel tactile in addition to being responsive.

DPI and Polling Rate

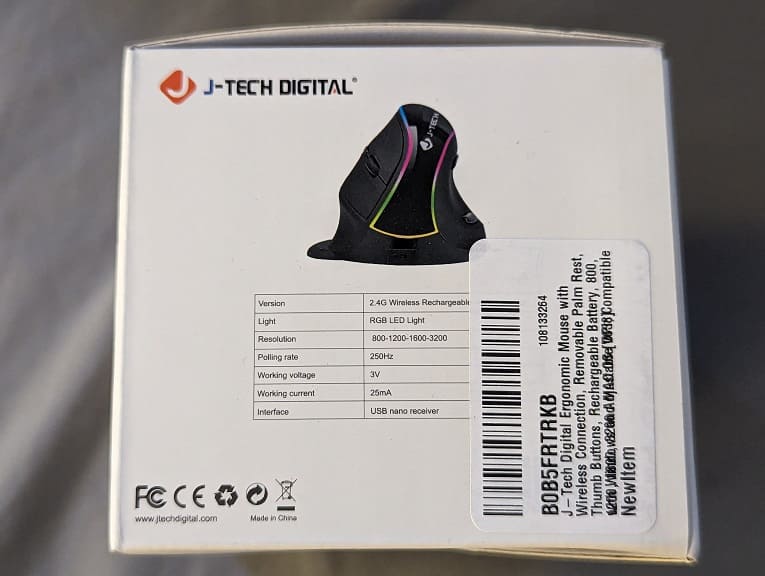
The J-Tech Digital Wireless Vertical Ergonomic Mouse (V638) uses a polling rate of 250 Hz along with the following DPI settings:

  • 800 DPI
  • 1200 DPI
  • 1600 DPI
  • 2400 DPI
  • 3200 DPI

Since vertical mouses are bulkier, you may want to increase the DPI so that you won’t have to move around the V638 as much to move the pointer across the screen.

Battery Life

The mouse comes with a built-in rechargeable 800mA lithium battery that should provide many hours of usage per full charge.

The amount of battery life varies depending on how you use the input device. For example, if you use it on a darker surface, then the battery will drain faster as opposed to a lighter colored surface.

We mostly keep the device plugged into a separate USB port on our PC; therefore, there is no need to worry about having on remaining battery during potentially crucial moments.

Power Saving Modes

To prolong the battery life, the J-Tech Digital V638 features three power saving levels.

The first level will make the mouse go into sleep mode when the mouse stops moving. You can wake the device by simply moving it.

For the second level, the mouse will enter into sleep mode after 70 seconds of inactivity. It will wake up again once it detects movement.

For the third level, the mouse will go into sleep mode after 15 minutes of non-usage. You can click any button to wake it again.

USB Charging Cable

The USB charging cable that comes with the J-Tech Digital Wireless Vertical Ergonomic Mouse (V638) feels somewhat flimsy. Furthermore, it is only around 3-feet long; so, if your computer isn’t close enough, then you may need to get a longer charging cable if you want to use the mouse and charge it at the same time.

Recap

Overall, we found the V638 to be a cheap and affordable option when it comes to using a daily for work. You can find our Pros and Cons for the product below:

Pros:

  • Affordable pricing
  • Comfortable shape
  • Multiple DPI settings
  • Tactile and responsive buttons
  • Power saving modes to prolong battery life

Cons:

  • Palm rest gets loose easily and interferes with the gliding
  • USB charging cable too short and flimsy

If you are interested, you can purchase the J-Tech V638 Digital Wireless Vertical Ergonomic Mouse on Amazon with this link (#CommissionsEarned).

Skull & Co. Skin, CQC and FPS Thumb Grip Set review

If you are looking for a thumb stick and/or analog cover, then you may have found the Skin, CQC and FPS Thumb Grip Set from Skull & Co. during your search. So, is this three-set bundle worth it? You can find out in this review article at Seeking Tech.

Compatibility

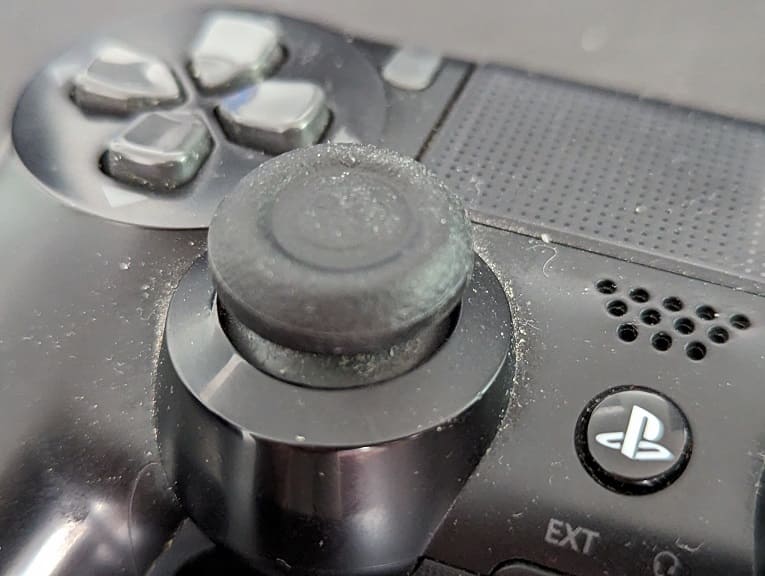
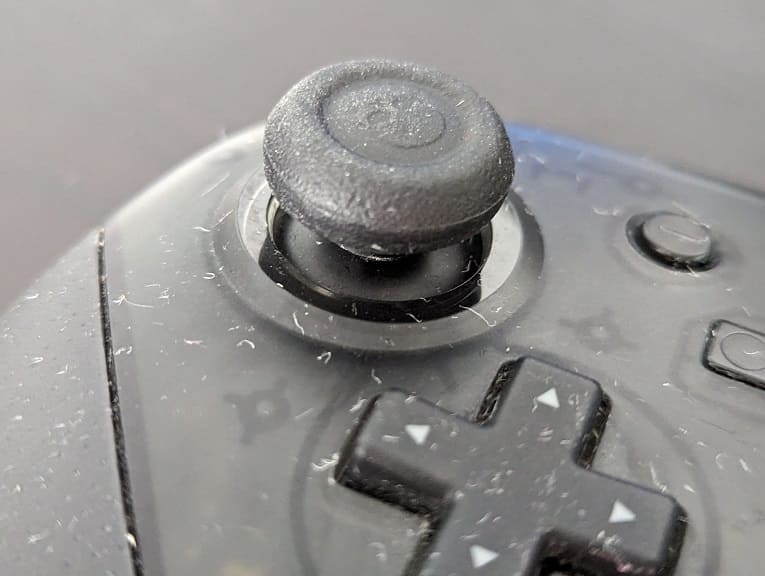
The Skin, CQC and FPS Thumb Grip is mainly advertised for the DualShock 4 and DualSense controller although Skull & Co. has stated that these covers should work well with the Nintendo Switch Pro controller as well.

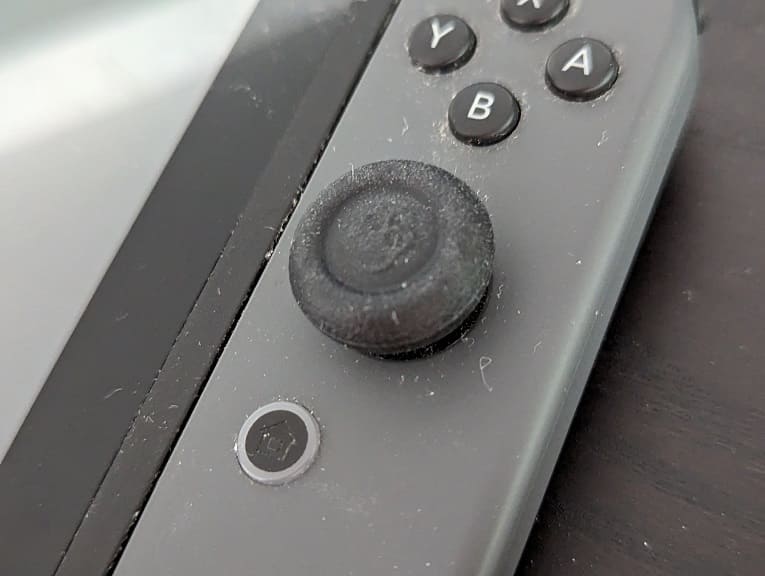
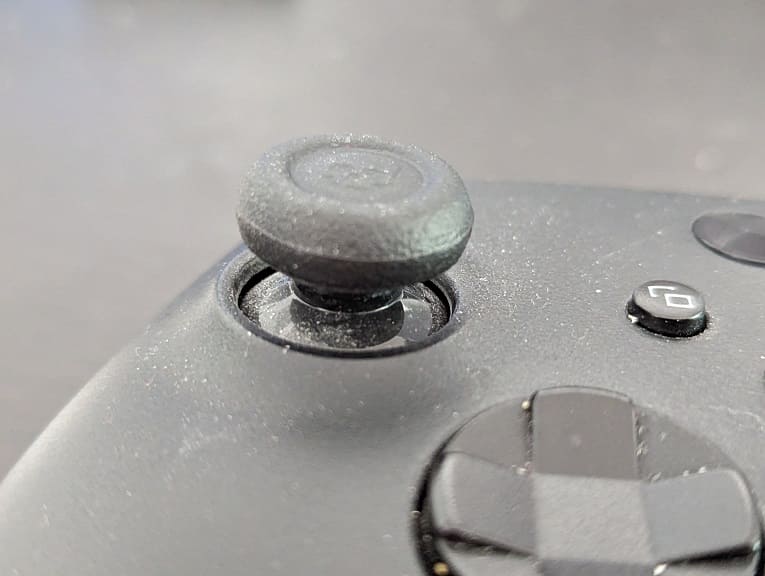
We also tested the grips on the Xbox Series X controller and Nintendo Switch Joy-Con. While not optimal, they are usable.

Installation

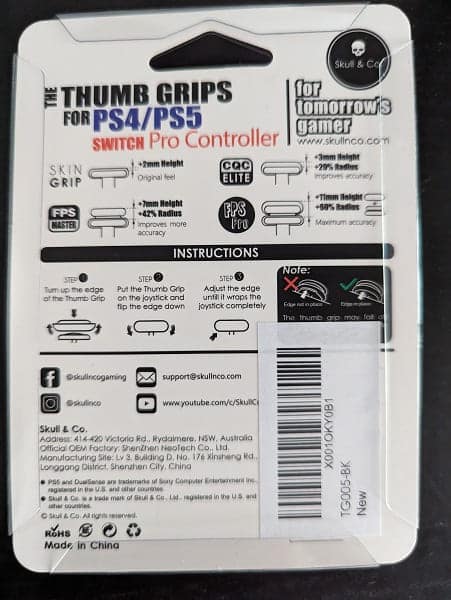
Attaching the grips on to the analogs is relatively easy. In order to do so, you have to turn up the edges of the covers all the way outwards, push the middle of the cover down the analog stick making sure you align it correctly and then make sure that the edge wraps around the analog completely when you unfurl it.

It took us a couple of tries to properly install the grips. You should make sure that the edge has been completely set in place at the bottom of the analog: otherwise, the covers will easily fall off.

Grip Types

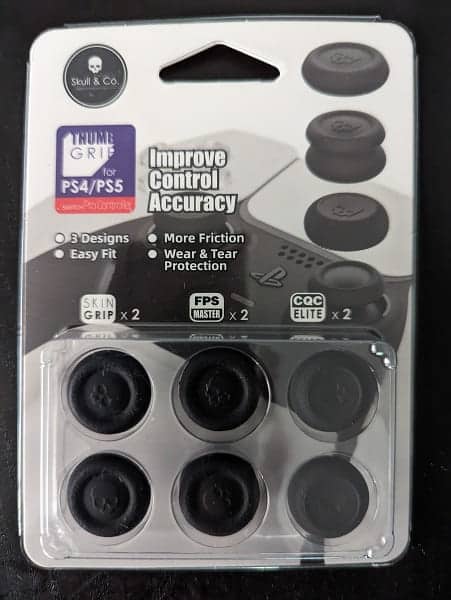
This bundle come with three grip types:

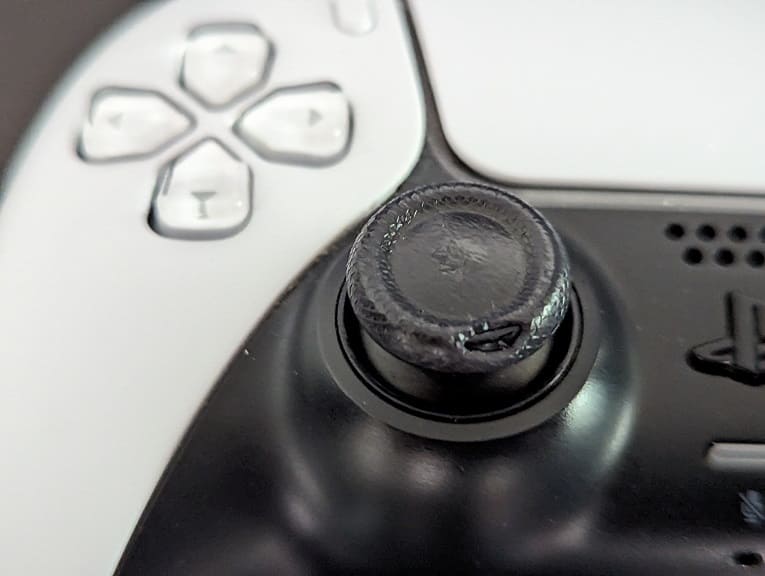
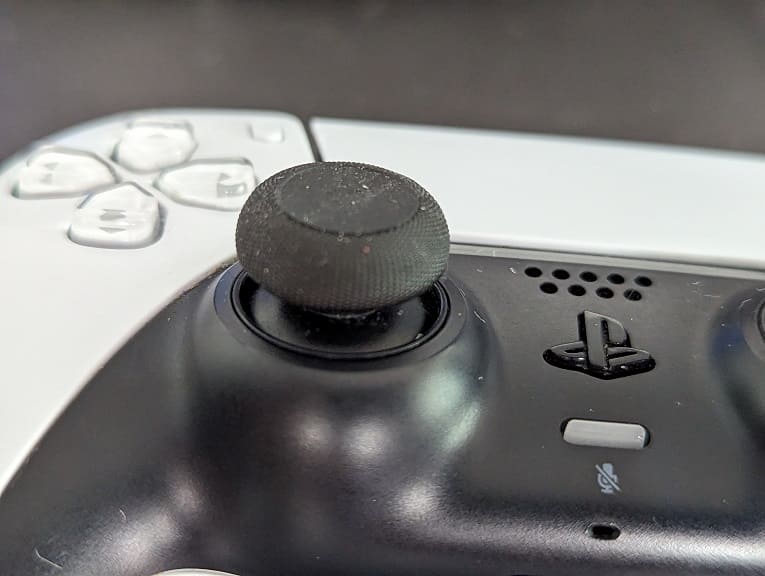
The Skull & Co. Skin Grip adds 2 mm of additional height to the analog stick. This provides the most natural feel as you should barely notice any difference when it comes to height. We used this for our DualSense analogs as the original top of the left stick started to peel off.

The Skull & Co. FPS Master Grip adds 7 mm of additional height, which the company claims to improve accuracy by increasing the movable radius by 42%.

The Skull & Co. CQC Elite Grip adds 11 mm of additional height, which supposedly increases the movable radius by 60%.

We found that the extra height added by the FPS Master Grip takes a little bit to get used to but ultimately felt comfortable with it. The taller CQC Elite Grip feels more uncomfortable for us, however, and may take even more time to get used.

As for improving the movable radius, we didn’t notice any difference. Most modern videogames already have sensitivity settings for the analog movements anyway; so, this feature seems a little redundant to us.

Summary

The Skull & Co. Skin and CQC Thumb Grips are both good replacements if you happen to damage the analogs of your DualSense, DualShock 4 and/or Nintendo Switch Pro Controllers. The FPS Thumb Grips are more uncomfortable when compared to the other two due to the added height.

We didn’t notice any performance improvements when it comes to the supposed increased moveable radius.

Since you get three pairs of covers in a relatively affordable set, we recommended picking this product up if you are looking for analog covers. Just don’t expect them to improve your gaming performance too much if at all.

If you are interested, you can purchase the Skull & Co. Skin, CQC and FPS Thumb Grip Set on Amazon with this link (#CommissionsEarned).

Is the Crucial P5 Plus with Heatsink worth it for PS5?

If you are looking for a compatible M.2 solid state drive where you can store and play PlayStation 5 games, then you might want to consider getting the Crucial P5 Plus.

You can check out Seeking Tech’s review for this storage drive, when it is being used with the PS5 console, to see if the product is good enough.

Meeting the PS5 M.2 SSD Requirements

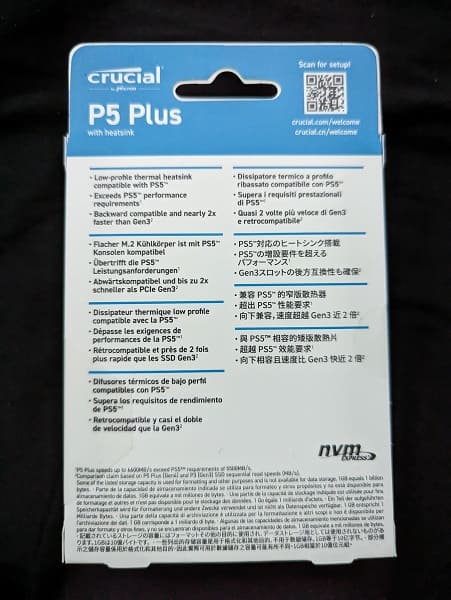
The Crucial P5 Plus meets all the requirements to be used as an additional storage option for PlayStation 5 games.

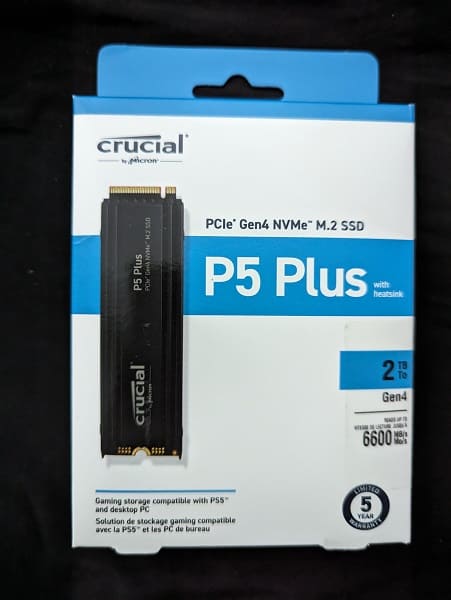
The SSD uses the M.2 2280 form factor, PCI-Express Gen4x4 NVMe interface in addition to a Socket 3 (Key M) connector.

With the heatsink installed, it is also small enough to fit within the 25 mm maximum width, 110 mm maximum length and 11.25 mm maximum height of the M.2 dock bay of the PS5.

The P5 Plus is also advertised with a reading speed of up to 6,600MB/s, which is more than the recommended 5,500MB/s for a compatible PS5 M.2 solid state drive.

Heatsink

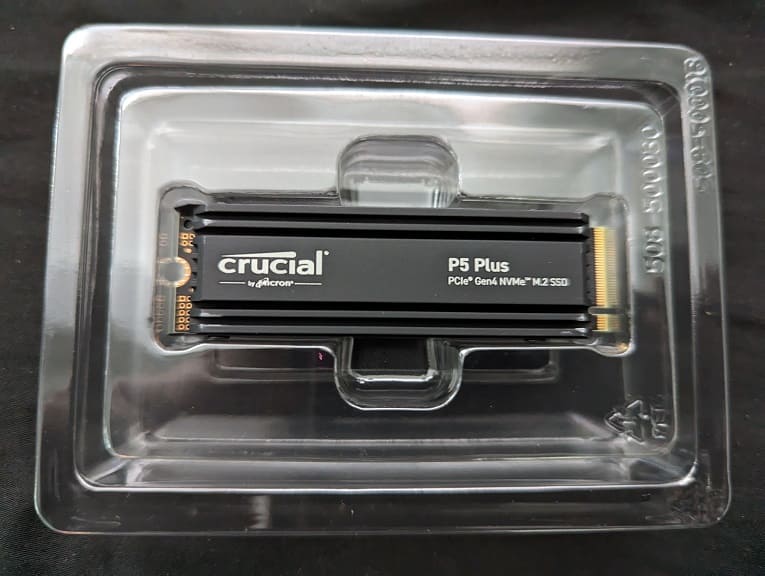
The Crucial P5 Plus comes with a variant that has a heatsink already pre-installed right out of the box. This saves you the trouble of finding a compatible heat reduction add-on as well as having to carefully install it on the solid state drive.

Installation

Inserting this SSD in our PlayStation 5 proved to be a little troublesome for us although most of the issues may be from our lack of experience.

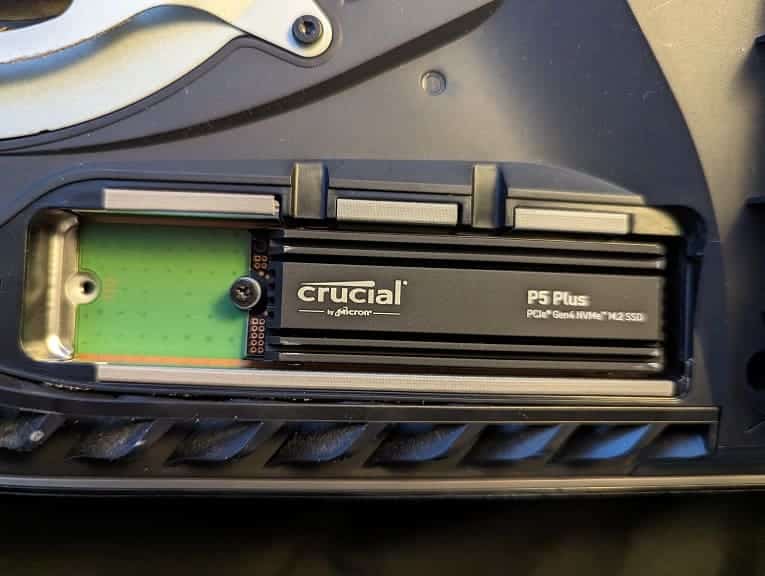
To install the Crucial P5 Plus, you need to take off the top cover of the PlayStation 5, remove the metal cover of the M.2 expansion bay and then insert the SSD into the slot.

To insert the P5 Plus, you have to do so from a diagonally upwards position at around a 30 degree angle. You should be able to feel and hear it click into the slot. This process took us several tries to get right with the storage drive.

If you inserted the drive incorrectly, then you may end up seeing the “Can’t access your M.2 SSD” error message. To see how you can make this message go away, you can check out this troubleshooting article.

Formatting

Once you inserted the drive correctly, the PlayStation 5 should let you know that you need to format it before you can start using the SSD as a storage option.

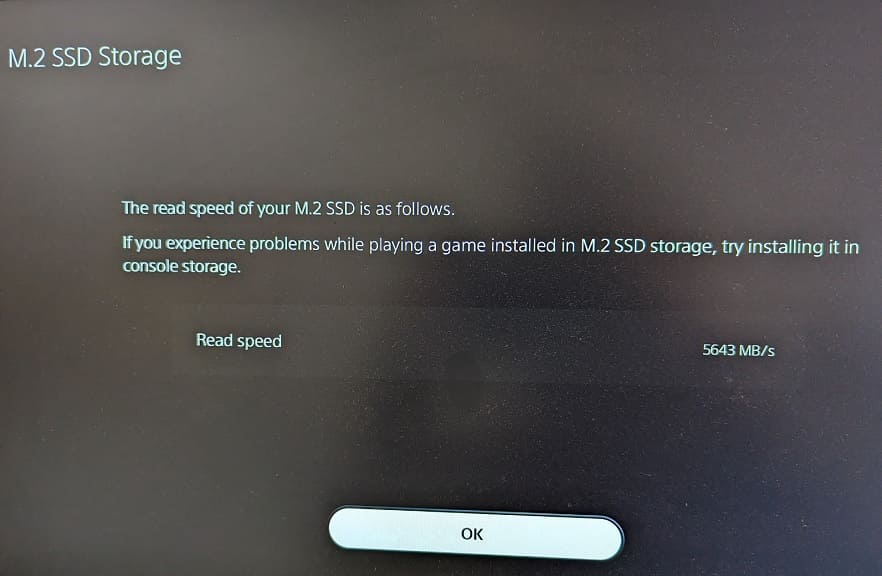
This process is automated. Once it is done, you should see the reading speed as detected by the PlayStation 5. The number can be somewhat different every time you do a reformat. In our initial setup, the speed was 5,623MB/s, which is faster than the recommended 5,500MB/s to be able to play PS5 games.

Storage Space

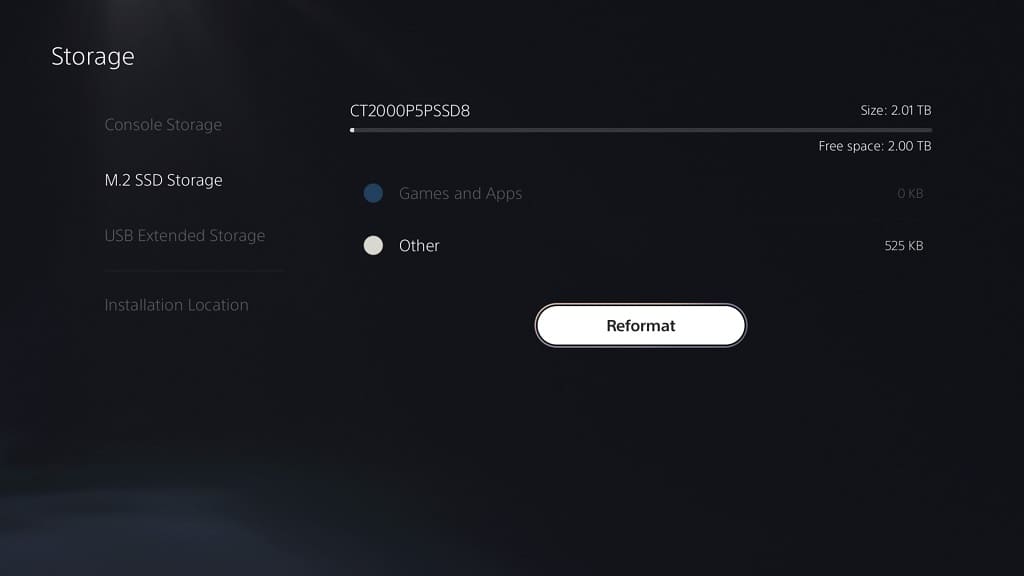
We installed the Crucial P5 Plus 2TB Gen4 NVMe M.2 SSD Internal Gaming SSD with Heatsink in our PlayStation 5. If you open the console’s Settings menu and then navigate over to Storage > M.2 SSD Storage, you should be able to see the total size and free space of the P5 Plus.

In our case, the 2TB P5 Plus (which is referred to as CT20000P5PSSD8 in the PS5 menus) has a total size of 2.01 TB with a free space of 2.00 TB with nothing installed.

Performance

So far, the Crucial P5 Plus SSD with Heatsink has worked flawlessly when playing the PlayStation 5 games that we have installed on it. The loading times, at least in our eyes, appear to be the same as when running the same game using the console’s internal storage.

When transferring games to and from the P5 Plus to the PS5’s console storage and vice versa, the progress was lighting quick as well.

By going to Settings > Storage > Installation Location, you will be able to tell the PS5 to download and install future games directly to the P5 Plus. We recommend doing this so that you don’t wear down the console’s solid state drive as these are soldiered directly to the motherboard and can’t be removed. So, if the console’s SSD is no longer working, then you need to replace the entire console as opposed to simply inserting a new M.2 solid state drive.

For the uninformed, every solid state drive has a Terabytes Written (or TBW for short) limit, which is the maximum amount of data that can be written on the drive over its lifetime. This is a general specification as the SSD may die off sooner or last longer.

Recap

Once you get past the installation phrase, which can be somewhat difficult if you have never inserted a M.2 SSD on your PlayStation 5, then the Crucial P5 Plus SSD with Heatsink should work without any noticeable performance issues.

So, if you are looking to expand the storage of your console, then we suggest that you pick up the Crucial P5 Plus SSD. If you are interested, you can purchase the PS5-compatible storage drive on Amazon via this link (#CommissionsEarned).

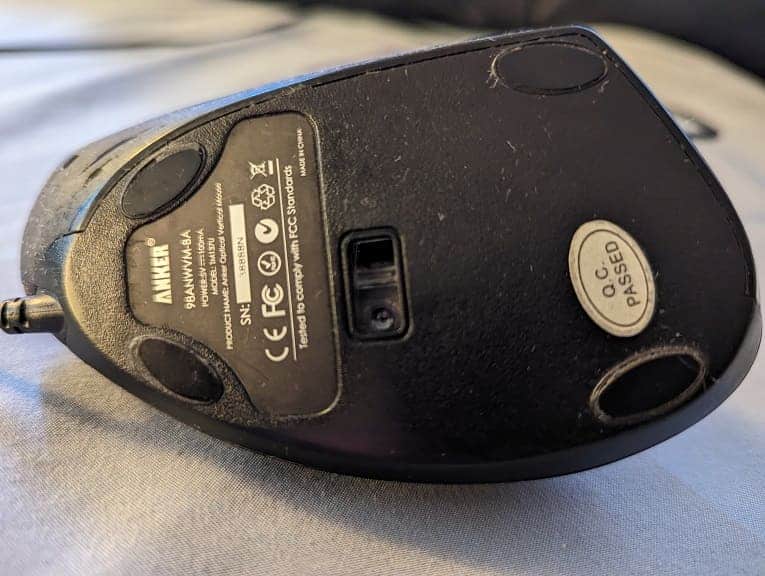
Anker Ergonomic Optical USB Wired Vertical Mouse review after 9 years of usage

The Anker Ergonomic Optical USB Wired Vertical Mouse is designed for comfort, which of course is very important if you spend all day working on a computer. We have been using this input device for nearly a decade and couldn’t have been happier.

To see whether or not the Anker Ergonomic Wired Vertical Mouse is worth it for your, you can check out this review from Seeking Tech.

Weight

This mouse weighs in at 5.3 ounces. As a result, it should be able to glide easily without much effort on your end.

Dimensions

In terms of dimensions, the maximum length for the Anker Ergonomic Optical USB Wired Vertical Mouse is 120 mm (or 4.8 inches) while the width is measured at 62.8 mm (or 2.5 inches). Being a vertical mouse, the device measures at 74.8 mm (or 2.94 inches) in height.

Cable Length

The mouse comes with a USB cable that is around 4.9 feet, or 1.5 meter, long. This is sufficient enough for us since the computer sits right next to us.

If your PC is further away, then you may need to get a USB extension cable, USB hub or any other USB pass-through device. Otherwise, you may experience some drag.

Comfort

When transitioning from a normal flat mouse, the Anker Ergonomic Optical USB Wired Vertical Mouse may take some time to get used to as the grip is different. Not to mention that it is bulkier to hold.

However, we eventually got used to the shape and found the vertical mouse to be a lot more comfortable than using a normal mouse.

When using a flat mouse, we found our shoulder, wrist, forearm and hand would constantly flare up and strain. We would end up taking constant rest breaks, which affects our efficiency when it comes to working.

If you pair the Anker Ergonomic Wired Vertical Mouse with a wrist rest, find a way to also rest your elbow and learn how to properly sit while working on your computer, then pain and discomfort on your arms should go away.

Buttons and Scroll Wheel

This mouse comes with five standard buttons in addition to a scroll wheel.

Your index finger should have access to the left mouse click button while your middle finger will be placed on the right mouse click button.

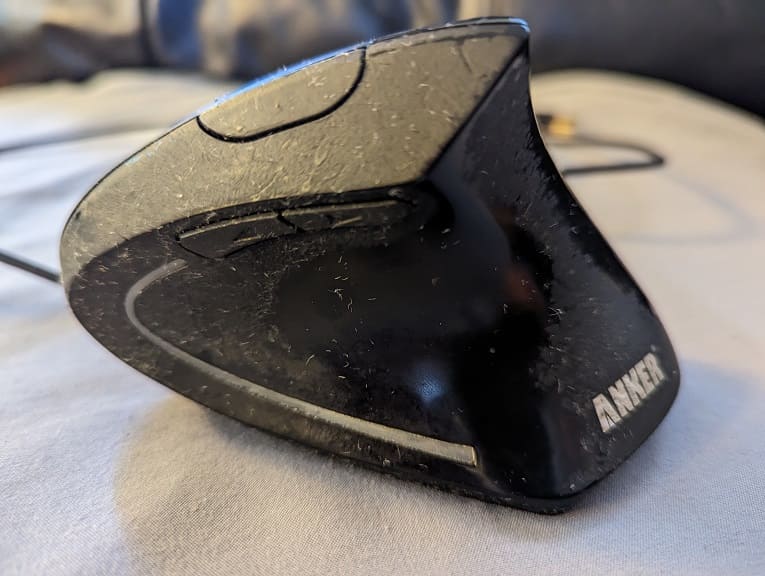
Your thumb will have access to the Next Page Button, Previous Page Button and DPI Switch Button.

After 9 years of continuous daily usage, the clicks and buttons hold up very well and function as intended.

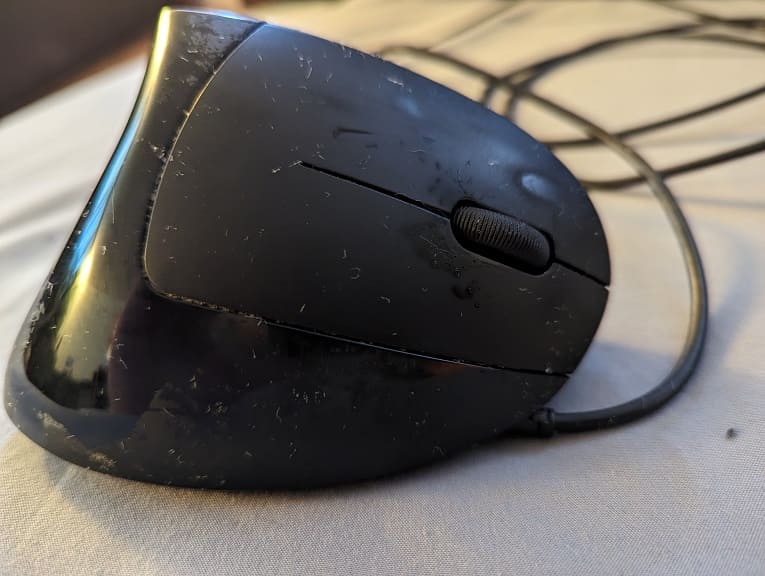
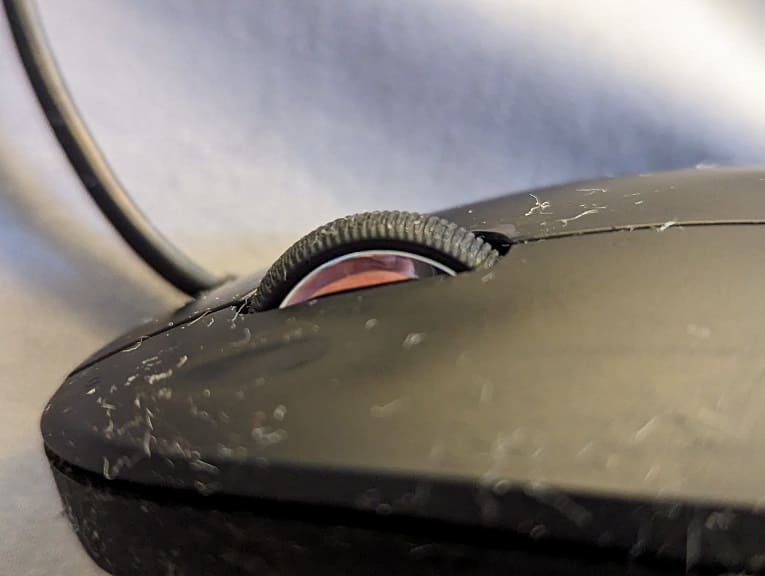
Our main issue, in terms of durability, is the scroll wheel. Once this wheel gets dirty and/or worn down, it will malfunction. When we use it to scroll down, it will eventually scroll up momentarily on its own. When we try to scroll upwards, it will also scroll down for a brief moment.

Over the years, we were able to fix the scroll wheel by cleaning any dust particles and grimes off of it. After nearly a decade, however, thorough cleansing wasn’t enough to fix the scrolling problems. As a result, we ended up getting a new mouse.

DPI

You can use the aforementioned DPI Switch Button to change the sensitivity of the mouse cursor. You will be able to switch between the 1000 DPI or 1600 DPI Resolutions.

Optical Sensor

The Optical Sensor has worked well as long as we maintained a clean surface. The mouse cursor would be unresponsive or register the wrong movements if dust particles get stuck next to it. Once we blew away the dust with our mouths, the sensor worked as intended.

Coating

Over the years, the matte coating of the Anker Ergonomic Optical USB Wired Vertical Mouse slowly faded away to give way to a glossier finish. If your hand prefers a matte surface over a smoother one, then you may need to replace the mouse sooner than us.

LED Light

The mouse also features an LED light on the side. This light may flicker and eventually die out after years of usage.

With that said, it has no performance impact. We also personally never pay much attention to the LED as we spend a vast majority of the time looking straight at the computer monitor instead.

Recap

Overall, we got more than more money’s worth with the Anker Ergonomic Optical USB Wired Vertical Mouse as it provided incredible comfort for 9 years before needing to be replaced.

To recap the review, you can find our pros and cons below:

Pros:

  • Ultra comfortable, especially when supplemented by wrist and elbow support in addition to a proper sitting position.
  • Optical sensor, buttons and clicks still work as intended after 9 years.

Cons:

  • The scroll wheel will malfunction if it gets dirty and eventually becomes unusable.
  • The matte coating surface will fade away eventually.

If you are interested, you can purchase the Anker Ergonomic Optical USB Wired Vertical Mouse on Amazon with this link (#CommissionsEarned).

Official Google Pixel 6 Case review

The Google Pixel 6, Google Pixel 6a and Google Pixel 6 Pro smartphones have extremely slippery surfaces. As a result, these devices can easily slip through your fingers. If it falls down to a hard surface, then it may cause visible damage. To combat the slipper exterior, Google has an official case that makes the phone easier to grip. Of course, the case also provides protection against shocks and drops.

So, are the official Google Pixel 6, Google Pixel 6a and Google Pixel 6 Pro cases any good when it comes to long term usage? You can find out in this review from Seeking Tech.

Grip

As we stated above, one initial benefit that we noticed immediately is that our Google Pixel 6 phone becomes much easier to hold. The thermoplastic elastomer exterior of the official case is rubber-like, which gives us a better grip when compared to the glossy finish of the smartphone.

Protection

The official case did a great job in absorbing shocks and drops initially. The inner polycarbonate kept our phone free of scratches.

Keep in mind that the cause will not fully protect the screen. Although it has raised edges that will help, the screen can still easily make contact with another object at certain angles.

Ports, Button and Camera Accessibility

The official Pixel 6 cases give you full access to the power and volume buttons. There are also holes at the bottom to accommodate the USB-C charging port to go along with the holes the two speakers. Moreover, the is also a big hole for the camera lens at the top.

Durability

The biggest issue we have with the official Google Pixel 6 case is durability.

The area with the power and volume buttons started to warp within a year. As a result, this makes these buttons harder to push and dust, dirt and other particles ended up getting to the case. Otherwise, the case was still protection our smartphone for many months after we noticed to warping.

Since our device was getting dirtier due to the warped edge of the power and volume buttons, we would occasionally remove the case in order to clean the phone. This eventually led to another issue as the top of the case ended up cracking.

More cracks started to appear and expand, leading to the thermoplastic elastomer exterior to warp with massive air bubbles. The inner polycarbonate also no longer fits our Pixel 6.

Unfortunately, our case ended up being so badly damaged in our phone would frequently fall completely out of the case and hit our face when we were holding it while lying down. Fed up, we eventually switched to another brand.

Recap

While the official Google Pixel 6 cases work well initially, the outer edge of the case started to warp after several months. It will eventually start to crack as well, which led to us having to replace it in less than two years of usage.

Along with the higher price tag when compared to the competition, we felt that we didn’t really get our money’s worth.

Instead of getting the official Pixel 6 case, we recommend that you go with cheaper alternatives. Even if those fail to provide long-term protection as well, they will be less expensive failures.

PlayStation VR2 cinematic mode review

In addition to playing virtual reality games, you can use the PlayStation VR2 as an extra screen via its cinematic mode. So, is the headset worth getting just for its flat screen display capabilities? You can find out in this review article from Seeking Tech.

Clarity

In cinematic mode, the resolution output is limited to 1080p. With that said, the actual image quality is blurrier than what you see if you are viewing a 1080p content on a television set.

This is the biggest issue we have with the PS VR2 cinematic mode as there is a noticeable drop in clarity, especially on the edge of the virtual screen, when compared to viewing the same content on a regular TV or monitor.

OLED

The PlayStation VR2 uses OLED technology. As a result, you will get deeper colors, especially when it comes to the black color output.

While it doesn’t compare to OLED televisions, it should still look great against LCD and LED screens when it comes to displaying HDR games and videos.

120 Hz Refresh Rate

One of the better features of the cinematic mode is its ability to display content at up to 120 frames per second. Up until the past few years, most television sets are only limited to 60 fps.

Games running at 120 fps will look even smoother with less input lag. Therefore, this feature is great for competitive gamers.

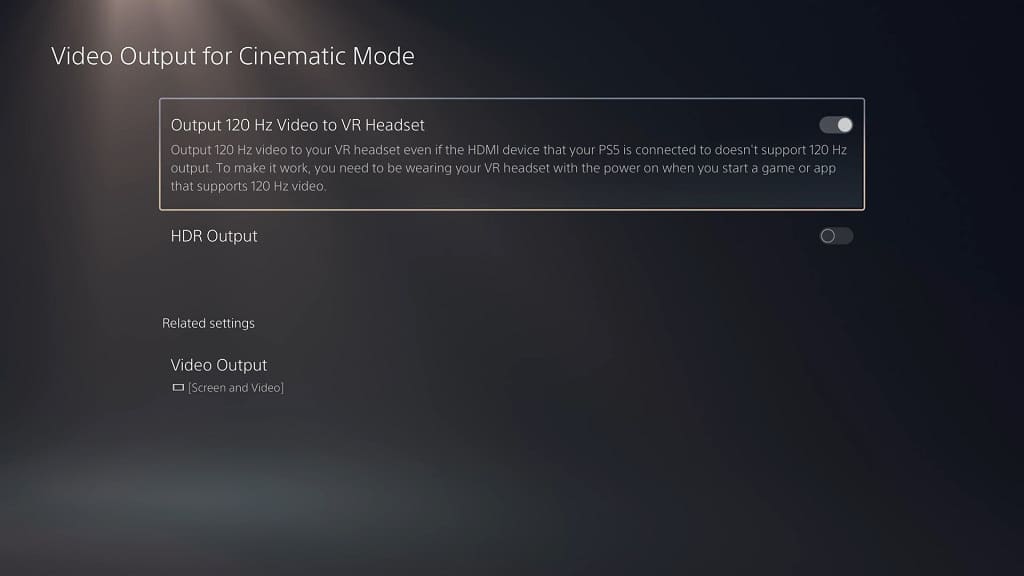
To see how you can enable the 120 Hz refresh rate support when viewing flat screen content with this virtual reality headset, you can check out this tutorial.

No VRR Support

On the flip side, the PlayStation VR2 doesn’t support Variable Refresh Rate. This helpful feature helps a game look smoother as long as it can maintain a frame rate of at least 48 fps.

As a result, the frame rate dips will be more noticeable when using the virtual reality headset as opposed to a flat screen that supports VRR.

Immersion

In the cinematic mode of the PS VR2, you will see a black void surrounding the screen. If you decide to use earphones or headphones, then you should easily be able to block out any visual and audio distractions from the real world.

You will end up being fully immersed in the video you are viewing or game you are playing. As its name suggest, the mode feels like you are playing a game or watching a video on a big movie screen at a theater.

Recap

The biggest benefits of using the PlayStation VR2 cinematic mode is its OLED display, 120 refresh rate and immersion.

On the other hand, you should not expect a sharp image quality as it can only display content at 1080p. Not to mention that the video output may even look blurrier when compared to viewing 1080p content on a TV or monitor. This mode also does not support VRR.

Overall, we found that the cinematic mode to be a neat extra benefit, especially if you don’t have an OLED television that has a 120 refresh rate. If you want to be fully immersed yourself in a flat screen game or movie, and don’t mind the drop in image clarity, then you may want to try out this mode once in a while.

With that said, you shouldn’t expect this cinematic to replace your 4K TV or monitor if you care about resolution.

Is the PlayStation Store $100 Gift Card + Free Sony Headphones bundle worth it?

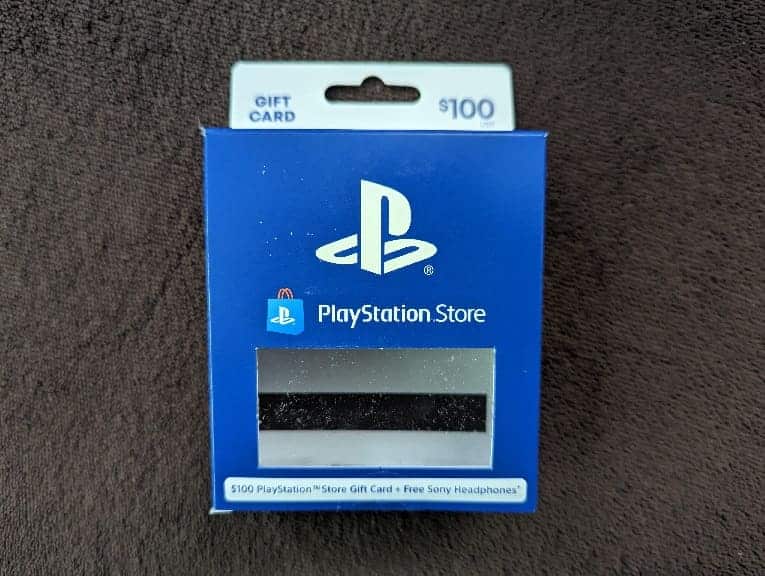
When looking for a PlayStation Store Gift Card at Best Buy, you may notice the PlayStation Store $100 Gift Card + Free Sony Headphones bundle. So, is this product worth purchasing if you are looking to add funds to your PlayStation Store wallet?

You can find out in this review article at Seeking Tech.

About $100 PlayStation Store Gift Card

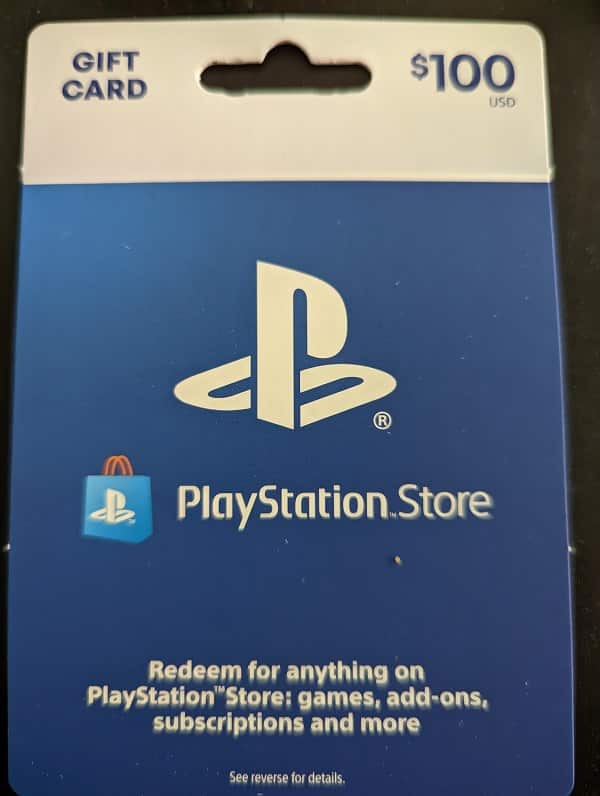
The first part of this bundle is the PlayStation Store Gift Card, which lets you add $100 to the digital wallet of your PlayStation Network account. You can then use the funds to purchase digital games, add-on DLC packs, subscription as well as other content from the PlayStation Store.

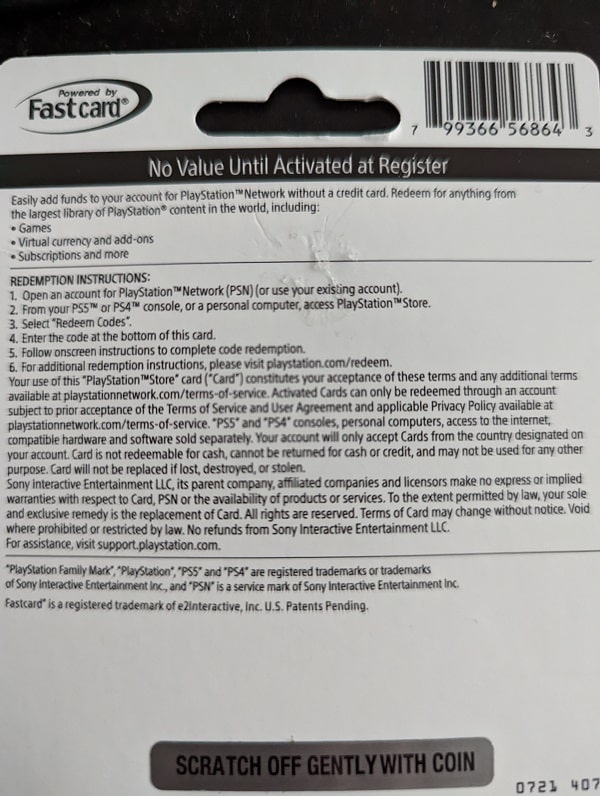
It is important to note that, if you purchase the bundle online from Best Buy, then the voucher won’t be sent to you via email. Instead, the code can only be found in a physical card from inside the packaging box.

You then need to scratch off the code and then manually input the string of letters and numbers into the redemption page on the PlayStation Store in order to add $100 funds to your PSN account.

So, if you are in a hurry trying to add funds to your PSN account, then buying this bundle online is not the fastest option. If you don’t mind waiting, however, then you will get a bonus gift.

About the free Sony Headphones

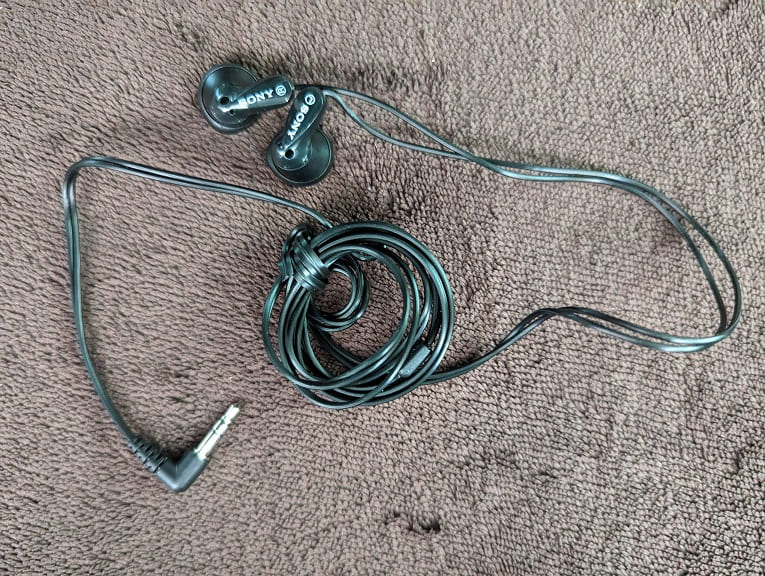
The free headphones that comes with the bundle is the black Sony MDR-E9LP Earphone. This accessory can be used with any devices that have an audio jack, including the DualShock 4, DualSense, PlayStation VR1 and PlayStation VR2.

Based on our experience, we wouldn’t recommend getting this as a standalone product as it feels cheaply made and seems to be very easy to break. It is also uncomfortable for us to wear as we prefer the in-ear earphones that have become more common in recent years.

The sound quality is also underwhelming as we definitely notice the tinny output with the occasional crackle.

As a result, we don’t recommend using the MDR-E9LP as your primary listening device for games, videos or audio. However, they should be serviceable as a temporary solution if your main headset, headphones or earbuds ends up breaking.

In terms of pricing, you can find the current price tag for the Sony MDR-E9LP Earphone as a standalone product on Amazon with this link. (#CommissionsEarned).

Overall

If you don’t mind waiting for the PlayStation Store $100 Gift Card + Free Sony Headphones bundle to get shipped to you via Bestbuy.com (or having to purchase it from a brick-and-mortar Best Buy store), then we recommend purchasing this product.

While the extra earphone that comes with the gift card is cheaply made, feels uncomfortable to wear and has poor sound output quality, it is serviceable enough to have as a temporary backup option if your main listening device needs to be repaired or replaced.

Is Xbox Live Gold worth it for Xbox Series X and Xbox Series S?

If you bought an Xbox Series X or Xbox Series S console, then you might be considering whether or not to get Xbox Live Gold. You can check out this review from Seeking Tech to see if this subscription service is worth it for these gaming system.

Online Multiplayer

The biggest factor you should consider is online multiplayer. Xbox Live Gold is required if you want to play premium games with other players over the Internet.

While this is now common for console gaming with Nintendo Switch Online for the Nintendo Switch and PlayStation Plus for PlayStation 4 and PlayStation 5, this online paywall was first introduced by Microsoft with the original Xbox.

With that said, Microsoft recently amended the rules so that you are no longer required to be a member of Xbox Live Gold in order to play free-to-play games online. These titles include Apex Legends, Call of Duty: Warzone and Fortnite.

For games that aren’t free-to-play, however, you will need an active subscription to play with others over the internet.

Games with Gold

In 2013, Microsoft introduced the Games with Gold feature to Xbox Live Gold as a response to the monthly game offering of the PlayStation Plus.

With Games with Gold, you will gain full access to games you redeemed as long as you remain an active member of the service.

The only exception to this rule is Xbox 360 games as you can play any titles you previously redeemed from Xbox Live Gold without being currently subscribed. With that said, 360 titles are no longer a part of Games with Gold.

In the past, you can get as many as 4 games per month with this feature. However, that number has dropped to just two titles currently.

It is also important to note that, while Games with Gold would offer bigger named games in the past, this is no longer the case with the advent of Xbox Game Pass. Instead, the games being offered are lesser-known titles, especially when you compare what you get with the monthly game service on PlayStation Plus.

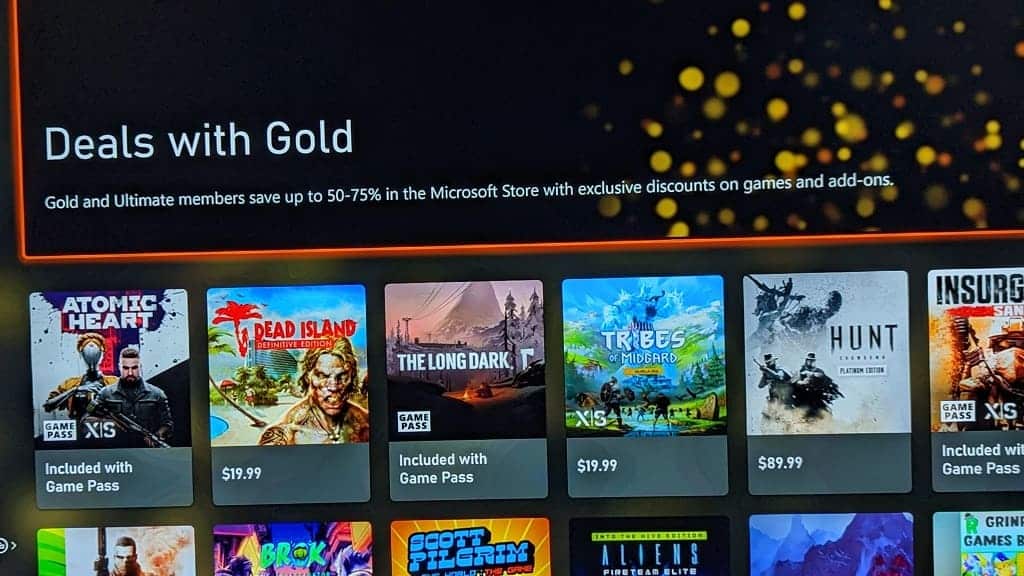
Deals with Gold

One last component you may want to take into account is Deals with Gold. With this feature, you can save some extra cash if you buy a lot of digital games from the Store App.

Some of the deals are either exclusive to Deals with Gold or offer an additional discount if you are a member of Xbox Live Gold.

What we like about Xbox Live Gold for Series X and S

The only real benefit for having Xbox Live Gold for Xbox Series X and Xbox Series S is the Deals with Gold as you can get great discounts on eligible titles.

What we don’t like about Xbox Live Gold for Series X and S

We don’t like most about Xbox Live Gold in the online paywall, especially when you consider that the first-party Microsoft games don’t require you to pay for online if you are playing on PC. On the Xbox Series X and Xbox Series S, you need to pay a monthly fee to play the same titles over the internet unless it is free-to-play.

While Games with Gold can offer some hidden gems, it pales in comparison to what was offered from the same service in the past. The collection is also much weaker than what you get if you have a PlayStation Plus subscription on the PS4 and/or PS5.

Overall

While Xbox Live Gold offers multiple benefits, it is not really worth the price of admission unless you want to consistently play games that require the online paywall throughout your subscription length.

The Games with Gold service only feature a pair of smaller titles that you most likely won’t be interested in. While Deals with Gold can be great, it requires you to spend money on the Store App in order to take advantage of this benefit. Not to mention that a lot of games go on sale anyway without Xbox Live Gold.

For the Xbox Series X and Xbox Series S, Microsoft has been putting all of their efforts towards Xbox Game Pass. If you don’t mind the added costs, the Xbox Game Pass Ultimate tier comes with all the Xbox Live Gold benefits to go along with giving full access to hundreds of videogames you can play on your Xbox console. Not to mention that you also have hundreds of titles available through cloud streaming or PC as well.

So, while Xbox Game Pass Ultimate is more expensive than Xbox Live Gold, it is also a vastly superior value proposition.