How to reduce the PlayStation VR2 screen door effect

When playing certain games with the PlayStation VR2, you may notice that there is a screen door effect. To see how you can potentially reduce this visual filter, you can take a look at this guide from Seeking Tech.

What is the screen door effect?

When you are looking through the PlayStation VR2 lens, you may notice that there is a grid overlay placed on top of the image. As a result, the graphics may appear as if you are looking through a screen door.

This effect occurs due to your eyes being extremely up close on the screen in the VR headset. You will notice the same effect if you look up close to your computer monitor and/or television screen.

The grids are actually tiny pixels that aren’t noticeable if you are looking at your monitor and/or TV at a normal viewing distance. Because you are looking up close at the lens of the PS VR2, the screen door effects become more noticeable.

Although the PlayStation VR2 has a resolution of 2000 x 2040 pixels per eye, which is significantly more than the 960 × 1080 pixels per eye of the first PS VR headset, the grid like filter can still be visible in certain virtual reality titles.

How to reduce the screen door effects in PlayStation VR2 games

The screen door effect varies on a game-by-game basis as some titles are more susceptible than others.

In some cases, you may be able to make the grids less visible by adjusting the brightness level. In order to do so, we suggest that you first look for the brightness slider from the in-game menu for the game you are playing.

If you aren’t able to adjust the brightness by using the in-game menu, then you can press the PS button on either the Left or Right PlayStation VR2 Sense Controller. From there, select the PlayStation VR2 Quick Settings card. You should then be able to adjust the brightness output of the VR headset.
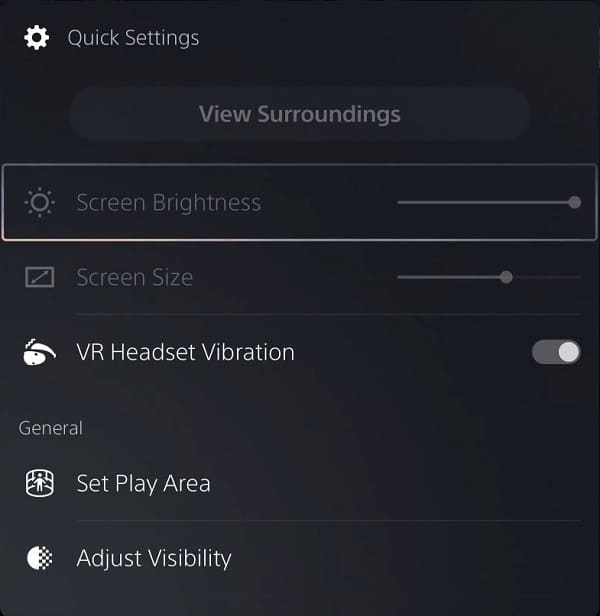
If the brightness option is greyed out, then you should make sure that you are wearing the PlayStation VR2 first before entering the PlayStation VR2 Quick Settings menu.

What to do if the PS VR2 screen keeps going black

If your PlayStation VR2 screen keeps going black, then you can check out this troubleshooting article from Seeking Tech to see how you can potentially fix this problem.

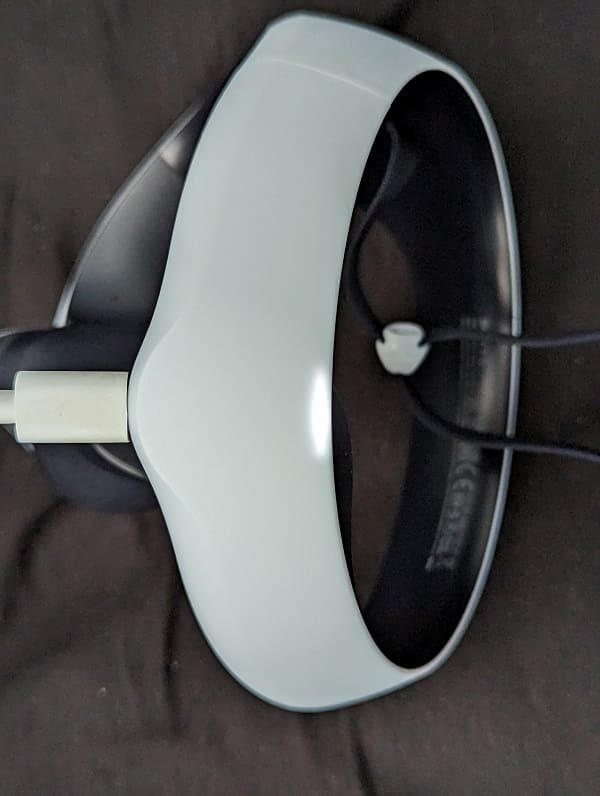
1. For the first step, you should make sure that the USB C cable of the virtual reality headset is securely connected on both ends.

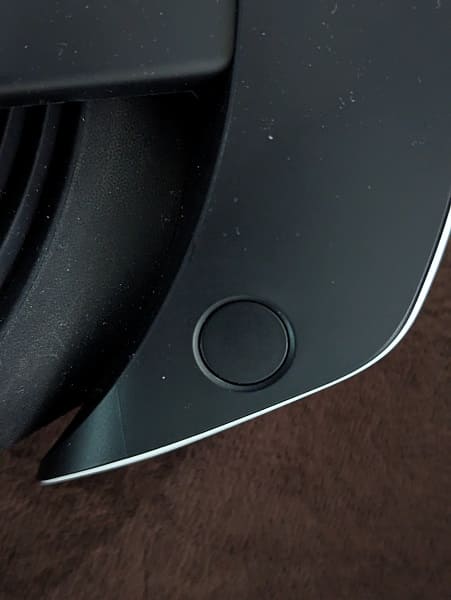
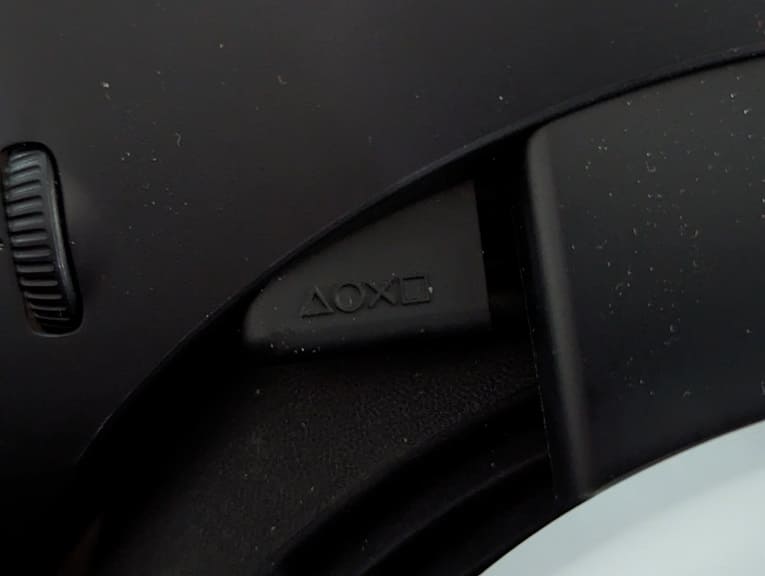
On the PlayStation VR2, you need to pull the scope outwards to find the USB connection. It should have the Circle, Triangle, Square and X symbols printed on it.

If this connection is loose, then you can try pushing it inwards.

2. Using a USB-C extension cable may cause the screen to go blank.

So, if you are using one, then we recommend that you remove it and then connect the PS VR2 headset directly to the PlayStation 5 console.

3. You can also try removing any other devices you have connected to the USB ports of your PS5.

4. The screen of the PlayStation VR2 may be turning off due to the VR headset overheating.

To see how you can prevent the temperature of this device from getting too hot, you can take a look at this previous guide.

5. Make sure you have the latest firmware downloaded for your PS5 as a new update may fix your screen issue.

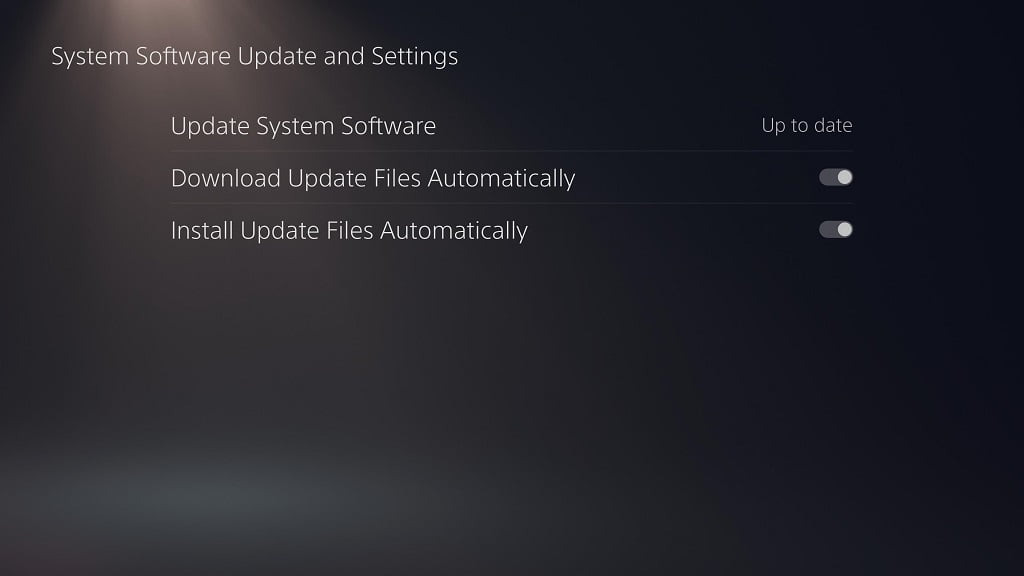
You can manually download an update by heading over to your console’s Settings menu and then selecting System > System Software > System Software Update and Settings > Update System Software > Update Using Internet.

6. If possible, try to test out your PlayStation VR2 headset on another PlayStation 5.

If the virtual reality headset works just fine on the other console, then there may be something wrong with the PS5. In this scenario, you will need to send the system in for repair.

If the screen is also going dark or turning off when it is connected to the other console, then you most likely need to send your PlayStation VR2 in for repair.

What to do if the PlayStation VR2 Sense Controllers won’t turn on

Most PlayStation VR2 games require the Sense Controllers. If these accessories do not seem to be powering on, then you can take a look at this troubleshooting article from Seeking Tech.

1. For the first step, we suggest that you try charging the Sense Controllers. If your PlayStation VR2 is brand new, then the internal batteries of its controllers could be depleted.

When recharging, you should use a compatible USB-C cable. For the best compatibility, you can use the USB-C charging cable that came with your PlayStation 5 and/or PlayStation VR2 headset.

Try to wait at least 15 minutes of charging before removing the USB-C cable from the Sense Controllers. Afterwards, press the PS button on the controllers to see if you see any lights appear.

2. It important to note that the Sense accessories will turn off right away if they aren’t connected to your PlayStation 5.

If you haven’t done so already, make sure you set up the PlayStation VR2 with your PS5. In order to do so, connect the virtual reality headset to the USB C port of the game console. Afterwards, turn on the console and then the PS VR2. The PS5 should detect the VR headset and then lead you through the rest of the setup process.

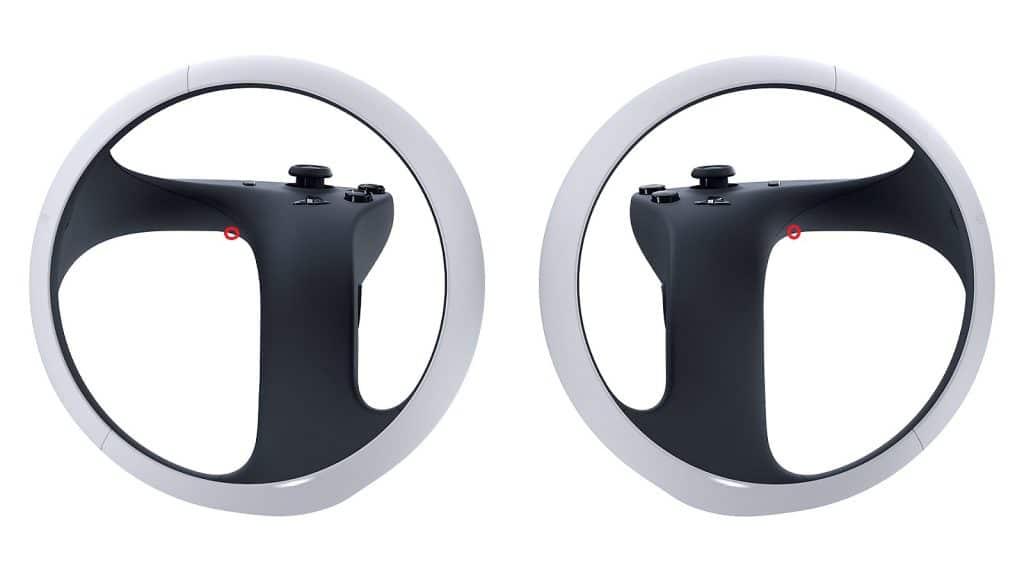
3. If the Sense Controllers still aren’t turning on, then you can try resetting them. To do so, you need to use a thin pin to push down on the reset button located at the bottom of the pin hole for at least 5 seconds.

The pinhole is located next to the L2 or R2 button on the backside. It may be hard to spot if your room isn’t brightly lit.

After resetting the controller, connect it to your PS5 via a USB cable and then press the PS button so that you can re-link it to the console.

4. If the left or right PS VR2 Sense pads still aren’t powering on, then there may be some hardware defect. In this case, you will have to send the controllers in for repair.

How to prevent lines from appearing on the PS VR2 screen

When playing with the PlayStation VR2, you may see lines appear on the screen of the lenses. Of course, this can be extremely distracting and take you out of your immersion while playing a game. To see how you can make these lines go away, you can take a look at this troubleshooting article from Seeking Tech.

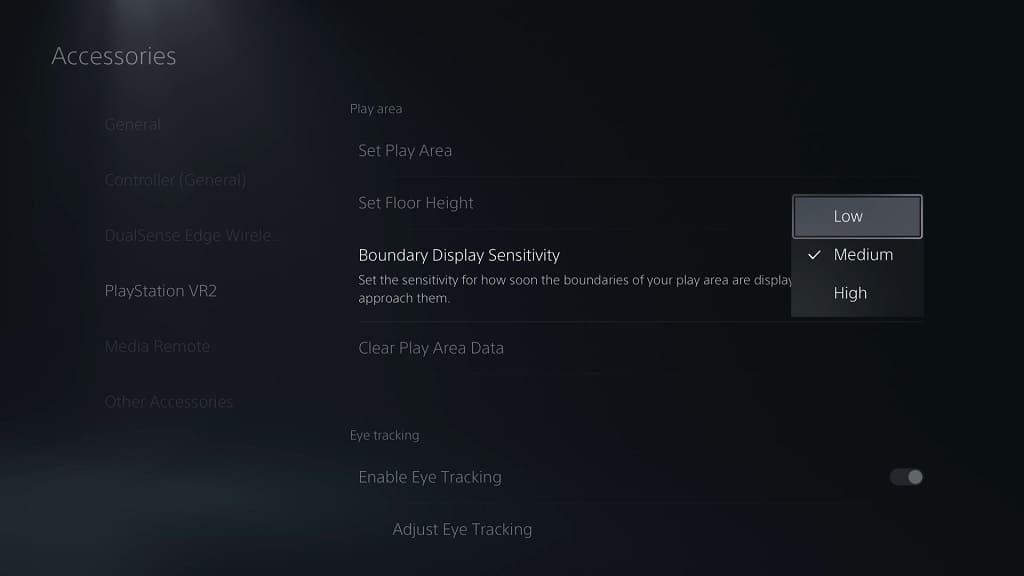
1. For the first fix, you can try setting the Boundary Display Sensitivity to Low. You can do so by taking the following steps:

  • Press the PS button to open the quick menu of your PS5.
  • Select Quick Settings from the quick menu.
  • Afterwards, scroll down and then select Other Settings.
  • In the Accessories > PlayStation VR2 menu, select Boundary Display Sensitivity.
  • Set the Boundary Display Sensitivity to Low.

By doing so, the white lines should show up less as the boundary setting won’t be as sensitive.

2. If you are still seeing the matrix like effects show up occasionally, then your play area may not be large enough. The good news is that you can manually edit your player area to increase its coverage, even beyond obstacles and walls.

In order to do so, you need to do the following:

  • Press the PS button to open the quick menu.
  • Next, you need to select Quick Settings.
  • You should then scroll down and select Set Play Area.
  • When asked how you would like to play with the PlayStation VR2, you need to select Stand Still and Moving Around.
  • Select the Reset Play Area option.
  • Once you get to the point where you can manually edit the play area, make sure you add more to your play area.

As we stated above, you can expand the area to beyond any walls or obstacles so that you can avoid hitting the border as often. If you decide to do so, you should be extremely careful so that you don’t run into walls and/or other obstacles while playing.

How to fix PlayStation VR2 Sense Controller finger detection issues

You may notice that the Left or Right PlayStation VR2 Sense Controller may not properly detect your finger placements and/or movements. To see how you can potentially fix this problem with the virtual reality device, you can take a look at this troubleshooting article from Seeking Tech.

1. To start off, we recommend that you check the controls for the game you are currently playing.

Some games will detect fingers differently when compared to others. Not to mention that a few titles may not support finger detection at all.

2. If you are sure that the PlayStation VR2 game you are currently playing does support finger detection, then the next step you can take is to try cleaning the Sense Controller.

You can start off by using a soft, lint-free cloth to wipe any dirt or substances away from the analog stick, buttons and other surfaces.

If you are having a difficult time removing some of the dirt and/or substances, then you can add some 99.9% isopropyl alcohol.

3. If you are wearing gloves while using the PS VR2 controller, then you can try removing them to see if it fixes the finger detection issues.

4. Of course, you can also try washing your hands if they are dirty.

5. If you haven’t done so already, you should make sure that you have the latest firmware versions of the Sense installed.

In order to do so, you first need to update your PlayStation 5 console by going to System > System Software > System Software Update and Settings > Update System Software > Update Using Internet.

Afterwards, connect your PlayStation VR2 Sense Controllers. If there is a new firmware available, then you should see a notification appear on screen asking you to update.

6. You can also try resetting the problematic controller.

To do so, make sure that your PS5 and the controllers are both turned off. Afterwards, use a small pin to push to button underneath the pinhole of the Left or Right PlayStation VR2 Sense.

You should eventually push down on a button. Keep that button pressed for at least 5 seconds to reset.

Once the Sense Controller has been reset, connect it again to your PlayStation 5. Afterwards, you should test it out to see if your fingers can be detected properly.

6. If your finger placements and movements aren’t still being recognized, then your controller may be defective. In this case, you will need to send it in to be replaced or repaired.

How to loosen sticky PlayStation VR2 Sense Controller analog and buttons

You may notice that the analog stick and/or buttons of the Left or Right PlayStation VR2 Sense Controller may feel stuck or sticky. To see how you can loosen these inputs, you can take a look at this troubleshooting article from Seeking Tech.

1. For the first step, you can use a lint-free cleaning cloth to remove any dust, dirt and other substances that may have been causing the analog or buttons to become sticky.

If you are having a hard time removing some of the dirt or substances, then you can try using 99.9% isopropyl alcohol. These solutions are safe for electronics as they dry much faster than water.

If you are looking for a product, then we suggest getting the MG Chemicals 824 99.9% Isopropyl Alcohol Electronics Cleaner for the PS VR2 Sense controllers, which you can find on Amazon with this link. (#CommissionsEarned).

2. If the analog or buttons are still stuck, then you can try soaking a Q-Tip with isopropyl alcohol and then cleaning the outer edge of the stuck button or analog stick.

Try to see if you can get a little bit of the solution to drop down the opening so that the liquid will loosen any debris.

3. You can also use a compressed air canister to blow into the outer edge of the sticky or stuck analog or button of the PlayStation VR2 Sense Controller.

4. If none of the aforementioned steps have worked so far, then you can try applying some pressure.

In order to do so, press down hard on the analog or button with your thumb. Next, rotate the analog or button clockwise and clockwise a couple of times to see if you are able to loosen it.

5. If the analog or button remains stuck, then you might want to consider taking the controller apart to see if you are able to clean the insides. This is a more advanced method that we don’t recommend doing if you aren’t familiar with taking electronics apart, cleaning it and then reassembling the parts.

If you are still interested in doing so, then you can check out the following official tear down video of the PlayStation VR2 Sense Controller below:

6. If you don’t want to take the controller apart, then you should send it in to be repaired or replaced. You most likely need to send in your entire PlayStation VR2 unit if you are asking Sony to do the repair.

PECOOVR PlayStation VR2 Smooth Glasses Spacer Protector review

If you want to use the PlayStation VR2 while wearing glasses, then there is a possibility that you may end up scratching the lenses of the virtual reality headset. To prevent this from happening, you can get a spacer that prevents your glasses from hitting the VR lenses.

During your research, you may have found the PECOOVR PlayStation VR2 Smooth Glasses Spacer Protector on Amazon. So, is this product worth getting? You can find out in this article from Seeking Tech.

What’s Included

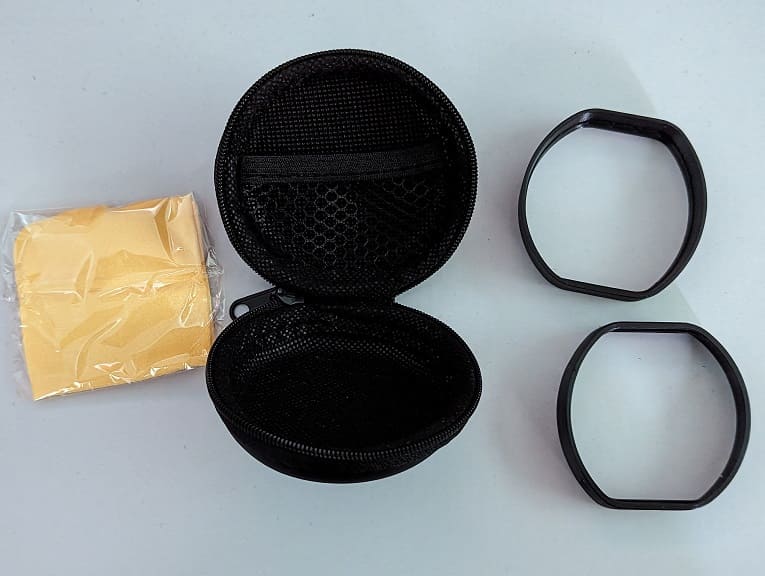
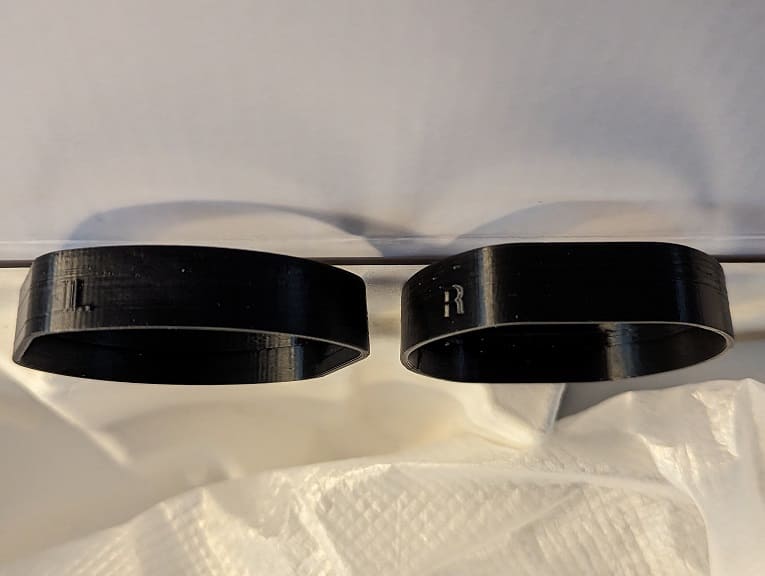
The PECOOVR PlayStation VR2 Smooth Glasses Spacer Protector features a left and right spacer insert for the lenses of the headset. It also features a microfiber cleaning cloth that you can use to wipe your glasses and the lenses clean.

All of these are stored inside a hard carrying case in case you need to take out the spacers and put them away somewhere safe.

Installation

Unfortunately, there aren’t any text instructions included with the PECOOVR PlayStation VR2 Smooth Glasses Spacer Protector. You will only find a video of the steps from a video posted on the Amazon product page or YouTube.

If you need help with the installation, then you can check out our tutorial.

Function

The PECOOVR Spacer does what it advertises as it adds a few extra centimeters to the outer edges of the left and right lenses in the PlayStation VR2 headset. By doing so, your glasses should not be able to make contact, and potentially scratch, the lenses.

While Sony has confirmed that you can wear glasses with the PS VR2, there have been many reports from consumers that they end up scratching the lens. Even if you are extremely careful when putting on and taking off the headset, scratches can happen if you move your head too much while playing a VR game.

Therefore, a spacer such as the PECOOVR can help save you time and money in terms of making you avoid sending your PlayStation VR2 unit in for repair.

We have been playing with the spacers equipped for dozens of hours so far and have found that the lenses of the VR headset have remained scratch free. These hours included playing titles that require a lot of movement such as Beat Saber, Pistol Whip and Les Mills BodyCombat.

Overall

As long as you installed it correctly, the PECOOVR PlayStation VR2 Smooth Glasses Spacer Protector does what it advertises as the product creates space between the lenses of the headset and your glasses. As a result, your glasses won’t cause any scratches to the lens.

While a little bit on the expensive side, it does come with a cleaning cloth and hard carrying case. You can find the current price of the product on Amazon with this link. (#CommissionsEarned).

If you have a 3D printer, or know someone that does, then you can use the print instructions provided by Lowfategg on Thingiverse in order to print out a compatible spacer.

How to install the PECOOVR PlayStation VR2 Smooth Glasses Spacer Protector

The PECOOVR PlayStation VR2 Smooth Glasses Spacer Protector does not come with any printed instructions. To see how you can properly install this accessory to the virtual reality headset, you can take a look at this tutorial from Seeking Tech.

1. If you haven’t done so already, make sure you take the two spacer protectors out of the carrying case.

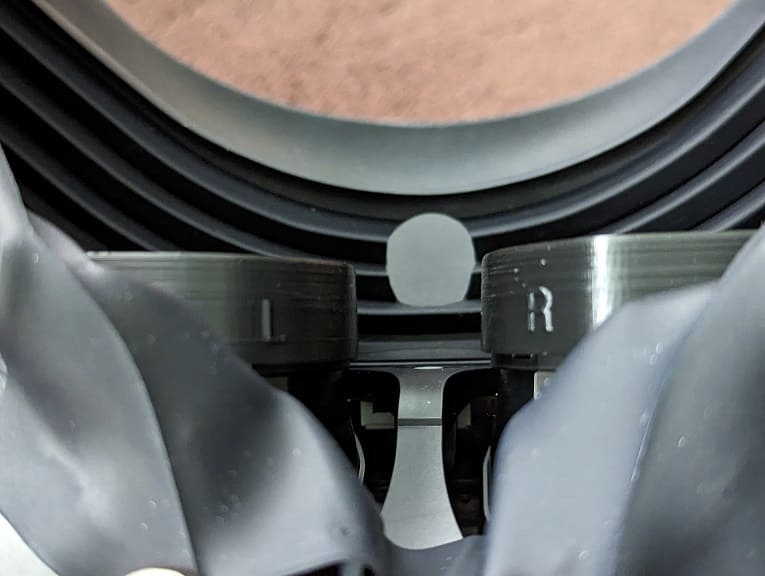
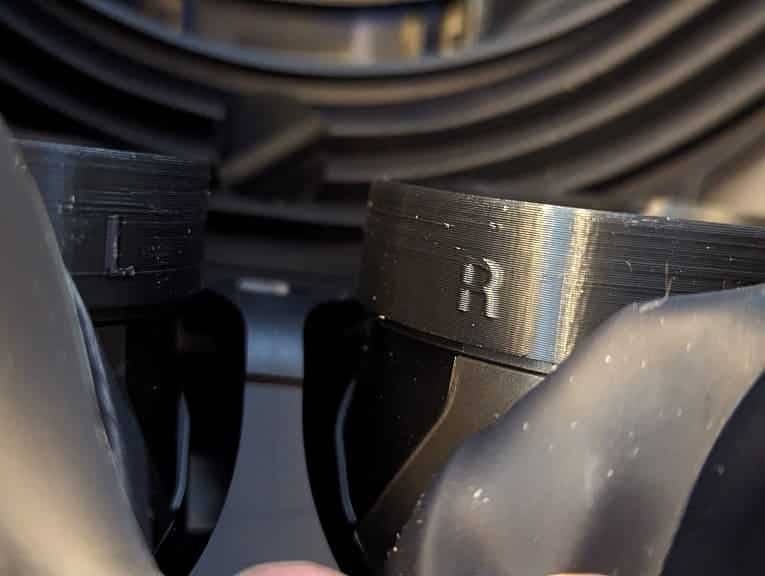
2. Look on the outer rings of the spacer protectors and you should see the L and R letters. You may need to inspect these accessories under bright lights to find these labels.

L indicates that the spacer is intended for the left lens of the PS VR2 while R indicates that it must be put on the right lens.

3. Next, lay the PlayStation VR2 face down on a soft surface. We recommend using a soft surface so that you don’t accidentally scratch or damage the scope and/or tracking cameras when installing the PECOOVR Smooth Glasses Spacer Protectors.

4. You may also want to find a way to keep the PlayStation VR2 upright. You can use your off hand to hold the headset and your other hand for installing the protectors.

In our case, we put the PS VR2 face down on a sofa. The soft surface of the couch prevented any scratches and damage while its back support keeps the headset stable while freeing us to use both hands during the installation.

5. Take one of the spacers and then make sure that the L or R isn’t upside down.

6. The L or R should be pointed towards the nose cut out of the light guard. So, you should make sure that you have the correct positioning.

7. Once you are sure you have the correct position, carefully align the spacer into the outer edge of the lens.

Avoid applying as much force as possible during this step as you don’t want to scratch the lens when maneuvering the spacer around.

8. Once you are done fitting the spacer, carefully push it down the lens in order to secure it. Make sure you push down on all sides of the spacer to ensure that it is equally leveled.

9. After installing one of the spacers, follow the same steps to install the other one.

If you need a video demonstration, then you can check out the following video from the PECOOVR YouTube channel:

10. You should be done installing the PECOOVR Smooth Glasses Spacer Protectors.

If the spacer or your skin made contact with the lenses on the PlayStation VR2, then you can use the cleaning cloth that came with the PECOOVR carrying case to carefully wipe the lens of any dirt, oil and other debris.

How to properly store the PlayStation VR2

If you aren’t using the PlayStation VR2, then leaving it out in the open can damage the expensive accessory. To see how you can properly store your virtual reality headset, you can take a look at this guide from Seeking Tech.

What can happen if you don’t properly store your PS VR2

If you don’t properly store your PlayStation VR2, then you could risk damaging its lenses due to the overexposure to direct sunlight.

Dust particles and other contaminants can also get to the lens, causing visual artifacts if you don’t wipe them off before using your headset. Dust can also end up blocking the ventilation shaft, which is designed to keep the lens from fogging up.

So, if you are aren’t using the virtual reality headset, it is best that you store it properly in order to avoid any potential damage.

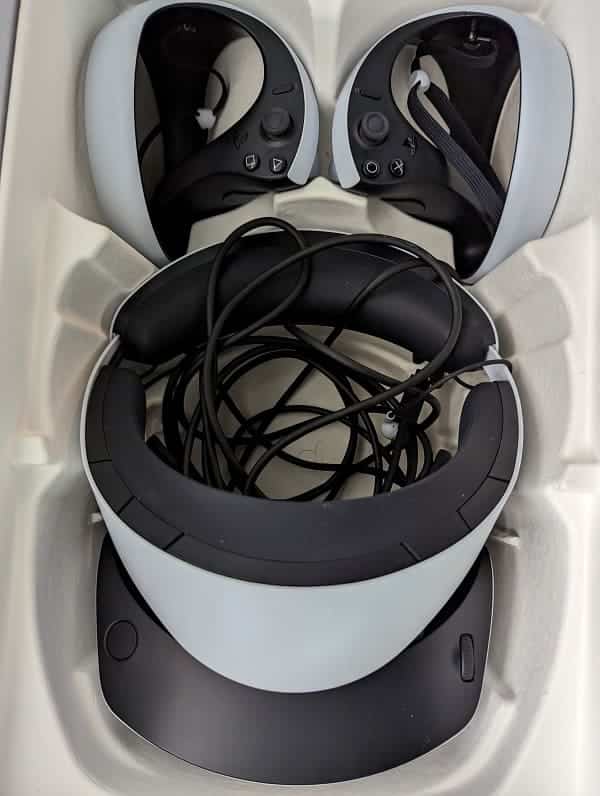
Using the retail box

The good news is that packaging box that comes with the PlayStation VR2 can be re-used as a storage box. If you still have it around, then we recommend that you take the following steps:

1. To start off, unplug the PS VR2 from the USB C port of your PlayStation 5.

2. If you have the earphones attached to the earpiece holders, then we suggest that you remove them. Otherwise, the headset may not be able to fit properly in the grooves of the box.

3. If you haven’t done so already, long press the scope adjustment button and then slide the scope all the way in. This is needed to fit the headset into the groove of the retail box.

4. Once you have everything set up, put the headset into its groove in the retail box. Make sure that the earphones aren’t blocking the sides when doing so.

5. Afterwards, carefully put the USB cable in the open space in between the the scope and the headband.

6. If you want to, you can also put the Left PlayStation VR2 Sense Controller and Right PlayStation VR2 Sense Controller into their respective groves.

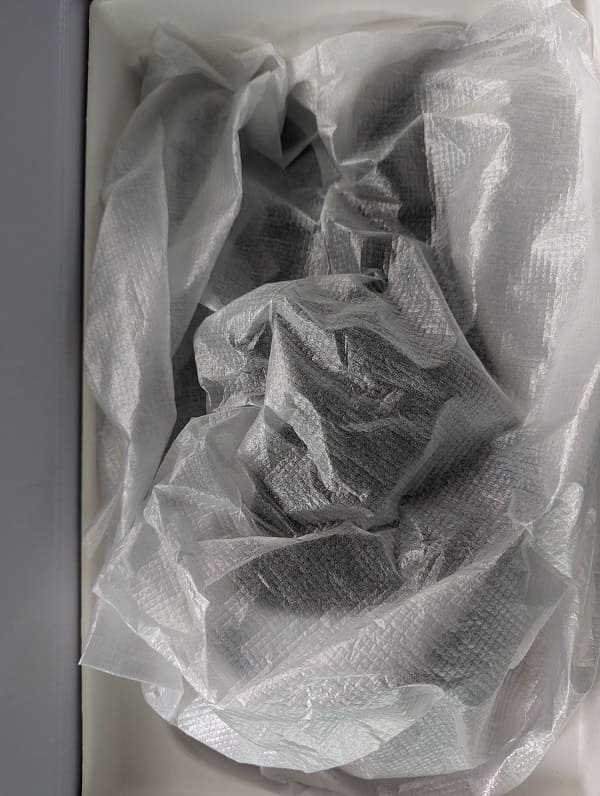
7. The retail box may not close all the way. If it doesn’t, then you can use one of the white plastic sheets that came in the packaging box as a dust cover.

PlayStation VR2 carrying case

If you already threw away the packaging box that came with your PlayStation VR2 and/or would like to easily move the virtual reality headset around, then you might want to consider getting a carrying case.

If you are interested in doing so, then we recommend checking out the Sarlar PlayStation VR2 Hard Carrying Case, which you can find on Amazon with this link. (#CommissionsEarned).

PlayStation VR2 cinematic mode review

In addition to playing virtual reality games, you can use the PlayStation VR2 as an extra screen via its cinematic mode. So, is the headset worth getting just for its flat screen display capabilities? You can find out in this review article from Seeking Tech.

Clarity

In cinematic mode, the resolution output is limited to 1080p. With that said, the actual image quality is blurrier than what you see if you are viewing a 1080p content on a television set.

This is the biggest issue we have with the PS VR2 cinematic mode as there is a noticeable drop in clarity, especially on the edge of the virtual screen, when compared to viewing the same content on a regular TV or monitor.

OLED

The PlayStation VR2 uses OLED technology. As a result, you will get deeper colors, especially when it comes to the black color output.

While it doesn’t compare to OLED televisions, it should still look great against LCD and LED screens when it comes to displaying HDR games and videos.

120 Hz Refresh Rate

One of the better features of the cinematic mode is its ability to display content at up to 120 frames per second. Up until the past few years, most television sets are only limited to 60 fps.

Games running at 120 fps will look even smoother with less input lag. Therefore, this feature is great for competitive gamers.

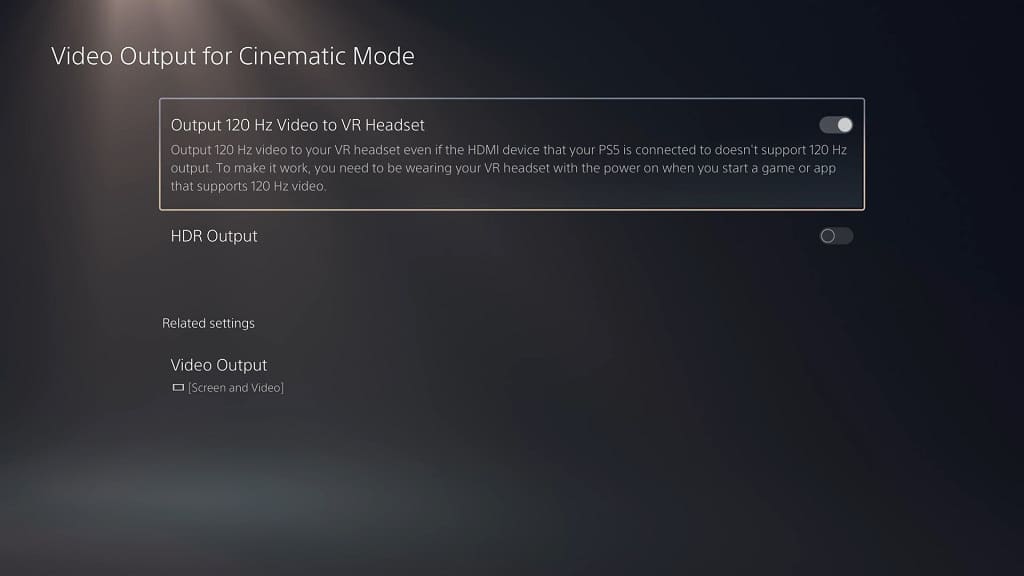
To see how you can enable the 120 Hz refresh rate support when viewing flat screen content with this virtual reality headset, you can check out this tutorial.

No VRR Support

On the flip side, the PlayStation VR2 doesn’t support Variable Refresh Rate. This helpful feature helps a game look smoother as long as it can maintain a frame rate of at least 48 fps.

As a result, the frame rate dips will be more noticeable when using the virtual reality headset as opposed to a flat screen that supports VRR.

Immersion

In the cinematic mode of the PS VR2, you will see a black void surrounding the screen. If you decide to use earphones or headphones, then you should easily be able to block out any visual and audio distractions from the real world.

You will end up being fully immersed in the video you are viewing or game you are playing. As its name suggest, the mode feels like you are playing a game or watching a video on a big movie screen at a theater.

Recap

The biggest benefits of using the PlayStation VR2 cinematic mode is its OLED display, 120 refresh rate and immersion.

On the other hand, you should not expect a sharp image quality as it can only display content at 1080p. Not to mention that the video output may even look blurrier when compared to viewing 1080p content on a TV or monitor. This mode also does not support VRR.

Overall, we found that the cinematic mode to be a neat extra benefit, especially if you don’t have an OLED television that has a 120 refresh rate. If you want to be fully immersed yourself in a flat screen game or movie, and don’t mind the drop in image clarity, then you may want to try out this mode once in a while.

With that said, you shouldn’t expect this cinematic to replace your 4K TV or monitor if you care about resolution.