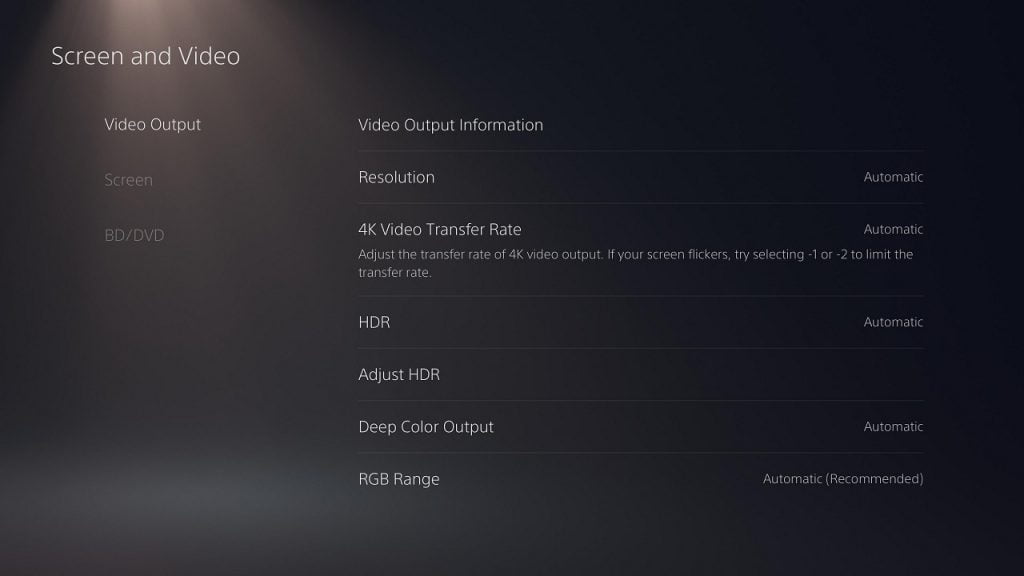
If you are experiencing issues with your television or/monitor properly displaying the video outputted from PlayStation 5, then you may have to use the “4K Transfer Rate” option from the system menu.
So, what does changing the “4K Transfer Rate” setting on the PS5 help with? You can find out in this guide at Seeking Tech.
What is 4K Transfer Rate?
4K Transfer Rate is also known as chroma subsampling, a feature that compresses the colors from the video output signal on your PlayStation 5.
How to find the “4K Transfer Rate” setting on PS5
To find the “4K Transfer Rate” setting on the PlayStation 5, you need to take the following steps:
1. First off, make sure you are in the home screen main menu of the PS5. This is the place where you can select which game to play, head to the PlayStation Store and perform other actions.
2. From the home screen, select the gear cog symbol, which represents the “Settings” menu, on the top right corner.
3. In the “Settings” menu, select “Screen and Video” from the list of available options.
4. In the “Screen and Video” menu, select the “Video Output” option on the left side of the screen.
5. On the right side, you will see the “4K Video Transfer Rate” option.

What happens when you set “4K Transfer Rate” to Automatic on PS5
By default, the “4K Transfer Rate” option is set to Automatic on the PlayStation 5.
This means that the system will automatically choose which of the 0, –1 or –2 options is best suited for the television or monitor it is connected to.
What happens when you set “4K Transfer Rate” to -1 on PS5
If you are experiencing issues, such as flickering or HDR not displaying correctly, then you can try manually setting the “4K Transfer Rate” on the PlayStation 5.
By setting the “4K Transfer Rate” to –1, you will restrict the video output bandwidth to the HDMI 2.0 specification, which is 18 Gbps. This means that you can only display the following in 4K video settings:
- 4K HDR at 60 Hz with YUV420
- 4K HDR at 60 Hz with YUV422
- 4K HDR at 50 Hz with YUV420
- 4K HDR at 50 Hz with YUV422
With the “4K Transfer Rate” set to -1, you won’t be able to use the following video output settings:
- 4K and 120 Hz
- 4K and 50 Hz/60 Hz with RGB/YUV444 DeepColor
What happens when you set “4K Transfer Rate” to -2 on PS5
If you decide to set the “4K Transfer Rate” to –2, restrict the video output bandwidth to the HDMI 1.4 specification, which is 10.2Gbps. As a result, you can only display the following 4K settings:
- 4K HDR at 60 Hz with YUV420
- 4K HDR at 50 Hz with YUV420
With the “4K Transfer Rate” at –2, you won’t be able to use the following video output settings:
- 4K and 120 Hz
- 4K and 50 Hz/60 Hz with RBG/YUV444
What is the best “4K Transfer Rate” setting on PS5?
The best setting to start with is to leave “4K Transfer Rate” to Automatic as the PS5 should be able to detect the HDMI spec of your TV or monitor.
If you are experiencing issues with screen flickering and/or HDR looking not looking correct, then you can manually change the setting to –1 or –2 to see if either of these options will resolve your issues.
