Recommended QN90C settings for PS5, Xbox Series X and S

If you bought the Samsung QN90C (also known as QN90CD), then you can check out this Seeking Tech guide to find the best settings to utilize when using this TV to play games on the PlayStation 5, Xbox Series X and/or Xbox Series S.

Model Numbers

This guide should cover all screen sizes of the QN90C, including the following model numbers:

43″:

  • QN43QN90CAFXZA
  • QN43QN90CDFXZA

50″:

  • QN50QN90CAFXZA
  • QN50QN90CDFXZA

55″:

  • QN55QN90CAFXZA
  • QN55QN90CDFXZA

65″:

  • QN65QN90CAFXZA
  • QN65QN90CDFXZA

75″:

  • QN75QN90CAFXZA
  • QN75QN90CDFXZA

85″:

  • QN85QN90CAFXZA
  • QN85QN90CDFXZA

Supported QN90C Console Gaming Features

With the Samsung QN90C, you will be able to play PlayStation 5 games at up to 120 frames per second. The other supported features include Auto Low Latency Mode, HDR10 and Variable Refresh Rate (for as low as 48 fps).

For the Xbox Series X and Xbox Series S, the QN90C can also display supported games at up to 120 fps. With these two consoles, this TV also supports Auto Low Latency Mode, HDR10 and Variable Refresh Rate (for as low as 40 fps).

Recommended QN90C settings for console gaming

To get the best out of your PS5, Series X or Series S consoles with the QN90C, you can take the following steps:

1. To start off, make sure you properly connect your console to the QLED.

For the PlayStation 5 and Xbox Series X, you can use the HDMI 2.1 cable that came with these consoles to connect to any of the four HDMI ports of the TV.
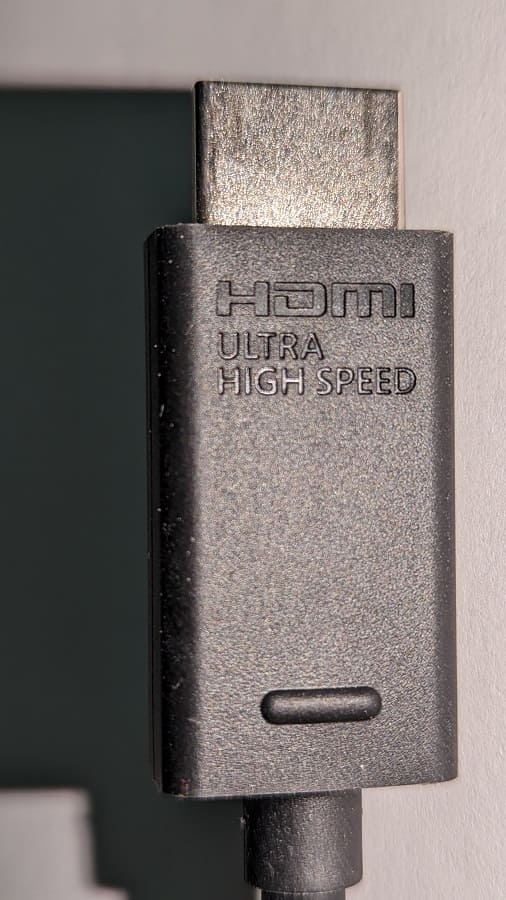
For the Series S, you can use the HDMI 2.0 cable that came with the system or get a HDMI 2.1 cable.

2. Next, make your way to the Settings> All Settings > Connection > Game Mode Settings > Game Mode. Afterwards, make sure that Game Mode is set to On.

By doing so, you should be able to get the lower input lag possible when playing a PS5 or Xbox Series game. Furthermore, Variable Refresh Rate should automatically be enabled on the QLED television set. VRR will help with minor frame rate drops and screen tearing.

While there are other TV settings that you can mess with, we recommend that you leave them alone for now.

3. On the console side, there are several settings that you may need to change.

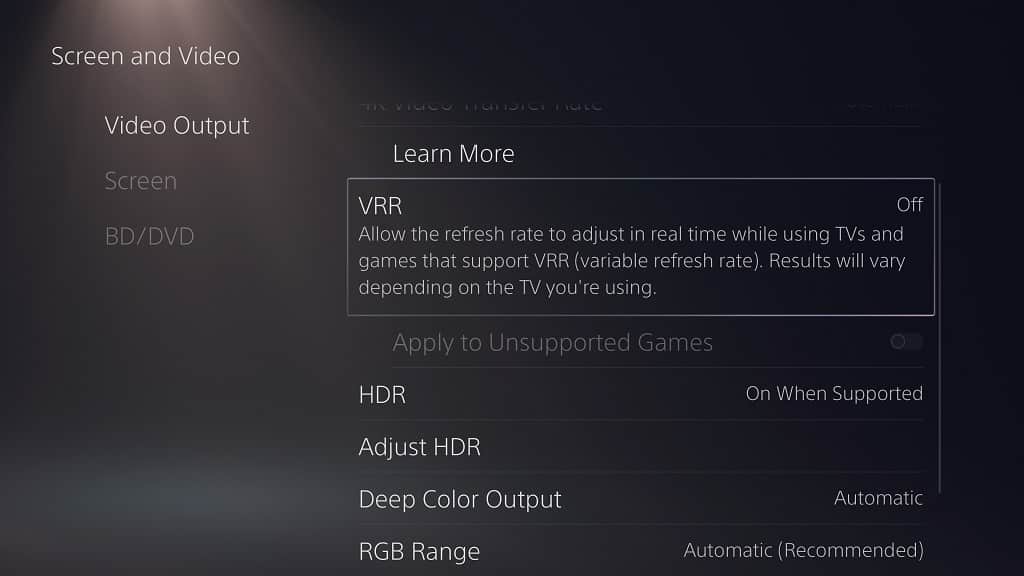
For the PlayStation 5 and PlayStation 5 Digital Edition consoles, head over to the Settings > Screen and Video > Video Output menu. From there, set the following to Automatic:

  • Variable Refresh Rate
  • 120 Hz
  • ALLM
  • 4K Transfer Rate
  • Deep Color Output
  • RGB Range

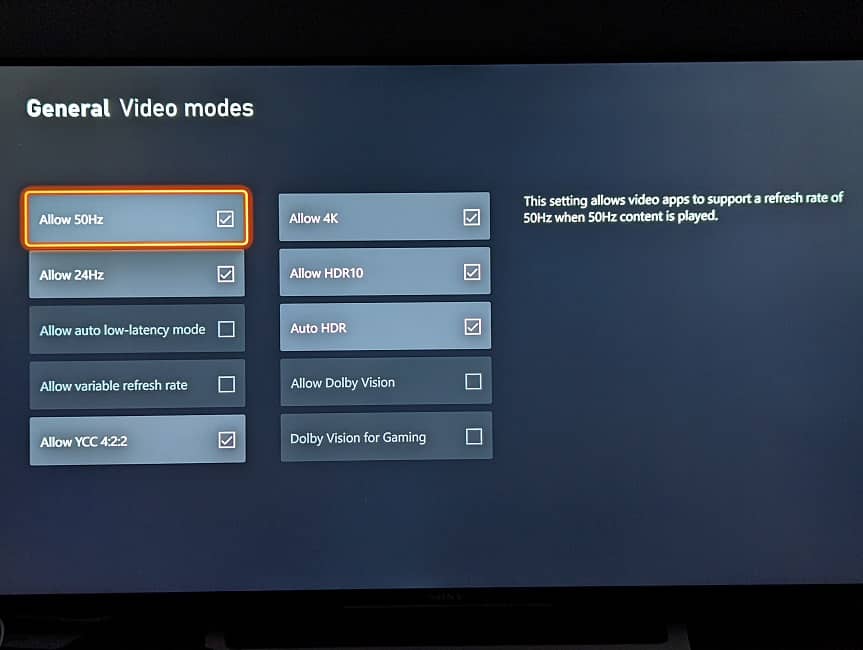
For the Xbox Series X and Xbox Series S, navigate towards the Settings > General > TV & Display Options > Video Modes menu. You should then make sure that the following boxes are selected:

  • Allow Auto-Low Latency Mode
  • Allow variable refresh rate
  • Allow 4K
  • Allow HDR10

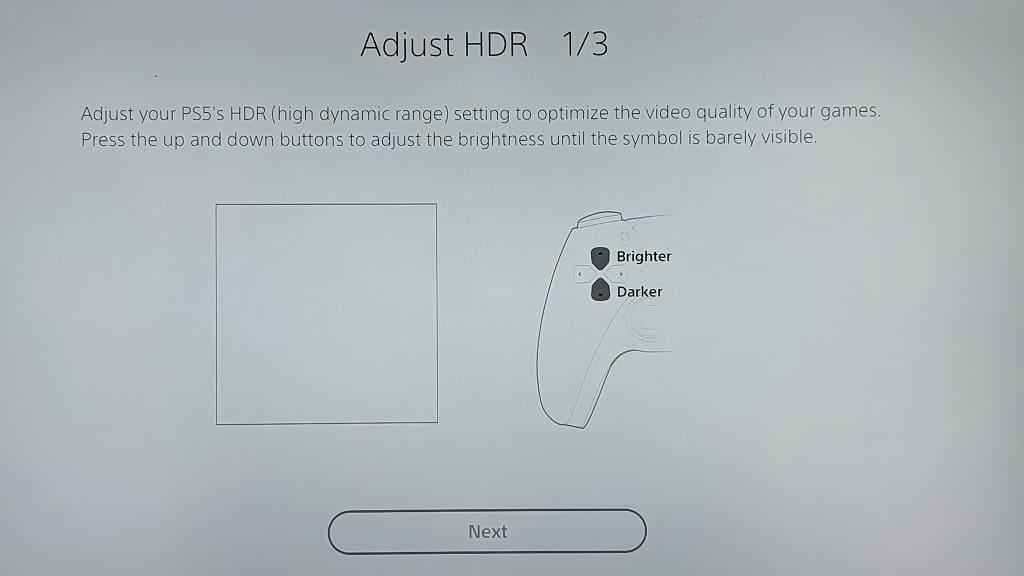
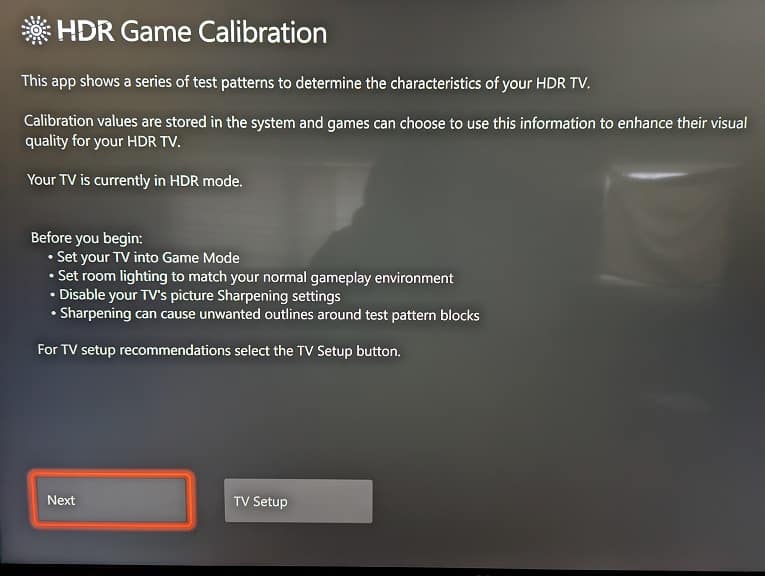
5. One last step for the console side, you need to take is to calibrate the HDR output of your console to match the QN90C.

You can find the menu to do so on the PS5 by making your way over to Settings > Screen and Video > Video Output > Adjust HDR.
On the Series X and Series S, you need to go to Settings > General > TV & Display Options > Calibrate HDR for games.
In both of these cases, follow the on-screen instructions to get HDR content to display properly on your QLED.

6. If some scenes in a game you are currently playing appear to be too dark, then you can adjust the Dynamic Black Equalizer setting from the Game Mode Settings menu of the Samsung QN90C.

If you feel that some games are running a little bit choppy, then you can go to the Game Motion Plus Settings from the Game Mode Settings screen. On the next page, you can adjust the Blur Reduction slider to make 60 fps games look smoother or the Judder Reduction slider to make 30 fps games look smoother. Furthermore, you can also add Black Frame Insertion by enabling LCD Clear Motion.

Samsung S90C wall mount specs

The Samsung S90C can be mounted on a wall. If you have this OLED, then you can check out this compatibility guide at Seeking Tech.

S90C Screen Sizes

This guide will cover the 55”, 65” 77” and 83” models of the S90C series, which should include the following model numbers:

55-inch Samsung S90C:

  • QN55S90CAF
  • QN55S90CAFXZA

65-inch Samsung S90C:

  • QN65S90CAF
  • QN65S90CAFXZA

77-inch Samsung S90C:

  • QN77S90CAF
  • QN77S90CAFXZA

83-inch Samsung S90C:

  • QN83S90CAEXZA
  • QN83S90CAEXZA

S90C Dimensions (without Stand)

Dimensions without Stand (in inches):

  • 55″ Samsung S90C: 48.2 inches x 27.9 inches x 1.6 inch
  • 65″ Samsung S90C: 56.9 inches x 32.7 inches x 1.6 inch
  • 77″ Samsung S90C: 67.7 inches x 38.9 inches x 1.8 inch
  • 83″ Samsung S90C: 72.9 inches x 41.8 inches x 1.8 inch

Dimensions without Stand (in millimeters):

  • 55″ Samsung S90C: 1224 mm x 709 mm x 41 mm
  • 65″ Samsung S90C: 1445 mm x 831 mm x 41 mm
  • 77″ Samsung S90C: 1720 mm x 988 mm x 46 mm
  • 83″ Samsung S90C: 1852 mm x 1062 mm x 46 mm

Dimensions without Stand (in centimeters):

  • 55″ Samsung S90C: 122.4 cm x 70.9 cm x 4.1 cm
  • 65″ Samsung S90C: 144.5 cm x 83.1 cm x 4.1 cm
  • 77″ Samsung S90C: 172.0 cm x 98.8 cm x 4.6 cm
  • 83″ Samsung S90C: 185.2 cm x 106.2 cm x 4.6 cm

S90C Weight (without Stand)

Weight without Stand (in pounds):

  • 55″ Samsung S90C: 35.7 lbs.
  • 65″ Samsung S90C: 46.5 lbs.
  • 77″ Samsung S90C: 77.4 lbs.
  • 83″ Samsung S90C: 83.8 lbs.

Weight without Stand (in kilograms):

  • 55″ Samsung S90C: 16.2 kg
  • 65″ Samsung S90C: 21.1 kg
  • 77″ Samsung S90C: 35.1 kg
  • 83″ Samsung S90C: 38.0 kg

S90C VESA Mounting Pattern

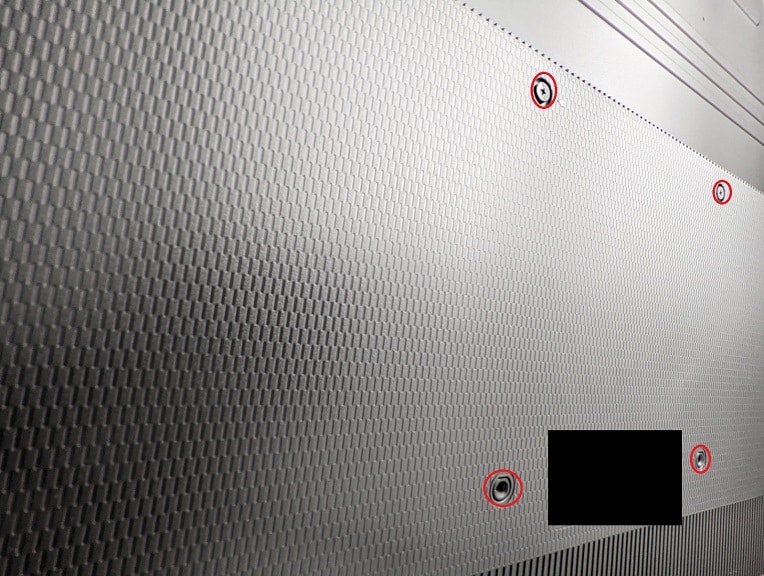
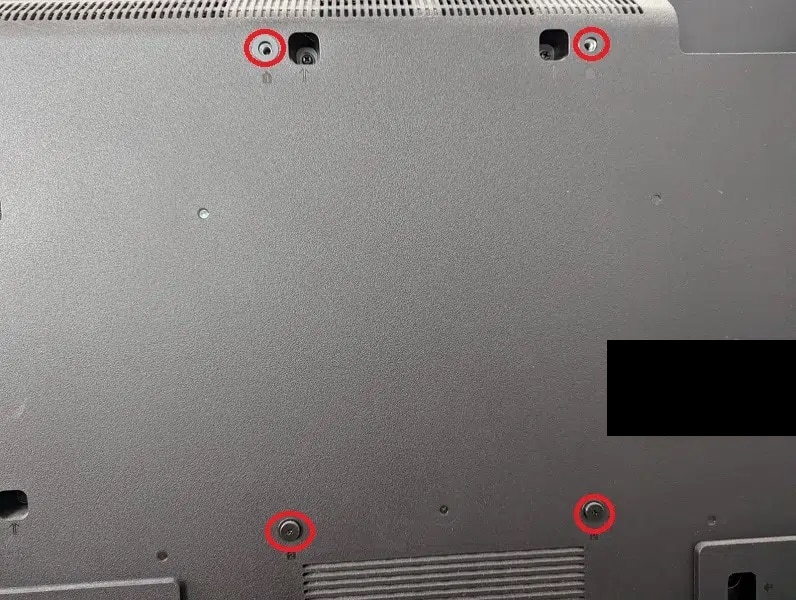
To install the mounting bracket to the back of the S90C, the VESA Mounting Pattern must be supported. This specification measures the horizontal and vertical distances in between the screw holes on the backside on the television set:

You can find the VESA Mounting Pattern for each screen size below:

  • 55″ Samsung S90C: 300 mm x 200 mm
  • 65″ Samsung S90C: 300 mm x 200 mm
  • 77″ Samsung S90C: 400 mm x 300 mm
  • 83″ Samsung S90C: 400 mm x 300 mm
VESA Mounting Pattern (example from different TV).

S90C Mounting Screw Type

All four sizes of the S90C supports the M8 screw type with a 28 mm to 30 mm screw depth.

What third-party wall mounts are compatible with the Samsung S90C?

For a wall mount to be compatible with S90C, it must be strong enough to hold the weight of the OLED television. Depending on your screen size, the TV may weigh as much as 83.8 lbs.

The mounting bracket also needs to support the VESA Mounting Pattern of your TV. The pattern is 300 mm x 200 mm for the 55-inch and 65-inch screen sizes and 400 mm x 300 mm for the 77-inch and 83-inch screen sizes.

If you are looking for specific product recommendations when it comes to picking the right fixed, tilting or full motion mount for the S90C, then you can check out this article.

Resource:

PlayStation VR2 cinematic mode review

In addition to playing virtual reality games, you can use the PlayStation VR2 as an extra screen via its cinematic mode. So, is the headset worth getting just for its flat screen display capabilities? You can find out in this review article from Seeking Tech.

Clarity

In cinematic mode, the resolution output is limited to 1080p. With that said, the actual image quality is blurrier than what you see if you are viewing a 1080p content on a television set.

This is the biggest issue we have with the PS VR2 cinematic mode as there is a noticeable drop in clarity, especially on the edge of the virtual screen, when compared to viewing the same content on a regular TV or monitor.

OLED

The PlayStation VR2 uses OLED technology. As a result, you will get deeper colors, especially when it comes to the black color output.

While it doesn’t compare to OLED televisions, it should still look great against LCD and LED screens when it comes to displaying HDR games and videos.

120 Hz Refresh Rate

One of the better features of the cinematic mode is its ability to display content at up to 120 frames per second. Up until the past few years, most television sets are only limited to 60 fps.

Games running at 120 fps will look even smoother with less input lag. Therefore, this feature is great for competitive gamers.

To see how you can enable the 120 Hz refresh rate support when viewing flat screen content with this virtual reality headset, you can check out this tutorial.

No VRR Support

On the flip side, the PlayStation VR2 doesn’t support Variable Refresh Rate. This helpful feature helps a game look smoother as long as it can maintain a frame rate of at least 48 fps.

As a result, the frame rate dips will be more noticeable when using the virtual reality headset as opposed to a flat screen that supports VRR.

Immersion

In the cinematic mode of the PS VR2, you will see a black void surrounding the screen. If you decide to use earphones or headphones, then you should easily be able to block out any visual and audio distractions from the real world.

You will end up being fully immersed in the video you are viewing or game you are playing. As its name suggest, the mode feels like you are playing a game or watching a video on a big movie screen at a theater.

Recap

The biggest benefits of using the PlayStation VR2 cinematic mode is its OLED display, 120 refresh rate and immersion.

On the other hand, you should not expect a sharp image quality as it can only display content at 1080p. Not to mention that the video output may even look blurrier when compared to viewing 1080p content on a TV or monitor. This mode also does not support VRR.

Overall, we found that the cinematic mode to be a neat extra benefit, especially if you don’t have an OLED television that has a 120 refresh rate. If you want to be fully immersed yourself in a flat screen game or movie, and don’t mind the drop in image clarity, then you may want to try out this mode once in a while.

With that said, you shouldn’t expect this cinematic to replace your 4K TV or monitor if you care about resolution.

Samsung S90C settings for PS5, Xbox Series X and S

If you have the Samsung S90C OLED television set, then you can check out this guide at Seeking Tech to see how you can optimize this screen when it comes to getting the best out of your PlayStation 5, PlayStation 5 Digital Edition, Xbox Series X and/or Xbox Series S consoles.

Model Numbers

This guide should cover all three screen sizes of the S90C series, including the following model numbers:

55” Samsung S90C:

  • QN55S90C
  • QN55S90CAF
  • QN55S90CAFXZA

65” Samsung S90C:

  • QN65S90C
  • QN65S90CAFX
  • QN65S90CAFXZA

77” Samsung S90C:

  • QN77S90C
  • QN77S90CAFX
  • QN77S90CAFXZA

Supported S90C Console Gaming Features

The S90C supports the following gaming features:

PlayStation 5 and PlayStation 5 Digital Edition:

  • HDR10
  • Variable Refresh Rate between 48 fps to 120 fps
  • Up to 120 frames per second

Xbox Series X and Xbox Series S:

  • HDR10
  • Variable Refresh Rate between 40 fps to 120 fps
  • Low Framerate Compensation
  • Up to 120 frames per second

Recommended S90C Settings for PS5, Xbox Series X and S

For the best S90C settings when it comes to the PlayStation 5 and Xbox Series consoles, you can try doing the following:

1. Connect your console to the Samsung OLED if you haven’t done so already.

All four of the HDMI ports of the TV are HDMI 2.1; so, you should make sure you are using the HDMI 2.1 cable that came with your PS5 or Series X.

The Series S only comes with a HDMI 2.0, which you can still use with the S90C although the bandwidth will be limited to the HDMI 2.0 specification. Alternatively, you can use a HDMI 2.1 cable to connect the Xbox Series S to the TV if you have an extra one available.

2. Open the Settings menu of the Samsung S90C and then make your way over to All Settings > Connection > Game Mode Settings > Game Mode. Afterwards, make sure that the game mode is turned on.

Enabling game mode will reduce the input lag when playing games. This action will also automatically enable Variable Refresh Rate support for the OLED.

3. The Game Mode Settings menu also has several other options like Dynamic Black Equalizer (which makes it easier to see in the darker in-game environments), Game Picture Expert (which automatically converts HDR10 to HDR10+) and Game Motion Plus (which adds interpolation for games that run at 30 fps as well as 60+ fps).

We suggest that you leave these settings alone as they may make games look less accurate when compared to the creator’s intent. Of course, you can always change these in the future on a game-by-game basis to see if you can get a better image quality.

4. You should now be done setting up your S90C for gaming. For the console side, however, you may still need to make sure adjustments.

For the PS5 and PS5 Digital Edition, open the Settings menu and then head over to Screen and Video and then Video Output. From there, you need to set VRR, 120 Hz, ALLM, 4K Transfer Rate, Deep Color Output and RGB Range settings to Automatic.

On the Xbox Series X and Xbox Series S, you also need to open its Settings menu. Afterwards, navigate over to General > TV & Display Options > Video Modes. From there, make sure that Allow Variable Refresh Rate, Allow Auto-Low Latency Mode, Allow 4K and Allow HDR10 boxes are all selected.

5. One last step you need to take is to calibrate the HDR brightness output of your console to match the HDR brightness of the Samsung S90C.

On the PlayStation 5, you can do so by going to Settings > Screen and Video > Video Output > Adjust HDR.

For the Xbox Series consoles, go to Settings > General > TV & Display Options > Calibrate HDR for Games.

Next, you have to follow the instructions that appear on the screen to properly set up HDR.

How to find missing items you bought from the Street Fighter 6 Goods Shop

When you purchase an item from the Goods Shop in Street Fighter 6, you may not be able to unlock it immediately. To see how you can get these missing items to show up, you can take a look at this troubleshooting article from Seeking Tech.

According to Capcom, the in-game times may take longer than usual to appear due to server congestion if a lot of players are using the Goods Shop at the same time.

1. For the first potential fix, you can try restarting your PC or console.

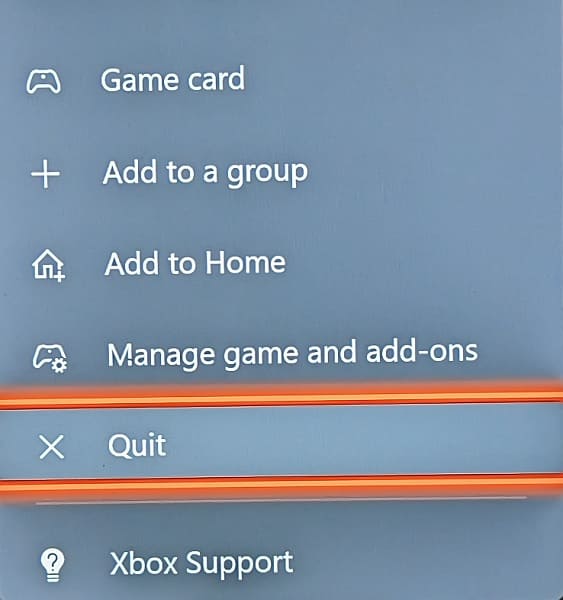
Keep in mind that the Xbox Series X and Xbox Series S use quick resume; therefore, you should quit the game before you restart your console by doing the following:

  • Press the Xbox logo on the controller to open the Guide menu.
  • Move the cursor in the Guide menu over to the Street Fighter 6 icon.
  • Press the Menu button on the controller.
  • Finally, select Quit from the small window menu.
  • Press and hold the Xbox button and then select the “Restart console” option.

After the reboot, log back into your account in Street Fighter 6 to see if you are able to locate the items you previously bought.

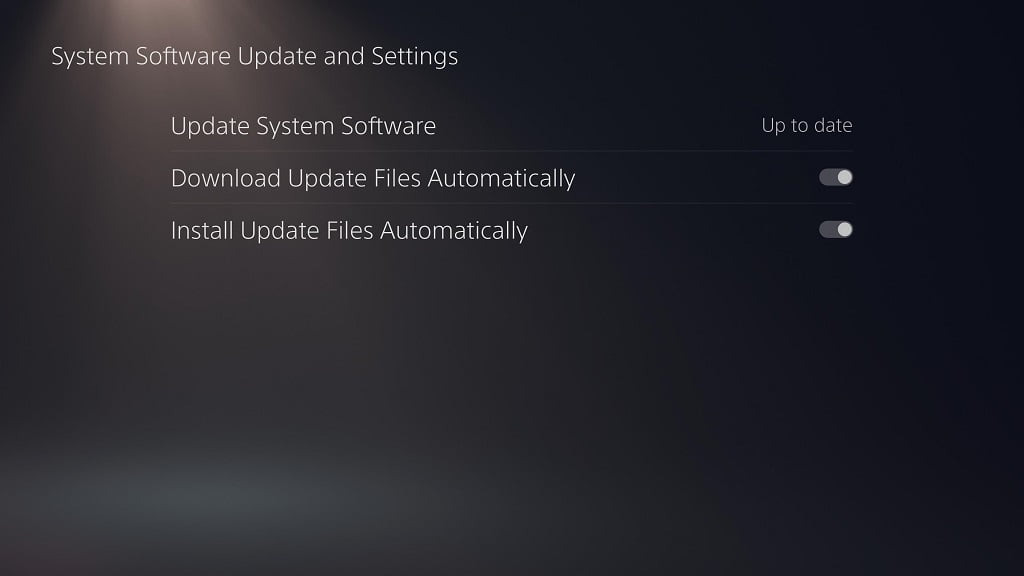
2. If the Goods Shop you purchased still isn’t showing up after a system restart, then you should make sure you have the latest firmware downloaded for your PlayStation 4, PlayStation 4 Pro, PlayStation 5, PlayStation 5 Digital Edition, Xbox Series X or Xbox Series S.

If you are playing SF6 on a PC, then can try downloading the latest client update for Steam.

Once you updated your hardware, open the game and log into your Capcom ID account to see if your missing Goods Shop items show up.

3. If you still can’t find the in-game content you purchased in the store, then we recommend that you contact the Capcom customer service team at the official Street Fighter website. You can do so by using this form.

When contacting Capcom, make sure you know the full name, as well as the quantity, of the missing item you purchased from the Goods Shop.

You will also need your User Code, which can be found in the Profile section of the Multi Menu. You can open this menu from the Mode Select screen by pressing the Options button if you are using a PlayStation controller or Menu button if you are using an Xbox controller.

Hopefully, they will be able manually add your lost Goods Shop item.

Recommended LG G3 settings for PS5, Xbox Series X and S

The G3 is the high end 4K OLED model released by LG in 2023. You can check out this guide at Seeking Tech to see the best settings you should use to get the most out of using this television set when it comes to playing PlayStation 5, Xbox Series X and Xbox Series videogames.

Model Numbers

This guide should cover all four screen sizes of the LG G3, which should include the following model numbers:

  • 55” LG OLED evo G3 (OLED55G3PUA and OLED55G36LA)
  • 65” LG OLED evo G3 (OLED65G3PUA and OLED65G36LA)
  • 77” LG OLED evo G3 (OLED77G3PUA and OLED77G36LA)
  • 83” LG OLED evo G3 (OLED83G3PUA and OLED83G36LA)

Supported PS5 Features

With the G3, you should be able to play PlayStation 5 games at up to 120 frames per second in 4K. You can also take advantage of the Variable Refresh Rate feature when the frame rate drops to as low as 48 fps.

In terms of HDR, the PS5 supports the HDR10 output format of the G3.

Supported Xbox Series X and Xbox Series S Features

You can also play Xbox Series X and Xbox Series S games at up to 120 frames per second in 4K with this 4K television. Both of these consoles also support VRR when the frame rate goes as low as 40 fps.

The Series X and Series S supports the HDR10 and Dolby Vision ouput formats of the LG G3.

Recommended Settings

You can take the followings steps when setting up your G3 OLED for the PlayStation 5, Xbox Series X and/or Xbox Series S:

1. If you haven’t done so already, connect your console to the HDMI port of your G3 TV. This television set features four HDMI 2.1 ports; therefore, any of the available ports should work.

2. Turn on your TV and console.

3. Next, press the gear button on the remote control.

4. In the system menu of your G3, select Game and then make sure that Game Optimizer is enabled.

5. Afterwards, scroll down and then make sure that the Prevent Input Delay (Input Lag) is set to Boost.

The Game Optimizer mode should reduce the input latency while playing games. The lag will be even lower when you use this boost mode.

6. Also in the Game menu, you should enable the VRR & G-Sync.

VRR will help with minor frame drops and screen tearing when playing PS5, Series X or Series S titles.

7. Next, go to the General menu in Settings and then select HDMI Settings. From there, you need to turn on 4:4:4 Pass Through. This will allow you to utilize the maximum bandwidth for the HDMI cable.

8. Go back to the Settings menu and then select Picture. You should then find and select Dynamic Tone Mapping and then set it to HGiG.

9. You should now be done with setting up your LG G3.

There are other settings that you can change but we suggest that you leave those to the default values for now. If the game you are playing does not look quite right, then you can try playing around with the other settings in the Game menu.

10. On the console side, you may also have to change some settings to take advantage of the G3 capabilities.

For the PS5, you need to go to the system’s Settings menu and then select Screen and Video > Video Output. From there, you need to set the VRR, 120 Hz, ALLM, 4K Transfer Rate, Deep Color Output and RGB Range settings to Automatic. Furthermore, make sure that HDR is set to On When Supported.

For the Xbox Series X and Xbox Series S, go to the console’s Settings menu and then select General > TV & display options > Video modes. You should then make sure that you have the Allow Auto-Low Latency Mode, Allow Variable Refresh Rate, Allow 4K, Allow HDR10, Allow Dolby Vision and Dolby Vision for Gaming settings are enabled.

10. Finally, you should calibrate your console’s HDR brightness output to match the performance of the LG G3.

To do so on the PS5, you need to go to gaming system’s Settings menu and then select Screen and Video > Video Output > Adjust HDR.

For the Series X and Series S, you should head over to Settings > General > TV & display options > Calibrate HDR for Games.

Follow the on-screen instructions of your PS5/Xbox to calibrate the HDR brightness output.

You should now be set to get the most out of PlayStation 5, Xbox Series X and/or Xbox Series S games when playing on your LG G3.

LG B3 wall mount specs

The B3 is one of several OLED televisions shipped by LG in 2023. If you have this TV set and would like to put it up on a wall, then you can check out this compatibility guide from Seeking Tech.

About the LG B3

The series offers all of the advance features you expect from a 4K television as it has a refresh rate of up to 120 frames per second in addition to supporting HDMI 2.1, HDR10, Dolby Vision, Dolby Atmos, Variable Refresh Rate and more. So, it is a good TV for gaming consoles such as the PlayStation 5, Xbox Series X and Xbox Series S.

The B3 sits in-between the entry-level A3 OLED as well as the higher range LG C3.

LG B3 Screen Sizes

This series comes in three sizes as customers can pick between the 55”, 65” or 77” version. You can find the model number for each of these variants below:

  • 55-inch LG B3 Series OLED 4K UHD Smart TV (OLED55B3PUA or OLED55B36LA)
  • 65-inch LG B3 Series OLED 4K UHD Smart TV (OLED65B3PUA or OLED65B36LA)
  • 77-inch LG B3 Series OLED 4K UHD Smart TV (OLED77B3PUA or OLED77B36LA)

LG B3 Dimensions without Stand

Dimensions without Stand (in millimeters):

  • 55” LG B3: 1227 mm x 709 mm x 46 mm
  • 65” LG B3: 1448 mm x 833 mm x 46 mm
  • 77” LG B3: 1722 mm x 993 mm x 56 mm

Dimensions without Stand (in centimeters):

  • 55” LG B3: 122.7 cm x 70.9 cm x 4.6 cm
  • 65” LG B3: 144.8 cm x 83.3 cm x 4.6 cm
  • 77” LG B3: 172.2 cm x 99.3 cm x 5.6 cm

Dimensions without Stand (in inches):

  • 55” LG B3: 48.3 inches x 27.9 inches x 1.8 inch
  • 65” LG B3: 57.0 inches x 32.8 inches x 1.8 inch
  • 77” LG B3: 67.8 inches x 39.1 inches x 2.2 inches

LG B3 Weight without Stand

Weight without Stand (in pounds):

  • 55” LG B3: 41.7 lbs.
  • 65” LG B3: 52.9 lbs.
  • 77” LG B3: 58.9 lbs.

Weight without Stand (in kilograms):

  • 55” LG B3: 18.9 kg
  • 65” LG B3: 24.0 kg
  • 77” LG B3: 26.7 kg

LG B3 VESA Mounting Pattern

The VESA Mounting Pattern refers to the four screw holes located on the back of your B3 OLED screen that you need to use to attach the mounting bracket. It is measured, in millimeters, as Width x Length.

You can find the measurements between these four holes below:

  • 55” LG B3: 300 mm x 200 mm
  • 65” LG B3: 300 mm x 200 mm
  • 77” LG B3: 400 mm x 200 mm
VESA Mounting Pattern (example from different TV).

What wall mounts are compatible with the LG B3?

For a wall mount to be compatible with the LG B3, it will need to support the VESA Mounting Pattern of the television set.

The 55-inch and 65-inch supports the same pattern at 300 mm x 200 mm. On the other hand, the screw holes are slightly wider apart with the 77-inch version as your wall mount will need to support the 400 mm x 200 mm VESA Mounting Pattern.

The bracket should also be strong enough to hold the weight of the OLED TV. This shouldn’t be a problem for most wall mounts as the maximum weight for the B3 series is just 58.9 lbs. (26.7 kg).

If you have a hard time looking for a compatible wall mount, then you can check out our general recommendations guide, which covers fixed, tilted and full motion mounting brackets.

Resources:

Samsung S95C wall mount specs

The S95C is one of two OLED television sets released by Samsung for 2023. If you have this TV and would like to hang it up on a wall, then you can check out this guide from Seeking Tech.

About the Samsung S95C

The S95C takes advantage of Samsung’s Quantum HDR OLED+ technology to provide stellar black and white color output.

In terms of gaming, this television set comes with four HDMI 2.1 ports in addition to featuring a 144 Hz refresh rate. As a result, you can play games at up to 144 frames per second on PC or 120 frames per second on the PS5, Xbox Series X and Xbox Series S.

It also supports the Variable Refresh Rate, FreeSync and GSYNC. These will get rid of small frame drops and screen tearing.

Screen Sizes

The S95C comes in three screen sizes as it offers a 55”, 65” and 77” option. This compatibility guide covers all variations of this series, including the following model numbers:

55-inch Samsung S95C 4K OLED TV:

  • 55S95C
  • QN55S95CAF
  • QN55S95CAFXZA
  • QE55S95CATXXU

65-inch Samsung S95C 4K OLED TV:

  • 65S95C
  • QN65S95CAF
  • QN65S95CAFXZA
  • QE65S95CATXXU

77-inch Samsung S95C 4K OLED TV:

  • 77S95C
  • QN77S95CAF
  • QN77S95CAFXZA
  • QE77S95CATXXU

S95C Dimensions without Stand

Dimensions without Stand (in millimeters):

  • 55″ Samsung S95C: 1224.6 mm x 706.3 mm x 11.0 mm
  • 65″ Samsung S95C: 1443.5 mm x 829.4 mm x 11.0 mm
  • 77″ Samsung S95C: 1716.6 mm x 984.1 mm x 11.2 mm

Dimensions without Stand (in centimeters):

  • 55″ Samsung S95C: 122.5 cm x 70.6 cm x 1.1 cm
  • 65″ Samsung S95C: 144.7 cm x 82.9 cm x 1.1 cm
  • 77″ Samsung S95C: 171.7 cm x 98.4 cm x 1.1 cm

Dimensions without Stand (in inches):

  • 55″ Samsung S95C: 48.2 inches x 27.8 inches x 0.4 inches
  • 65″ Samsung S95C: 56.8 inches x 32.7 inches x 0.4 inches
  • 77″ Samsung S95C: 67.6 inches x 38.7 inches x 0.4 inches

Weight without Stand

Weight without Stand (in pounds):

  • 55″ Samsung S95C: 30.4 lbs.
  • 65″ Samsung S95C: 41.7 lbs.
  • 77″ Samsung S95C: 62.2 lbs.

Weight without Stand (in kilograms):

  • 55″ Samsung S95C: 13.8 kg
  • 65″ Samsung S95C: 18.9 kg
  • 77″ Samsung S95C: 28.2 kg

S95C VESA Mounting Pattern

In order to attach your S95C to a mounting bracket, you need to use the mounting screw holes located on the back of the TV screen. The horizontal and vertical distances of these four holes are known as the VESA Mounting Pattern.

VESA Mounting Pattern (example from different TV).

You can find the measurements, which are done in millimeters, below:

  • 55″ Samsung S95C: 400 mm x 300 mm
  • 65″ Samsung S95C: 400 mm x 300 mm
  • 77″ Samsung S95C: 400 mm x 400 mm

S95C Mounting Screw Type

The mounting screw holes located on the backside of the Samsung S95C is designed to fit the M8 type screw that is between 5 mm to 6 mm long.

What Samsung branded wall mounts are compatible with the S95C?

You can find a list of compatible Samsung wall mounts for these televisions below:

55″ Samsung S95C:

  • Samsung Full Motion Slim Wall Mount (WMN-B16FB or WMN-B16FB/ZA)
  • Samsung Slim Fit Wall Mount (QN77S95CAF or QN77S95CAFXZA)

65″ Samsung S95C:

  • Samsung Full Motion Slim Wall Mount (WMN-B16FB or WMN-B16FB/ZA)
  • Samsung Slim Fit Wall Mount (QN77S95CAF or QN77S95CAFXZA)
  • Samsung The Terrace Wall Mount (WMN4277TT or WMN4277TT/ZA)

77″ Samsung S95C:

  • Samsung Full Motion Slim Wall Mount (WMN-B16FB or WMN-B16FB/ZA)
  • Samsung Slim Fit Wall Mount (QN77S95CAF or QN77S95CAFXZA)
  • Samsung Large Size Bracket Wall Mount (WMN8000SXT or WMN8000SXT/ZA

If you are interested, you can purchase some of these on Amazon with the following links:

What third-party wall mounts are compatible with the Samsung S95C?

Of course, you can also use a non-Samsung wall mount to hold your television set. If you are looking for specific recommendations, you can check out this list.

Resources:

How to fix LG A3, B3, C3, G3 and Z3 remote pointer issues

You are able to use the magic remote as a pointer for your 2023 LG OLED. If you are having a difficult time trying to get the pointer to work accurately, or at all, then you can take a look at this troubleshooting article from Seeking Tech.

1. If you haven’t done so already, you should make sure that your magic remote is properly paired and registered for your LG A3, LG B3, LG C3, LG G3 or LG Z3.

To re-register your remote, you need to point it towards the TV screen. Afterwards, you should press and hold the home and settings buttons on the controller at the same time for a minimum of 5 seconds.

You can check out this troubleshooter if your TV isn’t able to recognize any inputs from the magic emote.

2. The IR sensor of your television set may not be able to detect the pointer input correctly if it is exposed to overly bright light.

So, if you have bright lights pointed directly at your television screen, you should try to turn them off. If you have sunlight directly shining on the sensor, then try to use blinders to block out the sun.

3. Of course, you should also make sure that you don’t have any obstacles that may be blocking the IR sensor of your OLED screen from receiving the signal of your television remote.

4. Other wireless devices may cause issues with the TV remote inputs as well. So, you can try turning off any nearby electronics that are actively using wireless communications.

5. If you haven’t done so already, try moving closer to your TV. The A3, B3, C3, G3 and Z3 have an IR range of around 10 feet.

6. If the control is working fine but the pointer isn’t showing up, then make sure that you disable the Audio Guidance feature.

In order to do so, press the Settings button on the remote and then select the gear icon. Afterwards, go to General > Accessibility > Audio Guidance. From there, set Audio Guidance to Off.

7. Keep in mind that you can’t use the directional buttons and the pointer at the same time. So, if you press the Up, Down, Left or Right button, then the pointer will disappear.

8. If you manage to get the magic remote pointer to appear but it isn’t moving very smoothly, then you should be able to reset its position by moving the pointer to the edge of the screen.

Of course, you should also make sure that you don’t have any bright lights and/or obstacles that may be blocking the IR sensor.

9. You can also adjust the pointer speed to fit your preferences so that it will appear to be smoother.

In order to do so, you first need to press the Settings button on the remote and then select the Settings option on the TV screen. Afterwards, head over to General > System > Additional Settings > Pointer Options. From there, you will be able to adjust the Tracking Speed as well as the Pointer Size.

How to fix LG A3, B3, C3, G3 and Z3 magic remote issues

If the magic remote control of your LG A3, B3, C3, G3 or Z3 does not appear to be working, then you can take a look at this troubleshooting guide from Seeking Tech to see how you can fix it.

1. For the first step, we recommend taking a look at the battery compartment of the TV remote. You should make sure that the batteries are properly aligned to the positive and negative terminals.

2. If possible, you can also try replacing the alkaline batteries to see if the magic remote controller will power on.

3. Make sure you aren’t blocking the middle front portion of the television; otherwise, you may be hindering the wireless signals between the remote and TV screen.

4. If you have a lot of wireless devices nearby, then these may also be interfering with the communications between the LG magic remote and the TV.

In this case, you can try moving the remote closer to the television. If possible, you can also try turning off other nearby wireless devices to see if you are able to get the TV remote to work correctly.

5. If the IR sensor of your LG is exposed to bright lights, including sun light, then it may not be able to proely detect your remote.

In this case, you can see if turning off the lights and/or using blinders on the windows will make the remote controller more responsive.

6. If the remote appears to power on just fine and there are no obstacles that may be hindering its communcation with the TV, then the next step is to ensure that you have pairred it to your LG A3, LG B3, LG C3, LG G3 or LG Z3.

In order to pair the controller, you need to take the following steps:

  • Turn on your television set.
  • Wait for at least 20 seconds.
  • Point the remote towards the OLED screen and then press the Wheel/OK button on the remote.
  • If done correctly, you should see a pairing complete message appear on the TV screen.

6. You can also try re-registering the television remote.

The fastest way in doing so is to press and hold both the home and settings buttons on the remote for at least 5 seconds while it is pointed towards the screen. You should see some instructions that appear on the TV about de-registering and re-registering the television remote.

Alternatively, you can press and hold the back and home buttons at the same time for at least 5 seconds with the remote pointed towards the OLED. This will de-register the remote controller. Afterwards, press the Wheel/OK button again to re-pair the remote.