How to enable keyboard and mouse support for Assassin’s Creed Mirage on consoles

You can play with a keyboard and mouse in the PlayStation 4, PlayStation 5, Xbox One, Xbox Series S and Xbox Series X versions of Assassin’s Creed Mirage. To see how you can enable this control scheme as well as customize it, you can check out this tutorial from Seeking Tech.

1. To start off, you need to connect a compatible keyboard and mouse to your console.

The PlayStation and Xbox consoles do not Bluetooth. Instead, you can either directly connect the keyboard and mouse via a wired USB connection or by using a wireless USB dongle.

2. With the new controls connected, open Assassin’s Creed Mirage.

3. We then recommend that you open the Options menu.

4. From there, switch over to the Controls tab and then scroll down to the Keyboard and Mouse section.

5. You can then select Customize Controller to check out the control scheme when playing Assassin’s Creed Mirage with a keyboard and mouse.

You will also be able to reassign inputs.

6. In the Keyboard and Mouse section, you will also be able to adjust the following:

  • Walking Speed
  • Mouse Sensitivity
  • Aiming Sensitivity
  • Mouse Acceleration
  • Mouse X-Axis
  • Mouse Y-Axis

We suggest playing around with these options until the character and camera movements feel natural.

How to fix The Texas Chainsaw Massacre frame rate issues

You may notice some frame drops and stutters when playing The Texas Chainsaw Massacre videogame. To see how you can get the asymmetrical survival horror game to run smoother, you can check out this article from Seeking Tech.

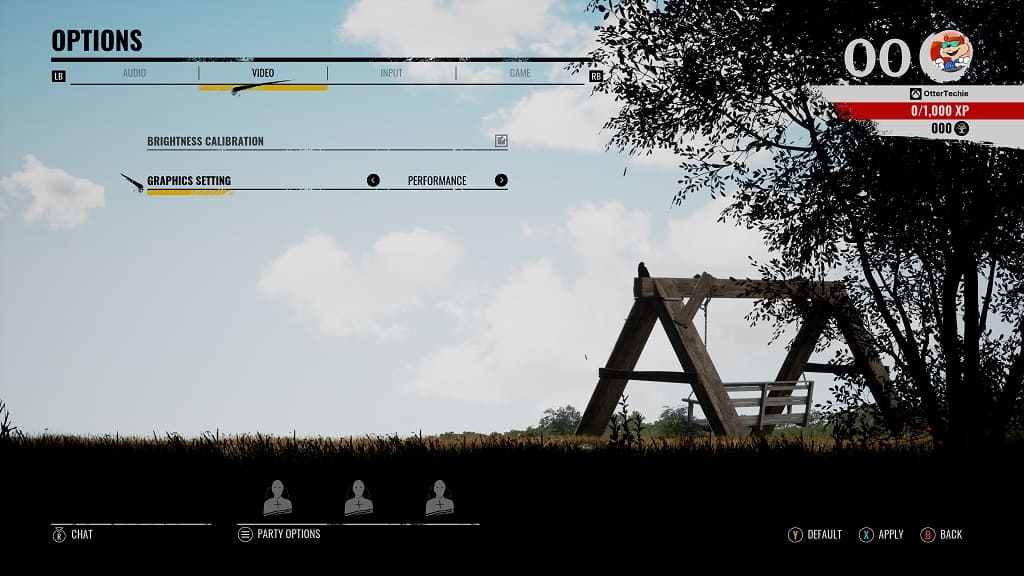
1. If you are playing The Texas Chainsaw Massacre on a PlayStation 5 or Xbox Series X console, then you are able to change Graphics Setting.

In order to do so, open the Options menu from the title screen and then head over to the Video tab. From there, make sure that Graphics Setting is set to Performance.

2. On the PC, you can two going to the same Options > Video menu and then lower some of the graphics settings to see if the frame rate improves.

You can also check to see if you have the latest drivers installed on your graphics card for your computer.

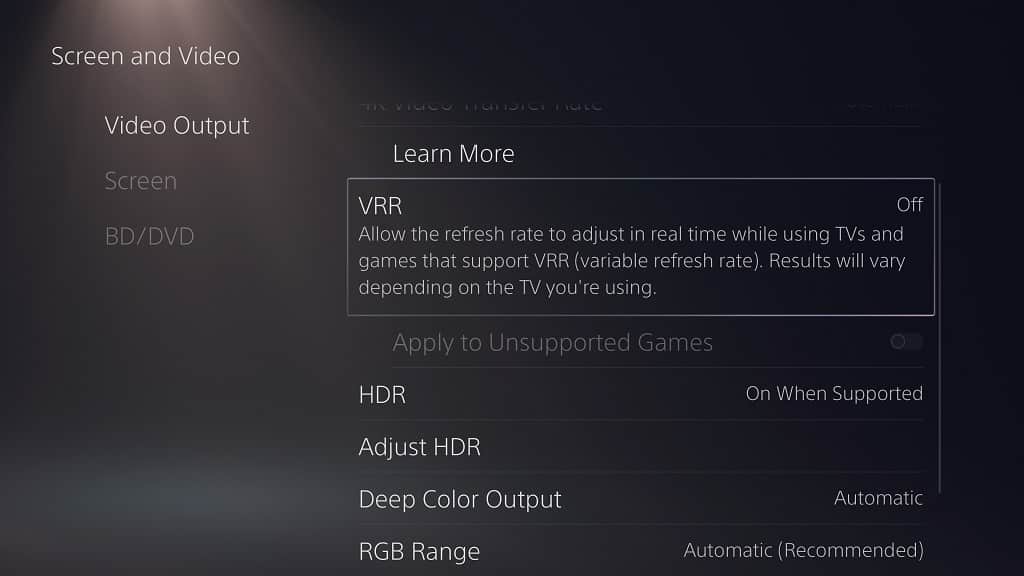
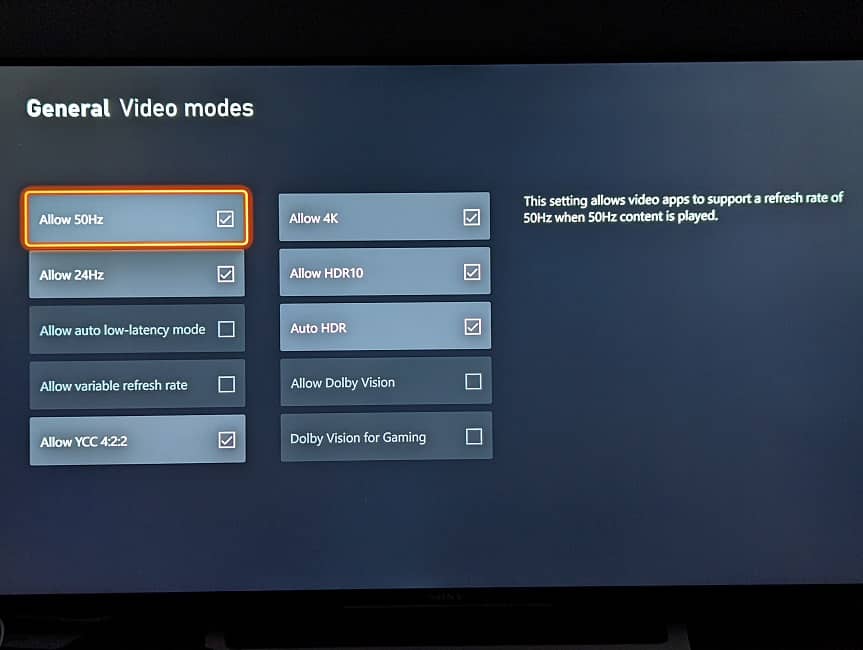
3. If your TV or gaming monitor is capable of Variable Refresh Rate, GSYNC or FreeSync, then you should make sure that it is turned on both your screen and system.

For the PS5, you need to head over to your console’s Settings menu and then go to Screen and Video > Video Output. From there, check to see if VRR is set to Automatic.

On the Xbox Series X or Xbox Series S, navigate over to the Settings menu of the console and then go to General > TV & display options > Video modes. From that menu, make sure that the “Allow variable refresh rate” setting is selected.

Variable Refresh Rate, GSYNC and FreeSync should help eliminate the smaller stutters and frame drops when playing the game.

4. If you haven’t done so already, make sure you have the latest patch installed for The Texas Chainsaw Massacre as the latest update may come with some performance improvements.

Recommended LG C3 settings for PS5, Xbox Series X and S

The LG C3 is a popular choice when it comes to a gaming television set capable of getting the most out of the PlayStation 5, Xbox Series X and Xbox Series S. To see what settings you should be using for this TV, you can check out this guide from Seeking Tech.

Model Numbers

This article should be based on the following model numbers from the C3 series:

  • 42″ LG C3 evo OLED TV (OLED42C3PUA)
  • 48″ LG C3 evo OLED TV (OLED48C3PUA)
  • 55″ LG C3 evo OLED TV (OLED55C3PUA)
  • 65″ LG C3 evo OLED TV (OLED65C3PUA)
  • 77″ LG C3 evo OLED TV (OLED77C3PUA)
  • 83″ LG C3 evo OLED TV (OLED83C3PUA)

Supported PS5 Features

When it comes to the PlayStation 5, the LG C3 supports Auto Low Latency Mode and HDR10.

In terms of frame rate, the TV is capable of playing PS5 games at up to 120 fps with Variable Refresh Rate support as long as it stays above 48 fps.

Supported Xbox Series X and Xbox Series S Features

For the Xbox Series X and Xbox Series S, the LG C3 supports Auto Low Latency Mode in addition to being capable of displaying games in HDR10 and Dolby Vision.

As for the frame rate, the Series X and Series S games can be played at up to 120 fps. When it comes to frame rate drops in these Xbox titles, the TV supports Variable Refresh Rate starting at 40 fps as well as Low Frame Rate Compensation.

Recommended Settings

To set up your LG C3 correctly for your PlayStation 5, Xbox Series X and/or Xbox Series S, you can take the following steps:

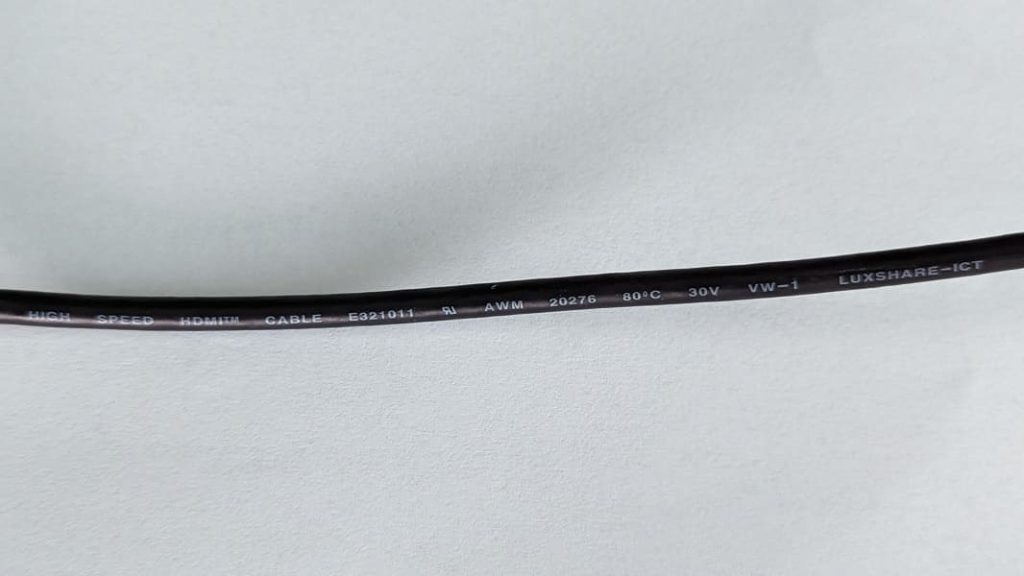
1. Connect your console to the OLED television if you haven’t done so already. Make sure you use the HDMI cable that came with your PS5, Series X or Series S for the best compatibility.

All four HDMI ports of the C3 are version 2.1; therefore, you can connect the console to any of them.

2. Open the TV settings of your LG C3 and then go to the General tab. From there, make sure that the Game Optimizer mode is turned on.

This picture setting will let you play games with low input lag. It will also turn on the Game Optimizer menu for the C3.

3. In the settings of your TV, you should also make sure that the HDMI Deep Color setting is set to 4K.

This will unlock the full HDMI 2.1 bandwidth for your console.

4. With the aforementioned Game Optimizer menu enabled, press the gear button on the TV remote to open it while the input of the screen is showing your connected console.

5. From there, make sure that the VRR & G-Sync setting is enabled.

6. In the same Game Optimizer menu, you should also set the Prevent Input Delay setting to Boost as well.

7. You should now be done with setting up your LG C3. With that said, you still have work to do on the console side. To start off, you should check to see if you have the right settings enabled on your PS5, Xbox Series X or Xbox Series S.

For the PlayStation 5, open the console’s Settings menu and then go to Screen and Video > Video Output. From there, you need to set the following options to Automatic:

  • VRR
  • 120 Hz
  • ALLM
  • 4K Transfer Rate
  • Deep Color Output
  • RGB Range

For the Xbox Series X and Xbox Series S, go to the console’s Settings menu and then navigate over to General > TV & Display Options > Video modes. You should then make sure that the following are enabled:

  • Allow Auto-Low Latency Mode
  • Allow Variable Refresh Rate
  • Allow 4K
  • Allow HDR10
  • Allow Dolby Vision
  • Dolby Vision for Gaming

7. You also need to calibrate your console’s HDR output for the LG C3.

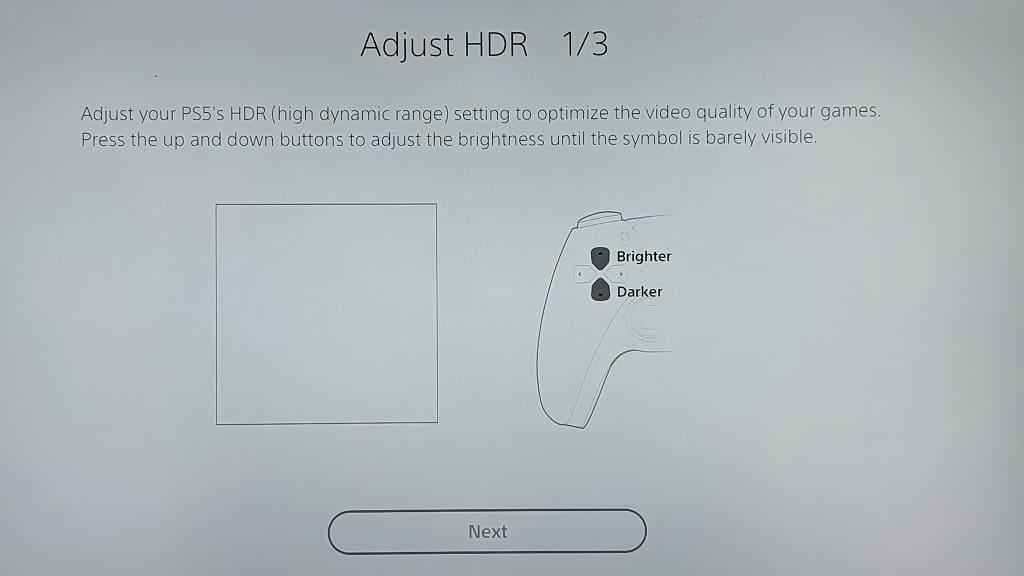
On the PS5 side, you need to open the Settings menu and then select Screen and Video > Video Output > Adjust HDR.

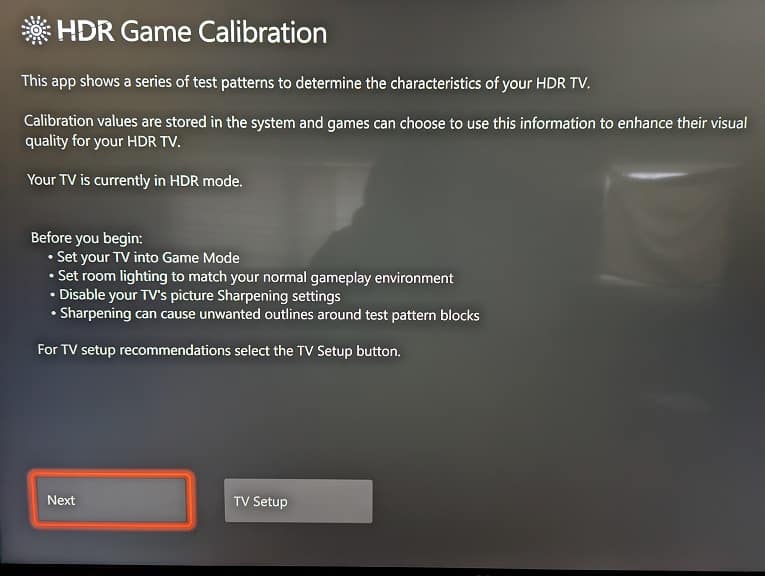
If you have an Xbox Series X or Xbox Series S, then you need to open the console’s Settings menu and then select General > TV & display options > Calibrate HDR for Games.

Finally, select the on-screen instructions to calibrate the HDR brightness output for your C3 OLED.

Samsung Q60C wall mount specs

If you bought the 2023 Samsung Q60C and would like to put it up on a wall, then you can check out this guide at Seeking Tech.

Screen Sizes

This article will cover the following model numbers of the Q60C:

32″:

  • QN32Q60CAF
  • QN32Q60CAFXZA

43″:

  • QN43Q60CAF
  • QN43Q60CAFXZA

50″:

  • QN50Q60CAF
  • QN50Q60CAFXZA

55″:

  • QN55Q60CAF
  • QN55Q60CAFXZA

65″:

  • QN65Q60CAF
  • QN65Q60CAFXZA

70″:

  • QN70Q60CAF
  • QN70Q60CAFXZA

75″:

  • QN75Q60CAF
  • QN75Q60CAFXZA

85″:

  • QN85Q60CAF
  • QN85Q60CAFXZA

Q60C Dimensions (without Stand)

Dimensions without Stand (in inches):

  • 32″ Q60C: 28.6 inches x 16.8 inches x 1.2 inch
  • 43″ Q60C: 38.0 inches x 22.0 inches x 1.0 inch
  • 50″ Q60C: 44.0 inches x 25.4 inches x 1.0 inch
  • 55″ Q60C: 48.5 inches x 27.9 inches x 1.0 inch
  • 65″ Q60C: 57.1 inches x 32.7 inches x 1.0 inch
  • 70″ Q60C: 61.4 inches x 35.5 inches x 1.0 inch
  • 75″ Q60C: 66.0 inches x 37.8 inches x 1.0 inch
  • 85″ Q60C: 74.8 inches x 42.7 inches x 1.1 inch

Dimensions without Stand (in millimeters):

  • 32″ Q60C: 726 mm x 427 mm x 30.5 mm
  • 43″ Q60C: 965 mm x 559 mm x 25 mm
  • 50″ Q60C: 1118 mm x 645 mm x 25 mm
  • 55″ Q60C: 1232 mm x 709 mm x 25 mm
  • 65″ Q60C: 1450 mm x 831 mm x 25 mm
  • 70″ Q60C: 1560 mm x 902 mm x 25 mm
  • 75″ Q60C: 1676 mm x 960 mm x 25 mm
  • 85″ Q60C: 1900 mm x 1085 mm x 25 mm

Dimensions without Stand (in centimeters):

  • 32″ Q60C: 72.6 cm x 42.7 cm x 3.1 cm
  • 43″ Q60C: 96.5 cm x 55.9 cm x 2.5 cm
  • 50″ Q60C: 111.8 cm x 64.5 cm x 2.5 cm
  • 55″ Q60C: 123.2 cm x 70.9 cm x 2.5 cm
  • 65″ Q60C: 145.0 cm x 83.1 cm x 2.5 cm
  • 70″ Q60C: 156.0 cm x 90.2 cm x 2.5 cm
  • 75″ Q60C: 167.6 cm x 96.0 cm x 2.5 cm
  • 85″ Q60C: 190.0 cm x 108.5 cm x 2.5 cm

Q60C Weight (without Stand)

Weight without Stand (in pounds):

  • 32″ Q60C: 11.7 lbs.
  • 43″ Q60C: 18.5 lbs.
  • 50″ Q60C: 25.4 lbs.
  • 55″ Q60C: 34.2 lbs.
  • 65″ Q60C: 46.1 lbs.
  • 70″ Q60C: 62.8 lbs.
  • 75″ Q60C: 69.2 lbs.
  • 85″ Q60C: 91.5 lbs.

Weight without Stand (in kilograms):

  • 32″ Q60C: 5.3 kg
  • 43″ Q60C: 8.4 kg
  • 50″ Q60C: 11.5 kg
  • 55″ Q60C: 15.5 kg
  • 65″ Q60C: 21.0 kg
  • 70″ Q60C: 28.5 kg
  • 75″ Q60C: 31.4 kg
  • 85″ Q60C: 41.5 kg

Q60C VESA Mounting Pattern

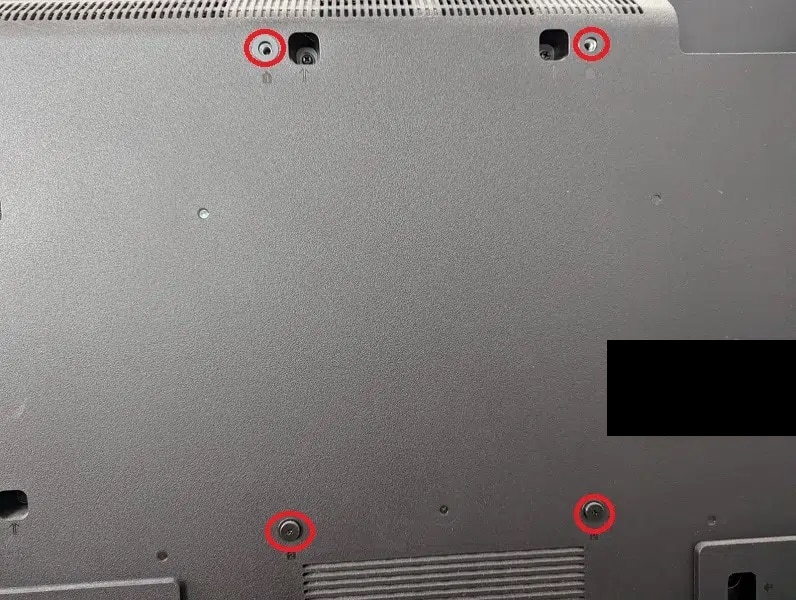
In order to install the wall mount to your TV, you need to use the four mounting screw holes located on the back of your Q60C. The vertical and horizontal distances between these screws are known as the VESA Mounting Pattern.

You can find the pattern for each screen size below:

  • 32″ Q60C: 100 mm x 100 mm
  • 43″ Q60C: 200 mm x 200 mm
  • 50″ Q60C: 200 mm x 200 mm
  • 55″ Q60C: 200 mm x 200 mm
  • 65″ Q60C: 400 mm x 300 mm
  • 70″ Q60C: 400 mm x 300 mm
  • 75″ Q60C: 400 mm x 400 mm
  • 85″ Q60C: 600 mm x 400 mm
VESA Mounting Pattern (example from different TV).

Q60C Mounting Screw Type

When it comes to the mounting screw type, Samsung recommends that you use the M4 with a length between 19 mm to 22 mm for the 32” Q60C.

For the bigger versions of this TV model, the company suggests using the M8 screw type with a length between 11 mm to 13 mm.

What wall mounts are compatible with the Samsung Q60C?

For a wall mount to be compatible with the Q60C, it must match the VESA Mounting Pattern on the back of the television set.

The 32-inch screen size features a 100 mm x 100 mm pattern. The 43-inch, 50-inch and 55-inch versions all use 200 mm x 200 mm. If you have a 65-inch or 70-inch set, then you have to use a mount that is compatible with 400 mm x 300 mm. The 75-inch model has a 400 mm x 400 mm pattern while the 84-inch screen size options utilizes the 600 mm x 400 mm pattern.

The same wall mount should also be strong enough to hold the weight of the television set. The Q60C series can weigh as much as 91.5 lbs. or 41.5 kg.

If you are looking for specific fixed, tilting or full motion wall mount recommendations for your Q60C, then you can check out this post.

Recommended Samsung Q60C settings for PS5, Xbox Series X and S

If you bought the 2023 Samsung QLED Q60C television set, then you can check out this guide from Seeking Tech to see which settings you should be using in order to get the most out of PlayStation 5, Xbox Series X and Xbox Series S games.

This guide should cover all screen sizes of the Q60C. The TV is available as a 32-inch, 43-inch, 50-inch, 55-inch, 65-inch, 70-inch, 75-inch or 85-inch set.

Supported PlayStation 5, Xbox Series X and Xbox Series S features

With the Q60C, you will be able to play PS5, Xbox Series X and Xbox Series S games at up to 60 frames per second in 4K resolution. The auto low latency modes for these consoles are also supported.

You won’t be able to take advantage of 120 fps or Variable Refresh Rate. For the Xbox consoles, Dolby Vision support is missing as well.

Recommended Settings

1. If you haven’t done so already, make sure that you connect your PS5, Xbox Series X or Xbox Series S console to your Q60C.

You should use the HDMI 2.1 cable that came with the PlayStation 5 or Series X. For the Series S, you should use the HDMI 2.0 cable that came with the console.

2. Open the Setting menu of your Q60C and then head over to External Device Manager.

Once you get there, go to Input Signal Plus and then make sure that it is enabled for the HDMI port that is connected to the game console.

3. Return to the External Device Manager and then go to Game Mode Settings. From there, make sure you have Game Mode enabled.

With this picture setting turned on, you will lower the input lag when playing videogames on the Samsung QLED screen.

4. Next, you need to check if you have the right settings enabled on your game console.

On the PlayStation 5 or PlayStation 5 Digital Edition, open the system’s Settings menu and then head over to Screen and Video > Video Output. From there, you need to set the following options to Automatic:

  • ALLM
  • 4K Transfer Rate
  • Deep Color Output
  • RGB Range

If you have an Xbox Series X or Xbox Series S, then you need to navigate over to the console’s Settings menu and the go to General > TV & Display Options > Video modes. From there, you need to enable the following:

  • Allow Auto-Low Latency Mode
  • Allow 4K
  • Allow HDR10

5. You then need to optimize the HDR brightness output of your console.

On the PS5, you can do so by going to Settings > Screen and Video > Video Output > Adjust HDR.

For both the Series X and Series S, you need to head over to Settings > General > TV & display options > Calibrate HDR for gaming.

6. You should be done setting up your Q60C for your consoles. However, you may want to head over to Game Motion Plus Settings menu on your TV. From there, you can add motion interpolation, which may help some games look smoother.

You can use Judder Reduction for games with a maximum frame rate of 30 fps. You can also add black frame insertion by using the LCD Clear Motion feature.

Samsung CU7000 wall mount specs

If you bought the Samsung CU7000 and would like to mount the TV up on your wall, then you can take a look at this compatibly guide from Seeking Tech.

Samsung CU7000 Screen Sizes

This guide should cover all available screen sizes from the CU7000 series, which should include the following model numbers:

43″:

  • UN43CU7000
  • UN43CU7000FXZA
  • UN43CU7000DXZA

50″:

  • UN50CU7000
  • UN50CU7000FXZA
  • UN50CU7000DXZA

55″:

  • UN55CU7000
  • UN55CU7000FXZA
  • UN55CU7000DXZA

58″:

  • UN58CU7000
  • UN58CU7000FXZA
  • UN58CU7000DXZA

65″:

  • UN65CU7000
  • UN65CU7000FXZA
  • UN65CU7000DXZA

70″:

  • UN70CU7000
  • UN70CU7000FXZA
  • UN70CU7000DXZA

75″:

  • UN75CU7000
  • UN75CU7000FXZA
  • UN75CU7000DXZA

85″:

  • UN85CU7000
  • UN85CU7000FXZA
  • UN85CU7000DXZA

CU7000 Dimensions (without Stand)


Dimensions without Stand (in inches):

  • 43″ CU7000: 37.9 inches x 2.02 inches x 2.3 inches
  • 50″ CU7000: 44.0 inches x 25.4 inches x 2.4 inches
  • 55″ CU7000: 48.4 inches x 27.8 inches x 2.4 inches
  • 58″ CU7000: 50.8 inches x 29.5 inches x 2.4 inches
  • 65″ CU7000: 57.1 inches x 32.7 inches x 2.4 inches
  • 70″ CU7000: 61.3 inches x 35.4 inches x 2.4 inches
  • 75″ CU7000: 65.9 inches x 37.7 inches x 2.4 inches
  • 85″ CU7000: 74.6 inches x 42.7 inches x 2.4 inches

Dimensions without Stand (in millimeters):

  • 43″ CU7000: 963 mm x 513 mm x 58 mm
  • 50″ CU7000: 1118 mm x 645 mm x 61 mm
  • 55″ CU7000: 1229 mm x 706 mm x 61 mm
  • 58″ CU7000: 1290 mm x 749 mm x 61 mm
  • 65″ CU7000: 1450 mm x 831 mm x 61 mm
  • 70″ CU7000: 1557 mm x 899 mm x 61 mm
  • 75″ CU7000: 1674 mm x 958 mm x 61 mm
  • 85″ CU7000: 1895 mm x 1085 mm x 61 mm

Dimensions without Stand (in centimeters):

  • 43″ CU7000: 96.3 cm x 51.3 cm x 5.8 cm
  • 50″ CU7000: 111.8 cm x 64.5 cm x 6.1 cm
  • 55″ CU7000: 122.9 cm x 70.6 cm x 6.1 cm
  • 58″ CU7000: 129.0 cm x 74.9 cm x 6.1 cm
  • 65″ CU7000: 145.0 cm x 83.1 cm x 6.1 cm
  • 70″ CU7000: 155.7 cm x 89.9 cm x 6.1 cm
  • 75″ CU7000: 167.4 cm x 95.8 cm x 6.1 cm
  • 85″ CU7000: 189.5 cm x 108.5 cm x 6.1 cm

CU7000 Weight (without Stand)

Weight without Stand (in pounds):

  • 43″ CU7000: 17.9 lbs.
  • 50″ CU7000: 25.1 lbs.
  • 55″ CU7000: 30.6 lbs.
  • 58″ CU7000: 33.5 lbs.
  • 65″ CU7000: 45.4 lbs.
  • 70″ CU7000: 54.7 lbs.
  • 75″ CU7000: 67.0 lbs.
  • 85″ CU7000: 88.6 lbs.

Weight without Stand (in kilograms):

  • 43″ CU7000: 8.1 kg
  • 50″ CU7000: 11.4 kg
  • 55″ CU7000: 13.9 kg
  • 58″ CU7000: 15.2 kg
  • 65″ CU7000: 20.6 kg
  • 70″ CU7000: 24.8 kg
  • 75″ CU7000: 30.4 kg
  • 85″ CU7000: 40.2 kg

CU7000 VESA Mounting Pattern

The VESA Mounting Pattern measure the horizontal and vertical distances of the mounting screw holes located on the backside of the CU7000. You won’t be able to attach the TV to a wall mount if the patterns don’t match up.

You can find the screw hole distances below:

  • 43″ CU7000: 200 mm x 200 mm
  • 50″ CU7000: 200 mm x 200 mm
  • 55″ CU7000: 200 mm x 200 mm
  • 58″ CU7000: 400 mm x 300 mm
  • 65″ CU7000: 400 mm x 300 mm
  • 70″ CU7000: 400 mm x 300 mm
  • 75″ CU7000: 400 mm x 400 mm
  • 85″ CU7000: 600 mm x 400 mm
VESA Mounting Pattern (example from different TV).

Mounting Screw Type

When it comes to installing the mounting to the backside of the CU7000, Samsung recommends that you use the M8 screw type with a length between 20 mm to 22 mm.

What wall mounts are compatible with the Samsung CU7000?

For a wall mount to be compatible with the CU7000, it must support the TV’s VESA Mounting Pattern on the backside.

The 43”, 50” and 55” screen sizes feature the 200 mm x 200 mm pattern. The 58”, 65” and 70” version uses the 400 mm x 300 mm pattern. The 75” option utilizes the 400 mm x 400 mm pattern while the 85” screen size supports 600 mm x 400 mm pattern.

The mounting bracket should also have a weight capacity limit that exceeds that weight of the CU7000 television, which can weigh as much as 88.6 lbs. (or 40.2 kg).

If you are looking for specific fixed, tilt or full motion wall mount options, then you can check out this article.

Resources:

Samsung CU7000 settings for PS5, Xbox Series X and S

If you purchase the Samsung 2023 CU7000, then you can check out this Seeking Tech guide to find the best settings for this television set to use when it comes to playing PlayStation 5, Xbox Series X and/or Xbox Series S games.

This article should cover all screen sizes of the CU7000 series, which should include the following model numbers:

43″:

  • UN43CU7000
  • UN43CU7000FXZA
  • UN43CU7000DXZA

50″:

  • UN50CU7000
  • UN50CU7000FXZA
  • UN50CU7000DXZA

55″:

  • UN55CU7000
  • UN55CU7000FXZA
  • UN55CU7000DXZA

58″:

  • UN58CU7000
  • UN58CU7000FXZA
  • UN58CU7000DXZA

65″:

  • UN65CU7000
  • UN65CU7000FXZA
  • UN65CU7000DXZA

70″:

  • UN70CU7000
  • UN70CU7000FXZA
  • UN70CU7000DXZA

75″:

  • UN75CU7000
  • UN75CU7000FXZA
  • UN75CU7000DXZA

85″:

  • UN85CU7000
  • UN85CU7000FXZA
  • UN85CU7000DXZA

Supported PS5 Features

With the CU7000, you will be able to play PlayStation 5 games at up to 60 frames per second in 4K with HDR10.

Supported Xbox Series X and Xbox Series S features

For the two Xbox consoles, the CU7000 can play games at up to 60 fps in 4K with HDR10.

Recommended Settings

1. For the first step, connect your console to the TV if you haven’t done so already. Make sure you use the HDMI cable that came with your PS5, Series X or Series S.

The CU7000’s HDMI ports are all version 2.0; therefore, you can use any of the three ports.

2. Next, navigate towards the External Device Manager menu from Settings. Once you get there, select Input Signal Plus and then make sure that this feature is enabled for the HDMI port that is connected to your console.

This is to ensure that the HDR10 support is turned on.

3. Afterwards, you need to head over to the Settings menu of the Samsung television and then make your way to Game Mode Settings. From there, make sure Game Mode is enabled.

By doing so, the CU7000 should be able to display PS5, Xbox Series X or Xbox Series S games with low input lag.

4. Next, you need to turn on your game console and then head over to its Settings menu.

On the PS5, navigate over to Screen and Video > Video Output. From there, make sure you set the following settings to Automatic:

  • ALLM
  • 4K Transfer Rate
  • Deep Color Output
  • RGB Range

On the Xbox Series X or S, make your way to the General > TV & Display Options > Video Modes menu. From there, make sure that the following boxes are checked:

  • Allow Auto-Low Latency Mode
  • Allow 4K
  • Allow HDR10

5. The next step is to calibrate your console’s HDR brightness output to match the capabilities of your CU7000.

You can calibrate your PS5 by heading over to the console Settings menu and then selecting Screen and Video > Video Output > Adjust HDR.

On the Xbox consoles, you need to head to the Settings menu and then select General > TV & Display Options > Calibrate HDR for Games.

6. You should be done setting up your CU7000 for your gaming console.

With that said, you can head back to the Game Settings Menu of your television set to adjust the Dynamic Black Equalizer, which makes it easier to see in the dark in specific games.

You may also want to play around with the Judder Reduction and LED Clear Motion settings from the Game Motion Plus Settings on a game-by-game basis.

Samsung CU8000 wall mount specs

If you purchased the Samsung CU8000 and would like to hang it up on a wall, then you can check out this guide from Seeking Tech.

Samsung CU8000 Screen Sizes

This article will be based on the 43-inch, 50-inch, 55-inch, 65-inch, 75-inch and 85-inch screen sizes of the CU8000, which should include the following model numbers:

43″:

  • UN43CU8000
  • UN43CU8000F
  • UN43CU8000FXZA

50”:

  • UN50CU8000
  • UN50CU8000F
  • UN50CU8000FXZA

55”:

  • UN55CU8000
  • UN55CU8000F
  • UN55CU8000FXZA

65”:

  • UN65CU8000
  • UN65CU8000F
  • UN65CU8000FXZA

75”:

  • UN75CU8000
  • UN75CU8000F
  • UN75CU8000FXZA

85”:

  • UN85CU8000
  • UN85CU8000F
  • UN85CU8000FXZA

CU8000 Dimensions (without Stand)

Dimensions without Stand (in inches):

  • 43″ CU8000: 38.0 inches x 22.0 inches x 1.0 inch
  • 50″ CU8000: 44.0 inches x 25.4 inches x 1.0 inch
  • 55″ CU8000: 48.5 inches x 27.9 inches x 1.0 inch
  • 65″ CU8000: 57.1 inches x 32.8 inches x 1.0 inch
  • 75″ CU8000: 66.0 inches x 37.8 inches x 1.0 inch
  • 85″ CU8000: 74.8 inches x 42.8 inches x 1.1 inch

Dimensions without Stand (in millimeters):

  • 43″ CU8000: 965 mm x 559 mm x 25 mm
  • 50″ CU8000: 1118 mm x 645 mm x 25 mm
  • 55″ CU8000: 1232 mm x 709 mm x 25 mm
  • 65″ CU8000: 1450 mm x 833 mm x 25 mm
  • 75″ CU8000: 1676 mm x 960 mm x 25 mm
  • 85″ CU8000: 1900 mm x 1087 mm x 28 mm

Dimensions without Stand (in centimeters):

  • 43″ CU8000: 96.5 cm x 55.9 cm x 2.5 cm
  • 50″ CU8000: 111.8 cm x 64.5 cm x 2.5 cm
  • 55″ CU8000: 123.2 cm x 70.9 cm x 2.5 cm
  • 65″ CU8000: 145.0 cm x 83.3 cm x 2.5 cm
  • 75″ CU8000: 167.6 cm x 96.0 cm x 2.5 cm
  • 85″ CU8000: 190.0 cm x 108.7 cm x 2.8 cm

CU8000 Weight (without Stand)

Weight without Stand (in pounds):

  • 43″ CU8000: 18.5 lbs.
  • 50″ CU8000: 25.4 lbs.
  • 55″ CU8000: 34.2 lbs.
  • 65″ CU8000: 46.1 lbs.
  • 75″ CU8000: 69.2 lbs.
  • 85″ CU8000: 91.5 lbs.

Weight without Stand (in kilograms):

  • 43″ CU8000: 8.4 kg
  • 50″ CU8000: 11.5 kg
  • 55″ CU8000: 15.5 kg
  • 65″ CU8000: 20.9 kg
  • 75″ CU8000: 31.4 kg
  • 85″ CU8000: 41.5 kg

CU8000 VESA Mounting Pattern

The VESA Mounting Pattern is also important specification as it measures the vertical and horizontal distances between the four mounting screw holes located on the back of the CU8000. The mounting bracket needs to support this pattern to be properly attached to the backside of the screen.

You can find VESA Mounting Pattern for the fix screen sizes below:

  • 43″ CU8000: 200 mm x 200 mm
  • 50″ CU8000: 200 mm x 200 mm
  • 55″ CU8000: 200 mm x 200 mm
  • 65″ CU8000: 400 mm x 300 mm
  • 75″ CU8000: 400 mm x 400 mm
  • 85″ CU8000: 600 mm x 400 mm
VESA Mounting Pattern (example from different TV).

Mounting Screw Type

When it comes to the screw type, Samsung recommends that you use the M8 type screw with a depth of 11 mm to 13 mm to attach the mounting bracket to the back of the CU8000.

What wall mounts are compatible with the Samsung CU8000?

For a wall mount to support the Samsung CU8000, it needs to support the VESA Mounting Pattern of the TV. The 43-inch, 50-inch and 55-inch screen sizes use the same 200 mm x 200 mm pattern. The bigger sizes each use a different pattern when compared to the other variants:

  • 65-inch: 400 mm x 300 mm
  • 75-inch: 400 mm x 400 mm
  • 85-inch: 600 mm x 400 mm

Furthermore, the mounting bracket should be able to support the weight of your CU8000, which may be as heavy as 91.5 lbs. (or 41.5 kg).

If you are looking for specific product recommendations, then you can take a look at this post.

Resources:

Recommended Samsung CU8000 settings for PS5, Xbox Series X and S

The CU8000 is an entry level 4K television set released by Samsung in 2023. If you have this TV and would like to optimize it for the PlayStation 5, Xbox Series X and/or Xbox Series S, then you can follow this guide from Seeking Tech.

Model Numbers

This guide is based on the 43-inch, 50-inch, 55-inch, 65-inch, 75-inch and 85-inch versions of the Samsung CU8000, which should include the following model numbers:

43″:

  • UN43CU8000
  • UN43CU8000FXZA

50”:

  • UN50CU8000
  • UN50CU8000FXZA

55”:

  • UN55CU8000
  • UN55CU8000FXZA

65”:

  • UN65CU8000
  • UN65CU8000FXZA

75”:

  • UN75CU8000
  • UN75CU8000FXZA

85”:

  • UN85CU8000
  • UN85CU8000FXZA

Supported CU8000 Console Gaming Features

With the 43-inch, 50-inch, 55-inch, 65-inch and 75-inch screen sizes of the CU8000, the following features are supported when it comes to playing games on the PlayStation 5, Xbox Series X and Xbox Series S:

  • Auto Low Latency Mode
  • HDR10
  • Up to 60 frames per second

If you have the 85-inch version of this CU8000, then you will also be able to use Variable Refresh Rate in addition to playing games at up to 120 frames per second.

Recommended CU8000 settings

To get the most out of the Samsung CU8000 when it comes to playing PS5, Series X and/or Series S games, you need to take the following steps:

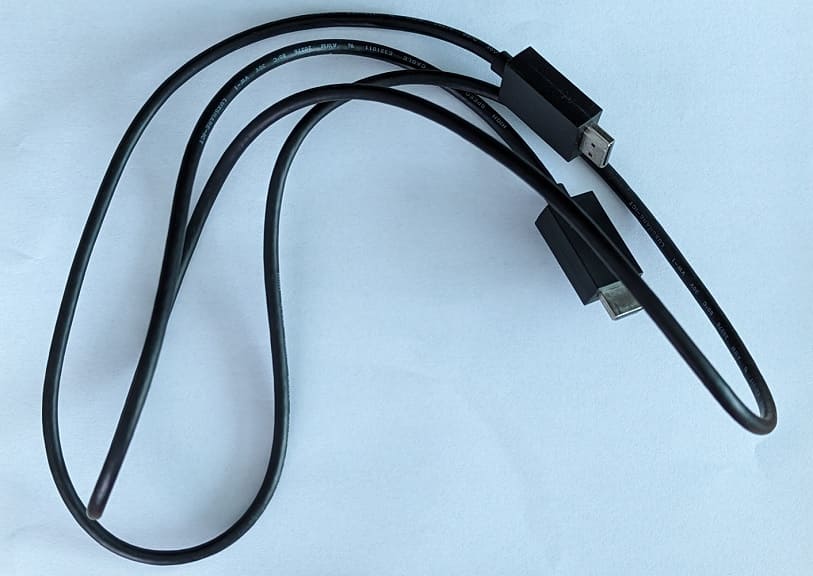
1. Connect your console to the TV if you haven’t done so already. Make sure you use the HDMI cable that came with your PlayStation 5, Xbox Series X and/or Xbox Series S for the best compatibility.
2. Next, you need to use your television remote to make your way over to the External Device Manager menu.

From there, select Input Signal Plus and then make sure that this feature is enabled for the HDMI port that is connected to your console.

3. From the same External Device Manager menu, select Game Mode and then make sure Game Mode is set to On.

By enabling Game Mode, the input lag should be reduced when playing videogames. For the 85-inch CU8000, this mode should automatically turn on the Variable Refresh Rate feature as well.

4. You should also make sure that the Color Space is set to Auto in the Color Space Settings menu of your television set.

5. The next step you should take is to go to the Settings menu of your console.

On the PlayStation 5, go to Screen and Video > Video Output.
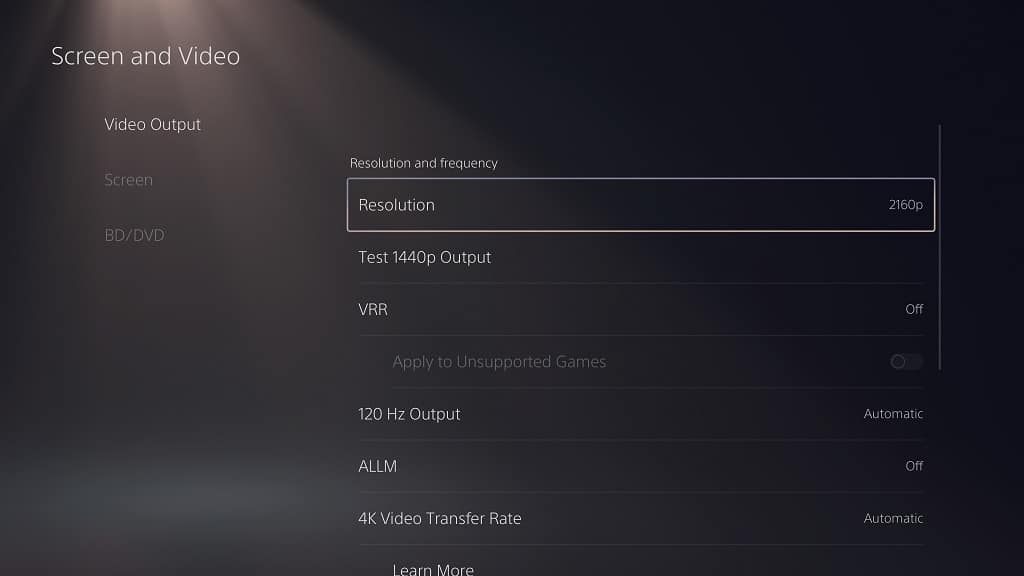
Afterwards, you should make sure that the following is set to Automatic:

  • ALLM
  • 4K Transfer Rate
  • Deep Color Output
  • RGB Range

If you have the 85-inch set, then you should also set 120 Hz and Variable Refresh Rate to Automatic as well from the Video Output menu as well.

For the Xbox Series X and Xbox Series S, navigate over to General > TV & Display Options > Video Modes.
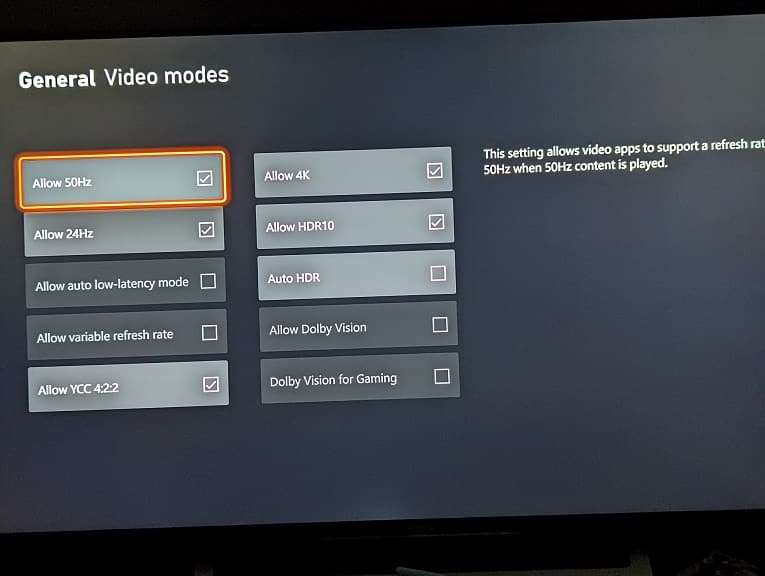
You should then make sure that the following settings are selected:

  • Allow Auto-Low Latency Mode
  • Allow 4K
  • Allow HDR10

If you are using the 85-inch screen size variant, then you should also select the Allow Variable Refresh Rate option in the Video Modes menu as well.

6. You then need to optimize the HDR brightness output.

To do so from the PS5, go back to the Settings > Screen and Video > Video Output menu and then select Adjust HDR.
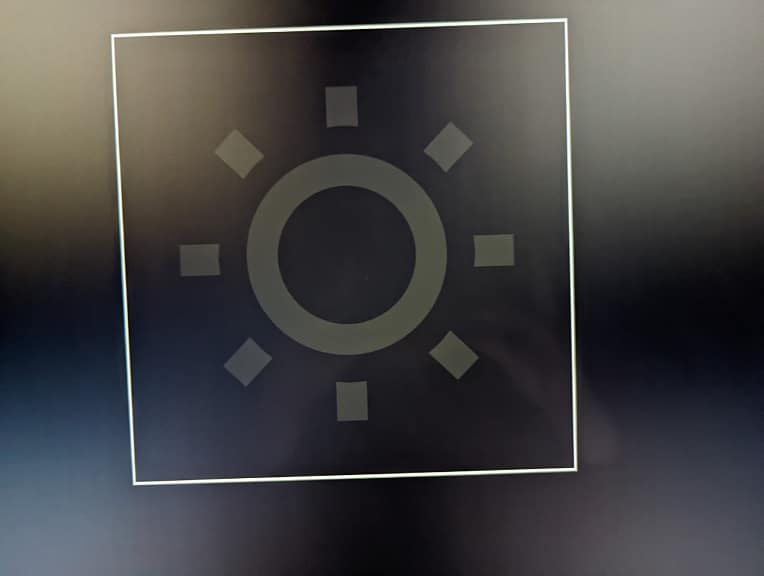
On the Series X and Series S, return to the Settings > General > TV & display options menu and then select Calibrate HDR for Gaming.
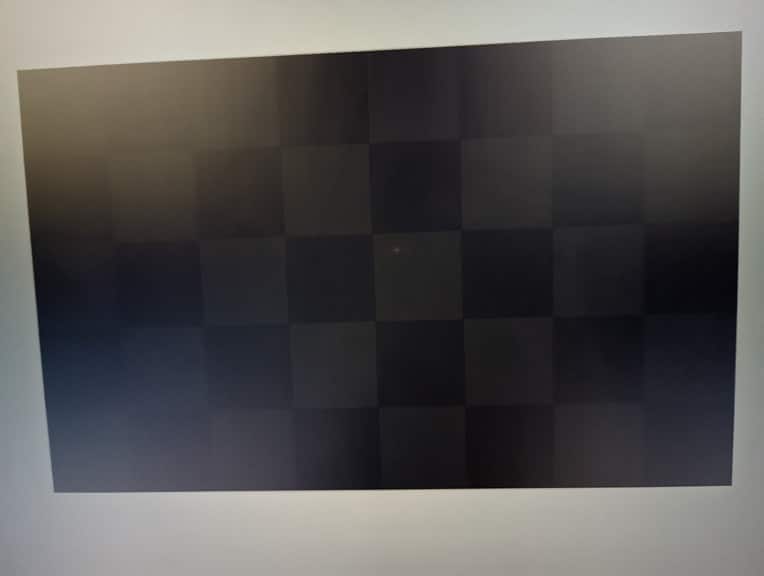
In both cases, you should see instructions appear on the TV screen that will direct you on how to adjust the HDR brightness output.

7. You should now be done with setting up your television set. With that said, you can use the Picture Clarity Settings of your CU8000 to make some of the games look smoother.

In this menu, you can use Judder Reduction for games that run at 30 fps. You can also use the LED Clear Motion feature from the same screen to add black frame insertion.

Both of these are completely optional as the effects vary from game to game.
Samsung QN90C and QN90CD wall mount specs

If you got the QN90C (which is also known as the QN90CD) and would like to install it up against a wall, then you can check out this compatibility guide at Seeking Tech.

Screen Sizes

This article will be covering all screen sizes of the QN90C and QN90CD, which should include the following model numbers:

43″:

  • QN43QN90CAF
  • QN43QN90CAFXZA
  • QN43QN90CDFXZA

50″:

  • QN50QN90CAF
  • QN50QN90CAFXZA
  • QN50QN90CDFXZA

55″:

  • QN55QN90CAF
  • QN55QN90CAFXZA
  • QN55QN90CDFXZA

65″:

  • QN65QN90CAF
  • QN65QN90CAFXZA
  • QN65QN90CDFXZA

75″:

  • QN75QN90CAF
  • QN75QN90CAFXZA
  • QN75QN90CDFXZA

85″:

  • QN85QN90CAF
  • QN85QN90CAFXZA
  • QN85QN90CDFXZA

QN90C and QN90CD Dimensions (without Stand)

Dimensions without Stand (in inches):

  • 43″ QN90C and QN90CD: 37.8″ x 22.0″ x 1.1″
  • 50″ QN90C and QN90CD: 43.8″ x 25.4″ x 1.1″
  • 55″ QN90C and QN90CD: 48.3″ x 27.8″ x 1.1″
  • 65″ QN90C and QN90CD: 56.9″ x 32.6″ x 1.1″
  • 75″ QN90C and QN90CD: 65.7″ x 37.7″ x 1.1″
  • 85″ QN90C and QN90CD: 74.5″ x 42.6″ x 1.1″

Dimensions without Stand (in millimeters):

  • 43″ QN90C and QN90CD: 960 mm x 559 mm x 28 mm
  • 50″ QN90C and QN90CD: 1113 mm x 645 mm x 28 mm
  • 55″ QN90C and QN90CD: 1227 mm x 706 mm x 28 mm
  • 65″ QN90C and QN90CD: 1445 mm x 828 mm x 28 mm
  • 75″ QN90C and QN90CD: 1669 mm x 958 mm x 28 mm
  • 85″ QN90C and QN90CD: 1892 mm x 1082 mm x 28 mm

Dimensions without Stand (in centimeters):

  • 43″ QN90C and QN90CD: 96.0 cm x 55.9 cm x 2.8 cm
  • 50″ QN90C and QN90CD: 111.3 cm x 64.5 cm x 2.8 cm
  • 55″ QN90C and QN90CD: 122.7 cm x 70.6 cm x 2.8 cm
  • 65″ QN90C and QN90CD: 144.5 cm x 82.8 cm x 2.8 cm
  • 75″ QN90C and QN90CD: 166.9 cm x 95.8 cm x 2.8 cm
  • 85″ QN90C and QN90CD: 189.2 cmx 108.2 cm x 2.8 cm

QN90C and QN90CD Weight (without Stand)

Weight without Stand (in pounds):

  • 43″ QN90C and QN90CD: 20.7 lbs.
  • 50″ QN90C and QN90CD: 29.8 lbs.
  • 55″ QN90C and QN90CD: 39.0 lbs.
  • 65″ QN90C and QN90CD: 53.4 lbs.
  • 75″ QN90C and QN90CD: 75.2 lbs.
  • 85″ QN90C and QN90CD: 95.9 lbs.

Weight without Stand (in kilograms):

  • 43″ QN90C and QN90CD: 9.4 kg
  • 50″ QN90C and QN90CD: 13.5 kg
  • 55″ QN90C and QN90CD: 17.7 kg
  • 65″ QN90C and QN90CD: 24.2 kg
  • 75″ QN90C and QN90CD: 34.1 kg
  • 85″ QN90C and QN90CD: 43.5 kg

QN90C and QN90CD VESA Mounting Pattern

To install the QN90C or QN90CD to a mounting bracket, the screw hole distances must be compatible. The horizontal and vertical distances between the four screw holes, which are measured in millimeters, can be found below:

  • 43″ QN90C and QN90CD: 200 mm x 200 mm
  • 50″ QN90C and QN90CD: 200 mm x 200 mm
  • 55″ QN90C and QN90CD: 200 mm x 200 mm
  • 65″ QN90C and QN90CD: 400 mm x 400 mm
  • 75″ QN90C and QN90CD: 400 mm x 400 mm
  • 85″ QN90C and QN90CD: 600 mm x 400 mm
VESA Mounting Pattern (example from different TV).

QN90C and QN90CD Mounting Screw Type

When it comes to the screw you need to used to attach the mount to the QN90C/QN90CD, Samsung recommends that you use the M8 screw type with a depth of 11 mm to 13 mm.

What third-party wall mounts are compatible with the Samsung QN90C and QN90CD?

For a wall mount to be compatible with the Samsung QN90C and QN90CD, it needs to support the VESA Mounting Pattern for the TV.

The 43-inch, 50-inch and 55-inch versions all use the 200 mm x 200 mm pattern. The 65-inch and 75-inch screen sizes feature a 400 mm x 400 mm pattern. The biggest screen option, the 85-inch, requires a mount that supports the 600 mm x 400 mm screw hole distances.

Furthermore, the mounting bracket needs to be strong enough to hold the weight of the QLED. The QN90C/QN90CD televisions can weigh as much as 95.9 lbs. or 43.5 kg.

You can take a look at our general wall mount recommendations guide to find a fixed, tilting or full motion mounting bracket that is compatible with the QN90C and QN90CD.

Resource: