Recommended Sony A80L settings for PS5, Xbox Series X and S games

The Sony A80L (or A80CL) is the most affordable 2023 OLED television model. If you purchased this TV, then you can check out this tutorial to see what recommended settings you should use in order to make the PlayStation 5, Xbox Series X and/or Xbox Series S videogames look the best on this screen.

Supported PS5 Features

With the Sony A80L, you can play PS5 games at 120 Hz refresh rate in 1080p and 4K. The 1440p resolution is limited to 60 Hz, however.

This OLED is also capable of displaying in HDR10 with Variable Refresh Rate (from 48 Hz to 60 Hz or 120 Hz) and Auto Low Latency Mode when you are playing on Sony’s latest console.

Supported Xbox Series X and Xbox Series S Features

The A80L can also play Series X and Series S games at up to 120 Hz in 1080p and 4K. Unfortunately, the 1440p resolution is also limited to 60 Hz on Xbox as well.

In terms of HDR, this set can display games in HDR10 as well as Dolby Vision. The latter will drop the refresh rate to 60 Hz, however, no matter the resolution.

The A80L also supports ALLM and VRR (from 40 Hz to 60 Hz or 120 Hz).

How to optimize the A80L for your console

To best optimize the Sony A80L OLED for your PS5, Series X and/or Series S, we recommend taking the following steps:

1. Connect your console to the HDMI port of your television set if you haven’t done so already.

If you have a PS5 and/or Series X, then you should use the HDMI 2.1 cable that came with the console to connect to either HDMI Port #3 or HDMI Port #4 of the A80L.
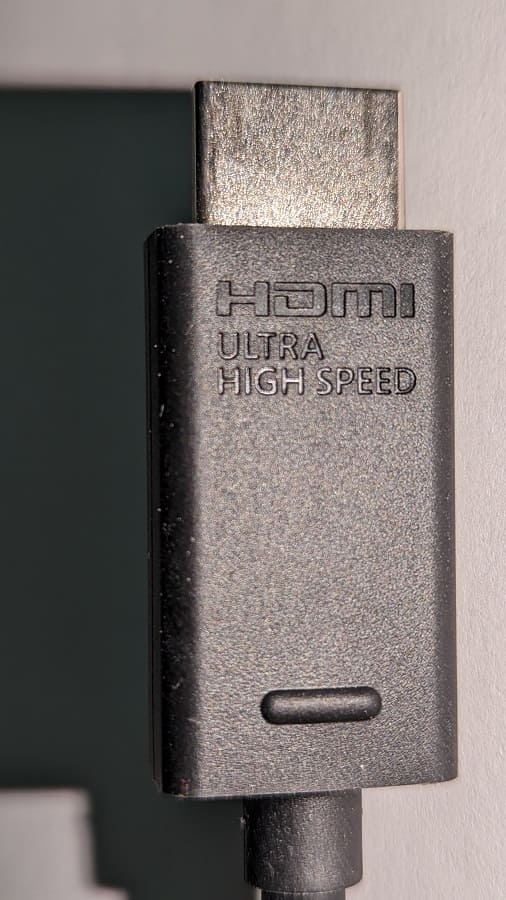
The Xbox Series S only comes with a HDMI 2.0 cable; so, you can use it to connect to any of the four ports of your OLED. On the other hand, you can get your own HDMI 2.1 cable and then connect the console to the third or fourth port.

2. With the console connected, turn on your A80L and then open its Settings menu.

From there, navigate over to the HDMI Signal Format section from the External Inputs menu. Afterwards, select the HDMI port that is connected to your console.

On the PS5, you need to select Enhanced Format (VRR).

On the Xbox Series X or Xbox Series S, you can select either Enhanced Format (VRR) or Enhanced Format (Dolby Vision). We recommend selecting Enhanced Format (VRR) as the default as not a lot of Xbox games support Dolby Vision. If you need to play or watch Dolby Vision content, then you can return to the HDMI Signal Format screen to switch over.

3. From the A80L menu, head over to the Picture sub-menu and then make sure that Picture Mode is set to Game and Auto Picture Mode is set to On.

4. While your Sony OLED should be ready for your console, you may still need to adjust some settings on the console side.

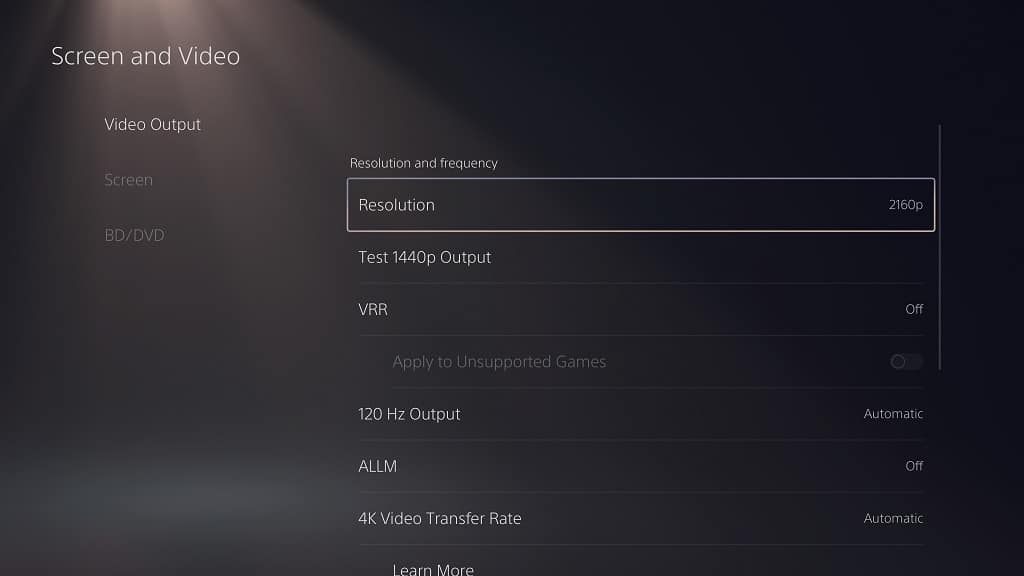
In the Settings menu of your PS5, head over to Screen and Video > Video Output and then match the following settings:

  • Resolution: 2160p
  • VRR: Automatic
  • 120 Hz: Automatic
  • ALLM: Automatic
  • 4K Transfer Rate: Automatic
  • HDR: On When Supported
  • Deep Color Output: Automatic
  • RGB Range: Automatic

You should then select Adjust HDR from the same Video Output menu and then follow the steps that appear in the following screens to calibrate the HDR brightness to match the capabilities of the A80L.
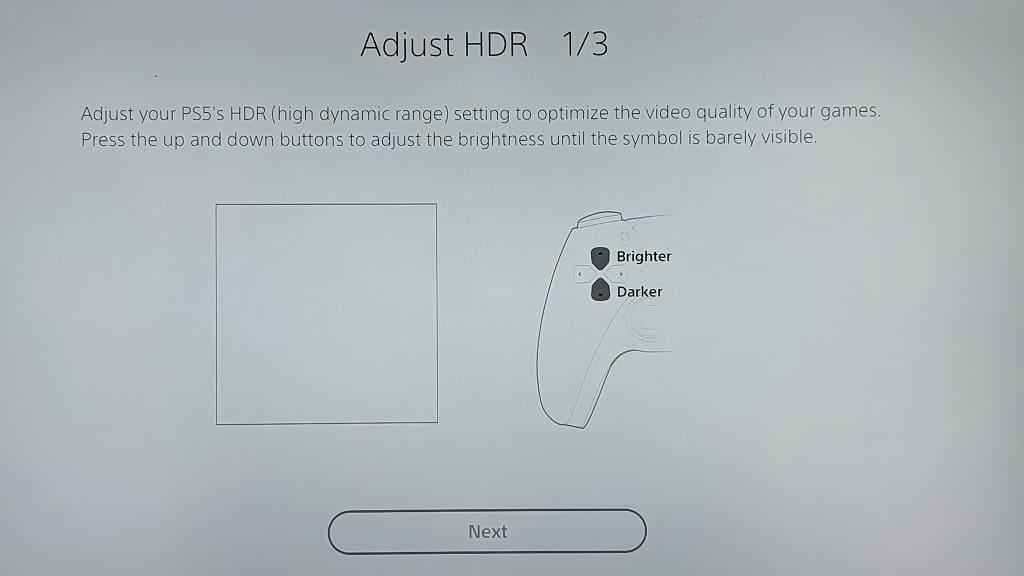
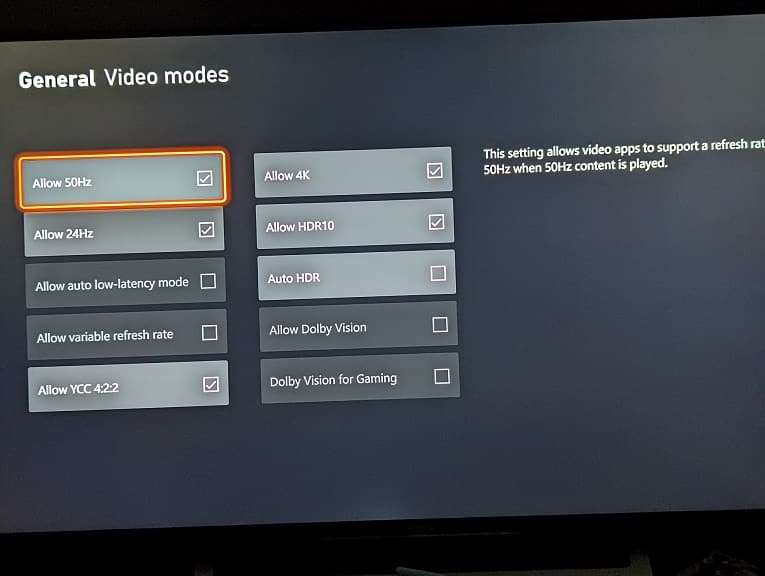
In the Settings App of the Xbox Series X and Xbox Series S, go to General > TV & display options > Video modes and then make sure that the following boxes are set:

  • Allow Auto-Low Latency Mode
  • Allow Variable Refresh Rate
  • Allow 4K
  • Allow HDR10

If you are planning on using Dolby Vision, then make sure you previously enabled Enhanced Format (Dolby Vision) on your A80L settings menu. Once you do, go to the Video modes menu of your Xbox and then check the Allow Dolby Vision and Allow Dolby Vision for Gaming boxes.

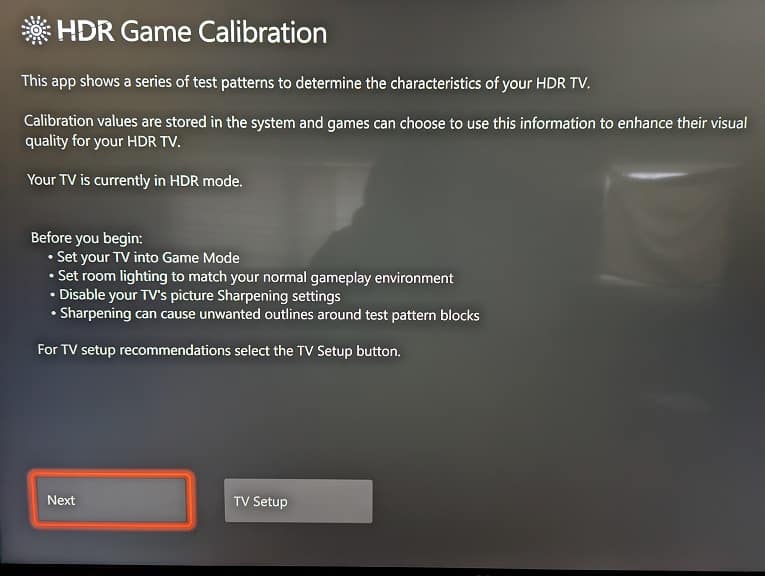
Once all that is done, return to the General > TV & display options and make sure that Resolution is set to 4K UHD. You should then select Calibrate HDR for gaming. Over the next three screens, follow the instructions to match the HDR brightness of your Xbox to the A80L.
Sony X93L and X93LC wall mount specs

The BRAVIA XR X93L or X93LC is a 2023 Mini LED television set. If you have this Sony TV and would like to install it on a wall in your home, then you can check out this guide from Seeking Tech.

X93L Screen Sizes

This article should cover all screen size options of the X93L or X93LC. You can find the model number for each below:

  • Sony BRAVIA XR 65” Class X93L Mini LED 4K HDR Google TV (Model Number: XR-65X93L or XR-65X93CL)
  • Sony BRAVIA XR 75” Class X93L Mini LED 4K HDR Google TV (Model Number: XR-75X93L or XR-75X93CL)
  • Sony BRAVIA XR85” Class X93L Mini LED 4K HDR Google TV (Model Number: XR-85X93L)

X93L Dimensions (without Stand)

Dimensions without Stand (in inches):

  • 65” X93L: 56.9 inches x 32.9 inches x 2.4 inches
  • 75” X93L: 65.8 inches x 37.9 inches x 2.3 inches
  • 85” X93L: 74.4 inches x 42.9 inches x 2.3 inches

Dimensions without Stand (in millimeters):

  • 65” X93L: 1443 mm x 835 mm x 60 mm
  • 75” X93L: 1667 mm x 961 mm x 56 mm
  • 85” X93L: 1889 mm x 1086 mm x 56 mm

Dimensions without Stand (in centimeters):

  • 65” X93L: 144.3 cm x 83.5 cm x 6.0 cm
  • 75” X93L: 166.7 cm x 96.1 cm x 5.6 cm
  • 85” X93L: 188.9 cm x 108.6 cm x 5.6 cm

X93L Weight (without Stand)

Weight without Stand (in pounds):

  • 65” X93L: 70.8 lbs.
  • 75” X93L: 94.1 lbs.
  • 85” X93L: 117.2 lbs.

Weight without Stand (in kilograms):

  • 65” X93L: 32.1 kg
  • 75” X93L: 42.7 kg
  • 85” X93L: 53.2 kg

X93L VESA Mounting Pattern

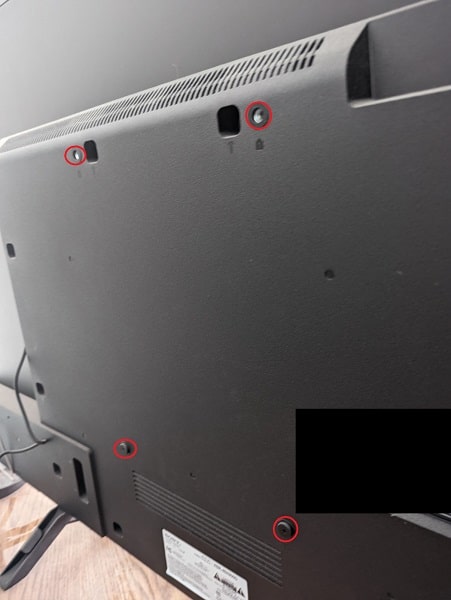
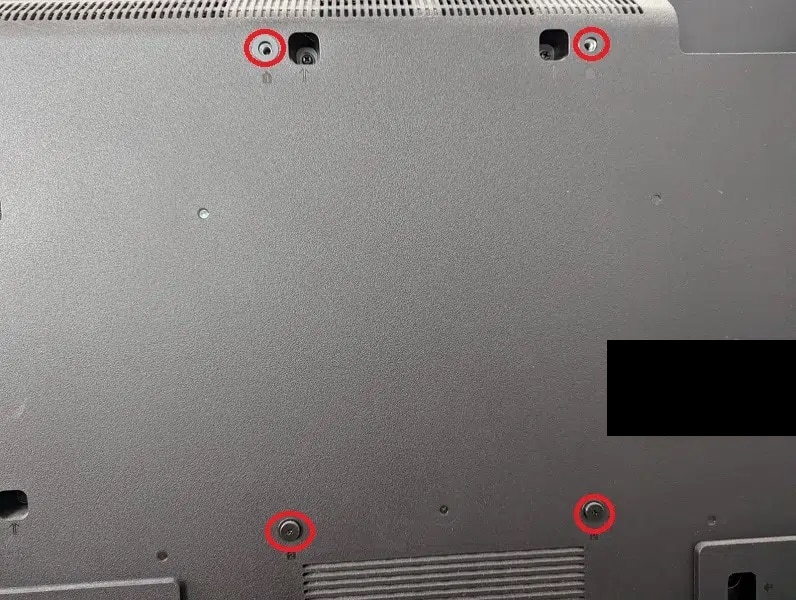
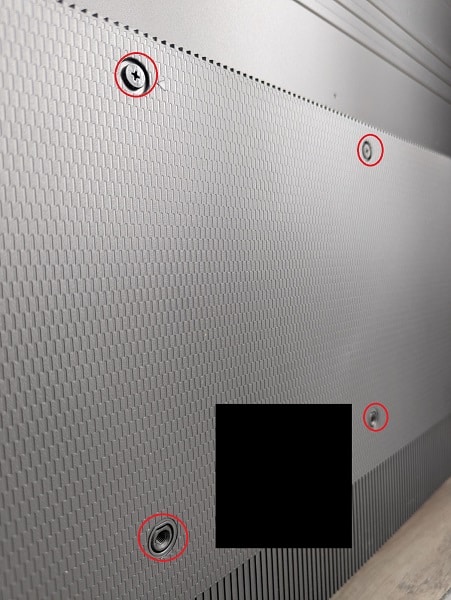
If you look at the back of your X93L, then you should see four screw holes that you need to attach the wall mount to the television set. The horizontal and vertical distances of these holes are referred to as the VESA Mounting Pattern.

VESA Mounting Pattern (example from different TV).

You can find the measurements below:

  • 65” X93L: 300 mm x 300 mm
  • 75” X93L: 300 mm x 300 mm
  • 85” X93L: 400 mm x 400 mm

What wall mounts are compatible with the Sony X93L and X93LC?

When picking a suitable mounting bracket for the Sony X93L/ X93LC, you should make sure that it able to fit the VESA Mounting Pattern of your screen size. The 65-inch and 75-inch models use the same 300 mm x 300 mm pattern while 85-inch version uses the 400 mm x 400 mm pattern.

The same mount should also be strong enough to hold the weight of the X93L, which can weigh as much as 117.2 pounds or 53.2 kg.

For specific fixed, tilting or full motion wall mount recommendations, you can check out this buyer’s guide.

Resources:

Recommended Sony X93L settings for PS5, Xbox Series X and S

If you got yourself the Sony X93L or X93CL, then you can check out this optimization guide from Seeking Tech to see how you can set it up to get the most out of playing PlayStation 5, Xbox Series X and Xbox Series S games.

Supported PS5 Features

With the Sony X93L, you will be able to play PS5 games at up to 120 frames per second in 1080p or 4K. 120 Hz is not supported at 1440p resolution.

This TV can also display games with Auto Low Latency Mode, HDR10 and Variable Refresh Rate.

Xbox Series X and Xbox Series S Features

When it comes to the Xbox Series X and S, the X93L can also play games from these consoles at up to 120 fps at the 1080p and 4K resolutions but not 1440p. The screen also supports Auto Low Latency Mode, HDR10 and Variable Refresh Rate.

When it comes to Dolby Vision, this Sony set and only display this HDR format at 60 Hz, so the games will be limited to 60 Hz.

How to set up the X93L for gaming

In order to properly set up the X93L for the PS5, Series X and Series S, we recommend that you do the following:

1. If you haven’t done so already, connect your console to the HDMI port of your TV.

The PlayStation 5 and Xbox Series X comes with a HDMI 2.1 cable; therefore, you need to use it to connect to either HDMI Port #3 or HDMI Port #4 of the X93L.

The Xbox Series S comes with an HDMI 2.0 cable; so, you can connect to any of the four HDMI ports. Alternatively, you can use a HDMI 2.1 cable with the Series S and then connect the system to either HDMI Port #3 or HDMI Port #4.

2. Next, head into the HDMI Signal Format menu from the settings of the X93L. From there, select the HDMI port that is connected to your console.

For the PS5, make sure that the format is set to Enhanced Format (VRR).

For the Xbox Series X and Xbox Series S, you can change the format to Enhanced Format (Dolby Vision) if you want to play games that support this HDR format. However, you will be limited to a maximum frame rate of 60 fps. For 120 fps, you need to set the format to Enhanced Format (VRR) instead.

Only a few Series X and Series S games support Dolby Vision. Therefore, we recommend setting the format to Enhanced Format (VRR) as the default option. If you want to try out Dolby Vision in a supported game or want to watch a Dolby Vision video, then you can switch over to Enhanced Format (Dolby Vision).

3. Next, head over to the Picture menu of your Sony television. From there, make sure that Picture Mode is set to Game as well as Auto Picture Mode to On.

By doing so, you should have lower input lag while also activating Auto Low Latency Mode and Variable Refresh Rate.

4. Afterwards, head into the Settings menu on your console.

For the PS5, go to Screen and Video > Video Output. In that menu, make sure that the resolution is set to 2160p, HDR is set to On When Supported and the following settings is set to Automatic:

  • VRR
  • 120 Hz
  • ALLM
  • 4K Transfer Rate
  • Deep Color Output
  • RGB Range

Afterwards, select Adjust HDR and then follow the on-screen directions to calibrate the HDR brightness output to match the capabilities of the X93L.

If you have the Series X or Series S, then you need to open the Settings app and then navigate to General > TV & Display Options. From there, make sure that Resolution is set to 4K UHD and then select Video modes. On the next screen, make sure you select the following:

  • Allow Auto-Low Latency Mode
  • Allow Variable Refresh Rate
  • Allow 4K
  • Allow HDR10

If you want to watch movies and/or play games in Dolby Vision as well, then you should also make sure that Allow Dolby Vision and Allow Dolby Vision for Gaming are selected as well.

Next, you need to return to the General > TV & Display Options menu, where you can then select Calibrate HDR for Gaming. Follow the on-screen directions to calibrate the HDR output to match the X93L.

You should now be done setting up your Sony Mini LED for the gaming console.

TCL QM8 and QM850G wall mount specs

In 2023, TCL released the QM8, also known as the QM850G, to the general public. If you purchase this Mini LED television and would like to install it on a wall, then you can take a look at this guide from Seeking Tech.

QM8 Screen Sizes

We will be covering all four screen sizes of the QM8 series. You can find the model number for each of these below:

  • TCL 65″ Q Class 4K MINI-LED QLED HDR Smart TV (65QM850G)
  • TCL 75″ Q Class 4K MINI-LED QLED HDR Smart TV (75QM850G)
  • TCL 85″ Q Class 4K MINI-LED QLED HDR Smart TV (85QM850G)
  • TCL 98″ Q Class 4K MINI-LED QLED HDR Smart TV (98QM850G)

QM8 Dimensions (without Stand)

Dimensions without Stand (in inches):

  • 65” TCL QM8: 56.9 inches x 32.6 inches x 1.7 inch
  • 75” TCL QM8: 65.8 inches x 37.9 inches x 1.9 inch
  • 85” TCL QM8: 74.6 inches x 43.0 inches x 2.1 inch
  • 98” TCL QM8: 85.8 inches x 49.2 inches x 1.6 inch

Dimensions without Stand (in millimeters):

  • 65” TCL QM8: 1445 mm x 828 mm x 43 mm
  • 75” TCL QM8: 1671 mm x 963 mm x 48 mm
  • 85” TCL QM8: 1895 mm x 1092 mm x 53 mm
  • 98” TCL QM8: 2179 mm x 1250 mm x 41 mm

Dimensions without Stand (in centimeters):

  • 65” TCL QM8: 144.5 cm x 82.8 cm x 4.3 cm
  • 75” TCL QM8: 167.1 cm x 96.3 cm x 4.8 cm
  • 85” TCL QM8: 189.5 cm x 109.2 cm x 5.3 cm
  • 98” TCL QM8: 217.9 cm x 125.0 cm x 4.1 cm

QM8 Weight (without Stand)

Weight without Stand (in pounds):

  • 65” TCL QM8: 50.1 pounds
  • 75” TCL QM8: 68.6 pounds
  • 85” TCL QM8: 105.6 pounds
  • 98” TCL QM8: 143.3 pounds

Weight without Stand (in kilograms):

  • 65” TCL QM8: 23 kg
  • 75” TCL QM8: 31 kg
  • 85” TCL QM8: 48 kg
  • 98” TCL QM8: 65 kg

QM8 VESA Mounting Pattern

The VESA Mounting Pattern refers to horizontal and vertical distances between the four mounting screw holes located on the back of the QM8. The TV mount must support the pattern or else you won’t be able to attach it.

VESA Mounting Pattern (example from different TV).

You can find the screw hole distances below:

  • 65” TCL QM8: 300 mm x 400 mm
  • 75” TCL QM8: 400 mm x 400 mm
  • 85” TCL QM8: 600 mm x 600 mm
  • 98” TCL QM8: 600 mm x 600 mm

QM8 Mounting Screw Size

To attach the mounting bracket to the back side of your QM8, you need to use the appropriate screw size. You can check out the recommended sizes below:

  • 65” TCL QM8: M6 x 12mm
  • 75” TCL QM8: M6 x 15mm
  • 85” TCL QM8: M8 x 20mm
  • 98” TCL QM8: M8 x 10mm

What wall mounts are compatible with the TCL QM8 and QM850G?

When it comes to picking the right wall mount for your QM8/QM850G, you need to pay attention to its weight capacity and VESA Mounting Pattern.

The 65-inch model weighs in at 50.1 lbs. with a rather unusual 300 mm x 400 mm pattern.

For the 75-inch screen size, the mount needs to be able to hold at least 68.6 lbs. and fit the 400 mm x 400 mm mounting pattern.

If you got yourself the 85-inch version, then the mounting bracket needs to be strong enough to hold 105.6 lbs. in addition to supporting the 600 mm x 600 mm pattern on the back side of your TV.

For the biggest size, the 98-incher, you will need to find a wall mount strong enough to hold a minimum of 143.3 lbs. while also being able to fit the 600 mm x 600 mm VESA Mounting Pattern.

When it comes to the recommended screw size, some of the wall mounts may come with a variety of screws. Of course, you can also purchase the screw size separately for your TV.

There are three main wall mount types available as you can choose between fixed, tilting or full motion. You can check out our buyer’s guide with this link if you want specific product recommendations for your QM8/QM850G.

Resource:

Recommended TCL QM8 settings for PS5, Xbox Series X and S

If you purchase the TCL QM8, also known as the QM850G, then you can check out this recommended settings guide from Seeking Tech to see how you can best optimize the TV for your PlayStation 5, Xbox Series X and/or Xbox Series S console.

Supported PS5 features

The QM8 takes full advantage of the PlayStation 5 as the following features are supported:

  • 120 Hz fresh rate
  • Variable refresh rate range between 48 fps to 120 fps
  • HDR10
  • Auto Low Latency Mode

Supported Xbox Series X and Xbox Series S features

The TCL television also supports all of the visual features being offered by the Series X and Series S consoles:

  • 120 Hz fresh rate
  • Variable refresh rate range between 40 fps to 120 fps
  • HDR10
  • Dolby Vision
  • Auto Low Latency Mode

How to set up the QM8 for PS5, Series X and Series S

In order to properly set up the TCL QM8 or QM850G, we recommend that you do the following:

1. Connect your console to one of the HDMI ports of the television set. Keep in mind that the HDMI #1 and HDMI #2 ports are HDMI 2.1 while the HDMI #3 and HDMI #4 ports are HDMI 2.0.

For the PS5 and Xbox Series X, use the HDMI 2.1 cable that came with the console to connect to either the HDMI #1 or HDMI #2 port of the TCL QM8.

If you have an Xbox Series S, you can use the HDMI 2.0 cable that came with the system to connect to any of the four HDMI ports of the TV. Alternatively, you can use a HDMI 2.1 cable and then connect the Series S to either of the first two HDMI ports.

2. Next, you need to head over to the Settings menu of your TCL QM8 and then navigate over to the Inputs section.

From there, select the HDMI port where your console is connected to and then make sure that the HDMI Mode is set to HDMI 2.1. You should see the following description:

Always use HDMI 2.1 mode for compatibility. Maximum resolution is 8K 60Hz or 4K 120Hz.

3. The Game Master Mode of the QM8 should automatically be turned on when the TV detects that your current HDMI input is connected to a game console. To double check, go to the Settings – System menu.

The Game Master Mode will reduce the input lag for playing videogames on the PS5, Xbox Series X, Xbox Series S and other consoles. Variable Refresh Rate and Auto Low Latency Mode will also be turned on.

This mode should unlock the Game Bar as well. You can open the special menu by pressing and holding the hamburger button on the remote control. By doing so, you should have quick access to the Shadow Enhancer (which helps make darker in-game environments easier to see) and other gaming features.

4. While you should be done setting up QM8/QM850G, there is more work to be done on the console side.

For the PS5, go to the console’s Settings app and then select Screen and Video > Video Output.

You should then make sure you have the following setup:

  • Resolution to 2160p
  • VRR to Automatic
  • 120 Hz to Automatic
  • ALLM to Automatic
  • 4K Transfer Rate to Automatic
  • HDR to On When Supported
  • Deep Color Output to Automatic
  • RGB Range to Automatic

On the Xbox Series X and Xbox Series S, open the Settings app and then make your way to General > TV & display options. Make sure that Resolution is set to 4K and then go to Video modes. From there, you need to make sure that the following options are selected:

  • Allow Auto-Low Latency Mode
  • Allow Variable Refresh Rate
  • Allow 4K
  • Allow HDR10
  • Allow Dolby Vision
  • Allow Dolby Vision for Gaming

5. The final step in the setup process is to calibrate the HDR brightness output settings on your console.

You can do so on the PS5 by heading to Settings > Screen and Video > Video Output > Adjust HDR and then follow the instructions on the screen.

For the Series X and Series S, make your way to General > TV & Display Options > Calibrate HDR for games and then follow the directions.

LG UR9000 wall mount specs

If you got yourself the 2023 LG UR9000, and would like to hang it on a wall, then you can check out this guide from Seeking Tech.

UR9000 Screen Sizes

The guide should cover all five screen sizes from the UR9000 series. You can find the model number for each option below:

  • LG 43 Inch Class UR9000 series LED 4K UHD Smart TV (43UR9000PUA)
  • LG 50 Inch Class UR9000 series LED 4K UHD Smart TV (50UR9000PUA)
  • LG 55 Inch Class UR9000 series LED 4K UHD Smart TV (55UR9000PUA)
  • LG 65 Inch Class UR9000 series LED 4K UHD Smart TV (65UR9000PUA)
  • LG 75 Inch Class UR9000 series LED 4K UHD Smart TV (75UR9000PUA)

UR9000 Dimensions (without Stand)

Dimensions without Stand (in inches):

  • 43” UR9000: 38.1 inches x 22.2 inches x 1.2 inch
  • 50” UR9000: 44.2 inches x 25.7 inches x 1.2 inch
  • 55” UR9000: 48.7 inches x 28.2 inches x 1.2 inch
  • 65” UR9000: 57.3 inches x 33.1 inches x 1.2 inch
  • 75” UR9000: 66.0 inches x 37.9 inches x 1.2 inch

Dimensions without Stand (in millimeters):

  • 43” UR9000: 968 mm x 564 mm x 30 mm
  • 50” UR9000: 1123 mm x 653 mm x 30 mm
  • 55” UR9000: 1237 mm x 716 mm x 30 mm
  • 65” UR9000: 1455 mm x 841 mm x 30 mm
  • 75” UR9000: 1676 mm x 963 mm x 30 mm

Dimensions without Stand (in centimeters):

  • 43” UR9000: 96.8 cm x 56.4 cm x 3.0 cm
  • 50” UR9000: 112.3 cm x 65.3 cm x 3.0 cm
  • 55” UR9000: 123.7 cm x 71.6 cm x 3.0 cm
  • 65” UR9000: 145.5 cm x 84.1 cm x 3.0 cm
  • 75” UR9000: 167.6 cm x 96.3 cm x 3.0 cm

UR9000 Weight (without Stand)

Weight without Stand (in pounds):

  • 43” UR9000: 20.5 pounds
  • 50” UR9000: 28.7 pounds
  • 55” UR9000: 33.1 pounds
  • 65” UR9000: 52.0 pounds
  • 75” UR9000: 72.8 pounds

Weight without Stand (in kilograms):

  • 43” UR9000: 9.3 kg
  • 50” UR9000: 13.0 kg
  • 55” UR9000: 15.0 kg
  • 65” UR9000: 23.6 kg
  • 75” UR9000: 33.0 kg

UR9000 VESA Mounting Pattern

The wall mount needs to be able to attach to the backside of your UR9000. To be compatible, the mounting screw holes of the mounting bracket needs to match up with the VESA Mounting Pattern, which is a measurement of the horizontal and vertical distances of the screw sockets.

VESA Mounting Pattern (example from different TV).

You can find the specific pattern for each screen size below:

  • 43” UR9000: 200 mm x 200 mm
  • 50” UR9000: 200 mm x 200 mm
  • 55” UR9000: 300 mm x 300 mm
  • 65” UR9000: 300 mm x 300 mm
  • 75” UR9000: 400 mm x 400 mm

What wall mounts are compatible with the LG UR9000?

If you want to mount your UR9000 up on a wall, then the mounting bracket needs to support the VESA Mounting Pattern for your screen size. The 43-inch and 50-inch models support 200 mm x 200 mm while the 55-inch and 65-inch versions use 300 mm x 300 mm. The biggest screen size available, the 75-inch set, features a 400 mm x 400 mm pattern.

The mount should also be able to hold the UR9000 weight. Fortunately, all screen sizes from this series are very lightweight as they won’t weigh more than 72.8 pounds (or 33 kg).

If you are looking for specific fixed, tilt or full motion wall mount recommendations, then you can check out this post.

Resource:

Recommended LG UR9000 settings for PS5, Xbox Series X and S

If you bought yourself the 2023 LG UR9000 Series LED 4K UHD TV, then you can take a look at this guide from Seeking Tech to see how you can best optimize it for the PlayStation 5, Xbox Series X and Xbox Series S consoles.

UR9000 PS5 Capabilities

The UR9000 is pretty limited when it comes to PlayStation 5 games, On the bright side, the TV supports HDR10 output as well as Auto Low Latency Mode.

However, it is not capable of Variable Refresh Rate while also being limited to displaying games at 60 frames per second.

UR9000 Xbox Series X and Xbox Series S Capabilities

When it comes to the Series X and Series S, the UR9000 can display games via HDR10 and Auto Low Latency Mode.

The TV isn’t capable of Dolby Vision HDR, VRR or Low Frame Rate Compensation. As we stated above, the refresh rate tops out at 60 Hz, which means that the maximum frame rate output is 60 fps.

How to setup the UR9000 for console gaming

To set up the UR9000 to get the most out of your current-gen console, we suggest that you take the following steps:

1. If you haven’t done so already, connect your PS5, Xbox Series X and/or Xbox Series S to the UR9000 via HDMI. The television set features three HDMI 2.0 ports.

Make sure you use the HDMI cables that came with your console. The PlayStation 5 and Series X each includes a HDMI 2.1 cable in the box while the Series S come with a HDMI 2.0 cable.

If you use an older HDMI cable, then the games may end up looking worse.

2. Next, you need to head over to the Settings of your UR9000. From there, make your way to HDMI Settings from the External Devices menu. Afterwards, you need to set HDMI Deep Color to 4K.

3. You then need to head over to General and then set the Picture Mode to Game Optimizer. Doing so will enable Auto Low Latency mode, which automatically switches your picture mode to Game Optimizer when the TV detects that your PS5, Series X or Series S is turned on.

Game Optimizer will also reduce the input lag, leading to a more responsive experience.

4. You should now be done setting up your UR9000; however, there is still some work left to do on the console side.

If you have a PS5, then you need to open its Settings menu and then make your way to Screen and Video > Video Output.

From there, make sure that Resolution is set to 2160p and HDR is set to On When Supported. The following settings should also be set to Automatic:

  • VRR
  • 120 Hz
  • ALLM
  • 4K Transfer Rate
  • Deep Color Output
  • RGB Range

For the Xbox Series X and Xbox Series S, open the Settings menu on these consoles. Afterwards, navigate over to General > TV & Display Options and check to see if Resolution is set to 4K UHD. You should then select Video Modes and make sure you have the following selected in the Video Modes screen:

  • Allow Auto-Low Latency Mode
  • Allow Variable Refresh Rate
  • Allow 4K
  • Allow HDR10

5. One final step is to calibrate the HDR output for the LG UR9000.

You can do so on the PS5 by going to Settings > Screen and Video > Video Output > Adjust HDR.

For the Xbox consoles, you need to head over to Settings > General > TV & Display Options > Calibrate HDR for Games.

Note: If the HDR still looks off when playing specific games, then you might want to consider enabling Auto Dynamic Contrast and/or Dynamic Tone Mapping from the HDMI Settings of the UR9000. Afterwards, we calibrate your HDR console output.

Samsung Q80C wall mount specs

If you would like to mount the 2023 Samsung Q80C (which may also be called the Q80 or Q80CD) up on a wall, then you can check out this compatibly guide at Seeking Tech.

Q80C Screen Sizes

This article will be covering the following screen sizes:

  • 50″ Class Samsung QLED 4K Q80C (Model Number: QN50Q80CAF or QN50Q80CAFXZA)
  • 55″ Class Samsung QLED 4K Q80C (Model Number: QN55Q80CAF or QN55Q80CAFXZA)
  • 65″ Class Samsung QLED 4K Q80C (Model Number: QN65Q80CAF or QN65Q80CAFXZA)
  • 75″ Class Samsung QLED 4K Q80C (Model Number: QN75Q80CAF or QN75Q80CAFXZA)
  • 85″ Class Samsung QLED 4K Q80C (Model Number: QN85Q80CAF or QN85Q80CAFXZA)
  • 98” Class Samsung QLED 4K Q80C (Model Number: QN98Q80CAF or QN98Q80CAFXZA)

Q80C Dimensions (without Stand)

Dimensions without Stand (in inches):

  • 50″ Q80C: 43.9 inches x 25.7 inches x 1.9 inch
  • 55″ Q80C: 48.3 inches x 27.8 inches x 1.8 inch
  • 65″ Q80C: 56.9 inches x 32.6 inches x 1.8 inch
  • 75″ Q80C: 65.8 inches x 37.7 inches x 1.8 inch
  • 85″ Q80C: 74.5 inches x 42.6 inches x 1.9 inch
  • 98” Q80C: 85.9 inches x 49.0 inches x 1.9 inch

Dimensions without Stand (in millimeters):

  • 50″ Q80C: 1115 mm x 653 mm x 48 mm
  • 55″ Q80C: 1226 mm x 706 mm x 46 mm
  • 65″ Q80C: 1445 mm x 828 mm x 46 mm
  • 75″ Q80C: 1671 mm x 958 mm x 46 mm
  • 85″ Q80C: 1892 mm x 1082 mm x 48 mm
  • 98” Q80C: 2182 mm x 1245 mm x 48 mm

Dimensions without Stand (in centimeters):

  • 50″ Q80C: 111.5 mm x 65.3 mm x 4.8 mm
  • 55″ Q80C: 122.6 mm x 70.6 mm x 4.6 mm
  • 65″ Q80C: 144.5 mm x 82.8 mm x 4.6 mm
  • 75″ Q80C: 167.1 mm x 95.8 mm x 4.6 mm
  • 85″ Q80C: 189.2 mm x 108.2 mm x 4.8 mm
  • 98” Q80C: 2182 mm x 1245 mm x 48 mm

Q80C Weight (without Stand)

Weight without Stand (in pounds):

  • 50″ Q80C: 30.0 pounds
  • 55″ Q80C: 37.7 pounds
  • 65″ Q80C: 50.5 pounds
  • 75″ Q80C: 72.1 pounds
  • 85″ Q80C: 91.1 pounds
  • 98” Q80C: 124.1 pounds

Weight without Stand (in kilograms):

  • 50″ Q80C: 13.6 kg
  • 55″ Q80C: 17.1 kg
  • 65″ Q80C: 22.9 kg
  • 75″ Q80C: 32.7 kg
  • 85″ Q80C: 41.3 kg
  • 98” Q80C: 56.3 kg

Q80C VESA Mounting Pattern

The wall mount should also support the VESA Mounting Pattern, which measures the horizontal and vertical distances of the four mounting screw holes located at the back, of your Q80C.

VESA Mounting Pattern (example from different TV).

The pattern may be different depending on the screen size. You can find the specification below:

  • 50″ Q80C: 200 mm x 200 mm
  • 55″ Q80C: 200 mm x 200 mm
  • 65″ Q80C: 400 mm x 300 mm
  • 75″ Q80C: 400 mm x 400 mm
  • 85″ Q80C: 600 mm x 400 mm
  • 98” Q80C: 600 mm x 400 mm

Q80C Mounting Screw Type

To attach the wall mount to the back of your TV, you will need to use a M8 type screw. You can find the screw type, as well as the screw depth, for each size below:

  • 50″ Q80C: M8 with 20-22 screw depth
  • 55″ Q80C: M8 with 17-19 screw depth
  • 65″ Q80C: M8 with 17-19 screw depth
  • 75″ Q80C: M8 with 11-13 screw depth
  • 85″ Q80C: M8 with 16-18 screw depth
  • 98” Q80C: M8 with 16-18 screw depth

What wall mounts are compatible with the Samsung Q80C?

When picking a wall mount for your Samsung Q80C, you should make sure that it supports the VESA Mounting Pattern of your specific screen size.

The 50-inch and 55-inch models use 200 mm x 200 mm. The 65-inch model utilizes 400 mm x 300 mm while the 75-inch supports 400 mm x 400 mm. Both the 85-inch and 98-inch models have the 600 mm x 400 mm patterns on the backside.

The weight capacity is also important as your mounting bracket needs to be strong enough to hold the Q80C. The 50-inch (30.0 lbs.), 55-inch (37.3 lbs.), 65-inch (50.5 lbs.) and 75-inch (72.1 lbs.) models should be lightweight enough for a majority of mounting brackets. For the 85-inch (91.1 lbs.) and 98-inch (124.1 lbs.) models, your selection will be more limited.

If you are looking for specific recommendations when it comes to picking a compatible fixed, tilting or full motion wall mount for your Q80C TV, then we recommend taking a look at our general wall mount recommendations article.

Resource:

Recommended Samsung Q80C settings for PS5, Xbox Series X and S

If you bought a 2023 Samsung Q80, Q80C or Q80CD series television set, then you can check out this Seeking Tech guide to see how you can best optimize it for playing PlayStation 5, Xbox Series X and/or Xbox Series S games.

Q80C Console Capabilities

On the PlayStation 5, the Q80, Q80C and Q80CD should be capable of providing the following features:

  • Up to 120 frames per second
  • Up to 4K resolution
  • Variable Refresh Rate between 48 fps to 120 fps
  • HDR10

For the Xbox Series X and Xbox Series S, this TV series supports the following:

  • Up to 120 frames per second
  • Up to 4K resolution
  • Variable Refresh Rate between 40 fps to 120 fps
  • Low Frame Rate Compensation
  • HDR10

Unfortunately, this TV does not support Dolby Vision.

How to optimize the Q80 for console gaming

To get the most out of the new consoles with the Q80, Q80C or Q80CD, we recommend that you take the following steps:

1. If you haven’t done so already, update your Samsung television to the latest available firmware. The new update may include new features, improved performance and/or bug fixes.

2. Next, make sure that your console is connected to your television screen.

All four ports of the Q80 series are HDMI 2.1. So, you need to use the HDMI 2.1 cables, which came with the PS5 and Xbox Series X consoles.

The Xbox Series S console only comes with an HDMI 2.0, which should be good enough. With that said, you can also get your own HDMI 2.1 cable for the Series S if you want to take full advantage of the video transfer bandwidth.

3. Next, open the Settings menu of your Q80, Q80C or Q80CD. From there, go to the External Device Manager and then check to see that Input Signal Plus is enabled for the HDMI port that is connected to your console.

4. From the same External Device Manager screen, head to the Game Mode Settings and then enable Game Mode.

This picture setting will reduce the input lag for videogames. It is applicable to all consoles that use the HDMI connection, including the PC, PlayStation 4, Xbox One, Nintendo Switch as well as the PlayStation 5, Xbox Series X and Xbox Series S.

By enabling Game Mode of the 2023 Q80 series, Variable Refresh Rate support will automatically be turned on for the TV as well.

The Game Mode Settings have several other options that you can adjust, such as Dynamic Black Equalizer and Game Motion Plus. We suggest that you leave these alone for now. If the game you are playing is too dark, then you can use Dynamic Black Equalizer. If the game appears to be running at an unstable frame rate, then you can try using the Game Motion Plus features.

5. Afterwards, head over to the Expert Settings section and set Color Tone to Warm 2.

6. You should be done setting up the Q80, Q80C or Q80CD for playing games. With that said, there may still be more work to do on your console.

On your PS5, open its Settings menu and then head over to Screen and Video > Video Output. On this screen, make sure you do the following:

  • Resolution: 2160p
  • VRR: Automatic
  • 120 Hz: Automatic
  • ALLM: Automatic
  • HDR: On When Supported
  • 4K Transfer Rate: Automatic
  • Deep Color Output: Automatic
  • RGB Range: Automatic

On the Series X or Series S, head over to the console’s settings menu and then select General > TV & Display Options. From there, make sure that Resolution is set to 4K UHD and then head over to the Video Modes section. Afterwards, tick the following boxes:

  • Allow Auto-Low Latency Mode
  • Allow Variable Refresh Rate
  • Allow 4K
  • Allow HDR10

7. One last step is to optimize the HDR brightness output on your console.

You can do so on the PS5 by going to Settings > Screen and Video > Video Output > Adjust HDR. On Xbox, go to Settings > General > TV & Display Options > Calibrate HDR for Games.

Afterwards, follow the on-screen instructions to properly calibrate the console’s HDR brightness to match the capabilities of your Q80, Q80C or Q80CD television set.

How to skip practice laps in Forza Motorsport

Before starting a race event in Forza Motorsport, you may be required to do practice laps. If you would rather skip straight to the actual racing in this game, then you can check out this guide at Seeking Tech to see how you can properly do so.

Why you need to practice

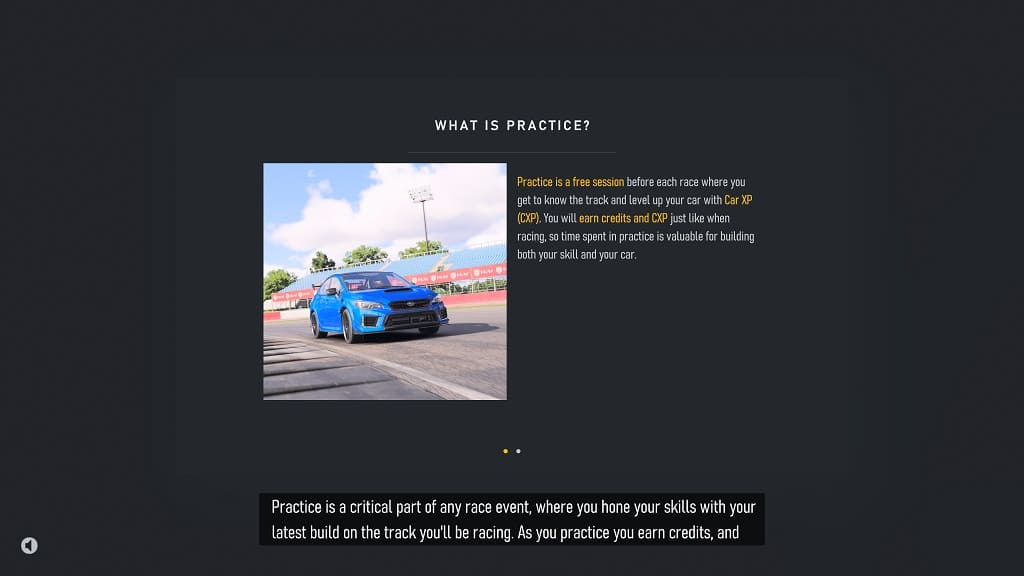
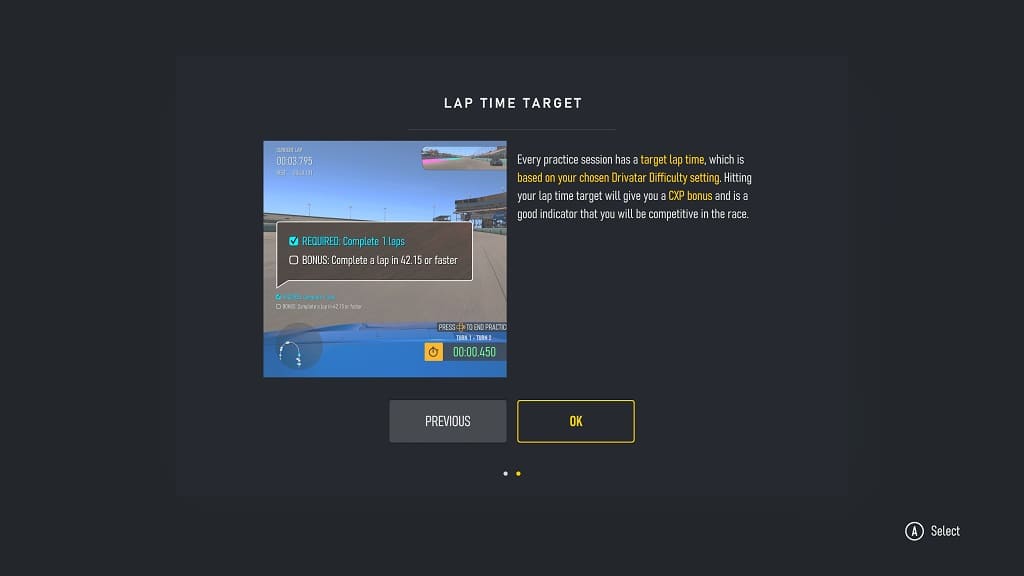
According to the development team at Turn 10 Studios, practice laps are designed to help you learn the track. The game will also reward you by giving you credits and Car Points (CP)/Car Experience Points (CXP) by successfully completing these practice runs.

How to skip practice laps

If you don’t mind missing out on the credits and Car XPs, then you need to do the following:

1. During practice, open the Pause Menu. If you are playing with an Xbox controller or racing wheel, you can do so by pressing the Menu button.

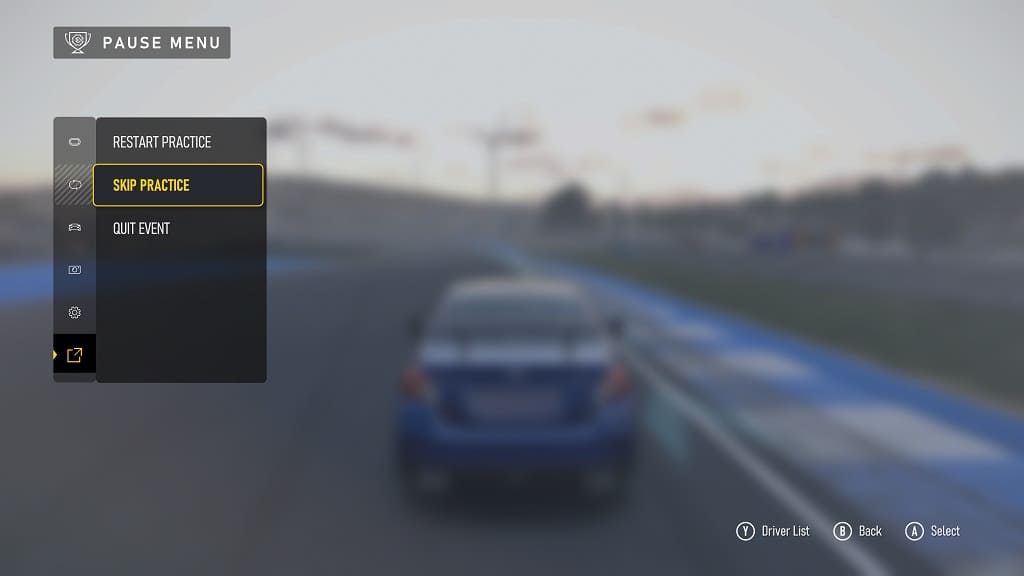
2. In the Pause Menu, select Exit.

3. Next, you need to select the Skip Practice option.

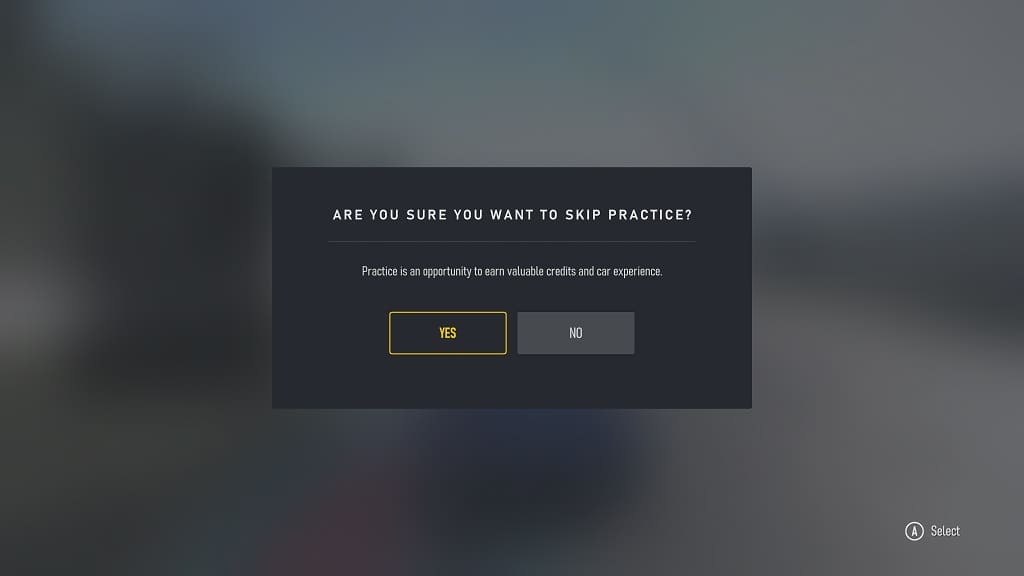
4. You will be asked if you want to skip practice as doing so means that you will miss the opportunity to earn credits and car experience.

You need to select Yes to continue.

Afterwards, you should be able to jump straight into the racing event.