How to make countering easier in AEW Fight Forever

A big part in the AEW Fight Forever videogame is being able to counter moves. If you have a hard time pull off this action, then you can take a look at this guide from Seeking Tech to see how you can make reversing easier.

In order to normally counter moves in AEW Fight Forever, you can the two shoulder buttons. On PlayStation, you have to press L1 for countering grapples and R1 for countering strikes.

If you are playing with an Xbox controller, the you have to use LB for reversing grapples and RB for reversing strikes.

For the Nintendo Switch controller, you need to use the L to counter grapples and R to counter strikes.

1. To make reversals easier, you can try enabling the Easy Countering setting by doing the following:

  • Open the Options menu in the Fight Forever videogame.
  • From the Options menu, head over to the Controller tab.
  • Make sure that the Easy Countering setting is turned on.
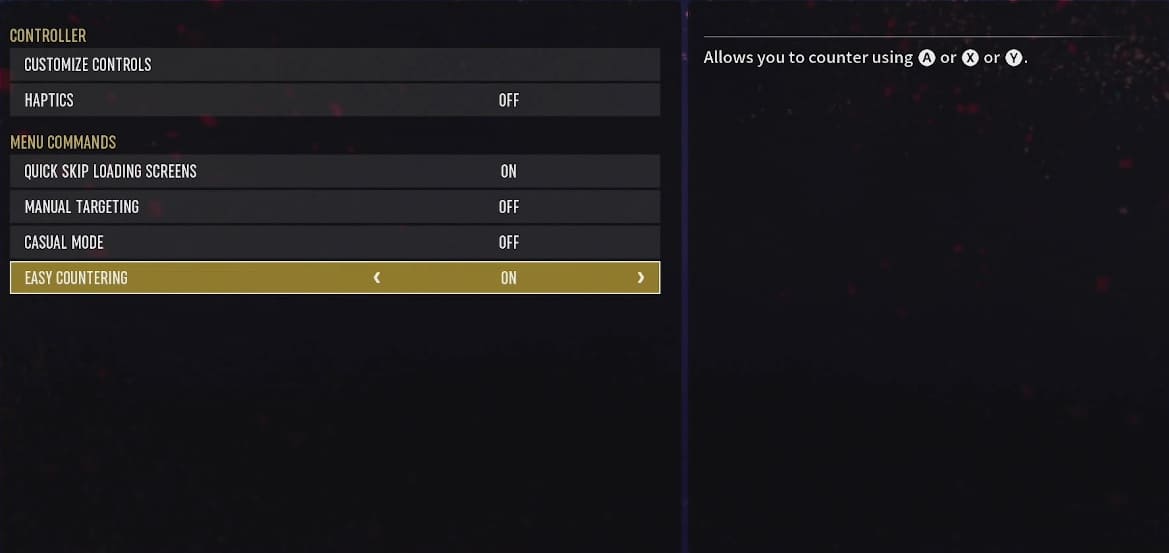
By enabling this feature, you counter by using the High Strike, Kick or Grapple attack buttons. This can be very helpful as you don’t have to rely on the shoulder buttons.

For the uninformed, you can use the Square, Triangle or X buttons to counter on PlayStation with Easy Countering enabled.

For the Xbox controller, you should be able to use the X, Y and A buttons.

If you are using a Nintendo Switch controller, then you can use the Y, X and A buttons to counter.

2. You can also try switching the difficulty setting to Easy. By doing so, you will have a bigger timing window when it comes to pulling off reversals.

You can change difficulty from the Match tab in the Options menu.

3. If you are still having a hard time pulling off counters, then we recommend that you simply keep practicing until you get the timing just right.

When practicing, try to keep the difficulty level the same. If you end up changing the difficulty mode, then it may throw off your timing when it comes to reversals.

How to change the referee in AEW Fight Forever

You are able to change the person who is refereeing your match in the AEW Fight Forever videogame. To see how you are able to swap out one referee for another, you can take a look at this tutorial from Seeking Tech.

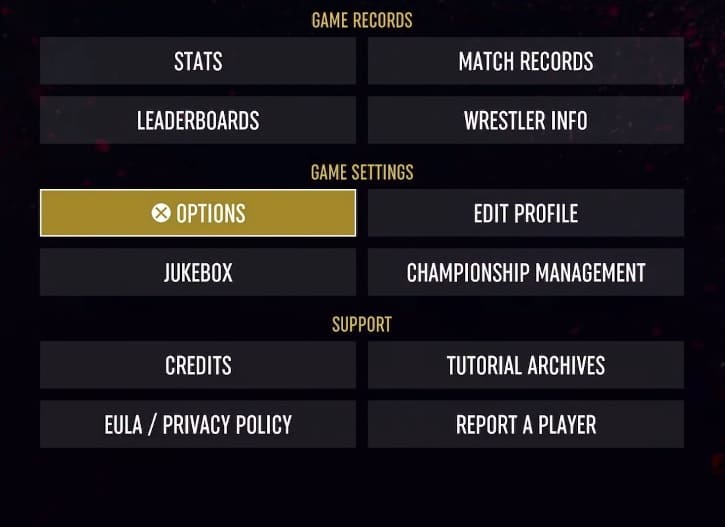
1. To start off, head over to the Options menu in the wrestling title.

You can do so from the title screen by first pressing the Triangle button on PlayStation, Y button on Xbox or X button on Switch. Next, you have to select Options on the new screen to proceed.

2. Inside of Settings, you need to first navigate over to the Match tab, which has the wrestling ring icon.

For the uninformed, you are able to change tabs by using the L1 and R1 buttons on a PlayStation controller, LB and RB buttons on an Xbox controller or L and R buttons on the Nintendo Switch.

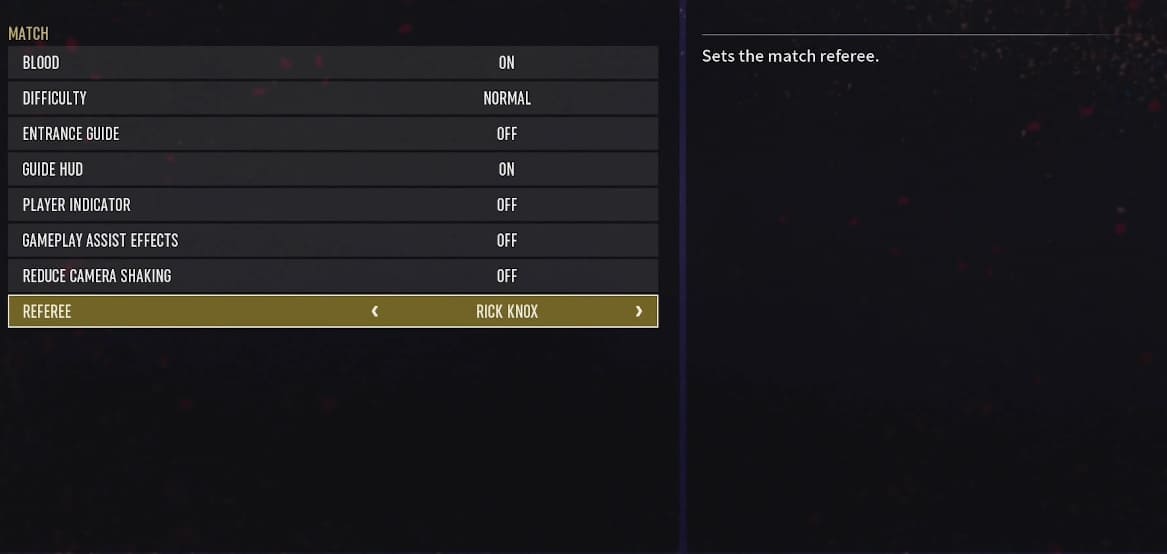
3. From the Match tab, you should move the menu cursor down to Referee, which will show the following description:

  • “Sets the match referee.”

4. At launch, you will be able to change this character to either Aubrey Edwards or Rick Knox.

5. After changing the ref, you can exit the Options menu.

The next time you start up a match in AEW Fight Forever, the referee should be changed to your preferred choice.

How to manually change your target in AEW Fight Forever

The auto targeting of the AEW Fight Forever can be troublesome during multi-man matches. To see how you can enable manual aiming in this wrestling videogame, you can follow the steps laid out in this tutorial from Seeking Tech.

1. First off, you need to make your way over to the Options menu.

To do so from the title screen, you first need to press Triangle if you are using a PlayStation pad, Y if you are using an Xbox pad or X if you are using a Switch pad. You should then be able to find and head into the Options menu from the next screen.

2. After arriving at Settings, you need to head over to the Controller section.

To change sections, you can use the L1 and R1 buttons on PlayStation controllers, LB and RB buttons on Xbox controllers or L and R buttons on Switch controllers.

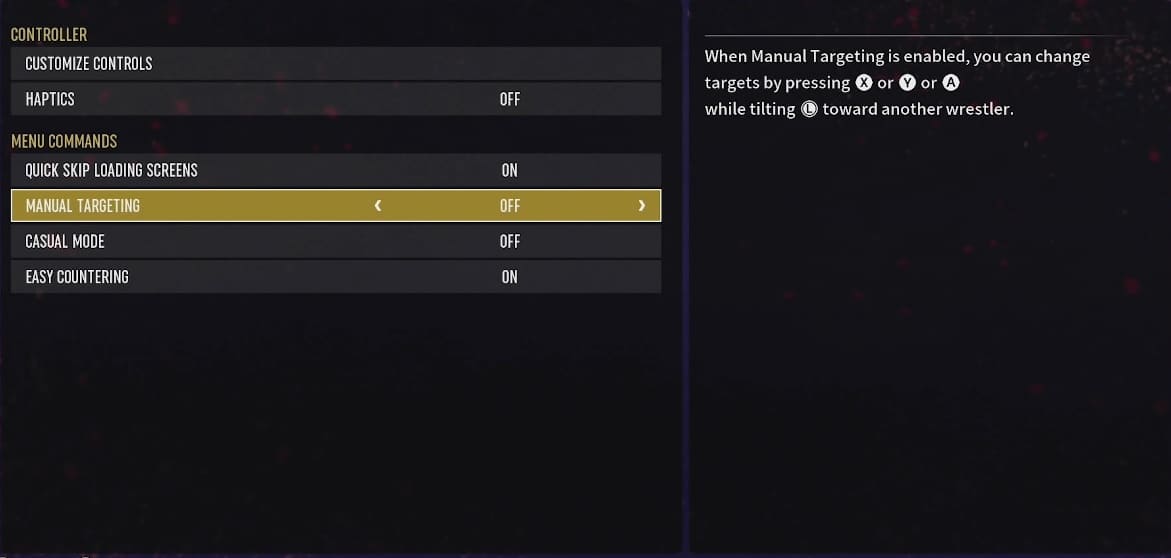
3. From the Controller section, move the menu cursor to Manual Targeting.

4. Make sure that Manual Targeting is set to On.

5. Once you are done enabling manual aiming, exit the Options menu.

6. In order to change your target during multi man matches, you need to tilt the left analog stick towards the direction of the targeted individual and then press the High Strike, Kick or Grapple button.

For the PlayStation controller, you can use the Square, Triangle or X buttons.

On Xbox, you can use the X, Y and A buttons.

If you are playing with a Nintendo Switch controller, then you can use the Y, X and A buttons.

How to lower the crowd noise and other volumes in AEW Fight Forever

You are able to adjust the volume settings for a variety of sounds in AEW Fight Forever. To see how you can properly do so in this wrestling videogame, you can check out this step-by-step tutorial from Seeking Tech.

1. To start off, you need to make your way over to the Options menu.

To do so from the title screen, you have to first press Triangle if you are using a PlayStation controller, Y if you are using an Xbox controller or X if you are using a Nintendo Switch controller.

On the next screen, you should then be able to head into Options in the Game Settings section.

2. Once you are inside of Options, you have to switch over to the Audio tab.

If you aren’t there already, then you can use the L1 and R1 buttons on the PlayStation gamepad, LB and RB buttons on the Xbox gamepad or L and R buttons on the Switch gamepad in order to change tabs until you get to the sound icon on the top side of the screen.

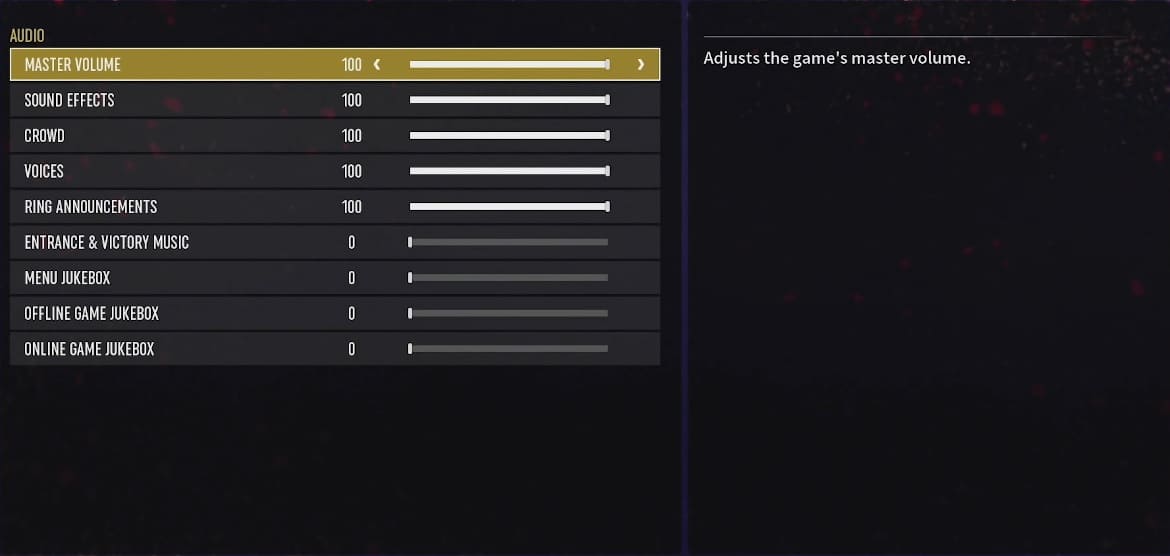
3. In the Audio tab, you will find the following sliders:

  • Master Volume – the overall volume of the game.
  • Sound Effects – the volume output of the various sound effects.
  • Crowd – the volume of the chants and other noises made by the crowd in a match.
  • Voice – the volume of the wrestler and NPC voices.
  • Ring Announcements – the volume of the ring announcer’s voice.
  • Entrance & Victory Music – the volume of the music that is played during the entrance and after the match has been completed.
  • Menu Jukebox – the volume of the background music being played when using the menus.
  • Offline Game Jukebox – the volume of the background music being played during offline matches and mini-games.
  • Online Game Jukebox – the volume of the background music being played during online matches and mini-games.

4. You can change any of the aforementioned volume settings from the Audio tab. To completely mute the audience, for example, you can move the Crowd slider all the way to 0.

5. After you are done adjusting the various volume settings, you can exit the Options menu.

The new volume levels should be automatically applied in AEW Fight Forever.

How to disable camera shake in AEW Fight Forever

To add more impact to moves in AEW Fight Forever, the camera will shake. If you find that the constant in-game camera movement to be distracting and/or making you feel motion sick, then you can take a look at this article from Seeking Tech to see how you are able to disable this feature.

1. To begin, you need to open the Options.

To do so from the title screen, you need to press the Triangle button on the DualSense/DualShock 4, Y button on the Xbox One/Xbox Series controller or X button on the Joy-Con/Nintendo Switch Pro Controller.

Afterwards, you should be able to find and select Options from the Game Settings section on the very next screen.

2. After opening the Options button, you need to use the L1 and R1 buttons of the PlayStation controller, LB and RB buttons on the Xbox gamepad or L and R buttons on the Switch controller to change tabs until you get to the wrestling ring icon at the top of the screen.

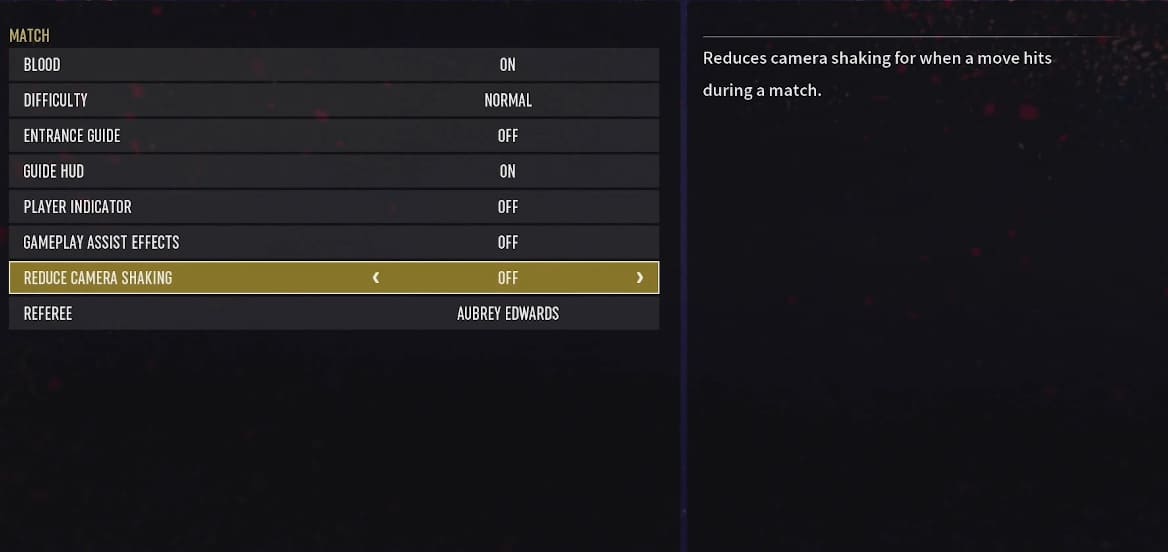
3. You should now be in the Match tab of the Options menu. Here, you need to move the cursor down to Reduce Camera Shaking, which should have the following description:

  • “Reduces camera shaking for when a move hits during a match.”

4. The Reduce Camera Shaking is set to “Off” by default. To disable this visual effect, make sure you set this setting to “On” instead.

5. Back out of the Options menu after disabling the camera shake.

When you play a match in AEW Fight Forever again, you should no longer see any exaggerated camera movement when a wrestling move is made.

How to turn off vibrations in AEW Fight Forever

By default, AEW Fight Forever features controller vibrations. This feature will help you feel more immerse with this wrestling game as you will feel every impact. With that said, these haptics can be too distracting and can cause the battery of your gamepad to drain faster.

To see how you can disable rumble in AEW Fight Forever, you can take a look at this tutorial from Seeking Tech.

1. Go to the Options menu.

In order to do so, you can press the Triangle button on PlayStation, Y button on Xbox or X button on Switch from the Title screen. You should then be able to select Options in the Game Settings section on the next screen.

2. From the Options menu, use the L1 and R1 buttons on PlayStation, LB and RB buttons on Xbox or L and R buttons on Switch to change tabs until you get to Controller.

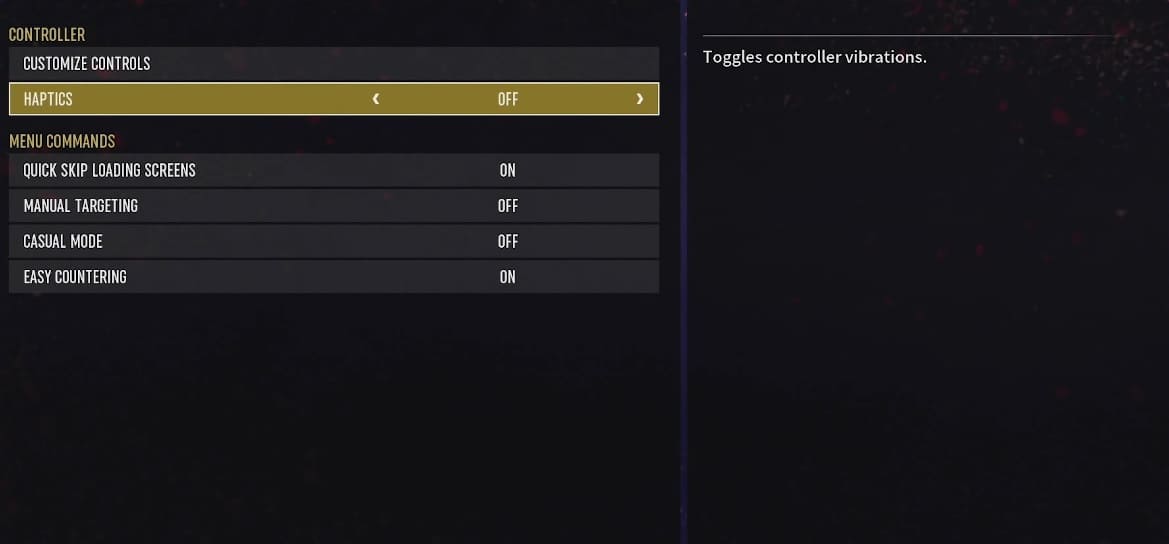
3. In the Controller tab, move the menu cursor to Haptics or Vibrations, which should be showing the following description:

  • “Toggles controller vibrations.”

4. By default, the Haptics or Vibrations setting is set to On. Make sure to set it to Off if you want to turn off rumble for your controller when playing AEW Fight Forever.

5. Once you are done, exit out of the Options menu.

6. The next time you play a match in this game, you should no longer notice your controller vibrating.

How to turn off camera shake in Lies of P

If you find that the in-game camera of Lies of P moves around too much in certain scenarios, then you can disable its shaking movement. To find out how you can turn this feature off in this action-role-playing game, you can check out this guide from Seeking Tech.

1. For the first step, you need to head into the Settings menu, which can be done from either the title screen or during gameplay.

To do so while playing the game, press the Options button if you are playing with a PlayStation controller or Menu button if you are playing with an Xbox controller to being up the in-game menu. Afterwards, use the directional button to move the cursor to the gear cog icon, where you can then select Settings with the X button on PlayStation or A button on Xbox.

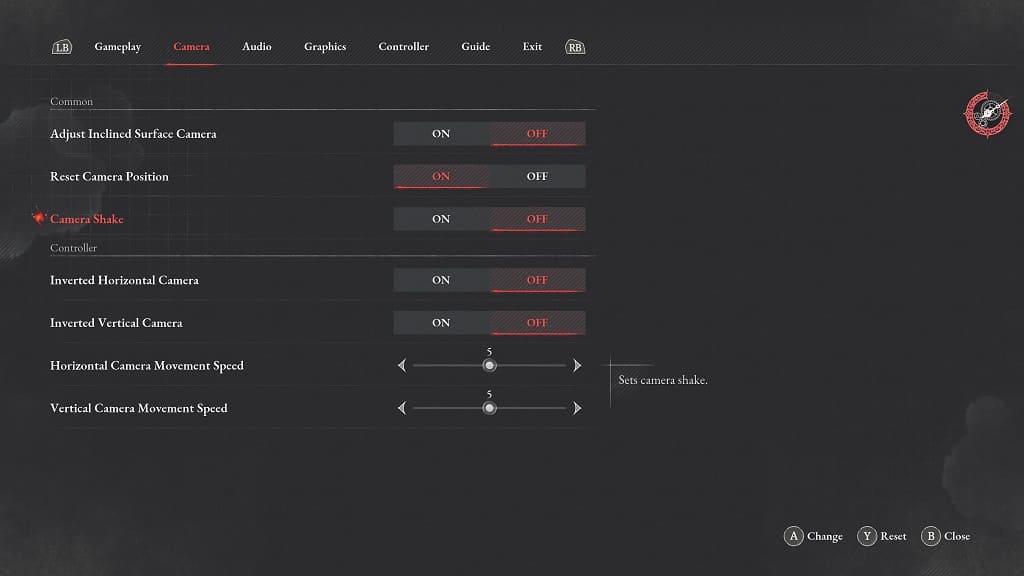
2. Inside of the Settings menu, you need to head over to the Camera tab. You are able to change tabs by using the L1 and R1 buttons on PlayStation or LB and RB buttons on Xbox.

3. From the Camera tab, move the menu cursor down to Camera Shake, which should show the following description:

  • “Sets camera shake.”

4. By default, this setting is set to On. Select it with the X button on PlayStation or A button on Xbox to turn it Off.

5. Back out of the Settings menu and then return to playing Lies of P. You should notice that the camera will no longer shake around.

What to do if the PlayStation VR2 isn’t turning on

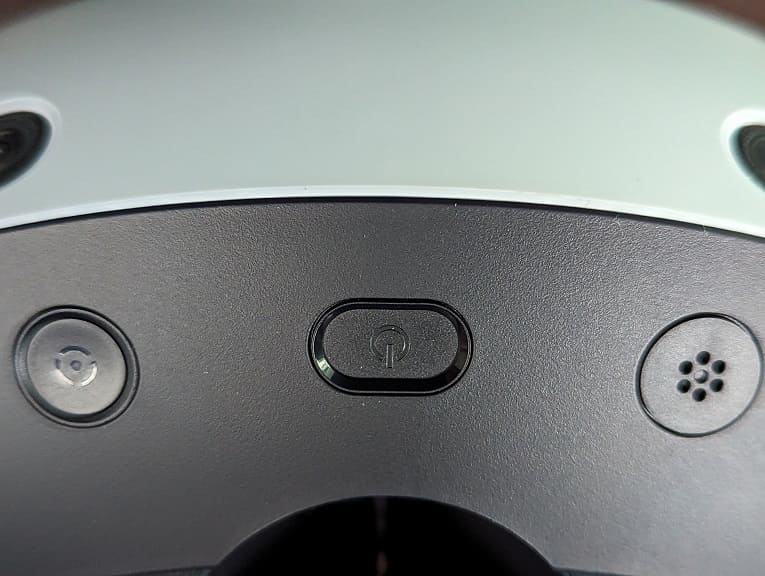
If the PlayStation VR2 isn’t turning on when you press the power button, then you can check out this troubleshooting article from Seeking Tech to see how you can potentially fix this issue.

1. For the first step, you can try restarting your PS5 by taking the following steps:

  • Unplug the PS VR2 from your PlayStation 5 or PlayStation 5 Digital Edition console.
  • Restart your PS5 by pressing the PS button, selecting the Power option located at the bottom menu and then selecting Restart PS5.
  • Connect the PS VR2 to the USB Type-C port of the PS5 again.
  • Press the power button on the PS VR2.

2. If your virtual reality headset still won’t turn on, then you should make sure that you aren’t using any extension cable to connect it to your PS5. Instead, the PS VR2 should be directly connected to the console.

3. You should also check to see if the USB cable is securely connected to the PlayStation VR2 headset.

In order to do so, pull the scope of the headset all the way out. You should then be able to find the USB connection between the scope and light shield.

If the connection appears to be loose, then try to push it inwards.

4. If the PS VR2 still won’t turn on, then you can try using it on another PlayStation 5 console if possible. If the accessory is able to power on just fine on a different system, then there may be something wrong with the USB Type-C port of the first PS5.

In this case, you need to repair the USB port of the console.

5. If the PlayStation VR2 does not work on multiple PS5 systems, then there could be something wrong with the hardware of the virtual reality headset.

For this scenario, you will most likely need to send the PS VR2 in to be repaired or replaced.

What to do if Xbox Series X or Xbox Series S is not auto updating

The Xbox Series X and Xbox Series S are capable of auto updating as the consoles can download the latest firmware and game patches without any manual inputs from the end users. If you find that the updates aren’t automatic, then you can check out this guide from Seeking Tech to see how you can potentially fix this issue.

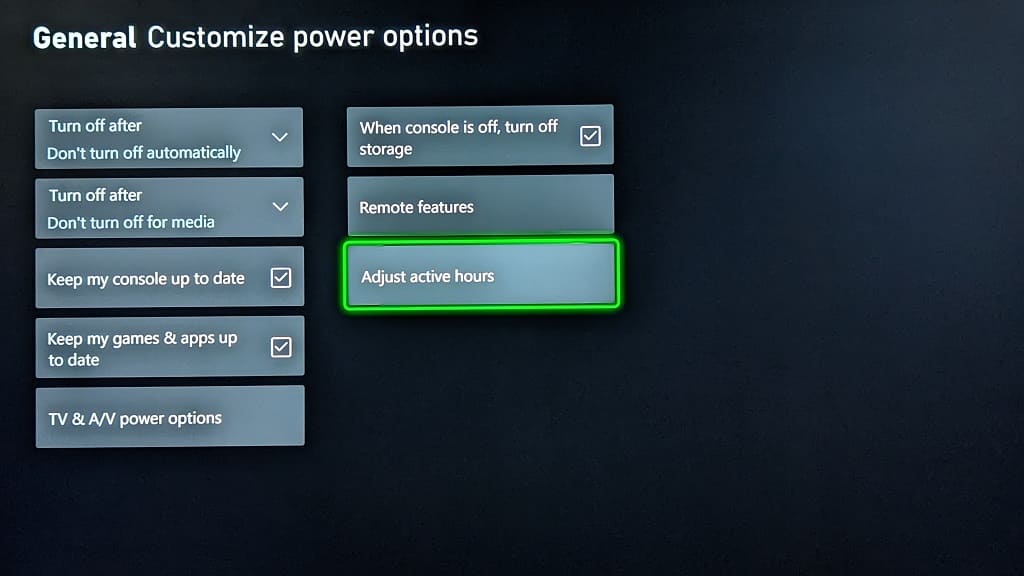
1. If your console isn’t updating in sleep mode, then we recommend that you check your settings. In order to do so, you first need to open the Settings menu of your Series X or Series S and then navigate over to General > Power options.

From the “General – Power options” menu, make sure that Sleep is selected. Afterwards, select Customize power options.” On the next screen, make sure that the “Keep my console up to date” and “Keep my games up to date” boxes are checked while the “When console is off, turn off storage” is unchecked.

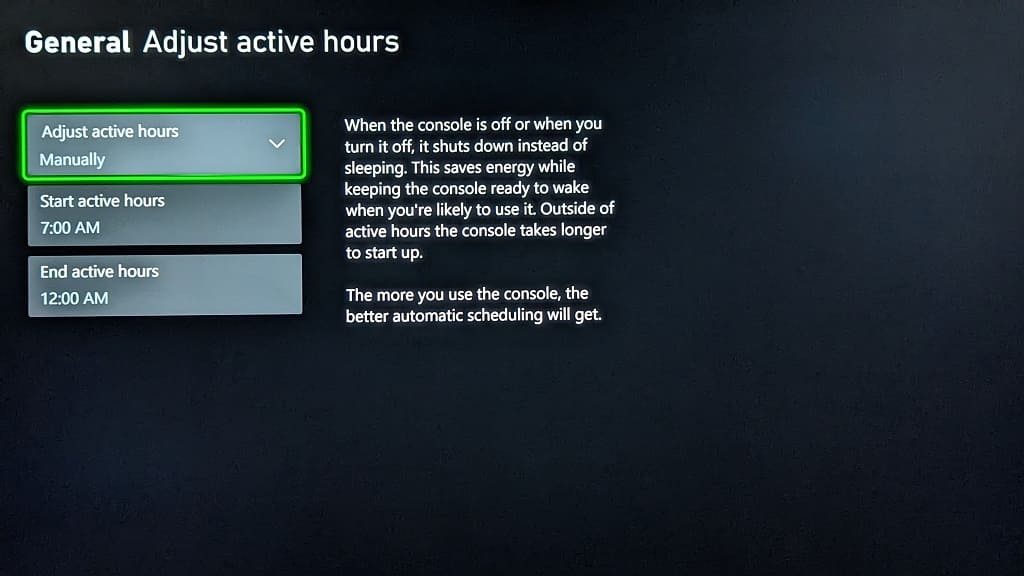
You can also select the “Adjust active hours” option from the “General – Customize power options” menu and then adjust the active hours so that your console will go into sleep mode instead of turning completely off.

2. If the updates still aren’t automatically downloading or installing, then you can try power cycling the console by doing the following:

  • Press and hold the power button on your Xbox Series X or Xbox Series S for around 10 seconds to turn it off completely.
  • Once the console has shut down, unplug its power cable from the power outlet.
  • Next, you need to wait for a minimum of 5 minutes.
  • Afterwards, re-plug the power cable of the console back into the power outlet.
  • Turn your Series X or Series S back on again.

3. If you have games installed on a USB storage drive, then you can try moving them to the Internal Storage or the Expansion Card.

4. You can also try factory resetting the console. To do so, open the Settings menu of the Xbox Series X or Xbox Series S. From there, select System > Console info > Reset console.

When asked how you want to reset your console, you can try the “Reset and Keep My Games & Apps” option first. If that doesn’t help kickstart your gaming system to auto update on its own, then you can try the “Reset and Remove Everything” option after selecting Settings > System > Console info > Reset console.

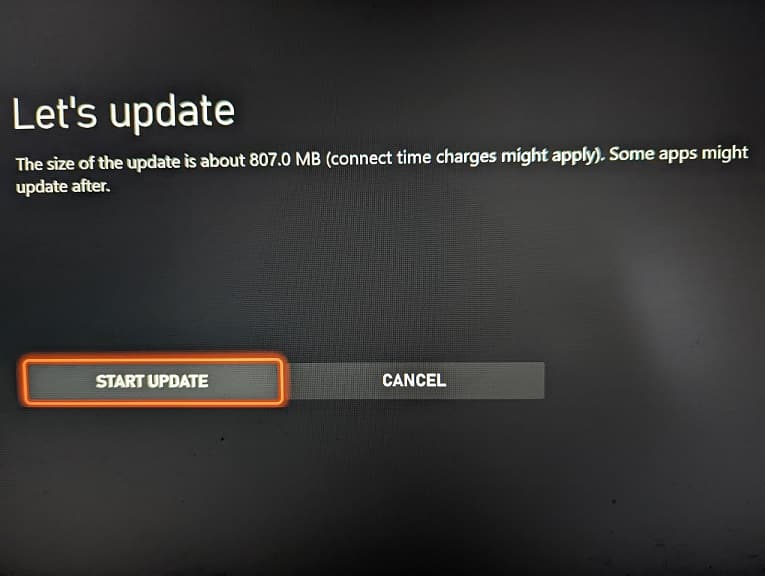
5. You can also try manually updating the firmware for your console by going to Settings > System > Updates. A new system software may make the automatic updates more reliable.

6. If none of the aforementioned steps have worked so far, then there is not much else you can do other than to manually update.

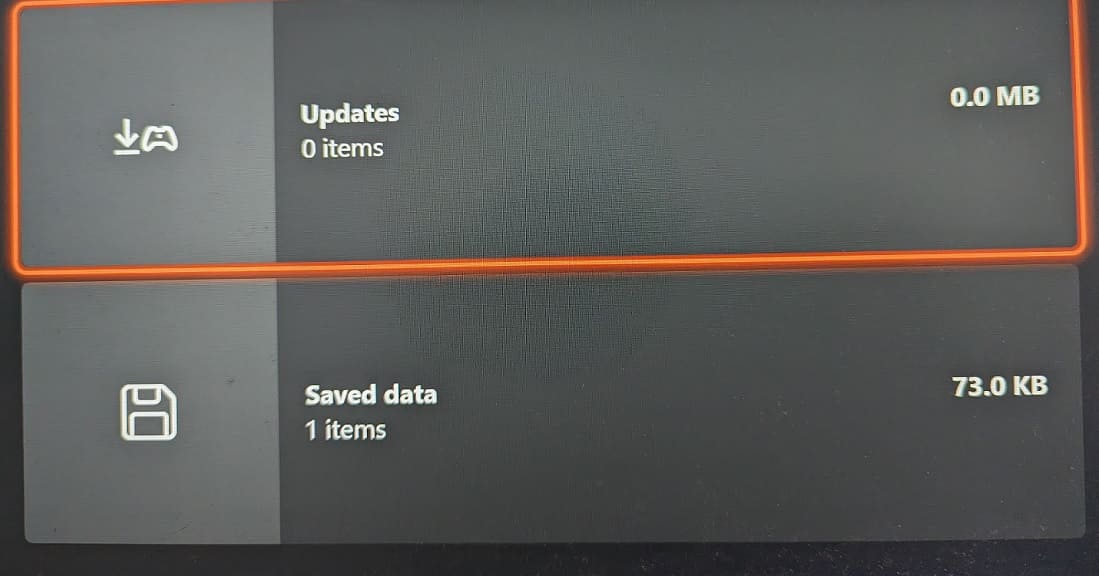
To do so for a specific game, move the menu cursor over to its icon from the dashboard menu. Afterwards, press the Menu button on the controller to bring up a pop-up window, which is where you can select the “Manage game and add-ons” option. Finally, select Updates on the next screen.

Samsung S90C settings for PS5, Xbox Series X and S

If you have the Samsung S90C OLED television set, then you can check out this guide at Seeking Tech to see how you can optimize this screen when it comes to getting the best out of your PlayStation 5, PlayStation 5 Digital Edition, Xbox Series X and/or Xbox Series S consoles.

Model Numbers

This guide should cover all three screen sizes of the S90C series, including the following model numbers:

55” Samsung S90C:

  • QN55S90C
  • QN55S90CAF
  • QN55S90CAFXZA

65” Samsung S90C:

  • QN65S90C
  • QN65S90CAFX
  • QN65S90CAFXZA

77” Samsung S90C:

  • QN77S90C
  • QN77S90CAFX
  • QN77S90CAFXZA

Supported S90C Console Gaming Features

The S90C supports the following gaming features:

PlayStation 5 and PlayStation 5 Digital Edition:

  • HDR10
  • Variable Refresh Rate between 48 fps to 120 fps
  • Up to 120 frames per second

Xbox Series X and Xbox Series S:

  • HDR10
  • Variable Refresh Rate between 40 fps to 120 fps
  • Low Framerate Compensation
  • Up to 120 frames per second

Recommended S90C Settings for PS5, Xbox Series X and S

For the best S90C settings when it comes to the PlayStation 5 and Xbox Series consoles, you can try doing the following:

1. Connect your console to the Samsung OLED if you haven’t done so already.

All four of the HDMI ports of the TV are HDMI 2.1; so, you should make sure you are using the HDMI 2.1 cable that came with your PS5 or Series X.

The Series S only comes with a HDMI 2.0, which you can still use with the S90C although the bandwidth will be limited to the HDMI 2.0 specification. Alternatively, you can use a HDMI 2.1 cable to connect the Xbox Series S to the TV if you have an extra one available.

2. Open the Settings menu of the Samsung S90C and then make your way over to All Settings > Connection > Game Mode Settings > Game Mode. Afterwards, make sure that the game mode is turned on.

Enabling game mode will reduce the input lag when playing games. This action will also automatically enable Variable Refresh Rate support for the OLED.

3. The Game Mode Settings menu also has several other options like Dynamic Black Equalizer (which makes it easier to see in the darker in-game environments), Game Picture Expert (which automatically converts HDR10 to HDR10+) and Game Motion Plus (which adds interpolation for games that run at 30 fps as well as 60+ fps).

We suggest that you leave these settings alone as they may make games look less accurate when compared to the creator’s intent. Of course, you can always change these in the future on a game-by-game basis to see if you can get a better image quality.

4. You should now be done setting up your S90C for gaming. For the console side, however, you may still need to make sure adjustments.

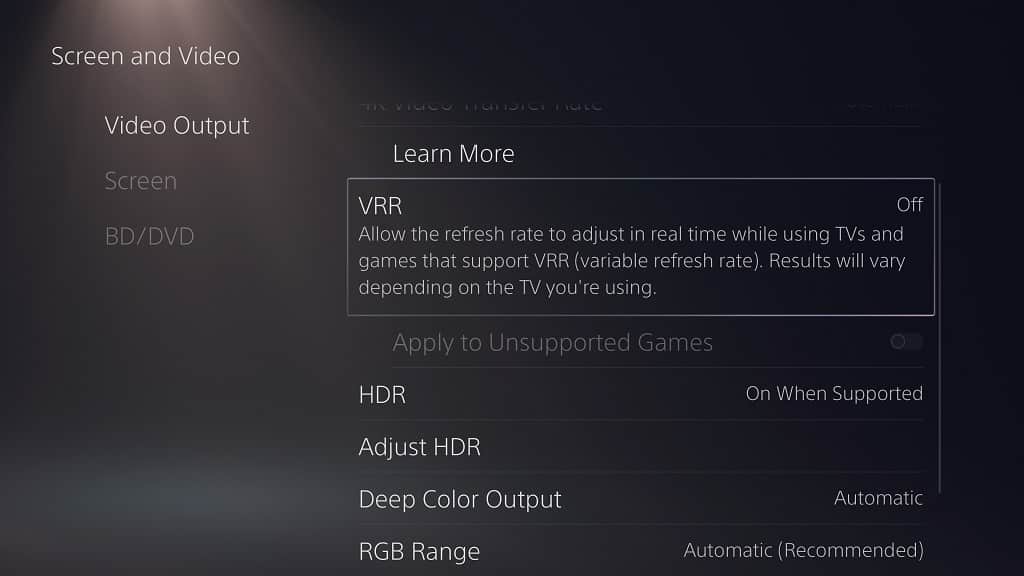
For the PS5 and PS5 Digital Edition, open the Settings menu and then head over to Screen and Video and then Video Output. From there, you need to set VRR, 120 Hz, ALLM, 4K Transfer Rate, Deep Color Output and RGB Range settings to Automatic.

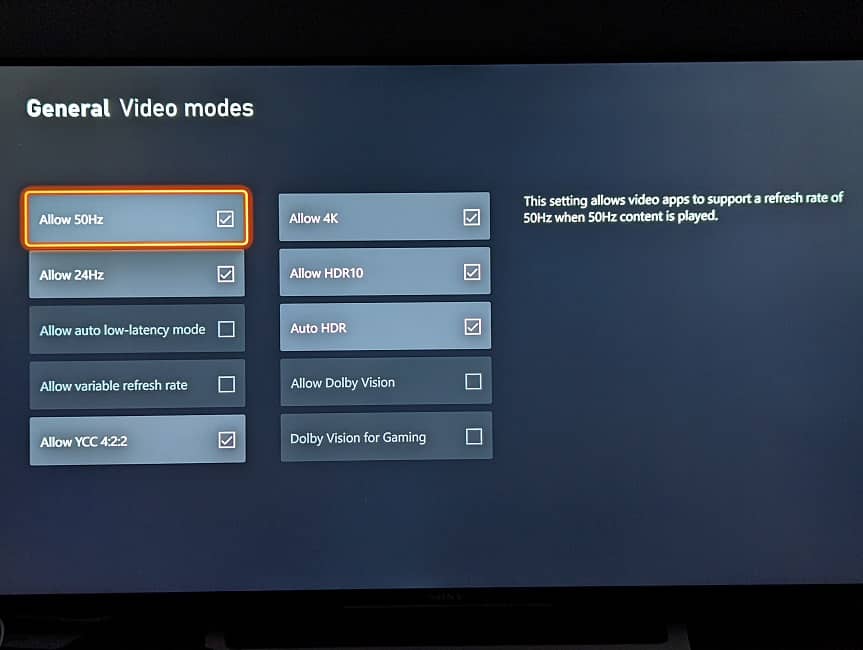
On the Xbox Series X and Xbox Series S, you also need to open its Settings menu. Afterwards, navigate over to General > TV & Display Options > Video Modes. From there, make sure that Allow Variable Refresh Rate, Allow Auto-Low Latency Mode, Allow 4K and Allow HDR10 boxes are all selected.

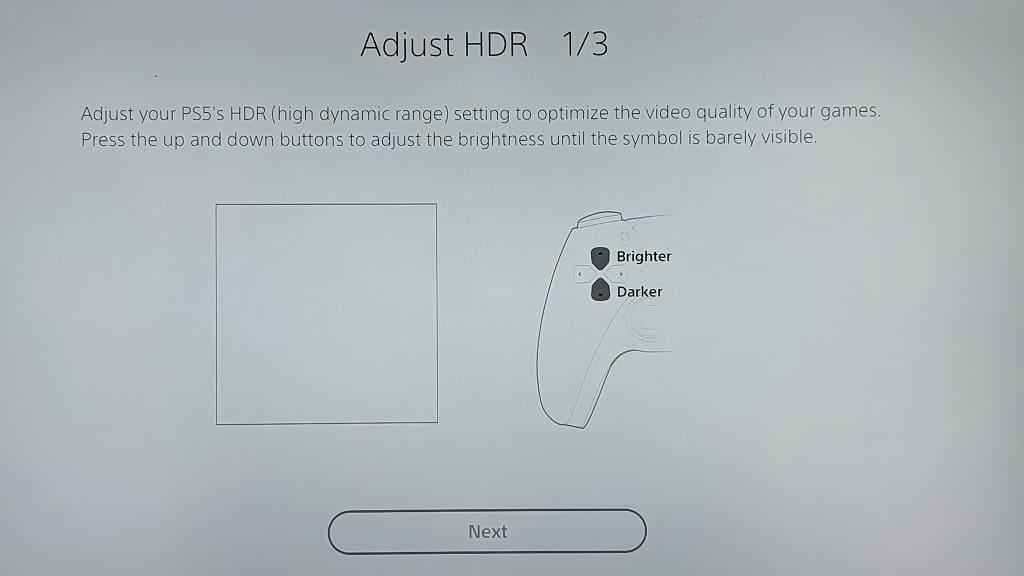
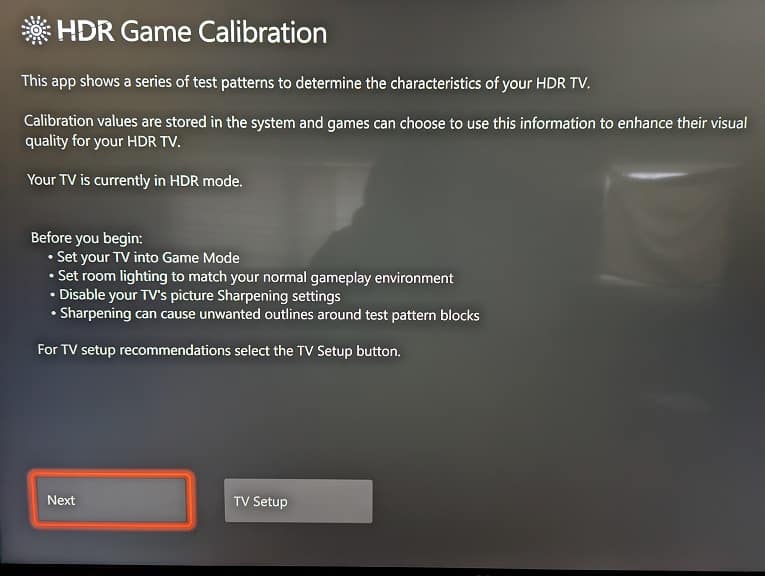
5. One last step you need to take is to calibrate the HDR brightness output of your console to match the HDR brightness of the Samsung S90C.

On the PlayStation 5, you can do so by going to Settings > Screen and Video > Video Output > Adjust HDR.

For the Xbox Series consoles, go to Settings > General > TV & Display Options > Calibrate HDR for Games.

Next, you have to follow the instructions that appear on the screen to properly set up HDR.