How to change graphics mode in Lies of P

In the PlayStation 5 and Xbox Series X versions of Lies of P, there are three graphics mode. To see how you can change the visual settings for this action role-playing game, you can take a look at this tutorial from Seeking Tech.

1. You won’t be able to change the graphical settings menu if you have already loaded into your save file. Instead, you need to exit out to the Title Screen.

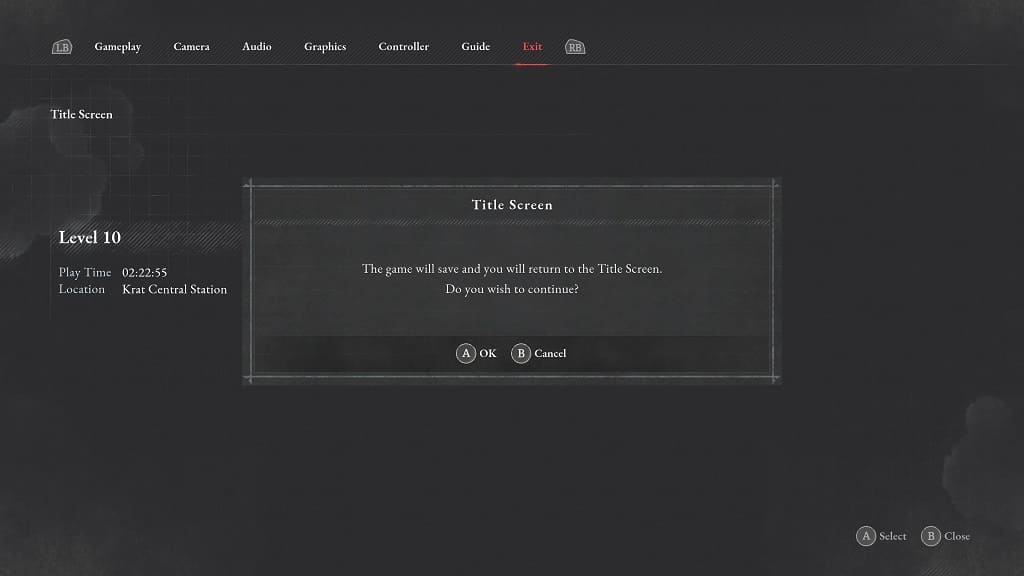
If you are currently playing the game, then you need to press the Options button on PS5 or Menu button on Xbox Series X. Afterwards, select Settings at the top. You then need to use the L1 and R1 buttons or LB and RB buttons to the Exit tab. From there, select Title Screen and then OK in the subsequent pop-up notification.
2. From the title screen, select Settings.

3. After getting to the Settings menu, use the L1 and R1 buttons or LB and RB buttons to switch over to the Graphics tab.

4. You should find the Graphics Mode setting in the Graphics tab. You will be able to select between the following options:

  • The Quality-centered mode changes the native resolution to 1440p with a target frame rate of 30 fps.
  • The Performance-centered mode changes the native resolution to 1080p with a target frame rate of 60 fps.
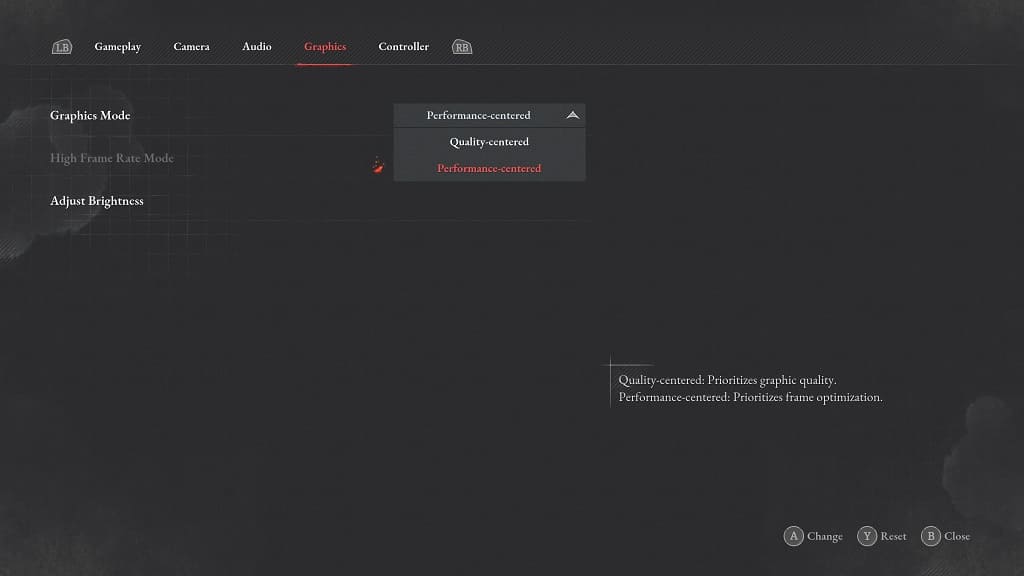
In both of these modes, the native resolution will be reconstructed to 2160p. If you want more clarity, then you should select Quality-centered. If you prefer having smoother gameplay, then you should select Performance-centered instead.

4. If you decide to go with the Quality-centered mode, and have a screen that has a 120 Hz refresh rate, then you can also enable the High Frame Rate Mode.
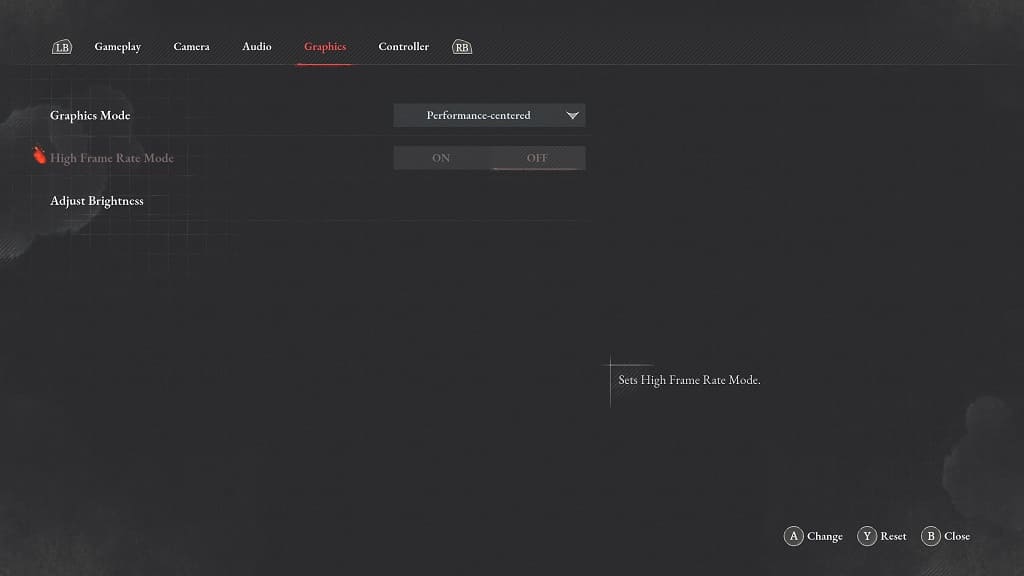
By doing so, you will be able to play Lies of P in high resolution at 40 fps instead of 30 fps.

5. Once you are done changing the graphics mode, close the Settings menu and then load back into your save file.

You should be able to notice the visual changes right away.

How to fix Lies of P brightness issues on PS5, Xbox Series X and S

You may find that some of the environments in Lies of P to be too dark, too bright or look washed out.

To see how you can fix the brightness issues with the PlayStation 5, Xbox Series X and Xbox Series S versions of this action RPG, you can take a look at this troubleshooting article from Seeking Tech.

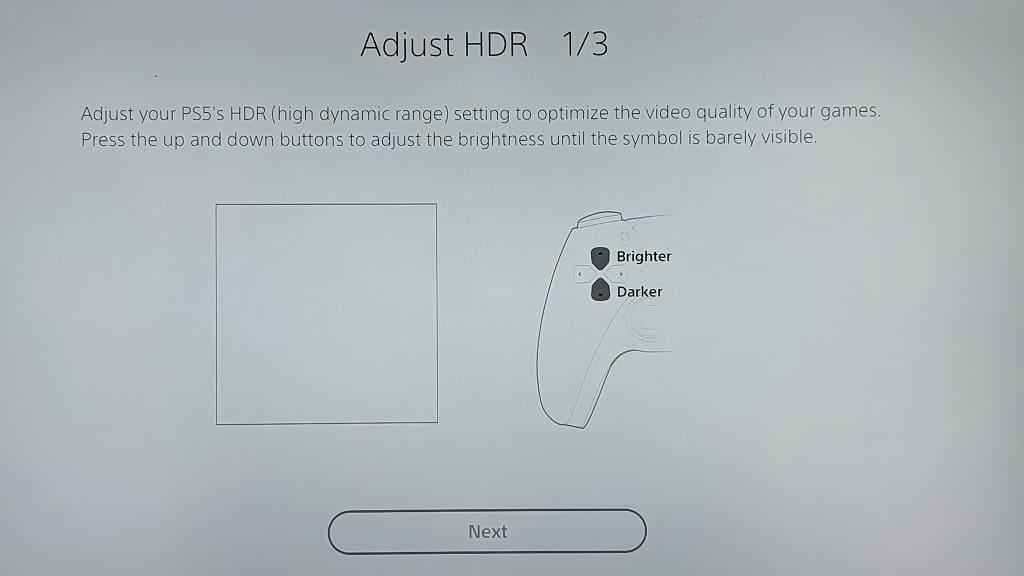
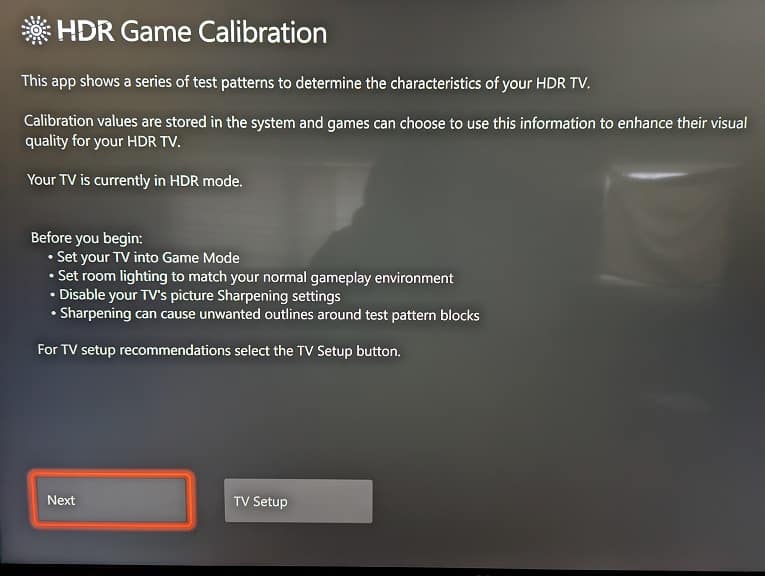
1. To start off, we recommend that you calibrate the HDR output of your game console.

In order to do so with the PS5, you need to go to its Settings menu and then select Screen and Video > Video Output > Adjust HDR.

If you are playing Lies of P on Xbox, then you have to go to its Settings menu on the dashboard and then select General > TV & display options > Calibrate HDR for games.

Afterwards, follow the directions shown on screen in order to calibrate the HDR brightness output.

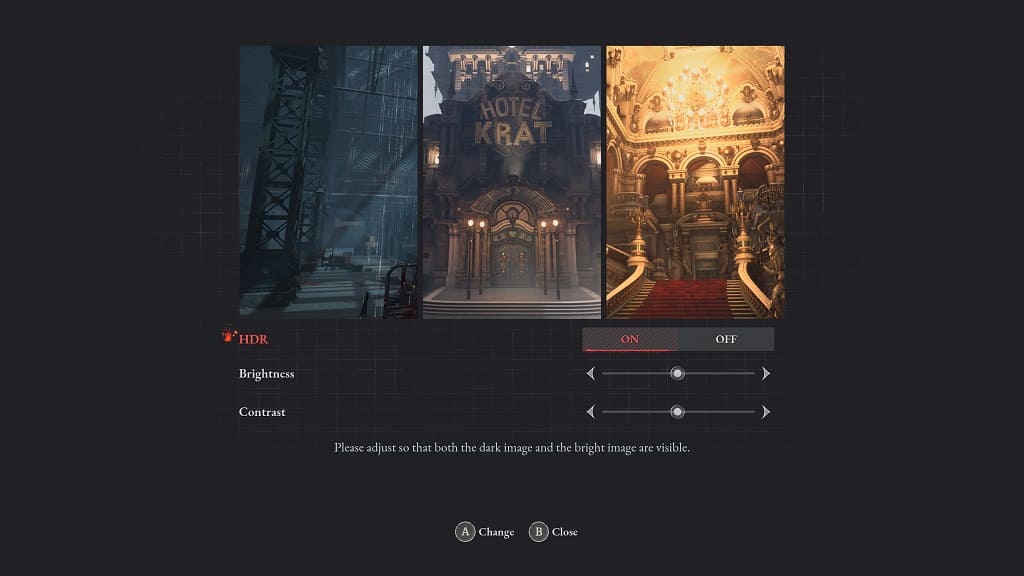
2. If the brightness still does not look quite right, then you can use the in-game Settings menu. You can do so by selecting “Settings” from the Title screen.

If you have already loaded into your save file, then you need to press the Options button on the PS5 controller or Menu button on the Xbox controller. From the in-game menu, select the gear icon to head into Settings.

Next, use the L1 and R1 buttons or LB and RB buttons to navigate your way towards the Graphics tab. From there, select the Adjust Brightness setting.

Inside of the Adjust Brightness menu, you will be able to enable or disable HDR. You will also be able to adjust the Brightness and Contrast sliders. When changing these levels, you can use the images at the top as a reference.

You may need to use the Adjust Brightness menu often when you move from one environment to another.

3. Of course, you can also use the settings of your television set or gaming monitor to adjust the brightness and contrast levels if you need to make additional adjustments.

How to properly store the PlayStation VR2

If you aren’t using the PlayStation VR2, then leaving it out in the open can damage the expensive accessory. To see how you can properly store your virtual reality headset, you can take a look at this guide from Seeking Tech.

What can happen if you don’t properly store your PS VR2

If you don’t properly store your PlayStation VR2, then you could risk damaging its lenses due to the overexposure to direct sunlight.

Dust particles and other contaminants can also get to the lens, causing visual artifacts if you don’t wipe them off before using your headset. Dust can also end up blocking the ventilation shaft, which is designed to keep the lens from fogging up.

So, if you are aren’t using the virtual reality headset, it is best that you store it properly in order to avoid any potential damage.

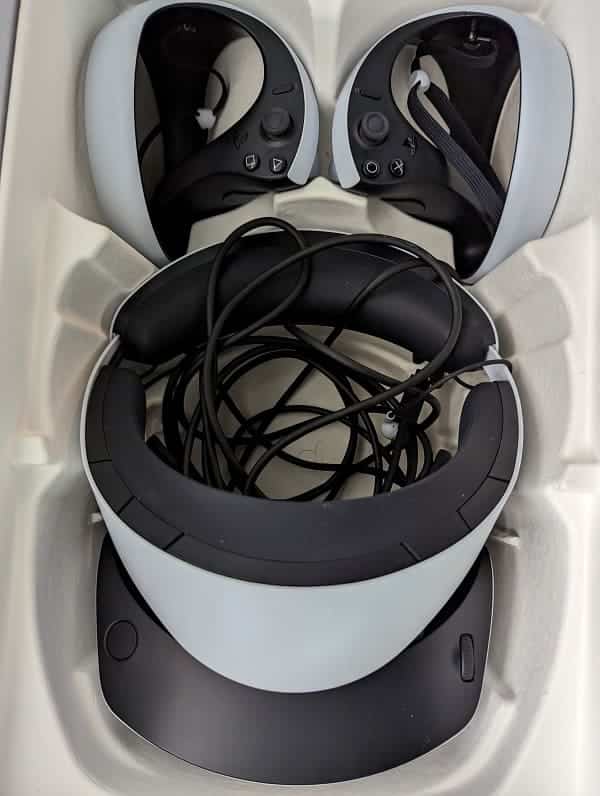
Using the retail box

The good news is that packaging box that comes with the PlayStation VR2 can be re-used as a storage box. If you still have it around, then we recommend that you take the following steps:

1. To start off, unplug the PS VR2 from the USB C port of your PlayStation 5.

2. If you have the earphones attached to the earpiece holders, then we suggest that you remove them. Otherwise, the headset may not be able to fit properly in the grooves of the box.

3. If you haven’t done so already, long press the scope adjustment button and then slide the scope all the way in. This is needed to fit the headset into the groove of the retail box.

4. Once you have everything set up, put the headset into its groove in the retail box. Make sure that the earphones aren’t blocking the sides when doing so.

5. Afterwards, carefully put the USB cable in the open space in between the the scope and the headband.

6. If you want to, you can also put the Left PlayStation VR2 Sense Controller and Right PlayStation VR2 Sense Controller into their respective groves.

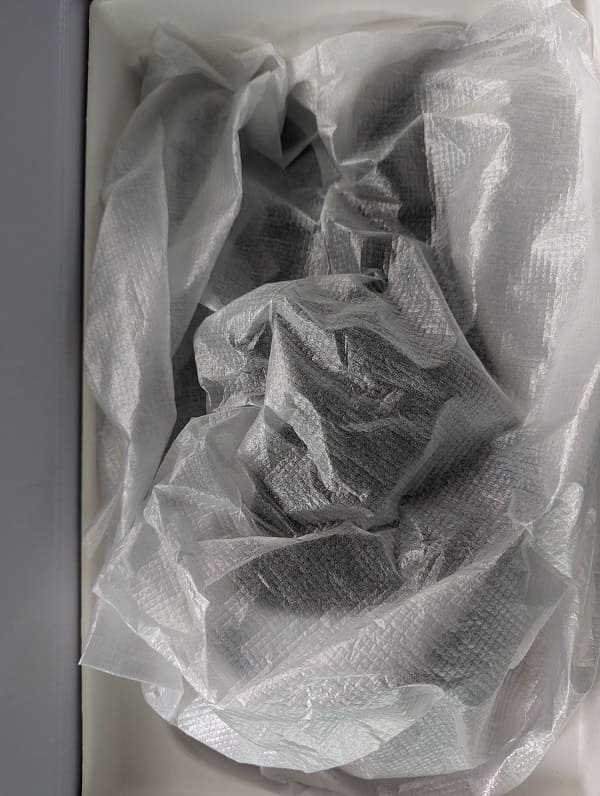
7. The retail box may not close all the way. If it doesn’t, then you can use one of the white plastic sheets that came in the packaging box as a dust cover.

PlayStation VR2 carrying case

If you already threw away the packaging box that came with your PlayStation VR2 and/or would like to easily move the virtual reality headset around, then you might want to consider getting a carrying case.

If you are interested in doing so, then we recommend checking out the Sarlar PlayStation VR2 Hard Carrying Case, which you can find on Amazon with this link. (#CommissionsEarned).

How to prevent the PS VR2 from slipping or sliding down your face

The PlayStation VR2 may slip or slide down your face, especially if you have to move around a lot in certain games. This can be somewhat annoying as the virtual reality headset has a small sweet spot in terms of sharpness. So, if that spot gets slightly off-centered, then the graphics will become blurrier.

To see how you can prevent the PS VR2 from slipping or sliding, you can check out this guide from Seeking Tech.

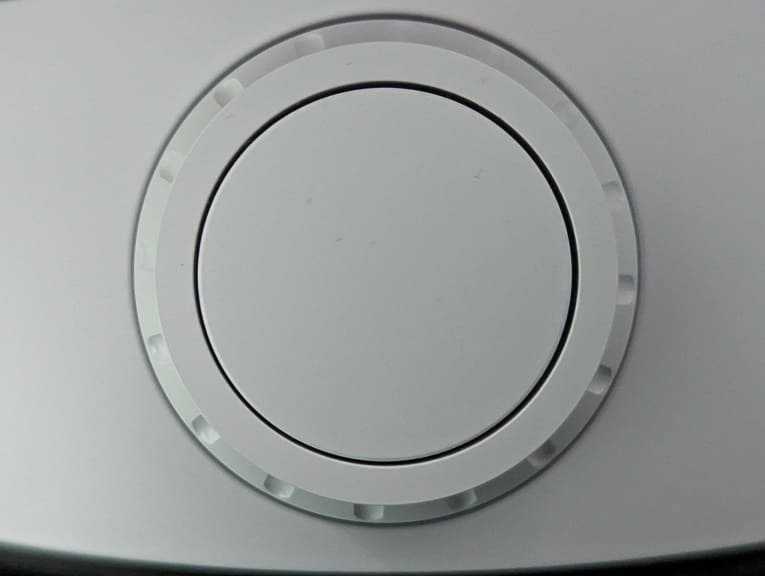
1. For the first step, you should make sure that the head band is securely enough. To tighten it, rotate the headband adjustment dial located at the back clockwise.

Be careful not to tighten it too much. If it feels like the virtual reality headset is squeezing your head, then press the headband release button to loosen it and then tighten it again until you reach an equilibrium in terms of comfort and stability.

2. Furthermore, you can try pulling the scope inner towards your face as well.

To do so, press and hold the scope adjustment button located on the top right side and then push the scope inwards.

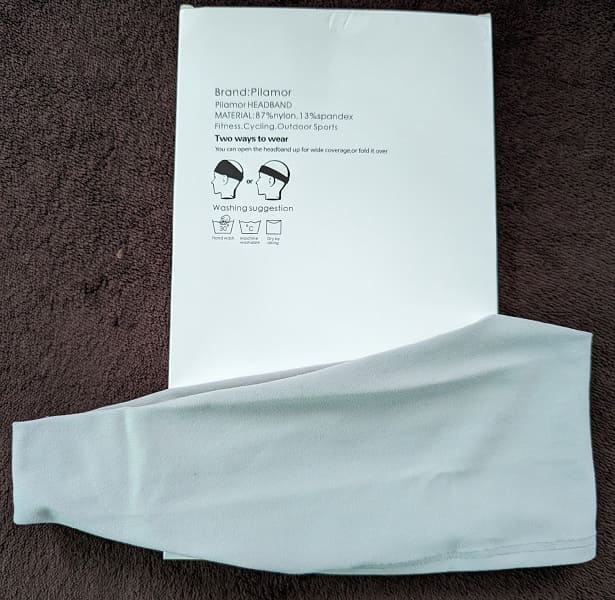
3. You can also try wearing a sweat band as it will absorb any sweat from your forehead. As a result, the PlayStation VR2 won’t lose its grip due to a slippery skin.

To find out more about how you can prevent sweat from getting inside the PS VR2, you can take a look at our previous post.

4. If you don’t have a headband available, then you can try wearing a baseball cap backwards. The bill of the back should provide additional support on the backside of the VR headset.

5. You can also try using headphones instead of ear buds or earphones. The bigger ear cups should prevent the PS VR2 from slipping or sliding as it should make the sides of the VR headset more stable.

What to do if you don’t get an image on screen when using PS VR2

If you don’t see an image when using the PlayStation VR2, then you can take a look at this troubleshooting guide from Seeking Tech to see how you can resolve this issue.

1. For the first step, you should make sure that you press the power button located at the bottom of the scope. The power indicator located at the front of the scope should turn solid white.

2. If you aren’t seeing anything while wearing the headset while the headset is powered on, then you should try re-connecting the accessory by doing the following:

  • Completely turn off your PlayStation 5 or PlayStation 5 Digital Edition.
  • Unplug the PlayStation VR2 from the USB C port of your console.
  • Re-plug the virtual reality headset back into the USB C port on the PS5.
  • Turn your PS5 back on.
  • Turn on the PS VR2.

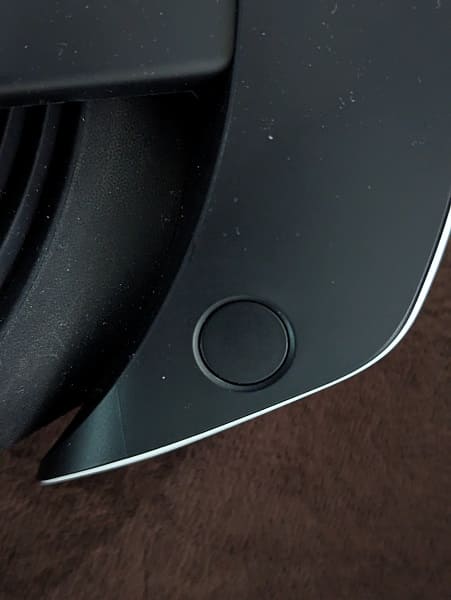
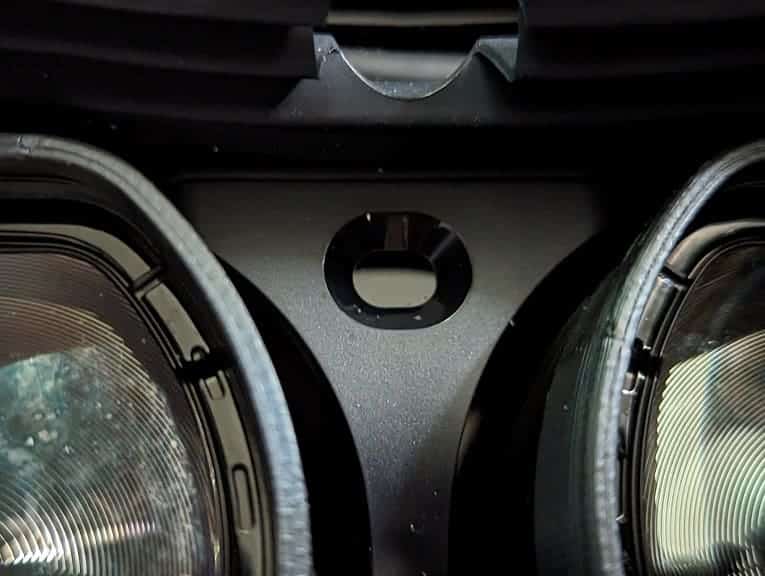
3. There is an attachment sensor located inside of the headset. You should make sure that the sensor is clean; otherwise, it may not be able to detect whether or not you are currently wearing the PlayStation VR2.

To clean the sensor, use a dry, lint-free cloth.

4. Hair and head accessories may also make the attachment sensor to be inaccurate. Therefore, you should make sure that only your bare face is inside the light shield.

Keep in mind that the PlayStation VR2 supports glasses. So, you should be fine if you need to wear glasses with this product.

5. Make sure that the USB cable is securely connected on both ends.

On the PlayStation VR2, the proprietary USB port is located in between the scope and light shield. You will need to pull the scope outwards to find it.

6. If possible, try to plug another accessory in to the USB C port of your PlayStation 5.

If the other accessory isn’t working as well, then you may need to send your console in for repair due to a faulty USB C port.

7. You can also try using your PlayStation VR2 headset on another PS5 if possible.

If the virtual reality headset isn’t showing an image when used on another console, then you may need to send the accessory in for repair.

What to do if PlayStation VR2 keeps turning off

When playing with the PlayStation VR2, the headset may keep turning off. To see how you can potentially fix this power problem, you can take a look at this troubleshooting article from Seeking Tech.

1. The first step you can take is to inspect the USB connection between the PS VR2 and PS5. You should make sure that this connecting is securely plugged in on both ends.

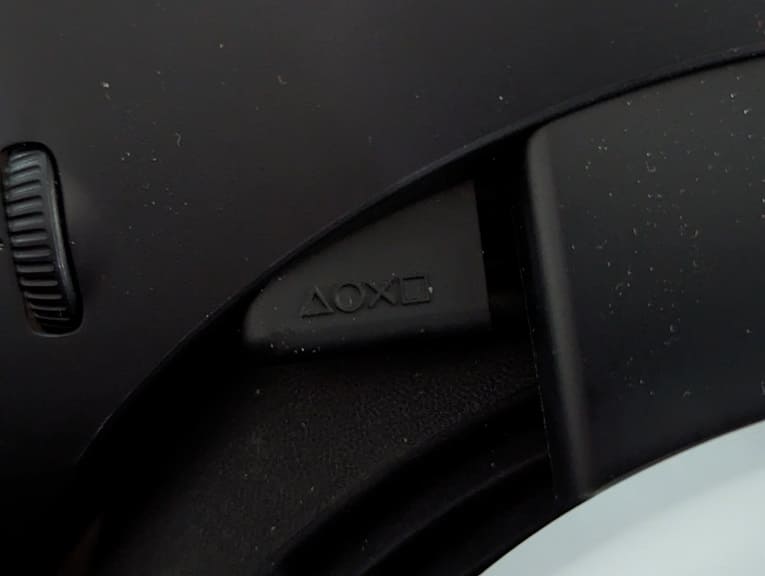
To find the USB connection on the virtual reality headset, you need to move the scope outwards. You should then see the PlayStation symbols on the plug located in between the scope and light shield.

2. Using an extension cable may cause the headset to shut off at random times.

Therefore, we recommend that you avoid using any extensions and, instead, simply connect your PlayStation VR2 headset directly to the PlayStation 5 or PlayStation 5 Digital Edition console.

3. There is also a possibility that the virtual reality headset may be overheating.

To see how you can prevent the temperatures from rising too high while you are using the PS VR2, you can check out our previous guide.

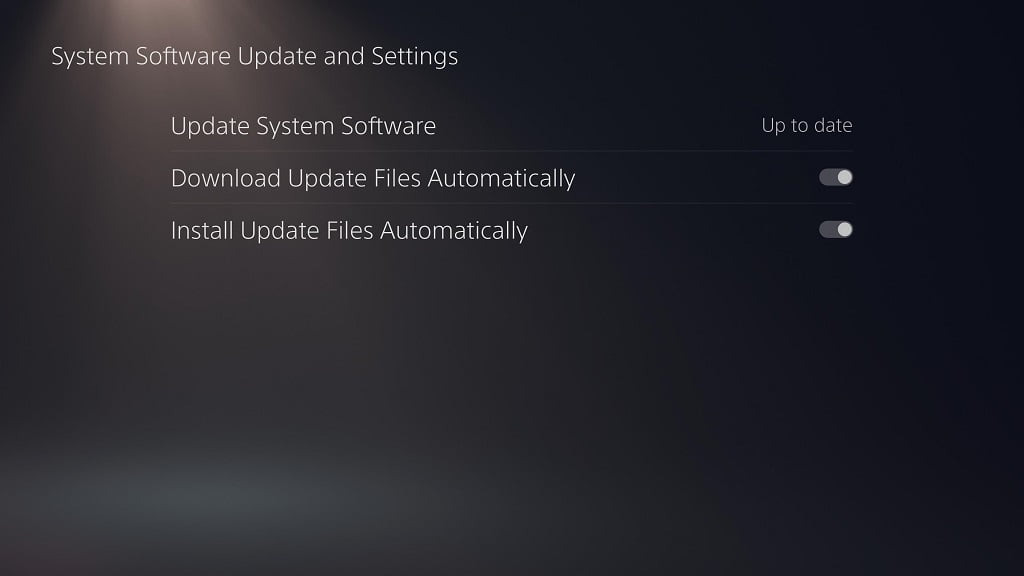
4. If you haven’t done so already, you should check to see if you have the latest system software update installed on your PS5.

To manually check, you can go to the Settings of the gaming system and then select System > System Software > System Software Update and Settings > Update System Software > Update Using Internet.

A new update may fix the power issue of your PS VR2.

5. If possible, you can try plugging in a different USB C device into your PS5 to see if the other device can function without any issues.

If you are also having problems with other USB C accessories, then the USB C port of your console may be faulty. In this case, you will need to get it repaired.

6. You can also try testing the PlayStation VR2 on a different PS5 if possible.

If the headset is also shutting off randomly on another console, then there may be a hardware issue with the VR headset. In this scenario, you will need to get the PlayStation VR2 repaired.

AEW Fight Forever ladder and weapon controls

Using ladders and weapons in AEW Fight Forever can be somewhat confusing if you aren’t familiar with the controls. You can check out this guide at Seeking Tech to find the appropriate button layout.

How to pick up a ladder or weapon

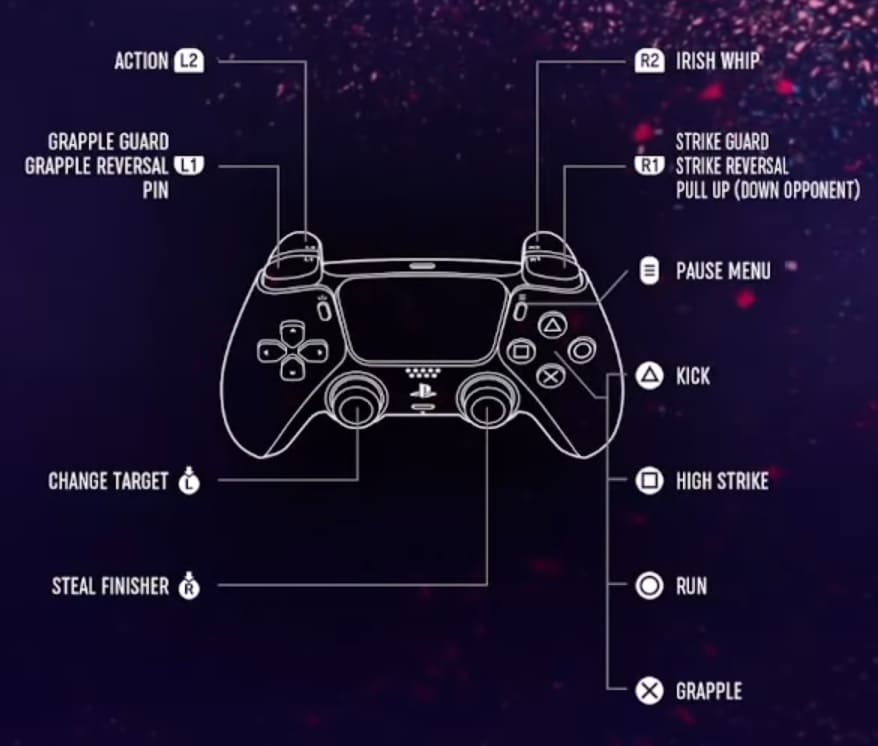
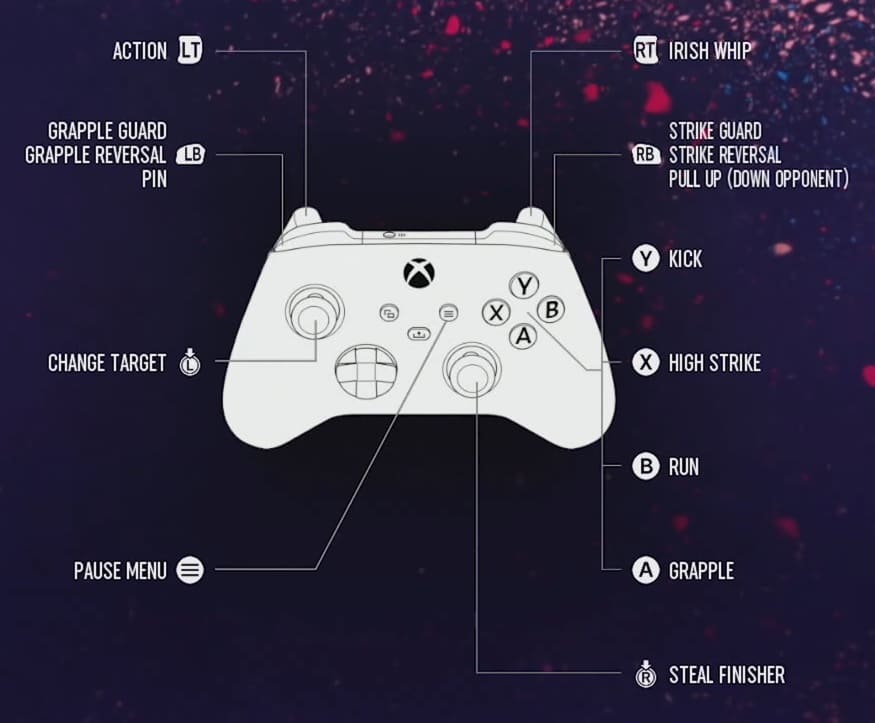
In order to pick up a ladder or weapon, you have to press the outer right shoulder button.

If you are playing with a PlayStation controller, then you have to use R2. On an Xbox controller, you have to use the RT button. If you are using a Switch controller, then you need to use the ZR button.

How to grab a ladder or weapon from under the ring

To get a weapon that has been hidden from under the ring you have to press the outer right trigger button (R2, RT or ZR) and then use the left analog stick.

How to attack with a weapon or ladder

In order to attack with the weapon or ladder you are holding, you need to use the high strike or kick button.

On a PlayStation pad, you have to press Square or Triangle. For an Xbox or Nintendo Switch pad, you need to press X or Y.

How to throw a weapon

If a weapon can be thrown, then you can do so by pressing the R2, RT or ZR button while using the left analog stick to aim at your target.

How to set up a table or ladder

If you want to set up a table or ladder when you are holding these types of weapons, then you have to press R2, RT or ZR.

How to ignite a table with fire

In order to set a table on fire, you need to have a finisher store up. Once you do, you can use the right analog stick to light the table om fire.

How to do a ladder spin attack

To perform a ladder spin attack, make sure you are holding a ladder with a finisher stored up. You can then use the right analog stick for this special move.

How to climb a ladder

In order to climb a ladder, make sure it is set up. Afterwards, you can press the L2, LT or ZL button while facing one of its sides to climb up the rungs.

How to grab object at the top of the ladder

If you want to grab the object hanging above the ladder, then you have to press the R2, RT or ZR.

How to push the ladder down

If you want to push down a ladder that has been set up, you need to use a combination of the left analog stick to go along with the R2, RT or ZR button.

AEW Fight Forever controls when your opponent is laying down

The controls in AEW Fight Forever can be confusing if you have your opponent laying down on the floor or wrestling ring. You can check out this guide at Seeking Tech to see what the proper controller layout is for this scenario.

How to pin

While your opponent is laying down in this game, you are able to pin them if you get close enough and then press the inner left shoulder button on the controller.

On the DualShock 4 or DualSense, you need to press L1 if you are using the default button layout. If you are using an Xbox One or Xbox Series controller, then you have to press the LB button. For the Nintendo Switch controller, you have to press the L button.

How to cancel a pin

To cancel a pin attempt, you have to press the inner right shoulder button.

On the PlayStation pad, you need to press R1 during the pinning sequence. For the Xbox pad, you have to press RB. Last but not least, you need to press the R button if you are using a Switch pad.

How to lift a downed opponent

If you want to pull up an opponent who is currently laying down, then you have to press the inner shoulder button.

Thus, you have to press R1 on PlayStation, RB on Xbox or R on Switch while close to a downed opponent to lift them upwards.

How to turn an opponent over

If your opponent is laying face down or face up and you want to turn them over, then you have to use the outer right shoulder button.

If you are playing with a PlayStation gamepad, you van to press the R2 button while close by the downed opponent without moving the left analog stick. On the Xbox, you have to press the RT button instead. For the Switch, you have to press ZR.

How to drag a downed opponent

If your opponent is laying on the floor or mat and you would like to drag them to a different location, then you first need to get close to them.

Afterwards, press and hold the outer right shoulder button (R2 on PlayStation, RT on Xbox or ZR on Switch) and then use the left analog to indicate the directions where you want to drag your opponent.

How to chain wrestle in AEW Fight Forever

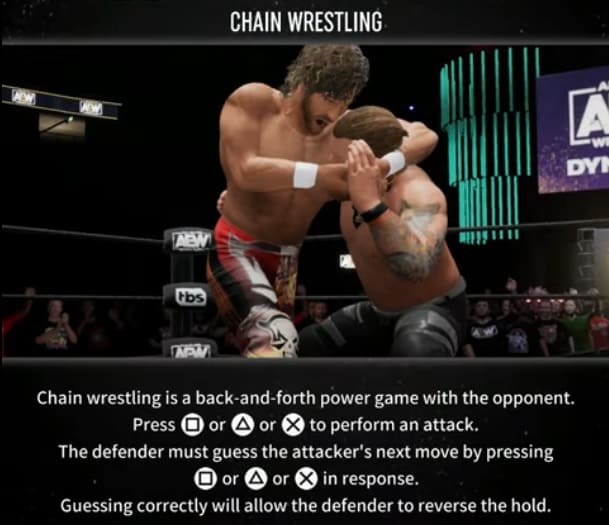
You are able to pull off a chain wrestling sequence in AEW Fight Forever. To find out how you can properly trigger this action, you can take a look at this guide from Seeking Tech.

Method #1

One of the ways you can initiate chain wrestling is by pressing the grapple button at the same exact time as your opponent.

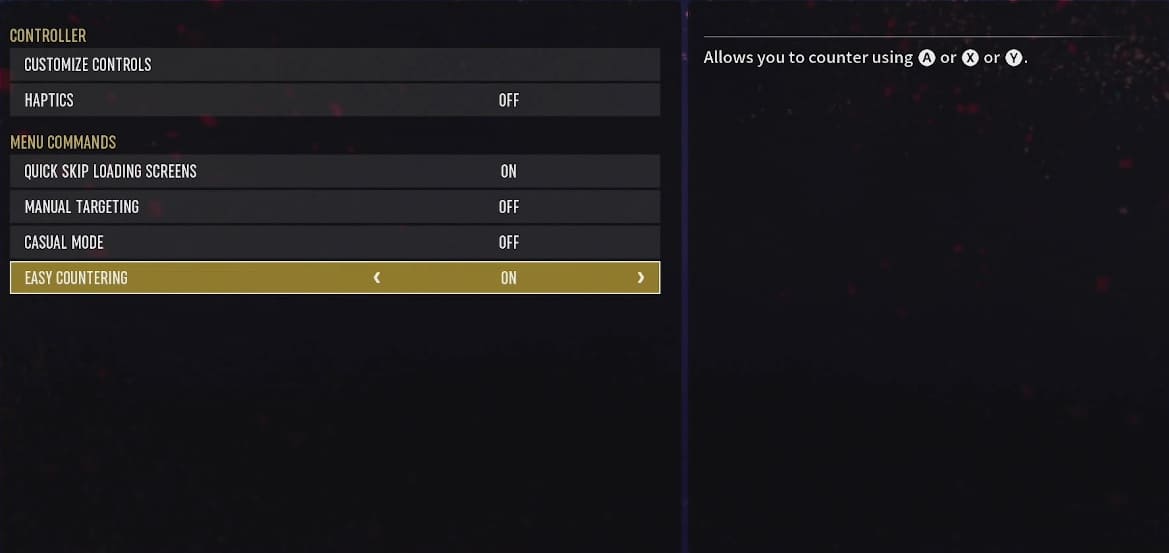
For this to trigger, you need to turn off the Easy Countering setting. You can do so by going to the Options menu in the game and then switch over to the Controller tab. By disabling this feature, you can no longer counter with the High Strike, Kick and Grapple buttons, which opens them up to be used to initiate chain wrestling.

In order to grapple, you need to press the X button if you are playing with a PlayStation controller or A button with an Xbox or Nintendo Switch controller.

Method #2

You can also pull off this sequence when the opponent has you in a grapple.

Once you turn off Easy Countering, wait until your opponent has you in a grapple. Afterwards, try to guess his next action when it comes to High Strike, Kick or Grapple. If you guessed correctly and press the button at the same time as your opponent, then you should start a chain wrestling sequence.

Keep in mind that you might not be able to chain wrestler if your momentum meter is too low.

On PlayStation, you use Square for High Strikes, Triangle for Kicks and X for Grapples.

For the Xbox controller, you press X to perform a high strike, Triangle to perform a kick and A to perform a grapple.

If you are using a Nintendo Switch controller, then you have to use the Y button for High Strikers, X button for Kicks in addition to A button for Grapples.

How to add a player indicator in AEW Fight Forever

In chaotic matches, especially when playing in local multiplayer, you may have a hard time finding your character. To make your wrestler easier to see, as well as which enemy they are currently targeting, you can take a look at this tutorial from Seeking Tech.

1. For the first step, you need to open up the Options menu in this wrestling game.

To do so from within the Title screen, you have to press the Triangle button if you are using the DualShock 4 or DualSense controller. If you are using an Xbox One or Xbox Series controller, then you can to press the Y button. If you are playing via a Nintendo Switch controller, then you have to press the X button instead.

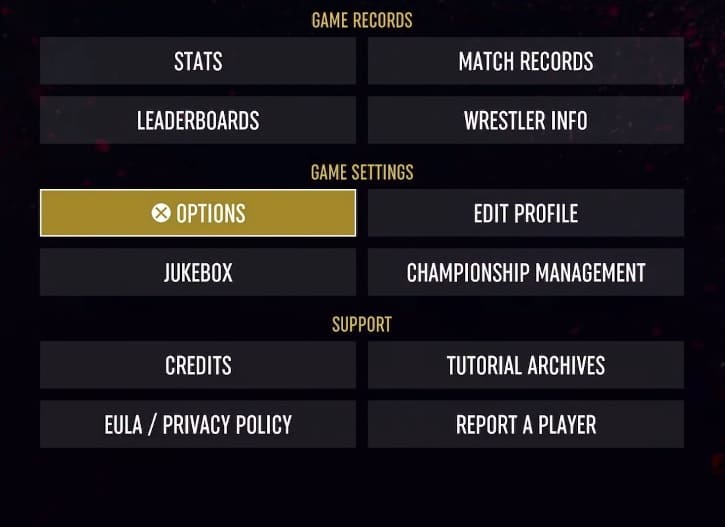
After doing so, you should be able to select Options in the new screen underneath the Game Settings section.

2. Inside of Options, you need to change tabs until you get to Match, which is represented with a wrestling ring icon.

You are able to change tabs by pressing the L1 and R1 shoulder buttons on PlayStation, RB and LB shoulder buttons on Xbox or the L and R buttons on Switch.

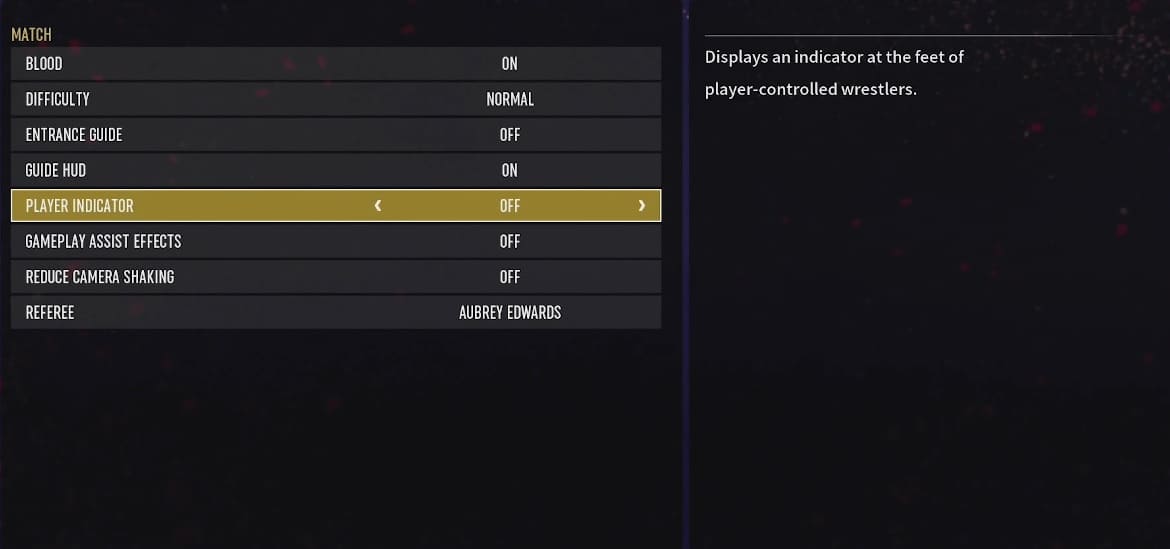
3. From the Match tab in the Options menu, move the cursor down to Player Indicator. It should show the following description:

  • “Displays an indicator at the feet of the player-controlled wrestlers.”

4. Make sure that the Player Indicator is set to On.

5. Exit the Options menu.

6. The next time you start up a match in AEW Fight Forever, you should see a player indicator appear on the wrestler you are currently controlling. You should also notice an arrow on the circle, which indicates who your character is targeting at the moment.