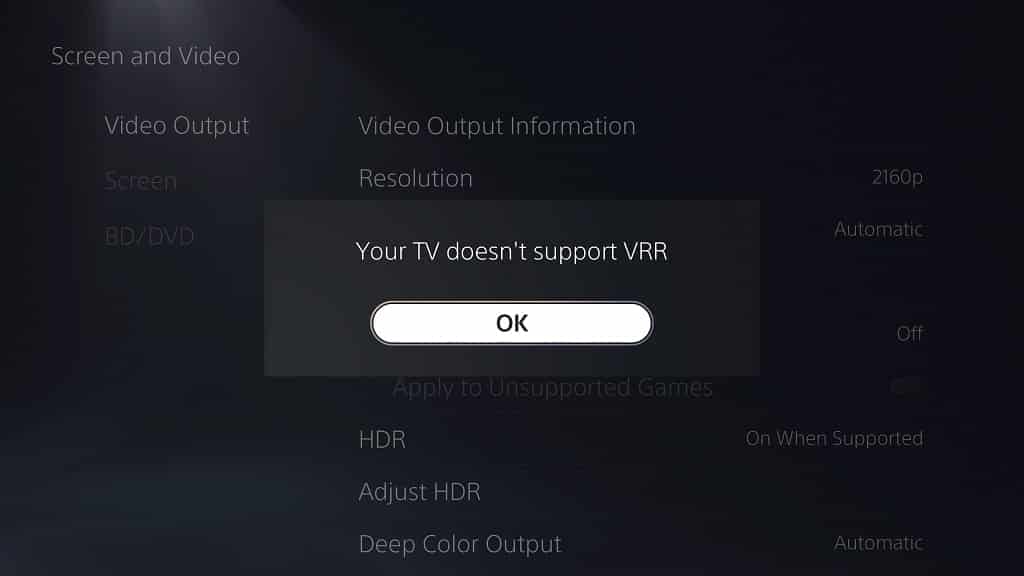
How to enable Hisense U7G and U8G VRR support for PS5

The Hisense U7G and U8G ULED Premium Quantum Dot QLED Series Android 4K Smart TVs are compatible with the Variable Refresh Rate feature of the PlayStation 5 and PlayStation 5 Digital Edition game consoles. By using VRR you will be able to remove any stutters and screen tearing from games that aren’t able to run at a locked frame rate.

To find out how you can use this feature for your Hisense ULED television, you can take a look at this tutorial at Seeking Tech.

To start off, it should be noted that this guide will be covering the following television models:

  • 55″ Hisense U7G ULED TV (55U7G)
  • 65″ Hisense U7G ULED TV (65U7G)
  • 75″ Hisense U7G ULED TV (75U7G)
  • 55″ Hisense U8G ULED TV (55U8G)
  • 65″ Hisense U8G ULED TV (65U8G)

1. If you haven’t done so already, make sure your U7G or U8G has been updated to the latest firmware. A new update may improve the performance and/or compatibility of using the Variable Refresh Rate on your television set for playing videogames from your PS5 console.

2. VRR was added to the PlayStation 5 and PlayStation 5 Digital Edition game consoles through a firmware update. Therefore, we recommend that you keep your system up-to-date as well.

3. Once you have both devices updated, use a HDMI 2.1 cable to connect your PS5 console to a HDMI 2.1 port of your Hisense U7G or U8G.

For the uninformed, your PS5 console should come with a HDMI 2.1 cable packed into the box.

If you are looking for a HDMI 2.1 cable, then you can take a look at this guide.

4. Turn on your game system and TV.

5. If your U7G or U8G is displaying another input source, then you need to switch over to the input source that is displaying your PS5.

6. Next, you need to press the menu button on the remote control of your Hisense television.

7. In the Menu of your television, select HDMI Format.

8. Make sure that the HDMI Format setting is set to Enhanced.

9. Go back to the TV menu and then select Picture.

10. From the Picture menu, select Advanced Settings.

11. In the Advanced Settings menu, make sure you set Instant Game Response to Auto.

12. In the same Advanced Settings menu, you should also make sure that FreeSync has been turned on as well.

13. On your PS5, go to the home screen, which is the main menu where you can pick which game or media app to open.

14. From the home screen, head to Settings by select the gear cog icon located on the top right side of the menu.

15. Inside of Settings, select Screen and Video.

16. From the Screen and Video submenu, find and select Video Output on the left column.

17. On the right side in the same submenu, make sure you set VRR to Automatic to enable Variable Refresh Rate for supported games.
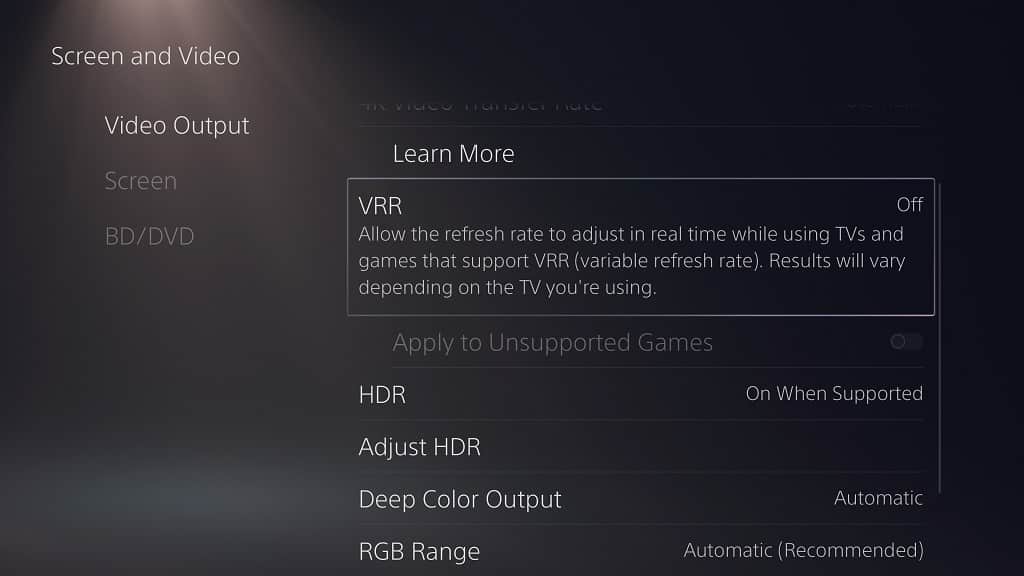
18. Right underneath the VRR setting, you can also turn on Apply to Unsupported Games to enable the VRR feature for games that do not natively use it.

How to enable Samsung Q70T, Q80T and Q90T VRR support for PS5

You can now use the Variable Refresh Rate feature of the PlayStation 5 and PlayStation 5 Digital Edition systems on your Samsung Q70T, Q80T or Q90T television set.

To find out how you can use VRR, which will help remove stutters and screen tearing, you can take a look at this article from Seeking Tech.

This guide will be covering all screen sizes of the 2020 Samsung Q70T, Q80T and Q90T series, which should include the following sets:

  • 55″ Samsung Q70T (QN55Q70TAFXZA)
  • 65″ Samsung Q70T (QN65Q70TAFXZA)
  • 75″ Samsung Q70T (QN75Q70TAFXZA)
  • 82″ Samsung Q70T (QN82Q70TAFXZA)
  • 85″ Samsung Q70T (QN85Q70TAFXZA)
  • 49″ Samsung Q80T (QN49Q80TAFXZA)
  • 50″ Samsung Q80T (QN50Q80TAFXZA)
  • 55″ Samsung Q80T (QN55Q80TAFXZA)
  • 65″ Samsung Q80T (QN65Q80TAFXZA)
  • 75″ Samsung Q80T (QN75Q80TAFXZA)
  • 85″ Samsung Q80T (QN85Q80TAFXZA)
  • 55″ Samsung Q90T (QN55Q90TAFXZA)
  • 65″ Samsung Q90T (QN65Q90TAFXZA)
  • 75″ Samsung Q90T (QN75Q90TAFXZA)
  • 85″ Samsung Q90T (QN85Q90TAFXZA)

1. If you haven’t done so already, make sure that you updated the firmware of your Q70T, Q80T or Q90T to the latest version. The newest release may improve the compatibility and/or performance of the Variable Refresh Rate feature.

2. Of course, you should also make sure that you updated your PlayStation 5 or PlayStation 5 Digital Edition to the latest available firmware as VRR was just added recently.

3. If you haven’t done so already, connect your PS5 game system by using the included HDMI 2.1 cable to the HDMI 2.1 port of your Q70T, Q80T or Q90T television set.

4. Turn on your game console and your TV.

5. Switch over to the input that is displaying your PlayStation 5 if your television set is showing a different source when turned on.

6. Press the settings button on your TV remote to open the TV settings menu.

7. You then need to select General.

8. From the General submenu, select External Device Manager.

9. In the External Device Manager submenu, select Input Signal Plus.

10. Next, you need to select the HDMI input that is connected to your PS5 in order to take advantage of the full HDMI 2.1 bandwidth for Variable Refresh Rate.

11. Afterwards, go back to the External Device Manager submenu and then select Game Mode Settings.

12. In the Game Mode Settings submenu, make sure that Game Mode is set to Auto.

13. On your PlayStation 5, head over to the Settings menu by selecting the gear icon on the top right side in the home screen.

14. Inside the Settings menu, you need to go to Screen and Video.

15. You then need to select Video Output from the left column of the Screen and Video submenu.

16. On the right side of the Screen and Video submenu, you need to select VRR.

If you don’t see the VRR setting, then you can check out this troubleshooting article.

17. Make sure that VRR is set to Automatic.

18. You may also want to enable Apply to Unsupported Games as doing so will force Variable Refresh Rate support for videogames that don’t natively take advantage of VRR. This setting may end up causing issues, however.

19. To see whether or not your Q70T, Q80T or Q90T is using VRR, press the info button while you are playing a videogame on your PlayStation 5 system.

You should see FreeSync (VRR) appear on the top right side of the screen if it is currently being used by your TV.

Samsung S95B wall mount specs

In 2022, Samsung released the S95B model. If you want to mount this OLED television set on a wall, then you can take a look at this wall mount compatibility guide from Seeking Tech.

What is the Samsung S95B?

The Samsung S95B is the first OLED television set in many years as it will display an infinite contrast ratio. By using its Neural Quantum Processor, the television set will also upscale lower resolution videos to 4K.

The other notable features include Quantum HDR OLED, Dolby Atmos support, Motion Xcelerator Turbo+, Eye Comfort Mode and Real Depth Enhancer.

Samsung S95B Screen Sizes

This guide will be based on the 55-inch and 65-inch models.

You can find the model numbers for both sizes below:

  • 55″ Samsung Class S95B OLED 4K Smart TV (QN55S95BAFXZA)
  • 65″ Samsung Class S95B OLED 4K Smart TV (QN65S95BAFXZA)

Samsung S95B Dimensions without Stand

Dimensions without Stand (in inches):

  • 55″ Samsung Class S95B OLED 4K Smart TV: 48.2 inches x 27.7 inches x 1.6 inches
  • 65″ Samsung Class S95B OLED 4K Smart TV: 56.9 inches x 32.5 inches x 1.6 inches

Dimensions without Stand (in millimeters):

  • 55″ Samsung Class S95B OLED 4K Smart TV: 1225 mm x 704 mm x 41 mm
  • 65″ Samsung Class S95B OLED 4K Smart TV: 1446 mm x 826 mm x 41 mm

Samsung S95B Weight without Stand

Weight without Stand (in pounds):

  • 55″ Samsung Class S95B OLED 4K Smart TV: 36.6 lbs.
  • 65″ Samsung Class S95B OLED 4K Smart TV: 47.8 lbs.

Weight without Stand (in kilograms):

  • 55″ Samsung Class S95B OLED 4K Smart TV: 16.6 kg
  • 65″ Samsung Class S95B OLED 4K Smart TV: 21.7 kg

Samsung S95B VESA Mounting Pattern

One last specification you should pay attention to is the VESA Mounting Pattern, which measures the horizontal and vertical distances in between the mounting screw holes that are found on the back of the Samsung S95B.

The pattern is identical on the 55-inch and 65-inch models, which you can find below:

  • 55″ Samsung Class S95B OLED 4K Smart TV: 300 mm x 200 mm
  • 65″ Samsung Class S95B OLED 4K Smart TV: 300 mm x 200 mm
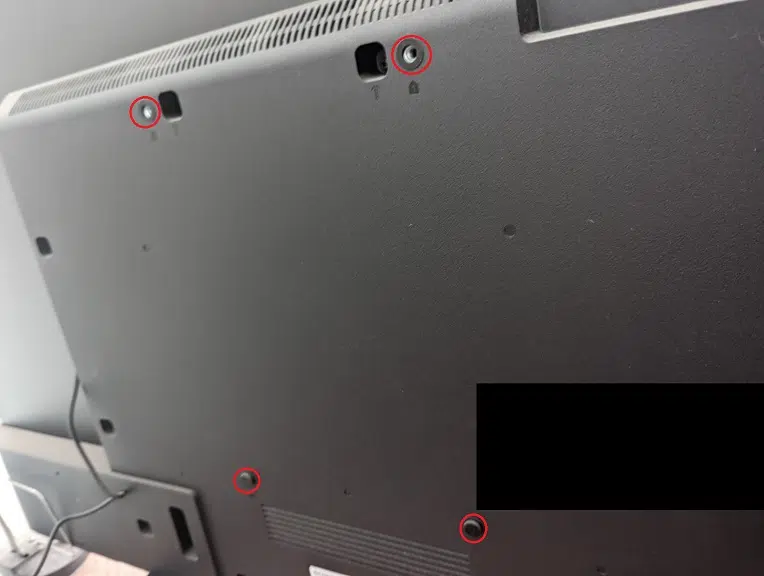
VESA Mounting Pattern (example from different TV).

Samsung S95B Wall Mount Screw Type

Both of these screen sizes also support the same wall mount screw type. To attach the S95B to a mount, you will need M8 screws with 28 mm to 30 mm in depth.

Official Samsung wall mounts for S95B

Samsung does have several wall mounts that are compatible with the S95B OLED.

The 2021 Slim Fit Wall Mount, which has a model number of WMN-A50EB, will let you install both the 55-inch and 65-inch screen sizes of the television right up next to a wall in order to create a minimalist look. After installation, you can also level the screen at up to 15 degrees if it looks crooked.

If you are interested, you can purchase the fixed wall mount on Amazon with the following link:

If you would like to move your S95B around then you should pick up the 2020 Full-Tilt Wall Mount, which should support the 65” version of the OLED. With this bracket, you will be able extend your screen from 25 mm from the wall to 250 mm from the wall. You can also tilt the TV forwards or backwards by up to 15 degrees as well as swivel to the left or right at up to 20 degrees.

You can buy the full motion mount, if you are interested, on Amazon via the following link:

What third-party wall mounts are compatible with the S95B?

As long as a mount supports the 300 mm x 200 mm VESA Mounting Pattern and can hold more than 47.8 lbs., then it should be compatible with both the 55-inch and 65-inch versions of Samsung Class S95B OLED 4K Smart TV.

There are three mount types that you can choose from, the most affordable of which is the fixed mount that will simply hold the screen in place. With a tilting mount, you can tilt the screen up or down to improve viewing angles. Last but not least, a full motion mount will let you extend, tilt and swivel the TV set.

If you are looking for specific product recommendations, then you can take a look at this guide to find the best available mounts for the Samsung S95B.

Resource:

How to enable TCL 5 S546 and TCL 6 R646 VRR support for PS5

You can now use the Variable Refresh Rate feature of your TCL 5 S546 or TCL 6 R646 with the PlayStation 5 and PlayStation 5 Digital Edition system.

To see how you can utilize VRR with these television sets, you can take a look at this article from Seeking Tech.

Before we begin, it is important to note that this guide will cover the following TVs:

  • 50″ TCL 5 Series S546 (50S546)
  • 55″ TCL 5 Series S546 (55S546)
  • 65″ TCL 5 Series S546 (65S546)
  • 75″ TCL 5 Series S546 (75S546)
  • 55″ TCL 6 Series R646 (55R646)
  • 65″ TCL 6 Series R646 (65R646)
  • 75″ TCL 6 Series R646 (75R646)

1. If you haven’t done so already, we recommend updating the firmware of your TCL 5 S546 or TCL 6 R646. By doing so, you may improve Variable Refresh Rate as well as other gaming features of your television set.

2. You should also keep your PlayStation 5 or PlayStation 5 Digital Edition up-to-date with the latest firmware.

3. Once you are ready, make sure you use a HDMI 2.1 cable to connect your PS5 console to a HDMI 2.1 port of your TCL 5 S546 or TCL 6 R646.

For the uninformed, your PlayStation 5 console should come with a HDMI 2.1 cable if you don’t know which HDMI cable to use.

4. Turn on both your TCL television set as well as your PlayStation 5 system.

5. Next, you need to press the button that has the gear cog icon on your TV remote in order to open the Settings menu of your TCL 5 S546 or TCL 6 R646.

6. From the Settings menu of your television set, you need to select Channels & Inputs.

7. Inside the Channels & Inputs, you then need to select Inputs.

8. In the Inputs menu, scroll down and make sure that the Variable Refresh Rate setting is turned on.

9. On your PlayStation 5 console, you should be in the home screen, which is the menu where you can select which game or media app to open.

10. Head to Settings from the home screen, which you can do by selecting the gear cog icon.

11. After getting to Settings, you then need to head to Screen and Video.

12. From the Screen and Video menu, you first need to select Video Output.

13. On the right side of the same Screen and Video menu, you then need to select VRR.

14. Set VRR to Automatic.

You may also want to enable the Apply to Unsupported Games setting as doing so will force Variable Refresh Rate for games that don’t natively use this feature. However, this setting may cause issues in unsupported games.

15. If your PS5 or PS5 Digital Edition still can’t detect the VRR feature from your TCL 5 S546 or TCL 6 R646, then you can try power cycling both you game console and your television set.

In order to do so, then you need to take the following steps:

  • Turn off your PS5 and TCL TV
  • Unplug both devices from the power outlet
  • Wait for at least 20 minutes
  • Plug the PS5 and TCL TV back into the power outlet
  • Turn both devices on and then see if you can activate VRR.

How to enable LG B1, C1 and G1 VRR support for PS5

Now that Sony has added Variable Refresh Rate support for the PlayStation 5 and PlayStation 5 Digital Edition system, you should be able to take advantage of VRR if you have a LG B1, C1 or G1.

To find out how you can use this feature, you can take a look at this tutorial at Seeking Tech.

This article should cover all screen sizes from the LG B1, C1 and G1 television series, which should include the following model numbers:

  • OLED55B1PUA
  • OLED65B1PUA
  • OLED77B1PUA
  • OLED48C1PUB
  • OLED55C1PUB
  • OLED65C1PUB
  • OLED77C1PUB
  • OLED83C1PUA
  • OLED55G1PUA
  • OLED65G1PUA
  • OLED77G1PUA

1. To begin, make sure your B1, C1 or G1 is updated to the latest firmware. If you don’t know how to do so, then you can try doing the following:

  • Turn on your television set and make sure you connect it to the internet.
  • Press the gear button on your remote controller to open the Quick Settings menu.
  • You should then select All Settings.
  • Afterwards, select Support.
  • Next, select Software Update.
  • In the Software Update, you will be able to see the current firmware version of your television set. You will also be able to manually update the firmware as well as enable automatic firmware updates.

2. Variable Refresh Rate support was added to the PlayStation 5 and PlayStation 5 Digital Edition thorugh a firmware update. To update your game console, you can try doing the following:

  • Power on your PS5 and make sure you are signed into the PlayStation Network.
  • From the main menu, which is where you can select which game to open, select the gear icon on the top right side to go to Settings.
  • Inside of Settings, head to System.
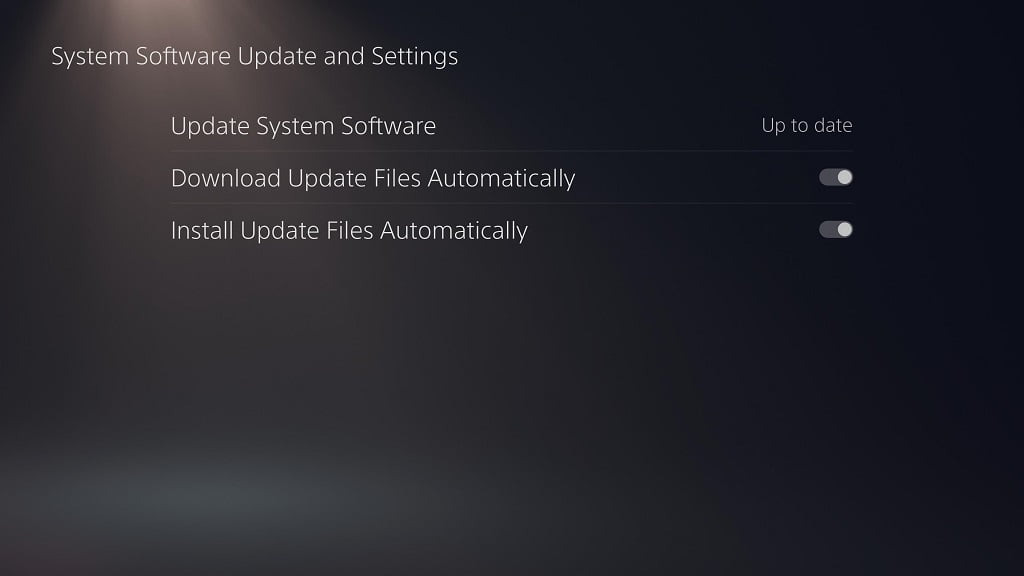
  • In the Settings menu, you first need to select System Software on the left and then System Software Update and Settings on the right.
  • Inside the new screen, select System Software.
  • Finally, select Update Using Internet.

3. With both your television set and game console updated to the latest firmware, the next step you can take is to make sure that your PlayStation 5 is connected to one of the HDMI 2.1 ports of your B1, C1 or G1 via a HDMI 2.1 cable.

For the uninformed, the PS5 comes with a HDMI 2.1 cable.

4. Once you are sure that everything is connected properly, then you can turn on both your TV and PS5. Make sure you switch the input source for your television to display the game console.

5. Next, you need to press the gear button on your TV remote to open the Game Dashboard.

If you see the regular menu instead, then you need to go to General > Game Optimizer. Afterwards, set the Game Optimizer setting to On.

You may also need to head to Picture from the regular menu and then select the Select Mode setting. You then need to select the picture mode to Game Optimizer.

6. The Game Dashboard should show whether or not Variable Refresh Rate has been enabled.

7. On your PlayStation 5 console, head over to the Settings menu and then go to Screen and Video > Video Output > VRR.

Next, you need to set VRR to Automatic. This will enable Variable Refresh Rate for games that support this feature.

You can also turn on the Apply to Unsupported Games setting, which will turn VRR support even for games that don’t natively support it. Keep in mind that this may cause issues with some games.

8. If the Game Dashboard of your B1, C1 or G1 still shows that VRR is turned off even after your turn on support on your PS5, then you need to select the Game Optimizer setting from the dashboard.

From the Game Optimizer menu, you can then turn on the “VRR & Gsync” setting.

How to fix ‘Your TV Doesn’t Support VRR’ issue with PS5

When trying to enable Variable Refresh Rate support on your PlayStation 5 or PlayStation 5 Digital Edition system, you may get the following error message:

“Your TV Doesn’t Support VRR”

To see how you can potentially fix this problem when trying to use the display feature with your television set or computer monitor, you can check out this troubleshooting article from Seeking Tech.

1. The first step we recommend taking is to make sure that your television set or computer monitor is compatible with the PlayStation 5 when it comes to taking advantage of the Variable Refresh Rate feature.

For best compatibly, you will need the following:

  • HDMI 2.1 port for your TV or monitor
  • Variable Refresh Rate support of your TV or monitor
  • HDMI 2.1 cable

The VRR feature of some television sets and monitors may also work over a HDMI 2.0 connection with the PS5. Your PlayStation 5 console should also come with a HDMI 2.1 cable included.

2. Make sure you are connecting the HDMI 2.1 cable to the correct HDMI 2.1 port. Some television sets or monitors may have different versions of HDMI ports available.

3. You should also make sure that you are connecting your console directly to your television set or monitor. Using a HDMI splitter or HDMI pass-through may cause issues when it comes to VRR.

4. We also recommend that you check to see if there is a new firmware update available for your television set or monitor.

Your screen may not support Variable Refresh Rate right out of the box. Not to mention that the updates may also improve VRR compatibility with the PlayStation 5.

To update the firmware, please refer to the user manual of your television set or computer monitor. If you can’t connect your TV or monitor online, then you will most like need an USB storage device to update its software.

5. You should also update the firmware of your PlayStation 5 or PlayStation 5 Digital Edition system if you haven’t done so already as doing so may help improve the VRR support.

In order to update the firmware of your console, you can try doing the following:

  • Turn of your PS5 or PS5 Digital Edition system.
  • Make sure that your system is connected to the internet and you are signed into the PlayStation Network.
  • If you don’t get a message asking you to download or install the new firmware, then you can manually do so by first selecting the gear icon, which can be found in the top right side of the home screen.
  • Inside the Settings menu, you then need to go to System.
  • From the System menu, you first need to select System Software from the left column.
  • You should then select System Software Update and Settings on the right side in the same System menu.
  • In the next screen, you need to select System Software.
  • Afterwards, we recommend that your select Update Using Internet.
  • Wait until the firmware update is completed.

Try to enable Variable Refresh Rate support on your PlayStation 5 or PlayStation 5 Digital Edition again after updating the console to see if the new firmware helps with the compatibility of this feature.

How to enable PS5, Xbox Series X and S VRR support for LG B2, C2 and G2

Variable Refresh Rate is a helpful feature for the LG B2, C2 and G2 as it will make most video games that have frame rate issues look smoother in addition to getting rid of screen tearing. Currently, the PlayStation 5, PlayStation 5 Digital Edition, Xbox Series S and Xbox Series X consoles use VRR.

To see how you can turn on Variable Refresh Rate for the B2, C2 and G2, you can take a look at this tutorial at Seeking Tech.

Before we begin, it should be noted that this guide is based on the following television sets:

  • 55”, 65” and 77” screen sizes of the LG B2
  • 42”, 48”, 55” 65”, 77” and 83” screen sizes of the LG C2
  • 55” 65”, 77” and 83” screen sizes of the LG G2

This article should cover the following model numbers:

  • OLED55B2PUA
  • OLED65B2PUA
  • OLED77B2PUA
  • OLED42C2AUA
  • OLED42C2PUA
  • OLED48C2AUA
  • OLED48C2PUA
  • OLED55C2AUA
  • OLED55C2PUA
  • OLED65C2AUA
  • OLED65C2PUA
  • OLED77C2AUA
  • OLED77C2PUA
  • OLED83C2AUA
  • OLED83C2PUA
  • OLED55G2PUA
  • OLED65G2PUA
  • OLED77G2PUA
  • OLED83G2PUA

1. If you haven’t done so already, you should update the firmware of your B2, C2 or G2 television set.

2. You should also update the firmware of your PlayStation 5, PlayStation 5 Digital Edition, Xbox Series X or Xbox Series S console.

This is especially important for the PS5 consoles as support for Variable Refresh Rate was only added through a firmware update.

3. Make sure you are using the HDMI cable that came with your system to connect to your television set.

For the uninformed, the PlayStation 5, PlayStation 5 Digital Edition and Xbox Series X come with a HDMI 2.1 cable while the Xbox Series S came with a HDMI 2.0 cable.

You can also use other HDMI cables as long as it is HDMI 2.1 for the PS5 consoles and at least HDMI 2.0 for the Xbox Series consoles (although HDMI 2.1 is highly recommended for the Series X if you want to get the most out of its graphical features).

4. Once you are ready, turn on your television set and game console.

5. Make sure your TV is displaying the HDMI input source of your PS5, PS5 Digital Edition, Xbox Series X or Xbox Series S.

6. Press the gear icon to open the Game Dashboard.

If pressing the gear icon menu opened the regular TV settings menu instead, then you need to select General > Game Optimizer. You then need to set Game Optimizer to On.

You may also need to go to Picture > Select Mode in order to change the picture mode to Game Optimizer in order to use the Game Dashboard.

7. From the Game Dashboard, you should see whether or not VRR has been turned on.

8. If the dashboard shows that Variable Refresh Rate is currently turned off, then we recommend checking to see if you enabled VRR support on your game console.

For the PlayStation 5 and PlayStation 5 Digital Edition, go to the home screen menu and then select the gear icon on the top right side to head into settings. From there, you need to select Screen and Video > Video Output > VRR. Finally, set VRR to Automatic. You may also want to enable the Apply to Unsupported Games setting in order to force Variable Refresh Rate on games that don’t natively support it.

For the Xbox Series X and Xbox Series S, you need to go to Settings, which you can do by pressing the Xbox button to bring up the guide menu. From the guide menu, go to the “Profile & system” tab and then select Settings. In Settings, go to General > TV & display options > Video modes. Finally, make sure that the “Allow variable refresh rate” setting is enabled.

8. If the Game Dashboard still isn’t showing any that VRR has been enabled, then you need to select the Game Optimizer option located on the dashboard. In the Game Optimizer menu, make sure that the “VRR & Gsync” setting is enabled.

How to turn on Variable Refresh Rate for PS5 and PS5 Digital Edition

Sony has finally added Variable Refresh Rate to the PlayStation 5 and PlayStation 5 Digital Edition. Enabling this very helpful feature can be somewhat confusing, however.

If you can’t find the VRR settings in the system menus, then you can take a look at this troubleshooting guide at Seeking Tech.

Where is the Variable Refresh Rate setting on PS5 and PS5 Digital Edition

In order to find the Variable Refresh Rate setting on your PlayStation 5 or PlayStation 5 Digital Edition, you need to do the following:

  • From the home screen, which is the menu where you can select which videogame to play, head into Settings by selecting the gear icon on the top right side of the screen.
  • Inside of Settings, select Screen and Video.
  • In the Screen and Video menu, you need to select Video Output on the left side.
  • Afterwards, you should find the Variable Refresh Rate setting on the right side of the same menu. The VRR setting should be in between the 4K Video Transfer Rate and HDR settings.
  • Keep in mind that VRR will still appear in the system menus even if your television set or monitor don’t support the feature.

What to do if the VRR setting is missing on PS5 and PS5 Digital Edition

If the Variable Refresh Rate setting does not appear in the system menus of your PlayStation 5 or PlayStation 5 Digital Edition, then you can try doing the following:

1. Sony stealthily added Variable Refresh Rate in a recent firmware update. So, if you haven’t updated your PS5 or PS5 Digital Edition system in a long time, then you can do so by taking the following steps:

  • Turn on your console and then make sure that it is connected online to the PlayStation Network.
  • If you didn’t get a prompt to download and install the new firmware immediately, then you need to go to Settings. In order to do so, select the gear icon from the home screen.
  • From the Settings menu, select System.
  • In the System menu, select System Software on the left side and then System Software Update and Settings on the right side in the same screen.
  • Next, you need to select update System Software.
  • You then need to select Update Using Internet.
  • Follow the on-screen instructions to complete the firmware update.

2. If the firmware of your PlayStation 5 or PlayStation 5 Digital Edition system is up to date but the Variable Refresh Rate is still not appearing, then make sure that your console is connected to the PlayStation Network.

3. If your console is connected to the PSN, then you can try restarting to see if VRR will show up.

4. Moreover, you can turn off your game system and then turn it back on again to see if doing so will fix the missing VRR issue.

4. You can also try opening a game or media app. Afterwards, press and hold the PS button to go to the home menu. You can then go to Settings > Screen and Video > Video Output to see if the VRR setting is now available.

How to fix Samsung QN85B and QN90B TV channel issues

When trying to watch a television channel with your Samsung QN85B or QN90B, you may encounter several issues such as having a weak signal, no signal, not being able to receive certain channels and deactivated broadcasting.

To see how you can fix these problems, you can take a look at this troubleshooting guide from Seeking Tech.

How to fix weak signal or no signal issues with the Samsung QN85B and QN90B

If your QN85B or QN90B, is showing that it has a weak signal or no signal at all, then you can try doing the following:

1. If you are using an antenna, then you can try repositioning it in order to get a better signal.

2. Make sure that the cable connection for the cable source is properly connected to your television set.

3. If you are using a cable box or set-top box, then you need to make sure that the device is turned on and functioning normally.

4. You should also make sure that your QN85B or QN90B is displaying the correct source.

In order to do so, press the home button on the remote control and then go to Menu > Connected Devices > Sources.

How to fix missing channels with Samsung QN85B and QN90B

If a channel is missing or not displaying correctly on your QN85B or QN90B, then you can try doing the following:

1. First off, make sure that the cable is correctly connected to your television set.

2. You should also make sure that your TV is displaying the correct source.

3. Furthermore, you may want to move the antenna around to see if you can get a better signal for the missing channel.

4. You can try performing a reset on your QN85B or QN90B.

In order to do so, start be pressing the home button on the remote and then going to Menu > Settings > All Settings > General & Privacy > Reset.

5. Furthermore, you can try running the Auto Program function.

To do so, press the home button on the TV remote and then select Menu > Settings > All Settings > Broadcasting > Auto Program.

How to fix broadcast deactivation issues with the Samsung QN85B and QN90B

If your QN85B or QN90B is showing that the broadcast has been deactivated, then you try doing the following:

1. To begin, make sure that the source of your television is set to TV.

2. If you are using a cable box or satellite box, then broadcasting is automatically disabled.

3. Broadcasting will also be turned off if you are using your TV to record something and/or using the Timeshift feature.

4. If you aren’t using a cable box, satellite box, recording function or TimeShift function, then we recommend that you turn off your television set, unplug it from the power outlet, wait for several minutes, re-plug it back into the power outlet, turn on the TV again and then retest to see if the broadcast has been re-enabled.

How to fix Samsung QN85B and QN90B remote issues

The Samsung QN85B and QN90B Neo QLED 4K TVs come with the TM2280E remote controller. If the remote is responding slowly, or is simply not working at all, then you can take a look at this troubleshooting article at Seeking Tech to see what you can do to fix your issues.

Before we go on, it should be noted that this guide is based on the 55”, 65”, 75” and 85” screen sizes of the QN85B and QN90B series.

1. The first step that can be taken is to make sure that there isn’t anything blocking the sensor of your remote as well as the receiver on your television set.

2. You should also make sure that there aren’t any physical objects that may be blocking the direct line of sight in between the TM2280E and your QN85B or QN90B.

3. Other wireless devices, such as a Wi-Fi router or microwave oven, may interfere with the communication between the remote and television set.

In this case, you can either try to turn off the other wireless devices or move them to a different room.

4. The distance between the TM2280E and Samsung Neo QLED 4K TV may also be too big, which may lead to a weak signal.

Therefore, you can try moving the remote closer to the television set to see if the remote controller is more responsive.

5. An overly bright room may also cause issues; thus, you can try moving the TV in a darker room to see if the remote is more responsive.

6. You can also try reconnecting the TM2280E to the QN85B or QN90B.

In order to do so, you need to press and hold both the Back and Play/Pause buttons at the same time for at least 3 seconds.

7. You should also make sure that your remote still have plenty of battery life as low battery levels may cause it to work slowly or not at all.

In order to check the battery level of your remote, you can press the home button and then go to Menu > Settings > All Settings > General & Privacy > Power and Energy Saving > Available Remote Battery.

If the battery life for the TM2280E is low, then you can recharge by using plugging the USB Type-C cable into its USB Type-C port and the other end of the USB cable to a power source.

Alternatively, you can turn the remote over and then place it over a light source to recharge using the solar panel located on the back of the device.