Optimizing the Sony X80K for PS5, Xbox Series X and Xbox Series S

If you want to properly set up your Sony X80K in order to optimize the television’s settings for the PlayStation 5, Xbox Series X and Xbox Series S, then you can take a look at this guide from Seeking Tech.

What PS5, Xbox Series X and Xbox Series S are supported by the X80K?

With the Sony X80K you can play games in either 1080p or 4K for these consoles. The refresh rate for this television set is limited to 60 Hz as it can display games at up to 60 frames per second. The Auto Low Latency Mode, HDR10 and Dolby Vision features are also supported.

What PS5, Xbox Series X and Xbox Series S aren’t compatible with the X80K?

The X80K does not support 1440p nor is it capable of displaying games at 120 frames per second. Also missing from this television series is the Variable Refresh Rate feature.

How to set up your X80K for PS5, Xbox Series X and Xbox Series S

In order to set up this TV so that you can get the most out of your PlayStation 5, Xbox Series X and/or Xbox Series S, we recommend that you take the following steps:

1. To start off, make sure that you are using a HDMI 2.0 or HDMI 2.1 cable to connect your console to one of the HDMI ports on the Sony X80K.

If you plan on using Dolby Vision for your Xbox Series X or Xbox Series S, then you need to connect the console to either the HDMI 3 or HDMI 4 port of your TV.

2. Once you are ready, press the gear button on the TV remote and then select Settings > Display & Sound > Picture > Video Signal.

Select the HDMI port that is connected to your game console.

If you have a PS5, then change the HDMI Signal Format to HDMI Enhanced Format.

If you have an Xbox Series X or Xbox Series S, then you can change it to HDMI Enhanced Format (Dolby Vision) if you want to play games in the Dolby Vision HDR format.

If you don’t plan on using Dolby Vision, then you can also set these Microsoft consoles to use the HDMI Enhanced Format instead.

3. Next, you need to go to Settings > Display & Sound > Picture.

In the Picture menu, change the Picture Mode to Game. Afterwards, turn on the Auto Picture Mode, which will enable Auto Low Latency Mode.

Next, you need to make sure that Ambient Light Sensor and Light Sensor settings are disabled. Otherwise, the X80K will adjust its automatically brightness levels, which can be extremely distracting when you are playing a game.

4. In the Picture menu, we also recommend that you disable the CineMotion and Motionflow settings.

5. Next, you optimize the HDR settings. To do so, go back to Settings > Display & Sound > Picture and then select Video Signal. Afterwards, set HDR Mode to Auto.

Your Sony X80K should now be optimized for your PlayStation 5, Xbox Series X or Xbox Series S.

6. On you game consoles, you should also make sure that you have the right settings.

If you have a PlayStation 5, then you need to go to Settings > Screen and Video.

From the Screen and Video menu, set resolution to 2160p as well as HDR to On When Supported. You should also make sure that the following settings are set to Automatic:

  • 4K Transfer Rate
  • ALLM
  • Deep Color Output
  • RGB Range

Finally, select Adjust HDR and then follow the steps posted on your TV screen to optimize the HDR brightness output for the X80K.

If you have an Xbox Series X or Xbox Series S, then you need to head over to Settings > General > TV & display options > Video modes. From there, you need to enable the following:

  • Allow auto-low latency mode
  • Allow 4K
  • Allow HDR10
  • Allow Dolby Vision (if you are planning to use this mode)
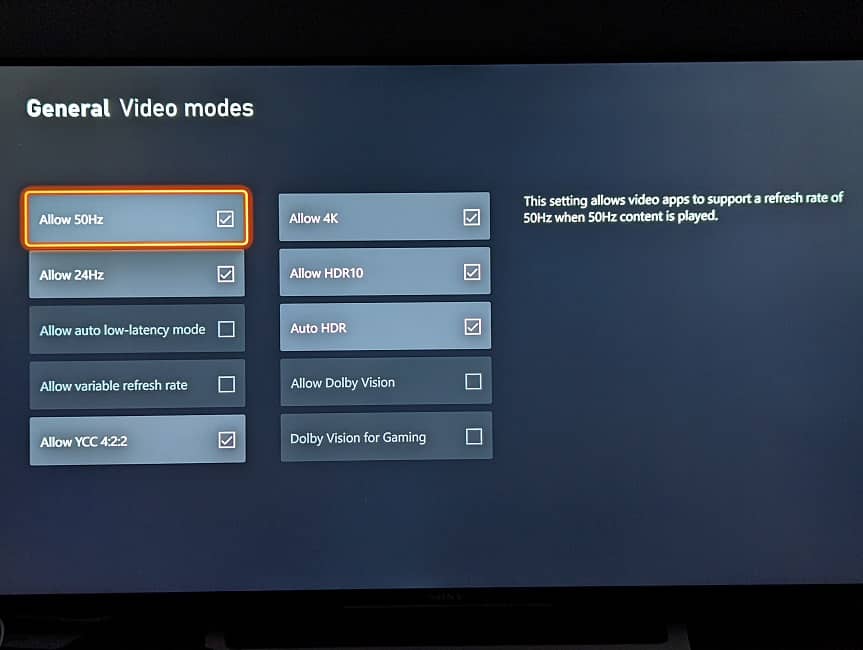
Furthermore, we suggest disabling the Auto HDR setting.

Finally, go to Settings > General > TV & display options and then select Calibrate HDR for games. Afterwards, follow the steps that appear on the screen to adjust the HDR brightness output for your Sony TV.

Recommended Samsung S95B settings for PS5, Xbox Series X and S

The Samsung S95B OLED is one of the better 2022 television sets you can get for your PlayStation 5, PlayStation 5 Digital Edition, Xbox Series X and/or Xbox Series S. You can take a look at this guide to see what recommended settings you should use to get the most out of these gaming consoles.

1. To start off, make sure you connect your console directly to your Samsung S95B OLED. Using a HDMI splitter or HDMI pass-through may end up causing issues with input lag and picture quality.

Keep in mind that the Xbox Series S only comes with a HDMI 2.0 cable. Therefore, you may want to get a HDMI 2.1 cable if you want to take full advantage of the Series S display capabilities.

Both versions of the PS5, as well as the Xbox Series X, come with a HDMI 2.1 cable included.

2. Next, you can head into the Setting of your Samsung S95B and then go to the Connections > Game Mode Settings. From there, make sure you set Game Mode to Auto. By doing so, the OLED TV will automatically detect when you are playing a game and switch over to the Game Mode.

In this mode, you will get lower input lag. Furthermore, the Variable Refresh Rate feature will automatically be enabled for the television set.

3. Also in the Game Mode Settings menu, we recommend that you set the Dynamic Equalizer to 0.

4. In the same menu, you can also select Game Motion Plus. From there, we recommend that you disable the Game Motion Plus feature as it could introduce additional lag and unwanted visual effects to your games.

5. You can also get to the HDR Tone Mapping menu in the Game Mode Settings. From there, set HDR10+ Gaming to Basic and then enable the Game HDR Setting.

6. Go back to the Settings menu and then head over to Picture > Expert Picture Settings.

Inside Expert Settings, we recommend setting Sharpness to 0. Otherwise, there could be unwanted visual articles that come with an over-sharpened picture.

7. For the rest of the Expert Picture Settings make sure you do the following:

  • Set Brightness to 50.
  • Set Contrast to 50.
  • Set Color to 30.
  • Set Tint (G/R) to 0.
  • Set Contrast Enhancer to Off.
  • Set Color Tone to Warm 2.
  • Set Gamma to 0.
  • Set Shadow Detail to 0.
  • Set Color Space Settings to 0.
  • Set Peak Brightness to High.

8. You should also make sure that you turn off an energy saving features for your Samsung S95B OLED that may be automatically lowering its screen brightness level.

To do so, head over to Settings > All Settings > General & Privacy > Power and Energy Saving. Afterwards, make sure that the following are disabled:

  • Brightness Optimization
  • Brightness Reduction
  • Motion Lighting

9. Furthermore, you should make sure that you have the right picture settings on your console.

On the PlayStation 5 and PlayStation 5 Digital Edition system, you need to go to the Settings > Screen and Video.

From the Screen and Video menu, make sure the following settings are correct:

  • Resolution is set to 2160p.
  • 4K Transfer Rate is set to Automatic.
  • VRR is Set to Automatic.
  • ALLM is set to Automatic.
  • HDR is set to On When Supported.
  • Deep Color Output is set to Automatic.
  • RGB Range is set to Automatic.
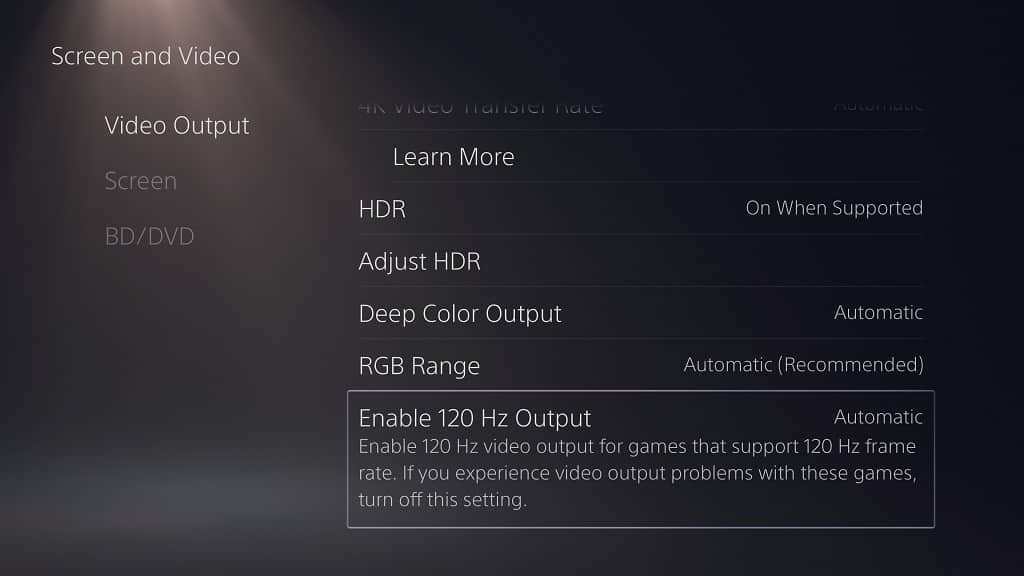
  • Enable 120 Hz Output is set to Automatic.

On the Xbox Series X and Xbox Series S, go to Settings > General > TV & display options. Inside the TV & display options menu, make sure that Resolution is set to 4K UHD.

From the same menu, go to “Video modes” and then make sure the following are enabled:

  • Allow auto-low latency mode
  • Allow variable refresh rate
  • Allow 4K
  • Allow HDR10

We recommend that you disable the Auto HDR setting in the “Video modes” menu if you want games that don’t support HDR to look as accurate as possible.

10. The Samsung S95B OLED TV Set should now be optimized for your PlayStation 5, PlayStation 5 Digital Edition, Xbox Series X and/or Xbox Series S.

With that said, you may still need to do some tweaking in some games. Fortunately, most modern releases come with in-game settings where you can adjust the brightness and/or contrast levels so that you don’t have to change your TV and/or console settings in order to get the best picture quality for that specific title.

What to do if the 120 Hz refresh rate is greyed out on Xbox Series X or S

Both the Xbox Series X and Xbox Series S consoles support 120 frames per second.

If the 120 Hz refresh rate option is greyed out when you try to enable it, then you can take a look at this troubleshooting guide at Seeking Tech to see what steps you can take to make this option selectable.

1. To start off, make sure you are using the correct HDMI cable for your Xbox Series X or Xbox Series S. Both of these consoles support HDMI 2.1 cables.

The Series X comes with a HDMI 2.1 cable included in the box while the Series S comes with a HDMI 2.0. You should still be able to unlock the 120 Hz refresh rate mode if you are using a HDMI 2.0 cable to connect these game consoles to your television set or gaming monitor.

2. Next, you should make sure that you are connected the HDMI cable to a HDMI 2.0 or HDMI 2.1 port of your TV or monitor. This is because some screens have different HDMI port versions.

If your console is connected to a HDMI port below version 2.0, then there may not be enough bandwidth to enable 120 frames per second.

3. We also recommend checking the display details in the menu of your Xbox Series X or Xbox Series S. In order to do so, you need to take the following steps:

  • Go to Settings from the home screen of your Xbox. If you can’t find it, you need to press the Xbox button on your controller and then navigate to the right until you see the “Profile & system” tab. From there, you can head into Settings.
  • Inside Settings, select “TV & display options.”
  • From the “General – TV & display options” menu, select “4K TV details.”
  • In the “General – 4K TV details” menu, you should see the resolution, refresh rate and other features that are supported by your television screen or gaming monitor when it comes to using your Xbox Series X or Xbox Series S.

4. If your TV or monitor is capable of 120 Hz but your Xbox isn’t able to detect it, then you can try disabling a few video modes to see if doing so will fix the problem.

In order to disable certain video modes, you need to do the following:

  • From the Settings menu of your Xbox Series X or Xbox Series S, you need to go to “TV & display options.”
  • In the “General – TV & display options” menu, you then need to select “Video modes.”

Inside the “General – Video modes menu,” you can try disabling the following:

  • Allow variable refresh rate
  • Allow Dolby Vision
  • And Dolby Vision for Gaming

We recommend disabling one of these at a time and then check to see if you can use 120 Hz on your Xbox Series X or S.

5. You can also try manually forcing your Xbox console to display at 1080p or 1440p as doing so may unlock 120 Hz.

To do so, you need to take the following steps:

  • In the Settings of your game console, go to “TV & display options.”
  • Inside the “General – TV & display options” menu, select Resolution.
  • In the drop-down menu, select either 1080p or 1440p.
  • Next, you need to select Refresh rate.
  • The 120 Hz option should no longer be greyed out.

How to fix ‘your TV doesn’t support ALLM’ issue on PS5

Auto Low Latency Mode support was recently added to the PlayStation 5 and PlayStation 5 Digital Editon systems. This is a helpful feature as it will allow the connected monitor or television set to automatically switch over to its game mode settings when gameplay is detected.

By using game mode, the input lag between the DualSense and the action you see on the screen should be reduced. Therefore, you gaming experience should end up felling more responsive when compared to using other picture modes on your monitor or TV.

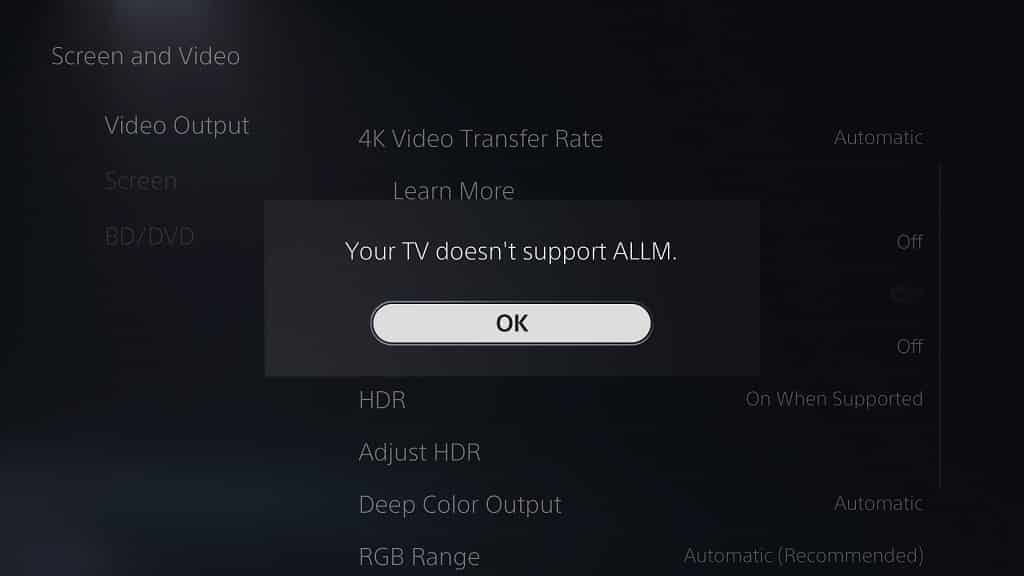
When trying to enable Auto Low Latency Mode, you may get an error message saying that “your TV doesn’t support ALLM.” If you are seeing this notification, then you can take a look at this troubleshooting article from Seeking Tech to see how you can potentially fix this issue with your PS5.

1. The first step we recommend taking is to make sure that your television set or monitor support Auto Low Latency Mode as this feature is relatively new to the screen display industry.

2. If your screen does support ALLM, then make sure you look through the settings menu of your TV or monitor to see if there is an option to turn it on.

3. You should also make sure that your PlayStation 5 or PlayStation 5 Digital Edition is connected to the correct HDMI port that supports ALLM.

4. Furthermore, you should connect your console directly to your TV or monitor.

Using an HDMI extension cable, HDMI passthrough device and/or HDMI splitter may make some features such as Auto Low Latency Mode incompatible.

5. You can try disconnecting the HDMI cable from your PS5 and the screen. Afterwards, reconnect the video cable again and then try to turn on ALLM.

6. If you have another HDMI cable available, then you can try using a new cable to see if you are able to activate the PS5’s low latency mode.

7. You may also want to consider power cycling both your PlayStation 5 and your screen.

In order to do so, you can take the following steps:

  • Turn off your PS5.
  • Unplug the game console from the power outlet.
  • Turn off your television set or monitor.
  • Unplug the screen from the power outlet.
  • Wait for a few minutes.
  • Plug the console and the screen back into the power outlet.
  • Turn on the console and screen.
  • Try to enable ALLM on your PS5.

8. Rebuilding the system or clearing its cache may also help.

To find out how you can do both of these actions, you can take a look at this article.

9. It is also a good idea to keep the firmware of your PlayStation 5 or PlayStation 5 Digital Edition system updated to the latest version.

10. Furthermore, make sure that you also update the firmware of your television set or monitor as a new release may help resolve the compatibility issues with the Auto Low Latency Mode of the PS5.

To update the software version of your screen, make sure you look in its settings menu or check out its user manual.

How to enable and disable ALLM on PS5

Auto Low Latency Mode was recently added to the PlayStation 5 and PlayStation 5 Digital Edition. This feature will automatically turn on your monitor’s or television’s game mode setting, which will help with reducing the input lag when playing a videogame. As a result, you will get a more responsive experience when it comes to controlling the game.

To see how you can enable or disable this feature, you can take a look at this tutorial from Seeking Tech.

1. The Auto Low Latency Mode was made available in a firmware update for the PS5 and PS5 Digital Edition consoles. So, if you haven’t done so already, you can download the new version of your system by taking the following steps:

  • To start off, make sure you turn on your PlayStation 5 and get to the home menu.
  • The home menu is where you can pick out which game or app to open. If you aren’t there currently, then you can easily go home by pressing and holding the PS button on the DualSense. You can also go home by pressing the PS button to bring up the quick menu and then select the house icon at the bottom.
  • After getting to the home menu, press the triangle button and then select the gear icon located on the top right side of the screen.
  • Inside of the Settings screen, you need to select System from the list of available options.
  • From the System screen, select System Software on the left column and then System Software Update and Settings on the right side.
  • In the System Software Update and Settings screen, select Update System Software.
  • Once you get to the System Software Update screen, select Update Using Internet.
  • Finally, select Update to start the firmware installation process.

2. With your PlayStation 5 or PlayStation 5 Digital Edition console updated, you can enable or disable Auto Low Latency Mode by first going to the aforementioned home menu.

3. From the home menu, head to Settings, which you can find on the top right corner of the screen.

4. After getting to the front page of Settings, you need to select Screen and Video from the list of available categories.

5. In the Screen and Video page, you need to select Video Output on the left column.

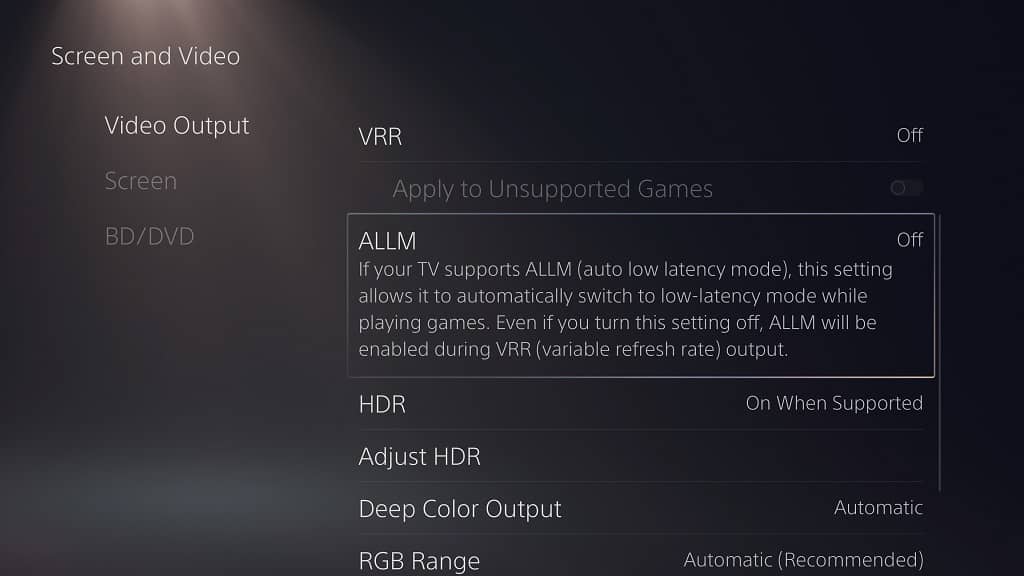
6. In the same Screen and Video page, you then need to select ALLM.

7. In the pop-up menu, you have the following options:

  • By setting Auto Low Latency Mode to “Off,” your television set or monitor won’t automatically switch to its game mode settings when you are playing a game. With that said, ALLM will be turned on if you have Variable Refresh Rate enabled.
  • By setting Auto Low Latency Mode to “Automatic,” your television set or monitor will automatically switch over to its game mode settings whenever it detects that you are currently playing a game on your console.

LG A2 wall mount specs

The A2 is a 2022 4K Smart OLED Television series made by LG. If you want to be able to install this television set on a wall, then you can take a look at this wall mount bracket compatibility guide at Seeking Tech.

LG A2 Screen Sizes

There are four different sizes of the A2 that have been manufactured. With that said, not all of these variants may be available in your region.

You can find the full list of screen size options for this television series below:

  • 48-inch LG A2 4K Smart OLED TV
  • 55-inch LG A2 4K Smart OLED TV
  • 65-inch LG A2 4K Smart OLED TV
  • 77-inch LG A2 4K Smart OLED TV

LG A2 Dimensions (without Stand)

Dimensions without Stand (in inches):

  • 48″ LG A2: 42.1” x 24.4” x 1.8”
  • 55″ LG A2: 48.3″ x 27.9″ x 1.8″
  • 65″ LG A2: 57.0″ x 32.8″ x 1.8″
  • 77″ LG A2: 67.7” x 38.9” x 2.0”

Dimensions without Stand (in centimeters):

  • 48″ LG A2: 107.0 cm x 62.0 cm x 4.59 cm
  • 55″ LG A2: 122.7 cm x 70.9 cm x 4.59 cm
  • 65″ LG A2: 144.8 cm x 83.3 cm x 4.59 cm
  • 77″ LG A2: 171.9 cm x 98.9 cm x 5.09 cm

Dimensions without Stand (in millimeters):

  • 48″ LG A2: 1070 mm x 620 mm x 45.9 mm
  • 55″ LG A2: 1227 mm x 709 mm x 45.9 mm
  • 65″ LG A2: 1448 mm x 833 mm x 45.9 mm
  • 77″ LG A2: 1719 mm x 989 mm x 50.9 mm

LG A2 Weight (without Stand)

Weight without Stand (in pounds):

  • 48″ LG A2: 25.4 lbs.
  • 55″ LG A2: 31.5 lbs.
  • 65″ LG A2: 37.7 lbs.
  • 77″ LG A2: 45 lbs.

Weight without Stand (in kilograms):

  • 48″ LG A2: 11.5 kg
  • 55″ LG A2: 14.3 kg
  • 65″ LG A2: 17.1 kg
  • 77″ LG A2: 20.4 kg

LG A2 VESA Mounting Pattern

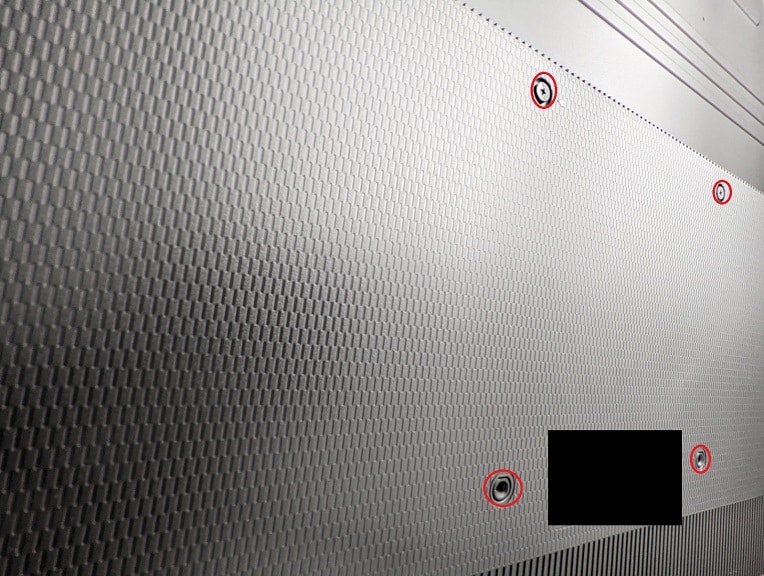
The wall mount bracket must also fit on the back of your LG A2 television set. The industry uses a standard called the VESA Mounting Pattern, which measures the four mounting screw holes located on the back of the TV. You need to use these holes to secure the wall mount to the screen.

You can find the measurement, which is shown as Horizontal x Vertical, below:

  • 48″ LG A2: 300 mm x 200 mm
  • 55″ LG A2: 300 mm x 200 mm
  • 65″ LG A2: 300 mm x 200 mm
  • 77″ LG A2: 300 mm x 200 mm
VESA Mounting Pattern (example from different TV).

What wall mounts are compatible with the LG A2?

For a wall mount bracket to be compatible with the LG A2, it needs to support the 300 mm x 200 mm VESA Mounting Pattern.

Furthermore, it needs to be able to hold the weight of the television, which can weigh as much as 45 lbs. (or 20.4 kg). Fortunately, a majority of big brands of wall mount manufacturers can easily hold up all screen size options of the A2 series.

If you are looking for specific recommendations, then you can take a look at this article.

Resource:

Samsung QN900B wall mount specs

The QN900B is one of two 2022 Neo QLED 8K television sets released by Samsung. If you want to be able to mount this TV set on a wall, then you can take a look at this wall mount compatibility guide from Seeking Tech.

What is the Samsung QN900B?

The QN900B is a premium television set that features a refresh rate of up to 144 Hz and supports up to 8K in resolution. Even if you don’t have 8K content, this TV will upscale lower resolution content to the maximum display resolution by using its Neural Quantum Processor 8K.

In terms of sound, this TV set is equipped with a 90-watt 6.2.4-channel and features built-in wireless Dolby Atmos smart TV-to-soundbar support.

As for console gaming, the QN900B comes with Variable Refresh rate support and four HDMI 2.1 ports. Therefore, it is well equipped to take advantage of the graphical feature set of the PlayStation 5, PlayStation 5 Digital Edition, Xbox Series X and Xbox Series S game consoles.

Samsung QN900B Screen Sizes

You can find the screen size options, along with the associated model numbers, for the QN900B television series below:

  • 65″ Class QN900B Samsung Neo QLED 8K Smart TV (QN65QN900BFXZA)
  • 75″ Class QN900B Samsung Neo QLED 8K Smart TV (QN75QN900BFXZA)
  • 85″ Class QN900B Samsung Neo QLED 8K Smart TV (QN85QN900BFXZA)

QN900B Dimensions without Stand

Dimensions without Stand (in inches):

  • 65″ Class QN900B Samsung Neo QLED 8K Smart TV: 56.4 inches x 32.3 inches x 0.7 inch
  • 75″ Class QN900B Samsung Neo QLED 8K Smart TV: 65.1 inches x 37.2 inches x 0.7 inch
  • 85″ Class QN900B Samsung Neo QLED 8K Smart TV: 73.9 inches x 42.2 inches x 0.7 inch

Dimensions without Stand (in millimeters):

  • 65″ Class QN900B Samsung Neo QLED 8K Smart TV: 1433 mm x 821 mm x 18 mm
  • 75″ Class QN900B Samsung Neo QLED 8K Smart TV: 1654 mm x 945 mm x 18 mm
  • 85″ Class QN900B Samsung Neo QLED 8K Smart TV: 1877 mm x 1072 mm x 18 mm

QN900B Weight without Stand

Weight without Stand (in pounds):

  • 65″ Class QN900B Samsung Neo QLED 8K Smart TV: 49.8 lbs.
  • 75″ Class QN900B Samsung Neo QLED 8K Smart TV: 69.9 lbs.
  • 85″ Class QN900B Samsung Neo QLED 8K Smart TV: 96.6 lbs.

Weight without Stand (in kilograms):

  • 65″ Class QN900B Samsung Neo QLED 8K Smart TV: 22.6 kg
  • 75″ Class QN900B Samsung Neo QLED 8K Smart TV: 31.7 kg
  • 85″ Class QN900B Samsung Neo QLED 8K Smart TV: 43.8 kg

QN900B VESA Mounting Pattern

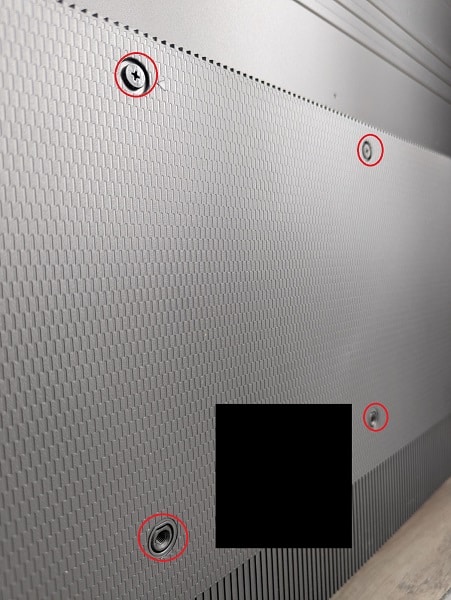
One last important specification you should take into account in the VESA Mounting Pattern, which is a measurement of the horizontal and vertical distances of the four mounting screw holes located on the back of the QN900B.

You can find the measurements for the 65-inch, 75-inch and 85-inch television models, in millimeters, below:

  • 65″ Class QN900B Samsung Neo QLED 8K Smart TV: 400 mm x 300 mm
  • 75″ Class QN900B Samsung Neo QLED 8K Smart TV: 400 mm x 400 mm
  • 85″ Class QN900B Samsung Neo QLED 8K Smart TV: 600 mm x 400 mm
VESA Mounting Pattern (example from different TV).

QN900B Wall Mount Screw Type

When it comes to the screw type you need to be using in order to install your QN900B to the mounting bracket, you will need M8 screws that have a depth 5 mm to 6 mm.

What wall mounts are compatible with the Samsung QN900B?

Samsung has several official mounts that can be used with the QN900B television series.

The 2021 Slim Fit Wall Mount, which has a model number of WMN-A50EB/ZA, provides a minimalist look as the 8K screen will be right up against the wall. This bracket should be compatible will all three screen sizes of the QN900B.

If you are interested, you can purchase the fixed mounting bracket on Amazon with the following link:

You can also get a tilting mount as it will help you get better viewing angles and prevent screen glaring. The 2020 Samsung Full-Tilt Wall Mount (WMN4277ST/ZA) supports the 65″ and 75” versions of the QN900B while the 2020 Samsung Large Size Full-Tilt Wall Mount (WMN5870XT/ZA) supports the 85” of the television.

You can purchase either of these tilting mounts on Amazon with the following links:

Along with these official mounts, there are also several third-party mounting brackets that you can use. For specific recommendations, you can take a look at this article.

Resource:

How to prevent and fix Samsung QN85B and QN90B overheating issues

When using your Samsung QN85B or QN90B, the television set and surround area may feel hot when touched. Your TV may also start to make popping or humming noises if it starts to heats up.

To see how you can prevent and potentially fix overheating issues with these television sets, you can take a look at this article at Seeking Tech.

This troubleshooting guide will cover the following screen sizes of the QN85B and QN90B television series:

  • 55-inch Samsung QN85B Neo QLED TV (QN55QN85BAFXZA)
  • 65-inch Samsung QN85B Neo QLED TV (QN65QN85BAFXZA)
  • 75-inch Samsung QN85B Neo QLED TV (QN75QN85BAFXZA)
  • 85-inch Samsung QN85B Neo QLED TV (QN85QN85BAFXZA)
  • 55-inch Samsung QN90B Neo QLED TV (QN55QN90BAFXZA)
  • 65-inch Samsung QN90B Neo QLED TV (QN65QN90BAFXZA)
  • 75-inch Samsung QN90B Neo QLED TV (QN75QN90BAFXZA)
  • 85-inch Samsung QN90B Neo QLED TV (QN85QN90BAFXZA)

How to prevent overheating issues with Samsung QN85B and QN90B

In order to prevent your QN85B or QN90B from getting too hot, you can try taking the following precautionary steps:

1. Make sure that you aren’t covering your television set, especially its vents, when it is turned on. Otherwise, you will be trapping heat.

2. Do not place your QN85B or QN90B inside an enclosed space as doing so will make the heat dissipation a lot harder.

3. Give plenty of empty air space around your television screen.

4. Avoid placing the TV near any heater, fireplace or any other heat source.

5. You should also avoid exposing your television to direct sunlight as doing so will heat up the internals of the set.

6. Don’t leave your TV on when you aren’t using it. You may want to consider setting up a power off timer if you keep leaving your television on.

Why your QN85B or QN90B is making humming and popping noises

When your Samsung QN85B or QN90B starts to heat up, the plastic materials will expand, resulting in the occasional popping sound.

Your television set will also start making humming noises due to the internal circuity being used to make the screen work.

How to fix overheating issues with QN85B and QN90B

If your QN85B or QN90B feels hot when touched, starts making a popping noise and/or starts making humming noises, then Samsung considers these to be quite normal. In other words, you should have nothing to worry about.

If you would like to cool down your television set anyway, then you can try doing the following:

1. The fastest way to cool down your television is by turning it off and then unplugging it from the power outlet.

2. If you want to keep using the QN85B or QN90B, then you can try decreasing the brightness level.

3. You can also try lowering the TV volume in order to cool your TV set.

4. If you aren’t using the Wi-Fi connection, then you might want to consider turning it off.

5. If you have your television set sitting in a less than ideal place, then you might want to make to a different area that will provide better ventilation.

How to enable LG B9, BX, C9, CX and GX VRR support for PS5

The PlayStation 5 and PlayStation 5 Digital Edition systems are now capable of using the Variable Refresh Rate feature. To see how you can use the PS5’s VRR function with your LG B9, BX, C9, CX or GX, you can take a look at this tutorial from Seeking Tech.

To start off, it should be noted that this guide is based on the following B9, BX, C9, CX and GX television models:

  • 55″ LG B9 (OLED55B9PUA)
  • 65″ LG B9 (OLED65B9PUA)
  • 77″ LG B9 (OLED77B9PUA)
  • 55″ LG BX (OLED55BXPUA)
  • 65″ LG BX (OLED65BXPUA)
  • 55″ LG C9 (OLED55C9PUA)
  • 65″ LG C9 (OLED65C9PUA)
  • 77″ LG C9 (OLED77C9PUA)
  • 48″ LG CX (OLED48CXPUB)
  • 55″ LG CX (OLED55CXPUA)
  • 65″ LG CX (OLED65CXPUA)
  • 77″ LG CX (OLED77CXPUA)
  • 55″ LG GX (OLED55GXPUA)
  • 65″ LG GX (OLED65GXPUA)
  • 77″ LG GX (OLED77GXPUA)

1. If you haven’t done so already, we recommended updating the firmware of your PlayStation 5 game console as well as your television set.

This is because the new updates may improve the compatibility and/or performance of VRR when using the two devices together.

2. You should also make sure that you connected your PS5 console to the HDMI 2.1 port of your B9, BX, C9, CX or GX.

Make sure you are using a HDMI 2.1 cable for the connection. For the uninformed, a HDMI 2.1 cable should be included in the box that came with your game console.

3. Next, turn on both your game console and your LG OLED television set.

4. If the input source of your TV isn’t showing the PlayStation 5, then make sure you switch over to the correct HDMI input.

5. Once you are ready, open the Settings menu of your B9, BX, C9, CX or GX.

6. You then need to select Picture.

7. In the Picture menu, select Additional Settings.

8. From the Additional Settings menu, you then need to select HDMI Ultra HD Deep Color.

9. Inside the new menu, make sure you have the HDMI Ultra HD Deep Color setting enabled on the HDMI input that is connected to your PS5.

10. Go back to the aforementioned Additional Settings menu and then select Instant Game Response.

11. After getting to the new menu, make sure that you have the Instant Game Response setting enabled on the HDMI input that is connected to your game console.

12. On your PlayStation 5, head over to the home screen. This is the main menu where you can choose which game or media app to open.

13. Select the gear icon located on the top right side of the home screen.

14. In the Settings menu, head over to Screen and Display.

15. From the Screen and Display menu, select Video Output from the list of available options on the left column.

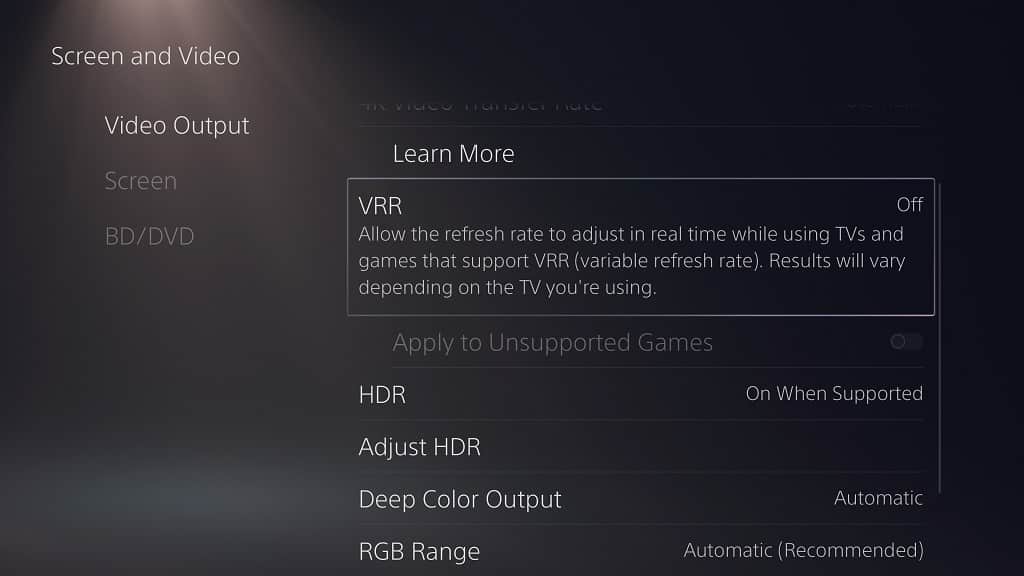
16. On the right side in the same Screen and Display menu, you should find the VRR option.

Here, you need to set VRR to Automatic.

There is also the “Apply to Unsupported Games” setting underneath it. If you enable this feature, then you can force VRR on games that don’t natively support the feature.

17. You can tell that VRR is working by quickly pressing the green button quickly in quick succession while playing a game to bring up the display information menu.

If your PS5 isn’t detecting the VRR feature of your TV, then you can check out this troubleshooting guide.

How to fix LG B1, C1, G1, B2, C2 and G2 audio delay issues when using game optimizer

The LG B1, C1, G1, B2, C2 and G2 comes with the game optimizer mode that features the best display settings when it comes to playing video games. If you use this mode while also utilizing an external sound output device on your television set, then you may experience audio delay.

In order to get the audio sync to be more accurate, you can take a look at this troubleshooting guide from Seeking Tech.

Before we start, it is important to note that this guide is based on all screen sizes of the B1, C1, G1, B2, C2 and G2 television sets, which should include the following model numbers:

LG B1:

  • OLED55B1PUA
  • OLED65B1PUA
  • OLED77B1PUA

LG C1:

  • OLED48C1PUB
  • OLED55C1PUB
  • OLED65C1PUB
  • OLED77C1PUB
  • OLED83C1PUA

LG G1:

  • OLED55G1PUA
  • OLED65G1PUA
  • OLED77G1PUA

LG B2:

  • OLED55B2PUA
  • OLED65B2PUA
  • OLED77B2PUA

LG C2:

  • OLED42C2AUA
  • OLED42C2PUA
  • OLED48C2AUA
  • OLED48C2PUA
  • OLED55C2AUA
  • OLED55C2PUA
  • OLED65C2AUA
  • OLED65C2PUA
  • OLED77C2AUA
  • OLED77C2PUA
  • OLED83C2AUA
  • OLED83C2PUA

LG G2:

  • OLED55G2PUA
  • OLED65G2PUA
  • OLED77G2PUA
  • OLED77Z2PUA
  • OLED83G2PUA

How to fix audio delay issues when using LG’s game optimizer mode

Switching the audio output to the TV speaker should help fix the audio delays when you are using the game optimizer mode on your LG B1, C1, G1, B2, C2 or G2.

In order to switch audio output, you can try doing the following:

1. Head to the Settings menu of your LG OLED television set.

2. You then need to go to the Sound sub-menu.

3. Next, you need to select Sound Out.

4. Finally, set Sound Out to Use TV Speaker.

How to fix audio delay issues for external audio device when using LG’s game optimizer mode

If you want to keep using your earphones, headphones, speaker or soundbar with the game optimizer mode turned on for your LG television set, then you can try taking the following steps:

1. Go to the Settings menu of your B1, C1, G1, B2, C2 or G2.

2. In the Settings menu, go to the Sound sub-menu.

3. Inside the Sound sub-menu, select Advanced Settings.

4. Next, you need to go to the “Select HDMI Input Audio Format” option.

5. Make sure you set “Select HDMI Input Audio Format” to PCM.

If you are still experiencing audio delays while using an external audio device even after switching to the PCM format in the game optimizer mode, then you can try the following potential solutions:

  • If you are using a wireless sound output device, then you need to make sure that there aren’t any physical objects, as well as other wireless devices, that may be weakening the signal.
  • If you are using a wired sound output device, then you should make sure that you are using the recommended HDMI or optical cable for the device and your television set.
  • If you are using HDMI to connect your external sound output device, then you need to make sure that the HDMI connection is passing through correctly, especially if you are connecting it to a splitter or another pass-through device, as each junction may introduce audio delay.
  • Keep in mind that wireless listening devices will introduce more audio lag when compared to wired listening devices.