How to fix Samsung Galaxy Tab S8, S8+ and S8 Ultra charging issues

The Samsung Galaxy Tab S8, Samsung Galaxy Tab S8 Plus and Samsung Galaxy Tab S8 Ultra feature internal rechargeable batteries.

If you are experiencing issues with trying to recharge these tablets, then you can check out this troubleshooting guide at Seeking Tech.

1. The first step we recommend taking is to make sure that the USB Type-C port of your tablet, the USB cable as well as USB port of the power source isn’t damaged.

If you see some issues, then we recommend replacing the damaged parts if possible.

2. The battery recharging process will slow, or even completely stop, if the internal temperature of your Galaxy Tab S8, Galaxy Tab S8 Plus or Galaxy Tab S8 Ultra gets too hot.

In this case, you need to unplug the device from the power source and then let it cool down before trying to recharge it again.

3. We also suggest that you don’t recharge and use the tablet at the same time as you will end up slowing down the charging process.

If you need to use the device while recharging it, then you can take a look at this article to see out how you can avoid draining the internal battery of your S8, S8 Plus or S8 Ultra.

For best results, you can simply turn off your device until it recharges.

4. The Samsung Galaxy Tab S8, Samsung Galaxy Tab S8 Plus and Samsung Galaxy Tab S8 Ultra also support Super Fast Charging. So, if your tablet is recharging too slowly for your liking, then we recommend picking up a compatible wall charger that has this feature.

If you are interested, we suggest getting the official 45 W Samsung Super Fast Charging Wall Charger, which you can find on Amazon with this link. (#CommissionsEarned).

5. It is also important to note that the internal batteries of the Galaxy Tab S8, Galaxy Tab S8 Plus and Galaxy Tab S8 Ultra will lose their effectiveness over time.

In order to slow down the degradation of the tablet’s internal battery, avoid overheating the device.

Furthermore, we recommend that you keep the battery life between a range of 20% to 80% full. Otherwise, the battery will get extremely stressed in the 1% to 19% as well as the 81% to 100% ranges, which will end up shortening its lifespan.

If the battery of your S8, S8 Plus or S8 Ultra is still charging slowly or not at all, then we recommend contacting Samsung for additional support.

How to reduce eye strain when using Samsung Galaxy Tab S8, S8+ and S8 Ultra

When using your Samsung Galaxy Tab S8, Samsung Galaxy Tab S8+ or Samsung Galaxy Tab S8 Ultra, your eyes may start to feel strained.

To see how you can reduce the straining, you can take a look at this troubleshooting guide from Seeking Tech.

1. The first step we recommend taking is to reduce the brightness level of your screen as doing so may help make you feel less tired when looking at your tablet.

If you don’t know how to lower the screen brightness and/or take advantage of the automatic brightness feature, then you can check out this tutorial.

2. Using a dark background may also make looking at the screen of your Galaxy Tab S8, Galaxy Tab S8+ or Galaxy Tab S8 Ultra more comfortable.

In order to do so, you need to take the following steps:

  • On your tablet, you first need to open the Settings App.
  • Inside of the Settings application, you then need to select Display.
  • In the Display menu, select Dark.
  • Keep in mind that this will only change the background on the system menus. For a specific app, you need to look at the settings of the application to see if a dark mode or night mode is available.

3. Changing the font size and font style may also help with your vision issues.

To change these on the system menu of your S8, S8 Plus and S8 Ultra, you need to do the following:

  • Launch the Settings App on your tablet.
  • From Settings, head over to Display.
  • In the Display screen, go to Font Size and Style.
  • Select Font Style and then select a style that is the most comfortable to look at. For additional styles, you can select +Download Fonts to get more from the Samsung Galaxy Store.
  • To change the font size, you need to use the Font Size slide from the aforementioned Font Size and Style menu.
  • You can also turn on Bold Font in the same menu to bold your text.

4. To further reduce eye strain, especially when using your Samsung Galaxy Tab S8, Samsung Galaxy Tab S8+ or Samsung Galaxy Tab S8 Ultra in the dark, we recommend enabling Eye Comfort Shield.

To turn this feature on, you need to take the following steps:

  • Once again, you need to open the Settings App on your device.
  • From the from page of the Settings application, you need to select Display.
  • Next, you need to go to Eye Comfort Shield.
  • In the next screen, make sure that the switch next to the Eye Comfort Shield feature is turned on.
  • In the same menu, you can also select Set Schedule in order to customize when you want to use this feature. You can pick between Always On, Sunset to Sunrise or Custom.
  • Furthermore, there is also a Color Temperature slider located in the Eye Comfort Shield menu. You can use the slider to change the temperature of the screen display in order to reduce your eye strain.

Samsung QN85B and QN90B wall mount specs

The QN85B and QN90B are two Neo QLED 4K Smart TVs that were released by Samsung in 2022.

If you want to mount these premium television sets on a wall, then you can take a look at this wall mount compatibility guide from Seeking Tech.

QN85B and QN90B Screen Sizes

This article will be covering the following screen sizes for the QN85B and QN90B television sets:

  • 55” Samsung QN85B Neo QLED 4K Smart TV (QN55QN85BAFXZA)
  • 65” Samsung QN85B Neo QLED 4K Smart TV (QN65QN85BAFXZA)
  • 75” Samsung QN85B Neo QLED 4K Smart TV (QN75QN85BAFXZA)
  • 85” Samsung QN85B Neo QLED 4K Smart TV (QN85QN85BAFXZA)
  • 55” Samsung QN90B Neo QLED 4K Smart TV (QN55QN90BAFXZA)
  • 65” Samsung QN90B Neo QLED 4K Smart TV (QN65QN90BAFXZA)
  • 75” Samsung QN90B Neo QLED 4K Smart TV (QN75QN90BAFXZA)
  • 85” Samsung QN90B Neo QLED 4K Smart TV (QN85QN90BAFXZA)

QN85B and QN90B Dimensions without Stand

When installing these Neo QLEDs on a wall, it is important to know their sizes as you will need to make enough room.

You can find the approximate dimensions (measured in millimeters, centimeters and inches) for both the QN85B and QN90B below:

Dimensions without Stand (in millimeters):

  • 55” QN85B: 1227 mm x 706 mm x 27 mm
  • 65” QN85B: 1446 mm x 829 mm x 27 mm
  • 75” QN85B: 1670 mm x 957 mm x 28 mm
  • 85” QN85B: 1892 mm x 1082 mm x 27 mm
  • 55” QN90B: 1227 mm x 706 mm x 26 mm
  • 65” QN90B: 1446 mm x 829 mm x 26 mm
  • 75” QN90B: 1670 mm x 957 mm x 27 mm
  • 85” QN90B: 1892 mm x 1082 mm x 27 mm

Dimensions without Stand (in centimeters):

  • 55” QN85B: 122.7 cm x 70.6 cm x 2.7 cm
  • 65” QN85B: 144.6 cm x 82.9 cm x 2.7 cm
  • 75” QN85B: 167 cm x 95.7 cm x 2.8 cm
  • 85” QN85B: 189.2 cm x 108.2 cm x 27 cm
  • 55” QN90B: 122.7 cm x 70.6 cm x 26 cm
  • 65” QN90B: 144.6 cm x 82.9 cm x 26 cm
  • 75” QN90B: 167 cm x 95.7 cm x 27 cm
  • 85” QN90B: 189.2 cm x 1082 cm x 27 cm

Dimensions without Stand (in inches):

  • 55” QN85B: 48.3″ x 27.8 “x 1.1”
  • 65” QN85B: 56.9″ x 32.6″ x 1.1″
  • 75” QN85B: 65.7″ x 37.7″ x 1.1″
  • 85” QN85B: 74.5″ x 42.6″ x 1.1″
  • 55” QN90B: 48.3″ x 27.8″ x 1″
  • 65” QN90B: 56.9″ x 32.6″ x 1″
  • 75” QN90B: 65.7″ x 37.7″ x 1.1″
  • 85” QN90B: 74.5″ x 42.6″ x 1.1″

QN85B and QN90B Weight without Stand

Wall mounts have a capacity limit in terms of how much television weight it can hold; therefore, it is also very important that you know the weight of your QN85B or QN90B.

You can check out the weight specifications, in pounds and kilograms, for these two Samsung TVs below:

Weight without Stand (in pounds):

  • 55” QN85B: 37.9 lbs.
  • 65” QN85B: 52.2 lbs.
  • 75” QN85B: 75 lbs.
  • 85” QN85B: 94.1 lbs.
  • 55” QN90B: 39 lbs.
  • 65” QN90B: 53.8 lbs.
  • 75” QN90B: 77.2 lbs.
  • 85” QN90B: 98.1 lbs.

Weight without Stand (in kilograms):

  • 55” QN85B: 17.3 kg
  • 65” QN85B: 23.7 kg
  • 75” QN85B: 34 kg
  • 85” QN85B: 42.7 kg
  • 55” QN90B: 17.7 kg
  • 65” QN90B: 24.4 kg
  • 75” QN90B: 35 kg
  • 85” QN90B: 44.5 kg

QN85B and QN90B VESA Mounting Pattern

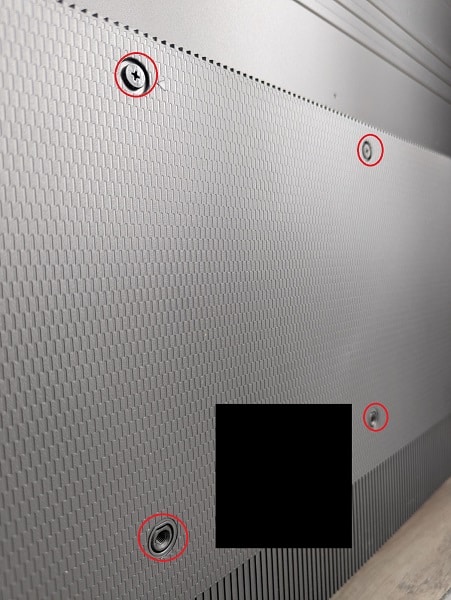
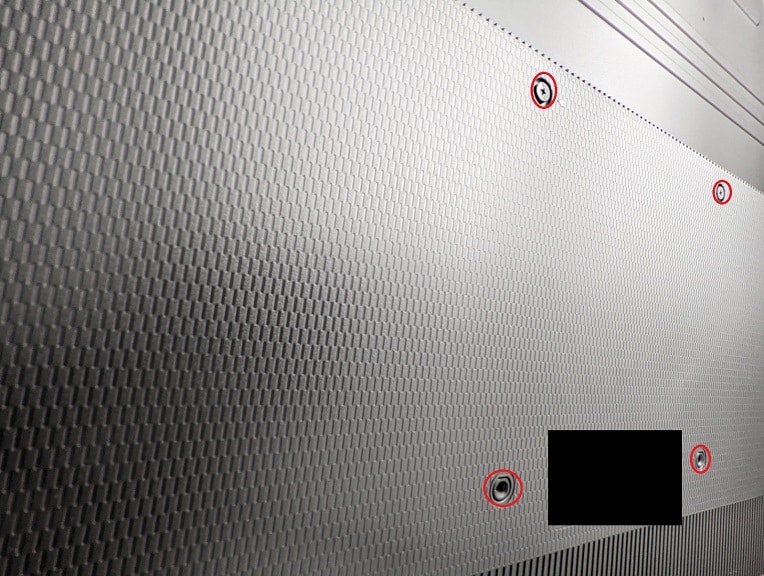
The wall mount also needs to support the VESA Mounting Pattern of your QN85B or QN90B. This pattern measures the horizontal and vertical distances of the four mounting screw holes located on the back of the Neo QLED sets.

You can find the VESA Mounting Patterns below:

VESA Mounting Pattern (in millimeters):

  • 55” QN85B: 200 mm x 200 mm
  • 65” QN85B: 400 mm x 300 mm
  • 75” QN85B: 400 mm x 400 mm
  • 85” QN85B: 600 mm x 400 mm
  • 55” QN90B: 200 mm x 200 mm
  • 65” QN90B: 400 mm x 300 mm
  • 75” QN90B: 400 mm x 400 mm
  • 85” QN90B: 600 mm x 400 mm
VESA Mounting Pattern (example from different TV).

QN85B and QN90B Wall Mount Screw Type

Of course, you need to be using the right screws to install these televisions on the wall mount. Both the QN85B and QN90B series support the M8 type screws with a depth of 11 mm to 13 mm.

What wall mounts are compatible with the QN85B and QN90B?

When looking for a wall mount for your Samsung QN85B or Samsung QN90B, you need to match the aforementioned weight and VESA Mounting Pattern of your TV set.

If you are looking to simply put your television on a wall, then you can get a fixed wall mount.

If you are planning to mount the QN85B or QN90B in a bright room, then you might want to get a tilting mount instead to prevent screen glares.

If you would like to tilt and swivel your TVs, then we suggest getting a full motion mount.

If you are looking for specific wall mount recommendations for the QN85B or QN90B, then we recommend taking a look at this guide.

Resource:

How to fix WWE 2K22 crashing issues on Xbox Series X and Xbox Series S

When playing WWE 2K22 on your Xbox Series X or Xbox Series S, the game may end up crashing frequently in a wrestling match, My Faction, MyGM, MyRise and/or Showcase.

To see how you can stop these freezes and lock ups from happening, you can take a look at this troubleshooting guide from Seeking Tech.

1. If your game is currently frozen, then you can try closing it by taking the following steps:

  • Press the Xbox button on your Xbox Series X or Xbox Series S controller. This should open the Guide menu.
  • In the Guide menu, scroll over to the WWE 2K22 icon.
  • With the wrestling game’s icon highlighted, press the Menu button on the controller, which should open the pop-up menu.
  • In the pop-up menu for WWE 2K22, select Quit.

2. If your Xbox Series X and Xbox Series S isn’t responding to your button inputs, then the system may have completely frozen.

In this case, you can force the console to shut down by pressing and hold the Xbox button located directly on it for at least 30 seconds.

3. Your Xbox Series console could also be crashing due to the accumulation of heat when playing this wrestling game.

So, if the system feels hot when touched, then we recommend turning it off and waiting until it cools off before you try to play WWE 2K22 again.

For additional tips to see how you can prevent your Series X or Series S from overheating, then you can take a look at this article.

4. Trying to resume a suspended session by using the Quick Resume feature on your console may also cause issues with the videogame.

Therefore, every time you want to stop playing WWE 2K22, we recommend that save your game and then close it from the Guide menu.

To find out more about how you can avoid using the Quick Resume feature, you can check out this article.

5. If your game is currently in the Quick Resume queue, then you can remove it by taking the following steps:

  • Press the Xbox button on your Xbox Series X or S controller.
  • In the Guide menu, head over to My Games and Apps.
  • In the next menu, scroll over to the WWE 2K22 icon in the Quick Resume section.
  • With the game’s icon highlighted, press the Menu button.
  • In the pop-up menu, select Remove from Quick Resume.

6. Along with WWE 2K22, you might also want to remove any other game in the Quick Resume queue.

7. The next step you can take is to try to clear the system cache.

In order to do so, you need to do the following:

  • Turn your Xbox Series X or Xbox Series S system completely off.
  • With the gaming system turned off, unplug its power cord from the power outlet.
  • Next, you simply need to wait for at least 2 minutes.
  • After waiting, plug the power cord back into the power outlet.
  • Turn on your system and then launch WWE 2K22.

8. Updating the firmware of your Xbox Series X or Xbox Series S may also improve the stability of the console when it comes to crashing.

To update the firmware, turn on your system and then make sure that it is connected to the Internet.

If you don’t see a notification regarding a new software version, then you can try doing the following:

  • Press the Xbox button to open the Guide menu.
  • In the Guide menu, switch over to the Profile & System tab by pressing the RB button several times.
  • On the Profile & System tab, select Settings.
  • Inside of Settings, select System in the left column and then Updates on the right side.
  • In the System – Updates menu, you should see whether or not your Series X or Series S console needs a firmware update.

9. If the game is still crashing, then the next step you can try is to delete all of the community creations as these may be causing the software to corrupt.

We recommend that you avoid having any of these user created content downloaded to avoid crashes until the game gets a new patch to address this specific issue.

10. If the storage of the internal SSD or expansion SSD where you have WWE 2K22 installed gets too full, then that may end up causing various issues as well.

Therefore, we recommend deleting any game data files, screenshots and videos you have stored. You should leave around 25% of free space.

11. You can also try deleting and then re-installing the game again.

In order to delete the game, you need to take the following steps:

  • Scroll over to the WWE 2K22 game icon from the home screen.
  • With the game highlighted, press the Menu button.
  • In the pop-up menu, select Manage Game and Add-ons.
  • In the Manage – WWE 2K22 menu, select the game.
  • In the next screen, make sure you select the game so that the note to the bottom right of the box display “Will Remove.”
  • Afterwards, select Save Changes.
  • To re-install the wrestling game, you need to re-insert the disc if you have a physical copy or download it from the Xbox Store if you bought the digital version.

12. You may also want to consider deleting your current save file to see if starting a new game will fix the freezing issues.

13. If none of the aforementioned solutions helped with fixing the crashing issues, then that is not much else you can do other than to wait for a new patch that may help address your problems.

To update the WWE 2K22 to the latest patch, you can try doing the following:

  • Turn on your console and then make sure it is connected to the Internet.
  • If you don’t get a notification about a new patch for WWE 2K22 being downloaded, then you can scroll over to the game on the home screen and then press the Menu button.
  • In the pop-up menu, you then need to select Manage Game and Add-ons.
  • In the Manage – WWE 2K22 menu, select Updates.
  • If there is a new update available, you should be able to see it in the WWE 2K22 – Updates menu.

Sony X80K wall mount specs

The X80K is a new television model released by Sony in 2022. If you are planning to mount this TV set on a wall, then you can take a look at this wall mount compatibly guide from Seeking Tech.

X80K Screen Sizes

The Sony X80K 4K LED TV is available in five different screen sizes as you can pick between the 43-inch, 50-inch, 55-inch, 65-inch and 75-inch.

You can find the model numbers for each of these sizes below:

  • 43” Sony X80K 4K HDR LED TV (KD-43X80K)
  • 50” Sony X80K 4K HDR LED TV (KD-50X80K)
  • 55” Sony X80K 4K HDR LED TV (KD-55X80K)
  • 65” Sony X80K 4K HDR LED TV (KD-65X80K)
  • 75” Sony X80K 4K HDR LED TV (KD-75X80K)

X80K Dimensions without Stand

Dimensions without Stand (in millimeters):

  • 43” Sony X80K: 964 mm x 563 mm x 69 mm
  • 50” Sony X80K: 1,119 mm x 649 mm x 70 mm
  • 55” Sony X80K: 1,233 mm x 713 mm x 72 mm
  • 65” Sony X80K: 1,452 mm x 836 mm x 72 mm
  • 75” Sony X80K: 1,675 mm x 962 mm x 73 mm

Dimensions without Stand (in inches):

  • 43” Sony X80K: 37.95 inches x 22.17 inches x 2.72 inches
  • 50” Sony X80K: 44.06 inches x 25.55 inches x 2.76 inches
  • 55” Sony X80K: 48.54 inches x 28.07 inches x 2.83 inches
  • 65” Sony X80K: 57.17 inches x 32.91 inches x 2.83 inches
  • 75” Sony X80K: 66 inches x 37.88 inches x 2.88 inches

X80K Weight without Stand

Weight without Stand (in pounds):

  • 43” Sony X80K: 22.3 lbs.
  • 50” Sony X80K: 27.4 lbs.
  • 55” Sony X80K: 35.1 lbs.
  • 65” Sony X80K: 47.8 lbs.
  • 75” Sony X80K: 71 lbs.

Weight without Stand (in kilograms):

  • 43” Sony X80K: 10.1 kg
  • 50” Sony X80K: 12.4 kg
  • 55” Sony X80K: 15.9 kg
  • 65” Sony X80K: 21.7 kg
  • 75” Sony X80K: 32.2 kg

X80K VESA Mounting Pattern

The wall mount will also need to fit the VESA Mounting Pattern of your Sony X80K television set. This pattern is the horizontal and vertical distances in between the four screw holes on the back of the TV.

You can find the measurements, in millimeters and inches, for all the available screen sizes from the X80K series below:

VESA Mounting Pattern (in millimeters):

  • 43” Sony X80K: 200 mm x 200 mm
  • 50” Sony X80K: 200 mm x 200 mm
  • 55” Sony X80K: 300 mm x 300 mm
  • 65” Sony X80K: 300 mm x 300 mm
  • 75” Sony X80K: 300 mm x 300 mm

VESA Mounting Pattern (in inches):

  • 43” Sony X80K: 7.87 inches x 7.87 inches
  • 50” Sony X80K: 7.87 inches x 7.87 inches
  • 55” Sony X80K: 11.81 inches x 11.81 inches
  • 65” Sony X80K: 11.81 inches x 11.81 inches
  • 75” Sony X80K: 11.81 inches x 11.81 inches
VESA Mounting Pattern (example from different TV).

Official Sony wall mounts for X80K

Sony does have an official wall mount that should be compatible with the 55-inch, 65-inch and 75-inch versions of the X80K.

With the Sony SU-WL855 Ultra Slim Wall-Mount Bracket, you will be able to swivel your screen to the left or right.

If you are interested, you can purchase the product on Amazon with the following link:

What third-party wall mounts are compatible with the Sony X80K?

If you are looking for a third-party mount for your X80K, then make sure that the wall mount supports the aforementioned VESA Mounting Pattern and is capable of holding the weight of your screen size.

Fixed mounts are usually the most affordable as these will simply keep your Sony 4K LED TV in a fixed position on a wall.

Tilting mounts are great in terms of preventing screen glares and getting good viewing angles if you want to install your X80K high up on the wall.

Full motion mounts will let you extend, tilt and swivel your screen.

If you are looking for specific recommendations for your TV, then you can take a look at this article.

Resource:

How to fix WWE 2K22 crashing issues on PS5

When playing WWE 2K22 on your PlayStation 5 or PlayStation 5 Digital Edition, the wrestling videogame may end up crashing. These crashes or freezes could occur when you are wrestling in a match, creating a superstar in addition to playing in the My Faction, MyGM, MyRise and Showcase modes.

To see how you can potentially fix these problems, you can take a look at this troubleshooting guide from Seeking Tech.

1. If WWE 2K22 has seemingly crashed, then we recommend that you close the game by taking the following steps:

  • Press and hold the PS button on your DualSense controller to bring up the home screen.
  • On the home screen, navigate over to the WWE 2K22 icon.
  • With the icon of the game highlighted, press the Options button on your controller.
  • In the pop-up menu, select Close Game.

2. If the system isn’t responding to the button presses on your controller, then you can try to force your PS5 or PS5 Digital Edition to shut down by taking the steps laid out in this tutorial.

3. The next step you can take is to clear the cache of your console.

In order to do so, you need to take the following steps:

  • Turn off your PlayStation 5 or PlayStation 5 Digital Edition If you haven’t done so already.
  • Press and hold the power button on the system until you hear two beeps. If done correctly, the system should boot into Safe Mode.
  • In Safe Mode, you first need to connect your DualSense to you console by using a compatible USB cable.
  • Once the controller has been connected, press the PS button to be able to use it.
  • Now that you have control, select Clear Cache and Rebuild Database.
  • Next, you need to select Clear System Software Cache.
  • Select OK to continue with the deletion of the cache.

4. You can also try rebuilding the database of your PS5 or PS5 Digital Edition by doing the following:

  • To begin, return to the Safe Mode menu once again.
  • In the Safe Mode menu, select Clear Cache and Rebuild Database.
  • You then need to select Rebuild Database.
  • Finally select OK to start the rebuild process, which may take a little bit of time to be completed.

5. If the solid state drive that has the WWE 2K22 game installed gets too full, then it may lead to performance issues and even crashing problems.

Ideally, you should have around 25% of free space on either the internal built-in SSD or the M.2 expansion SSD.

So, if the drive is too full, then we recommend deleting any installed games, screenshots or videos in order to get to at least 25% of free space.

6. If you have community creations downloaded into your game, then these user created content may be causing WWE 2K22 to crash.

Therefore, you may want to consider deleting the custom files to see if your game will stop freezing.

7. Resuming WWE 2K22 after you put your PlayStation 5 or PlayStation 5 Digital Edition system into rest mode may also cause stability and other issue.

In this case, we recommend completely turning off your console in order to avoid using the rest mode.

8. The crashing or freezing issues of WWE 2K22 may also be due to your game console running too hot.

If your system feels hot when touched, then we recommend turning it off and then let it cool down before playing WWE 2K22. You should also make sure that you aren’t blocking its vents and/or keeping the system in an enclosed space.

To find out more about how you can prevent your PlayStation 5 or PlayStation 5 Digital Edition system from overheating, you can take a look at this article.

9. Another potential fix that you can try is to delete the game and then re-install it again.

To delete, hover over the WWE 2K22 game icon on the home screen and then press the Options button on your controller. Next, you need to select Delete and then OK.

After deleting the game, you can re-insert the disc to re-install it again if you have a physical copy. If you have a digital copy, you can re-download the game from the Game Library menu.

10. You may also want to try deleting your save file.

Before doing so, however, you should upload the saved data to the cloud, which requires a PlayStation Plus subscription, so that you can download it again in case deleting the save file doesn’t stop the crashing and you don’t want to lose your progress in WWE 2K22.

11. A system software update usually contains stability improvements for your system, which may help resolve the crashing issues with this wrestling game.

To update the firmware, you can take the following steps:

  • Turn on your PlayStation 5 or PlayStation 5 Digital Edition and make sure it is connected to the Internet.
  • If you don’t get a notification about a new system software update, you can select the gear icon from the home menu to go to Settings.
  • In Settings, select System.
  • In the System menu, first select System Software on the left column and then System Software Update and Settings on the right side.
  • Next, you need to select Update System Software if you see that a new firmware is available.
  • Finally, choose the Update Using the Internet option.

12. If none of the potential solutions help fix the WWE 2K22 crashing issues, then there is not much else you can do other than to wait until a new patch is available that will hopefully make the game more stable on the PlayStation 5 and PlayStation 5 Digital Edition.

To download and install a new patch, you can do the following:

  • If you haven’t done so already, turn on your console and make sure it is connected online.
  • If you don’t get a notification about a new patch being automatically downloaded for the game, then you need to hover over to the icon for WWE 2K22 from the home menu on your system.
  • With WWE 2K22 highlighted, press the Options button on your DualSense.
  • In the pop-up menu, select Check for Update.

How to use internet tethering with the Samsung Galaxy Tab S8, S8+ and S8 Ultra

The Samsung Galaxy Tab S8, Samsung Galaxy Tab S8+ and Samsung Galaxy Tab S8 Ultra can be used as a tether to connect another device to the internet. To find out how to do so with this tablet series, you can take a look at this tutorial at Seeking Tech.

What types of tethering do the Galaxy Tab S8, S8+ and S8 Ultra support?

The Galaxy Tab S8, Galaxy Tab S8 Plus and Galaxy Tab S8 Ultra will support the following tethering types:

The Bluetooth Tethering type will connect the other device to your tablet via Bluetooth in order to gain internet access.

With the USB Tethering type, the other device will connect to your tablet via the USB connection in order to gain internet access. The S8, S8 Plus and S8 Ultra all come with an USB Type-C to USB Type-C cable.

If the other device only has a USB Type-A port, then you will need to get a USB Type-A to USB Type-C cable. If you are looking for a specific recommendation, then we suggest checking out the Anker USB Type A to USB Type C Cable, which you can find on Amazon with this link. (#CommissionsEarned)

If you use Ethernet Tethering type, then the other device will connect to your tablet via the Ethernet cable. For this connection to work, you will need a USB Type-C to Ethernet Adapter. If you are looking for one, then we recommend picking up the Anker USB Type-C to Ethernet Adapter, which is available on Amazon via this link. (#CommissionsEarned)

How to use Samsung Galaxy Tab S8, S8+ and S8 Ultra for internet tethering

In order to use your Samsung Galaxy Tab S8, Samsung Galaxy Tab S8+ or Samsung Galaxy Tab S8 Ultra as an internet tether, you need to take the following steps:

1. To begin, make sure that you connect the other device to your S8, S8 Plus or S8 Ultra tablet.

If you are using Bluetooth Tethering, then you need to connect the other device to your tablet over the Bluetooth connection. If you are experiencing issues trying to do so, then you can take a look at this troubleshooting guide.

If you are using USB Tethering, then you need to connect the other device to your Samsung tablet via a compatible USB cable.

If you are using Ethernet Tethering type, then you need to plug the USB Type-C end of the USB Type-C to Ethernet Adapter to your Samsung tablet. Next, you need to use the Ethernet cable to connect the Ethernet port of the adapter to the Ethernet port of the other device.

2. Once the tablet and the other device has been connected, you then need to open the Settings App on your Galaxy Tab S8, Galaxy Tab S8 Plus or Galaxy Tab S8 Ultra.

3. Inside of Settings, you need to go to Connections.

4. After getting to the Connections menu, you then need to head to Mobile Hotspot and Tethering.

5. In the Mobile Hotspot and Tethering, you need to select the correct connection type as you can choose between Bluetooth Tethering, USB Tethering or Ethernet Tethering.

Sony A80K, A90K, A95K, X80K, X85K, X90K, X95K and Z9K LED light indicator guide

The A80K, A90K, A95K, X80K, X85K, X90K, X95K and Z9K are part of Sony’s 2022 television lineup. These TVs feature a LED indicator at the bottom that will display the status of the device.

You can take a look at this guide from Seeking Tech to see what the various LED light and blinking patterns represent.

Blinking White Light

If the LED indicator of your Sony A80K, A90K, A95K, X80K, X85K, X90K, X95K or Z9K is blinking a white light, then it indicates that a firmware update is currently in progress.

If the light is only blinking when you are using the television remote, then this is perfectly normal as it means that the TV is receiving the signal from the remote.

Solid White Light

If your 2022 Sony TV is showing a solid white light, then it indicates that the Picture Off mode has been enabled.

If you can’t disable the Picture Off mode with your remote, then you need to unplug the television set from the power outlet and then wait 30 seconds. You can then plug the TV back in and turn it back on to see if the screen is showing a picture.

Blinking Cyan Light

If your A80K, A90K, A95K, X80K, X85K, X90K, X95K or Z9K is blinking a cyan color, then it may indicate that it is connected to a smartphone, tablet or mobile device.

Alternatively, this cyan light may mean that your television set has been set to Demo Mode.

Solid Amber Light

If you are seeing your Sony TV displaying a solid amber light, then it indicates that a timer has been set. This could be related to the On Timer, Sleep Timer, Reminder Timer and/or REC Timer that was previously set up.

Solid Pink Light

If the LED indicator displays a solid pink light, then it means that either a recording has started or the content being displayed on screen is currently paused.

Solid Green Light

If you are getting a solid green light from your A80K, A90K, A95K, X80K, X85K, X90K, X95K or Z9K, then it indicates the built-in camera and/or built-in microphone are currently enabled.

If you are seeing a solid green light with no picture, then you need to unplug the TV from the power outlet and wait 30 seconds. After waiting, plug the television back into the power outlet and then turn it back on to see if you can get a picture to appear on the screen.

Solid Yellow Light

If your Sony TV is displaying a yellow light, then it means that the built-in microphone is enabled while the television screen is set to Standby Mode.

Blinking Red Light

If the A80K, A90K, A95K, X80K, X85K, X90K, X95K or Z9K is blinking red, then the television set is experiencing some issues.

To potentially fix the blinking red light problem, you can try doing the following:

  • Turn off your TV and turn it back on again using the remote.
  • Turn off your TV and turn it back on again using the power button located on the TV.
  • Unplug the power cord from the power outlet, wait 30 seconds and then plug it back in again. Afterwards, turn on your TV.
  • Turn off your TV and then disconnect any USB cable, USB device, HDMI cable as well as other cables and/or devices you have attached. Afterwards, turn the television back on again.

If you are still seeing a blinking red light after taking all of the aforementioned recommended actions, then you may have to contact Sony as you may need to send your TV set in for repair due to a hardware issue.

How to insert, format and remove memory cards for Panasonic LUMIX GH6

The LUMIX GH6 is a new flagship mirrorless camera released by Panasonic.

You can check out this guide at Seeking Tech to see how you can insert, format and remove compatible memory cards for this device.

What memory cards are compatible with the Panasonic LUMIX GH6?

When it comes to memory cards, the Panasonic LUMIX GH6 comes with a double card slot.

One of the slots support the CFexpress Type B format from 64 GB to 512 GB while the other slot support the microSD UHS-II format. For the microSD card, the U3 speed rating, as well as a video speed rating of at least V30, are recommended by Panasonic if you want the best performance. The maximum supported capacity for microSD cards are 256 GB.

If you are looking for a specific microSD card recommendation, then we suggest picking up the Sony TOUGH-G microSDXC UHS-II Card as it features the U3 and V90 speed ratings. It also comes with a read speed of up to 300 MB per second along with a write speed of up to 299 MB per second.

If you are interested, you can purchase our recommended microSD card on Amazon with the following link:

If you are looking for a compatible CFexpress Type B card, then we recommend picking up the Sony CFexpress Tough Memory Card. This memory card has a reading speed of up to 1,700 MB per second and a writing speed of up to 1,480 MB per second.

If you are interested, you can find the recommended CFexpress Type B card on Amazon via the following link:

How to insert a memory card into the Panasonic LUMIX GH6

In order to insert a memory card into the Panasonic LUMIX GH6, you need to take the following steps:

1. Open the card door located on the side of the camera.

2. You should see two slots as the #1 slot is made for CFexpress Type B while the #2 slot is made for microSD.

3. Insert your memory card into the correct slot and then push down. If done correctly, you should hear a click, which indicates that the card is securely inserted into the slot.

4. Close the card door.

How to format a memory card for the Panasonic LUMIX GH6

In order to format your CFexpress Type B or microSD card for the LUMIX GH6, you need to take the following steps:

1. Before you begin, make sure you transfer any important files off of the CFexpress Type B or microSD card as the formatting process will delete all previous data stored on the memory card.

2. Next, insert the card into the LUMIX GH6 camera if you haven’t done so already.

3. Press the Menu button on the camera.

4. Next, go to Setup.

5. You then need to select Card/File.

6. Finally select Card Format.

After formatting your memory card, you should be able to start using it to store videos and photos.

How to safely remove memory card from Panasonic LUMIX GH6

In order to safely remove a memory card from the Panasonic LUMIX GH6, you can take the following steps:

1. Open the card door on your camera.

2. Check to see if the light indicator next to the memory card slot of your CFexpress Type B or microSD card is turned on.

If the light indicator is turned on, then it indicates that the memory card is currently being accessed. In this case, we recommend waiting until the light turns off before continuing; otherwise, you will risk damaging the memory card and camera.

3. Once you no longer see the light next to the memory card slot turned on, we recommend waiting for several minutes if you were using the camera beforehand. This is because the memory card may still be hot.

Fortunately, the LUMIX GH6 will display a high temperature caution message on its screen. Once this message disappears, you should be able to safely proceed without causing any potential injury.

4. To remove the memory card, press down on it until you hear a click.

5. Let go once you hear a click and the memory card should pop out of the memory card slot.

6. Slide the card out to remove your CFexpress Type B or microSD card from the camera.

7. Close the card door after you remove the memory card.

How to prevent Samsung Galaxy Tab S8, S8+ and S8 Ultra burn-in issues

The Samsung Galaxy Tab S8 features a 11″ TFT LCD screen. The Plus version of the S8 comes with a 12.4″ Super AMOLED screen while the Ultra version includes a bugger 14.6″ Super AMOLED screen. If you aren’t careful with how you use these tablets, then these screens may be susceptible to afterimages.

To see how you can prevent burn-in issues with the Galaxy Tab S8 series, you can take a look at this guide from Seeking Tech.

1. To start off, we recommend lowering the brightness level of the screen as higher brightness will make the screen of your tablet more vulnerable to getting ghosting images.

To find out how you can change the screen brightness, as well as use the Adaptive Brightness (which will automatically adjust the screen depending on the ambient lighting conditions), you can check out this guide.

2. If you haven’t done so already, we also recommend setting up the Screen Timeout feature.

In order to do so, you need to take the following steps:

  • Open the Settings App on your Samsung Galaxy Tab S8, Samsung Galaxy Tab S8+ or Samsung Galaxy Tab S8 Ultra.
  • On the front page of the Settings App of the tablet, head over to display.
  • You then need to select the Screen Timeout option.
  • Set a time limit in terms of when the screen will automatically turn itself off due to inactivity.

3. There are also a few precautions that you can take when it comes to using your Samsung tablet in order to prevent images from being burned into the screen of your tablet.

Keep in mind that screens are more susceptible to static images. Therefore, we recommend that you take frequent breaks if you are watching a video or using an app that has permanent black border, logo and/or other types of static graphics.

You should also take breaks when playing a videogame or using an app that contain static images.

When taking a break, we recommend turning the screen of your Galaxy Tab S8, Galaxy Tab S8+ or Galaxy Tab S8 Ultra off for a few minutes. Alternatively, you can also make you screen display something completely different for a few minutes so that the pixels won’t get burned in.

How to Samsung Galaxy Tab S8, S8+ and S8 Ultra burn-in issues

If you are seeing some afterimages on the screen of your S8, S8 Plus or S8 Ultra, the we recommend that you immediate stop your screen from displaying the same graphic that caused the issue in the first place.

If the afterimage is temporary, then it should eventually go away on its own as long as the screen is displaying something else.

If the ghost image managed to stay on the screen of your Samsung Galaxy Tab S8, Samsung Galaxy Tab S8+ or Samsung Galaxy Tab S8 Ultra after a few days, then the burn-in damage may be permanent. In this case, you most likely need to get new tablet.