How to download music, video, VR and other apps on PS5

The PlayStation 5, as well as the PlayStation 5 Digital Edition, are multimedia gaming systems that support a multitude of music, video, VR and other applications.

You can follow this guide at Seeking Tech to find out how to download, install, launch, exit and delete media apps on the PS5.

How to access media apps on PS5

To access the media apps on your PlayStation 5, you need to take the following step:

In the home screen main menu, navigate up and then select “Media.” Alternatively, you can simply press the R1 button on your DualSense.

How to download and install media apps on PS5

To download and install media apps on your PlayStation 5, you can do the following:

1. Head to “Media” from the home screen.

2. In the “Media” section of the home screen, navigate to the left and then select the “All Apps” option.

3. In this section, you will be presented with the following applications that are currently compatible with the PlayStation 5:

Video and Music Apps:

  • Amazon Prime Video
  • Apple TV
  • CBS News
  • Crunchyroll
  • DAZN
  • Disney+
  • ESPN
  • Funimation
  • HBO Max
  • Hulu
  • My Videos (Movies and Shows Purchased from PlayStation Store)
  • Netflix
  • NFL Sunday Ticket
  • NHL
  • PeacockTV
  • Plex
  • Pluto TC
  • Spotify
  • Tubi
  • Twitch
  • Vudu Movies and TV
  • WWE Network
  • Youtube

VR and Experienxe Apps:

  • In the Cloud: VR Afterlife
  • Inception VR
  • Joshua Bell VR Experience
  • Rad TV

4. Select the app you want to install on your PS5.

5. In the next screen, select the “Download” option.

5. Wait for the app download to complete and the PS5 will automatically install the app on the system.

6. Once the installation is complete, you will get a notification pop-up. If you press the PS button when the notification appears on the screen, you will go right into the media app.

How to launch media apps on PS5

To launch a media app on the PlayStation 5 normally after the initial installation, you need to take the following steps:

1. Head to “Media” from the home screen menu.

2. Your App should appear on the horizontal listing. Select that app in order to launch it.

3. If you don’t see your app, select the “App Library” option to see if it is listed there.

4. If you still can’t find your app, you can select the “All Apps” option from the “Media” section.

How to manually update media apps on PS5

To manually update a media app on the PlayStation 5, you can do the following:

1. Go to “Media” from the home screen.

2. Highlight the app you want to update and press the Options button on your DualSesne controller. This button has three horizontal lines on top (it is directly to the left of the triangle button).

3. If done correctly, a pop-up menu should appear. Here, you need to select “Check for Update.”

How to suspend media apps on PS5

In order to suspend a media app on your PlayStation 5, you can take the following steps:

1. While using the app, press and hold the PS button on your DualSense until the home screen shows up (make sure you hold the button down or you would bring up the quick menu instead).

2. If done correctly, the media app will be suspended, which means that it be in the same state as where you left off if you decide to launch the app again as long as you don’t close it.

How to manually close media apps on PS5

The following actions will cause a media app to close on the PS5:

  • Turning off the PS5.
  • Resetting the PS5.
  • Launching a videogame.
  • Launching another media app.

To manually close a media app on PlayStation 5, you need to do the following:

1. Return to the “Media” section of the home screen.

2. Highlight the app you want to close and then press the Options button on your DualSense.

3. In the new pop-up menu, select the “Close App” option.

How to delete media apps on PS5

To delete a media app on the PlayStation 5, you have to take the following steps:

1. Go to the “Media” section of the home screen.

2. Highlight the app you want to delete and then press the Options button on your DualSense controller.

3. In the pop-up menu, select the “Delete” option.

4. In the next screen, select “OK” to confirm the action.

How to change name, online ID, profile picture, avatar and more on PS5

With the PlayStation 5 and PlayStation 5 Digital Edition, changing your user profile settings can be a bit confusing.

If you are having a hard time making edits to your PlayStation Network profile, then you can follow this Seeking Tech guide.

How to edit your user profile on PS5

To edit your profile on the PlayStation 5, you can take the following steps.

1. From the Home Screen main menu, go to your profile picture, which you can find on the upper right corner of the screen.

2. A pop-up menu should appear when you select your picture. Here, you need to select the “Profile” option.

3. In the new “Profile” menu, navigate to the left until you see the “Edit Profile” option, which as a pencil symbol attached to it.

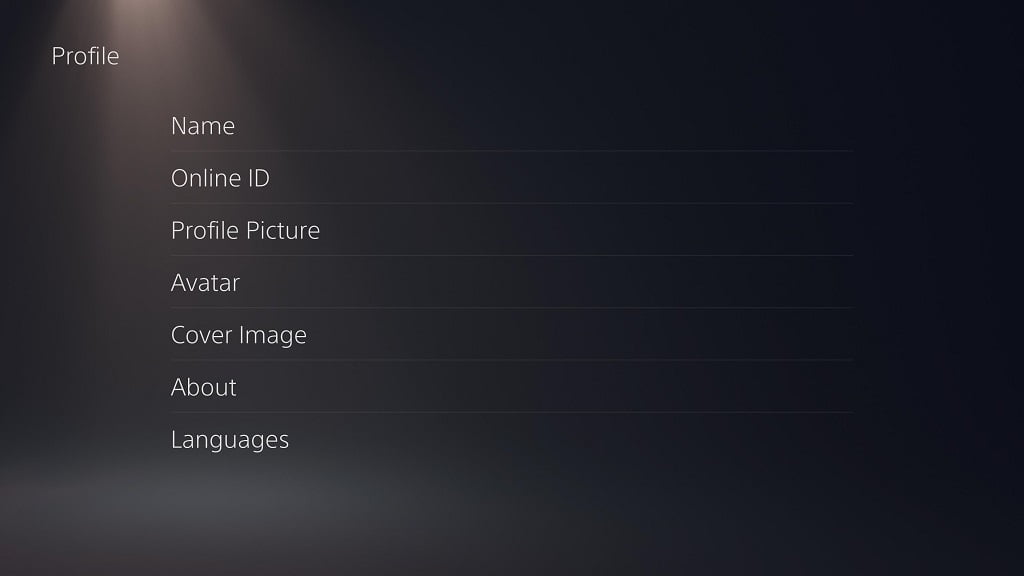
4. In the next screen, you will be given the option to change the following settings on your PSN profile:

  • Name
  • Online ID
  • Profile Picture
  • Avatar
  • Cover Image
  • About
  • Languages

How to change your name on the PS5

In order to change your profile on the PlayStation 5, you need to take the following steps:

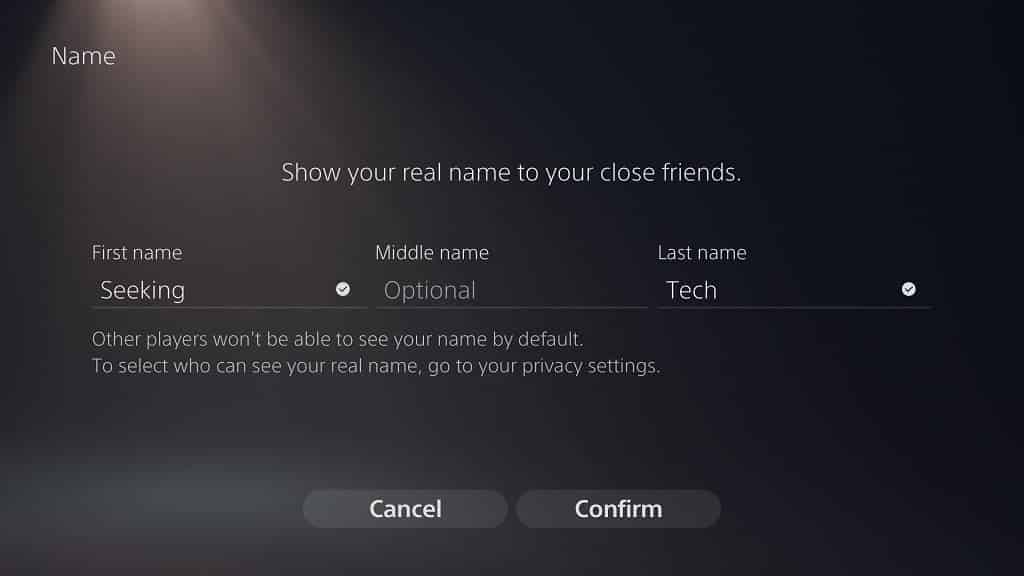
1. In the aforementioned “Profile” menu, select the “Name” option.

2. In the next screen, you will be able to change your first name, middle name and last name.

3. Selecting either of the three will bring up an on-screen keyboard for input. Once you are done, press the “Done” key on the keyboard or use the R2 button on your DualSense.

4. Once you are satisfied with your name change, select the “Confirm” option.

How to change your PSN ID on PS5

To change your PSN ID on the PS5, you have to take the following steps:

1. In the “Profile” menu, select the “Online ID” option.

2. The next two screens will explain the warnings about changing your PSN name and the negative effects it will have on games from the older PS3, PS4, PSP and PS Vita systems. It will also note that the first name change will be free while subsequent changes will require a charge.

3. In the next screen, you have to re-enter your PSN password.

4. In the final screen, you will be able to type out your new PSN ID. In the same screen, you will see whether or not the name change will be charged. You will also see suggested ID names.

5. Once you are satisfied with your new ID, select the “Confirm” option on the bottom right side of the screen to complete the name change.

How to change your PSN profile picture on PS5

You can take the following steps if you want to change your profile picture on the PS5:

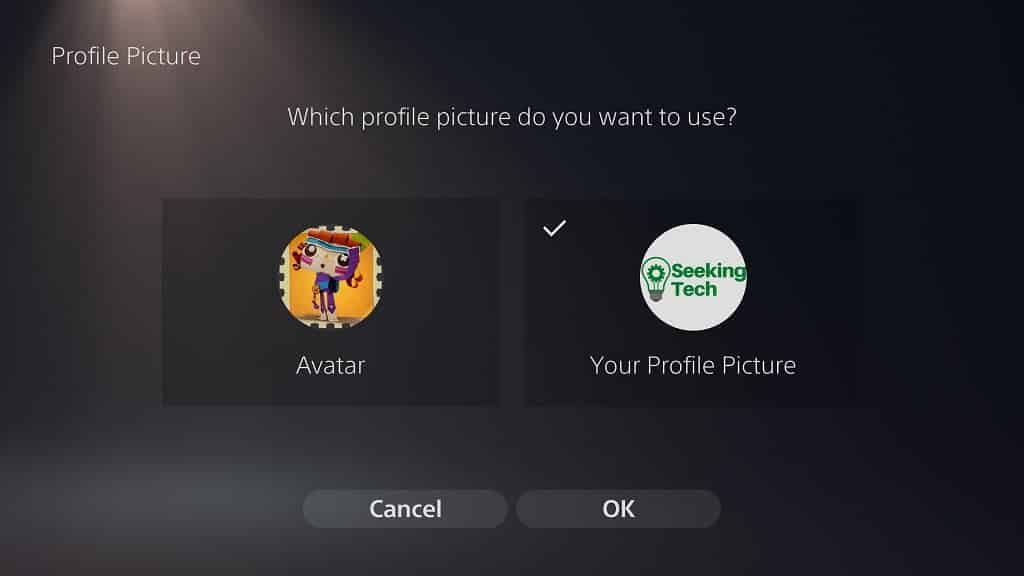
1. In the in the “Profile” menu, select the “Profile Picture” option.

2. In the new “Profile Picture” menu, you can change the image to either your avatar or your profile picture.

Unfortunately, you can’ directly change your profile picture on the PS5. Instead, you have to use the My PlayStation website or the PlayStation App.

How to change your PSN profile picture on PS5 using the My PlayStation website

To change your PS5 profile pic on the My PlayStation website, you need to do the following:

1. Sign in to My PlayStation with your PSN account.

2. From your profile page, select the “Edit Profile” option. This will bring you to the “Profile” section of the Sony Entertainment Network website.

3. Select the “Edit” option to the right of “Profile Picture.”

4. In the pop-up menu, select “Change Picture.”

5. Select the image file you want to upload.

6. In the next screen, you can also adjust the position and size of the uploaded picture.

7. In the final screen, select “Yes” to confirm the change.

How to change your PSN profile picture on PS5 using the PlayStation App

To change your PSN profile pic on the PlayStation App, you have to take the following steps:

1. Sign in to PSN account on the PlayStation App.

2. In the home screen, tap on your profile picture.

3. In your profile screen, tap the “Edit Profile” option.

4. In the new screen, select the “Edit” option to the right of “Profile Picture.”

5. In the next screen, select “Change Picture.”

6. Choose the image file on your phone you want to upload.

7. In the next screen, you can adjust the file and size before saving.

8. In the final screen, select the “Yes” option to confirm the change.

How to change your PSN avatar on PS5

To change your PSN avatar, you have to take the following steps:

1. In the “Profile” menu, select the “Avatar” option.

2. In the “Avatar” menu, you can pick your new avatar. You can press the R1 and L1 buttons on your DualSense to switch between different categories.

How to change the profile background image on PS5

To change the background image of your profile, you need to do the following:

1. In the “Profile” menu, select the “Cover Image” option.

2. In the new screen, select the “Select Image” option.

3. Find the image you want to be put in the background and then confirm your selection with the “Select” option.

4. In the next screen, you can change the size and position of the image. Once you are satisfied, select the “Save” option.

5. In the final screen, wait until the new background image appears and then select the “Done” option to confirm the change.

How to change your personal description on PS5

To add or edit your personal description for your profile on the PlayStation 5, you have to take the following steps:

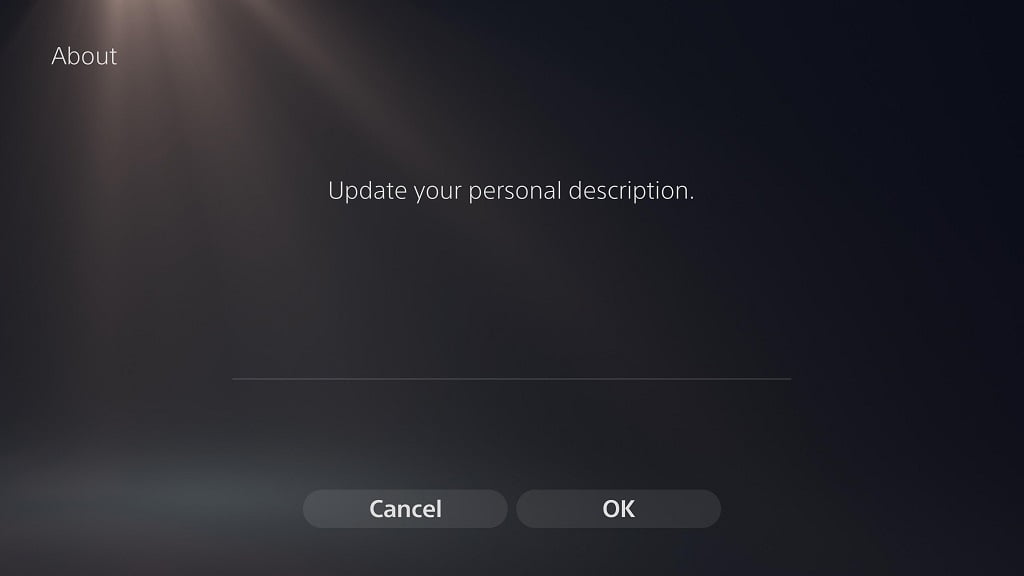
1. In the “Profile” menu, select the “About” option.

2. In the “About” menu, select the empty space in the middle. This will bring up an on-screen keyboard you can use to type your description. Once you are satisfied, you can either use the “Done” key on the keyboard or R2 button on your DualSense controller.

3. Afterwards, select the “OK” option to confirm.

How to change your profile language settings on PS5

To change your profile languages, you need to do the following:

1. In the “Profile” menu, select the “Languages” option.

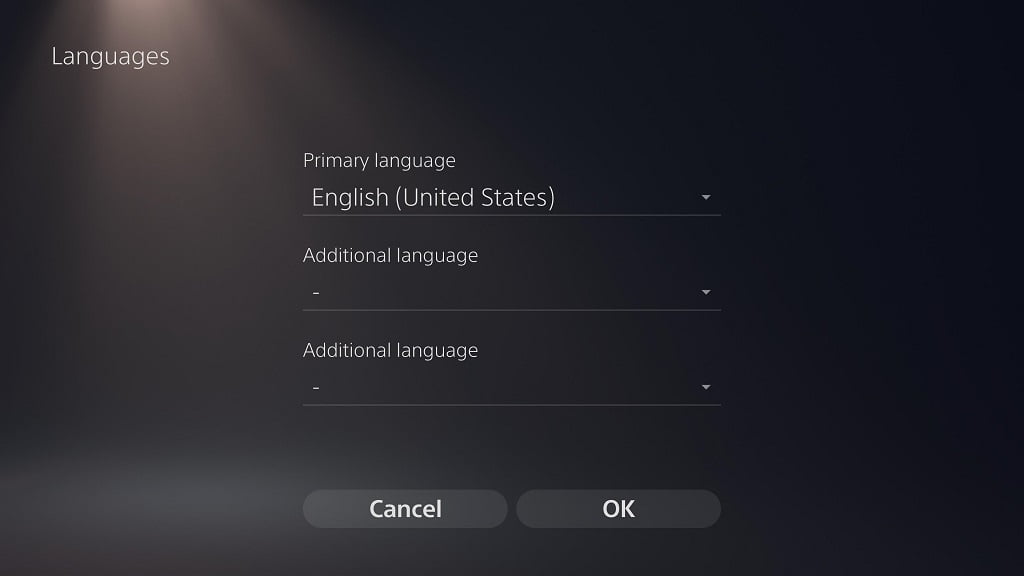
2. In the new “Languages,” you will be able to select your primary language as well as up to two additional languages for your profile via drop-down menus.

3. Once you are satisfied with your selections, select the “OK” option for confirmation.

How to fix issues with DualSense not updating to latest firmware

The new DualSense can be updated through software. If you are having problems trying to update to the latest firmware for the PlayStation 5 controller, then you can follow this tutorial at Seeking Tech.

How to view DualSense Firmware Version

Before we begin, you should make sure that the firmware for your DualSense is not outdated.

To check what software version your PS5 controller is currently equipped with, you can take the following steps:

1. From the Home Screen system menu, go to “Setting,” which you can find on the upper right corner.

2. In the new “Settings” menu, go to “Accessories.”

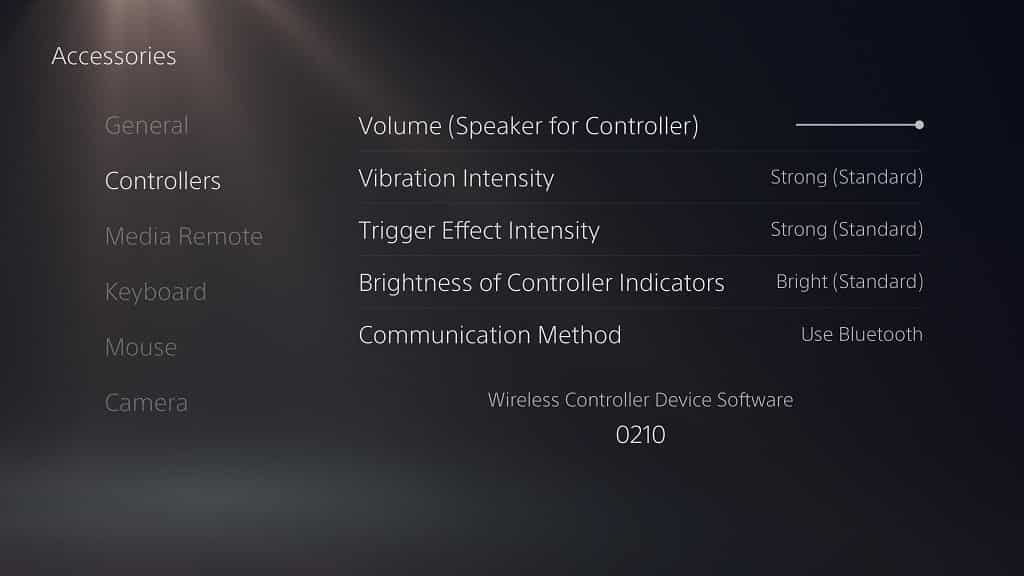
3. In the new “Accessories” menu, select “Controllers.”

4. On the right side, you will see a number under “Wireless Controller Device Software.” This represents the current software installed on the DualSense.

If the number you see did not match the latest firmware available, then you need to update your controller.

If you aren’t getting an automatic prompt to update the software of your DualSense, you can take the following steps.

How to disconnect PS5 from the Internet

First off, we recommend disabling your Internet connection on the PlayStation 5 or PlayStation 5 Digital Edition.

You can do so with the following steps:

1. Head to “Settings” from the Home Screen.

2. In the “Settings” menu, go to “Network.”

3. In the new “Network” menu, select “Settings” on the left and then “Connect to the Internet” on the right side. If the circle to the right of “Connect to the Internet” is black, then the connection is disabled.

How to manually change the date

The next step is to manually change the date, which you can do with the following steps:

1. Go to “Settings” from the Home Screen system menu.

2. In the “Settings” menu, head to “System.”

3. In the “System” menu, select “Date and Time” on the left side and then “Set Date and Time” on the right side of the same screen.

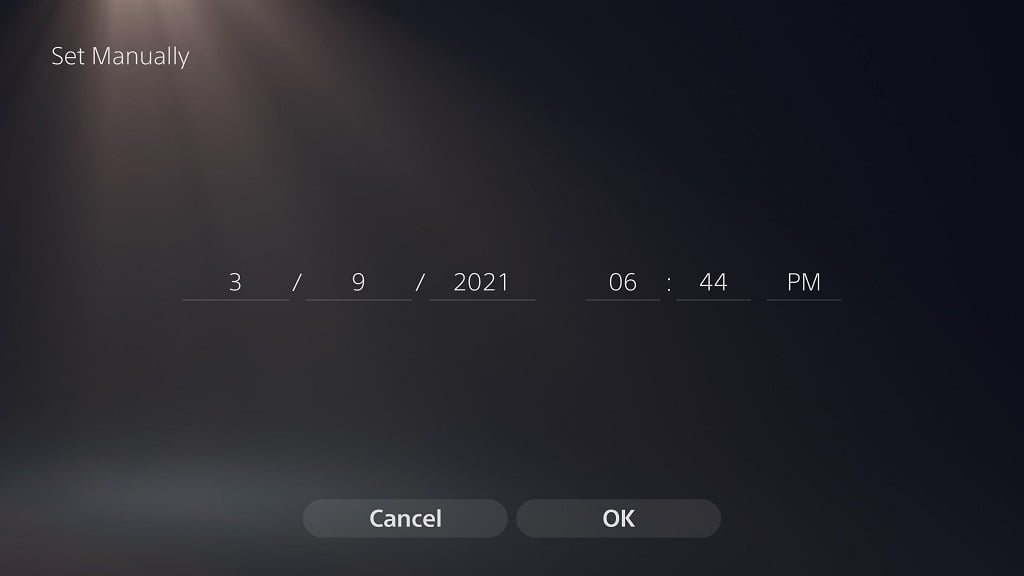
4. In the “Set Date and Time” menu, select “Set Manually.”

5. In the “Set Manually” menu, change the date to one day ahead of your current date.

How to un-pair Dualsense to PS5

The next step is to un-pair your DualSense to your PlayStation 5.

In order to do so, you need to take the following steps:

1. Head back to the “Settings.”

2. Under “Settings,” select “Accessories.”

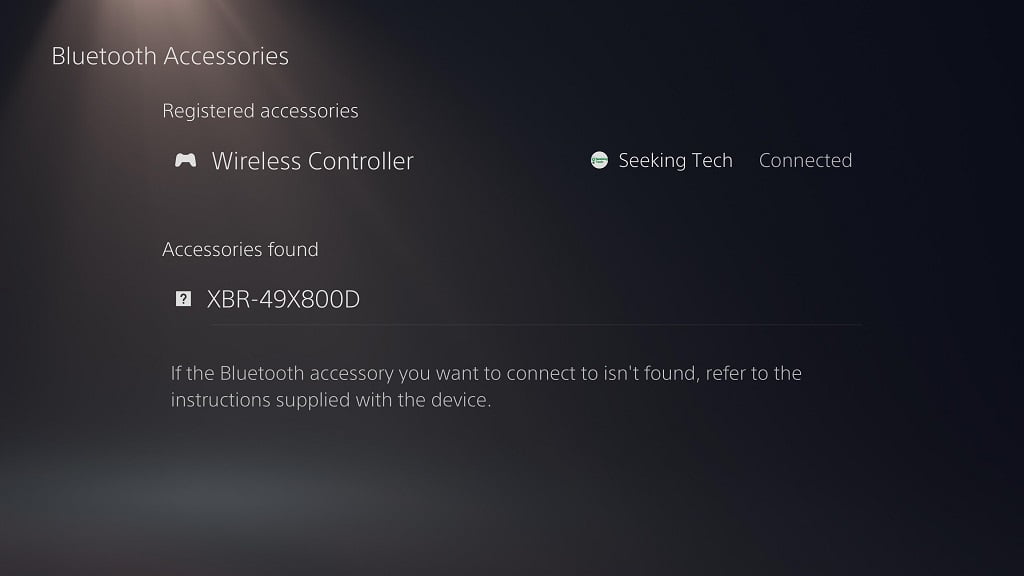
3. In the new “Accessories” menu, select “General” on the left side and then “Bluetooth Accessories” on the right side of the same screen.

4. In the “Bluetooth Accessories” menu, select “Wireless Controller.” Make sure that this is the same controller you want to update.

5. In the new pop-up menu, select “Disconnect.”

How to manually turn off the PS5

After disconnecting your DualSense, you should then manually turn off your PlayStation 5 console.

To shut down the PS5 without a controller, you need to take the following step:

Press and hold the power button on the console until you hear a second beep. On the TV, you will see a message that says that the console is preparing to turn off.

If you have a regular PS5 with a disc drive, this button is the bottom-most button if you decided to put your console on a vertical position. If you decided to lay your console down horizontally, then the button is the right-most button.

If you have a PlayStation 5 Digital Edition, then there is only one button on the system.

How to re-register Dualsense controller to PS5

The final step is to re-register your DualSesne to your PlayStation 5, which you can do with the following steps:

1. With your console turned off, connect your DualSense to your PlayStation 5 using an USB cable. You can use the default cable that came with your PS5. If you don’t have a cable, then you check out this guide for an alternative.

2. Turn on your PlayStation 5 by pressing the power button on the console.

3. Press the PS button located on your DualSense to paired the controller to the system.

4. From the Home Screen main menu, go to “Settings” and then “Network.”

5. In the “Network” menu, go to “Settings” from the left side and then select “Connect to the Internet” on the right side of the same screen. If the circle to the right of “Connect to the Internet” is white, then that means that you have reconnected your PS5 to the Internet.

6. Once your console has been connected to the internet, and you controller have been re-registered to your PS5, you should get a prompt to update to the latest software version for the DualSense.

7. Follow the instructions on screen to get the firmware update for the controller.

8. Afterwards, make sure to change back the date and time. You can do so by going to “Settings,” then “System,” then “Set Date and Time.” Here, select “Set Using Internet” and then “Set Now” in the next screen accurately set the date and time.

How to fix issues with muffled, tinny and low-quality headset audio on PS5

When using your headset with the PlayStation 5 (or PlayStation 5 Digital Edition), you may notice that the sound is muffled, tinny and/or generally of lower quality than what you were expecting.

If your headset is not sounding right when playing games on the PS5, you can follow this Seeking Tech guide to find some potential fixes.

Before we being, we recommend taking a look at your headset to see if it is functioning normally. To do so, we suggest testing it on another device, like a computer or a non-PS5 game system.

If your headset is working normally on other devices, then the next step we recommend you take is to see if it can be updated via a firmware. If it is, you can usually find the new software file, as well as instructions to updating, on the official website of the manufacturer of your headset.

You should also make sure that your PlayStation 5 is up-to-date as the latest firmware could fix your headset audio issues. If your console is connected to the Internet, then it will automatically download the newest firmware if there is an update available.

Furthermore, if you are using a wireless headset that connects to your PS5 via an USB transmitter, then we recommend using the USB port in the front as many players are reporting issues with the two back ports.

What are the best compatible PS5 headsets?

Keep in mind that not all headsets are compatible with the PlayStation 5. If you are looking for a new headset, we recommend either the official PULSE 3D Wireless Headset or the SteelSeries Arctis 7P Wireless.

If you are interested, you can purchase either of the two on Amazon with the following links:

To find out more about these two headsets, you can take a look at our compatibility guides for Sony and SteelSeries PS5 headsets.

How to disable 3D audio on PS5

If none of the aforementioned suggestions fix the bad quality headset audio issues, then one of the more common fixes is by disabling 3D audio.

The PlayStation 5 comes with the Tempest Engine to deliver 3D audio. Not all PS5 games support this feature. Not to mention that PS4 backwards compatible games also do not support the Tempest Engine.

Games that do not support PS5’s 3D audio feature may end up sounding distorted. So, if you are experiencing headset issues, you can try disabling 3D audio.

You can do so with the following steps:

1. Turn on your PlayStation 5 and then select a user profile. This will bring you to the Home Screen main menu.

2. In the main menu, head to “Settings,” which you can find on the top right corner of the screen.

3. In the Settings menu, select “Sound.”

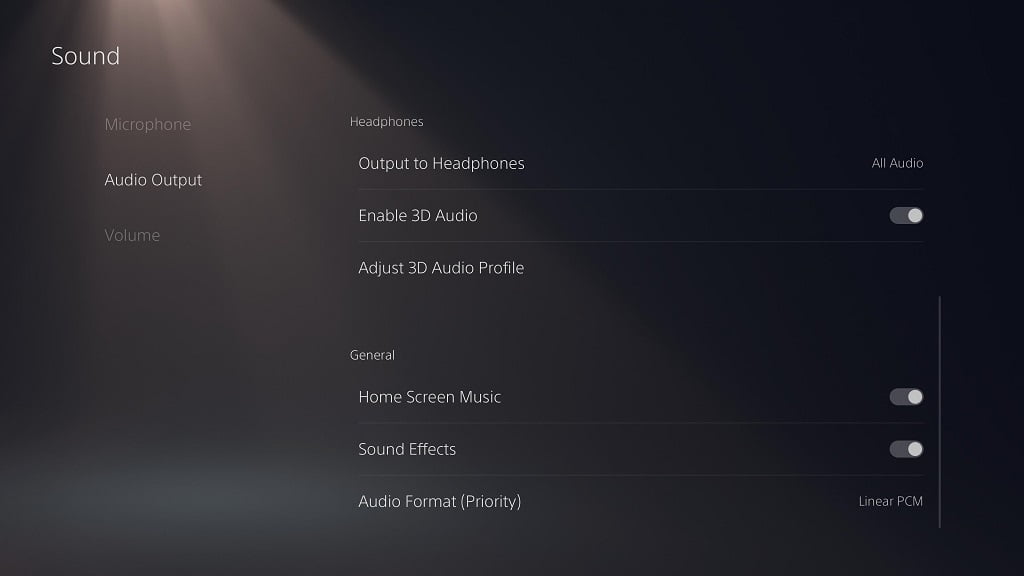
4. In the Sound menu, select “Audio Output” on the left side.

5. On the right side of the same screen, scroll down until you see the “Enable 3D Audio” option. If it is greyed out, you need to make sure your headset is plugged in.

6. If the to the right of the “Enable 3D Audio” option is white, it means that the feature is currently enabled. Select “Enable 3D Audio” to turn it off.

How to adjust 3D audio profile on PS5

Another potential fix for the muffled, tinny and/or low-quality headset sound is by adjusting the 3D audio profile.

You can do so with the following steps:

1. Return to the aforementioned Sound menu in Settings.

2. In the Sound menu, select “Audio Output” on the left side and the “Adjust 3D Audio Profile” option under Headphones on the right side of the same screen. If this is greyed out, make sure your headset is plugged in and “Enable 3D Audio” is enabled.

3. In the Adjust 3D Audio Profile menu, follow the instructions on the screen. Basically, you want the water line to be as close to your ear level as possible.

How to change the audio format of PS5

If you still getting bad audio from your headset, you can try changing the audio format on the PlayStation 5.

To do so, you can take the following steps:

1. Head back to the Sound menu in Settings and then select “Audio Output” on the left side of the screen.

2. Scroll all the way down and select “Audio Format (Priority)” under General.

2. You have three options as you can choose between “Linear PCM,” “Bitstream (Dolby)” and “Bitstream DTS.” Test out all three to see if changing the audio format will resolve the distorted sound.

How to rebuild database on PS5

If none of the above fixes worked, then you can try rebuilding the database on your PlayStation 5.

To do so, you need to take the following steps:

1. Turn your PS5 completely off.

2. Locate the power button on your PlayStation 5. Press down and hold. You should hear a beep immediately. After seven seconds, you should hear a second beep. At this point, you can let go of the power button.

3. If done correctly, the PS5 will boot up in Safe mode. Follow the onscreen instructions to connect your DualSense controller to go to the menu.

4. In the menu, select “Rebuild Data” to start the process.

How to make PS4 games look better on PS5

The PlayStation 5 (as well as the PlayStation 5 Digital Edition) can play PlayStation 4 games due to the backwards compatibility feature. When playing PS4 videogames on the PS5, these games could actually end up looking worse when compared to being played on the PlayStation 4 and/or PlayStation 4 Pro.

If you are running into visual issues, then you can check out this guide at Seeking Tech to find out how to make your PS4 games look better on the PS5.

Why PS4 games look worse on PS5

The main reason some PlayStation 4 games look worse when running on the PlayStation 5 is due to how the PS5 handles HDR.

When you enable HDR on the PlayStation 5, the system will use HDR on all contents, even on games that don’t use HDR. As a result, non-HDR (also known as SDR) games will be automatically converted to a HDR image.

Thus, you could end up getting a different image, for better or worse, when playing PS4 games on the PS5 console.

Another potential problem is with backwards compatibility. While a vast majority of games are compatible, you can still run into some issues.

How to check what PS4 games are compatible with PS5

The first step we recommend taking is to see if the PlayStation 4 game you are having issues with may be due to problems related to the PS5 backwards compatibility feature. The easiest way to check is by searching for the game on the Official PlayStation Store Website.

On the bottom of the product page of the game, you will see one of the three messages:

1. “To play this game on PS5, your system may need to be updated to the latest system software. Although this game is playable on PS5, some features available on PS4 may be absent.”

2. “When playing on PS5, this game may exhibit errors or unexpected behavior and some features available on PS4 may be absent. To play this game on PS5, your system may need to be updated to the latest system software.”

3. “Playable on: PS4 only”

The first message means that the PS4 game should be fully backwards compatible with the PS5. The second message means that the PS4 game can be played on the PS5 but with potential issues. The third message means that you can’t play the PS4 game on the PS5 as it won’t boot up at all.

If your game got the second message, then you might not be able to do anything on your end to make your PS4 game look better on the PS5. Instead, you have to wait for either the developer to release a patch for the game and/or for Sony to update its backwards compatibility feature for the PlayStation 5.

If the game is tagged with the first message, then we recommend checking if it supports HDR.

What PS4 games support HDR?

HDR is a relatively new display technology. Thus, a majority of PlayStation 4 games does not support it. To find a list of HDR-compatible PS4 games, you can check out the one compiled by Push Square. If your game is not on the aforementioned list, then you can see if your game supports HDR by looking for a HDR option from the in-game menu.

Disabling Dynamic Tone Mapping

If you have a television set that is capable of Dynamic Tone Mapping, then we recommend turning that setting off as it could lead to inaccurate colors. Instead, we recommend using either HGiG or nothing at all. For more information, you can take a look at HDTVTest’s video on Dynamic Tone Mapping and HGiG.

Turn on HDR In-Game

If the PS4 game you are having trouble with supports HDR, then we recommend checking the in-game menu to see if HDR is enabled. If the HDR option is disabled, then it means that the game is being converted from SDR to HDR by the PlayStation 5. By enabling the HDR option, you should be able to get a more natural HDR image.

How to disable auto-HDR on PS5

If your game does not support HDR, then we recommend disabling HDR on the PlayStation 5 system. As we stated above, the PS5 will convert non-HDR (or SDR) games to HDR, which could make it look worse than the original image.

To disable auto-HDR, you have to disable HDR entirely on the PlayStation 5. To do so, you have to take the following steps:

1. Enter the “Settings” menu from the Home Screen. This is located on the upper right corner of the screen next to the clock and your profile picture.

2. In the “Settings” menu, head to “Screen and Video.”

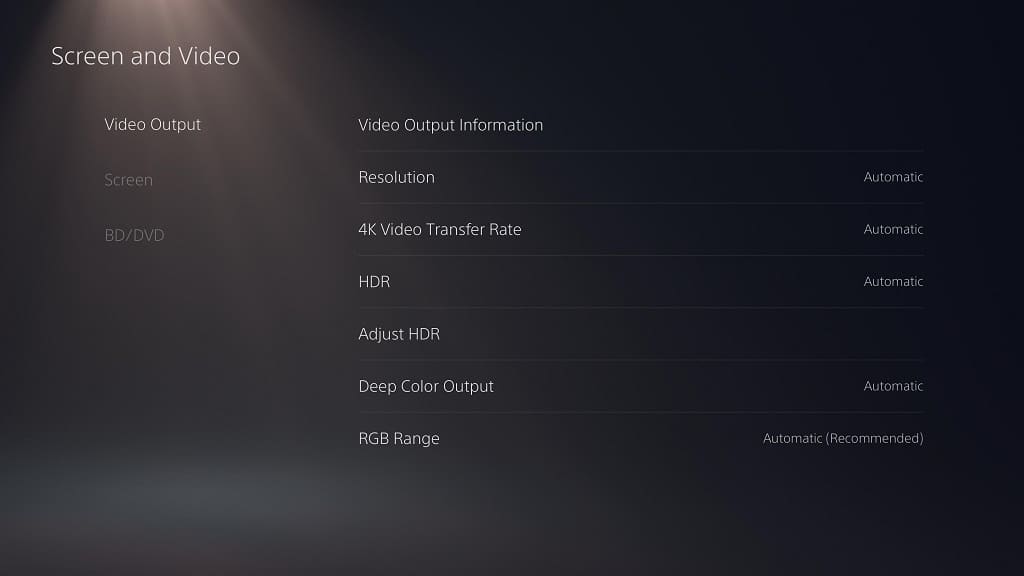
3. In the “Screen and Video” menu, head to “Video Output” on the left tab and then select “HDR” on the right side of the screen.

4. Change “HDR” from “Automatic” to “Off.” Your television will refresh itself to make the change.

5. Keep in mind that this setting will turn off HDR for all contents. If other games and/or media look fine with HDR previously, then we recommend turning it back on after you done playing the PS4 game that is having HDR problems.

If none of the aforementioned suggested solutions fixes work, then we recommend take a look at the following guides to help you calibrate the HDR settings on the PlayStation 5:

How to fix PS5 HDR issues with being too bright or too dark

When playing PlayStation 5 games with HDR, you may notice that the screen can get too bright or too dark. If you are experiencing these brightness issues, then you can follow this guide at Seeking Tech to find some potential fixes.

Is Your TV Good Enough for HDR Gaming?

The first step you should take is to check if your television set is good enough for HDR. We recommend TVs that can reach at least 500 nits (cd/m2) in peak brightness for HDR to really stand out. Ideally, it should be at 600 nits or more.

Anything below 500 nits may not be worth playing games with HDR enabled as your screen will get too dark to properly display the content. To find out how to turn off HDR on the PS5, you can check out the bottom portion of this tutorial.

To check how bright your television set can get, we recommend searching for it on RTINGS as the website tests the brightness levels for a majority of mainstream TVs.

Disabling Dynamic Tone Mapping on Your TV

If your TV is good enough to display HDR at a passable level, then we recommend disabling Dynamic Tone Mapping, or its equivalent, on your TV if it available. This feature adds post-processing to the HDR image, which may lead to inaccurate black and white colors.

If your TV has HGiG, then we recommend turning that on instead. The HGiG mode is made specifically for videogames to provide a consistent HDR image quality across different television models.

How to Match the PS5 and TV RGB Ranges

Having mismatching RGB ranges on your PlayStation 5 and TV could result in the game looking too bright and/or dark due to blown highlights and crushed blacks.

To resolve this issue, the RGB range on your television needs to match the RGB range of your PlayStation 5. On the PS5, you have three options: “Automatic” (which is the default), “Full” and “Limited.”

If your TV RGB is set to limited or its equivalent, then your PS5 should also be set to limited. If your TV RGB is set to full or its equivalent, then your PS5 should be set to full.

The “Automatic” option should, in theory, detect your television’s RGB range and match the setting with your PlayStation 5’s RGB range. However, that doesn’t always happen. So, if you are seeing loss in details due to overly bright and/or dark scenes, then you need to manually adjust the RGB range.

To do so on the PlayStation 5, you need to take the following steps:

1. From the Home Screen main menu, locate and enter “Settings,” which you can find on the upper right corner.

2. In the “Settings” menu, enter “Screen and Video.”

3. In the “Screen and Video” menu, select “Video Output” on the list from the left side of the screen and then “RGB Range” on the right side of the screen.

4. As we stated above, you will get three options: “Automatic,” “Full” and “Limited.” If you are unsured what the RGB range for your television set is, you can try either “Full” or “Limited” and then see how it looks in a game. You can then try the other option if you are still experiencing brightness issues.

How to adjust HDR brightness levels on PS5

If matching the RGB ranges of your television screen to your PlayStation 5 did not resolve the problem, then we recommend adjusting the HDR brightness levels. To do so on the PS5, you can take the following steps:

1. From the “Settings” menu of the system, enter “Screen and Video” and then select “Video Output” on the list from the left side. Afterwards, select “Adjust HDR” on the right side of the same screen.

2. The “Adjust HDR 1/3” screen lets you adjust the maximum luminance of your display. The on-screen message suggests that you should change the brightness until the sun logo inside the box is barely visible. We recommend increasing the brightness to one more level where the logo will first become invisible. Doing so means that you will take full advantage of the highest brightness levels of your television.

3. For the “Adjust HDR 2/3” screen, you should follow the same aforementioned instructions as the first screen. Thus, you should go one level beyond where the logo is barely visible. As we stated above, this setting allows you to use the maximum brightness levels of your TV.

4. The “Adjust HDR 3/3” screen lets you adjust the minimum luminance. If you have an OLED display or a display with local dimming, then we recommend setting this to as low as possible in order to get true blacks. For other television sets, you simply decrease the brightness until the logo first become completely invisible.

5. If you are playing in a brightly lit room, then you might want to increase the brightness of the “Adjust HDR 3/3.” If not, then the screen may become too dark for the ambient lighting.

How to fix PS5 HDR washed-out issues

When playing your PlayStation 5 (or PlayStation 5 Digital Edition) in HDR, you may run into issues with dulled or washed-out colors.

You can follow this Seeking Tech guide to find some potential fixes to these problems.

Optimizing Your TV for PS5 HDR

The first step we recommend taking is to make sure your television set is optimized for using HDR on PlayStation 5.

The firmware of your TV should be up-to-date.

Furthermore, the correct HDR-capable HDMI port must be used when connecting your game system.

You should also make sure that you are playing the PS5 using the game mode settings of your television set.

If your TV have HGiG and Dynamic Tone Mapping modes, we recommend using either HGiG or turning off both options instead of Dynamic Tone Mapping.

There are many other settings that you can use to calibrate your HDR picture.

For now, we recommend leaving the rest of the settings to default and do the calibrating with the PlayStation 5.

How to fix HDMI handshake issues with PS5

If the HDR colors appear fine when turning on your PS5 in one occasion but appeared washed out in another, then the HDR color problems may be related to a HDMI handshake issue between the PlayStation 5 and your TV.

Below are several ways you can reset the handshake problems (and potentially fix the dulled or washed-out HDR):

1. Turn off your TV and turn it back on again.

2. Power off your PS5 and turn it back on again.

3. Disconnect the HDMI cable and reconnect it again.

4. Disable and enable HDR on the PS5. You can do this by going to “Settings” from the Home Screen menu. In “Settings,” select “Screen and Video” and then “Video Output.” Afterwards, select the “HDR” setting and change it to “Off.” Select “HDR” again and change it to “Automatic” in order to complete the reset.

How to fix the dulled/washed-out HDR on PS5

If your HDR problems aren’t related to the HDMI handshake, you can try changing the HDR settings on your PlayStation 5.

Below are a few settings that we recommend changing to get a better HDR picture:

How to change the PS5 RGB Range

Most of the issues relating to incorrect HDR colors on the PlayStation 5 is due to a mismatch of RGB ranges of the game console and your television set.

For now, we recommend leaving the RGB range of your television to its default setting and only changing the RGB range of the PS5.

To do so, you can take the following steps:

1. In the Home Screen menu, go to “Settings.”

2. From the “Settings” menu, head to “Screen and Video.”

3. In the “Screen and Video” menu, select “Video Output” on the left side and then “RGB Range” on the right side.

4. The default option is “Automatic (Recommended).” Select either the “Limited” or “Full” option instead. Afterwards, test the new setting out in a game to see if the HDR colors are still washed out.

5. If you are still experiencing issues, you can try the other option that you didn’t pick in the “RGB Range” settings and test the results.

6. If none of the options work, you can try to change the RGB range of your television set and then retest using with the “Limited” and “Full” options on the PS5.

How to change the PS5 4K Video Transfer Rate

You can also try limiting the transfer rate of your HDMI if you are getting dulled HDR colors.

To do so, you can take the following steps:

1. From the Home Screen menu, go to “Settings” and the “Screen and Video.”

2. From the “Screen and Video” menu, select “Video Output” on the left tab and then “4K Video Transfer Rate.”

3. The default option is “Automatic.” Select either “-1” or “-2” instead and then test out the new setting in a game.

4. If your first choice was ineffective, you can try the other option in “4K Video Transfer Rate.” Afterwards, retest the game to see if you get better contrast.

On a side note, changing the transfer rate will also help with flickering issues. You can find out more with this guide.

How to adjust PS5 HDR

If none of the above potential fixes work, we recommend adjusting the HDR on your PlayStation 5.

You can do so with the following steps:

1. Go to the aforementioned “Screen and Video” menu from “Settings.”

2. In the “Screen and Video” section, select “Video Output” and then “Adjust HDR.”

3. In the three subsequent screens, we recommend following the on-screen instructions to adjust the brightness until the symbol in the box is barely visible. Once you are done adjusting, you can test out the HDR in a game.

4. If you are still having problems, we recommending readjusting the HDR again. Instead of following the on-screen instructions this time, we recommend being a little bit more aggressive. For the first two screens, once you increase the brightness to barely seeing the symbol in the box, we suggest going up one more level in brightness. For the final screen, we suggest going down one more level after you darkened your screen to where the symbol in the box is barely visible. Retest the game to see if you get better results.

How to disable PS5 HDR

If none of the aforementioned potential fixes resolve the dulled/washed HDR colors, then we recommend simply disabling HDR altogether to see if SDR looks better on your television.

You can take the following steps to disable HDR on PlayStation 5:

1. In “Settings,” go back to “Screen and Video” and then select “Video Output” on the left side. Afterwards, select “HDR” on the right side.

2. The default option for the “HDR” setting is “Automatic.” Change this to “Off” to disable the visual feature.

3. The screen will then refresh itself. By disabling HDR, you will also disable Deep Color Output. After all that, test out a PS5 game to see if you prefer the SDR image to the HDR image.

How to clean and disinfect the DualSense controller

If you aren’t careful, your DualSense can end up getting quite dirty.

If you notice the controller looking a little less than pristine, you can follow this Seeking Tech guide to find the best way to clean in.

Why the DaulSense gets dirtied easily

Currently, the default DualSense features a two-tone color scheme that is mostly white.

It is a lot easier to notice any grimes on a controller on a white shell as opposed to a black shell or other darker colored shells.

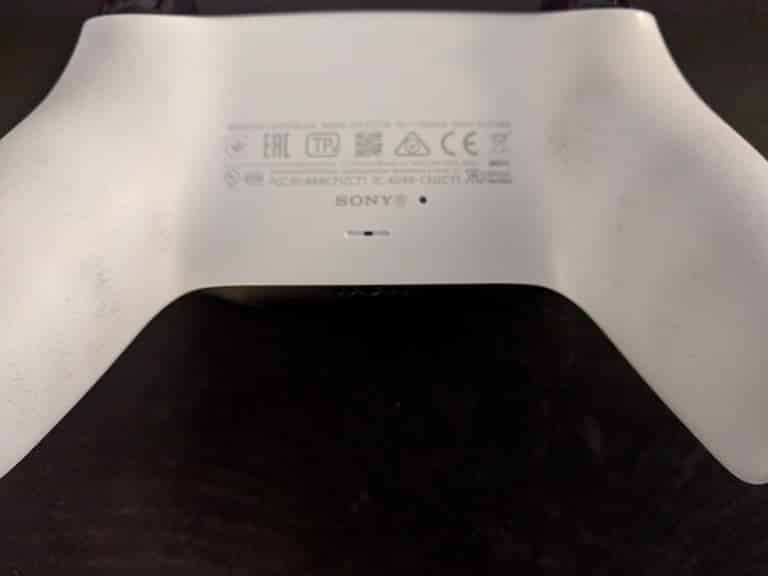
Not to mention that the back grip on the PS5 controller features microscopic circle, cross, square and triangle symbols.

While the coarse textures give you a better grip on the gamepad, it also attracts a lot of dirt, skin, oil and other substances that come from your hand.

You can see what a dirty controller looks like below.

Best cleaning solution for DualSense

The best liquid you can use to clean the DualSense is a highly concentrated isopropyl alcohol.

This solution is designed to dissolve any adhesives, fingerprints, oils, residues and other contaminants on your PlayStation controller.

Not to mention that it will also disinfect bacteria and viruses that may be living on the surface of the gamepad.

Isopropyl alcohol also evaporates very quickly.

Furthermore, it conducts less electricity when compared to pure water. So, you don’t have to worry about potentially damaging the game pad.

The solution is also relatively safe to use as long as you are in a well-ventilated environment with lots of air. With that said, the alcohol may cause skin and eye irritation upon contact.

In terms of concentration, we recommend at least 90% isopropyl alcohol. Although there are less concentrated solutions available, such as the more common 70%, these contain more water that could cause harm to your DualSense if it seeps into its circuitry.

If you don’t have the liquid solution, you can purchase a MG Chemicals 99.9% Isopropyl Alcohol Electronics Cleaner Liquid Bottle on Amazon with this link. (#CommissionsEarned).

Other DualSense cleaning tools

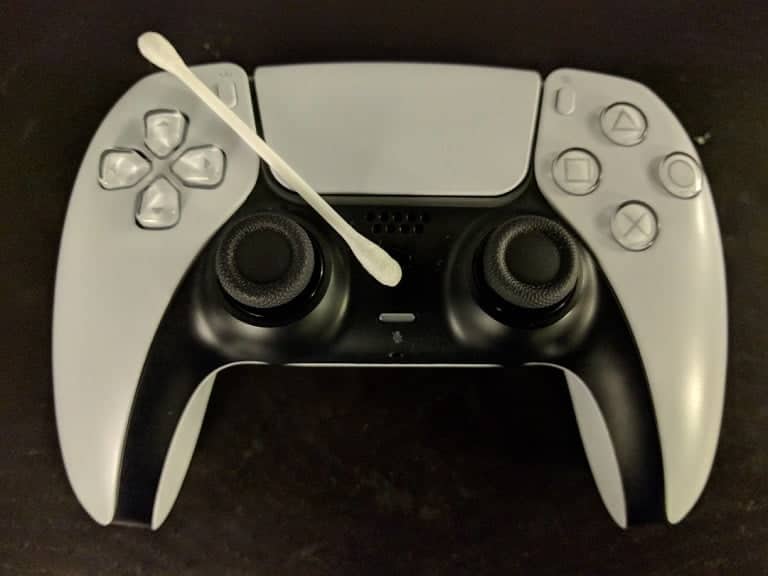
In addition to the isopropyl alcohol, we recommend using microfiber cleaning cloths and cotton swabs (also known as ear swabs and Q-tips) to clean the DualSense. You can also use a new toothbrush or cotton balls.

The swabs are especially useful when cleaning the tight spaces in between the buttons and analog sticks as well as the coarse texture of the back grip.

For the back grips, you may have to use more alcohol and force to clean off the stains.

If you skin gets irritated easily, then you might want to use latex gloves during the cleaning procedure when using the isopropyl alcohol.

Precautions

Before cleaning your DualSense, first make sure that the PS5 gamepad is completely turned off. Furthermore, you should not be recharging the accessory when cleaning it at the same.

You can tell that the controller is completely powered off when there aren’t any lights being displayed.

When cleaning, you should also make sure that you don’t accidentally press the PS button located on the front of the controller as doing will power the controller on.

Last but not least, we recommend not using the controller immediately after cleaning until it completely dries out.

As we stated above, the high concentration isopropyl alcohol dries quickly so you won’t have to wait too long. If you are using a 70% concentrated version, then you should wait a little bit longer as an extra precaution.

How to prevent the DualSense from getting dirty

To prevent your DualSense from getting dirtied in the future, you should make sure that whoever is playing the PlayStation 5 thoroughly wash their hands beforehand. You should also avoid eating with your hands when playing games.

When not in use, you should store the PS5 controller on a clean surface.

With that said, a good cleaning of the DualSense is recommended once in a while as you don’t want any buildup, some of which could be hard to spot if you aren’t looking closely enough, to accumulate.

Not to mention that you will be disinfecting your controller from bacteria and viruses as well.

How to upload and download cloud save files on PS5

The PlayStation 5 and PlayStation 5 Digital Edition both allow you to back up your saved data to the cloud. If you are interested in doing so, then you can follow this guide at Seeking Tech.

PS5 Cloud Storage Requirement

Unlike the PlayStation 4, the only way to back up your save files for PlayStation 5 games is through cloud storage. In order to use cloud storage, you need to be a member of PlayStation Plus.

If you haven’t subscribed already, you can purchase a 1-year subscription to PS+ on Amazon with this link. (#CommissionsEarned).

How to manually upload save files to the cloud on PS5

In order to manually upload save files to the cloud on your PlayStation 5 or PlayStation 5 Digital Edition, you can take the following steps:

1. From the Home Screen main menu, select “Settings.” The option is located on the upper right corner of the screen with the gear symbol.

2. Under the “Settings” menu, select the “Saved Data and Game/App Settings” option.

3. On the left tab in the “Saved Data and Game/App Settings” menu, select either “Saved Data (PS5)” if you are uploading saved data from a PlayStation 5 game or “Saved Data (PS4)” if you are uploading saved data from a PlayStation 4 game. Afterwards, select the “Console Storage.”

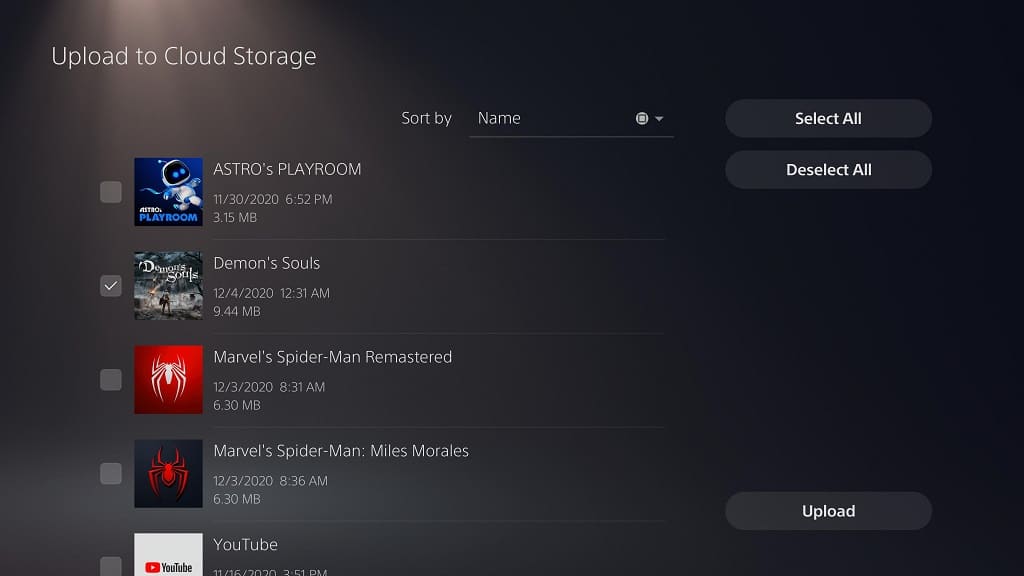
4. In the “Console Storage” menu, select “Upload to Cloud Storage.”

5. In the game selection screen, select the game or games in which you want to upload saved data for cloud storage. Once you make your selection, select the “Upload” option to the bottom right of the screen.

How to manually download backup save files from the cloud on PS5


To manually download save files from the cloud storage to your PlayStation 5 or PlayStation 5 Digital Edition system, you can take the following steps:

1. In the aforementioned “Settings” menu, go to “Saved Data and Game/App Settings.”

2. On the left tab in the “Saved Data and Game/App Settings” menu, go to either “Saved Data (PS5)” if you want to download the save file from a PlayStation 5 game or “Saved Data (PS4)” if you want to download a save file from a PlayStation 4 game. Afterwards, go to “Cloud Storage.”

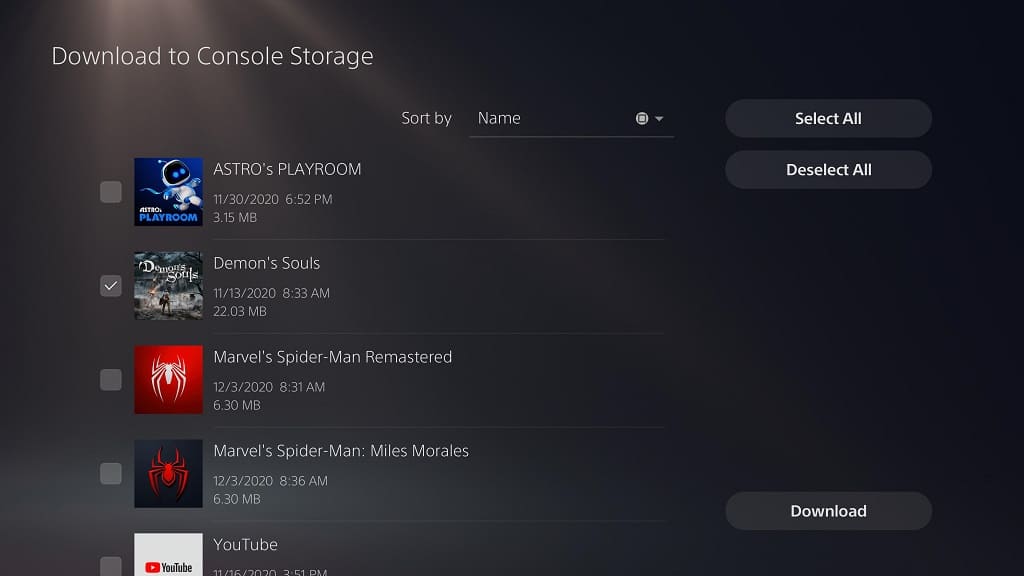
3. In the “Cloud Storage” menu, select the “Download to Console Storage” option.

4. In the game selection screen, select the game or games in which you want to download the saved data that are stored on the cloud. Once you make your selection, select the “Download” option to the bottom right of the screen.

How to enable auto-sync save files on PS5 in rest mode

You can also setup your PlayStation 5 or PlayStation 5 Digital Edition to automatically upload save files to the cloud storage in rest mode. To do so, you need to take the following steps:

1. In the “Settings” menu, head to “System.”

2. In the “System” menu, head to “Power Saving” on the left tab and then select the “Features Available in Rest Mode.”

3. In the “Features Available in Rest Mode” menu, select “Stay Connected to the Internet.” The circle to the right of the wording should be solid white when this feature is enabled.

4. Afterwards, head back to the aforementioned “Saved Data and Game/App Settings” menu.

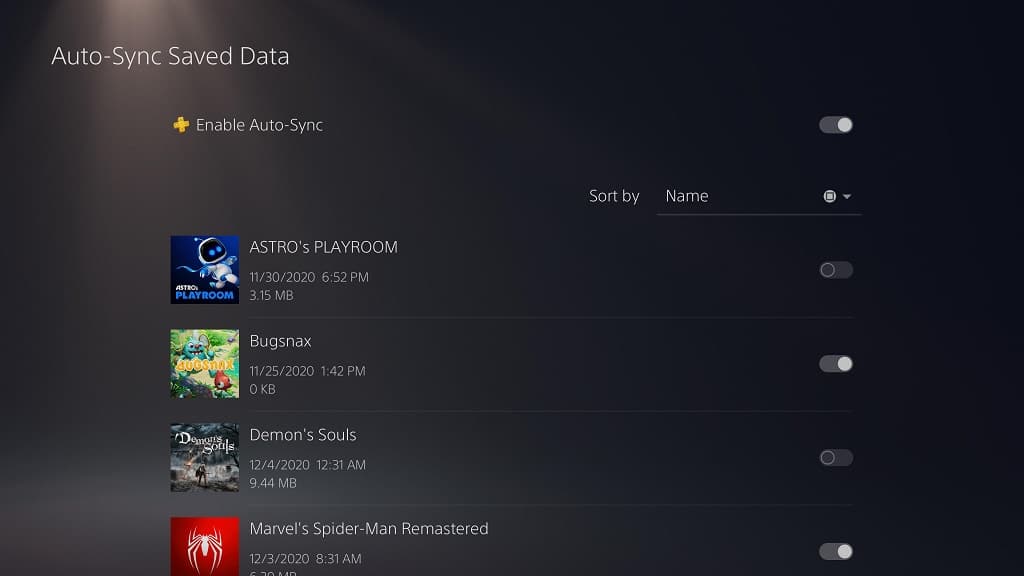
5. To enable automatic saved data uploads for PlayStation 5 games, select “Saved Data (PS5)” on the left tab and then “Sync Saved Data” on the right side. Afterwards, select “Auto-Sync Saved Data.” In the “Auto-Sync Saved Data” menu, select “Enable Auto Sync” to use this feature (it is enabled when the circle to the right of the wording is solid white). In the same menu, you can also select the PS5 games that you want to automatically upload save files to the cloud.

6. To enable automatic saved data uploads for PlayStation 4 games, select “Saved Data (PS4)” on the left tab and then “Auto-Upload” on the right side. In the “Auto-Upload” menu, select the “Automatically Upload Saved Data to Cloud Storage” option to turn this feature on (it is enabled when the circle to the right of the wording is solid white). In the same menu, you can also select the individual PS4 games that will take advantage of this feature.

How to prevent your PS5 from overheating

The new PlayStation 5 and PlayStation 5 Digital Edition systems produce a lot of heat that can cause hardware problems. You can follow this guide at Seeking Tech for some tips that will help you prevent your PS5 system from overheating.

PS5 and PS5 Digital Edition Operating Temperature

Sony recommends that both the PlayStation 5 and PlayStation 5 Digital Edition to be operated in a temperature range between 5°C to 35°C (which is 41°F to 95°F). When it comes to overheating, you should avoid playing your system at the upper temperature limit as much as possible.

How to maximize airflow for PS5

To maximize the airflow for your PlayStation 5 system, and thus prevent overheating issues, you should consider where you place your console.

Sony recommends that the vents located on the back of the PS5 should be at least 4 inches (or 10 cm) away from the wall. You should also avoid putting your system in narrow or closed spaces, such as cabinet compartments, as these will trap heat.

With the included stand, you can place your PS5 in a horizontal or vertical position. We recommend going with the vertical position as heat will build up at the bottom of the system. Less of your PlayStation 5 will be exposed to the heat from underneath when it stands vertically as opposed to the horizontal position.

If possible, we also suggest placing your PS5 on top of a desk or cabinet as you won’t have anything above the system to trap heat and prevent the heat from dissipating from the surrounding air. We don’t recommend placing the system on a floor, especially on a carpet or rug, as the dust and dirt from the flow would easily be sucked into the PS5.

You should also avoid putting your PlayStation 5 in a place where it is exposed to direct sunlight, high humidity and smoke residue.

How to avoid blocking your PS5 vents

You should also avoid blocking the vents of your PlayStation 5 as these are need to create airflow in order to cool the console. You should not be covering your system with cloth or any other materials during operation.

You should also clean any dust buildup on the vents as well as the inside of your console as the particles will keep the heat trapped inside.

Don’t use your PS5 with a voltage transformer or inverter

Sony also recommends that you don’t plug in the AC power cord of your PlayStation 5 into a voltage transformer or inverter as doing so could end up causing overheating components.

Don’t use rest mode on PS5

Our last suggestion to prevent your PlayStation 5 from getting heating issues is to not use the rest mode. Even in this low-powered state, the video game system is still using a lot of electricity and, thus, generating heat.

Not to mention that rest mode is currently causing other issues with the PlayStation 5, which leads to the system freezing and even bricking.

To find out how to disable and avoid using rest mode, you can check out our previous tutorial.