How to fix mushy and sticky buttons on DualSense

When using the DualSense controller, you may have noticed that pressing a button may feel mushy or even sticky.

If the button does not seem as clicky as before, or even seems to be stuck, then you can follow this troubleshooting guide from Seeking Tech for some potential fixes.

Why DualSense button gets mushy and sticky

The buttons on your DualSense gamepad can get mushy and sticky due to several factors.

The oil, dirt and other containments on your thumbs, for example, can easily go through the outer edge of the button and end up inside the gamepad.

Dust particles can also get inside and cause issues with the buttons.

How to prevent DualSense button from getting mushy or stuck

To prevent your buttons on the PS5 controller from getting mushy or even stuck, you can do the following:

1. Wash your hands thoroughly before using the DualSense.

2. Store the controller in a well aerated room with low humidity.

3. If you are not going to use your controller for an extended period of time, you can use a dust cover or store it is a closed cabinet to prevent any dust buildup.

4. Clean the surface of the gamepad occasionally.

Fix #1: Apply Pressure on Button with Circular Motion

The first fix we recommend taking is by pressing down hard on the button that you feel mushy or sticky with your thumb.

With the button held down, you should then try to move the button in a circular motion. This can be done clockwise, counterclockwise or in both directions.

Make sure you apply pressure on the edges of the button to loosen it.

Keep doing this procedure until the button on your PlayStation 5 controller gets unstuck and feels clickily to press again.

Fix #2: Clean Edges of Button with WD-40 Specialist Contact Cleaner

If the aforementioned method does not work, then we suggest cleaning the button.

We do not recommend opening the DualSense as it is a rather complicated process. Not to mention that you can easily break the PS5 gamepad if you aren’t careful when disassembling and reassembling.

Instead, we recommend cleaning the edges of the button.

One of the methods is to use the WD-40 Specialist Contact Cleaner. This product is designed to remove oil, dirt, residue and condensation of electronics. The solution dries quickly and won’t leave behind any residue.

If you don’t have the cleaning product, then you can purchase one on Amazon with the following link:

To apply the WD-40 Specialist Contact Cleaner on the mushy or sticky DualSense button, you need to do the following:

1. First off, you need to make sure that the DualSense is completely turned off. You can tell that the PlayStation 5 controller is powered off where there are no lights coming out of it.

2. Using the smart straw of the WD-40 Specialist Contact Cleaner, spray along the edges of the mushy or sticky button. When applying, make sure you don’t press the PS button as doing so will power the controller on.

3. After spraying all around the edges of the problematic button, wait a few minutes to make sure that the WD-40 Specialist Contact Cleaner solution has completely dried.

4. Afterwards, test to see if the button feels normal to press again. If not, you can try spraying the edges again.

Fix #3: Clean Edges of Button with Isopropyl Alcohol

Another method to cleaning the DualSense button is by applying isopropyl alcohol.

Highly concentrated isopropyl alcohol will help remove oil, dirt and other residues. Not to mention that it will also dry quickly and won’t leave behind any residues on its own.

If you don’t have any isopropyl alcohol available, then we recommend picking up the MG Chemicals – 824-1L on Amazon via the following link:

To clean the button using isopropyl alcohol, you need to do the following:

1. Make sure that your DualSense is completely turned off.

2. Apply the isopropyl alcohol to a brush or cotton swap.

3. Clean the outer edges of the mushy or stick button. Make sure to are getting the cleaning solution in the crevices. During this time, you should also make sure that you don’t accidentally push the PS button as it will turn the controller on.

4. Wait a few minutes for the isopropyl alcohol to completely dry out and the test the button again to see if it feels clicky to press. If you are still experiencing issues, you can try cleaning the edges again.

How to block players on PlayStation 5

Being able to block specific PSN users can be tricky with the PlayStation 5 and PlayStation 5 Digital Edition.

If you are having a hard time trying to figure out how blocking works, then you can follow this tutorial at Seeking Tech.

What does blocking a player mean on PlayStation 5?

Blocking a player means that you will no longer be able to interact with that particular PSN user.

The list of restrictions includes the following:

The blocked user account can’t send friend request to your PSN account.

The blocked user account can’t send game invites to your PSN account.

The blocked user account can’t send messages to your PSN account.

The blocked user account can’t send party invites to your PSN account.

The blocked user account can’t voice chat with your PSN account.

Your use name won’t show up on search on the blocked user account.

Your description can’t be seen by the blocked account.

Your online status can’t be seen by the blocked account.

Your profile picture can’t be seen by the blocked account.

You won’t be able to see any of the blocked account’s live broadcasts.

You won’t be able to see any of the blocked account’s shared screenshots.

You won’t be able to see any of the blocked account’s shared video clips.

How to block a user on your friends list on PS5

To block a user on your friends list, you need to do the following:

1. With the PlayStation 5 turned on, press the PS button on the DualSense controller.

2. Navigate down until you get to a row of options.

3. Find and select the “Game Base” option.

4. In the pop-up menu, select the “View All Friends” option.

5. In the next screen, select the user on your friends list that you want to block.

6. On the user page, select the “More” option. It has the “…” icon that is located all the way to the right.

7. In the pop-up menu, select the “Block” option.

You may also want to use the “Report” option to report your issues with that player to PlayStation. You can report a player based on their in-game behaviors, their activities outside of playing a game as well something they edited into their PSN user profile.

8. You will get a notification pop-up asking “Do you want to block this player?” Select “Block” to confirm your action.

How to block a user that is not on your friends list on PS5

To block a PSN that is not on your friends list, you can do the following:

1. Press the PS button on your DualSesne controller.

2. Select “Game Base” from the available bottom options.

3. In the pop-up menu, go to “View All Friends.”

4. In the top row of options, select the “Search” option.

5. Type in the user name you want to block in the “Search for players” field by using the virtual keyboard.

6. Press the R2 button or select the “Done” option from the virtual keyboard to confirm the search.

7. Select the user name that you want to block from the “Players” list.

8. In the user page, select the “More” option, which has the “…” icon from the top tab.

9. In the pop-up menu, select the “Block” option.

10. In another pop-up menu, select the “Block” option to confirm your choice.

How to unblock a user on PlayStation 5

To unblock a PSN user on the PS5, you need to do the following:

1. Push the PS button on the DualSense.

2. In the bottom row of options, select “Game Base.”

3. In the pop-up menu, press the “Options” button on your DualSense and then select the “Go to Game Base” option.

4. In the “Game Base” menu, scroll all the way to the right in the top options and select “Game Base Settings.” It is located directly to the right of the “Create Party” option.

5. In the “Game Base Settings” menu, select the “Blocked Players” option.

6. In the “Blocked Players” menu, select the user name you want to unblock.

7. In the pop-up menu, select the “Unblock” option.

8. If you want to be friends again with the user name you just unblocked, either you or the other player will need to send a friend request. The recipient will then have to accept the request.

How to pair additional DualSense, DualShock 4 and other controllers on PS5

Along with the DualSense, the PlayStation 5 (as well as the PlayStation 5 Digital Edition), can be played with the DualShock and other controllers.

You can follow this step-by-step guide at Seeking Tech on how to pair additional controllers to your PS5.

PS5 Controller Compatibility

The first step we recommend taking is to make sure that your controller is compatible with the PlayStation 5.

The most compatible gamepad is, of course, the DualSense. This controller, which comes with new features such as built-in microphone, haptic feedback and impulse triggers, is guaranteed to work with any PS5 game.

If you want an additional DualSense, then you can purchase the controller on Amazon with the following link:

The PlayStation 5 is also compatible with the DualShock 4. With that said, the DS4 cannot be used to play PS5 games. Instead, the PlayStation 4 controller can only be used to play backwards compatible PS4 games on the PlayStation 5 system.

If you are interested, you can purchase the DualShock 4 on Amazon via the following link:

A vast majority of third-party controllers for the PlayStation 4 (including arcade sticks, flight sticks and racing wheels) should also be able to work with the PlayStation 5.

Some of these input devices may need a firmware update. So, you may have to contact the manufacturer of your controller to see if there are any software updates that will add PS5 compatibility.

You may also want to look to see if there are any PS5-specific pairing instructions. If there isn’t any, you can try pairing the third-party controller on the PlayStation 5 using the same pairing method as the PlayStation 4 system.

How to pair an additional controller on PS5 using USB

The fastest way to pair an additional controller on your PlayStation 5 is by using an USB cable.

To do so, you can take the following steps:

1. Connect your controller to your PlayStation 5 using a USB cable. For the uninformed, the DualSense uses an USB Type-C to USB Type-A cable while the DualShock 4 uses a micro-USB to USB-Type A cable.

2. If you haven’t done so already, turn on your PlayStation 5. You can do so by pressing the PS button on a controller that was previously paired with the system. You can also simply use the power button on the system.

3. Press the PS button on the unpaired controller.

4. To differentiate between controllers, you will then be asked to attached a user profile to the newly paired controller. If you select the same user profile as the older paired controller, then the older controller will automatically turn off and the newly paired controller will become the default input device.

If you are planning to play a local multiplayer game using two or more players, then you need to select the Add User option from the user profile selection screen. In the Add User menu, the new player can create their own PlayStation Network account, sign into an existing PlayStation Network or simply play as a guest.

How to pair an additional controller on PS5 using Bluetooth

Pairing a controller to your PlayStation 5 wirelessly is convenient as you don’t need to look for the correct USB cable.

In order to pair an additional controller on your PlayStation 5 using Bluetooth, you can take the following steps:

1. First, make sure that your controller has some battery life. If you have a DualSense or DualShock, you can tell that there is still some battery life left by pressing the PS button and seeing lights flashing.

2. Use the controller that has already been paired to your PlayStation 5 to turn on the system.

3. Select your user profile to go to the home screen.

4. In the home screen, go to Settings, which you can find on the upper right corner of the screen.

5. In the Settings menu, go to Accessories.

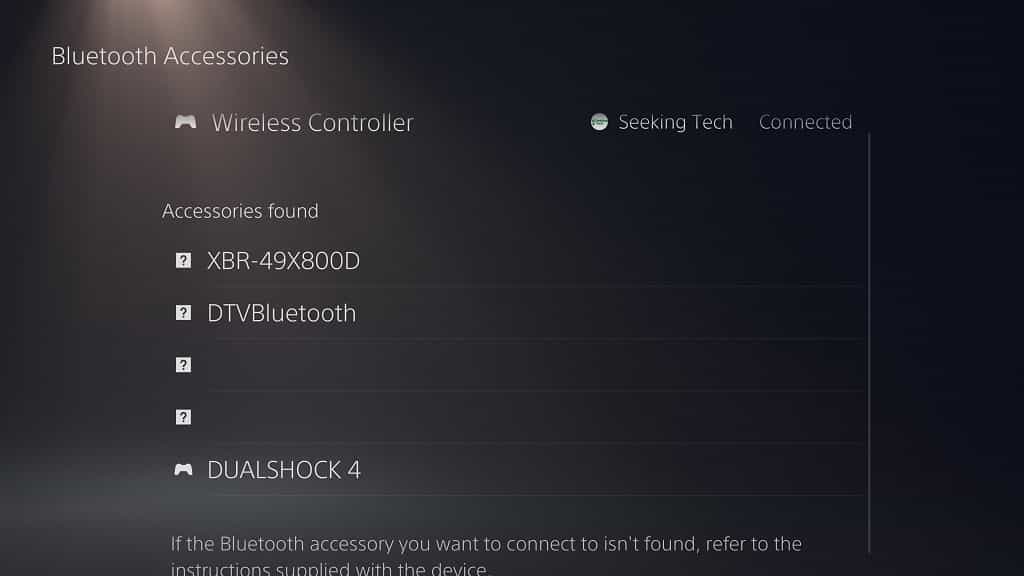
6. In the Accessories menu, select General on the left tab and then Bluetooth Accessories on the right side of the same screen.

7. With the unpaired controller, press and hold both the PS button as well as the Create/Share button at the same time.

The Create/Share button is located directly to the right of the directional pad. This button is referred to as Share on PlayStation 4 controllers. For the PlayStation 5, Sony changed its name to Create.

8. The unpaired controller should appear in the “Accessories found” section.

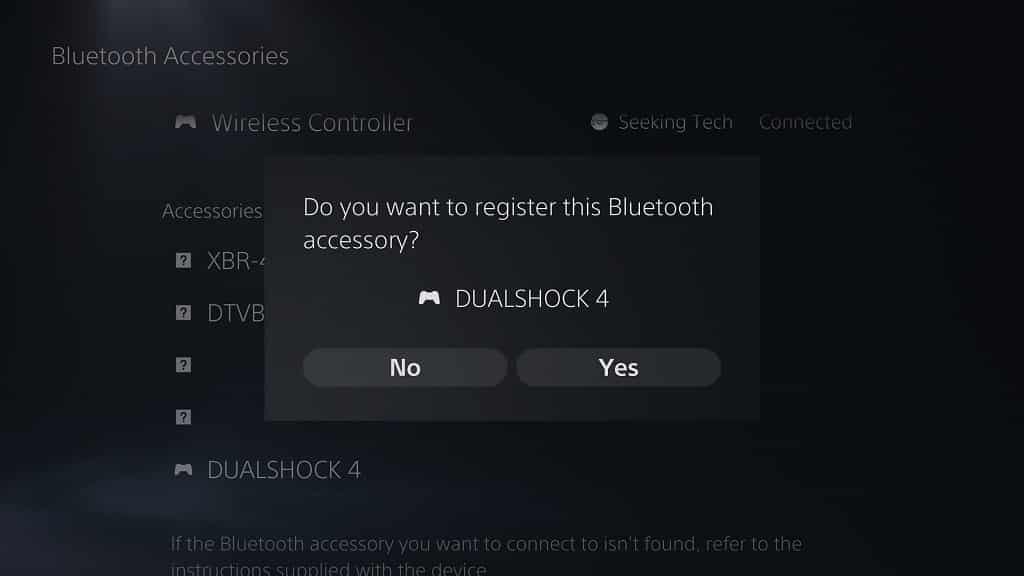
9. With your previously paired controller, quickly select the unpaired controller from the “Accessories found” section.

If you are too slow, you will get an error message, which means you have to followed Step #7 again as you need to press and hold the PS button and Create/Share button to make the unpaired controller appear on the list again.

10. In the pop-up menu, select the Yes option to confirm the pairing.

11. Afterwards, you need to select a profile for the newly paired controller. You can follow the same instructions we mentioned above in order to attach your controller to a user profile.

How to unpair a controller on PS5

In order to unpair a controller on the PlayStation 5, you need to do the following:

1. Go to Settings from the home screen of the system menu.

2. In Settings, go to Accessories.

3. In Accessories, select General from the left side and then Bluetooth Accessories on the right side of the same screen.

4. Find the controller you want to unpair under the ‘Registered accessories” section.

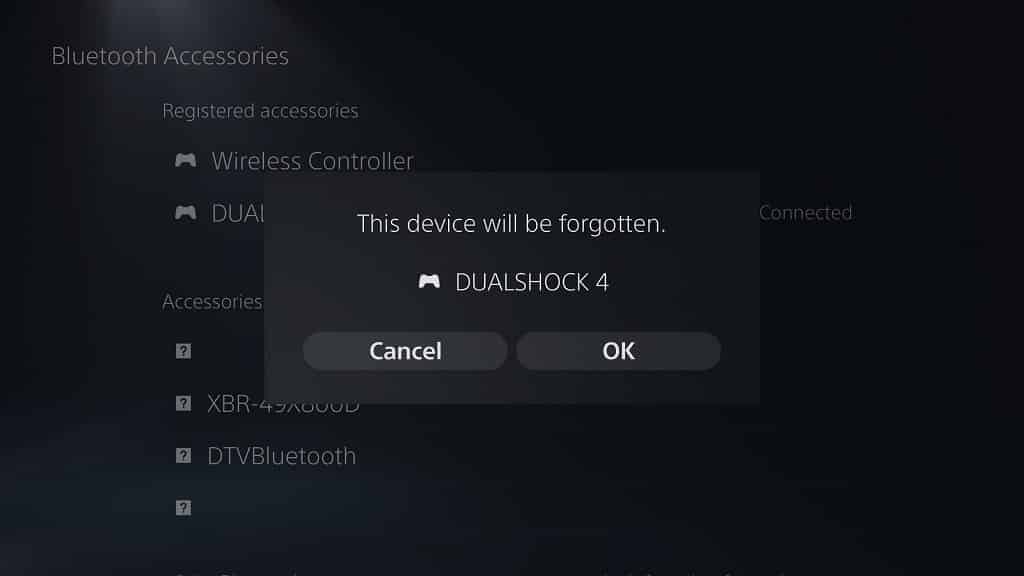
5. Select the controller and then Delete in the pop-up menu.

6. In the next pop-up menu, select OK to unpair the controller.

How many controllers can be connected at the same time on the PlayStation 5?

You can connect as many as four controllers at the same time on the PS5 system.

Can you pair the same controller on multiple systems?

You can’t pair the same controller on multiple systems. Any time you pair a controller to a new system, the controller will automatically forget its previous pairing.

How to redownload games on the PlayStation 5

Redownloading a videogame on the PlayStation 5, as well as the PlayStation 5 Digital Edition, can be a little bit confusing.

If you are having issues when it comes to how to redownload a game, then you can follow this tutorial at Seeking Tech.

Using the Correct User Profile

Before we start, make sure that you are using the right user profile. The game you are planning to redownload is tied to the user profile you used to originally purchase and download the software.

If you have to change to a different account, you can do so with the following steps:

1. From the home screen (this is where you can select games to play), select your profile picture on the upper right corner of the screen.

2. In the pop-up menu, select the “Switch User” option.

3. In the “Switch User” menu, you will be able to change to a different user account. If the account with the game you want to redownload is not on the PlayStation 5 system, you can add it in with the “Add User” option.

How to redownload a game on PS5

To redownload a game on PlayStation 5, you need to do the following:

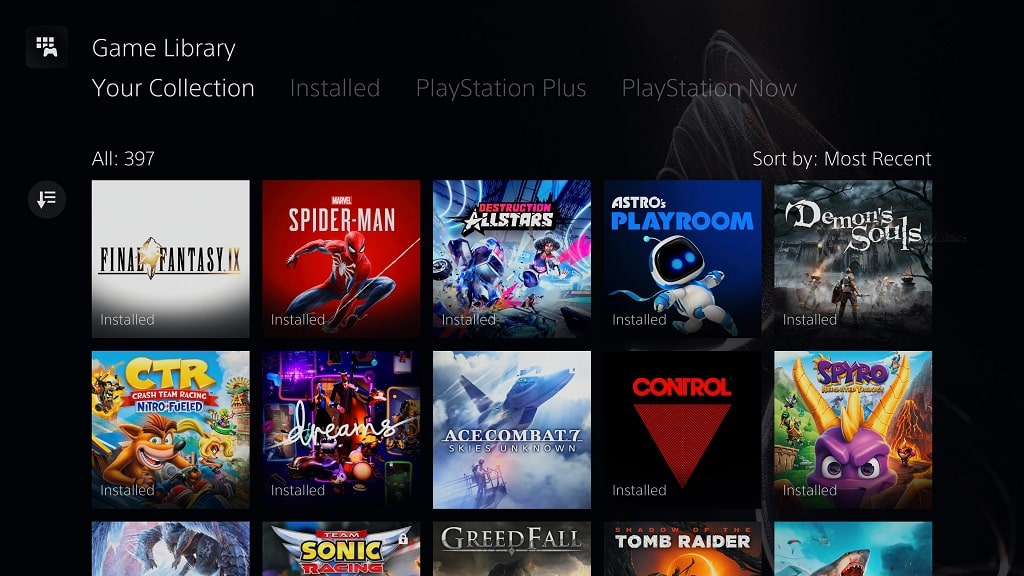
1. From the game selection portion of the home screen, scroll all the way to the right and select the “Game Library” option.

2. From the “Game Library” Menu, make sure that the list is sorted under “Your Collection.” You can switch between the upper tabs using the L1 and R1 buttons on your DualSense controller.

3. To make finding your game easier, you may want to use the “Sort and Filter” option to the left of the videogames listing. This will give you the following sorting options:

  • Most Recent
  • Purchase Date (New – Old)
  • Purchase Date (Old – New)
  • Name (A – Z)
  • Name (Z – A)
  • Platform (PS5)
  • Platform (PS4)
  • Platform (PS3)
  • Source (PlayStation Store)
  • Source (PlayStation Plus)
  • Source (PlayStation Now)
  • Source (Other)

4. You can tell that a game can be redownloaded by looking at the upper right corner of the game’s icon. You should see a small downward pointing arrow symbol.

5. Highlight the game you want to redownload and then press the X (otherwise known as Cross) button.

6. In the game’s profile page, select the “Download” option.

What if the game you want to redownload on the PS5 is not listed?

If the game you want to redownload is not listed in your Game Library, you can try doing the following:

1. From the home screen, go to “Settings,” which is located on the top right corner of the menu.

2. From the “Settings” menu, go to “Users and Accounts.”

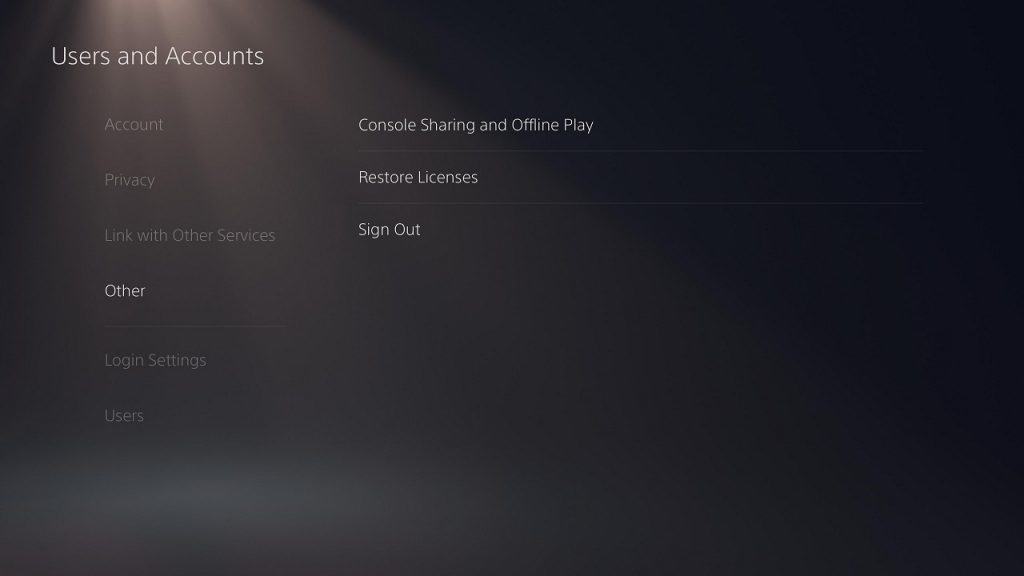
3. From the “Users and Accounts” menu, select the “Other” option from the left tab of the screen and then then the “Restore Licenses” option on the right side of the same screen.

4. From the “Restore Licenses” menu, select the “Restore” option.

5. If you still can’t find your game, then it is likely tied to a different account used to originally to make the purchase. So, you might want to try another user account to see if it is there.

What if the game you want to redownload on the PS5 does not have a download option?

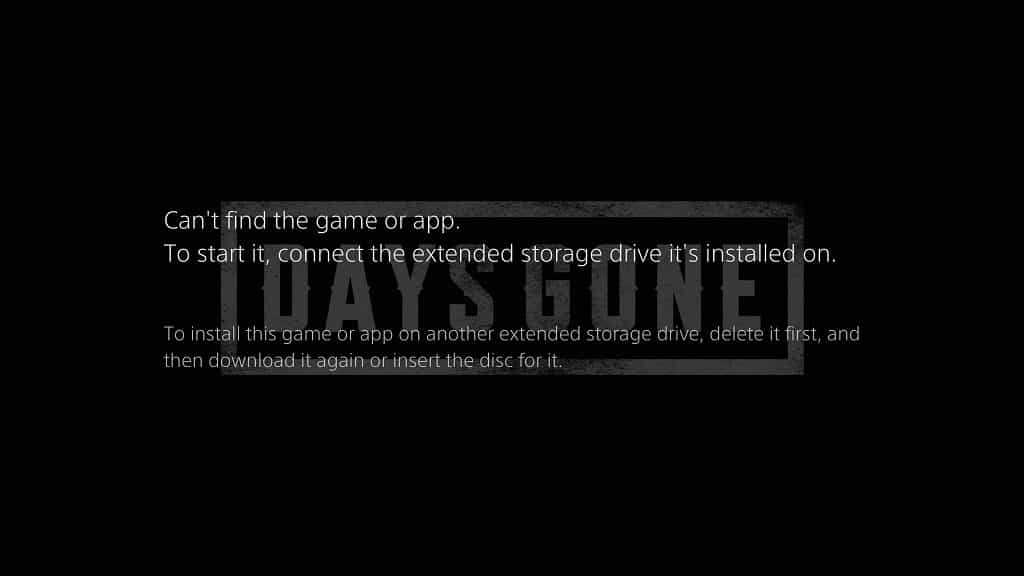
If the game you want to redownload does not have a download option, it is possible that you already have the game downloaded on an external storage drive.

You can tell that your game is installed on an external drive from your Game Library by finding a small cylinder symbol that appear on the upper right corner of the game’s icon. If you try to play a game without the external drive connected to your PlayStation 5, you will get an error message.

If you no longer have access to the external storage drive and/or would like to download the game directly onto the SSD of your PlayStation 5, you can take the following steps:

1. Go to “Game Library” from the home screen.

2. In the “Game Library” menu, highlight the game you want to redownload.

3. Press the Options button, which is the button with the three horizontal lines on top (it is directly to the left of Triangle), on your DualSense controller.

4. In the pop-up menu, select the “Delete” option.

5. After the deletion, select same game from the “Game Library.”

6. In the game’s profile page, select the “Download” option.

How to move a game from an external storage drive to the PS5 SSD

Instead of re-downloading a game, you can also simply move the game from your external storage drive to your PS5. This will save you a lot of bandwidth if you are under a bandwidth limit.

If you are interested in doing so, you can take the following steps:

1. With the external storage drive connected to the PlayStation 5, go to “Settings” from the home screen.

2. In “Settings,” head to “Storage.”

3. In “Storage,” select “Extended Storage” on the left tab and then the “Games and Apps” option on the right side of the same screen.

4. In the “Games and Apps” menu, select “Items You can Move” from the top tab.

5. Afterwards, select the game you want to move to the PS5’s SSD and then select the “Move” option on the lower right corner.

6. In the pop-up menu, select the “OK” option.

How to change Wi-Fi frequency bands on PS5

The PlayStation 5, as well as the PlayStation 5 Digital Edition, supports both the 2.4 Ghz and 5 Ghz Wi-Fi frequency bands.

You can follow this guide from Seeking Tech to find which of these band is the best. You will also learn how to switch between the two on the PS5.

Best PS5 Internet Connection Method: Ethernet LAN vs. 2.4 Ghz Wi-Fi vs. 5 Ghz Wi-Fi

If you are looking for the fastest and most consistent speed, then the best internet connection for your PlayStation 5 is Ethernet LAN. The only drawback is that you need a wired connection. If you can’t or simply don’t want to use an Ethernet capable, then you are limited to wireless Internet.

When compared to the 5 Ghz frequency band, the 2.4 Ghz frequency band has much wider Wi-Fi coverage range and will run into less interference.

On the other hand, the 5 Ghz Wi-Fi has better download and upload speeds than the 2.4 GHz Wi-Fi.

Overall, we recommend using Ethernet LAN if possible. If not, then we suggest using 5 GHz Wi-Fi over 2.4 Ghz Wi-Fi if you have the proper setup.

How to check what Wi-Fi frequency band the PS5 is using

To check what Wi-Fi frequency band your PlayStation 5 is currently using, you can take the following steps:

1. From the home screen of the system where you select games to play, go to “Settings” on the upper right corner.

2. From the “Settings” menu, go to “Network.”

3. From the “Network” menu, select “Connection Status” from the left tab and then the “View Connection Status” on the right side of the same screen.

4. In the “View Connection Status,” you will be able to see the “Wi-Fi frequency band in use.”

How to change Wi-Fi frequency bands on PS5

If you are experiencing issues with the wireless Internet connection on your PlayStation 5 (such as slow downloads/uploads, lag as well as disconnections), then you might want to consider changing the Wi-Fi frequency band from 2.4 GHz to 5 GHz or from 5 GHz to 2.4 Ghz.

To do so, you need to do the following:

1. From the aforementioned home screen, head to the “Settings.”

2. In the “Settings” menu, head to “Network.”

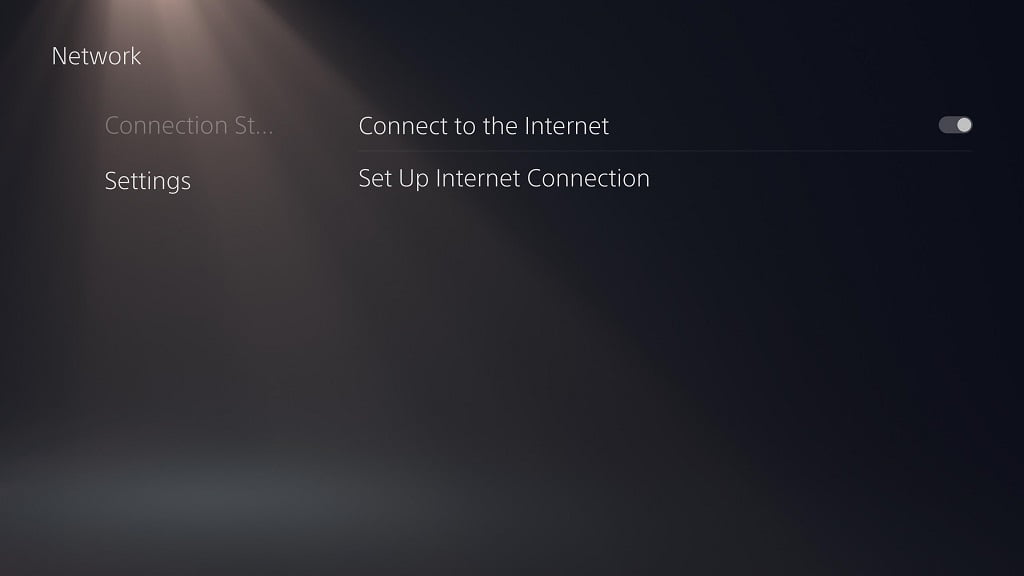
3. In the “Network” menu, select “Settings” from the left tab and then “Set Up Internet Connection” on the right side of the same screen.

4. In the “Set Up Internet Connection” menu, find your Wi-Fi network from the registered network list.

5. With your Wi-Fi network highlighted, press the Options button on your DualSense controller. This button is located directly to the left of the Triangle button and has three horizontal lines on top of it.

6. In the pop-up menu, select the “Wi-Fi Frequency bands” option.

7. In the next pop-up menu, you have the following options:

“Automatic”

“5 GHz”

“2.4 Ghz”

“Automatic” is the default option as the PlayStation 5 will automatically use what it detects to be the best wireless option. You can force your system to use 5 GHz Wi-Fi by selecting the “5 GHz” option or force it to use 2.4 Ghz Wi-Fi by selecting the “2.4 Ghz” option.

How to improve Wi-Fi connection on PS5

If you are still experience issues related to using Wi-Fi on the PlayStation 5, then we recommend repositioning your system and/or Wi-Fi router/satellite.

Your goal is to put your PS5 and your Wi-Fi router/satellite as close as possible without any obstructions in between. The obstructions include walls, microwaves as well as other wireless devices.

For 5 GHz Wi-Fi specifically, you need to make sure that there is a direct line of sight between the PlayStation 5 and the Wi-Fi router/satellite in order to prevent disconnects, latency, slow speeds as well as other Wi-Fi related issues.

How to fix issues with bricked or unresponsive DualSense

When playing the PlayStation 5 (or PlayStation 5 Digital Edition), you may encounter issues where your DualSense will be bricked or not responsive.

If you are experiencing this problem, you can follow this guide at Seeking Tech to find some potential fixes.

Updating to latest firmware and patches

The first step we recommend taking is to update to the latest system firmware and software patch files if possible. The issues you are encountering with your DualSense could be related to the software of the system or even a specific videogame.

If you are automatically connected to the internet on your PS5, then you should get a pop-up notification anytime there is an update available for the system or your most recently-played games.

How to manually update the PS5 firmware

To manually update your system, you can take the following steps:

1. Go to “Settings” from the home screen menu. This is located on the upper right corner of the screen as the gear symbol.

2. Under the “Settings” menu, go the “System” from the list.

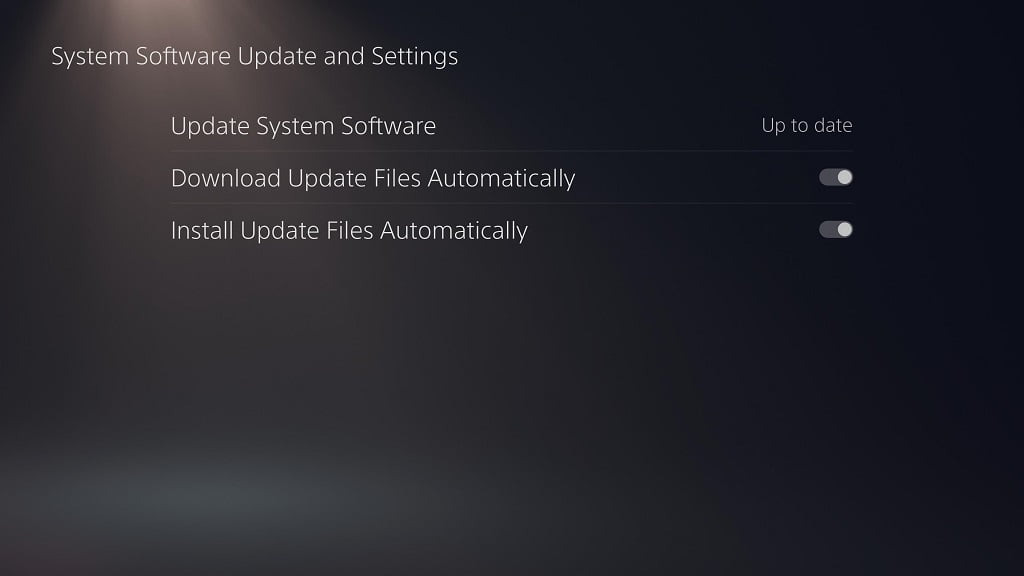
3. Under the “System” menu, select “System Software” from the list to the left and then the “System Software Update and Settings” option on the right side of the same screen.

4. Under the “System Software Update and Settings” menu, select “Update System Software.”

5. In the “Update System Software” menu, select “Update Using Internet.”

6. Follow the instructions on the screen to update to the latest PlayStation 5 firmware.

How to manually update a game on PS5

To manually update a specific game, you need to do the following:

1. In the home screen (this is the menu used to launch games), navigate to the game you want to update.

2. With the game highlighted, press the Options button (which is the button with three horizontal lines located to the left of the Triangle button).

3. In the pop-up menu, select the “Check for Update” option.

How to tell if you need to recharge your DualSense

The unresponsiveness of your PS5 controller could simply be related to its depleted battery power.

To tell if your DualSense still have some battery life left, press the PS button. If there is power, lights will flash from the controller. Your PlayStation 5 will also turn on.

If you don’t see any lights, you should try recharging the DualSense with a charging USB cable. If you don’t have one, you can check out this guide from Seeking Tech.

If you are having problems recharging the controller, then you might want to navigate over to this tutorial for additional help.

How to reset the DualSense controller

If you are sure that your DualSense issue is not related to the battery, then you can try resetting your controller. To do so, you need to take the following steps:

1. First, make sure that your PlayStation 5 is completely turned off. If you don’t know how to shut off the system, then you can check out this tutorial.

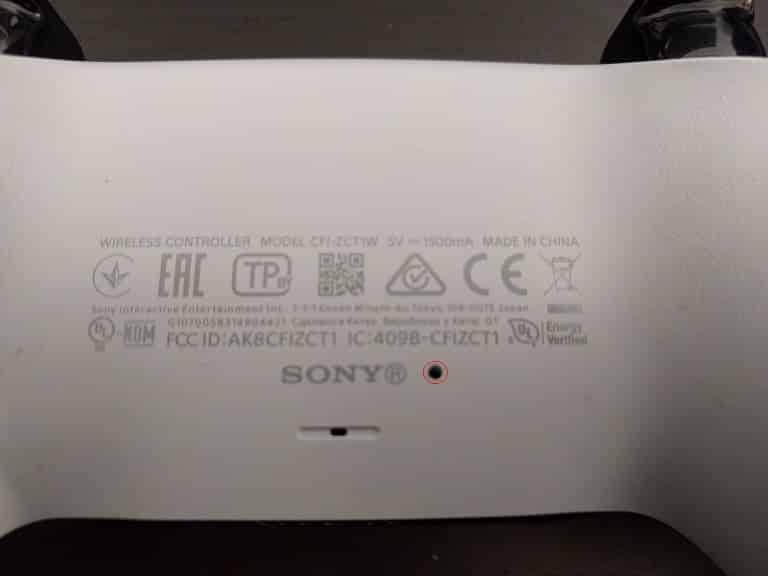
2. Turn over your DualSense and you should see a small hole located to the right of the SONY trademark.

3. Use either a pin or toothpick to press down on this hole until you feel the press of a button.

4. Hold down on this button for 3 to 5 seconds to reset the controller.

5. After you are done with resetting the DualSense, connect it your PlayStation 5 system using an USB cable.

6. Turn on your PlayStation 5. Your system should be able to detect your DualSense. You may also get a notification to update to the latest firmware for the PS5 controller.

7. If recharging and resetting your controller does not work, then you may have to contact PlayStation Support as your issue may be hardware related. You can do so with this website.

If you are too inpatient when it comes to waiting for your DualSense to be repaired, then you might want to pick up a second controller.

How to prevent screen burn-ins on PS5

When you play the PlayStation 5 (or PlayStation 5 Digital Edition), you may run into issues with screen burn-in, image burn-in, image retention and/or ghost image.

If you want to prevent any of the aforementioned problems, then you can follow this guide at Seeking Tech.

What is burn-in?

Burn-in occurs when your television displays some form of discoloration that is either temporary or permanent.

When it comes to gaming, you may run into issues if you are playing a game with a high-contrast heads-up display (HUD) continuously without using the TV for anything else.

OLED television sets are the most susceptible to burn-ins. Newer OLEDs, such as the LG CX and Sony A8H, are better equipped at handling image retention issues than older models. With that said, you may still run into issues if you aren’t careful.

To be completely safe from screen burn-ins, we at Seeking Tech provided a list of helpful tips below.

Change HUD Settings

Most modern videogames come with customizable settings for the HUD.

For example, the Demon’s Souls remake lets you set the HUD to display dynamically. Thus, the HUD will only show up during certain actions.

Change Your Gaming Habits

If you are playing a game with a non-customizable, high-contrast HUD for many continuous hours at a time, make sure you take short breaks every hour or two.

When taking a break, you should also try pausing the game, bringing up the game system, use the PS5 quick menu, use the PS5 home screen menu, turn off the television and anything else that will give your TV a break from constantly displaying the same still image.

TV Settings to Prevent Screen Burn-Ins

Most modern television set, such as the aforementioned CX and A8H, comes with settings to combat screen burns.

For example, LG’s Screen Shift and Sony’s Pixel Shift features are designed to move images around the television screen. LG’s Pixel Refresher and Sony’s Panel Refresh features will also remove any temporary image retentions.

A lot of TVs also come with screen savers as well as automatic shutdown features that will activate after a certain amount of time.

How to dim your screen on PS5

There are several actions you can take on your PlayStation 5 to prevent screen burns.

The first of which is to dim the screen after a set amount of time. To find this setting, you can take the following steps:

1. From the home screen, which is the main menu where you can launch games, you need to find and go to “Settings.” This option is located on the upper right section of the screen.

2. In the “Settings” menu, find and go to “Screen and Video.”

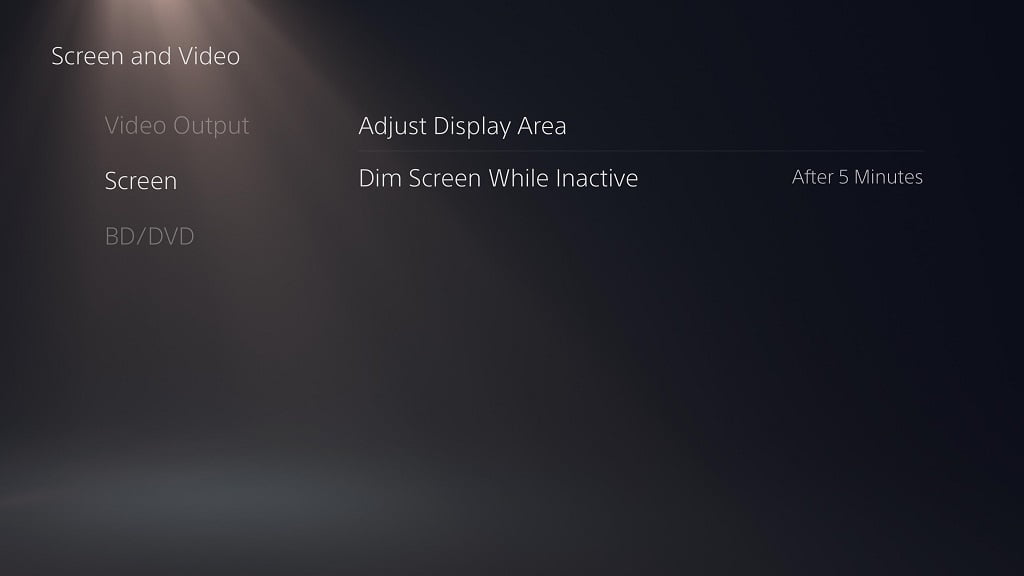
3. In the new “Screen and Video” menu, select the “Screen” option from the left tab and then the “Dim Screen While Inactive” option on the right side.

4. In the new pop-up menu, you have the following choices:

  • “After 5 Minutes”
  • “After 15 Minutes”
  • “After 30 Minutes”
  • “Don’t Dim”

5. For the best results when it comes to prevent screen burn-ins, we recommend using “After 5 Minutes” for the “Dim Screen While Inactive” setting.

How to set automatic rest mode while playing media on PS5

You may also want to consider sending your PlayStation 5 into rest mode after a set amount of inactivity, which watching a video, in order to prevent any screen burn-ins. To do so, you need to do the following:

1. From the home screen of the PlayStation 5, head to “Settings.”

2. From the “Settings” menu, head to “System.”

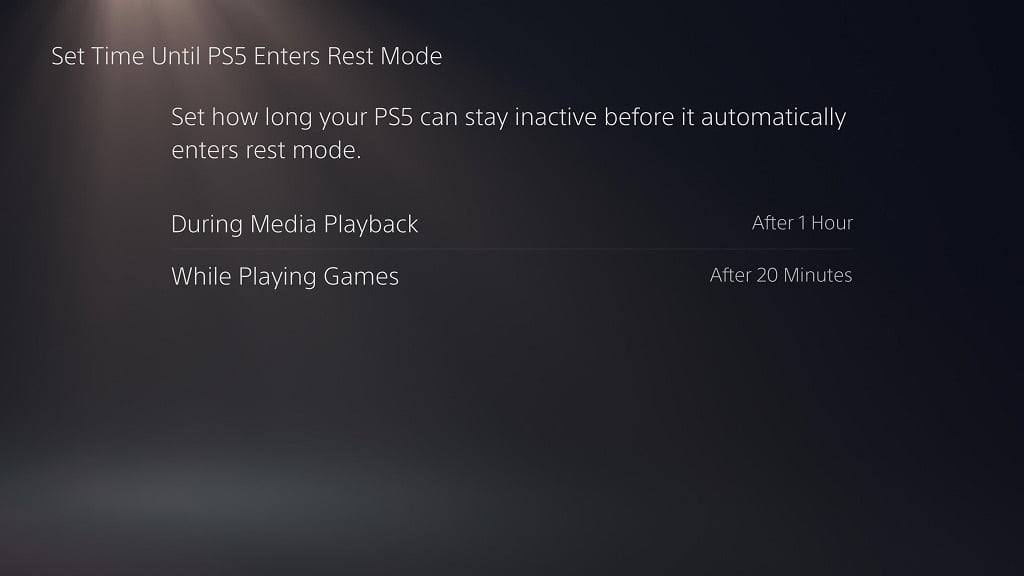
3. From the “System” menu, select “Power Saving” from the left tab and then the “Set Time Until PS5 Enters Rest Mode” on the right side of the same screen.

4. From the “Set Time Until PS5 Enters Rest Mode” menu, select “During Media Playback.”

5. In the new pop-up menu, you have the following choices:

  • “After 1 Hour”
  • “After 2 Hours”
  • “After 3 Hours”
  • “After 4 Hours”
  • “After 5 Hours”
  • “Don’t Put in Rest Mode”

6. For the best option when it comes to prevent any damage to your screen, we recommend picking “After 1 Hour” for the “During Media Playback” setting.

How to set automatic rest mode while playing videogames on PS5

You can also set when to send your PS5 into rest mode, when playinga a game, after a certain amount of idle time. To do so, you can take the following steps:

1. Return to the aforementioned “Set Time Until PS5 Enters Rest Mode” menu. You can do so from the home screen by going to “Settings” > “System” > “Power Saving” > “Set Time Until PS5 Enters Rest Mode.”

2. From the “Set Time Until PS5 Enters Rest Mode” menu, select the “While Playing Games” option.

3. The new pop-up menu will give you the following options:

  • “After 20 Minutes”
  • “After 1 Hour”
  • “After 2 Hours”
  • “After 3 Hours”
  • “After 4 Hours”
  • “After 5 Hours”
  • “Don’t Put in Rest Mode”

4. To prevent potential screen burn and image retention issues, we recommend using “After 20 Minutes” for the “While Playing Games” settings.

How to delete the ‘Other’ data from the PS5 SSD

When looking into the amount of free space you have on your PlayStation 5 (or PlayStation 5 Digital Edition), you may have noticed that there are data categorized as “Other.”

You can follow this tutorial at Seeking Tech to find out what the “Other” data represents as well as how to delete it off of the solid state drive of your PS5.

How to view Other data on PS5 storage

In order to view how much space the “Other” data is taking up on the PlayStation 5’s SSD, you need to take the following steps:

From the home screen, which is the main menu where you can launch games, go to “Settings.” You can find this option on the top right corner of the screen.

1. In “Settings,” navigate down and then select “Storage.”

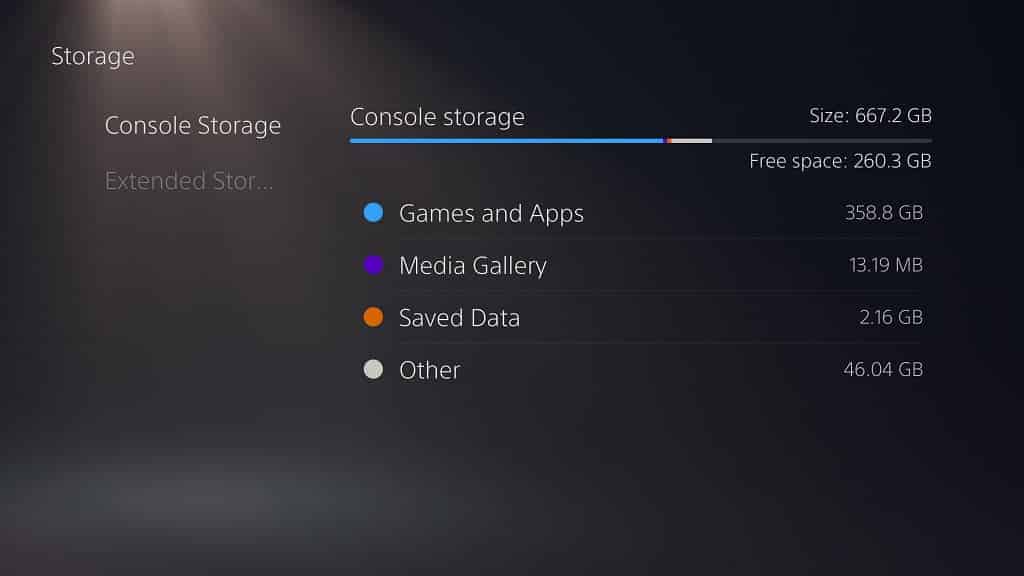
2. In the “Storage” menu, you will see the “Console Storage,” which includes the “Other” data.

What is “Other” data on PS5?

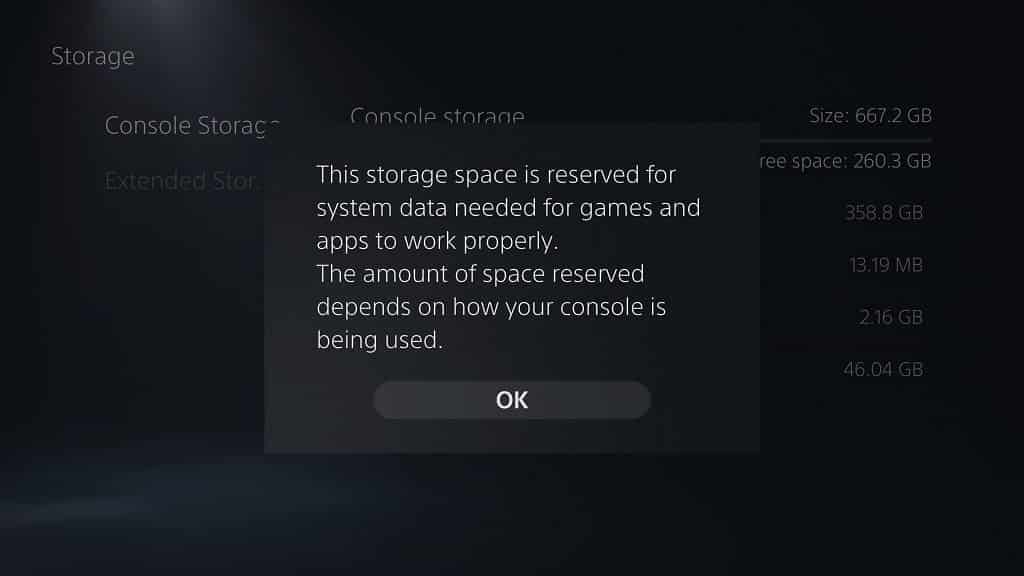
According to Sony, the “Other” data is the system data required to run games and applications on the PlayStation 5. This category is also linked to the files needed to run the operating system of the PS5.

How to delete Other data on PS5

Currently, you cannot directly delete the “Other” data off of the PlayStation 5. With that said, some of the “Other” data is linked to games and applications.

So, by deleting a game or application, the “Other” data on the SSD will also be reduced. Moving a game to an external storage will also delete some of the space off of the “Other” category.

How to delete games on PS5

To delete games, and get rid of some of the “Other” data, you can take the following steps:

1. From the home screen, find and enter the “Settings” menu.

2. Under the “Settings” menu, find and enter “Storage.”

3. In the “Storage” menu, select the “Console Storage” option on the left side and then the “Games and Apps” option on the right side of the same screen.

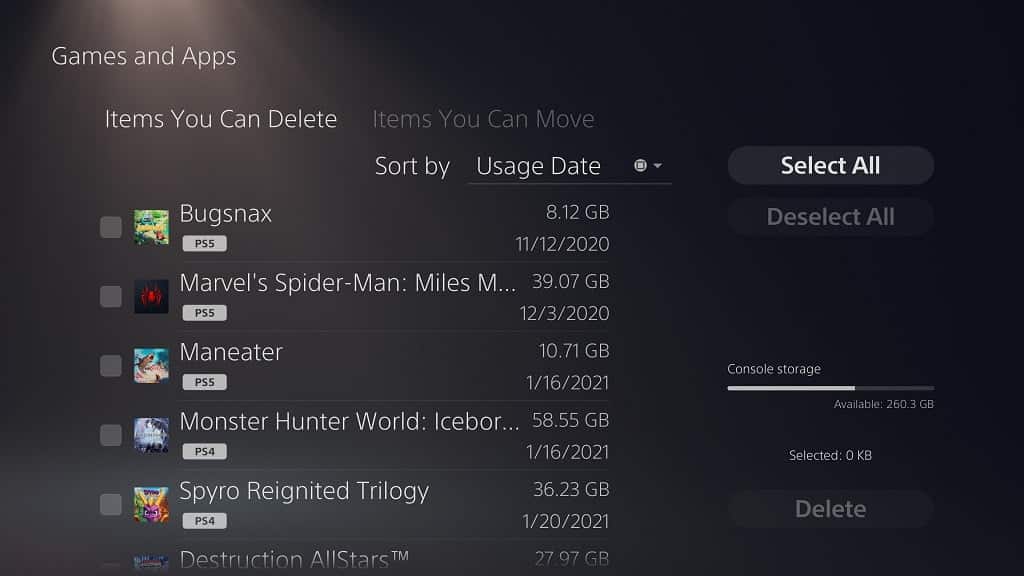
4. If you have a compatible external storage connected, you can choose between two options on top of the “Games and Apps” menu: “Items You Can Delete” and “Items You Can Move.”

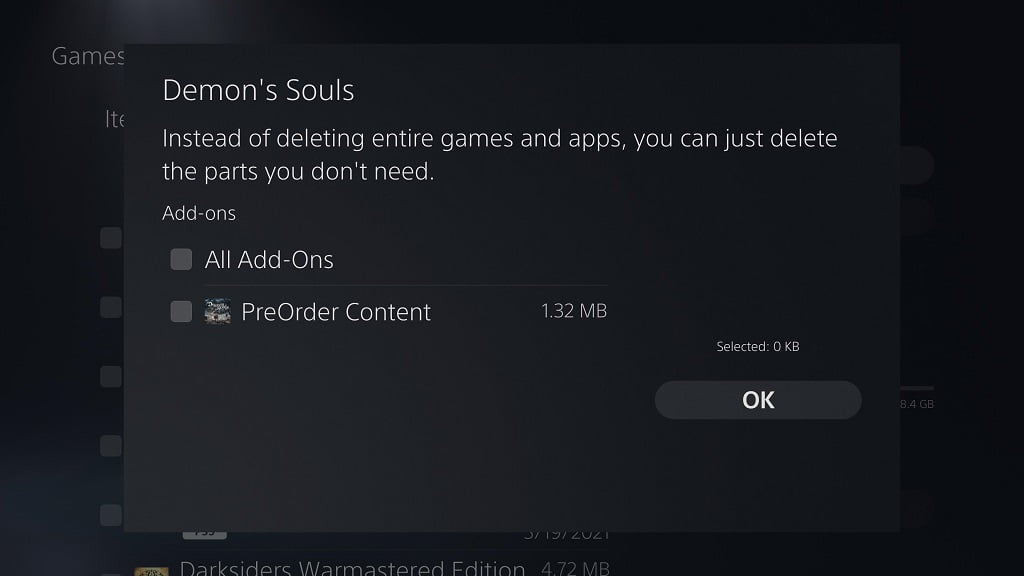
5. Select “Items You Can Delete” and you should see a list of games on the SSD that you can delete. On select games, you may see a pencil and three horizontal lines symbol. Selecting this symbol will allow you to delete portions, such as add-ons or pre-order content, of a game instead of the entire game.

6. Once you selected all the games you want to delete, select the “Delete” option on the lower right corner of the screen.

7. In the pop-up menu, select “OK” to delete the files and reduce the “Other” data size.

How to move games to external storage drive on PS5

Moving games to the external storage drive will also save you some space when it comes to the “Other” data.

Currently, this can only be done for PS4 games. PS5 games can only be stored on the internal solid state drive of the PlayStation 5.

To move PS4 games from the internal SSD of the PlayStation 5 to an external storage drive, you need to take the following steps:

1. First make sure, that a compatible external hard drive is connected to your PS5. It should show up when you go to “Settings” > “Storage” > “Extended Storage.”

2. If this is the first time you are using an external storage drive on a PS4/PS5, you may have to format the drive by picking the “Format as Extended Storage” option.

3. Keep in mind that the formatting process will delete are the current data on the external storage drive. So, if you have important data on it, make sure you copy the files over to another drive before formatting.

4. Now that your external drive is connected, head back to the “Storage” menu and select the “Console Storage” option on the left side and then “Games and Apps” on the right side.

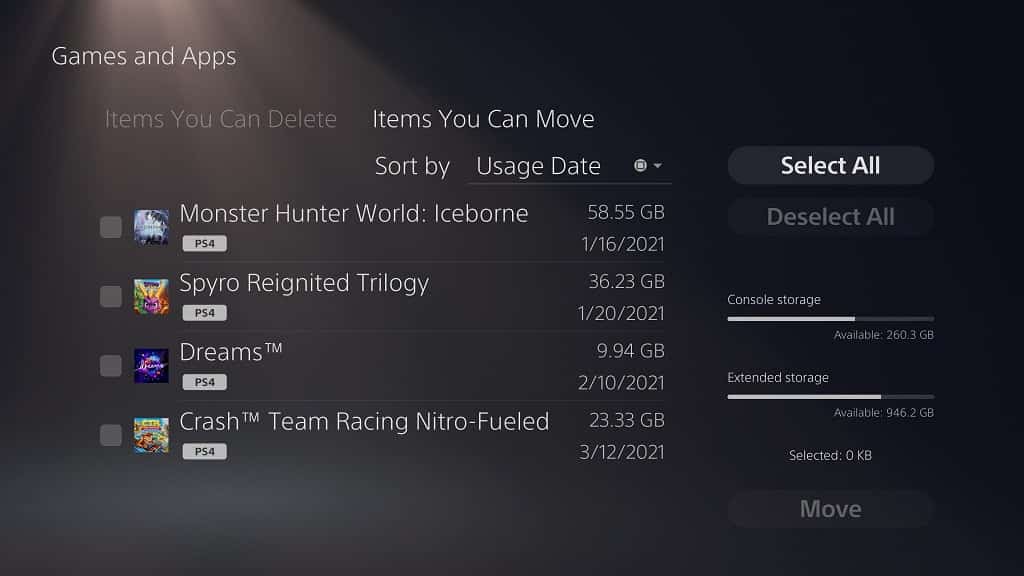
5. In the “Games and Apps” menu, select the “Items You Can Move” option at the top.

6. You can then select the PS4 games you want to move to the external drive.

7. Once you made your selection, select the “Move” option on the bottom right of the screen.

8. In the pop-up notification, select “OK” to confirm the move.

How to cancel the download process on PS5

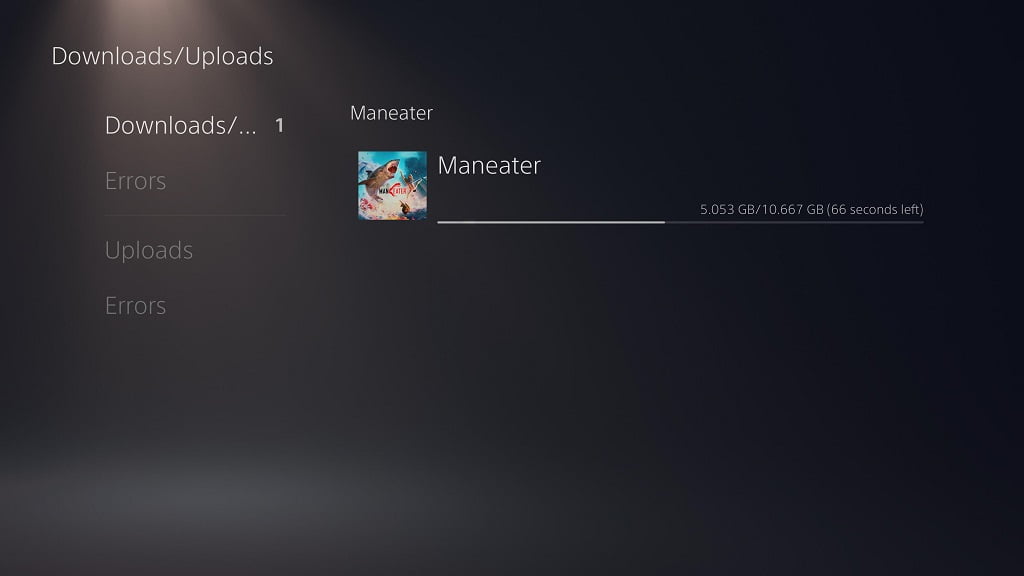
You can also reduce the size of the “Other” data by cancelling a game or application download. You can do so with the following steps:

1. If you are actively downloading a game or application, press the PS button on the DualSense controller to bring up the quick menu.

2. In the quick menu, navigate downwards and select the “Downloads/Uploads” option (it is the one attached to the downward pointing arrow symbol).

3. In the pop-up menu, select the download-in-progress game you want to delete.

4. In the “Downloads/Uploads” menu, select the “Downloads/Copies” option of the left side and then the game you want deleted on the right side.

5. In the new pop-up menu, select the “Cancel and Delete” option to clear off some “Other” data space from the PS5’s SSD.

6. To save even more space on the solid state drive of the PlayStation 5, you may want to check out our guide to disabling trophy screenshots and videos with this tutorial from Seeking Tech.

How to change time, date, time zone, time format and more on PS5

The PlayStation 5, along with the PlayStation 5 Digital Edition, is capable of displaying the time and date. You can check out this tutorial at Seeking Tech to see how you can change the time, date, time zone, time format and daylight savings settings.

How to check the time on PS5

The time will always appear on the top right corner on the system menus.

To access the home screen main menu while you are playing a game or using an app, hold the PS button on the DualSense controller.

To access the control center quick menu while you are playing a game or using an app, simply press the PS button.

In both of these menus, the clock will be displayed on the upper right corner of the screen.

How to check the date on PS5

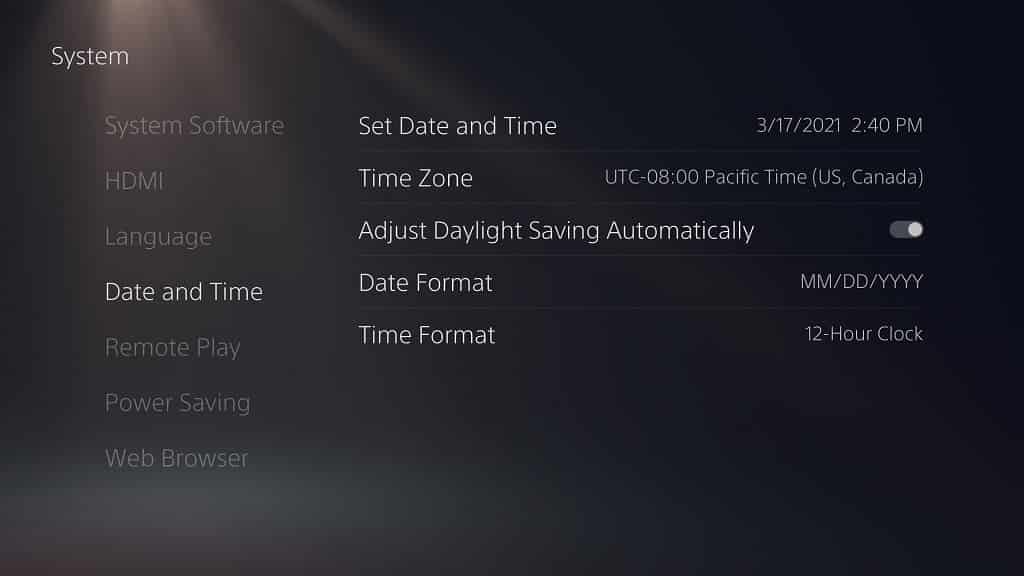
Checking the date on the PlayStation 5 is a lot more complicated than checking for the time. To do so, you need to take the following steps:

1. From the home screen main menu, head to “Setting.” You can find this on the upper right corner of the screen in between the search option and your user profile picture.

2. Under the “Settings” menu, go to “System.”

3. Under the “System” menu, select “Date and Time” on the left side of the screen.

4. On the right side of the same screen from the “System” menu, you will find the current date.

How to manually change the date and time on PS5

If you want to change the date and time on your PlayStation 5, you must do the following:

1. From the home screen, go to “Settings,” then “System” and then “Date and Time.”

2. Afterwards, on the right side of the “System” menu, select the “Set Date and Time” option.

3. In the “Set Date and Time” menu, you have two options: “Set Manually” and “Set Using Internet.”

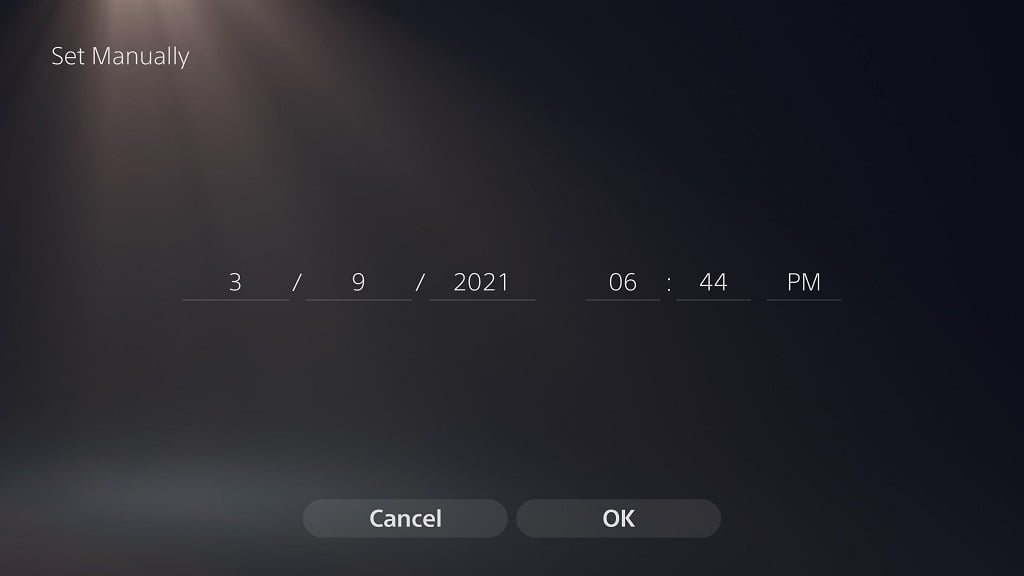
4. To change the date and time by yourself, select the “Set Manually” option.

5. In the “Set Manually” menu, change the time and/or date to your desire and then select the “OK” option in the bottom of the screen to confirm the changes.

How to automatically synchronize the date and time on PS5

If you would like synchronize the date and time automatically, then you should do the following:

1. From the home screen, select “Settings.”

2. Afterwards, go to “System” and then select “Date and Time” on the left side.

3. You can then select the “Set Date and Time” on the right side of the same screen.

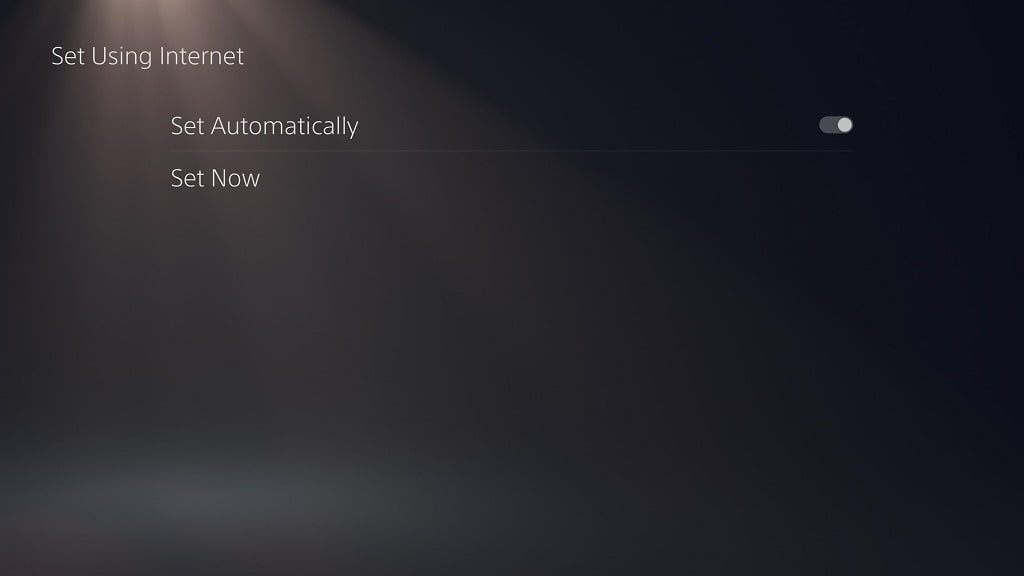
4. In the new “Set Date and Time” screen, select the “Set Using Internet” option.

5. In the “Set Using Internet” menu, select the “Set Now” option to synchronize the current time and date.

6. In the same “Set Using Internet” menu, you can also enable “Set Automatically,” an option that will synchronize the time and date every time you are signed into the PlayStation Network. You can tell that this setting is enabled when the switch to the right of the wording is white.

How to change the time zone on PS5

To change your time zone on the PlayStation 5, you can take the following steps:

1. Go back to the “Date and Time” menu. You can do so from the home screen by going to “Settings” -> “System” -> “Date and Time.”

2. In the “System” menu where you selected “Date and Time,” select the “Time Zone” option on the right side.

3. In the new pop-up menu, select your new time zone.

How to enable and disable daylight savings on PS5

To enable or disable daylight savings on the PlayStation 5, you can do the following:

1. Head to the “Date and Time” menu by selecting “Settings,” “System” and then “Date and Time” from the home screen.

2. Under the same “System” menu where you choose “Date and Time” on the left side of the screen, select the “Adjust Daylight Savings Automatically” on the right side.

3. The switch to the right of the “Adjust Daylight Savings Automatically” wording will indicate that this feature will be enabled when it turns white. If the same switch is black, then the feature is disabled.

How to change the date format on the PS5

You can change the format in which the date is shown on the PlayStation 5 by doing the following:

1. From the home screen, head back into the “Date and Time.” That means that you have to go to “Settings,” “System” and then “Date and Time.”

2. Here, you need to select the “Date Format” option.

3. In the pop-up menu, you will be able to pick between the “YYYY/MM/DD,” “MM/DD/YYYY” and “DD/MM/YYYY” formats.

How to change the time format on the PS5

To change the format in which time is displayed, you need to take the following steps:

1. Select “Settings” from the home screen system menu.

2. In the “Settings” screen, select “System.”

3. In the “System” screen, select “Date and Time” on the left side of the screen and then “Time Format” on the right side of the same screen.

4. In the pop-up menu, you have two options: “12-Hour Clock” or “24-Hour Clock.”

How to remap DualSense and DualShock 4 buttons on PS5

With the PlayStation 5, as well as PlayStation 5 Digital Edition, you can reassign buttons on your DualSense and DualShock 4 controllers. If you are interested in doing so, then you can follow this tutorial at Seeking Tech.

How to remap DualSense and DualShock 4 buttons on PS5

To remap the buttons on your controller, you need to take the following steps:

1. Turn on your PS5 and select your user profile. This will bring you to the home screen menu. If you are already playing a game or using an app, you can press and hold the PS button on your controller until the home screen shows up.

2. The remapped buttons will be tied to your user profile. To switch user profiles, you need to select your profile picture from the home screen menu (it is located on the upper right corner of the screen). Afterwards, select the “Switch User” option in the new pop-up menu.

3. After making sure you are on the right profile, go to “Settings” from the home screen (this is also located on the upper right corner of the screen, right next to your profile picture).

4. In the new “Settings” menu, select the “Accessibility” option.

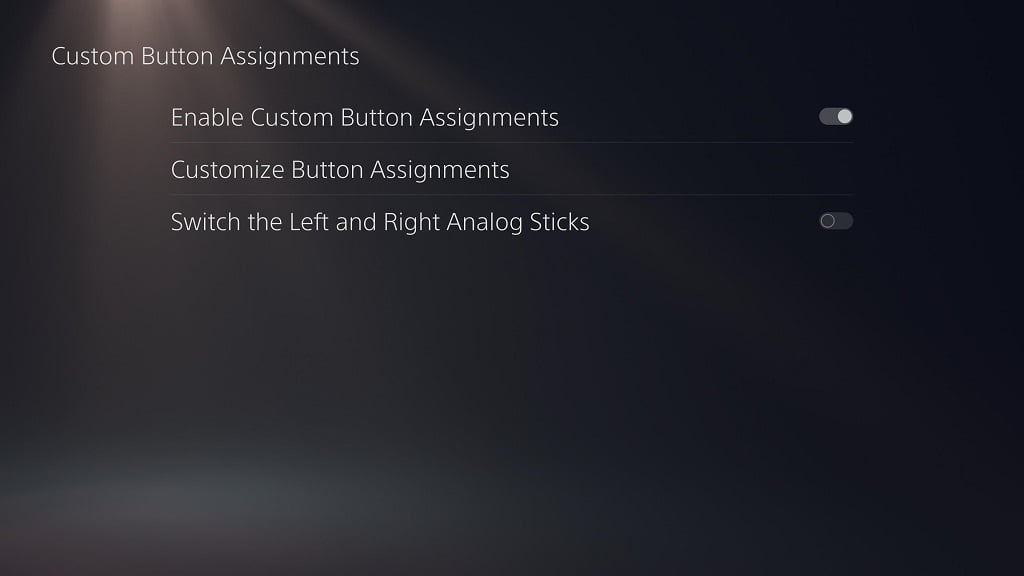
5. In the “Accessibility” menu, select the “Controllers” option on the left side of the screen and then the “Custom Buttons Assignments” option on the right side of the screen.

6. In the “Custom Buttons Assignments” menu, select the “Enable Custom Button Assignments” option if it is disabled. You can tell that this feature is enabled by looking at the switch to the right of the wording. The feature is turned on when the switch is white. The other options below will also become selectable.

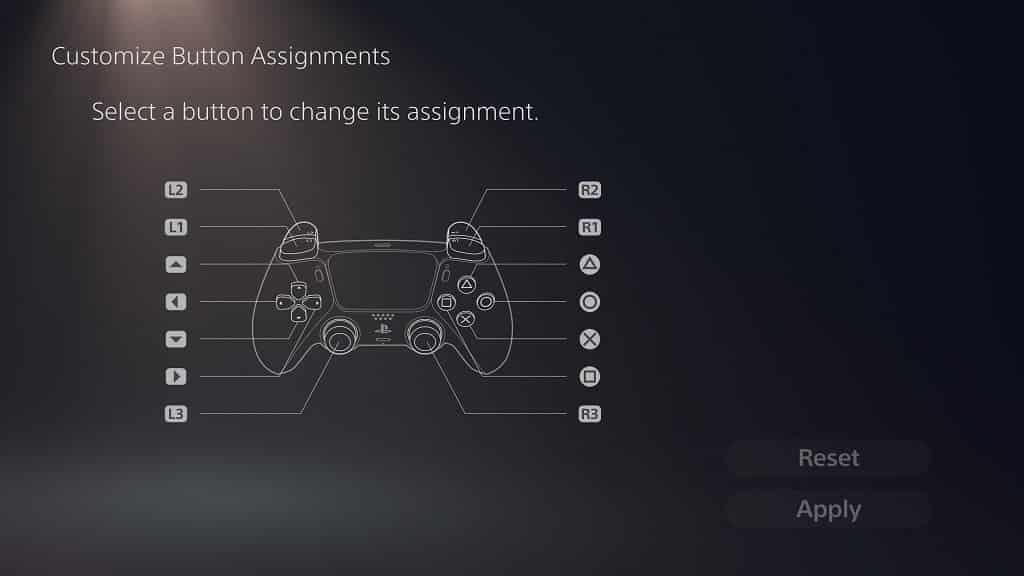
7. After enabling the “Custom Button Assignments” option, select “Customize Button Assignments” from the same menu screen.

In the “Custom Button Assignments” menu, you will be able to remap the following buttons:

  • L1
  • L2
  • L3
  • R1
  • R2
  • R3
  • Triangle
  • Circle
  • Cross (X)
  • Square
  • Up Directional Button
  • Left Directional Button
  • Down Directional Button
  • Right Directional Button

You can switch between any of the aforementioned buttons. For example, if you change the default functionality of the Triangle button to the X button, the default functionality of the X button will automatically change to the Triangle button as well. Keep remapping the buttons until you achieved your desired results.

8. Once you are satisfied with the changes, you can select the “Apply” option to save your remapped button layout.

Common Button Changes

Some of the more common button remaps are L1 to L2 and R1 to R2. Before the PlayStation 4, a lot of games, especially those from the first-person and third-person shooting genres, use the L1 and R1 buttons for aiming and shooting.

The other common change is from X to O. Before the PlayStation 5, a lot of videogames originating from Japan will use the O button as confirmation and the X button as cancel. This button assignment would either stay the same or be switched when a Japanese game is localized for other regions such as North America.

Some gamers may also like to change the functionally of the L3 and R3 as pushing down on the left and right analog sticks of the DualSense or DualShock 4 may not feel all that great, especially if you are using these buttons to run or perform a melee attack.

Can you remap PS, share and options button on PS5?

You can’t remap any of the PS, share or options button on your DualSense/DualShock 4 controller when using the PlayStation 5.

How to disable DualSense and DualShock 4 remapped buttons on PS5

If you want to disable using the remapped buttons on the PlayStation 5, you must take the following steps:

1. From the home screen, go to the aforesaid “Settings” menu.

2. In “Settings,” go to “Accessibility.”

3. In the new screen, select “Controllers” on the left side and then “Custom Button Assignments” on the right side.

4. Select the “Enable Custom Button Assignments” option. You can tell that this setting is disabled if you look at the switch to the right of the wording. If the switch is black (and the other two options below it become non-selectable), then the custom button assignments are disabled.

4. To use the remapped buttons again, you have to re-enable the “Enable Custom Button Assignments.” Doing so will bring back your previous customized buttons layout.

How to reset DualSense and DualShock 4 remapped buttons on PS5

If you would like to reset the remapped controller buttons on the PlayStation 5, you can take the following steps:

1. Return to the aforementioned “Custom Button Assignments” menu. You can do so by going from the home menu to “Setting,” then ““Accessibility,” then “Controller” and, finally “Custom Button Assignments.” Make sure “Enable Custom Button Assignments” is turned on and then select “Custom Button Assignments.”

2. In the menu, select the “Reset” option on the bottom right corner.

How to switch the DualSense/DualShock 4 left and right analog sticks on PS5

To switch the functions of the left and right analogs on the PlayStation 5, you need to do the following:

1. Return to the “Custom” Button Assignments” menu by heading to home screen and then selecting the following options in subsequent order: “Settings,” “Accessibility,” “Controllers” and “Custom Button Assignments.”

2. Make sure that the “Enable Custom Button Assignments” is turned on and then select the “Switch the Left and Right Analog Sticks” option.

How to invert DualSense and DualShock 4 controls on PS5

If you want to invert controls systemwide on your PlayStation 5 for your DualSense and DualShock 4, you can take the following steps:

From the home screen menu, head to “Setting.”

1. In the “Settings” menu, select the “Saved Data and Game/App Settings” from the available options.

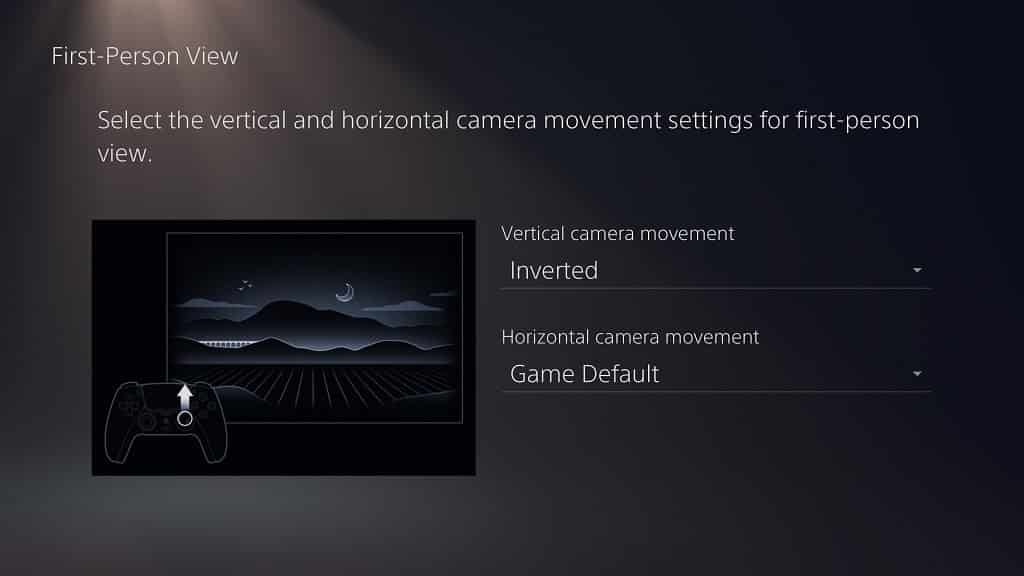
2. In the new “Saved Data and Game/App Settings” menu, select “Game Presets on the left side of the screen and then either “First-Person View” or “Third-Person View” on the right side of the screen.

3. In the new menu, you will be able to change two settings: “Vertical Camera Movement” and “Horizontal Camera Movement.” For both, you have three options “Game Default,” “Normal” or “Inverted.” If you select “Normal” or “Inverted” you will see a short video demonstrating the effect of the new setting.

4. Once you are satisfied with the changes, you can back out, which is the O button on your controller be default, to confirm the changes.