How to disable PS5 trophy notification

Just like the PlayStation 3, PlayStation Vita, PlayStation 4 and PlayStation 4 Pro, you are able to earn trophies when playing games on your PlayStation 5 and PlayStation 5 Digital Edition.

If you don’t want to earn trophies at all, then you can take a look at this tutorial from Seeking Tech to see you can do to potentially remove this feature.

Can you disable trophies on PlayStation 5?

The trophy feature can’t be completely disabled on the PlayStation 5 or PlayStation 5 Digital Edition.

With that said, you can easily avoid trophies by disabling its notification settings. By doing so, you won’t get a message any time you earn a trophy while playing the game. As a result, this will help you feel more immerse in your gaming experience.

How to turn off trophy notifications on the PS5 and PS5 Digital Edition

In order to turn off trophy pop-up messages on the PlayStation 5 and PlayStation 5 Digital Edition, you need to take the following steps:

1. First off, make sure you are in the home screen, which is where you can select which game or media app to open.

If you aren’t then you have to press and hold the PS button on your controller to bring it up.

2. In the home screen, go to the Settings menu, which you can do so by selecting the gear icon on the top right side of the screen.

3. From the Settings menu, select Notifications, which is near the bottom of the list.

4. Inside the Notifications menu, select Trophies.

5. In the pop-up menu, you have the following options:

If you disable the Show Pop-Ups setting, then the trophy notification won’t appear when you are playing a game, watching a video or streaming your gameplay.

If you disable the During Games setting, then the trophy notification will be turned off when you are playing a game.

If you disable the During Videos setting, then the trophy notification won’t show up when you are watching a video.

If you disable the During Broadcast setting, then the trophy notification won’t show up when you are streaming your gameplay.

How to automatically switch to the Xbox Series S or Xbox Series X input on your TV

A new feature was recently added to the Xbox Series S and Xbox Series X where your television set will automatically switch to the input that is playing your console.

To see how you can use this feature, you can take a look at this tutorial from Seeking Tech.

1. The first step you can take is to make sure that your television supports HDMI-CEC. You can try to look through the digital or physical manual to see if your TV has this feature.

2. If you believed that your television set supports HDMI-CEC, then the next step is to make sure that it is enabled on your TV.

Open the Settings menu of your TV and then check to see if there is an option to turn on HDMI-CEC or something similar to it.

3. Once you have your television ready, turn on your Xbox Series S or Xbox Series X.

4. Next, you need to head over to the Settings menu on your game system.

If you can’t find Settings from the home screen, then you can do the following:

  • Press the Xbox button on the controller.
  • In the Guide menu, press RB button several times until you get to the “Profile & system” tab.
  • Next, you need to select Settings.

5. From the Settings menu, select General on the left column.

6. On the right side of the same menu, you then need to select “Sleep mode & startup.”

7. Inside the “General – Sleep mode & startup” menu, you need to select “TV & A/V power options” on the left column.

8. In the “General – TV & A/V power options” menu, make sure that HDMI-CEC is enabled.

9. In the same screen, you then need to enable the “Switch TV input using controller” setting.

10. Press the B button on the controller to back out of the “General – TV & A/V power options” menu.

11. You should get a Restart your Xbox console notification stating that your Xbox Series S or Xbox Series X needs to be restarted in order for the changes to take effect.

12. Select Restart Now.

13. Once the system has rebooted, the “Switch TV input using controller” setting will be activated.

You can test this new feature by switching your TV to a different input. Afterwards, you can press the Xbox button on your controller. If done correctly, your television set should switch to the input displaying your Xbox Series X or Xbox Series S.

How to fix dimming and flickering issues with Samsung QN85B and QN90B

When using the Samsung QN85B or QN90B Neo QLED 4K Smart Television Sets, you may experience dimming and/or flickering problems.

To see how you can fix these issues for the 55-inch, 65-inch, 75-inch and 85-inch screen sizes of both models, you can take a look at this troubleshooting article at Seeking Tech.

In order to fix the dimming and flickering problems with your Samsung QN85B or QN90B, you can try doing the following:

1. The first step you can take is to try turning off your QN85B or QN90B and then turn it back on again.

2. You can also try unplugging your TV set from the power outlet, wait a few minutes, and then re-plug it back into the power outlet.

3. You should make sure that the HDMI and other cables aren’t damaged and are properly connected to your Samsung television set.

4. If your screen is still dimming or flickering, then you can try to disable Brightness Optimization by first pressing the home button on your remote controller.

You then need to select Menu > Settings > All Settings > Power and Energy Saving > Brightness Optimization.

Afterwards, make sure that the Brightness Optimization feature is turned off.

2. You can also try disabling Brightness Reduction by pressing the home button on the TV remote and then going to Menu > Settings > All Settings > Power and Energy Saving > Brightness Reduction.

Finally, make sure that the Brightness Reduction setting is disabled.

3. You should disable Motion Lighting as well.

In order to do so, press the home button on the remote and then select Menu > Settings > All Settings > Power and Energy Saving > Motion Lighting.

Next, you need to make sure that Motion Lighting has been turned off.

4. Moreover, you can also try turning off Contrast Enhancer by pressing the home button on the remote and then selecting Menu > Settings > All Settings > Picture > Expert Settings > Contrast Enhancer.

You then need to make sure that you have Contrast Enhancer disabled.

5. You can also try running the Picture Test to see if the dimming and/or flickering is related to your Samsung Neo QLED TV or with the connected device.

In order to run a test, press the home button on the remote and then go to Menu > Settings > Support > Device Care > Self Diagnosis > Picture Test.

If the screen appears to be operating normally, then the dimming or flickering may be related to the input device you have connected to your television set.

In this case, you can either connect a different device or refer to the user manual of the troublesome device to see how you can get rid of the dimming and/or flickering.

6. If your television set is still flickering and/or dimming after trying all of the aforementioned solutions, then we recommend contacting Samsung for additional support.

The cause for these screen issues may end up being hardware related, which means that your TV may need to be repaired or replaced.

PS Plus vs. PS Plus Essential vs. PS Plus Extra vs. PS Plus Deluxe vs. PS Plus Premium

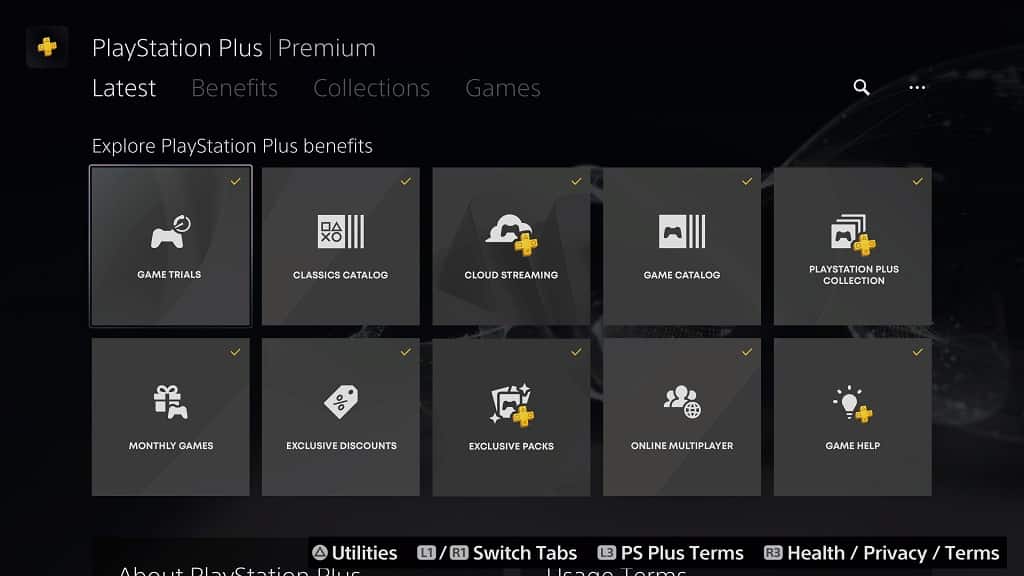
PlayStation Plus is being expanded to multiple tiers. So, how does the Essential, Extra, Deluxe and Premium versions of the subscription service compare to the original?

You can find out in this versus guide from Seeking Tech.

Quick Summary

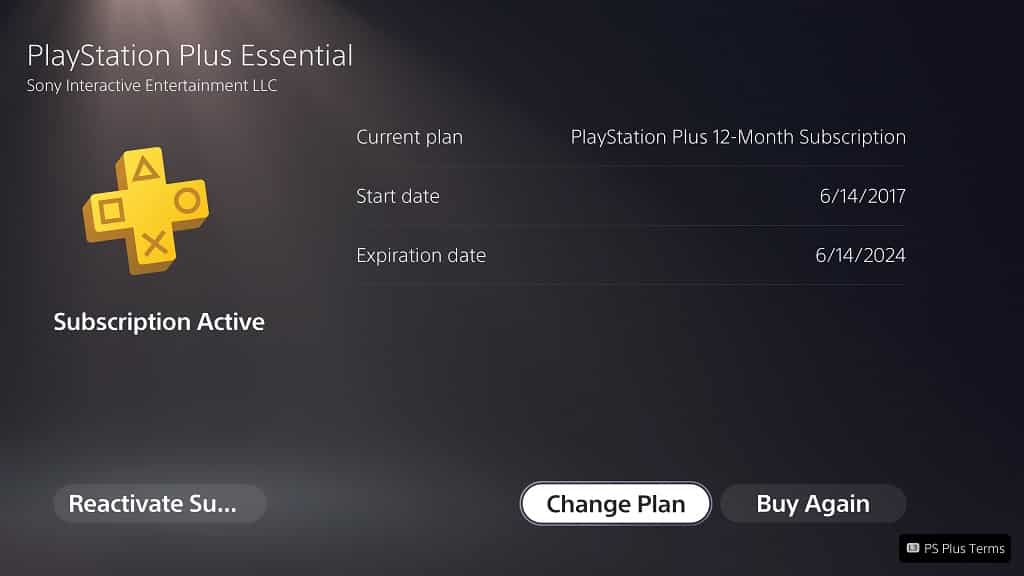
The original PlayStation Plus is the same as PlayStation Plus Essential as you will get monthly games, online multiplayer access, PS Plus Collection and PS5 cloud save backups. In June 2022, the standard PlayStation Plus will be converted over to PlayStation Plus Essential.

PlayStation Plus Extra comes with everything from the original Plus and Essential while also adding an expanded catalog of downloadable PS4 and PS5 games.

PlayStation Plus Deluxe, which will only be available in select regions, comes with all the benefits of Plus, Plus Essentials and Plus Extras. You will also get access to game trials as well as downloadable PS1, PS2 and PSP games.

PlayStation Plus Premium has all the benefits as the other PlayStation Plus tiers. It is also the only version to adds cloud streaming for PS1, PS2, PSP, PS3 and PS4 games.

PlayStation Plus vs. PlayStation Plus Essential vs. PlayStation Plus Extra vs. PlayStation Plus Deluxe vs. PlayStation Plus Premium Comparison Chart

You can take a look at our comparison table for the original PlayStation Plus as well as the new PlayStation Plus tiers below.

PlayStation PlusPlayStation Plus EssentialPlayStation Plus ExtraPlayStation Plus DeluxePlayStation Plus Premium
Online multiplayer accessYesYesYesYesYes
Cloud storage for PS5 save filesYesYesYesYesYes
Monthly downloadable gamesYesYesYesYesYes
Time-limited game trialsNoNoNoYesYes
PlayStation Plus CollectionYesYesYesYesYes
Curated PS1 downloadable games catalogNoNoNoYesYes
Curated PS2 downloadable games catalogNoNoNoYesYes
Curated PS3 downloadable games catalogNoNoNoNoNo
Curated PSP downloadable games catalogNoNoNoYesYes
Curated PS4 downloadable games catalogNoNoYesYesYes
Curated PS5 downloadable games catalogNoNoYesYesYes
Curated PS1 cloud streaming games catalogNoNoNoNoYes
Curated PS2 cloud streaming games catalogNoNoNoNoYes
Curated PS3 cloud streaming games catalogNoNoNoNoYes
Curated PSP cloud streaming games catalogNoNoNoNoYes
Curated PS4 cloud streaming games catalogNoNoNoNoYes
Curated PS5 cloud streaming games catalogNoNoNoNoNo

Monthly Games

As with the original PlayStation Plus, the new Essential, Extra, Deluxe and Premium tiers will also offer at least two downloadable games every month.

You can play these software releases as long as you are an active member for any version of the PlayStation Plus.

If you have been a subscriber to PlayStation Plus for a very long time, then you may have gotten PS3, PSP and Vita games from the service in the past. To play these on your older PlayStation systems, you will still need to stay subscribed to any of the available Plus tiers.

To find out more about how PlayStation Plus Essential, PlayStation Plus Extra, PlayStation Plus Deluxe and PlayStation Plus Premium impact the PS3, PSP and Vita systems, you can take a look at this article.

Online Multiplayer Access

Just like the original PlayStation Plus, the new versions are required in order to play online multiplayer for a vast majority of games on the PlayStation 4 and PlayStation 5.

The exceptions include free-to-play releases like Apex Legends, Call of Duty Warzone, Fortnite and Genshin Impact. For Final Fantasy XIV, you also don’t need to subscribe to a PlayStation Plus tier.

Cloud Storage for PS5 Save Files

In order to back up your save files for PlayStation 5 games, you will still need a PlayStation Plus membership.

For PS4 save files, you are able to back up these data through an USB storage device.

PS Plus Collection

The original PlayStation Plus, along with PlayStation Plus Essential, still come with the PlayStation Plus Collection, which is a list of downloadable PS4 games that you can play on PlayStation 5 or PlayStation 5 Digital Edition.

This perk is exclusive to owners of a PS5 system.

Game Trials

The PlayStation Plus Deluxe and PlayStation Plus Premium are the only two subscriptions to offer game trials that will let your try out select games for a limited amount of time.

Downloadable Games Catalog

The more expensive versions of the PlayStation Plus will offer curated lists of downloadable games.

With PlayStation Plus Extra, you are able to download and play PS4 and PS5 games.

With PlayStation Plus Deluxe and PlayStation Plus Premium, you can download and play PS1, PS2, PSP, PS4 and PS5 games.

Cloud Streaming Games Catalog

The PlayStation Plus Premium is the only version of the service that will allow you to play games over cloud streaming. Along with the PS1, PS2, PSP, PS4 and PS5 games, you will also be able to stream PS3 games.

What will happen to the original PlayStation Plus?

Once the new PlayStation Plus versions are made available, the original PlayStation Plus will be converted over to PlayStation Plus Essential as the two services are the same.

How to prevent water damages to JBL PartyBox 110

The PartyBox 110 is the latest portable speaker released by JBL in 2021.

You can take a look at this guide at Seeking Tech to see how you can prevent the 110 model of the PartyBox series from getting water damaged.

What in the IP rating for JBL PartyBox 110?

The PartyBox 110 has an ingress protection rating of IPX4.

In terms of water protection, this speaker should be shieled from water splashes from any directions. This product has not been rated for any protection against dust buildup.

How to prevent JBL PartyBox 110 from water damages

As you can see from the IP rating, the PartyBox 110 only offers limited water protection against splashes. Therefore, we recommend taking the following precautions when using this speaker:

1. Make sure you keep the protective covers for the back panel (this is where the USB, AUX in addition to other controllers and ports are located) and AC power closed at all time near water.

2. If you need to use the AC power or the back panel, then you need to keep your speaker away from water contact.

3. In general, it is recommended that you avoid putting the PartyBox 110 near any body of water such as the pool, sink or bathtub.

4. You should not place a drink, or any other types of water containers, on top of the speaker.

5. Furthermore, you should avoid using the product in a place that has extremely high humidity such as a sauna.

6. If you are recharging the PartyBox 110, it is very important that you keep the speaker and the AC power cable dry before doing so.

What to do when you get too much water on your JBL PartyBox 110

If you get too much water on your JBL PartyBox 110, you can take the following steps:

1. To begin, we recommend wearing rubber gloves before touching the water damaged speaker so that you won’t get potentially shocked.

2. Next, you need to turn off the speaker if it hasn’t already been turned off.

3. You should then remove any cables you have attached to the speaker.

4. Afterwards, move the speaker away from the water.

5. If you have any excess water, try to gently shake it off.

6. Finally, you have to wait until the PartyBox 110 completely air dries to room temperature. To be extra cautious, you can wait for a couple days.

We don’t recommend trying to speed up this process by using a heating source such as hair blow dryer as it may cause damages to your speaker.

7. After waiting until your speaker is dry again, you may want to try to turn it back on to see if it is still functioning normally.

How to disable sleep mode for PS5

Your PlayStation 5 and PlayStation 5 Digital Edition may put itself to sleep in a powered down mode. To prevent this from happening, you can take a look at this tutorial from Seeking Tech.

How to disable automatic sleep mode for PS5

In order to prevent your PlayStation 5 or PlayStation 5 Digital Edition from automatically entering into sleep mode, you need to take the following steps:

1. First off, make sure you are in the Home Screen, which is the main menu where you can select which game or app to open.

If you aren’t, then you can press and hold the PS button on the DualSense to get there.

2. From the Home Screen, select the gear icon located on the top right side of the menu.

3. Inside of Settings, select System.

4. In the System menu, you first need to select Power Saving on the left column and then select Set Time Until PS5 Enters Rest Mode on the right side of the screen.

5. Inside the Set Time Until PS5 Enters Rest Mode menu, select During Media Playback and then set this setting to Don’t Put in Rest Mode.

6. In the same Set Time Until PS5 Enters Rest Mode menu, select While Playing Games and then set it to Don’t Put in Rest Mode.

How to avoid manually putting your PS5 in sleep mode

In addition to disabling automatic sleep mode for your PlayStation 5 or PlayStation 5 Digital Edition console, you also need to manually avoid using it as well.

In order to do so with the power button located directly on your PS5 system, you need to take the following steps:

1. Press and hold it until you hear two beeping noises.

2. The first beep should come immediately after you press and hold the power button.

3. Keep holding the power button until you hear a second beep, which should come around three second after the first beep.

4. You should get a notification on the screen stating that your system is preparing to shut down.

5. Avoid unplugging the system from the power outlet until it has completely turned off.

To avoid putting your PS5 in sleep if you are using the system menu to turn off your console, you need to do the following:

1. Bring the Control Center quick menu by pressing the PS button on DualSense controller.

2. In the Control Center, select the power icon, which should be the right most option at the bottom.

3. In the Power pop-up menu, select Turn Off PS5.

4. An on-screen message should appear saying that the system is preparing to turn off.

5. Avoid unplugging the PS5 or PS5 Digital Edition console from the power outlet until the shutdown process has been completed.

How to fix power, no sound and unresponsiveness issues with JBL PartyBox 110

When using your JBL PartyBox 110, the portable speaker may not appear to be powered on, may not be responding your button presses and/or may not be outputting any sound.

You can take a look at this troubleshooting guide at Seeking Tech to see how you can potentially fix these issues.

How to fix issues with the JBL PartyBox 110 not turning on

To begin to fix these issues, we suggest checking if your PartyBox 110 is powering on correctly.

1. The first step we recommend taking is to press the power button on your speaker.

If you see the indicator below the power button show a completely white light, then that indicates that your speaker should be turned on with more 80% battery life.

If you see a partial white light, then it means that the battery is between 15% to 80% charged.

If you see a red light, then the battery life is less than 15%.

If you don’t see any light at all, then it may be due to a depleted battery life.

2. If you don’t see any light coming out of the indicator below the power button, plug the AC power supply cord that came with the PartyBox 110 to the speaker and the other end of the cable to a power outlet.

3. After plugging the portable speaker into the power outlet, you should be able to turn it on by pressing the power button.

4. If the PartyBox 110 is still not turning on even when plugged in, then you can try plugging it into a different power outlet.

5. If the speaker is still not powering on, and it is still under warranty, then you can try contacting JBL.

How to fix unresponsiveness issues with JBL PartyBox 110

If you believe that your JBL PartyBox 110 but is not responding to your button presses, then you speaker may have been set to demo mode. In order to disable it, you need to press and hold the Play and Bass Boost buttons at the same time for five seconds.

If you are still experiencing responsiveness issues, then you can also try factory resetting the speaker by pressing and holding the Play and Lights button for 10 seconds. After your speaker has rebooted, you will need to pair it again to the source device.

If none of the aforementioned potential solutions work, and your PartyBox 110 is still under warranty, then we recommend contacting JBL.

How to fix sound issues with the JBL PartyBox 110

If your PartyBox 110 is turned on and is responding to your button presses but appears to be muted, then you can do the following:

1. First off, you can try rotating the wheel of the clockwise to increase the volume level.

2. You should also make sure that the connected source device is not muted.

You can try turning up the volume by pressing the volume up button of the device.

Furthermore, you can also try increasing the volume of the media player on the device if possible.

3. If you still can’t get any sound, then you can try connecting another device to your speaker.

4. If your PartyBox 110 still can’t play any sound after trying multiple devices, then you might want to consider contacting JBL if your product is still covered under warranty.

How to install the INLAND Gaming Performance Plus to PS5

The INLAND Gaming Performance Plus Solid State Drive is compatible with the PlayStation 5 and PlayStation 5 Digital Edition systems. Once you insert and format this storage drive, you will be able to store PS5 games and play them directly on the M.2 drive.

You can take a look at this tutorial to see how you can properly setup this SSD for your game console.

Before we begin, we should note that this guide should be based on the following products:

  • 1 TB INLAND Gaming Performance Plus Gen 4 PCIe 4.0 NVMe M.2 SSD
  • 2 TB INLAND Gaming Performance Plus Gen 4 PCIe 4.0 NVMe M.2 SSD

Both of these solid state drives have sequential read speeds of up to 7000 MB per second, which is more than the recommended minimum of 5,500 MB per second for PS5 compatibility. These SSDs also come equipped with heatsinks that will fit into the docking bay.

How to insert INLAND Gaming Performance Plus into the PS5

In order to insert the 1 TB or 2 TB INLAND Gaming Performance Plus Gen 4 PCIe 4.0 NVMe M.2 SSD into your PlayStation 5 or PlayStation 5 Digital Edition, you need to take the following steps:

1. If you previously used your solid state drive, then the first step we recommend taking it to transfer any important files you have on it to another storage. Otherwise, these files will be deleted when you format the SSD.

2. Once you are ready, start by unplugging the HDMI cable, USB cable, power cable as well as any other accessories you have connected to your PlayStation 5 or PlayStation 5 Digital Edition.

3. If you have your system sitting on a stand, then you need to detach the stand as well.

4. Afterwards, we recommend laying the console down flat on a soft surface with the PS logo of the outer case at the bottom.

5. You should also make sure that you are facing the backside of the system, which is where the HDMI port and power port are located.

6. Next, you need to place your right hand on the bottom right corner of the outer case and then your left hand on the top left corner.

7. Lift up the lower right corner of the outer case with your right hand and then slide the outer case off to the left.

8. With the outer casing removed, you should be able to find the metal cover of the M.2 docking bay of your PlayStation 5 or PlayStation 5 Digital Edition.

9. Use a crosshead screwdriver top remove the screw holding the metal cover.

10. You then need to remove the metal cover.

11. After opening the M.2 docking bay, you need to use the crosshead screwdriver again to remove the screw and spacer inside.

12. Place the spacer you removed in the previous step into the “80” hole of the docking bay.

13. Next, you need to insert your 1 TB INLAND Gaming Performance Plus or 2 TB INLAND Gaming Performance Plus starting from a diagonally upwards position into the M.2 slot of your PS5.

14. Use the screw you removed from Step #11 to screw down the other end the solid state drive into the “80” hole.

15. After installing the solid state drive, screw back in the metal cover of the M.2 docking bay.

16. Afterwards, slide the outer cover of your PlayStation 5 or PlayStation 5 Digital Edition back into place starting from the left side.

How to format INLAND Gaming Performance Plus for PS5

After inserting the INLAND Gaming Performance Plus and reassembling your console, you need to format the solid state drive by taking the following steps:

1. Reattach the stand, HDMI cable, power cable as well as other accessories you previously have plugged into your PS5 if you haven’t done so already.

2. Turn on your console.

3. You should eventually arrive at the M.2 SSD Storage screen.

4. Press the PS button on your Dualsense.

5. Once you are able to use your controller, select the Format M.2 SSD option.

6. The formatting process will then start. Once it has ended, you should see the sequential read speed of your 1 TB INLAND Gaming Performance Plus M.2 SSD or 2 TB INLAND Gaming Performance Plus M.2 SSD as tested by your PS5 console.

7. Select the Ok option to continue to the home screen menu.

Where to find INLAND Gaming Performance Plus in the PS5 menus

In order to find the location of your newly installed INLAND Gaming Performance Plus in the system menus of your PlayStation 5 or PlayStation 5 Digital Edition, you need to do the following:

1. From the home screen menu, select the gear icon located on the upper right area.

2. Inside of the Settings menu, select Storage.

3. After getting to the Storage menu, select M.2 SSD Storage on the left side.

4. You should be able to find your INLAND Gaming Performance Plus solid state drive on the right side in the same menu.

5. In the same Storage menu, you can also transfer game data, delete game data and reformat the INLAND Gaming Performance Plus SSD.

How to fix audio, Bluetooth, microphone and power issues with PartyBox On-The-Go

When using the JBL PartyBox On-The-Go, you may run into several issues.

You can check out this guide at Seeking Tech to see how you can fix the most common problems with this portable speaker.

How to fix PartyBox On-The-Go when it doesn’t turn on

If your JBL PartyBox On-The-Go is not turning on, then it may be due to its depleted internal battery.

The speaker has a maximum battery life of 6 hours. That length could lessen depending on how you are using the PartyBox On-The-Go.

To fix this issue, you can simply plug the speaker into a power outlet by using the included AC power cable.

You should then be able to start using the speaker. Alternatively, you can wait until the internal battery fully charges, which should take around 3.5 hours, to use the speaker without it being plugged into a power outlet.

How to fix PartyBox On-The-Go unresponsive buttons

If the speaker is not responding to your button presses, then it may be in demo mode. For the uninformed, the demo mode of the JBL PartyBox On-The-Go will disable all buttons with the exception of the play, light effects, bass boost, volume up and volume down buttons.

In order to disable demo mode, you need to press and hold the play and bass boost buttons at the same time for at least 5 seconds.

Afterwards, you should be able to use all the buttons on the speaker.

How to fix PartyBox On-The-Go no sound issues

If your PartyBox On-The-Go is not outputting any sound, you can try doing the following:

First off, make sure that the speaker is turned on.

If your speaker is turned on but you aren’t getting any sound, try adjust the volume by pressing the volume up and volume down buttons. You can also try pressing the volume up and volume down buttons at the same time as doing so will mute or unmute the speaker.

One last fix you can try is to look at the audio source. For example, if your phone is connected to your speaker over Bluetooth, you need to make sure that the audio you are playing on your phone isn’t muted.

How to fix PartyBox On-The-Go poor audio quality issues

If you are getting sound from the JBL PartyBox On-The-Go but it is of poor quality, then your issue may be related to the Bluetooth connection.

To resolve this, we recommend moving the speaker and the other device it is connected with over Bluetooth closer together.

You need to also make sure that aren’t any physical objects in between the speaker and the other device. Wi-Fi, microwaves and other Bluetooth devices could also weaken the connection as well. Furthermore, outdoor usage will also hinder the Bluetooth connection between the speaker and the other device.

How to fix PartyBox On-The-Go Bluetooth connection issues

If you can’t get your device connected to the PartyBox On-The-Go, you can try taking the following steps:

First off, make sure that the Bluetooth connection is enabled and previously paired with the speaker on the other device.

The PartyBox On-The-Go and the other device needs to be close together (the maximum range is 33 feet). Furthermore, you also need to make sure that there isn’t any physical objects or other wireless signals that may hinder the Bluetooth connection.

If you still can’t connect, then your speaker may already be connected to another Bluetooth device. To resolve this, press and hold the Bluetooth button on the PartyBox On-The-Go for at least 20 seconds. This will disconnect the speaker with the other device. You can then try to connect the speaker with your desired device once again.

How to fix PartyBox On-The-Go wireless microphone issues

If you are having issues with the microphone of the JBL PartyBox On-The-Go, you can try doing the following:

First off, make sure that the microphone is turned on and still has sufficient battery life remaining. If the battery level is low, then we recommend replacing the batteries.

You can also try pairing the mic to the speaker again. To do so, turn off both devices. Afterwards, turn on the speaker. Place the microphone on top of the speaker and then turn the mic on. The two devices should be paired and connected within 3 minutes.

It should be noted that the JBL PartyBox On-The-Go can only support a maximum of two microphones.

How to factory reset the JBL PartyBox On-The-Go

Factory resetting the JBL PartyBox On-The-Go may also help fix some of the aforementioned issues.

To restore the speaker to its original default settings, simply press and hold the play button for at least 10 seconds.

How to fix Google Pixel Buds A-Series low volume issues

When using the Google Pixel Buds A-Series, you may notice that the sound output is too quiet for your liking. You can check out this troubleshooting guide at Seeking Tech to see how you can potentially fix these low volume issues.

1. Before we begin, you should make sure that you didn’t set the volume low or muted on the paired device.

You may have also accidentally lowered or muted the volume in the media player running in the web browser or app.

2. You should also make sure that the Pixel Buds A-Series aren’t overheating. This is because the earbuds’ performance will be lowered if they get too hot.

You can take a look at this tutorial to see how you can prevent your earbuds from overheating.

3. Moreover, we also recommend recharging your earbuds.

If you are experiencing issues with trying to recharge the Pixel Buds A-Series and/or its charging case, you can check out this guide.

4. You should also check if there is any Bluetooth interference. Make sure that the Pixel Buds A-Series is relatively close to the paired device. You should also make sure that you aren’t close to any other wireless devices.

To find out more about how you can fix the Bluetooth connection problems, you can take a look at this tutorial.

5. You may also want to you clean your earbuds as dust and dirt could be partially blocking the sound output.

To see how to clean the Pixel Buds A-Series, you can take a look at the video from Google below.

6. If you are still having the low volume issue with your Google Pixel smartphone, then it may due to the Disable Absolute Volume setting. Therefore, you can try switch it to off in order to see if the volume increases.

To turn off the Disable Absolute Volume on a Pixel 6 or Pixel 6 Pro, you can take the following steps:

  • First off, you need to access the “Developer options” menu. To do so, open the Settings app on your Pixel 6 or Pixel 6 Pro and then select “About phone.”
  • In the “About phone” menu, you then need to quickly tap “Build number” 7 times. This should unlock “Developer options” menu, which you can find by going back to Settings and then selecting System.
  • In the “Developer options” menu, make sure that “Use developer options” is enabled and then scroll down until you see the “Disable absolute volume” setting.
  • Make sure that the “Disable absolute volume” setting is set to off.

7. If you have an Android device that isn’t a Pixel phone, you can go to the Settings menu of the paired device and the select Connections, Bluetooth and then Advanced. Here, make sure that the “Media volume sync” is turned on.

8. If you are using a non-Pixel Android device, you can also go to the device’s Settings menu, Network and then Bluetooth.

Next, go to the Settings menu of your Pixel Buds.

Afterwards, select “Edit the name of the device” and then rename it to “ABS-DO-ENABLE” (without the quotation marks).

After renaming the device, tap and hold the device name and then select Disconnect.

Finally, tap the device name again to reconnect.