How to change the brightness level in Granblue Fantasy Versus: Rising

If you find some of the Granblue Fantasy Versus: Rising stages look too dark while other levels look a little too dark, then you might need to change the brightness level. To find out how you can do in this 2.5D fighting game, you can check out this tutorial from Seeking Tech.

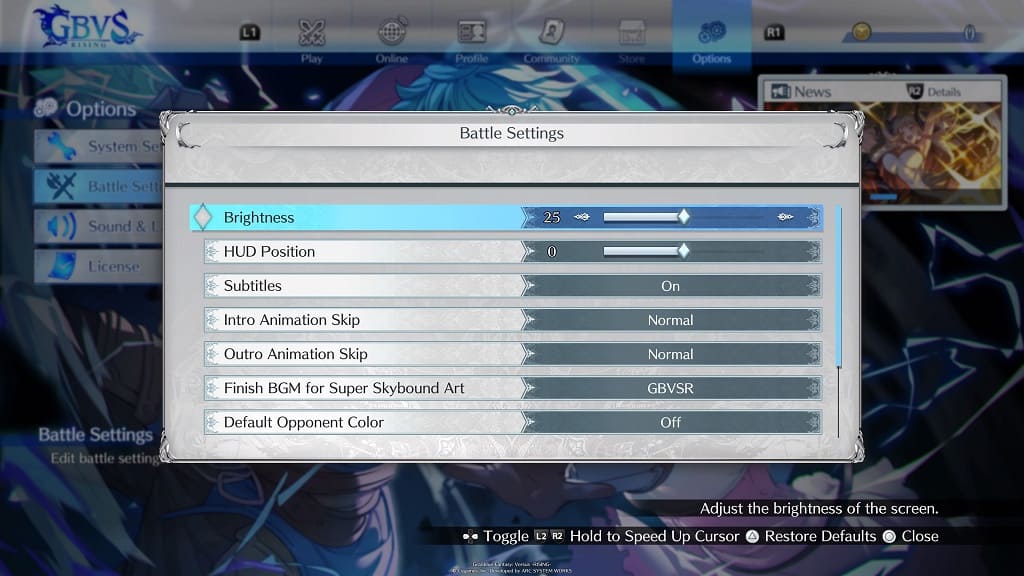
1. From the main menu, switch over to the Options tab and then select Battle Settings.

2. In the pop-up menu, you should find the Brightness slider with the following description:

Adjust the brightness of the screen.

3. The default value of the Brightness slider is 25. Use the left analog or directional button to change it anywhere from a value of 0 to 5.

4. Test out the new brightness in the game to see if it looks right. If it still looks off, then you can return to the Options > Battle Settings screen and then re-adjust the brightness level.

5. You can also adjust the HDR brightness output on your PC, PS4 or PS5 to see if that makes any difference.

How to change the character design to the original in Granblue Fantasy Versus: Rising

You are able to change the character design in Granblue Fantasy Versus: Rising. If you prefer the original to look of some of the characters, then you can check out this guide at Seeking Tech to see how you can change the design.

1. From the main menu, you need to switch over to the Options tab. If you are playing with a DualSense or DualShock 4, then you can change tabs by pressing the L1 and R1 buttons.

2. From the Options tab, select System Settings from the list.

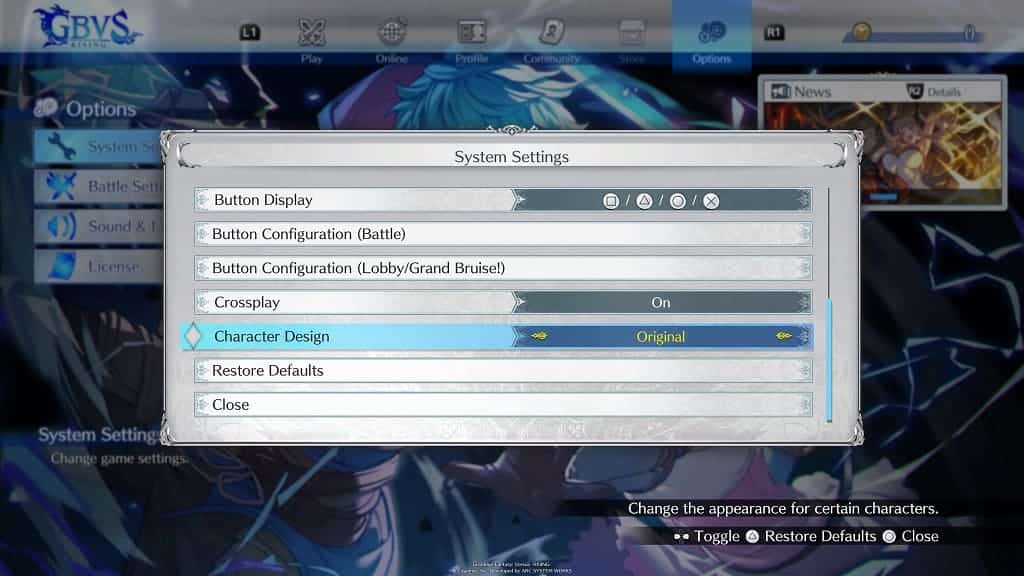
3. In the pop-up menu, you then need to scroll down and then move the cursor to Character Design. You should see the following description:

Change the appearance for certain characters.

4. By default, the Character Design is set to GBVS. To change it to the design from the first game, you need to set it to “Original.”

How to turn off crossplay in Granblue Fantasy Versus: Rising

By default, Granblue Fantasy Versus: Rising supports cross-platform play as PC players can match up with PlayStation 4 and PlayStation 5 players on the PlayStation Network.

If you would rather disable crossplay in this multiplatform fighting game, then you can check out this Seeking Tech guide to see how you can do so.

1. For the first step, head over to the Options tab from the main menu. If you are playing with a PlayStation gamepad, then this using the L1 and R1 shoulder buttons.

2. Next, you need to select System Settings from the Options screen.

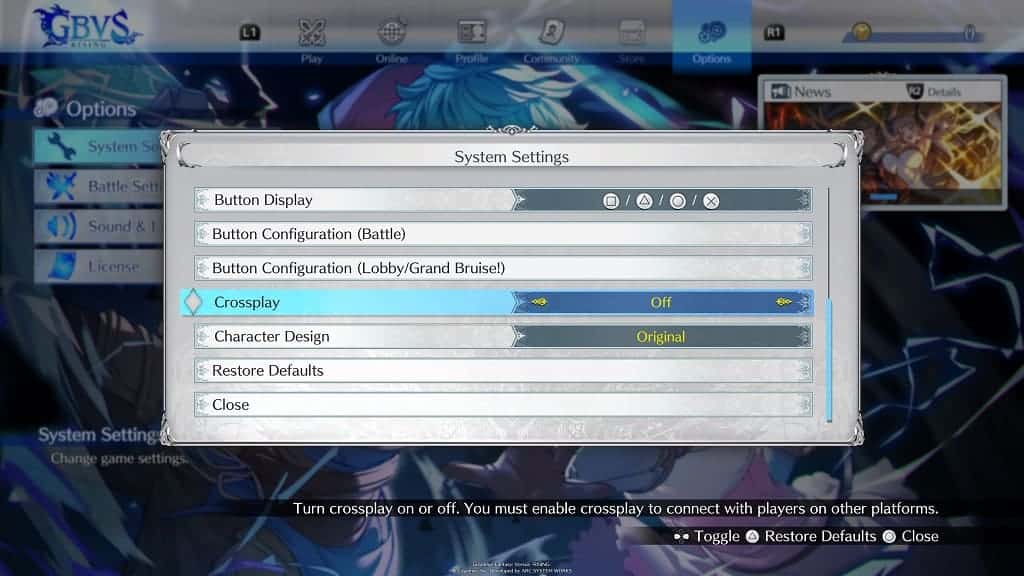
3. In the pop-up window, scroll down and then move the cursor to Crossplay. You should see the following description appear at the bottom:

Turn crossplay on or off. You must enable crossplay to connect with players on other platforms.

4. Use the left analog stick or directional buttons to change the setting from “On” to “Off.”

5. You can then exit the Options menu.

If you are playing on PC, then you will only be matched up with other PC players with cross-platform play disabled. On the PS4 and PS5, you can only play with others on the same PlayStation Network ecosystem.

How to change server region in Granblue Fantasy Versus: Rising

You are able to change your matchmaking region in Granblue Fantasy Versus: Rising. If you are interested in doing so for this fighting game, then you can check out this tutorial from Seeking Tech.

1. From the main menu, you need to switch over to the Options tab. This can be done by pressing the L1 and R1 buttons on a PlayStation controller.

2. In the Options tab, select System Settings.

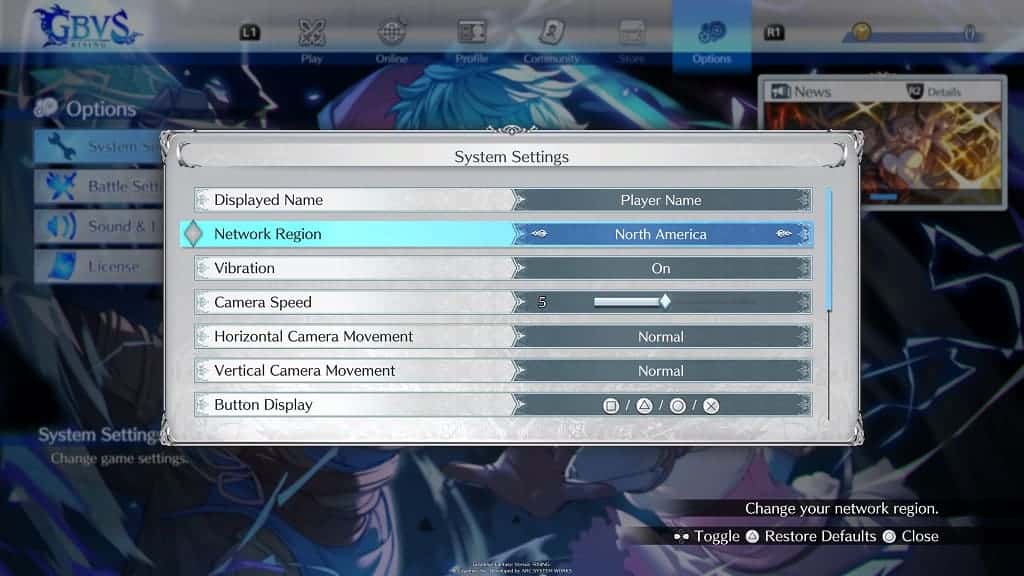
3. On the next screen, move the cursor down to Network Region. It should have the following description:

Change your network settings.

4. Use the left analog stick or directional pad to change to any of the available server regions:

  • North America
  • Europe
  • Asia
  • South America
  • Japan

5. After changing your region, you can exit the Options tab.

When you try to play online again, you should now be matched up with others in the server you previously selected.

How to enable or disable Spider-Man 2 comic book style visual effects

In Marvel’s Spider-Man 2, you can add comic book style visual effects during combat. To see how you can enable or disable this feature in the open-world superhero game, you can take a look at this guide from Seeking Tech.

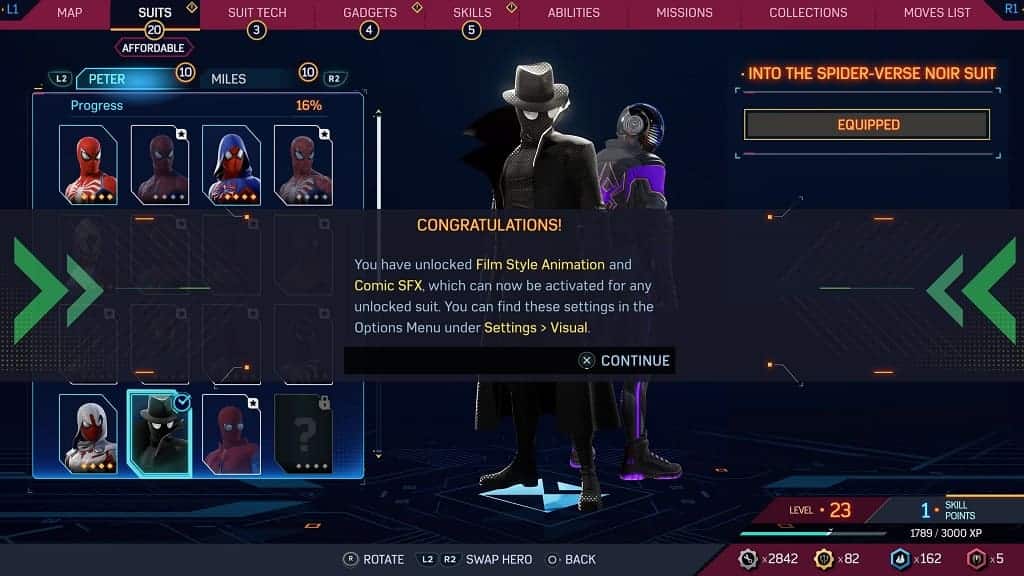
1. To unlock the Comic SFX setting, you first need to unlock a suit that supports the feature. When you do, you should see a Congratulations message that notifies you of the new customization option.

2. Next, you need to head into Settings.

If you already loaded in your save file, then you can press the Options button on the controller to bring up the pause screen, where you can then select Settings.

3. Afterwards, select Visual from the list of Options.

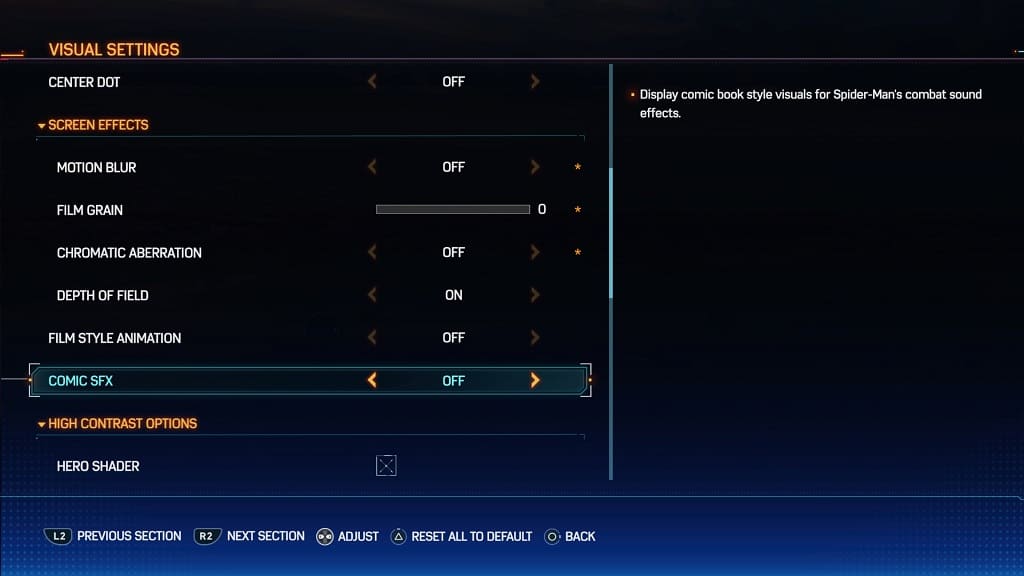
4. In the Visual Settings screen, scroll down until the cursor is moved to Comic SFX. You should see the following description appear on the right side:

Display comic book style visuals for Spider’s combat sound effect.

5. Use the left analog stick or directional pad to set the Comic SFX setting to “ON” if you want to add these visual effects during battles. If you would rather have a cleaner look, then you can set this setting to “OFF” instead.

6. After you are done, you can exit the Settings menu. The next time you enter into a fight in Spider-Man 2, you should notice the change when it comes to the comic book special effects.

How to enable or disable Spider-Man 2 low frame rate character animations

Just like the first two installments in the series, Marvel’s Spider-Man 2 features a setting where you can make the character animation render at a low frame rate. By enabling this feature, the game will give off a similar visual flair as the Spider-Man: Into the Spider-Verse and Spider-Man: Across the Spider-Verse animated films.

To see how you can turn on or turn off the low frame rate character animations, you can check out this tutorial.

1. To change the frame rate for character animations, you need to first unlock a suit in the game that uses this feature. When you do, you should see a Congratulations message saying that you have unlocked Film Style Animation.

2. With the required setting unlocked, make your way to the Settings menu.

In order to do so within the game, press the Options button on the DualSense and then select Settings. On the next screen, select Visual.

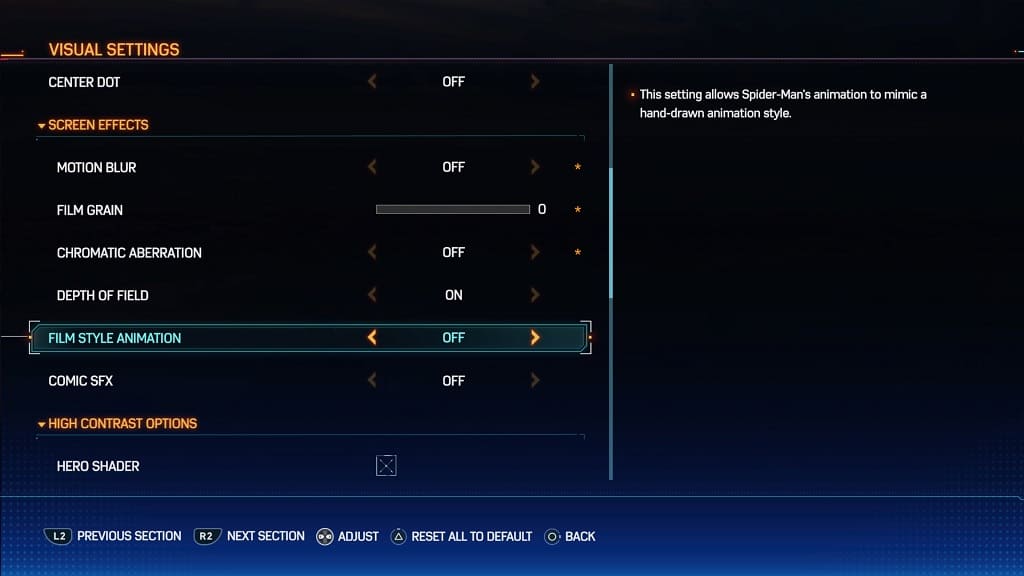
3. In the Visual Settings menu, scroll down and then move the cursor to Film Style Animation. It should show the following description:

This setting allows Spider-Man’s animation to mimic a hand-drawn animation style.

4. Use the left analog or directional pad buttons to switch the Film Style Animation to “ON” if you want to enable this visual feature or “OFF” if you want it disabled.

5. You can then exit the Settings screen and return to playing Spider-Man 2. You should be able to notice the change in the character animation right away.

How to turn off Action Assist in Like a Dragon Gaiden

If you are playing Like a Dragon Gaiden: The Man Who Erased His Name in the Beginner Difficulty Setting, then Action Assist is turned on by default. This feature simplifies the combat to one button press for certain attacks.

If you find that Action Assist is making the fights to be less engaging, then you can check out this guide from Seeking Tech to see how you can disable this feature.

1. If you haven’t done so already, make your way to the Settings menu from either the main menu or pause menu.

2. Once you get there, select Game Settings.

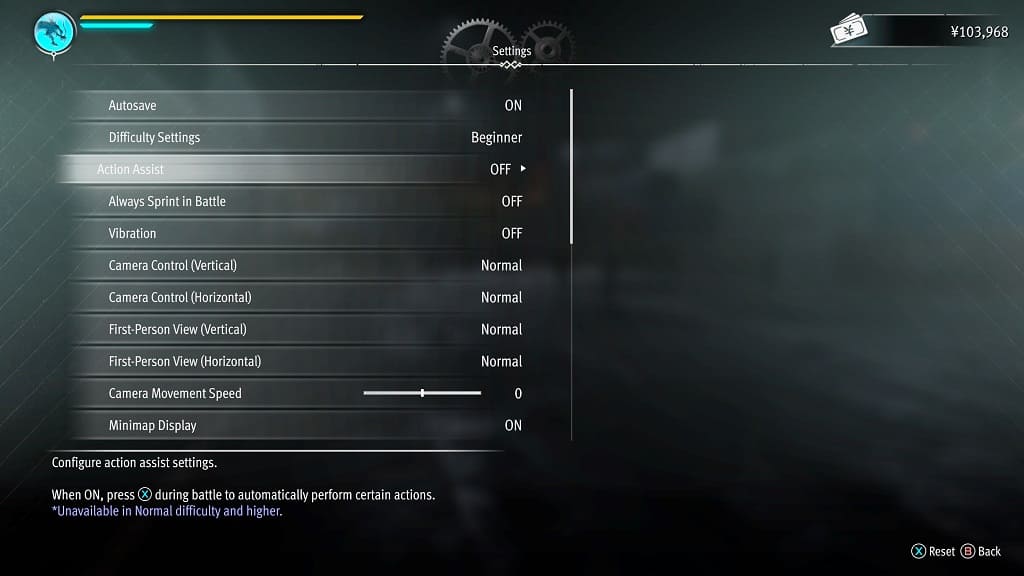
3. Next, you need to move the cursor down to Action Assists. You should see the following description appear at the bottom of the screen (the button prompt is based on the Xbox controller):

When ON, press X during battle to automatically perform certain actions.

*Unavailable in the Normal difficulty and higher.

4. Use the left analog stick or directional pad to set the Action Assists setting from “ON” to “OFF.”

Alternatively, you can change the Difficulty Setting on the same screen to Standard (which is Normal) or Professional (Hard). By doing so, Action Assists will be disabled and can’t be changed.

5. Afterwards, exit the Settings menu.

You should have more control in combat the next time you get into a fight in Like a Dragon Gaiden.

How to disable controller vibration in Like a Dragon Gaiden

If you are playing Like a Dragon Gaiden: The Man Who Erased His Name with a supported gamepad, then haptic feedback is enabled by default. If you would rather play through this game without your controller rumbling, then you can check out this Seeking Tech guide to see how you can disable it.

1. For the first step, make your way to the Settings menu. This can be done in the main menu if you haven’t loaded into your save file yet or from the pause screen.

2. In Settings, select Game Settings from the list of available options.

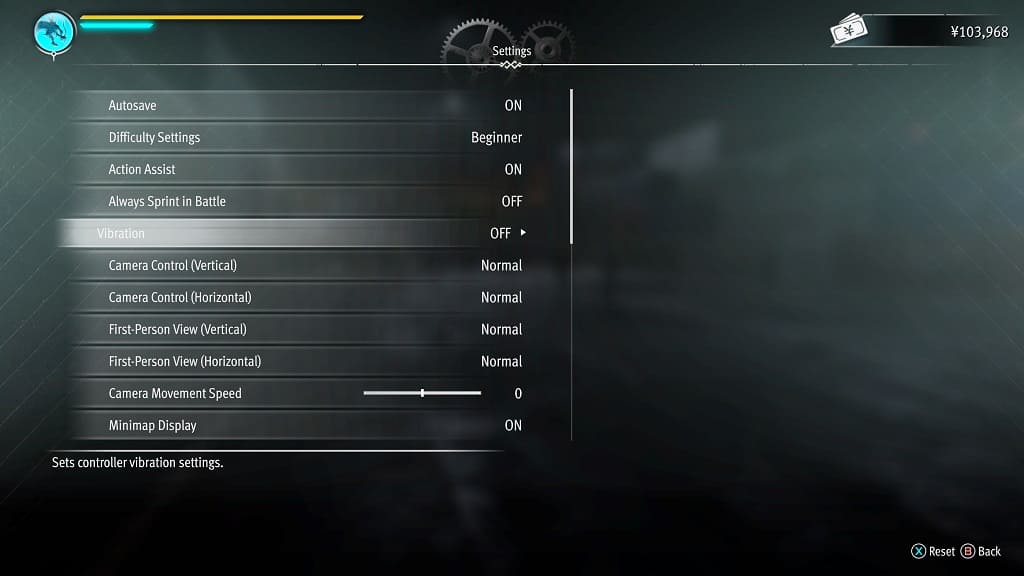
3. On the next screen, move the cursor down to Vibration, which should have the following description:

Sets controller vibration settings.

4. By default, the Vibration setting is set to “On.” To disable rumble, use the left analog stick or directional pad to change it to “Off.”

5. Once you are done, you can back out of the Settings menu and then return to playing Like a Dragon Gaiden. You should no longer feel your controller vibrate.

How to change difficulty mode in Like a Dragon Gaiden

You will be able to switch between three difficulty settings in Like a Dragon Gaiden: The Man Who Erased His Name. You will be asked to choose one before starting a new save file. To find out how you can change difficulty after the initial setup in the latest Yakuza game, you can check out this article from Seeking Tech.

1. For the first step, you need to head into the Settings menu, which can be done from the title screen or pause screen.

2. From there, select the Game Settings option from the list.

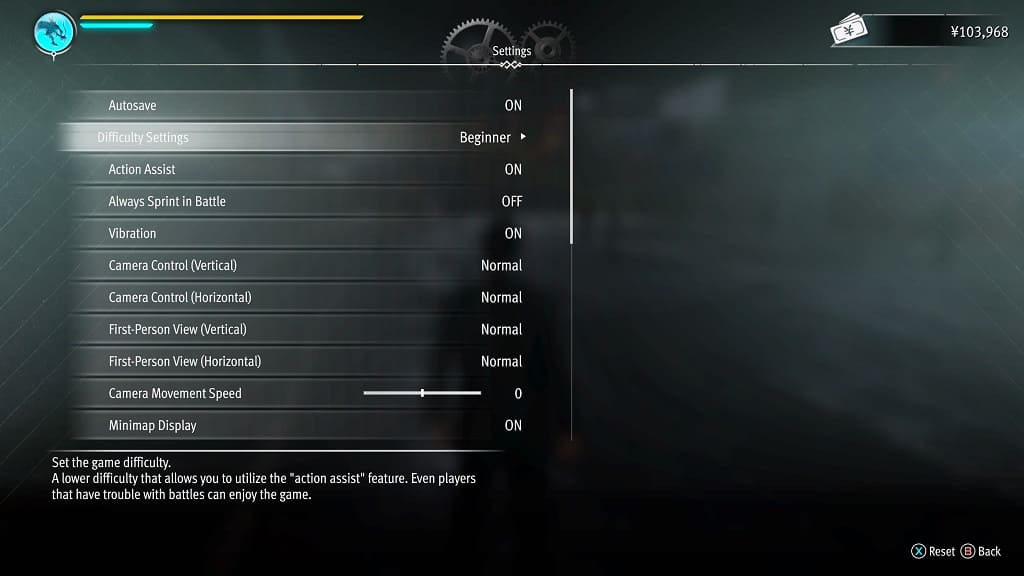
3. On the next screen, move the cursor down to Difficulty Settings. You should be able to switch between the three following options:

Beginner:

A lower difficulty that allows you to utilize the “action assist” feature. Even players that have trouble with battles can enjoy the game.

Standard:

Enjoy Battles through this fairly standard difficulty. Recommended for all people.

Professional:

Recommended for players who are skilled at action games. Experience the utmost challenge, and the tense vibes of always being near death.

4. To change difficulty modes, use the left or right directional pad buttons. You can also tilt the left analog stick to the left or right.

We recommend picking Beginner if you are having a hard time in battles and/or playing just for the story. On the other end of the spectrum, you can try the Professional mode if you want to experience combat at the hardest. The Standard mode is the normal one with balanced fights.

5. Once you are done, exit out of the Settings menu. The new difficulty will be applied the next time you start a fight.

Recommended TCL QM8 settings for PS5, Xbox Series X and S

If you purchase the TCL QM8, also known as the QM850G, then you can check out this recommended settings guide from Seeking Tech to see how you can best optimize the TV for your PlayStation 5, Xbox Series X and/or Xbox Series S console.

Supported PS5 features

The QM8 takes full advantage of the PlayStation 5 as the following features are supported:

  • 120 Hz fresh rate
  • Variable refresh rate range between 48 fps to 120 fps
  • HDR10
  • Auto Low Latency Mode

Supported Xbox Series X and Xbox Series S features

The TCL television also supports all of the visual features being offered by the Series X and Series S consoles:

  • 120 Hz fresh rate
  • Variable refresh rate range between 40 fps to 120 fps
  • HDR10
  • Dolby Vision
  • Auto Low Latency Mode

How to set up the QM8 for PS5, Series X and Series S

In order to properly set up the TCL QM8 or QM850G, we recommend that you do the following:

1. Connect your console to one of the HDMI ports of the television set. Keep in mind that the HDMI #1 and HDMI #2 ports are HDMI 2.1 while the HDMI #3 and HDMI #4 ports are HDMI 2.0.

For the PS5 and Xbox Series X, use the HDMI 2.1 cable that came with the console to connect to either the HDMI #1 or HDMI #2 port of the TCL QM8.

If you have an Xbox Series S, you can use the HDMI 2.0 cable that came with the system to connect to any of the four HDMI ports of the TV. Alternatively, you can use a HDMI 2.1 cable and then connect the Series S to either of the first two HDMI ports.

2. Next, you need to head over to the Settings menu of your TCL QM8 and then navigate over to the Inputs section.

From there, select the HDMI port where your console is connected to and then make sure that the HDMI Mode is set to HDMI 2.1. You should see the following description:

Always use HDMI 2.1 mode for compatibility. Maximum resolution is 8K 60Hz or 4K 120Hz.

3. The Game Master Mode of the QM8 should automatically be turned on when the TV detects that your current HDMI input is connected to a game console. To double check, go to the Settings – System menu.

The Game Master Mode will reduce the input lag for playing videogames on the PS5, Xbox Series X, Xbox Series S and other consoles. Variable Refresh Rate and Auto Low Latency Mode will also be turned on.

This mode should unlock the Game Bar as well. You can open the special menu by pressing and holding the hamburger button on the remote control. By doing so, you should have quick access to the Shadow Enhancer (which helps make darker in-game environments easier to see) and other gaming features.

4. While you should be done setting up QM8/QM850G, there is more work to be done on the console side.

For the PS5, go to the console’s Settings app and then select Screen and Video > Video Output.
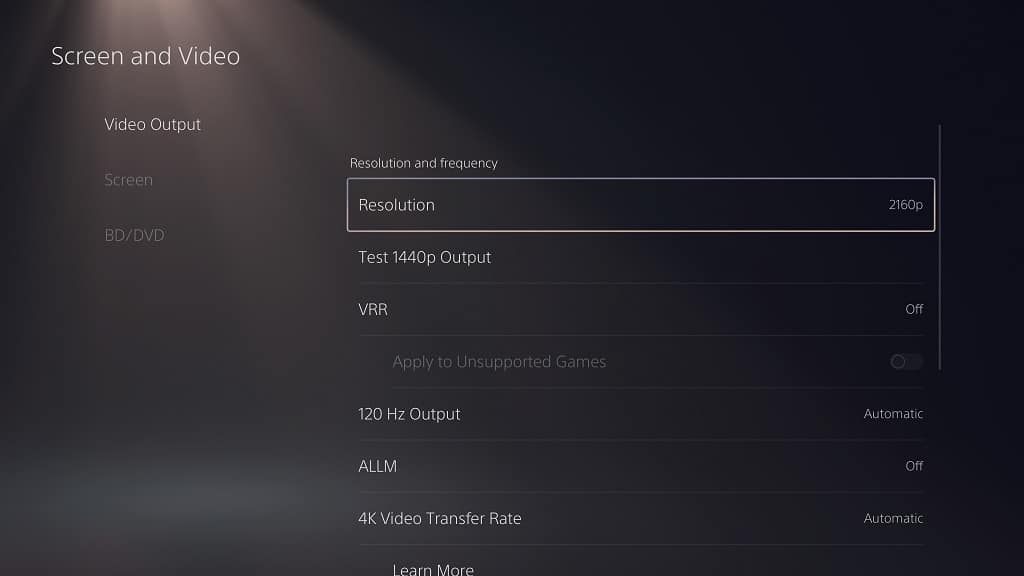
You should then make sure you have the following setup:

  • Resolution to 2160p
  • VRR to Automatic
  • 120 Hz to Automatic
  • ALLM to Automatic
  • 4K Transfer Rate to Automatic
  • HDR to On When Supported
  • Deep Color Output to Automatic
  • RGB Range to Automatic

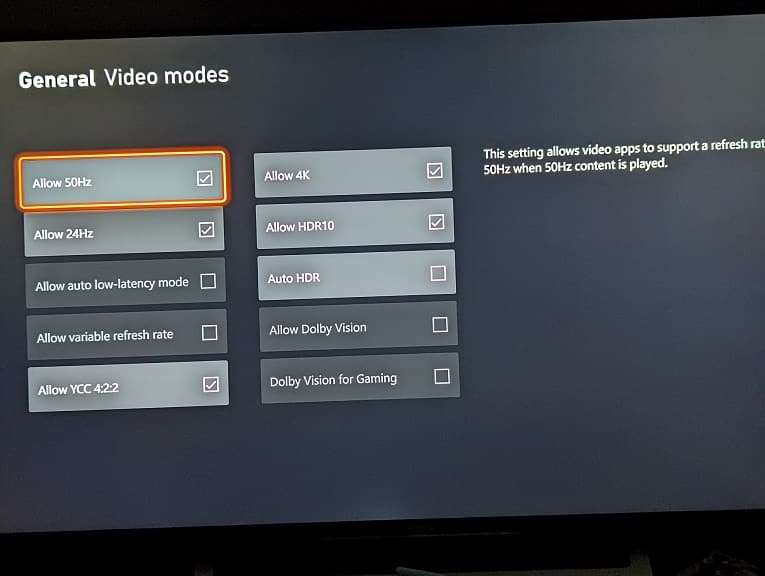
On the Xbox Series X and Xbox Series S, open the Settings app and then make your way to General > TV & display options. Make sure that Resolution is set to 4K and then go to Video modes. From there, you need to make sure that the following options are selected:

  • Allow Auto-Low Latency Mode
  • Allow Variable Refresh Rate
  • Allow 4K
  • Allow HDR10
  • Allow Dolby Vision
  • Allow Dolby Vision for Gaming

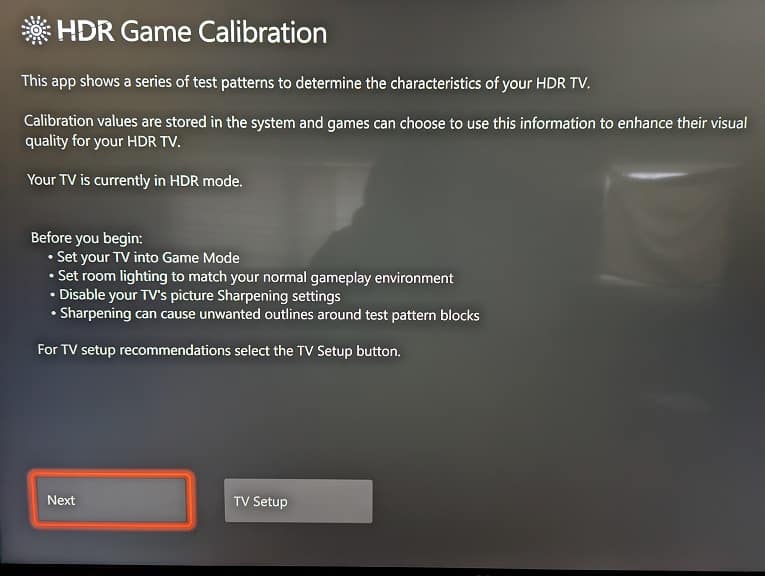
5. The final step in the setup process is to calibrate the HDR brightness output settings on your console.

You can do so on the PS5 by heading to Settings > Screen and Video > Video Output > Adjust HDR and then follow the instructions on the screen.
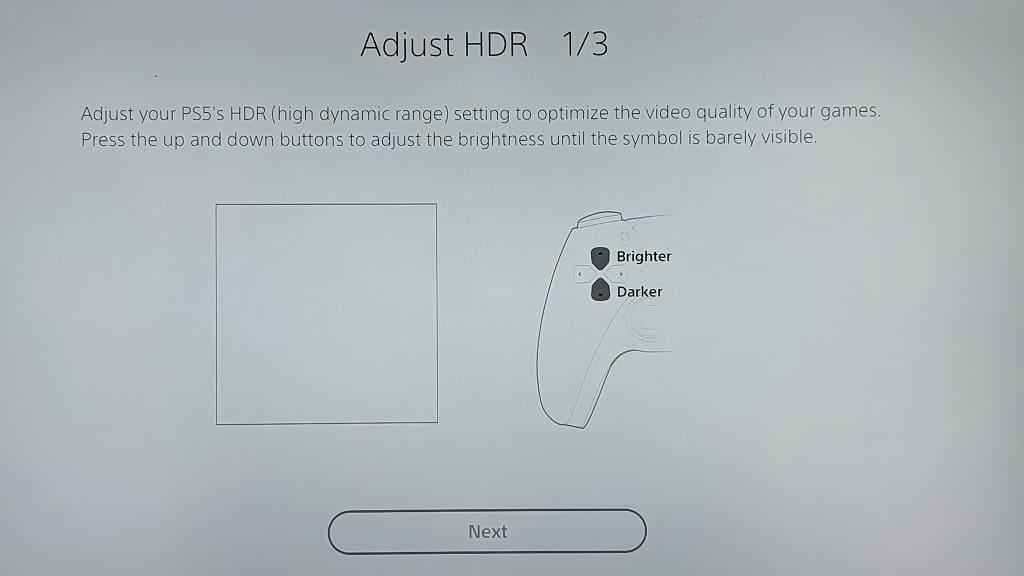
For the Series X and Series S, make your way to General > TV & Display Options > Calibrate HDR for games and then follow the directions.