How to change the mouse sensitivity settings in Lego Fortnite

Aiming with a mouse may feel unresponsive or overly sensitive in Lego Fortnite. To see how you can adjust the mouse sensitivity settings in this game, you can take a look at this tutorial from Seeking Tech.

1. You need to head over to the Settings menu in Lego Fortnite if you aren’t there already.

2. From there, you need to view the Mouse and Keyboard tab.

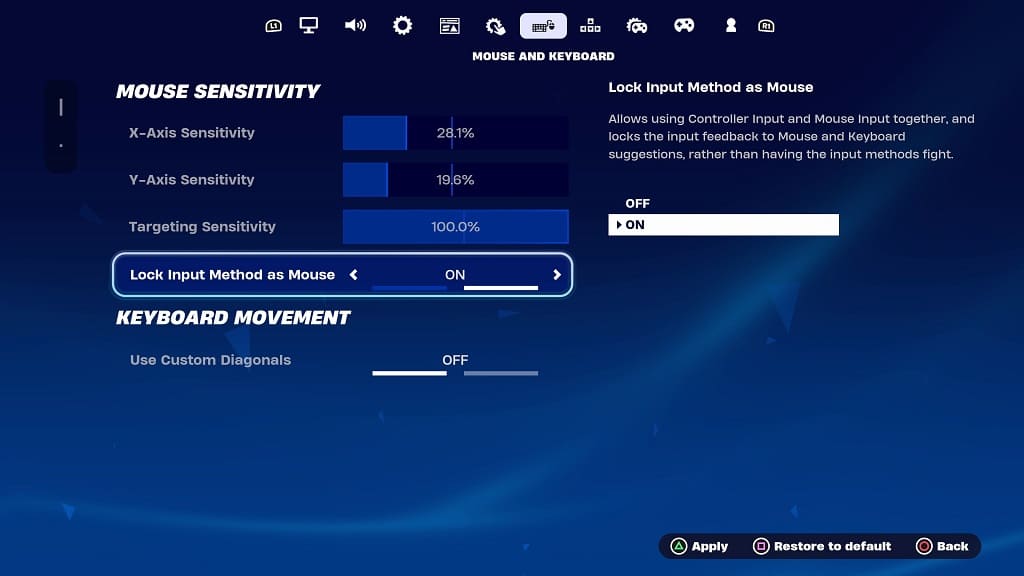
3. Once you get to the Mouse and Keyboard tab, you should be able to adjust the following settings:

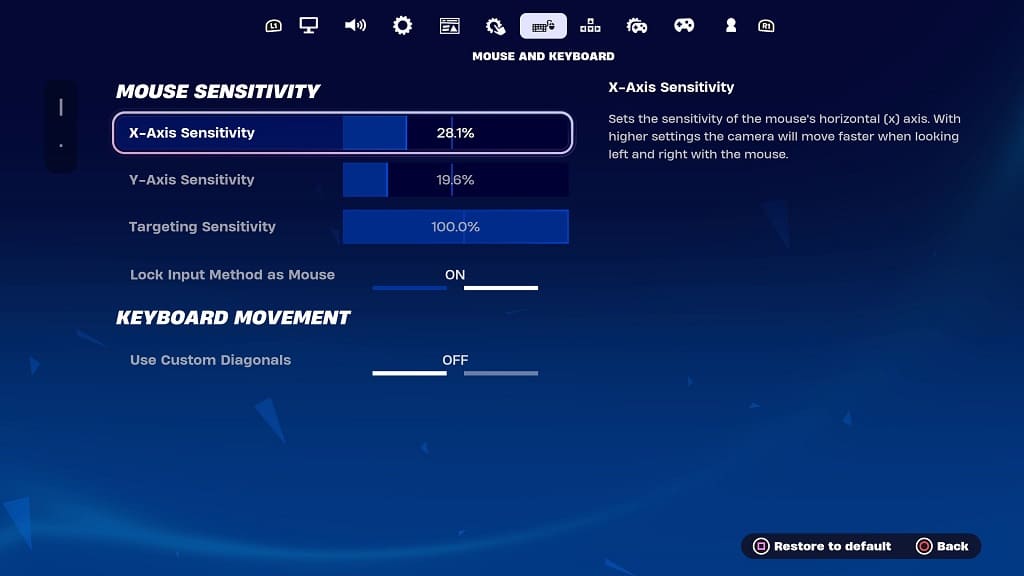
The X-Axis Sensitivity slider adjusts the responsiveness of the horizontal mouse movements. The higher the value, the more sensitive it will be.
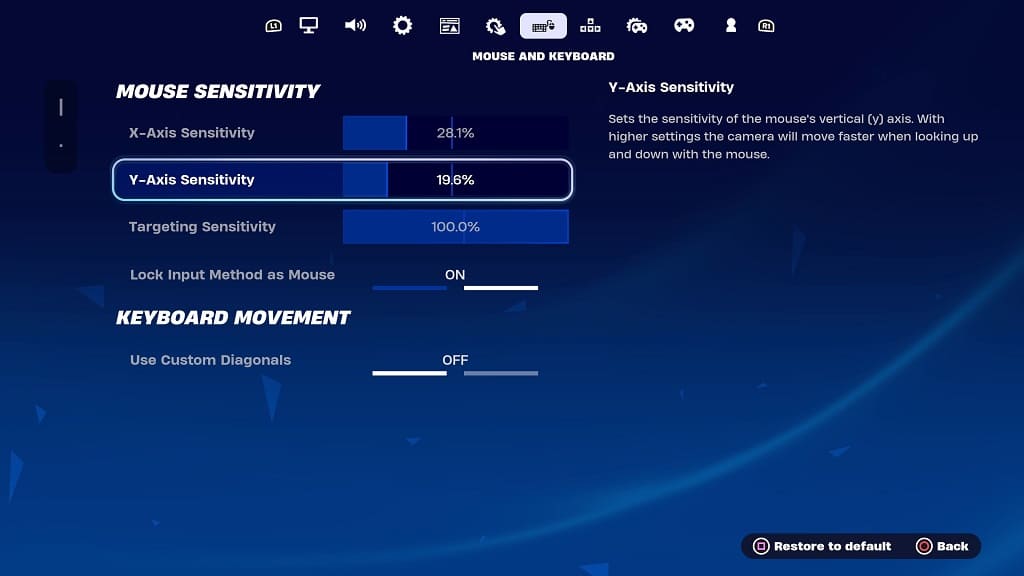
The Y-Axis Sensitivity slider adjusts the responsiveness of the vertical mouse movements. The higher the value the more, the faster it will move.
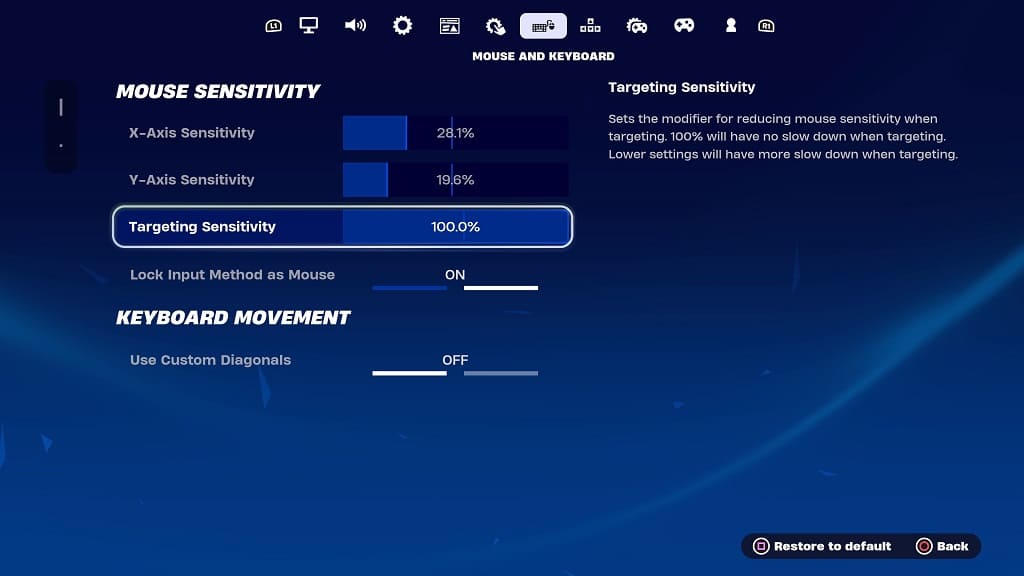
The Targeting Sensitivity slider adjusts the slowdown of your mouse movement when aiming. The default value is 100%, which means that there won’t be any slowdown. So, if you want your mouse to move slower when you are targeting, then you can try decreasing this slider.
4. Once you are done, make sure you apply the changes and test them out in Lego Fortnite.

How to lock input method to mouse and keyboard only in Lego Fortnite

If you have a controller, mouse and keyboard connected to your system while playing Lego Fortnite, then you can use both methods at the same time. By doing so, however, you may encounter accidental inputs.

You can check out this Seeking Tech guide to see how you can lock the input method to mouse and keyboard only.

1. To start off, open the Settings menu from within Lego Fortnite.

2. From there, you need to switch over to viewing the Mouse and Keyboard tab.

3. You should see the Lock Input Method as Mouse setting from there with the following description:

Allow using Controller Input and Mouse Input together, and locks the input feedback to Mouse and Keyboard suggestions, rather than having the inputs method fight.

4. Make sure you set the Lock Input Method as Mouse setting to On.

5. Apply the change.

How to turn off controller vibrations in Lego Fortnite

When playing Lego Fortnite with a compatible controller, you will feel vibrations based on certain actions. To see how you can disable rumble in this multiplayer game, you can check out this tutorial from Seeking Tech.

1. For the first step, you need open the Settings menu from withing Lego Fortnite.

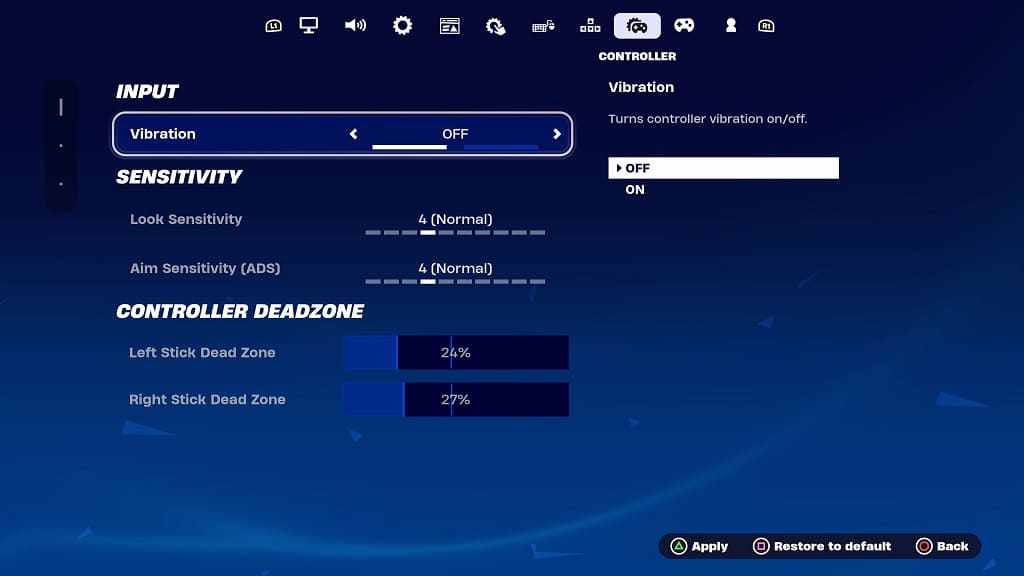
2. From there, you need to navigate over to the Controller tab.

For the uninformed, you can switch tabs by using the L1 and R1 buttons, LB and RB buttons or L and R buttons.

3. You should see the Vibration setting in the Controller tab. It should have the following description:

Turns controller vibration on/off.

Make sure that it is set to Off.

4. Afterwards apply the change. This can be done by pressing Triangle on PlayStation, Y on Xbox or X on Switch.

How to enable and customize gyro aiming in Lego Fortnite

If you are playing Lego Fortnite with a compatible controller, then you can enable gyro aiming. This allows you to aim and move the camera by moving your controller around. Once you get used to it, you should end up having better precision.

To see how you can enable, as well as customize this helpful feature, you can check out this tutorial from Seeking Tech.

1. For the first step, open up the Settings menu in Lego Fortnite.

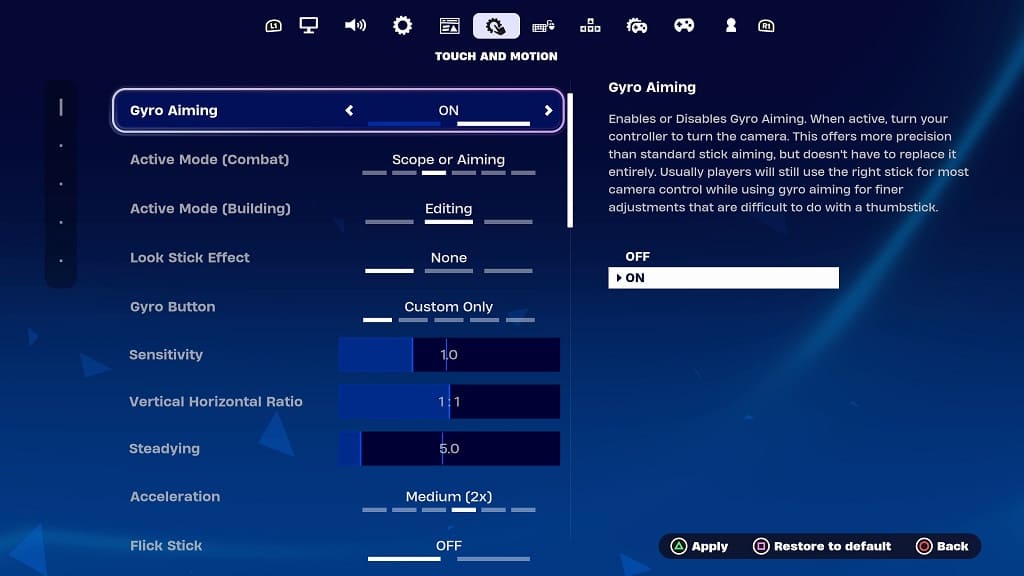
2. From there, you need to head over to the Touch and Motion tab. You can change tab by pressing L1 and R1 on a PlayStation controller or LB and RB on a Nintendo Switch controller.

3. You should see the Gyro Aiming setting at the very top of the screen. Make you set it to On.

4. Below it, there are a bunch of customization options that you can play with to fine tune motion aiming:

Active Mode (Combat):

  • None
  • Scope Only
  • Scope or Aiming
  • Scope, Aiming, Harvesting
  • Scope, Aiming, Firing
  • Always

Active Mode (Building):

  • None
  • Editing
  • Always

Look Stick Effect:

  • None
  • Disables
  • Enables

Gyro Button:

  • Custom Only
  • Reload / Interact
  • Toggle Pickaxe
  • Crouch / Slide
  • Reset Camera

Acceleration:

  • Legacy
  • Off
  • Low (1.5X)
  • Medium (2X)
  • High (4X)
  • Custom

Flick Stick:

  • Off
  • On

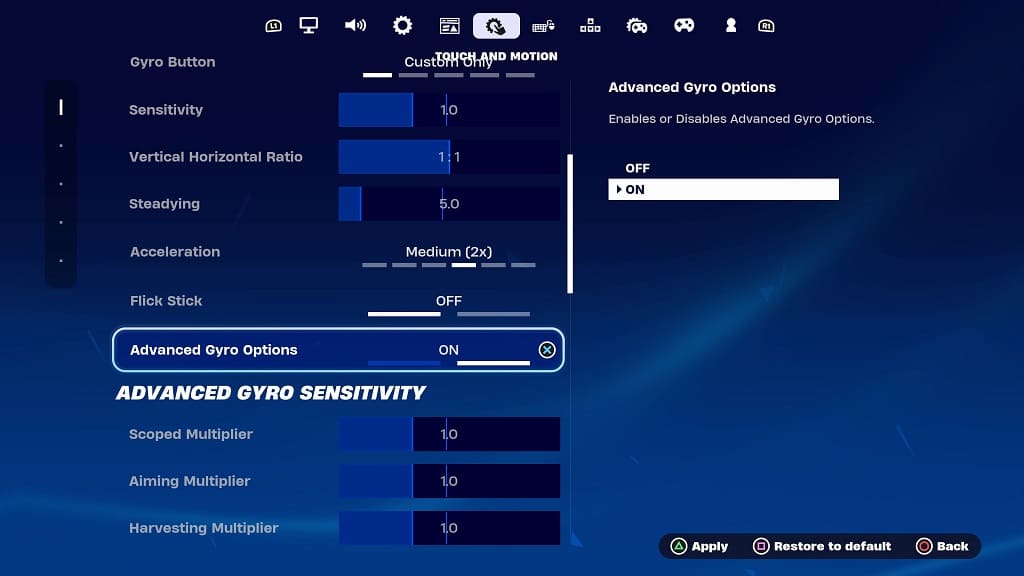
There are also sliders for Sensitivity, Vertical Horizontal Ratio and Steadying.

5. In the same screen, you can also turn on Advanced Gyro Options, which unlocks a bunch of other settings that you can adjust.

6. Once you are done, you need to apply the settings by pressing Triangle on the PlayStation or X on the Nintendo Switch controller.

How to turn off on-screen tips in Lego Fortnite

When playing Lego Fortnite, you may notice that there will be occasional pop-ups explaining how to play the game. You can check out this Seeking Tech guide to see how you can disable these notifications.

1. You need to first make your way to the Settings menu.

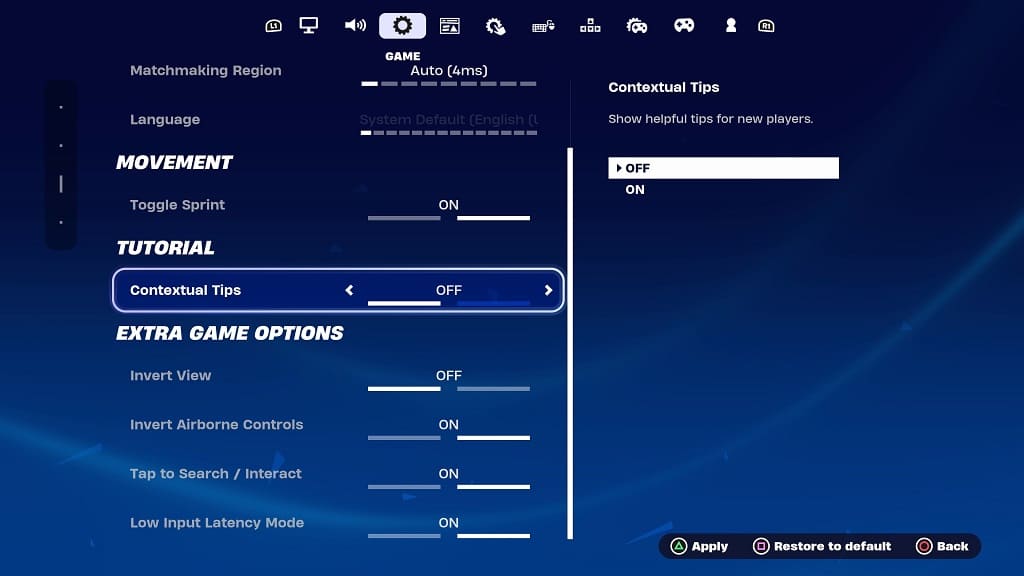
2. From there, you need to switch over to the Game tab.

If you are playing Lego Fortnite with a controller, then you can change tabs by using L1/R1, LB/RB or L/R.

3. In the Game tab, scroll down to the Tutorial section and then move the cursor over to Contextual Tips. It should show the following description on the right side:

Show helpful tips for new players.

4. Make sure that the Contextual Tips setting is set to Off.

5. Apply the new settings. On a controller, this can be done by pressing Triangle on PlayStation, Y on Xbox or X on Switch.

How to fix Killer Instinct: Anniversary Edition brightness issues

You may notice that some of the stages in Killer Instinct: Anniversary Edition look too dark while others appear to be too bright. To see how you can fix the brightness issues with this PC and Xbox fighting game, you can take a look at this Seeking Tech guide.

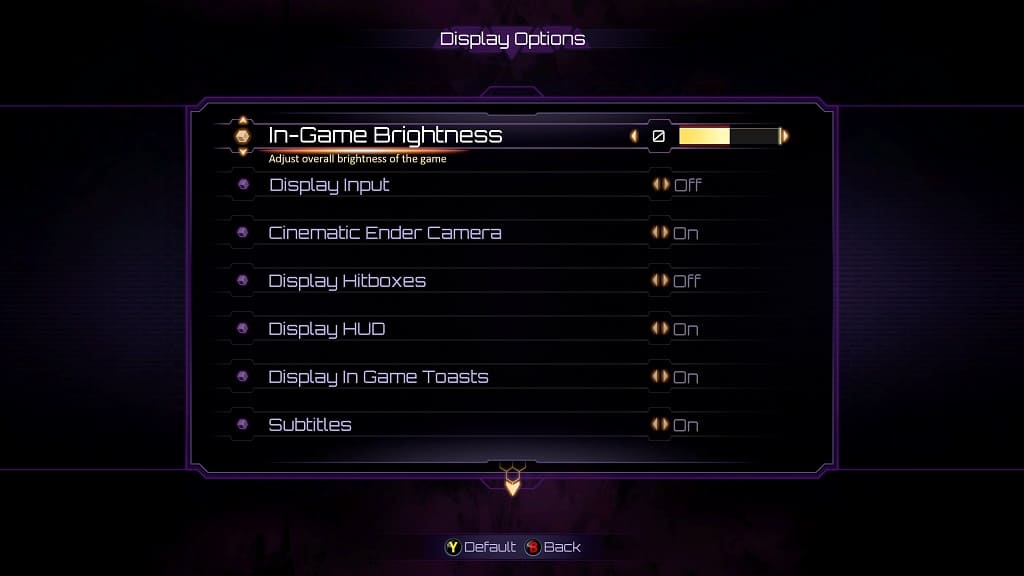
1. For the first step, you can use the brightness slider from within Killer Instinct: Anniversary Edition. In order to do so, open the Help & Options menu and then select Display.

From the Display Options screen, move the cursor to In-Game Brightness. This setting should have the following description:

Adjust overall brightness of the game.

The default value of the In-Game Brightness is 0. You will be able to change it anywhere from –10 to +10. Move the slider to the left to make the graphics darker or to the right if you want to make the visuals brighter.

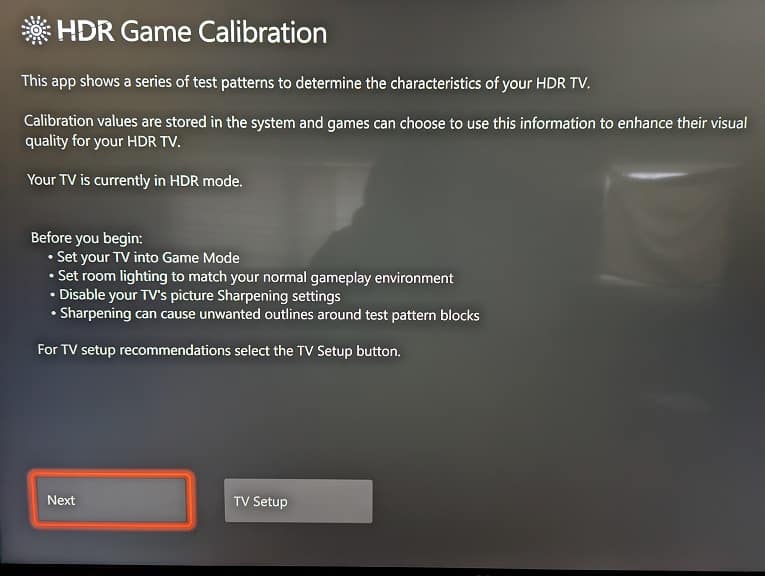
2. If the in-game brightness slider did not work, then you can try re-calibrating the HDR brightness output of your PC or console.

On Xbox, you can do so by going to Settings > General > TV & display options > Calibrate HDR for gaming.

3. You can also adjust the brightness and contrast sliders on your television’s or monitor’s settings menu.

4. Lastly, you can also try playing the fighting game in SDR. In order to do so, disable SDR on your PC/console as well as your TV/monitor.

How to mute the announcer in Killer Instinct: Anniversary Edition

By default, Killer Instinct: Anniversary Edition uses an announcer that will commentate on certain actions in a match. If you would rather mute this voice, then you can check out this guide at Seeking Tech to see how you can properly do so.

1. If you haven’t done so already, make your select Help & Options from either the main menu or pause menu in the game.

2. On the Options menu, select Audio.

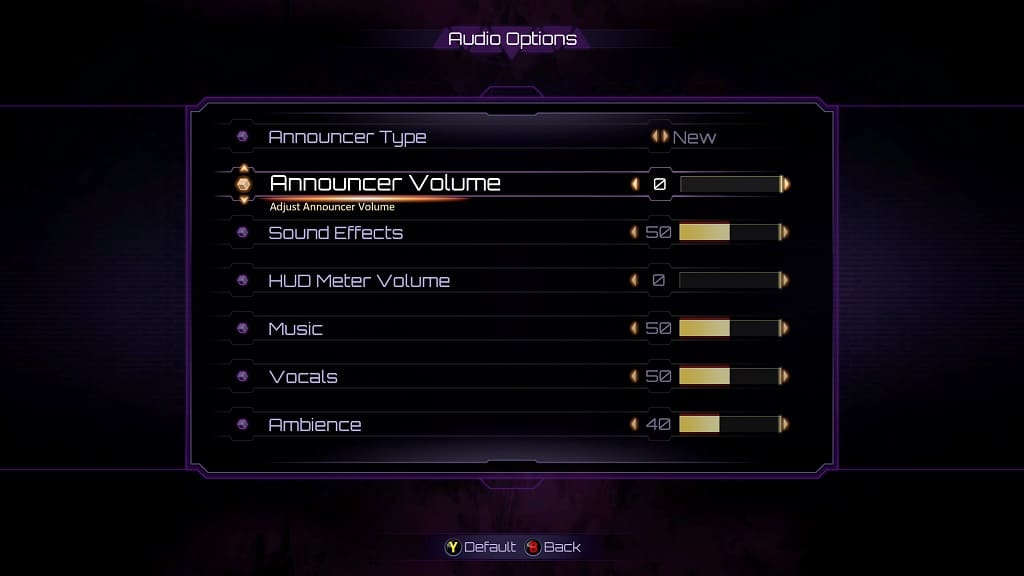
3. From the Audio Options menu, move the cursor down to Announcer Volume.

4. The Announcer Volume setting has a default value of 50. You will be able to adjust it in increments of 5.

To completely mute the commentator, use the left analog stick or left directional pad button to move the slider all the way to the left until it is at a value of 0.

5. Exit the menus in Killer Instinct: Anniversary Edition.

The next time you fight, the commentator should be muted.

Sony A75L wall mount specs

If you bought the Sony A75L and would like to hang it high up on a wall, then you can check out this Seeking Tech guide to see what specifications you need to know to find a compatible wall mount.

Sony A75L Screen Sizes

This article will cover the 55-inch and 65-inch variants of the OLED series. You can find the names and model numbers for both below:

  • Sony BRAVIA XR 55” Class A75L OLED 4K HDR Google TV (Model Number: XR-55A75L)
  • Sony BRAVIA XR 65” Class A75L OLED 4K HDR Google TV (Model Number: XR-65A75L)

Sony A75L Dimensions (without Stand)

Dimensions without Stand (in inches):

  • 55” Sony A75L: 48.4 inches x 28.1 inches x 2.1 inches
  • 65” Sony A75L: 57.1 inches x 33.0 inches x 2.1 inches

Dimensions without Stand (in millimeters):

  • 55” Sony A75L: 1227 mm x 712 mm x 53 mm
  • 65” Sony A75L: 1448 mm x 836 mm x 53 mm

Dimensions without Stand (in centimeters):

  • 55” Sony A75L: 122.7 cm x 71.2 cm x 5.3 cm
  • 65” Sony A75L: 144.8 cm x 83.6 cm x 5.3 cm

Sony A75L Weight (without Stand)

Weight without Stand (in pounds):

  • 55” Sony A75L: 39.3 lbs.
  • 65” Sony A75L: 50.5 lbs.

Weight without Stand (in kilograms):

  • 55” Sony A75L: 7.8 kg
  • 65” Sony A75L: 22.9 kg

Sony A75L VESA Mounting Pattern

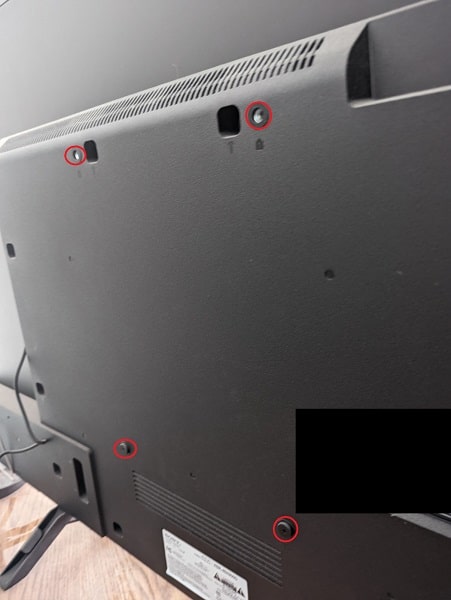
If you look at the back of the A75L, you should see four visible screw holes. Known as the VESA Mounting Pattern, these are used to attach the wall mount to the television set.

Both variants use the 300 mm x 300 mm, which is the horizontal and vertical distances in between the screws.

VESA Mounting Pattern (example from different TV).

What wall mounts are compatible with the Sony A75L?

To recap, a wall mount needs to be strong enough to hold the weight of the A75L, which can weigh as much as 50.5 pounds or 22.9 kilograms.

Furthermore, it must support the VESA Mounting Pattern of the OLED. For both the 55-inch and 65-inch screen sizes, the mounting screw hole distances are 300 mm x 300 mm.

For specific fixed, tilting and full motion wall mount recommendations that may be compatible with the Sony A75L, you can check out this buyer’s guide.

Resource:

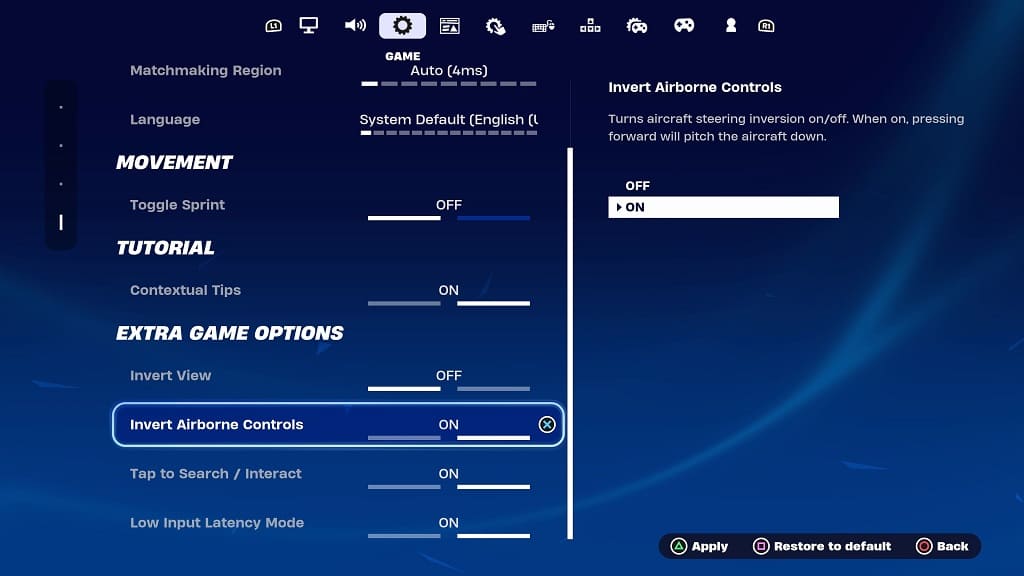
How to non-invert flight controls in Lego Fortnite

By default, the flight controls are inverted in Lego Fortnite. In order to steer the aircraft upwards, you need to tilt the analog stick down. To move the aircraft downwards, you need to tilt the analog up.

You can check out this tutorial at Seeking Tech to see how you can non-invert the flight controls.

1. If you haven’t done so already, open up the Settings menu in Lego Fortnite.

2. From there, you need to switch over to viewing the Game tab. To change tabs, use the L1/R1, LB/RB or L/R buttons if you are playing the battle royale game with a gamepad.

3. From the Game tab, scroll down to the Extra Game Options section and then move the cursor over to Invert Airborne Controls. You should see the following description:

Turns aircraft steering inversion on/off. When on, pressing forward will pitch the aircraft down.

4. Make sure that the Invert Airborne Controls setting is set to Off.

5. Apply the new change to the game. You have to press Triangle, X (on Xbox) or Y (on Switch) in order to do so.

The flight controls will now be inverted. The aircraft should move in the same direction as your analog stick movements.

How to invert camera controls in Lego Fortnite

By default, moving the analog sticks upward in Lego Fortnite will also move the in-game camera upwards while moving it down will tilt the camera downwards. You can check out this Seeking Tech guide to see how you can invert these controls.

1. Start off by heading to the Settings menu in Lego Fortnite.

2. From there, use the L1/R1 buttons on a PlayStation controller, LB/RB buttons on an Xbox controller or L and R buttons on a Nintendo Switch controller to change tabs until you are viewing the Game tab.

3. From there, move the cursor down to Inverted View. It should be showing the following description:

Turns off inversion on/off. When on your character will look down when the controller is moved up.

4. Make sure that the Inverted View setting is set to On.

5. Apply the new change. This can be done by pressing Triangle on the PlayStation pad, Y on the Xbox pad or X on the Switch pad.

The camera will now be pointed down when you tilt the right analog upwards. If you tilt the analog downwards, then the camera will move up.