How to add markers to interactive objects in Prince of Persia: The Lost Crown

If you are having a hard time identifying which object can be interacted with in Prince of Persia: The Lost Crown, then you can check out this troubleshooting guide at Seeking Tech to see how you can enable markers.

1. To start off, open the pause screen in the game.

2 Afterwards, make your way to the System tab, where you can then select Options.

3. From the Options screen, make sure you are viewing the Gameplay section.

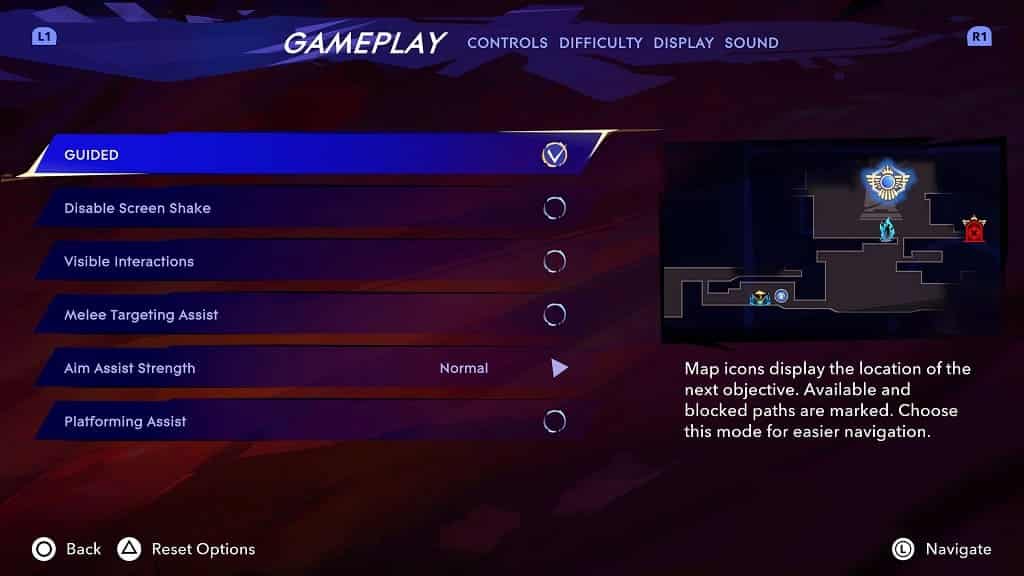
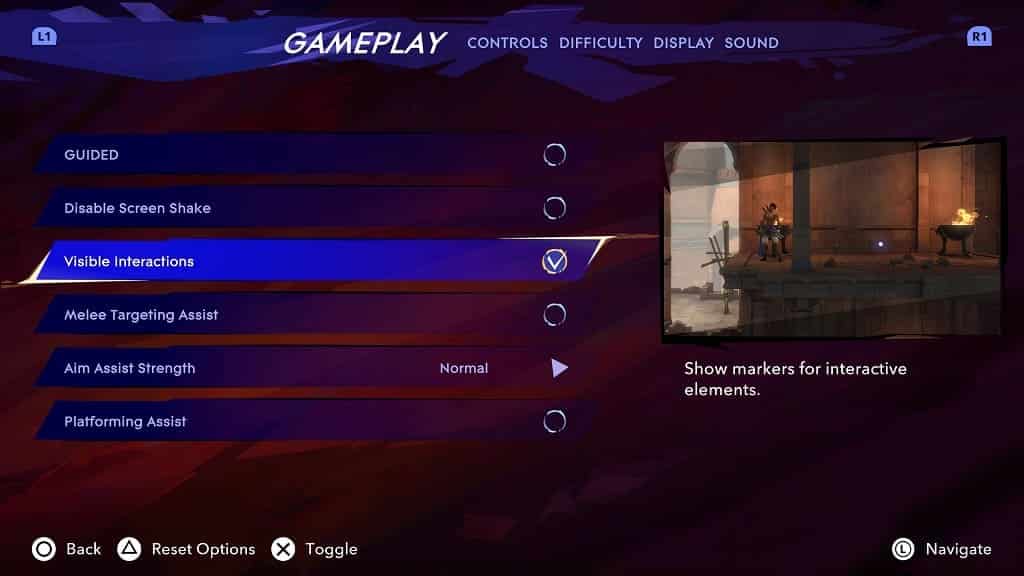
4. Next, you need to move the cursor down to Visible Interactions, which has the following description:

Show markers for interactive elements.

5. Make sure that Visible Interactions is selected and then exit the pause menu.

When you play Prince of Persia: The Lost Crown, you should now see a white dot on objects that you can interact with.

What to do if you get lost in Prince of Persia: The Lost Crown

Being from the Metroidvania genre, Prince of Persia: The Lost Crown has a lot of exploration, including some backtracking. If you find yourself getting lost frequently, then you can check out this guide at Seeking Tech to see how you can enable the Guided mode.

1. For the first step, you need to open the Pause menu.

If you are playing with a controller, then this can be done by pressing Options on PlayStation, Menu on Xbox or + on Switch.

2. In the Pause menu, switch over to the System tab and then select Options.

You can switch tabs by using the L1 and R1, LB and RB or L and R buttons.

3. You should be viewing the Gameplay tab right away. If not make sure you navigate over.

4. From there, make sure that the Guided setting is enabled.

By doing so, the locations of the next objective, open paths and blocked paths are marked on the map.

Exit the menu and return to playing The Lost Crown. When you open the map, you should see the new navigation icons that will lead you to where you need to go.

Recommended Vizio Quantum Pro settings for PS5, Xbox Series X and S

If you purchased the 2023 Vizio Quantum Pro, then you can take a look at this Seeking Tech guide to see what are the best settings that you should be using in order to get the most out of the PlayStation 5, Xbox Series X and Xbox Series S consoles.

Compatible PS5 Features

In terms of the PlayStation 5, the Quantum Pro is capable of displaying games at a 120 Hz refresh rate in 4K. This Vizio television set also supports Auto Low Latency Mode, HDR10 and Variable Refresh Rate.

It is important to note that, while you can the screen to display at 1440p, the resolution disables HDR and limits the refresh rate to 60 Hz. So, make sure you stick with 1440p.

Compatible Xbox Series X and Xbox Series S Features

The Vizio Quantum Pro also supports all of the display features of the Xbox Series X and Xbox Series S:

  • 120 Hz at 4K
  • Auto Low Latency Mode
  • HDR10
  • Dolby Vision
  • Variable Refresh Rate

How to set up the Vizio Quantum Pro for gaming

In order to properly set up the Quantum Pro for your PS5, Series X or Series S, we recommend that you take the following steps:

1. Connect your console to your Vizio television set if you haven’t done so already.

For the PlayStation 5 and Xbox Series X, use the HDMI cable that came included with your system and connect it to the HDMI #3 port. The other ports on the TV are only HDMI 2.0.

The Xbox Series S only comes with a HDMI 2.0 cable; so, you can connect it to any of the four HDMI 2.0 ports. Alternatively, you can use a HDMI 2.1 cable, if you have one available, to connect Series S to the third HDMI port.

2. Use the Quantum Pro remote to switch over to the HDMI input where your console is connected and then open the Settings menu of the TV.

From there, make your way to the Gaming menu and then make sure that the Gaming/PC Mode setting is set to Auto.

By doing so, the screen will automatically reduce the input lag when you are playing a videogame. This action should also enable Auto Low Latency Mode and Variable Refresh Rate.

3. Next, turn on your console if you haven’t done already and then head over to the system’s Settings menu.

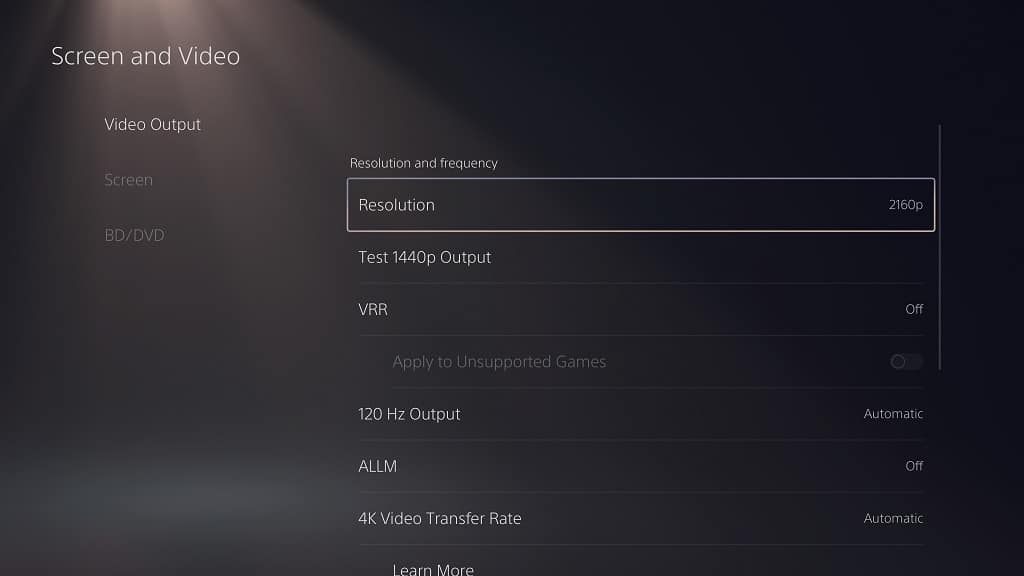
On the PlayStation 5, head over to Screen and Video > Video Output and double check to see if the display settings are set like the following:

  • Resolution: 1080p
  • VRR: Automatic
  • 120 Hz Output: Automatic
  • ALLM: Automatic
  • 4K Transfer Rate: Automatic
  • HDR: On When Supported
  • Deep Color Output: Automatic
  • RGB Range: Automatic (Recommended)

Afterwards, select Adjust HDR. You will be taken to a new menu, where you need to follow the instructions on the screen in order to sync up the HDR brightness output of your PS5 to the Quantum Pro.

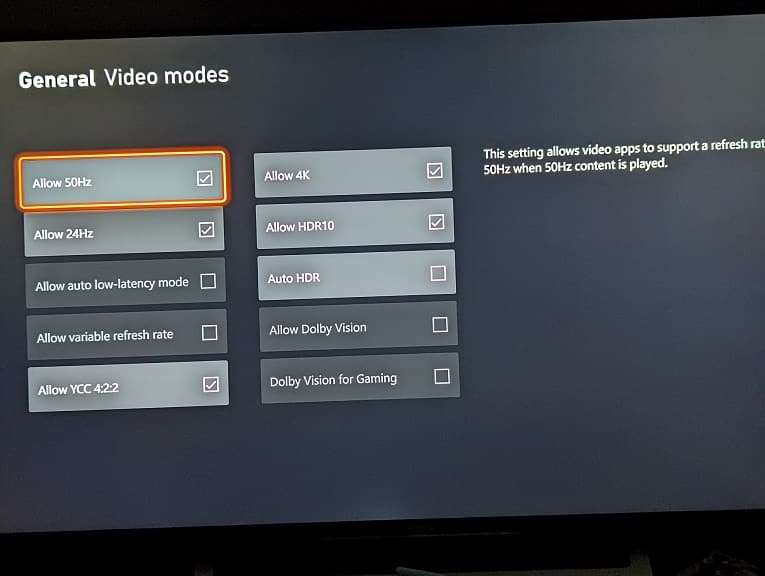
For the two Xbox Series consoles, go to General > TV & display options > Video modes. On that screen, select the following:

  • Allow auto low-latency mode
  • Allow 4K
  • Allow HDR10
  • Allow Dolby Vision
  • Allow Dolby Vision for Gaming

Next, head back to the General > TV & display options screen. From there, make sure that the Resolution setting is set to 4K and the Refresh Rate setting is set to 120 Hz.

Afterwards, select Calibrate HDR for Gaming. Over the next three menu screens, follow the directions to adjust the HDR brightness output of your Xbox to match the TV’s HDR parameters.

You should now be fully set up when it comes to playing PlayStation 5, Xbox Series X and/or Xbox Series S games.

How to customize subtitle display settings in The Finals

The Finals feature subtitles by default. To see how you can change the settings for these captions, you can take a look at this tutorial from Seeking Tech.

1. To start off, you need to open the Settings menu in The Finals.

2. Inside of Settings, open the Accessibility tab.

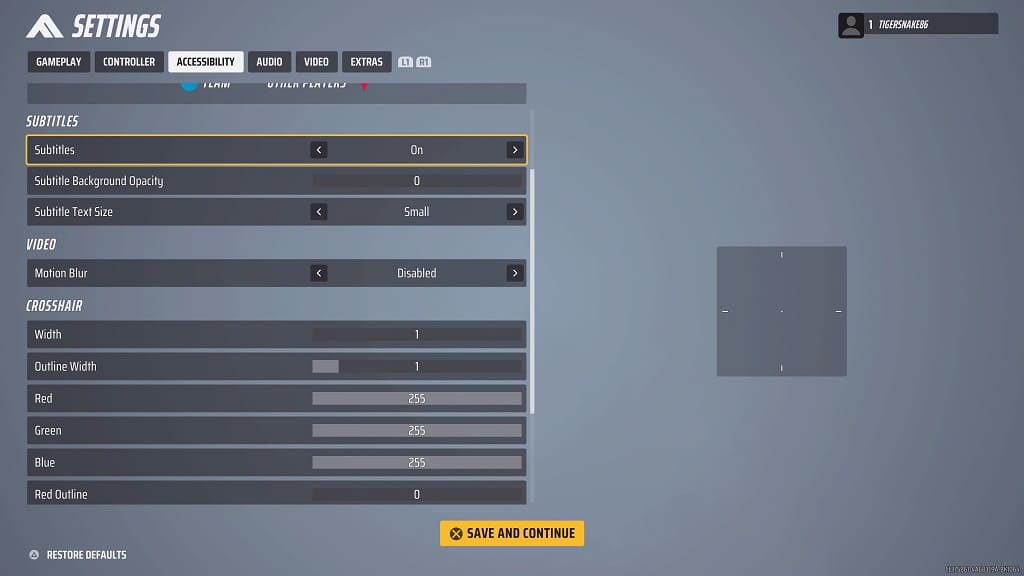
3. From there, you should see the Subtitles section.

You should see the following options:

Subtitles – This lets you enable or disable text on the bottom of the screen when someone is talking.

Subtitles Background Opacity – This lets you add a dark background to the subtitles that will make them easier to read. The slider is set to 0 by default, which means that there isn’t any background.

Subtitle Text Size – This lets you change the size of the subtitles, which is set to Small by default. You can also choose the Medium or Large options. Each time you change this feature, you should see a sample text appear at the bottom of the screen.

Recommended TCL S470G settings for PS5, Xbox Series X and S

If you got the 2023 TCL S4, which has a model number that ended with S470G, then you can check out this Seeking Tech guide to see how you can set up this TV when it comes to playing PlayStation 5, Xbox Series X and Xbox Series S games.

Supported Gaming Features

The S470G is pretty limited when it comes to gaming features. You can play games in HDR10 at 4K and 60 frames per second. Auto Low Latency Mode is also supported.

Other than that, the TV isn’t compatible with some of the more advanced features of the new consoles such as 120 frames per second, Variable Refresh Rate or Dolby Vision.

How to set up the S470G for gaming

In order to optimize the S470G for these gaming systems, we recommend that you take the following steps:

1. If you haven’t done so already, connect your console to the HDMI port of your TCL TV. For best compatibility, use the HDMI cable that came with your PS5, Xbox Series X or Xbox Series S.

You can connect to any of the three HDMI ports of the S470G.

2. Next, use the TV remote to open the Settings menu, where you need to make your way over to the Picture Modes screen. Once you get there, make sure that you have Game Mode selected.

By doing so, you will be able to play games at lower input lag when compared to other display modes of the screen.

3. Next, head over to the Inputs screen in the Settings menu and make sure that Auto Low Latency Mode is activated.

4. Now turn on your console and head over to its Settings menu.

On the PS5, go to Screen and Video > Video Output. On this screen, set Resolution to 2160p and HDR to On When Supported. Afterwards, double check to see if the ALLM, 4K Transfer Rate, Deep Color Output and RGB Range settings are all set to Automatic.

Finally, select Adjust HDR and then follow the instructions on the screen to calibrate the HDR brightness output of the PS5 to the TCL S470G.

On the Xbox consoles, head over to General > TV & display options > Video modes. From there, check the following boxes:

  • Allow auto low-latency mode
  • Allow 4K Allow
  • HDR10

Head back to the General > TV & display options screen and then set Resolution to 4K UHD. Afterwards, select “Calibrate HDR for gaming” and then follow the on-screen tutorial to sync your Series X or Series S HDR brightness output with the S470G.

Your TCL television set should now be fully optimized for your PlayStation 5, Xbox Series X or Xbox Series S console.

How to fix connection failed error when trying to login to The Finals on PS5

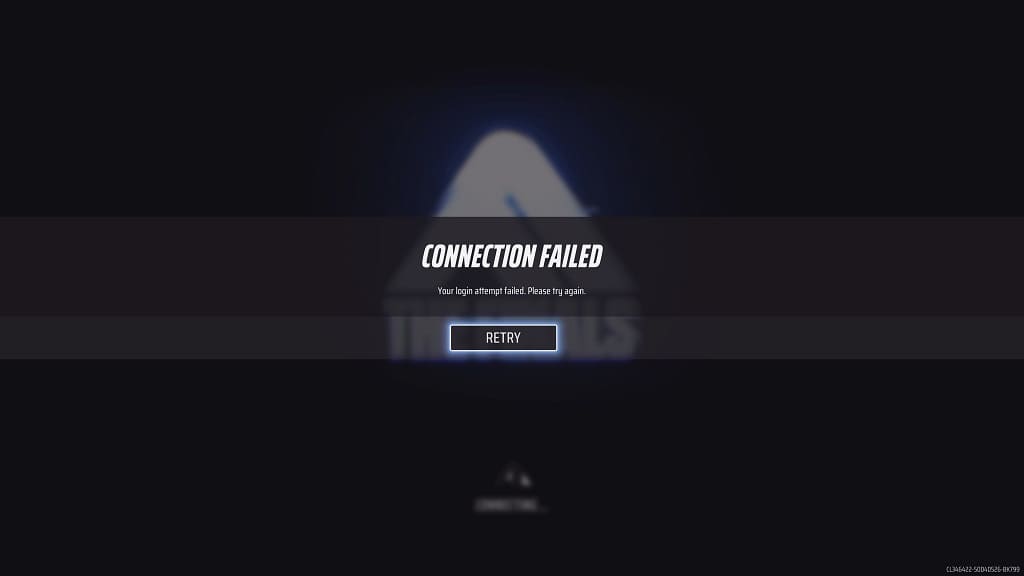
When trying to log into the servers of the PlayStation 5 version of The Finals, you may notice the following error message:

Connection Failed. Your login attempt failed. Please try again.

To see how you can potentially fix this issue, you can take a look at this troubleshooting article from Seeking Tech.

If you see the “connection failed” notifications when trying to connect to the servers, then you may have the wrong version of the game downloaded. Before The Finals officially, there were multiple beta versions available. If you try to connect to the beta releases, then you will end up seeing the aforementioned error.

So, to get past the startup screen, you need to download the full game by taking the following steps:

1. If you haven’t done so already, delete the beta version of The Finals.

If you have the game in the home screen, then you can hover over it. It should have the title of “The Finals Beta.” Afterwards, press the Options button on the controller and then choose the Delete option.

2. To find the full version of The Finals, go to the PlayStation Store App and search for it.

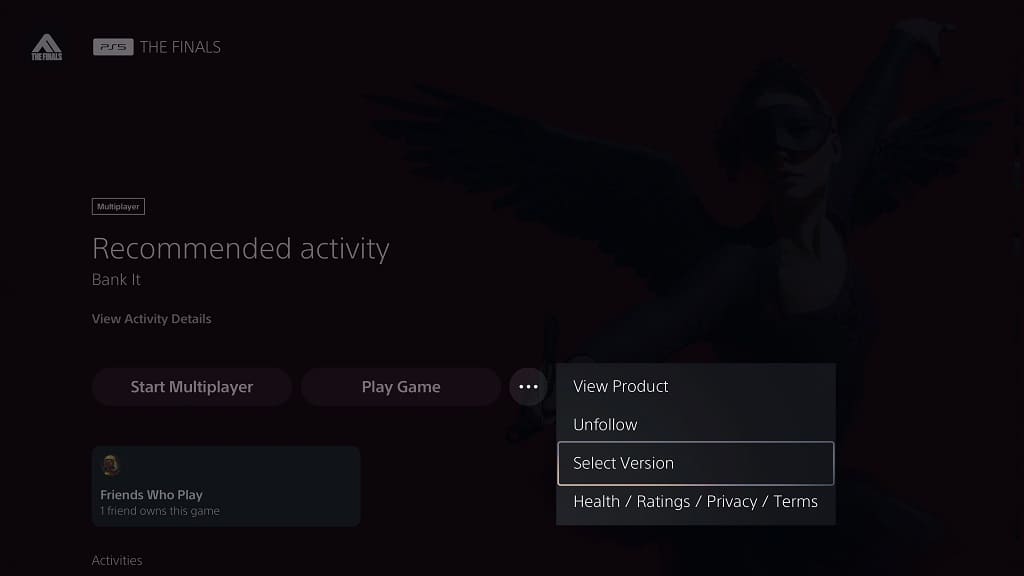
3. From the product page, you may see the full game version appear on the right side at the top.

If you don’t see it, select the “…” icon at the top and then pick “Select Version.” You should then be able to select the full game from there.

4. Download the full version. Once the installation is complete, you should no longer see the “connection failed” error when connecting to the online servers.

How to fix Lego Fortnite brightness issues

When playing Lego Fortnite, you may encounter some brightness issues as some environments may look a little too dark while others may look overly bright. To see how you can fix these issues for the multiplayer title, you can take a look at this troubleshooting guide from Seeking Tech.

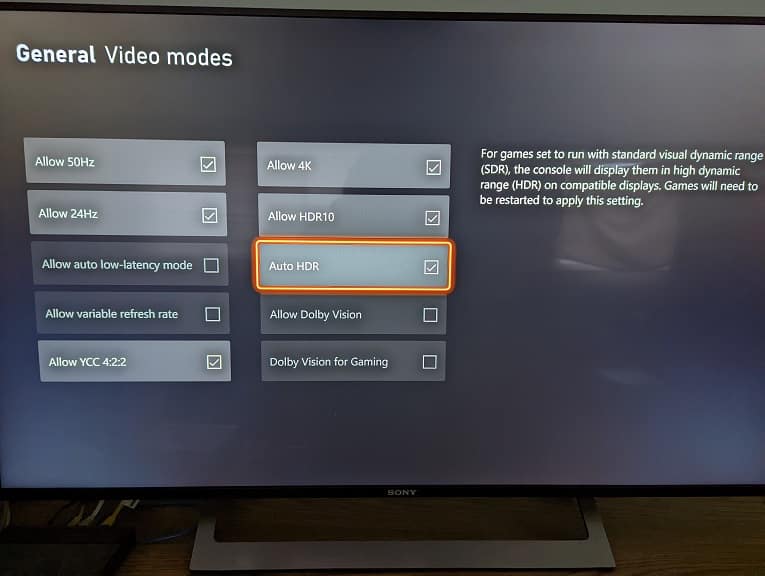
1. It is important to note that Lego Fortnite does not support HDR. So, if you have any Auto HDR enabled on your TV, monitor, PC or console, then you should make sure that you disabled it. Otherwise, the brightness may look off.

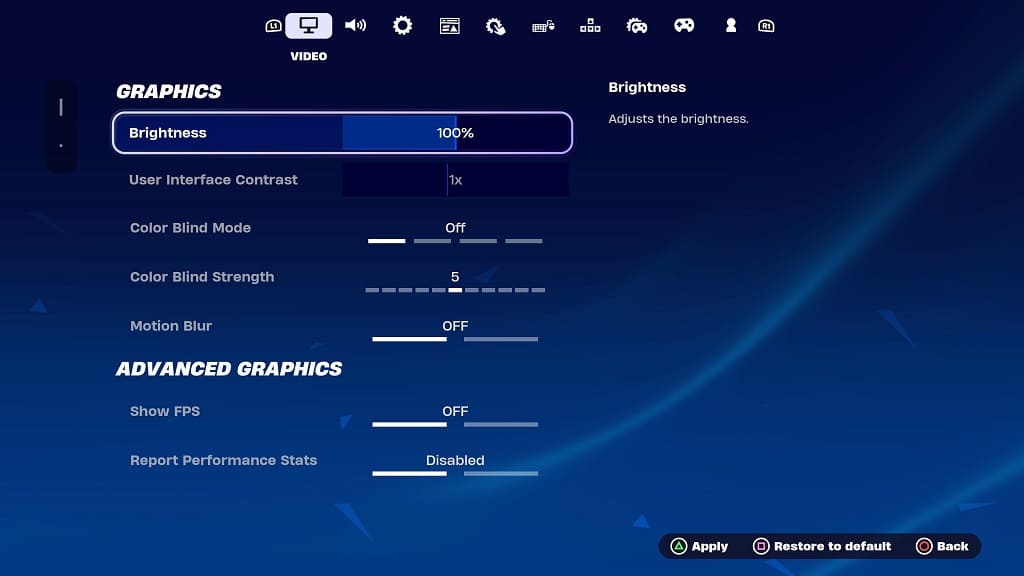
2. You can also try using the in-game brightness slider.

In order to do so, open the Settings menu in Lego Fortnite. From there, move the cursor over to the Video tab, where you should be able to find the Brightness slider.

The brightness is set to 100% be default. To make the graphics darker, move it to the left. To make the visuals brighter, move the slider to the right.

3. You can also try adjusting the brightness and contrast settings on your TV or monitor.

Recommended Hisense U7K settings for PS5, Xbox Series X and S

If you got yourself the Hisense U7K, then you can check out this guide at Seeking Tech to see how you can best optimize it for the PlayStation 5, Xbox Series X and/or Xbox Series S.

Supported PS5 Features

The U7K fully supports all of the display features of the PlayStation 5 as you will be able to play games at a maximum frame rate of 120 at a maximum resolution of 4K. The TV also supports Auto Low Latency Mode, HDR10 and Variable Refresh Rate.

Supported Xbox Series X and Xbox Series S Features

The Hisense U7K is also fully compatible with the display features of the Xbox consoles as you can play Series X and Series S games at up to 120 fps in 4K. Also supported are ALLM, HDR10, Dolby Vision and VRR.

How to set up the U7K for gaming

To get the most out of the television set for your PS5, Series X or Series S, we recommend that you take the following steps:

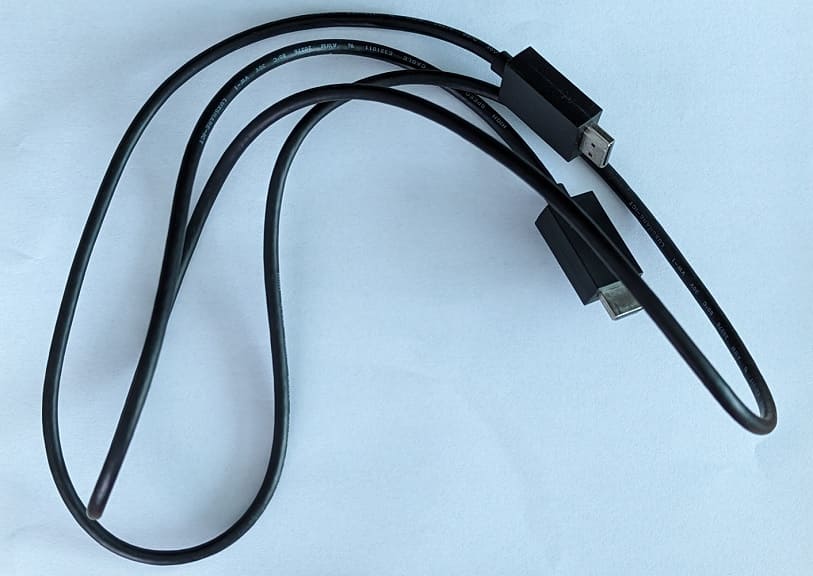
1. Connect your console to the television if you haven’t done so already. Make sure you use the HDMI cable that came with your gaming system and connect to either the third or fourth HDMI ports of the U7K.
2. Using the TV remote, open the Settings menu and then select HDMI Format. You should then select the HDMI port that is connected to your console. Afterwards, make sure that Enhanced Format is selected.

This format should unlock full video bandwidth, allowing you to use all of the display features of your console.

3. In the same Settings menu of your U7K, go to Display & Sound > General > Picture Mode and then select Game.

By using Game Mode, you will reduce the input lag when playing videogames on a HDMI-connected device such as the PlayStation 5, Xbox Series X and Xbox Series S.

4. Next, go to Settings > Display & Sound > Game Settings > Instant Game Response.

By turning this feature on, you will enable Auto Low Latency Mode, which automatically puts your U7K in Game Mode when it detects that you are playing a videogame.

5. You should be done on the TV side; however, there is still some more work to do on the console side. So, make sure you turn on your PS5, Xbox Series X and/or Xbox Series S and then head over to its Settings menu.

On the PlayStation 5, navigate to Screen and Video > Video Output. Over there, set Resolution to 2160p and HDR to On When Supported. You should also set VRR, 120 Hz, ALLM, 4K Transfer Rate, Deep Color Output and RGB Range to Automatic.

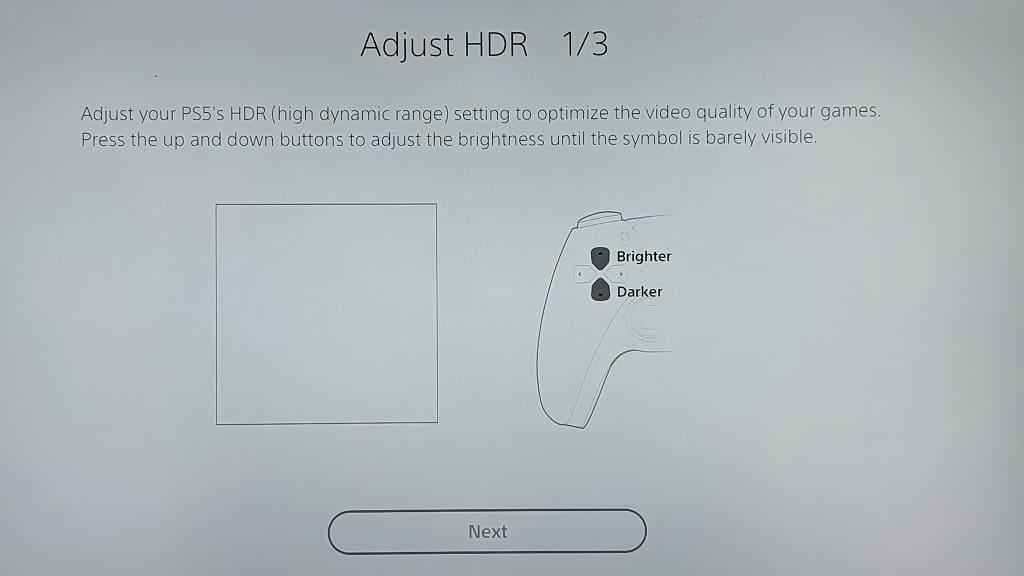
Next, select the Adjust HDR option. Over the next three screens, the PS5 will then guide you to adjusting the console’s HDR output to sync up with the U7K.
For the Xbox Series X and Xbox Series S, navigate to General > TV & display options > Video modes and then make sure that the following options are enabled: Allow Auto-Low Latency Mode, Allow 4K, Allow HDR10, Allow Dolby Vision and Allow Dolby Vision for Gaming. You should then set Variable Refresh Rate to Gaming Only.

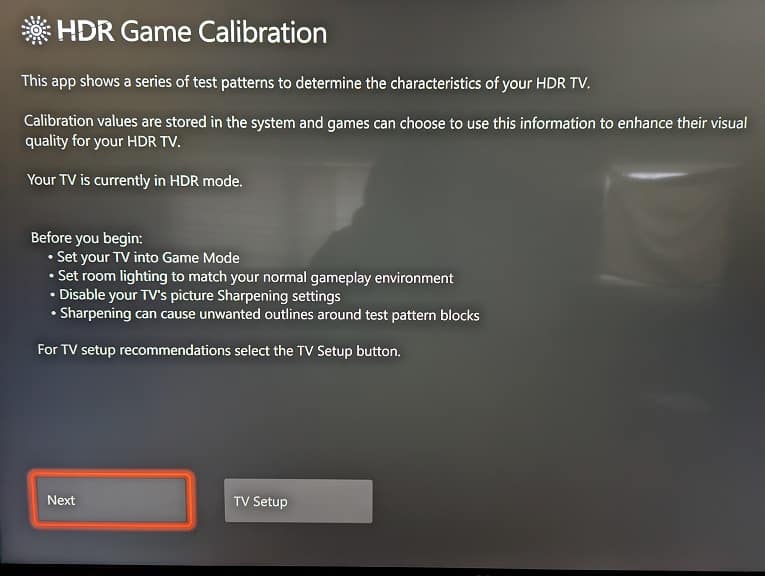
Afterwards, return to the Settings > General > TV & display options. From there, make sure that Resolution is set to 4K UHD and Refresh Rate set to 120 Hz. Finally, select Calibrate HDR for Gaming. Your Xbox will then guide you through how to sync up the console’s HDR display with your U7K.
You should now be done with setting up your Hisense U7K TV to get the most out of your PlayStation 5, Xbox Series X and/or Xbox Series S.
How to fix Lego Fortnite controller aiming issues

If you are having issues aiming with a controller in Lego Fortnite, then you can check out this guide at Seeking Tech.

1. To start off, make sure you have Game Mode, or a similar sounding mode, enabled in the Picture Mode setting of your television or monitor. This mode is designed to reduce input lag when it comes to playing Lego Fortnite and other games.

2. If possible, try to connect your wireless controller to your console. Using a cable or direct connection should lead to faster responses when compared to wireless communications.

If you can only use wireless, then make sure that you sit close enough to the gaming system. You should also check to see if there are any physical obstacles that may interfere with your controller inputs.

Sometimes, other wireless devices nearby may also cause latency. So, you might want to consider removing these.

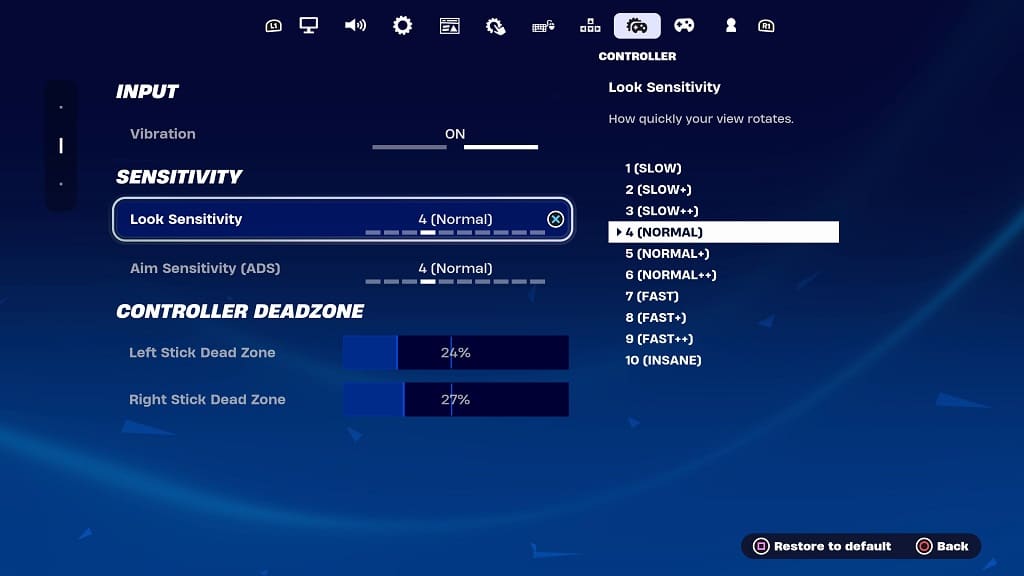
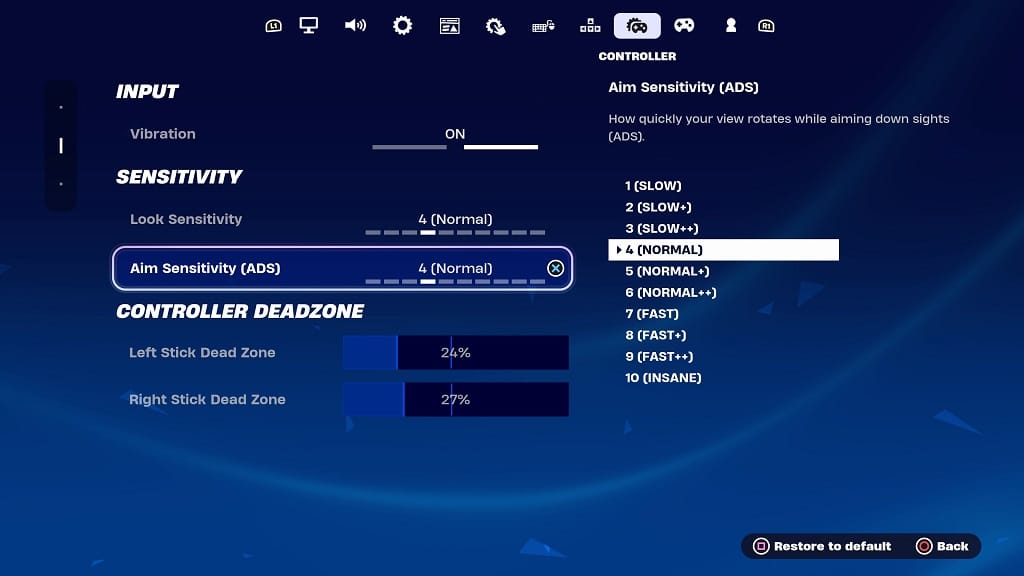
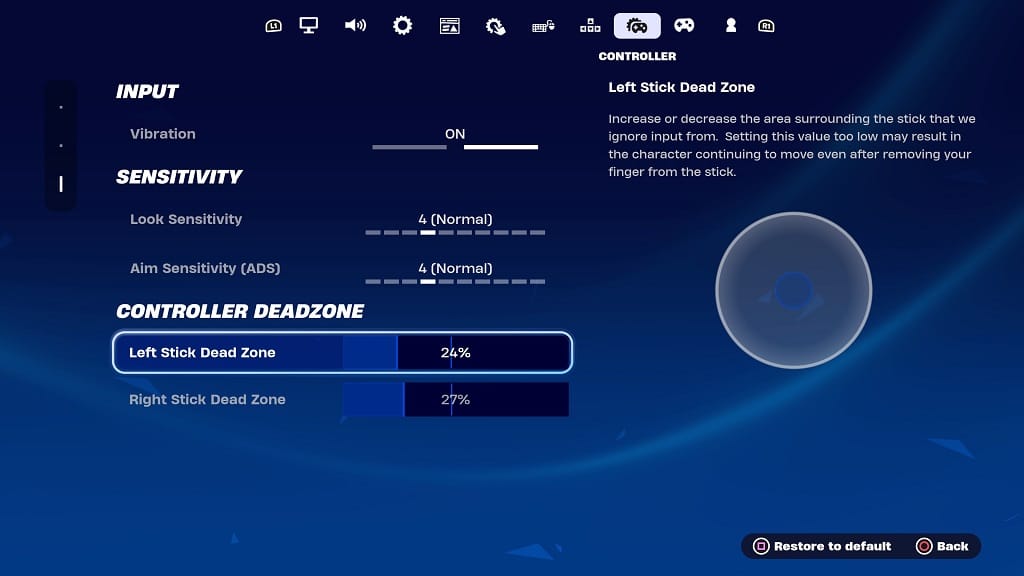
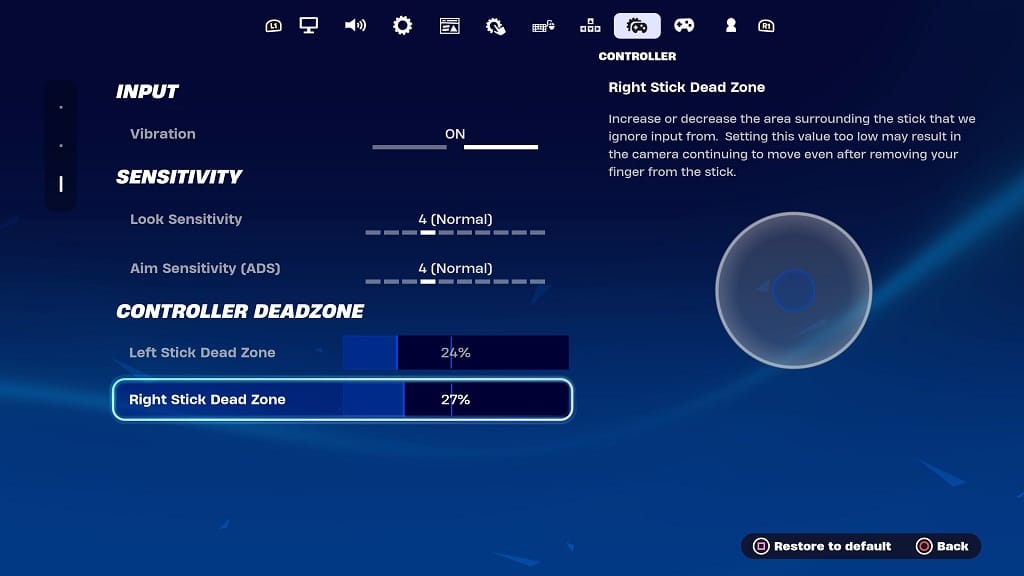
3 If the aiming still does not feel right, then you should open the Settings menu in Lego Fortnite. From there, head over to the Controller tab.

Once you arrived, you should see the following settings:

Look Sensitivity

Aim Sensitivity (ADS)

Left Stick Dead Zone

Right Stick Dead Zone

We recommend that you play around with these settings, and test them out in the game, to see which combinations work well for you.

How to turn off subtitles in Lego Fortnite

By default, subtitles are enabled in Lego Fortnite. To see how you can turn these off, you can take a look at this tutorial from Seeking Tech.

1. To start off, you need to head over to the Settings menu in the multiplayer game.

2. From there, you need to switch over to viewing the Audio tab.

3. Inside the Audio tab, select Sound on the left side.

4. You then need to select Subtitles on the right side of the same screen.

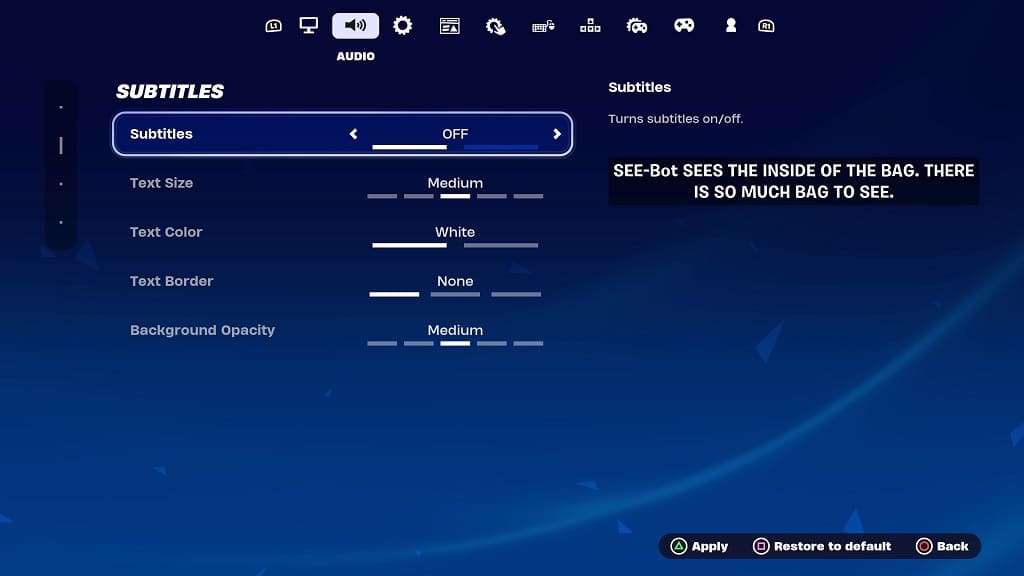
5. Once you get to the Subtitles menu, move the menu cursor down to the Subtitles setting and then make sure it is set to “Off.”

6. Apply the change and exit Settings.

When you start playing Lego Fortnite again, you should notice that there are no longer any subtitles.