How to change the voice and text language in Live A Live

The U.S. version of Live A Live supports both English and Japanese voice dialogue. To see how you can change the language in this unique Japanese role-playing game, you can take a look at this tutorial from Seeking Tech.

1. Before we start, it is important to note that the Language Settings can only be accessed from the title screen of Live A Live. So, if you are currently playing the game, then you need to save your progress and then quit back to the title screen.

On the PlayStation 4 and PlayStation 5 versions of the game, for example, you need to do the following:

  • Press the Triangle button to open the Main Menu.
  • In the Main Menu, press the Options button to open the Save Menu.
  • Save your game in the Save Menu and then return to the Main Menu.
  • Afterwards, select Settings.
  • Inside of Settings, you need to select Return to Title.
  • You should see a message warning you that you will be losing any unsaved progress. Here, you need to select Confirm.

2. Once you get to the title screen of Live A Live, press any button to open a list of options.

3. Next, you need to select the Settings option.

4. You should then select Language Settings from the Settings menu.

5. Inside the Language Settings sub-menu, you should see the Voice Language setting. By default, this is set to English if you are playing the U.S. region.

You can use the left analog stick or directional pad to change to a different voiced dialogue language.

6. From the same Language Settings sub-menu, you can also change the text language, which is set to English by default if you are playing the U.S. copy.

You should see the following options:

  • English
  • French
  • Italian
  • German
  • Spanish
  • Korean
  • Simplified Chinese
  • Traditional Chinese
  • Japanese

7. Once you are done making the changes, go back out of the Language Setting menu. You should get a message saying that the new settings have been saved.

8. Load back into your game and should see the new language options enabled.

How to fix Dead Island 2 HDR and brightness issues

You may find some of the environments in Dead Island 2 to be too bright while others to be too dark. To see how you can fix the brightness, as well as HDR, issues with this first-person action-adventure game, you can take a look at this troubleshooting guide from Seeking Tech.

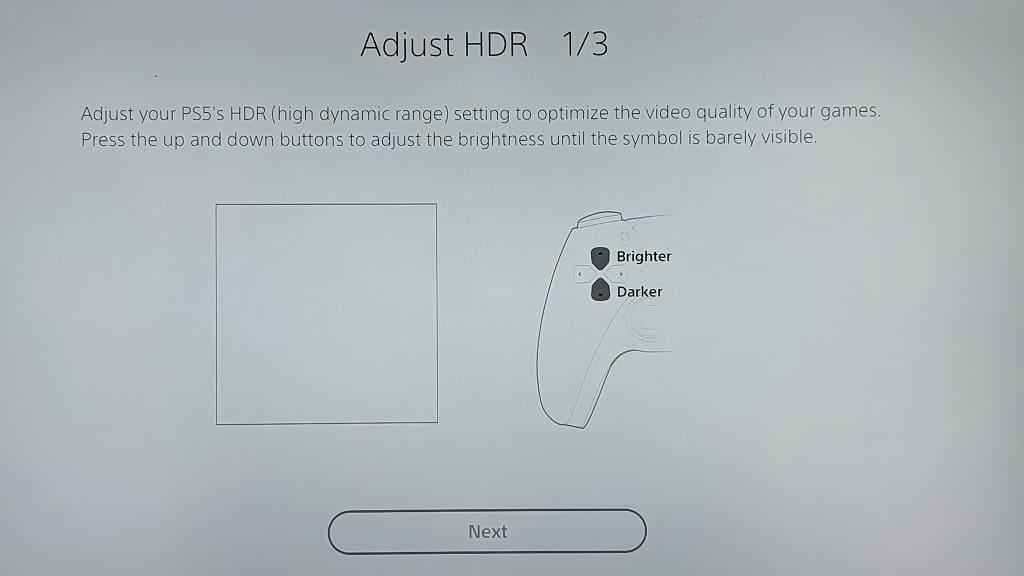
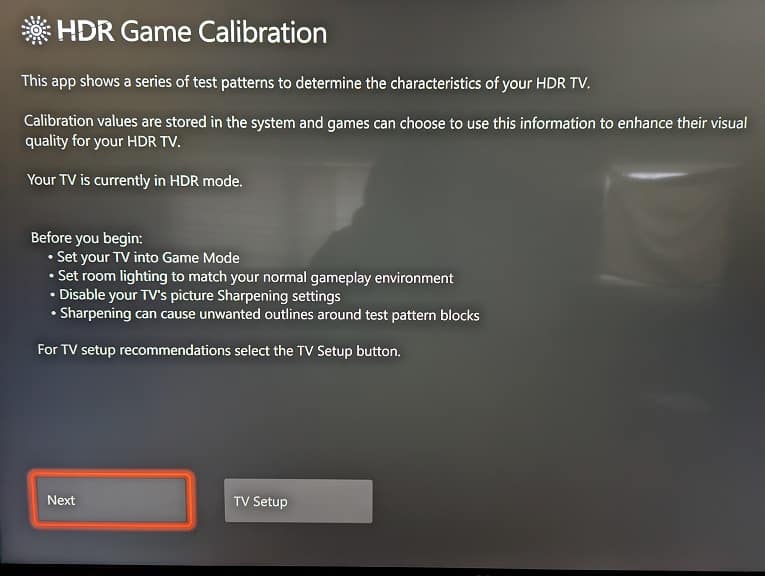
1. For the first step, we suggest calibrating the HDR brightness output of your gaming system to the television screen or monitor.

If you are playing on the PlayStation 4 or PlayStation 4 Pro, then you need to go to your console’s Settings menu and then select Sound and Screen > Video Output Settings > Adjust HDR.

On the PlayStation 5 or PlayStation 5 Digital Edition, you should go to Settings > Screen and Video > Video Output > Adjust HDR.

For the Xbox One, Xbox One S, Xbox One X, Xbox Series S or Xbox Series X, you need to head over to Settings > General > TV & display options > Calibrate HDR for games.

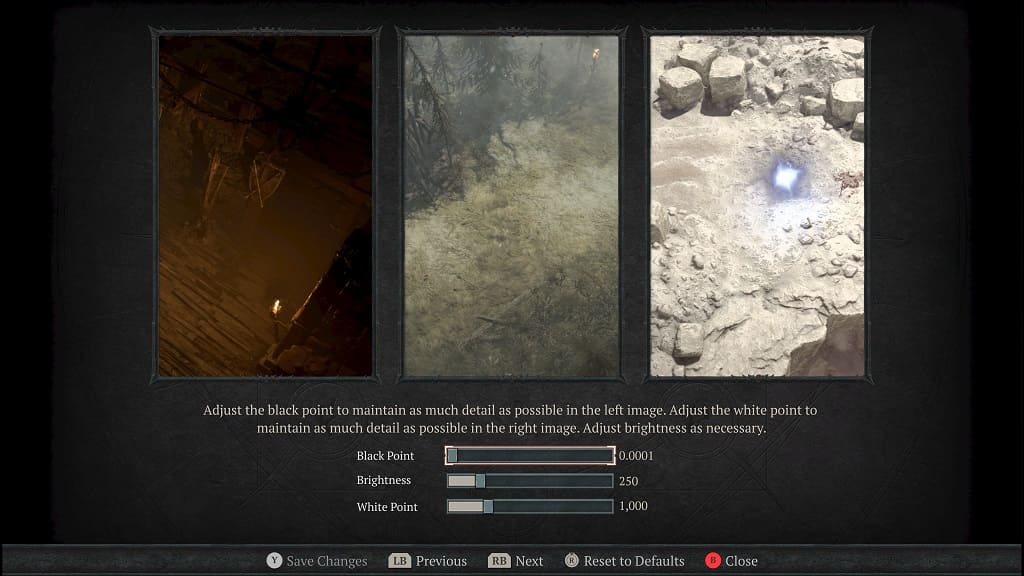
2. Next, we recommend using the HDR menu in Dead Island 2 for further calibration. You can get there by going to the Options menu and then selecting Display. From the Display menu, make sure that HDR is enabled and then select Brightness (HDR).

In the Brightness (HDR) menu, you will be able to adjust the following:

  • Calibrate White Point
  • Calibrate Black Point
  • Brightness
  • UI Brightness

Depending on the HDR brightness output of your screen, as well as the ambient room lighting, we may need to re-adjust these settings occasionally.

In regards to the ambient room lighting, you can try turning off the lights or playing at night. If you are getting a lot of sunlight, then you can try putting blinders on the windows to darken the room.

3. It is important to note that some screens are better at displaying HDR games when compared to others. So, if possible, you can try playing Dead Island 2 on a different HDR-supported TV or monitor to see if you can get a more suitable picture quality.

When changing screens, make sure you re-calibrate the HDR brightness output by using the system menus as well as the in-game Brightness HDR menu.

4. If you don’t have a good HDR capable television set or monitor available, then you can try playing Dead Island 2 in SDR.

In order to do so, open the Options menu while playing the game and then go to Display. From there, make sure that the HDR Enabled Setting is set to No in order to disable the HDR feature. Afterwards, the Brightness (SDR) option can be selected.

In the Brightness (SDR) menu, you should be able to adjust the following:

  • Calibrate White Point
  • Calibrate Black Point
  • Brightness

You may need to go back to this menu occasionally depending on the time of day you are playing this video game as the ambient room lighting may affect your visibility. If you are playing during a bright sunny day with no window blinders, for example, then the darker areas in Dead Island 2 will be harder to see due to the brighter ambient lighting.

How to turn off Dead Island 2 enemy health bars and damage numbers

Dead Island 2 will display a health bar for the enemy you are targeting. The first-person action-adventure game will also show the damage number when you connect on an attack. While these can be very helpful, they will also add some clutter to the user interface.

If you find that both of these elements to be very distracting and, therefore, end up breaking your immersion, then you can take a look at this tutorial to see how you can disable these features.

1. For the first step, you need to head over to the Options menu while playing Dead Island 2 if you aren’t there already.

2. After getting to the Options menu, you need to select UI.

3. Once you are in the UI menu, you need to scroll down and move the cursor to Zombie Health & Status, which should have the following description:

  • “Turn zombie health & status information on or off.”

4. Make sure that the Zombie Health & Status setting is turned off.

5. Afterwards, keep scrolling down the UI menu in Dead Island 2 until you get to Damage Numbers. This setting should show the following description:

  • “Turn floating numbers when damaging zombies on or off.”

6. You should set the Damage Numbers to Off.

7. After disabling both Zombie Health & Status and Damage Numbers settings, you need to exit the UI menu.

8. You should see a notification pop-up saying that you have updated the settings. Here, you need to save the changes in order to apply them in the game.

To save, you need to press the X button if you are playing Dead Island 2 on a PlayStation 4, PlayStation 4 Pro or PlayStation 5.

If you are playing DI2 on the Xbox One, Xbox One S, Xbox One X, Xbox Series S or Xbox Series X, then you need to press the A button to save the edited settings.

How to fix Dead Island 2 input lag issues on PS5, Xbox Series X and S

If you are playing Dead Island 2 on the PlayStation 5, PlayStation 5 Digital Edition, Xbox Series X or Xbox Series S, then you may notice that your character may not be as responsive to your control inputs as you would like.

To see how you can reduce the input lag for this first-person action-adventure game, you can take a look at this troubleshooting article from Seeking Tech.

1. To begin, we recommend connecting your controller to the console directly so that you can take advantage of the wired connection. Doing so should result in less latency when compared to using the same gamepad wirelessly.

For the Xbox Series X and Xbox Series S, you simply need to plug the controller in.

For the PS5 consoles, you need to plug the controller in and then go to its Settings menu. Afterwards, you need to head over to Accessories > Controller (General) > Communication Method. Finally, select USB Cable from the Communication Method menu.

2. If your television set supports a Game Mode, or a similarly named, picture setting, then we highly recommend using it. These modes are designed to lower the input lag when it comes to playing video games like Dead Island 2.

3. If you feel like your character is moving and/or aiming slowly, then you can use the Controls menu in Dead Island 2 to make some adjustments. You get there from the Options menu in the game.

From the Controls menu, you will be able to adjust the Sensitivity, ADS (Aiming Down Sight) Sensitivity and Aim Assist Sensitivity.

For additional options, you can set the Enable Advanced Settings from the same screen to On. You can then be able to make the following adjustments:

Look X-Axis:

  • Look Maximum Boost
  • Look Boost Ramp Time
  • Look Boost Threshold

Look Y-Axis:

  • Look Maximum Boost
  • Look Boost Ramp Time
  • Look Boost Threshold

Left Stick:

  • Inner Deadzone
  • Outer Deadzone
  • Invert Y Axis
  • X-Axis Sensitivity

Right Stick:

  • Inner Deadzone
  • Outer Deadzone
  • Y-Axis Sensitivity
  • Invert Y-Axis
  • X-Axis Sensitivity

4. The DualSense Edge and Xbox Elite controllers also come additional settings that will let you adjust the dead zone of the analog sticks as well as adjust the trigger sensitivity.

So, if you have these premium gamepads, then you can try messing around with the settings of these controllers to see if you can get a more responsive experience while playing the game.

5. If you are still experiencing some input lag, then you can try playing Dead Island 2 on a different television set or monitor.

Some screens are better at reducing latency when compared to others.

6. You should also make sure that your PS5, Series X or Series S is directly connected to the TV or monitor as any pass-through device or splitter may add additional lag.

7. Of course, you should also keep the game updated as the development team at Dambuster Studios could release a new patch that may fix your input lag problems.

How to turn off hints and tutorials in Dead Island 2

When playing Dead Island 2, you may find that the hints and tutorials that pop up in the middle or left side of the screen to be somewhat annoying. Thankfully, you are able to disable these messages from appearing during gameplay.

To find out how to do so, you can take a look at this tutorial from Seeking Tech.

1. To start off, you need to head over to the Options menu in Dead Island 2.

2. From the Options menu, you should be able to find and select UI, which is short for User Interface.

3. After getting to the UI menu, move the cursor until you get to Left Side Notifications Pop-Ups, which should have the following description:

  • “Turn left-side notification pop-ups for tutorials, challenges, blueprints, unlocks and the Zompeida on or off.”

4. If you turn off Left Side Notifications Pop-Ups, you should be able to stop the tutorials from appearing. However, you will also be turning off any challenges, blueprints, unlocks and Zompeida notifications.

5. Once you are done disabling Left Side Notifications Pop-Ups, scroll down the same UI menu until you get to Small Central Hints, which should show the following information:

  • “Turns small central hints, for example about broken weapons or no ammo, on or off.”

6. After disabling hints, back out of the UI menu and you should see the following message appear:

  • “Confirm Choices. You’ve updated your options settings! Ready to plunge back into Hell-A?”

Here, you need to select the Save Changes option in order to save and apply them in the game.

If you are playing Dead Island 2 on the PlayStation 4, PlayStation 4 Pro or PlayStation 5, then you need to press the X button on the DualShock 4 or DualSense controller.

You need to press the A button if you are playing the game on an Xbox One, Xbox One S, Xbox One X, Xbox Series S or Xbox Series X console.

DualSense Edge settings for Dead Island 2

If you have a DualSense Edge, then you can use this premium controller to get a leg up in Dead Island 2. To see how you can get the most out of this gamepad, you can take a look at this guide from Seeking Tech.

Analog Caps and Back Buttons Attachments

In regard to the analog caps and back button attachments that you can use with the DualSense Edge for Dead island 2, we recommend that go with the combination that gives you the most comfort and/or feel of control.

You may need to play around with these add-ons for the controller for a little bit in order to find your preferences. With that said, the combination you used for first-person shooters should work well with this first-person action-adventure game as well.

Trigger Stops

We suggest that you move the trigger stops located on the back of the DualSense Edge all the down for DI2. By doing so, it should take less time to attack or throw as you only need to press the R2 button slightly to perform these actions.

You should also be able to aim faster as the L2 button will only need to be pressed slightly.

Customize Button Assignments

As for the back buttons, we recommend assigning L3 function to the left back button and R3 function to the right back button.

By default, the L3 button is used for sprinting in Dead Island 2; therefore, pressing down on the left analog stick may feel more awkward when compared to pressing down on the back button.

The default function of R3 is to knockback the target. It is more awkward to press down on the right analog stick than by simply pressing the right back button.

By pressing the L3 and R3 buttons with the default layout, you will also activate fury mode. This should be easier to use with the back buttons as opposed to pressing down on the analogs.

To prevent yourself from accidentally using spring, knockback and/or fury mode, we suggest disabling the L3 and R3 buttons once you reassign their functions to the back buttons.

Stick Sensitivity/Deadzone and Trigger Deadzone

With the DualSense Edge, you can use the system menus of the PlayStation 5 to adjust the sensitivity and deadzone settings for the analog sticks. Before doing so, however, we recommend that you first head over to the Control section of the Options menu in Dead Island 2. From there, you can use the in-game setting to adjust the sensitivity, acceleration and dead zones of the analog sticks.

If your analogs still do not feel quite right after changing the in-game settings, then you can then go to the Stick Sensitivity/Deadzone menu on your PlayStation 5 to make additional adjustments.

If you feel like the L2 and R2 buttons still aren’t as response as you would like even after moving the trigger stops all the way to the bottom on the back of the DualSense, then you can head over to the Trigger Deadzone menu of the DualSense Edge to make additional changes.

How to enable hard mode settings in Final Fantasy Pixel Remaster on Switch and PS4

The new Final Fantasy Pixel Remaster for the Nintendo Switch and PlayStation 4 features several modifiers that you can use to make these classic games harder. To see how you can enable these hard mode settings, you can take a look at this tutorial from Seeking Tech.

1. To start out, you need to open the in-game menu when you are outside of battle and being able to freely explore the environment.

You need to press the X button if you are playing on the Nintendo Switch, Nintendo Switch Lite or Nintendo Switch OLED. To open the same menu, you need to be pressing the Triangle button on the PlayStation 4, PlayStation 4 Pro and PlayStation 5.

2. Once you open the in-game menu, you need to select Configuration.

3. You should then select Boost from Configuration.

4. Depending on the game you are currently playing, you will see different settings in the Boost menu. Most of these features will allow you to decrease the amount of money, experience points and other points you earned when defeating all enemies in a battle.

You can decrease these awards by 50% or make it so that you don’t earn anything at all by winning these encounters. If you just want to fight in mandatory battles, then you can also disable random encounters.

To play Final Fantasy, Final Fantasy II, Final Fantasy III, Final Fantasy IV, Final Fantasy V or Final Fantasy VI at a higher difficulty, you can try the following settings:

Final Fantasy:

  • EXP at 0x or 0.5x
  • Gil at 0x or 0.5x

Final Fantasy 2:

  • Gil at 0x or 0.5x
  • Weapon Skill Boost at 0x or 0.5x
  • Magic Skill Boost at 0x or 0.5x
  • Attribute Boost at 0x or 0.5x
  • Compensatory HP at 0x or 0.5x

Final Fantasy 3:

  • EXP at 0x or 0.5x
  • Gil at 0x or 0.5x

Final Fantasy 4:

  • EXP at 0x or 0.5x
  • Gil at 0x or 0.5x

Final Fantasy 5:

  • EXP at 0x or 0.5x
  • Gil at 0x or 0.5x
  • ABP at 0x or 0.5x

Final Fantasy 6:

  • EXP at 0x or 0.5x
  • Gil at 0x or 0.5x
  • Magic AP at 0x or 0.5x

Keep in mind that these modifiers can be changed anytime from the Boost menu. So, if you feel like that you no longer want to limit yourself when it comes to battle rewards, then you change the aforementioned multipliers back to a normal rate or even increase the awards by two/four times the default amount.

How to fix Dead Island 2 co-op hosting issues

You are able to play Dead Island 2 with two other players online to fight against zombies. If you can’t seem to host others playing on a different platform, then you can check out this troubleshooting article from Seeking Tech.

Cross-Play vs Cross-Gen Co-Op

Before we begin, it is important to note that Dead Island 2 does not support cross-play as PC, PlayStation and Xbox gamers won’t be able to play with each other.

With that said, the game does support cross-generation match making. As a result, PlayStation 4, PlayStation 4 Pro and PlayStation 5 gamers can play cooperatively with each other.

The same is also applicable to the Xbox family as Xbox One, Xbox One S, Xbox One X, Xbox Series S and Xbox Series X players are able to play with each other.

If you own the PC version of DI2, then you can only team up with other computer players.

Older Consoles

If you want to play co-op with others from the same console family but still aren’t able to connect, then your issue may be related to having an older console.

Currently, you aren’t able to host a cooperative session if you are playing Dead Island 2 on the base PlayStation 4, base Xbox One or Xbox One S. This is due to the technical limitations of these systems when compared to the newer and more powerful hardware.

The development team is planning to make the hosting feature available for these older consoles eventually through a patch. So, you should make sure that you have the latest version of this action role-playing game downloaded and installed if you haven’t done so already.

If you aren’t willing to wait for an update, then you can tell the other players to invite you instead if they are playing on a PlayStation 4 Pro or PlayStation 5 and you are playing on a base PlayStation 4.

If you are playing on a base Xbox One or Xbox One S, then you can tell the other players to invite you if they are playing Dead Island 2 on an Xbox One X, Xbox Series S or Xbox Series X.

Your game progression should be saved even if you are joining into the host’s game.

Of course, you can also simply upgrade from a PS4 to a PS4 Pro or PS5. If you are playing on Xbox One or Xbox One S, then you can upgrade to Xbox One X, Xbox Series S or Xbox Series X if you want to host a co-op session.

How to use Final Fantasy Pixel Remaster auto battle on Switch and PS4

The Nintendo Switch and PlayStation 4 versions of Final Fantasy, Final Fantasy II, Final Fantasy III, Final Fantasy IV, Final Fantasy V and Final Fantasy VI added automatic battles. To see how you can enable, as well as use this feature, which can be very helpful when grinding or during very long fights, you can take a look at this tutorial from Seeking Tech.

How to enable auto battle in Final Fantasy Pixel Remaster

In order to enable auto battle during fights in these Final Fantasy Pixel Remaster titles, you can simply press the Y button if you are playing on the Switch, Switch Lite or Switch OLED in encounters. On the PlayStation 4 or PlayStation 5, you need to press the Square button on the DualShock 4 or DualSense.

You can also turn the auto battle feature on permanently by taking the following steps:

1. First off, make sure that you are outside of battle and exploring the field.

2. Next, you need to open the in-game menu by pressing the X button on the Nintendo Switch or Square button on PlayStation.

3. From the in-game menu, you need to select Configuration.

4. Afterwards, move the cursor to the Continue Auto Battle setting, which has the following description:

  • “Set auto-battle to remain on in the next battle.”

5. Set the Continue Auto Battle setting to On to enable this feature.

How does auto battle work?

By turning on the auto battle feature, your characters will repeat the last actions you previously assigned them.

For instance, if you command one of the character to use the cure spell, the other to use a magic attack and the rest of the party members to physically attack the enemies, then each individuals will repeat the same action over and over again unless you manually disable the feature by pressing the Y button on the Nintendo Switch or Square button on PlayStation during the fight.

By enabling auto battle, you will also speed up the encounters significantly.

If you want to level up and/or gain money quickly in the new versions of Final Fantasy, Final Fantasy 2, Final Fantasy 3, Final Fantasy 4, Final Fantasy 5 and Final Fantasy 6, then you can use auto battle to go along with the boosted cheats in order to make the grind a lot faster.

Of course, auto battle is also very helpful if you want to go through the game as fast as possible by doing a speed run.

How to disable Final Fantasy Pixel Remaster random battles on Switch and PS4

The Final Fantasy Pixel Remaster games on the Nintendo Switch and PlayStation 4 feature random battles. If you find that these frequent encounters are annoying, especially if you feel lost exploring the dungeon or world map, then you can take a look at this tutorial from Seeking Tech to see how you can turn off these fights.

Method #1

Square Enix included a quick shortcut if you want to turn off encounters without using the in-game menu in Final Fantasy, Final Fantasy II, Final Fantasy III, Final Fantasy IV, Final Fantasy V and Final Fantasy VI.

In order to do so, you simply press down on the right analog stick if you are playing these games on the Nintendo Switch, Nintendo Switch Lite or Nintendo Switch OLED.

You should press the R3 button to disable random encounters on the PlayStation 4, PlayStation 4 Pro, PlayStation 4 or PlayStation 5 Digital Edition console.

After pressing down on the right analog stick or R3 button, you should see a message appear on screen that says Encounters Off. This indicates that you should no longer be fighting in any random battles.

If you are seeing the Encounters On message instead, then you need to press the same button again if you want to turn off these fights.

Method #2

For the second method, you need to open the in-game menu any time you are outside of battle and exploring the field. You can do so by pressing the X button on Switch or Triangle button on PS4/PS5.

Afterwards, you need to head over to the Configuration section. From there, you should scroll down and then select Boost. Finally, you can set Encounters to Off from the Boost screen.


It is important to note that, unlike the remasters of Final Fantasy VII, VIII and IX, the remastered versions of the first six games of the series do not offer any battle cheats like invincibility.

As a result, you may need to fight some of the random encounters in order to gain enough experience points, as well as Gil and other points, in order to level up to an appropriate level to have a chance in the tougher mandatory boss fights.

Thankfully, you can use the aforementioned Boost menu to significantly increase the EXP, Gil and the other awards by winning an encounter.

These cheats should make grinding in the Switch and PS4 versions of Final Fantasy, Final Fantasy 2, Final Fantasy 3, Final Fantasy 4, Final Fantasy 5 and Final Fantasy 6 a lot easier.