How to change voice chat settings in Lego Fortnite

You can check out this guide at Seeking Tech to see how you can change the voice chat, voice reporting, voice chat method and voice chat notifications settings in Lego Fortnite.

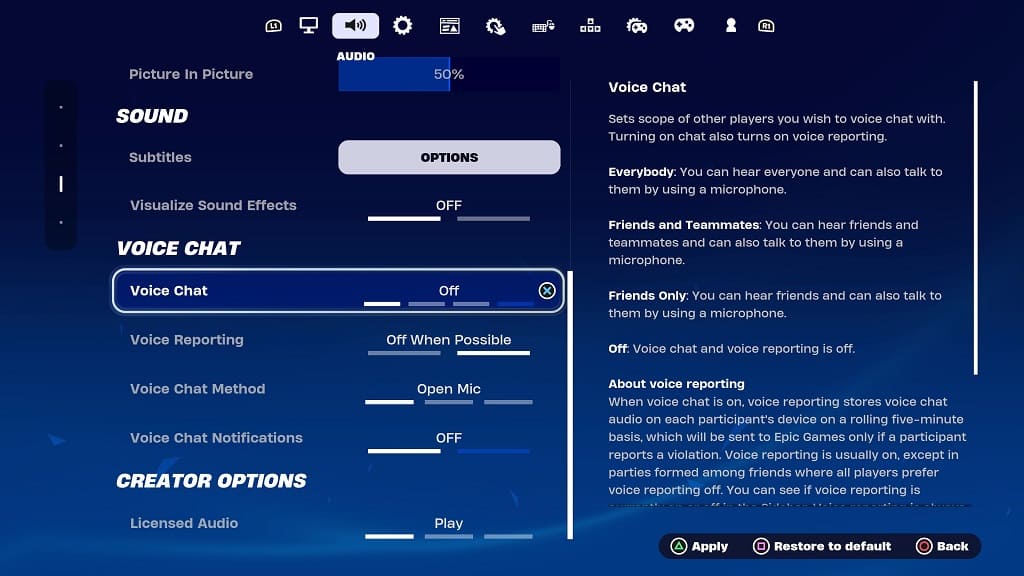
1. To start off, you need to open the Settings menu in Lego Fortnite.

2. Once you are there, move over to the Sound tab. If you are playing with a controller, then you can change tabs with the L1/R1, LB/RB or L/R buttons.

3. Select the Voice Chat option on the left column.

4. On the right column, you should see the following options:

Voice Chat: This lets you change the scope of your voice communications with other players. You will be able to change it to any of the following:

  • Off
  • Friends Only
  • Friends and Teammates
  • Everybody

Voice Reporting: This is a feature that captures a voice conversation. If the conversation gets reported, then the audio log will be sent to EPic Games for further review. This can be changed to the following:

  • Always On
  • Off When Possible

Voice Chat Method: This setting lets you change how you want to activate voice chat. You can do so with the following methods:

  • Open Mic
  • Push to Talk
  • Mute

Voice Chat Notifications: This lets you disable or enable on-screen notifications when another player speaks.

5. Once you are done, apply the settings. On a controller, you can do so by pressing the Triangle on PlayStation, X button on Switch or Y button on Xbox.

6. You can then exit the Settings menu and return to playing Lego Fortnite.

How to fix SteamWorld Build brightness issues

You can find some of the environments in SteamWorld Build too be too bright or too dark. To see how you can fix the brightness issue in the latest SteamWorld videogame, you can take a look at this troubleshooting article from Seeking Tech.

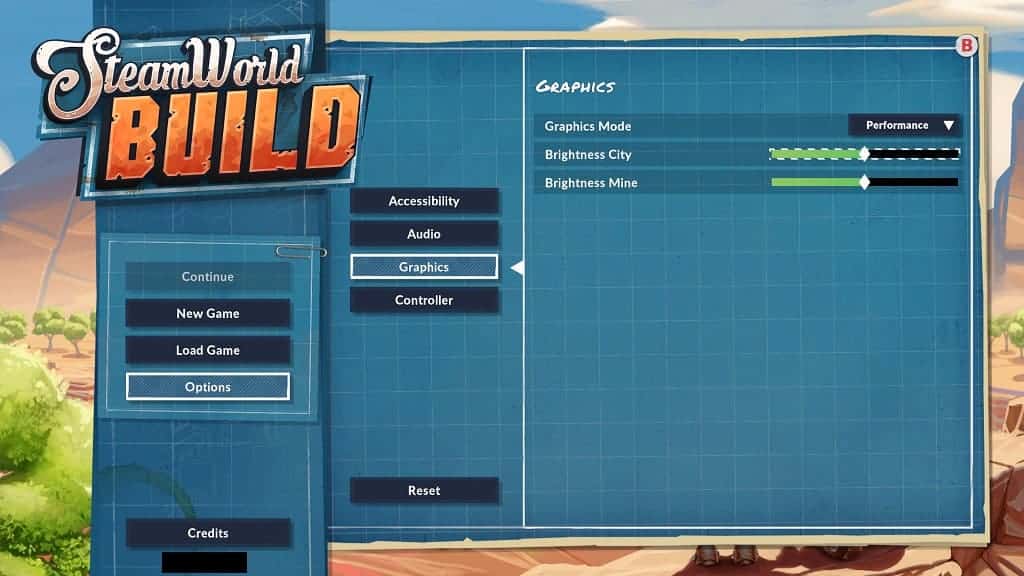
1. For the first potential fix, you can try using the in-game brightness sliders. You can do so by going to the Options > Graphics menu. From there, you should be able to adjust the brightness in the City section as well as the Mine section.

2. If the brightness still looks off, then you can adjust the brightness level on your PC or console.

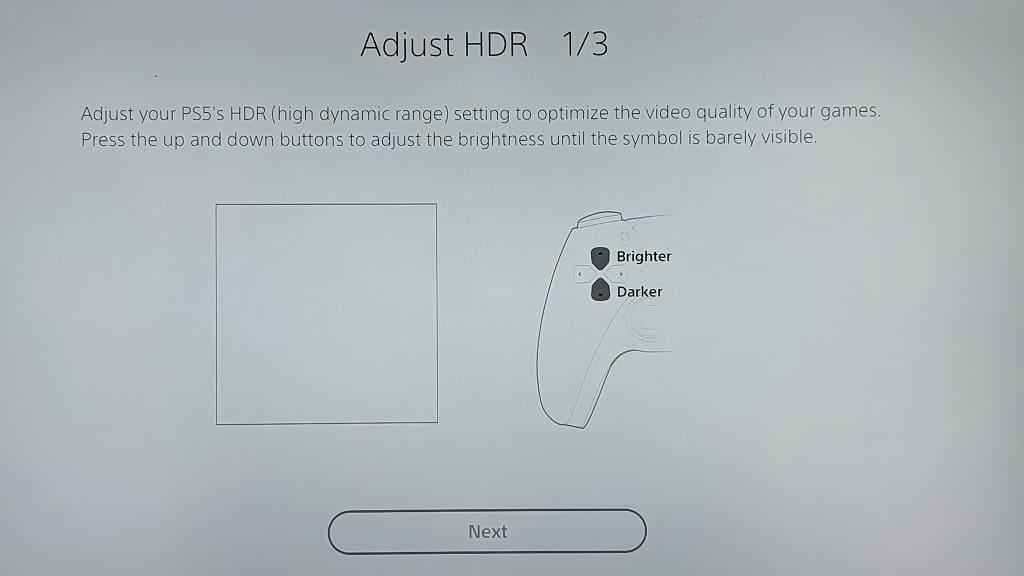
On the PS4, you need to go to Settings > Sound and Screen > Video Output Settings > Adjust HDR. On PlayStation 5, head over to Settings > Screen and Video > Video Output > Adjust HDR.

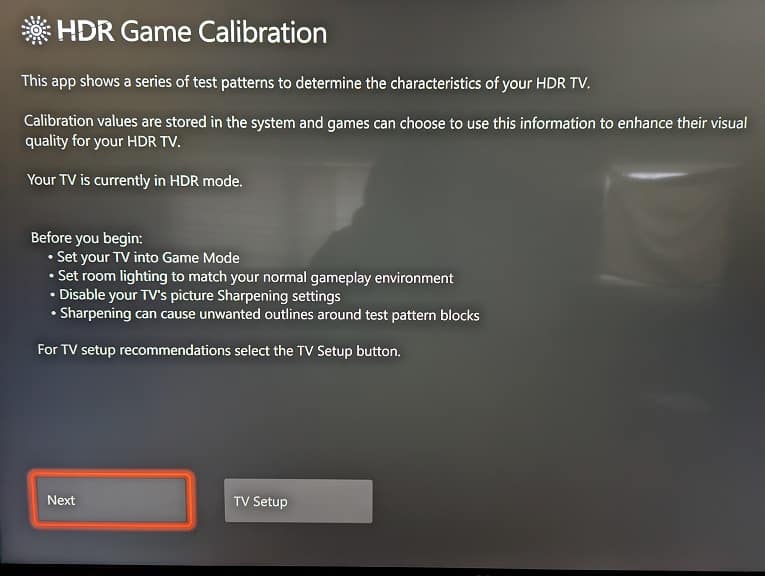
For the Xbox consoles, select Settings > General > TV & display options > Calibrate HDR for gaming.

If you are playing on the Nintendo Switch in handheld mode, you can try adjusting its screen brightness.

3. Of course, you can try adjusting the brightness and contrast levels on your television set or monitor as well.

4. If you are playing Steam World Build in HDR, then you can try disabling HDR to play in SDR. The brightness may end up looking better by doing so.

Make sure you disable HDR from your PC/console as well as your TV/monitor.

How to invert the camera in SteamWorld Build

By default, the in-game camera in SteamWorld Build will move in the same direction to where you are tilting the right analog stick. You can check out this tutorial from Seeking Tech to see how you can invert the camera controls in this city building and dungeon exploration title.

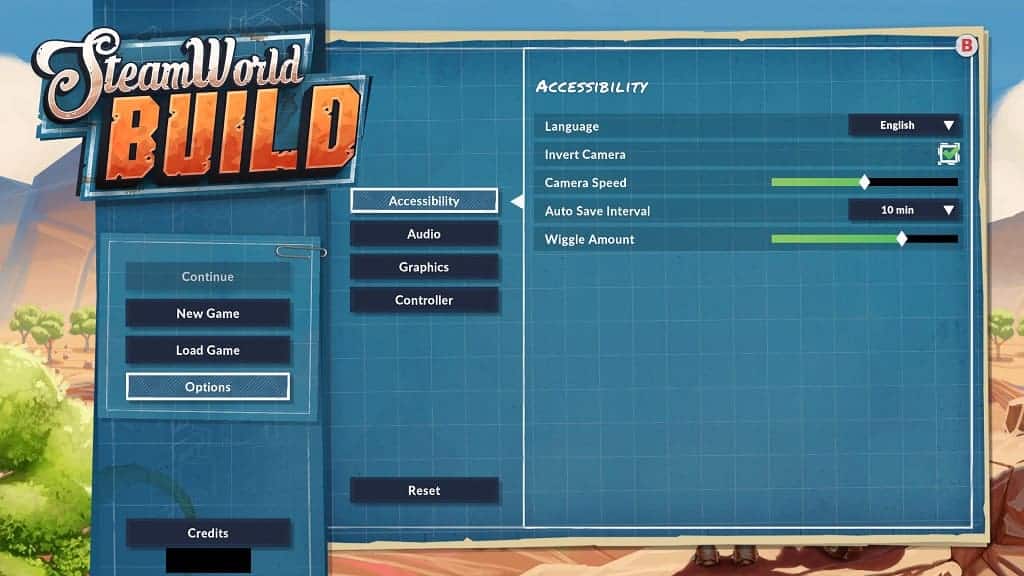
1. To start off, you need to make your way to the Options menu. This can be done from the main menu or pause menu.

2. Next, you need to select Accessibility.

3. From the Accessibility tab in the Options menu, move the cursor down to Invert Camera.

4. Make sure that the box next to it has a check mark.

5. Exit the Options menu and return to playing Steam World Build.

The camera controls should now be inverted. To move the camera to the left, you have to push the right analog stick to the right and vice versa. To move the camera upwards, tilt the analog stick down and vice versa.

Skull & Co. Skin, CQC and FPS Thumb Grip Set review

If you are looking for a thumb stick and/or analog cover, then you may have found the Skin, CQC and FPS Thumb Grip Set from Skull & Co. during your search. So, is this three-set bundle worth it? You can find out in this review article at Seeking Tech.
Compatibility

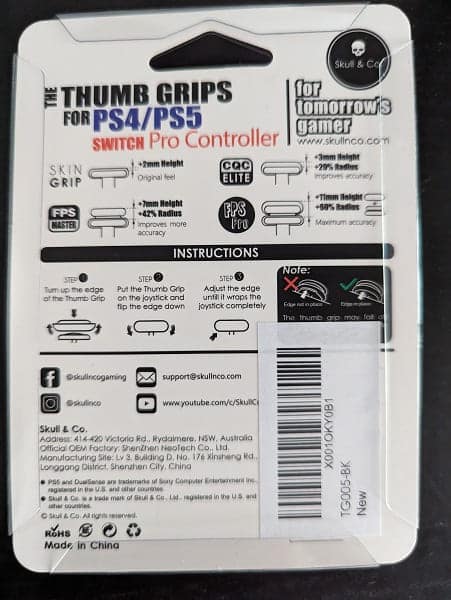
The Skin, CQC and FPS Thumb Grip is mainly advertised for the DualShock 4 and DualSense controller although Skull & Co. has stated that these covers should work well with the Nintendo Switch Pro controller as well.
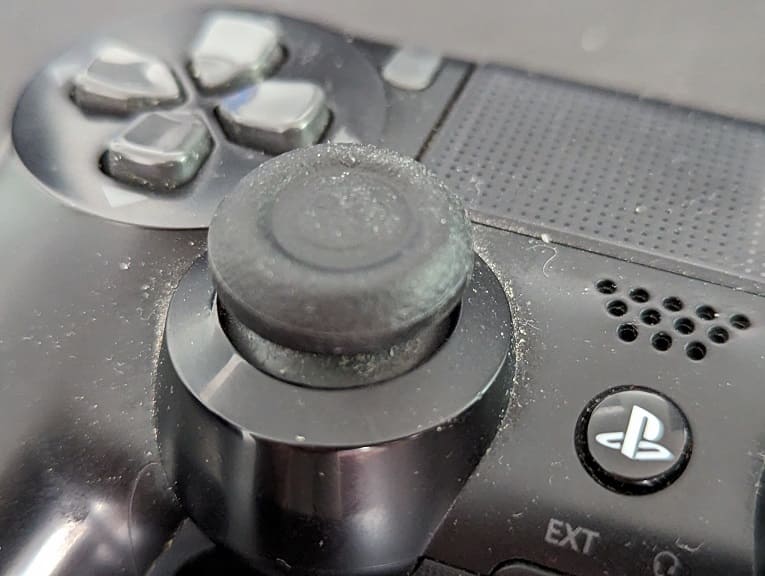
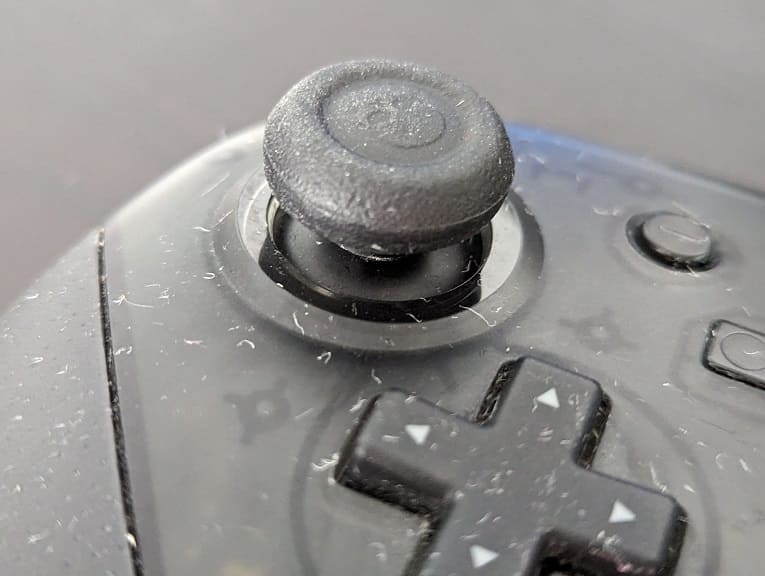
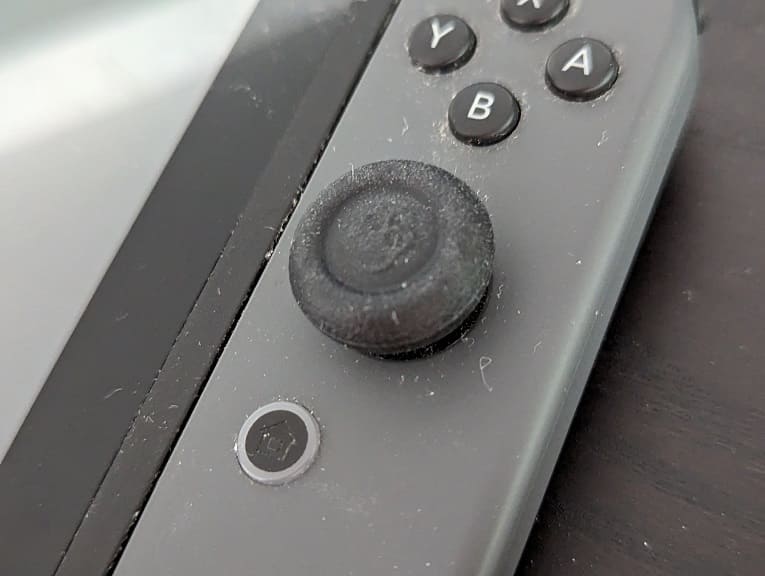
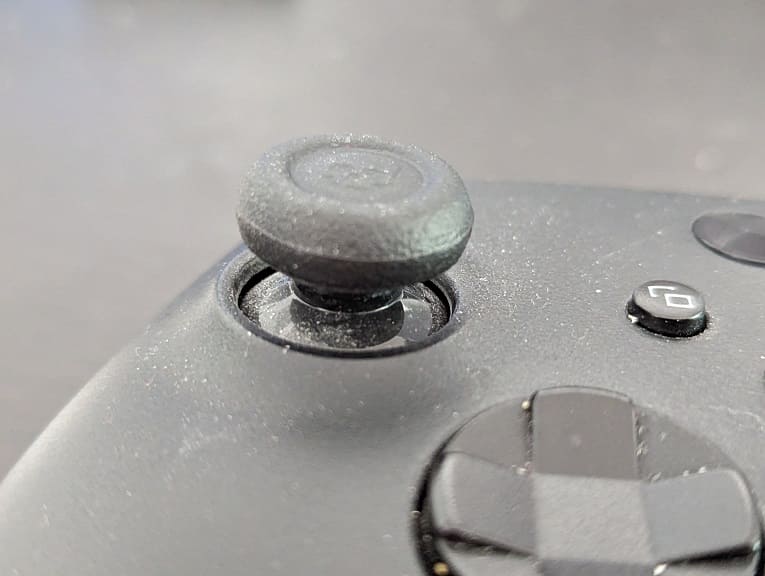
We also tested the grips on the Xbox Series X controller and Nintendo Switch Joy-Con. While not optimal, they are usable.
Installation

Attaching the grips on to the analogs is relatively easy. In order to do so, you have to turn up the edges of the covers all the way outwards, push the middle of the cover down the analog stick making sure you align it correctly and then make sure that the edge wraps around the analog completely when you unfurl it.

It took us a couple of tries to properly install the grips. You should make sure that the edge has been completely set in place at the bottom of the analog: otherwise, the covers will easily fall off.
Grip Types

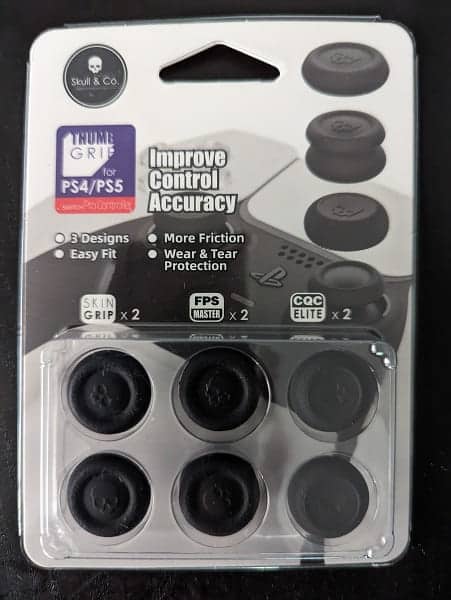
This bundle come with three grip types:

The Skull & Co. Skin Grip adds 2 mm of additional height to the analog stick. This provides the most natural feel as you should barely notice any difference when it comes to height. We used this for our DualSense analogs as the original top of the left stick started to peel off.
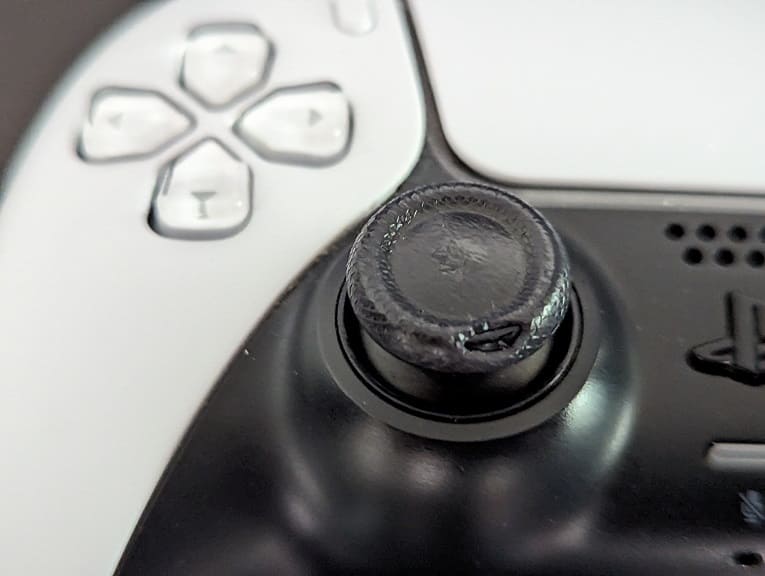
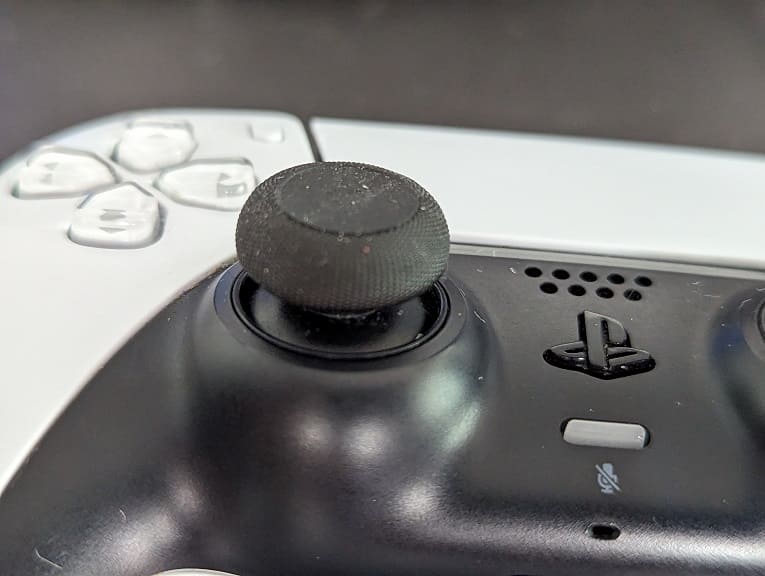
The Skull & Co. FPS Master Grip adds 7 mm of additional height, which the company claims to improve accuracy by increasing the movable radius by 42%.

The Skull & Co. CQC Elite Grip adds 11 mm of additional height, which supposedly increases the movable radius by 60%.

We found that the extra height added by the FPS Master Grip takes a little bit to get used to but ultimately felt comfortable with it. The taller CQC Elite Grip feels more uncomfortable for us, however, and may take even more time to get used.

As for improving the movable radius, we didn’t notice any difference. Most modern videogames already have sensitivity settings for the analog movements anyway; so, this feature seems a little redundant to us.

Summary

The Skull & Co. Skin and CQC Thumb Grips are both good replacements if you happen to damage the analogs of your DualSense, DualShock 4 and/or Nintendo Switch Pro Controllers. The FPS Thumb Grips are more uncomfortable when compared to the other two due to the added height.

We didn’t notice any performance improvements when it comes to the supposed increased moveable radius.

Since you get three pairs of covers in a relatively affordable set, we recommend picking this product up if you are looking for analog covers. Just don’t expect them to improve your gaming performance too much if at all.

If you are interested, you can purchase the Skull & Co. Skin, CQC and FPS Thumb Grip Set on Amazon with this link (#CommissionsEarned).
How to fix UNDER NIGHT IN-BIRTH II Sys:Celes input lag issues

You may encounter some input lag while fighting in UNDER NIGHT IN-BIRTH II Sys:Celes. To see how you can potentially fix the latency, you can check out this troubleshooting article from Seeking Tech.

1. For the first potential fix, you should double check to see if you have Game Mode (or a similarly name mode) enabled as doing so will reduce the input delay.

2. We also recommend that you play the 2D fighting game with a connected controller as it should be faster and more stable when compared to wireless.

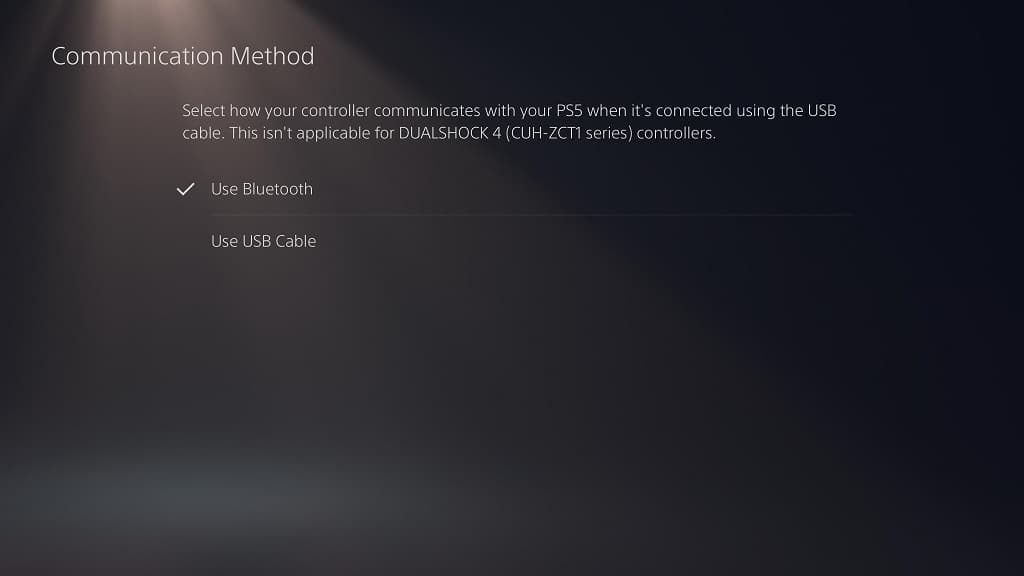
On the PS5, make sure you enabled USB communication by going to the console’s Settings menu and then selecting Accessories > Controller (General) > Communication Method > Use USB Cable.

For the PS4, open the console’s Setting menu and then select Devices > Controllers > Communication Method > Use USB Cable.

3. By default, UNDER NIGHT IN-BIRTH II has Vsync enabled. While this prevents screen tearing, it also adds to the input lag.

To disable it, open the Option menu in the game and then select System. From the System Settings screen, make sure that Vertical Sync is set to Off.

4. Return to the Option menu and then head over to the Game section.

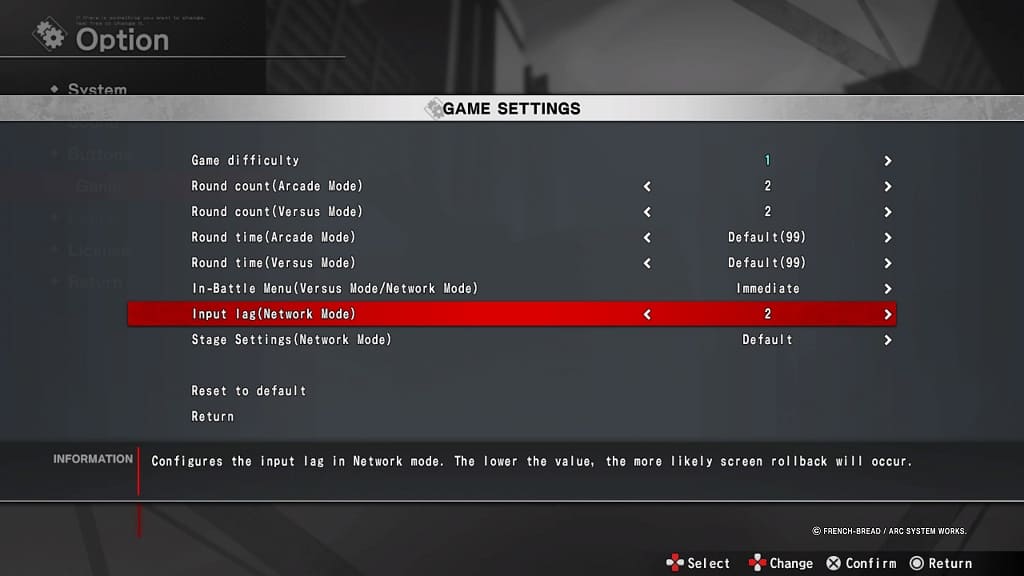
From the Game Settings screen, move the cursor down to Input Lag (Network Mode). It should show the following description:

Configures the input lag in Network mode. The lower the value, the more likely screen rollback will occur.

The default value of the Input Lag (Network Mode) setting is 2. You will be able to change it within a range of 1 to 4. After changing the value, test it out during an online match to see if the controls feel more responsive.

How to prevent accidental pausing in UNDER NIGHT IN-BIRTH II Sys:Celes

If the action gets too intense in UNDER NIGHT IN-BIRTH II Sys:Celes, you may end up accidentally hitting the pause button (which is the Options button on the DualSense/DualShock 4 and the + button on the Nintendo Switch). This will end up throwing the rhythm and the intensity of the fight completely off.

To see how you can prevent accidental pausing in this 2D fighting title, you can check out this guide at Seeking Tech.

1. From the main menu of UNDER NIGHT IN-BIRTH II, open Options.

2. Next, you need to select Game from the Options screen.

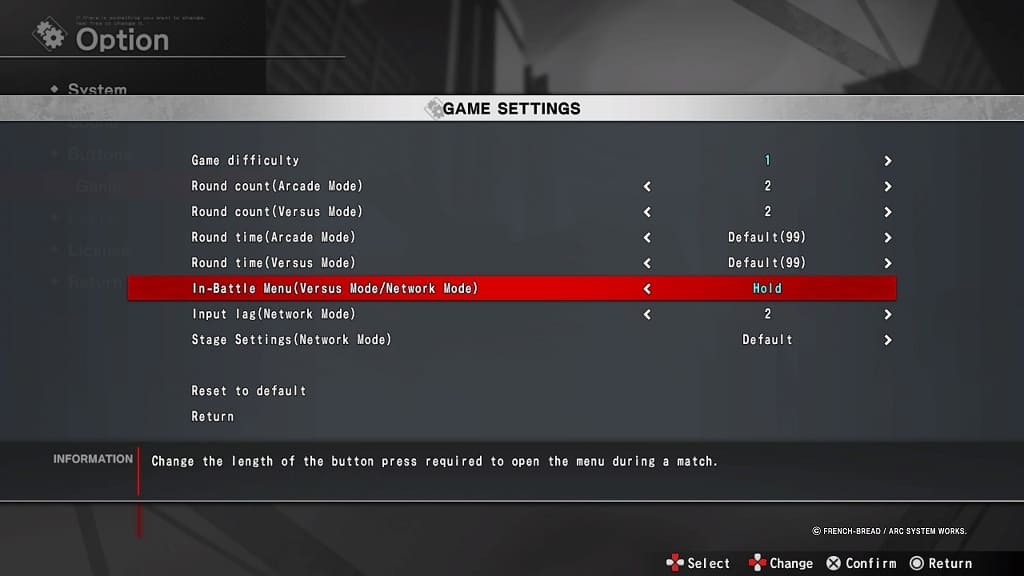
3. In the Game Settings menu, move the cursor down to In-Battle Menu (Versus Mode/Network Mode). You should see the following description appear at the bottom:

Change the length of the button press required to open the menu during a match.

4. Make sure that the In-Battle Menu (Versus Mode/Network Mode) setting is set to On and then exit the Option menu.

To now pause during the middle of the match, you need to hold the pause button. If you quick press it instead, then the battle will keep going.

How to automatically skip intros in UNDER NIGHT IN-BIRTH II Sys:Celes

By default, UNDER NIGHT IN-BIRTH II Sys:Celes will play a short introduction at the start of every versus battle. To skip them, you have to press the Options button on the DualSense/DualShock 4 or the + button on the Nintendo Switch.

If you would rather set it so that the intro is automatically skipped for every versus match, then you can check out this guide at Seeking Tech to see how you can properly do so.

1. To start off, you need to select Option from the main menu.

2. Next, select System from the Option screen.

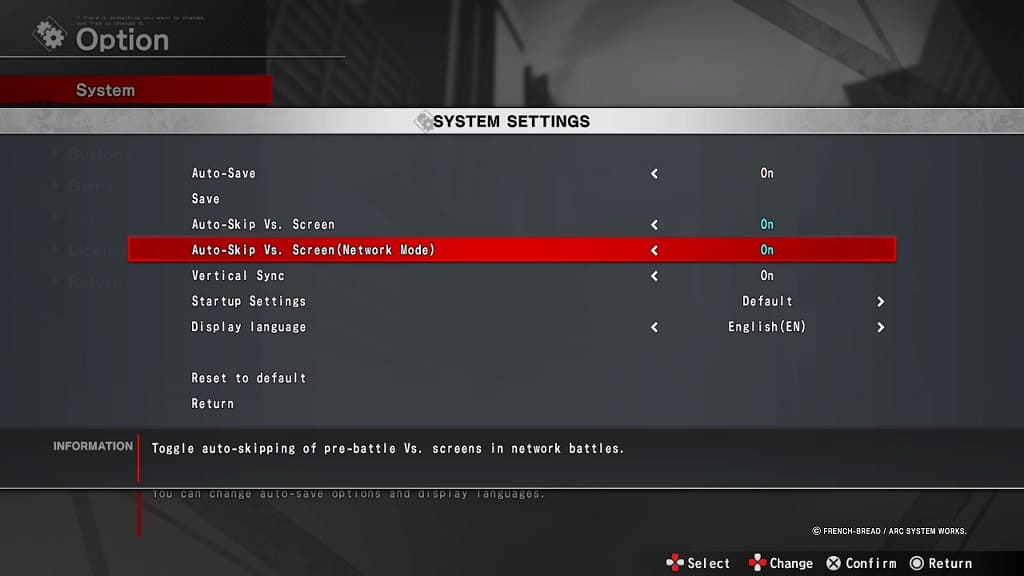
3. In System Settings, move the cursor down to Auto Skip Vs. Screen, which has the following description:

Toggle auto-skipping of pre-battle Vs. screens.

Make sure that it is set to On.

4. From the same screen, move the cursor down to Auto Skip Vs. Screen (Network Mode). You should see the following description:

Toggle auto-skipping of pre-battle Vs. Screens in network battles.

Make sure that Auto Skip Vs. Screen (Network Mode) is set to Off.

5. You can then exit the Options menu.

The next time you play a versus match offline or online, you should no longer see any introduction cut scenes.

How to fix Persona 5 Tactica HDR and brightness issues

You may find that Persona 5 Tactica may look off as the graphics may be too dark, too bright or seemed washed out. To see how you can fix these visual issues, you can take a look at this troubleshooting article from Seeking Tech.

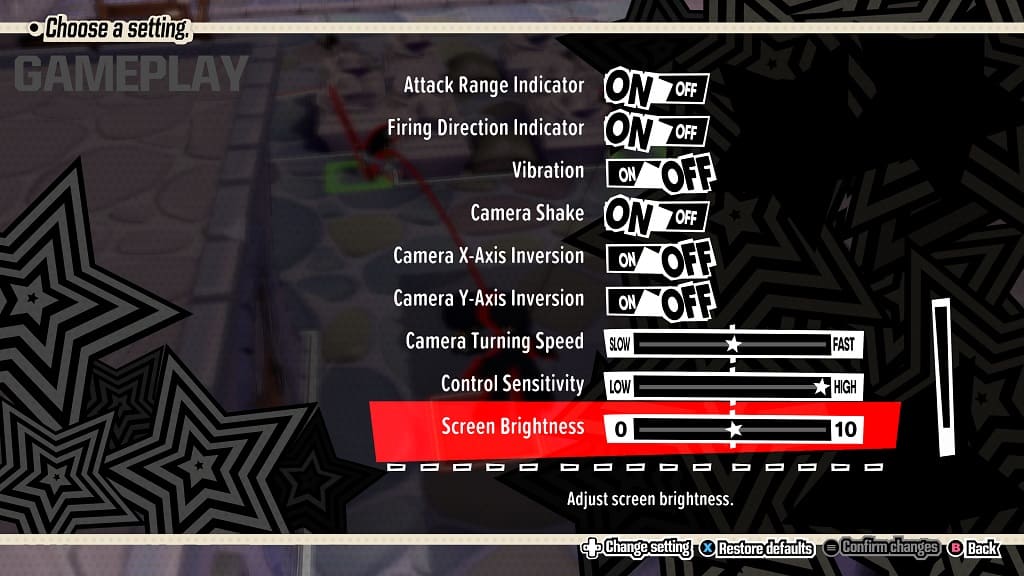
1. Start off by heading into the Settings menu and then selecting Gameplay Settings. From there, scroll down to the bottom to find the Screen Brightness slider.

Use this to adjust the in-game brightness output.

2. If you still get the game to look right, then you can try adjusting the HDR output on your console.

On the PS5, this can be done by going to Settings > Screen and Video > Video Output > Adjust HDR.

For the PS4, go to Settings > Sound and Screen > Video Output Settings > Adjust HDR.

If you are playing on Xbox One, Xbox Series S or Xbox Series X, go to Settings > General > TV & display options > Calibrate HDR for games.

3. Of course, you can also try adjusting the brightness, contrast and/or gamma levels of your television set or monitor.

4. You can also try playing Persona 5 Tatica in SDR to see if the game ends up looking better for you.

In order to do so, disable HDR as well as any SDR-to-HDR conversion features on your TV and gaming system.

How to change the voice language in Persona 5 Tactica

Persona 5 Tactica supports English and Japanese voice overs. To see how you can switch between the two, you can check out this tutorial from Seeking Tech.

1. If you haven’t done so already, you need to go to the title screen in the game. Otherwise, you won’t be able to change the voice acting language.

If you are currently playing, then you can bring up the pause screen and then select the Return to Title option.

2. From the title screen, select Settings.

3. Next, you need to select Audio Settings.

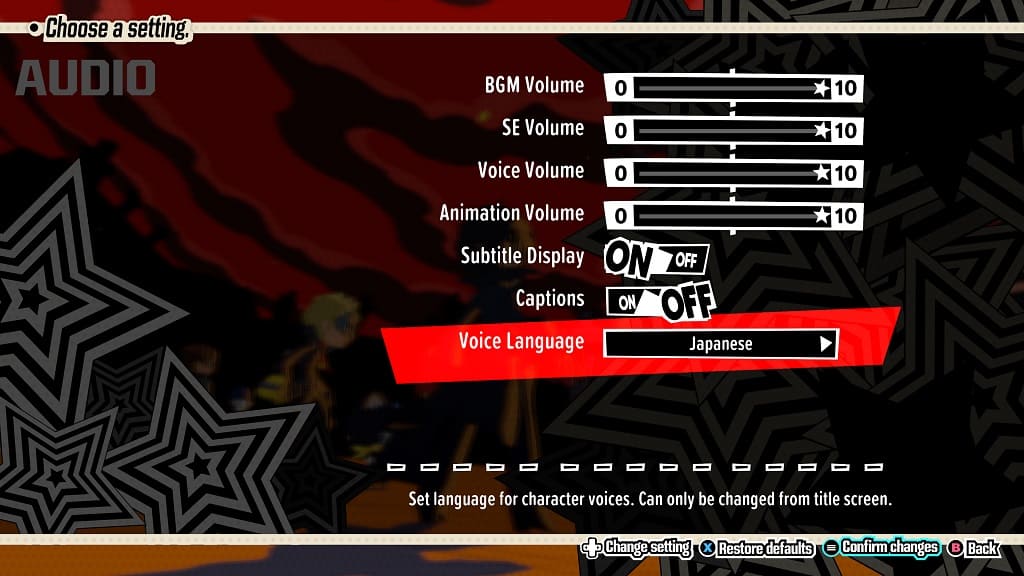
4. In Audio Settings, move the cursor down to Voice Language. It should have the following description:

Set language for character voices. Can only be changed from title screen.

Note: If this option is blocked out, then it indicates that you aren’t viewing the Settings > Audio Settings from the title screen.

5. Use the left analog or directional pad button to switch from English to Japanese or vice versa.

6. Confirm the voice language change by pressing the + button if you are playing with a Nintendo Switch controller, Options button on a PlayStation controller or menu button on an Xbox controller.

When you start playing Persona 5 Tactica, you should be able to hear the new language when a character speaks.

How to adjust the movement sensitivity in Persona 5 Tactica

When playing Persona 5 Tactica, you may notice that moving your controller around feel a little too loose or slippery. To see how you can adjust the movement controls in this game, you can check out this guide from Seeking Tech.

1. To begin, open up the Settings menu.

2. In Settings, navigate over to Gameplay Settings.

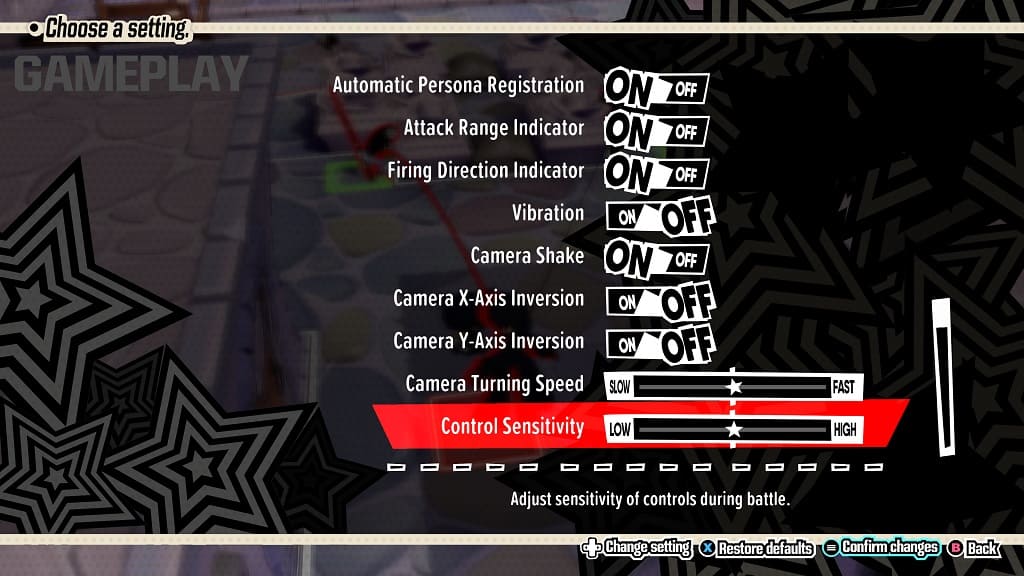
3. Next, scroll all the way down and then move the menu cursor to Control Sensitivity. You should see the following description:

Adjust sensitivity of controls during battle.

4. To make the movement feel weightier, move the slider to the left. Alternatively, you can also move the slider to the right to increase the sensitivity.

5. Once you are done, confirm your edits by pressing the + button on Switch, Options button on PlayStation or Menu button on Xbox.

6. Test out the next sensitivity setting in a battle. If it still does not feel quite right, then you can return to Settings > Gameplay Settings > Control Sensitivity to re-adjust.