What’s the difference between the Xbox Gift Card and Microsoft Store Gift Card?

When looking for a gift card that can be used on your Xbox One, Xbox One S, Xbox One X, Xbox Series S and Xbox Series X, you may have found the Xbox Gift Card and Microsoft Store Gift Card. 

So, what are the differences between these two products? You can find out in this versus guide from Seeking Tech. 

Quick Summary 

In terms of benefits, the Xbox Gift Card and Microsoft Store Gift Card are identical. When redeemed, both will add funds to the digital wallet of your Microsoft Store account. You can then use these funds to buy digital and physical products. 

The only difference is the branding as the Xbox Gift Card caters to Xbox One, Xbox One S, Xbox One X, Xbox Series S and Xbox Series X gamers while the Microsoft Store Gift Card is for general purchases from the online retailer store. 

So, if you are looking to gift an Xbox gamer with one of these cards, then you are better off going with the Xbox Gift Card.  

Keep in mind that you can’t use these cards at a physical Microsoft Store location. Instead, the funds can only be used when shopping at the Microsoft Store website or app. 

Xbox Gift Card and Microsoft Store Gift Card comparison chart

You can find out comparison table for the Xbox Gift Card and Microsoft Store Gift Card below. 

Xbox Gift CardMicrosoft Store Gift Card
Description“Buy games, add-ons, devices and more.” “Buy devices, games, software, apps, movies, music and more at Microsoft Store online, on Windows and on Xbox.” 
Benefits Add funds to Microsoft Store walletAdd funds to Microsoft Store wallet
Availability Physical card

Digital voucher code
Physical card

Digital voucher code
Redemption Options Microsoft Store Windows App 

Redeem Microsoft Website 

Xbox Console  
Microsoft Store Windows App 

Redeem Microsoft Website 

Xbox Console  
Denominations $10 

$15 

$20 

$25 

$30 

$40 

$50 

$60 

$70 

$100 
$10

$15

$25

$50

$75

$100

Benefits 

The Xbox Gift Card and Microsoft Store Gift Card provide identical benefits as both will add funds to your digital wallet on the Microsoft Store. 

You can then use the funds to buy digital and physical products. These may include games, DLC, microtransactions, apps, movies, music in addition to subscription services such as Xbox Live Gold, Xbox Game Pass and Xbox Game Pass Ultimate.  

It is important to note that you can’t use funds from your digital wallet at a physical, brick-and-mortar Microsoft Store. Instead, you are limited to the online Microsoft Store. 

Branding 

When it comes to branding, the Xbox Gift Card uses the Xbox green theme and features the following description:  

“Buy games, add-ons, devices and more.” 

On the other hand, the Microsoft Store Gift Card is black and has the following description: 

“Buy devices, games, software, apps, movies, music and more at Microsoft Store online, on Windows and on Xbox.” 

Availability 

These gift cards can be found in most major retailer with other physical cards. You can also purchase digital codes from these cards and have the vouchers sent immediately to your email.  

Redemption Options 

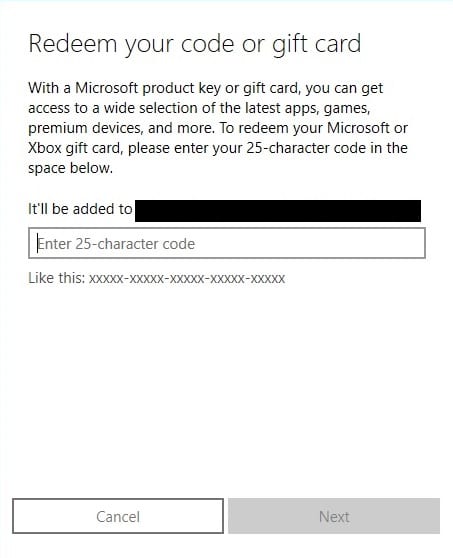
You can redeem the Xbox Gift Card and Microsoft Store Gift Card by using the Microsoft Store Windows App, Redeem Microsoft Website and Microsoft Store Xbox App.  
Denominations 

You can check out the currently available denominations for the two card types below: 

Xbox Gift Card: 

  • $10  
  • $15  
  • $20  
  • $25  
  • $30  
  • $40  
  • $50  
  • $60  
  • $70  
  • $100 

Microsoft Store Gift Card: 

  • $10  
  • $15  
  • $25  
  • $50  
  • $75 
  • $100

How to make it easier to see in Call of Duty: Modern Warfare II and Warzone 2.0

You may find it hard to see enemies and other objects when playing Call of Duty: Modern Warfare II and Call of Duty: Warzone 2.0. To see how you can spot things easier in these games, you can take a look at this tutorial from Seeking Tech.  

1. To start off, open the Call of Duty: Modern Warfare II launcher if you haven’t done so already.  

2. Next, you need to press the Menu/Options button while in order to bring up a menu that appears on the right side. 

3. You then need to press the R1 or RB button a few times to switch over to the Settings tab. 

4. Once you get to the Settings tab, you need to select Graphics. 

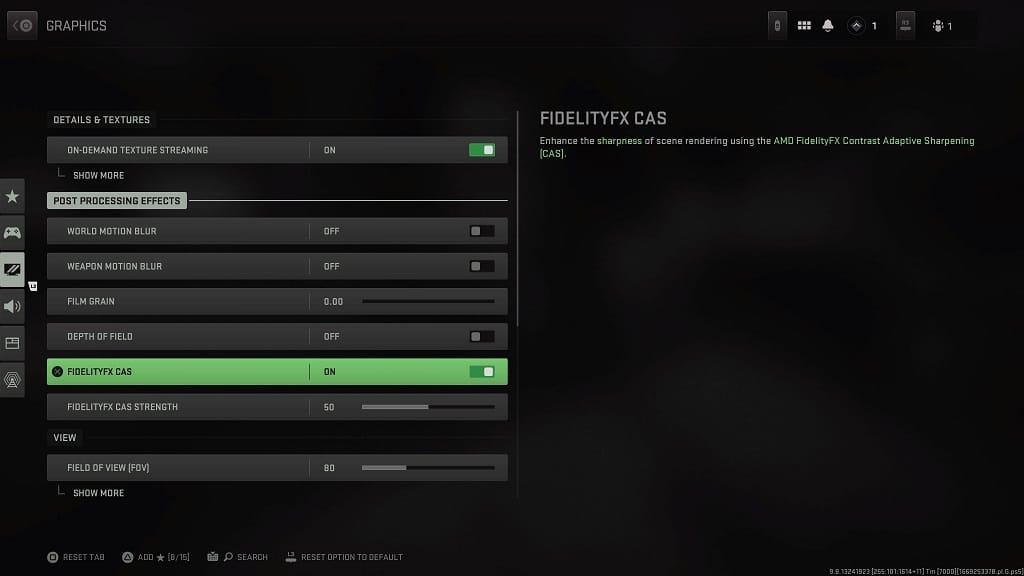
5. In the Graphics menu, we recommend that you do the following: 

  • Enable On-Demand Texture Streaming 
  • Disable World Motion Blur 
  • Disable Weapon Motion Blur 
  • Set Film Grain to 0.00 
  • Disable Depth of Field 
  • Enable FidelityFX CAS 

For FidelityFX CAS, you can change the intensity of the sharpening effects and then test it out in game. You can then make any adjustments in the slider to cater to your preference.  

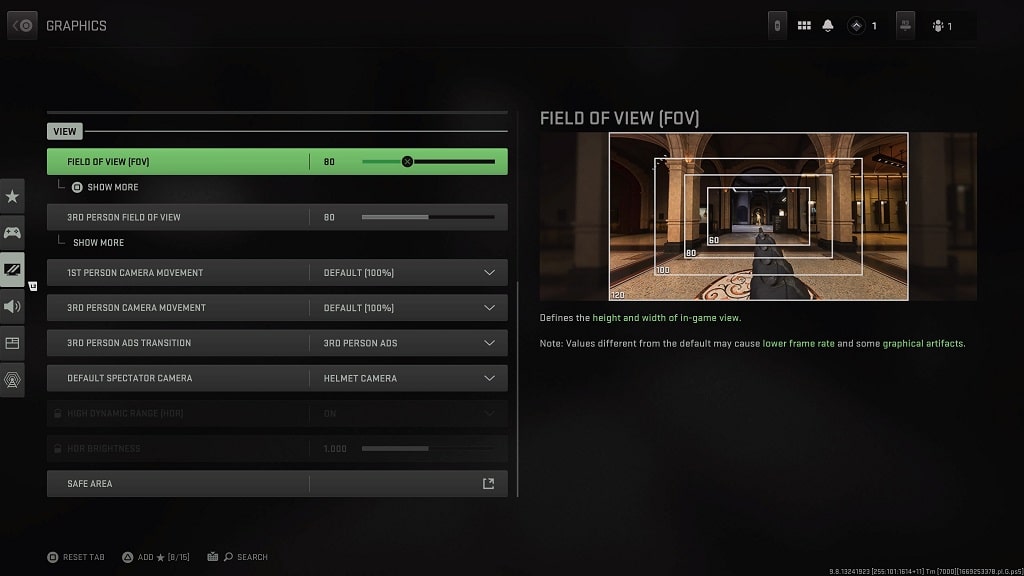
You can also increase the field of view for the first- and third-person perspective in the Graphics menu. By increasing the FoV, you will be able to see more of your surrounding areas.  

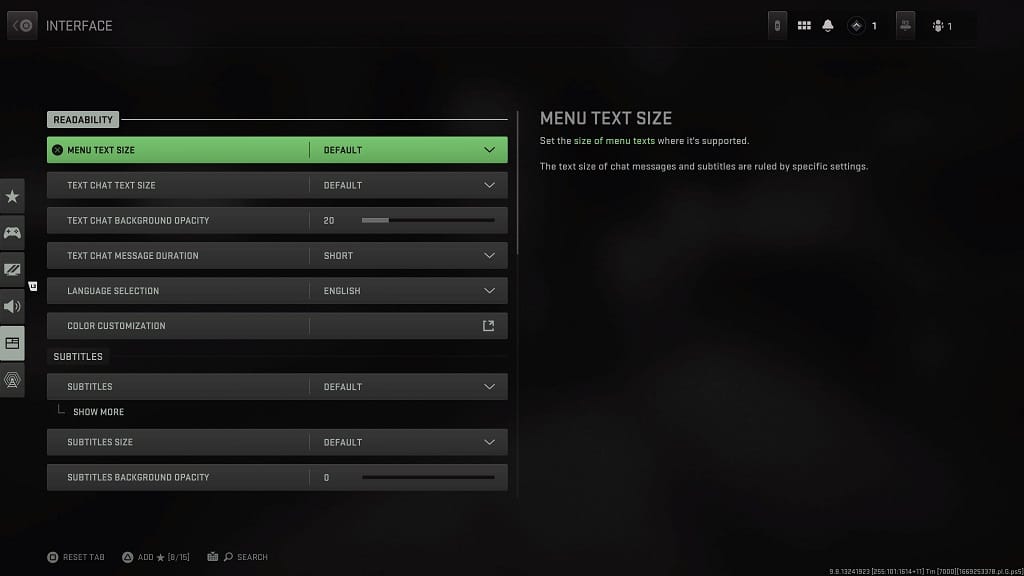
6. Return to the Settings tab and then select Interface. 

7. From the Interface menu, you will be able to change how text is display on the screen.  

Furthermore, you will be able to customize the following HUD elements: 

  • Mini Map Shape 
  • Mini Map Rotation 
  • Horizontal Compass 
  • Crosshairs 
  • Crosshair Bobbing 
  • Hit Marker Visuals 
  • Damage-Based Hit Markers 
  • Player Names 
  • Vehicle HUD Prompts

You can also choose to disable tool and gameplay tips in the same menu. 

8. Go back to the Settings back once again and then head into Accessibility.  

9. From the Accessibility menu, you can add a color filter in order to the World Color Intensity. This may help make it easier to see enemies and other objects in Modern Warfare 2 and Warzone 2.0.  

10. We also recommend that you optimize the HDR output of the game. Otherwise, it may be hard to see in certain scenes.  

Call of Duty: Modern Warfare II and Call of Duty: Warzone 2.0 do not have any in-game settings where you can adjust its brightness. Therefore, you need to adjust HDR from your PC or game console. You can also try adjusting the brightness of your television screen or gaming monitor.

What’s the difference between the Xbox Gift Card and Xbox Live Gold Gift Card?

If you are looking to purchase a gift card that can be used for the Xbox One, Xbox One S, Xbox One X, Xbox Series S and/or Xbox Series X, then you may have found the Xbox Gift Card and Xbox Live Gold Gift Card during your research. 

So, what are the differences between these two cards? You can find out in this comparison post at Seeking Tech.  

Quick Summary 

With the Xbox Gift Card, you will be adding funds to your Microsoft Store’s digital wallet. You can then use the added funds on digital games, DLC, subscriptions (including Xbox Live Gold) as well as physical products. 

With the Xbox Live Gold Gift Card, you are only limited to using the fund on the Xbox Live Gold subscription.  

Due to the versatility, we recommend picking up the Xbox Gift Card over the Xbox Live Gold Gift Card if you are looking at these two products. 

Xbox Gift Card vs. Xbox Live Gold Gift Card comparison chart  

You can check out our comparison table between the Xbox Gift Card and Xbox Live Gold Gift Card below. 

Xbox Gift CardXbox Live Gold Gift Card
Benefits Add funds to Microsoft Store walletStart or extend Xbox Live Gold subscription
Availability Physical card

Digital voucher code
Physical card

Digital voucher code
Redemption Options Microsoft Store Windows App 

Redeem Microsoft Website 

Xbox Console  
Microsoft Store Windows App 

Redeem Microsoft Website 

Xbox Console  
Denominations $10 

$15 

$20 

$25 

$30 

$40 

$50 

$60 

$70 

$100 
$9.99 

$24.99 

$39.99 

$59.99 
PricingCheck price on Amazon.(#CommissionsEarned)Check price on Amazon.(#CommissionsEarned)

Benefits 

By redeeming the Xbox Gift Card, you will add the funds to the digital wallet of your Microsoft Store account. You can then use the funds to purchase digital games, downloadable content, microtransactions as well as subscriptions such as Xbox Live Gold, Xbox Game Pass and Xbox Game Pass Ultimate. You can also use the funds on physical products that are sold by the online Microsoft Store.  

With the Xbox Live Gold Gift Card, you are limited to only starting or extending your Xbox Live Gold subscription. For the uninformed, Xbox Live Gold is required to unlock online multiplayer for a majority of games (the lone exceptions are free-to-play titles). You will also get exclusive discounts and a pair of free games on a monthly basis. 

Branding 

Both cards feature the Xbox green color scheme. You will also find the Microsoft logo on the top left side as well as the value of the card on the top right side. 

With the Xbox Gift Card, you will see the following description printed on it: 

  • “Buy games, add-ons, devices and more.” 

With the Xbox Live Gold Gift Card, you will see the following: 

  • “Play with friends online and get exclusive member benefits on console.” 

Availability 

You can purchase both of these cards as a digital voucher code that will be sent to you via email or other communication methods. They can also be bought as a physical card that contain a code.  

Redemption Options 

You will be able to redeem both cards by using any of the following options:  

  • Microsoft Store Windows App 
  • Redeem Microsoft Website 
  • Xbox Console  

Denominations 

The Xbox Gift Card offers a wide range of denominations as you will have the following choices: 

  • $10 
  • $15 
  • $20 
  • $25 
  • $30 
  • $40 
  • $50 
  • $60 
  • $70 
  • $100 

The Xbox Live Gold Gift Card only offers four options, which based on the length of the subscription. These variations are based on 1 month, 3 months, 6 months and 1 year. You can find the available denominations for the Xbox Live Gold Gift Card below: 

  • $9.99 
  • $24.99 
  • $39.99 
  • $59.99

How to prevent motion sickness in Call of Duty: Modern Warfare II and Warzone 2.0

When playing Call of Duty: Modern Warfare II and Call of Duty: Warzone 2.0, you may start getting a little motion sickness. To see how you can reduce some of the visual effects in order to make your dizziness and/or nausea go away, you can follow this tutorial from Seeking Tech. 

1. To start off, turn on your PC or console and then open the Call of Duty: Modern Warfare 2 launcher. 

2. In the launcher, press the Options/Menu button on your controller to bring up the in-game menu. 

3. From the in-game menu, press the RB or R1 button several times to get to the Settings tab. 

4. In the Settings tab, select Graphics. 

5. After getting to the Graphics menu, we recommend disabling the World Motion Blur and Weapon Motion Blur settings from the Post Processing Effect section. 

6. In the same Graphics menu, scroll down to the View section.  

From there, you will be able to adjust the Field of View for the first- and third-person perspective. If you are getting motion sickness from the default FoV, then you can try increasing these settings to see if you can handle the wider angle better.  

7. From the same View section, we also recommend reducing 1st Person and 3rd Person Camera Movements in order to prevent the camera from shaking too much when you are playing Modern Warfare 2 and/or Warzone 2. 

8. Next, you need to return to the Settings tab of the in-game menu and then head to Accessibility.  

9. From the Accessibility menu, select All Accessibility Settings.  

10. In the next screen, make sure you are in the Display tab. 

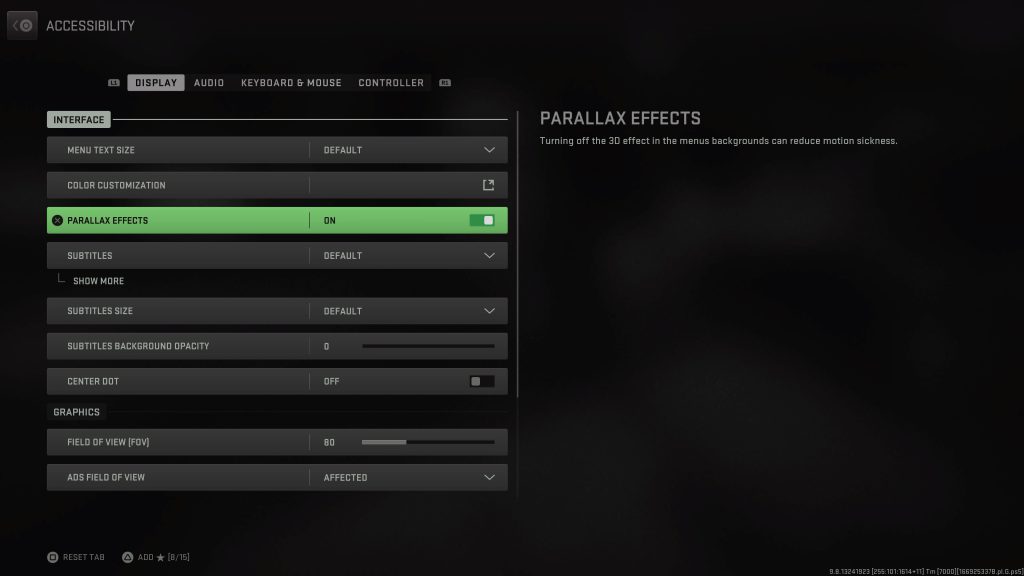
11. From the Display tab, you should disable the Parallax Effects from the Interface section as doing so will disable the 3D background effects of the menu, which should help with preventing motion sickness. You can also add a Center Dot to the gameplay screen as doing so will help your eyes focus.

12. In the same screen, scroll down to the Graphics section. 

While a lot of the settings from the Graphics section are the same as the previous steps, there is also a new ADS Filed of View option that you can link or unlink to your 1st person field of view angle. 

13. If your television set or monitor has a 120 Hz refresh rate and/or adaptive sync support, then we recommend enabling these features. 

By doing so, you will get a smoother experience when playing Call of Duty: Modern Warfare II and Call of Duty: Warzone 2.0, which should help with your dizziness and/or nausea.

How to make it easier to see in God of War Ragnarök 

God of War Ragnarök has a lot going on when it comes to gameplay. With the camera up close, it can be very hard to see the enemy, item as well as the location you need to go next.  

To see how you can make things easier to track in this PlayStation 4 and PlayStation 5 videogame, you can follow the steps laid out in this tutorial at Seeking Tech.  

1. To begin, you need to go to the Settings menu of God of War Ragnarök.  

You can do so by select Settings from the title screen. Alternatively, you can also press the Options button on your gamepad when playing the game and then select Settings from the Options menu.  

2. Inside the Settings menu, you need to select Text & Color. 

3. In the Text & Contrast section of the Text & Color menu, you will be able to change the text and icon sizes as well as enable a high contrast HUD. 

4. In the Color section, you can add a color filter as well as change the color of the user interface. 

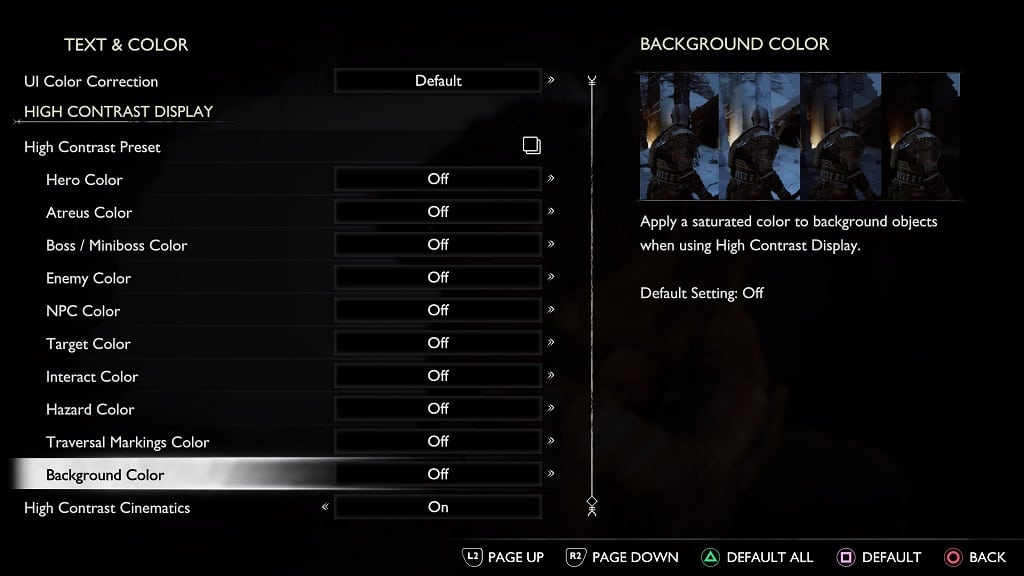
5. In the High Contrast Display section, you can select between several high contrast presets. You can also customize the following individual elements to make them easier to see: 

  • Hero Color 
  • Atreus Color 
  • Boss and Miniboss Color 
  • Enemy Color 
  • NPC Color 
  • Target Color 
  • Interact Color 
  • Hazard Color 
  • Traversal Markings Color 
  • Background Color 
  • High Contrast Cinematics


6. Once you are done with the Text & Color menu, go back to the front page of Settings and then select Accessibility. 

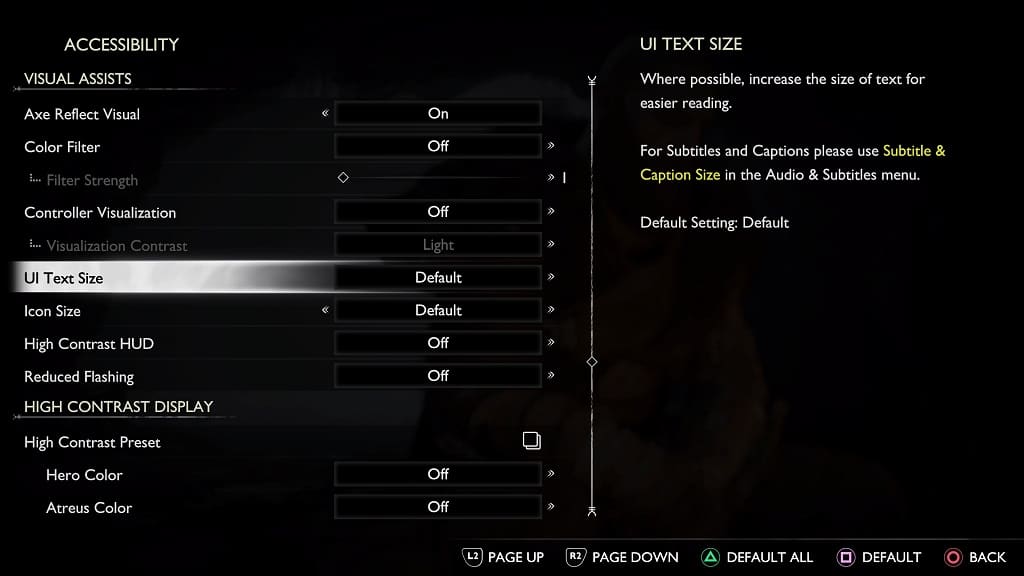
7. From the Accessibility menu, scroll down to the Visual Assists section. From there, you will be able to adjust the following: 

  • Axe Reflect Visual 
  • Color Filter 
  • Controller Visualization 
  • UI Text Size 
  • Icon Size 
  • High Contrast HUD 
  • Reduce Flashing 

8. You can also use the High Contrast Display section in the Accessibility menu although it is the same as the one in the Text & Color menu. 

9. In the Subtitles and Captions section, you will be able to change the following settings: 

  • Subtitles 
  • Captions 
  • Direction Indicators  
  • Subtitle & Caption Size 
  • Subtitle & Caption Background 
  • Subtitle & Caption Blur 

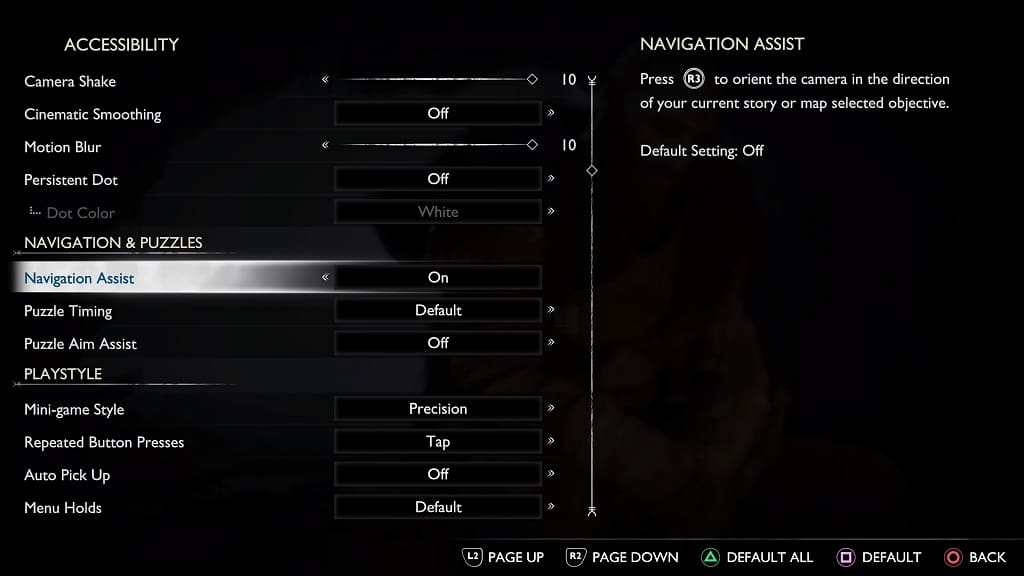
10. In the Accessibility menu, we also highly recommend that you scroll to the Navigation and Puzzles section. From there, you can enable Navigation Assist. 

By doing so, the camera will show you which direction you need to go for your next object when you press the R3 button outside of combat. This can be very helpful if you are constantly getting lost in the game.  

How to prevent motion sickness when playing God of War Ragnarök

When playing God of War Ragnarök, you may start to feel a little dizzy or nauseous. Thankfully, the PlayStation 4 and PlayStation 5 game comes with several graphics and accessibility options that should help with motion sickness. 

You can check out this guide from Seeking Tech to see how you can adjust these helpful settings. 

1. To start off, make sure you turn on your console and open God of War Ragnarök if you haven’t done so already. 

2. Next, you need to go to the Settings menu in the game.  

You can do so from the start screen. If you are currently playing the game, then you need to press the Options button on the DualShock 4 or DualSense controller and then select Settings from the Options menu. 

3. Inside of Settings, select Graphics & Camera. 

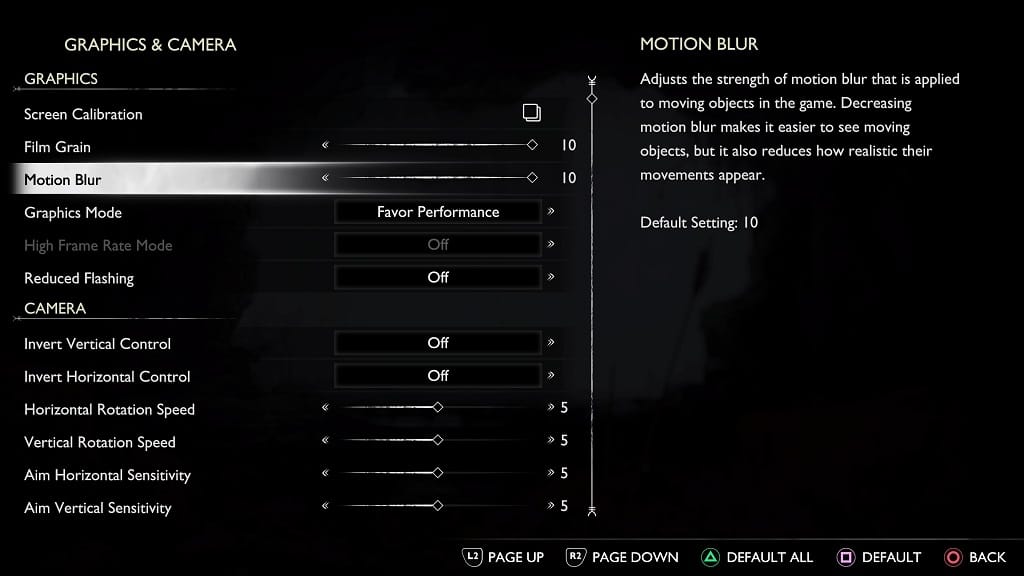
4. From the Graphics & Camera menu, you will be able to reduce Motion Blur in the Graphics section. 


5. Furthermore, we also recommend changing the Graphics Mode to Favor Performance as the higher frame rate should make the game run smoother and potentially help reduce motion sickness. 

6. If your television or monitor set supports 120 Hz and/or Variable Refresh Rate, then we also recommend using these features to get even higher and smoother frame rates. 

7. You can reduce film grain and flashing lights as well in the Graphics section. 

8. In the Camera section of the Graphics & Camera menu, you will be able to adjust the rotation speed of the in-game camera. 

9. You can also use the Motion Reduction section in order to reduce the ambient camera sway and camera shake. 

10. Once you are done with the Graphics & Camera menu, return to the front page of Settings and then select Accessibility. 

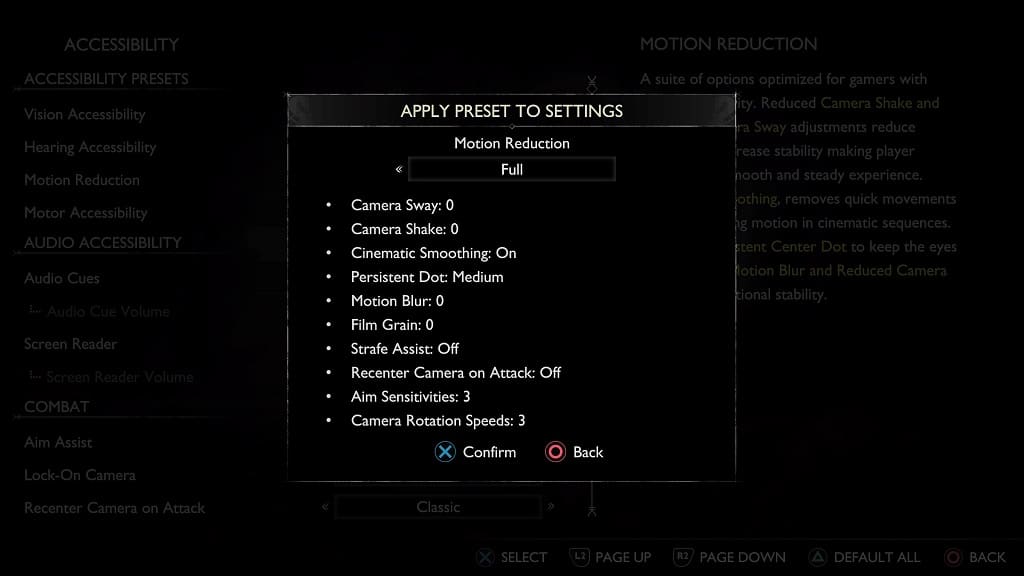
11. Inside of the Accessibility menu, select Motion Reduction. Afterwards, you will be able to choose between the None, Some and Full presets. 

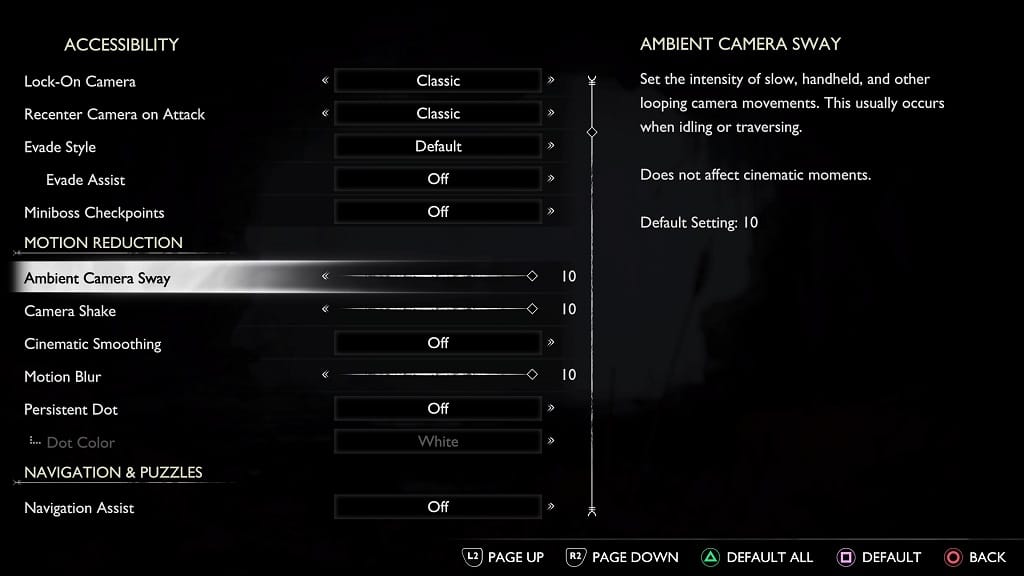
12. For further customization options, you scroll down to the Motion Reduction section of the Accessibility menu. From there, you will be able to adjust the following: 

  • Ambient Camera Sway 
  • Camera Shake 
  • Cinematic Smoothing 
  • Motion Blur 
  • Persistent Dot  

The Persistent Dot is helpful as it focuses your eyes towards the middle of the screen. You are able to change the size and color of the dot.  

13. After making any changes in the Settings menu, make sure you test it out in the game to see if additional adjustments need to be made.

How to fix Call of Duty: Warzone 2.0 HDR issues on PS5

When playing Call of Duty: Warzone 2.0 on your PlayStation 5 or PlayStation 5 Digital Edition console, you may experience some issues with the HDR display. Some areas may look too dark while others may look a little too bright. The colors in general may look washed out as well. 

To see how you can get a better HDR output for this free-to-play game, you can take a look at this troubleshooting article from Seeking Tech.  

1. The first potential step you can try is to make sure that you have HDR actually enabled on your screen and console.  

On your PlayStation 5, you need to head over to the Settings menu. From there, you need to select Screen and Video, followed by Video Output. You should then make sure that you set HDR to “Always On” or “On When Supported” in the Video Output menu. 

2. On your television set, you should also make sure that you don’t have any settings enabled that may automatically dim the brightness output or change the contrast. If you do, then you need to turn them off. 

3. You can also try changing the RGB Range of your PS5’s output.  

In order to do so, go back to the aforementioned Video Output menu and then select RGB Range. This setting should be set to Automatic (Recommended) by default. You can try changing it to either Limited or Full to see if your HDR issues go away when playing Warzone 2. 

4. You should try re-calibrating the HDR Brightness on your console as well. 

To do so, head back to the Video Output menu and then select Adjust HDR. Over the next few screens, you then need to follow the instructions that appear on the screen in order to calibrate the brightness output of your console to match your television screen. 

5. There is a possibility that the HDR color and brightness output of your TV is not that good.  

If you believed that this is the case, then you can try playing Call of Duty: Warzone 2.0 on a different television set or monitor with HDR support.  

If that is not possible, then you can try playing the game without HDR. In order to disable HDR on your PS5, go to the Settings > Screen and Video > Video Output menu and the set HDR to Off. 

6. Although you won’t be able to adjust the HDR brightness when playing Warzone 2, you should be able to add a color filter. To do so, you need to take the following steps: 

  • While playing the game, press the Options button on your controller. 
  • In the newly opened menu, press R1 several times to switch over to the Settings tab.  
  • From the Settings tab, press the Triangle button.  
  • After getting to the Accessibility menu, you need to select All Accessibility Settings.  
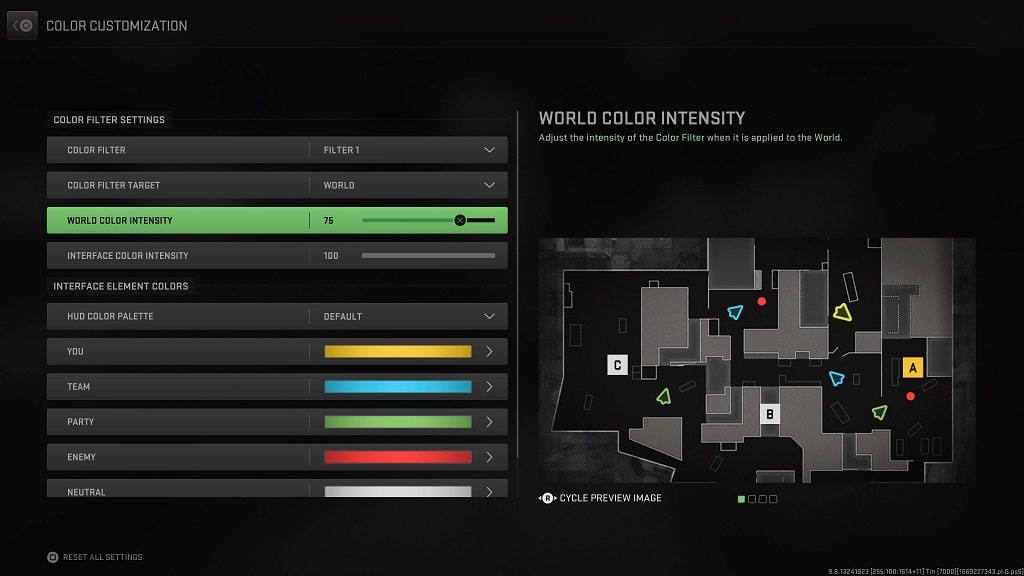
  • Next, you need to select Color Customization from the Display tab. 
  • From the Color Customization menu, select any of the available options in the Color Filter setting. 
  • In the Color Filter Target, select World. 
  • You can then adjust the World Color Intensity.  

How to refund PlayStation Plus 

PlayStation Plus will unlock online multiplayer for paid games on the PlayStation 4, PlayStation 4 Pro, PlayStation 5 and PlayStation 5 Digital Edition consoles. If you need to get a full or partial refund for this subscription, then you can take a look at this tutorial from Seeking Tech to see how you can properly do so. 

PlayStation Plus refund requirements 

In order to get a full or partial refund on PlayStation Plus, you need to request one within 14 days of purchasing your subscription. Otherwise, it is likely that PlayStation will reject your request.  

Of course, the refund policy may be different depending on your region. This guide is based on the U.S. region. 

How much can you get refunded from PlayStation Plus? 

The amount you can get refunded back from a PlayStation Plus service depends on how you have been using the service. The following activities should count as usages: 

  • Playing multiplayer games that require PlayStation Plus  
  • Adding any monthly games offered by the PlayStation Plus Essential tier to your game library  
  • Adding any games offered by the PlayStation Plus Extra, Deluxe and Premium tiers to your game library 
  • Playing any games through cloud streaming from PlayStation Plus Premium tier 
  • Buying a game, DLC or other digital product that have a discount tied to being a PlayStation Plus member 
  • Using the cloud storage of PlayStation Plus 

So, if you have been using PlayStation Plus for a few days, then it is likely that you are only getting a partial amount refunded. If you haven’t used the subscription you bought yet, then you may be able to get a full refund.  

Keep in mind that, if you bought PlayStation Plus directly from the PlayStation Store and the subscription service got a discount within 14 days after your purchase, then you should be able to get a refund. The amount should be the difference between the amount you originally paid, the discounted price and how you were using the subscription before it was discounted. 

If you bought PlayStation Plus from a third-party retailer but haven’t redeem the voucher code, then you need to contact the retailer instead of Sony if you want to get a refund for your purchase. 

How to request a refund for PlayStation Plus 

In order to request a refund for PlayStation Plus, you can take the following steps: 

1. To start off, you need to visit the official PlayStation Contact Us webpage.  

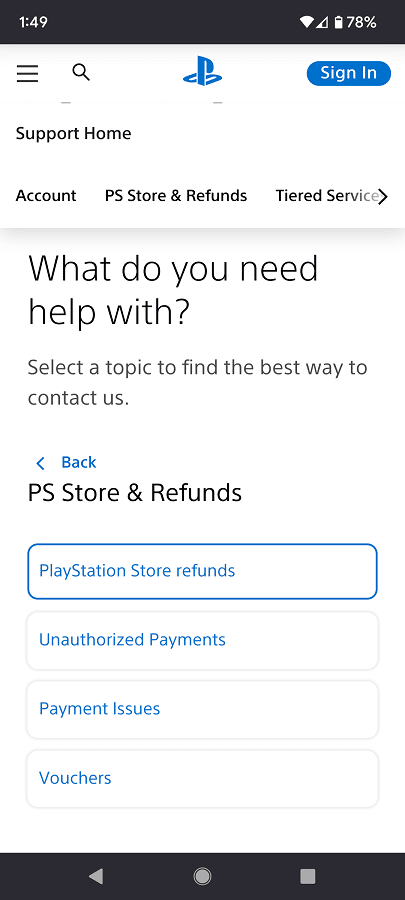
2. From there, you need to select PS Store & Refunds. 

3. You then need to select PlayStation Store Refunds. 

4. Afterwards, select the Live Chat option. 

5. The customer support representative should then walk you through the rest of the refund process. 

6. If you managed to get a partial or full refund, then PlayStation will try to credit funds back to your original payment method. If that is not possible, then the company will send the refunded amount to the digital wallet of your PlayStation Network account.

How to gift PlayStation Plus

PlayStation Plus is a subscription service. In addition to unlocking online gameplay for the PlayStation 4 and PlayStation 5, this membership will also give you full access to a select library of games. To see how you can gift PS Plus to a family or friend, you can take a look at this tutorial from Seeking Tech. 

PlayStation Plus tiers 

Before we start, it is important to note that there are four different PlayStation Plus tiers. 

PlayStation Plus Essential will give you access to a few games on a monthly basis to go along with online multiplayer. 

PlayStation Plus Extra comes with all the benefits of the Essential tier while also providing access to hundreds of additional PS4 and PS5 games. 

PlayStation Plus Premium includes all the benefits of the Essential and Extra tiers. It also features game trials, access to hundreds of classic games in addition to the ability to play over cloud streaming. 

PlayStation Plus Deluxe is only available in select regions. With this tier, you get all of the benefits of the Essential and Extra tiers. Aside from cloud streaming, you will also get the same benefits as the Premium tier.  

To learn more about these different PlayStation Plus plans that are currently available, you can check out this comparison article. 

Can you gift PlayStation Plus through the PlayStation Store? 

Unfortunately, there is currently no way that you can gift PlayStation Plus to someone directly by using the PlayStation Store. Instead, you need use a third-party retailer for gifting this subscription service.  

How to gift a physical PlayStation Plus card 

One of the ways you can gift someone a PS Plus subscription is by giving them a physical gift card.  

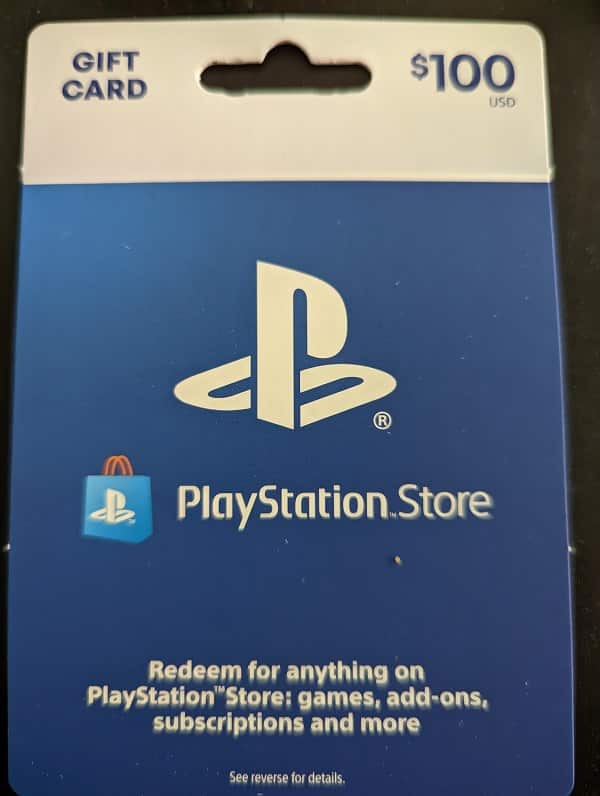
Sony is currently selling PlayStation Store Gift Cards and PlayStation Plus Wallet Funds at major retailers like Best Buy, GameStop, Target and Walmart. These cards should come with the voucher code and redemption instructions located at the back.  

We recommend using this method if you prefer using physical gifts instead of digital ones.  

How to gift a digital PlayStation Plus card 

If you don’t mind doing a digital gift, then you can purchase a voucher code through online retailers such as Amazon as well as the websites for the aforementioned Best Buy, GameStop, Target and Walmart. 

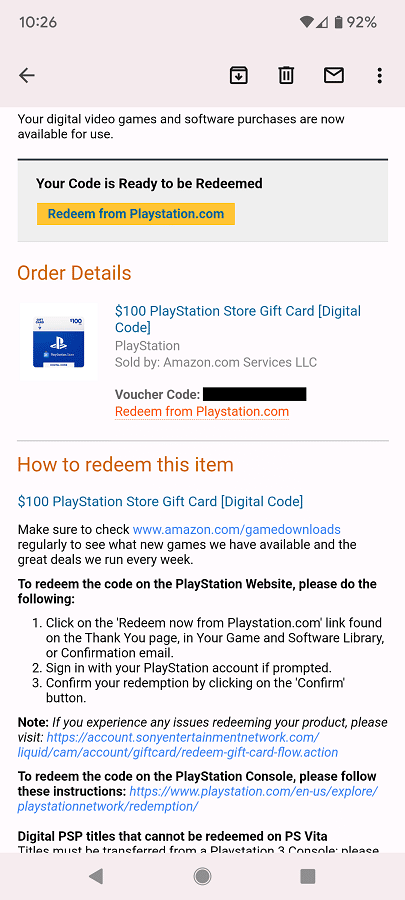
If you decide to use Amazon, for example, you can buy a PlayStation Store Gift Card and PlayStation Plus Wallet Fund voucher code. After the purchase, you should get an email that contains the voucher code with redemption instructions. You can then forward this email to the gift recipient.  

Both PlayStation Store Gift Card and PlayStation Plus Wallet Fund will add funds to the digital wallet of your family’s or friend’s PlayStation Network account. Once the funds have been redeemed, the gift receiver will be able to spend it on PlayStation Plus as well as other digital products (like games, DLC, microtransactions and other subscriptions) on the PlayStation Store.

What’s the difference between PlayStation Store Gift Cards and PlayStation Plus Wallet Funds?

If you are looking to add more funds to your PSN wallet, or gift the funds to another person, then you have two options when shopping at a third-party retailer: PlayStation Store Gift Cards and PlayStation Plus Wallet Funds. 

So, what are the main differences between these two currency cards? You can find out in this comparison guide from Seeking Tech. 

Quick Summary 

The only major difference between the PlayStation Store Gift Cards and PlayStation Plus Wallet Funds is that they offer different denominations. 

The PlayStation Store Gift Cards are designed for general usage. Therefore, you can purchase them at $10, $25, $50, $75 or $100. 

The PlayStation Plus Wallet Funds are made for the new PlayStation Plus tiers as they should cover the subscription in addition to any applicable sales tax. Thus, you can get these funds at $30, $55, $70 and $110. 

When redeemed, both the PlayStation Store Gift Cards and PlayStation Plus Wallet Funds will be added to the digital wallet of your PSN account. You can then be able to spend it on subscriptions, games, DLC and/or microtransactions.  

PlayStation Store Gift Cards vs. PlayStation Plus Wallet Funds comparison chart  

You can take a look at our comparison table for the PlayStation Store Gift Cards and PlayStation Plus Wallet Funds below. 

PlayStation Store Gift CardsPlayStation Plus Wallet Funds
Denominations $10 

$25 

$50 

$75 

$100 
$30 

$55 

$70 

$110 
Branding White color scheme with PlayStation Plus and PlayStation Store logosYellow color scheme with PlayStation Plus logo
Availability Physical cards

Digital voucher codes
Physical cards

Digital voucher codes
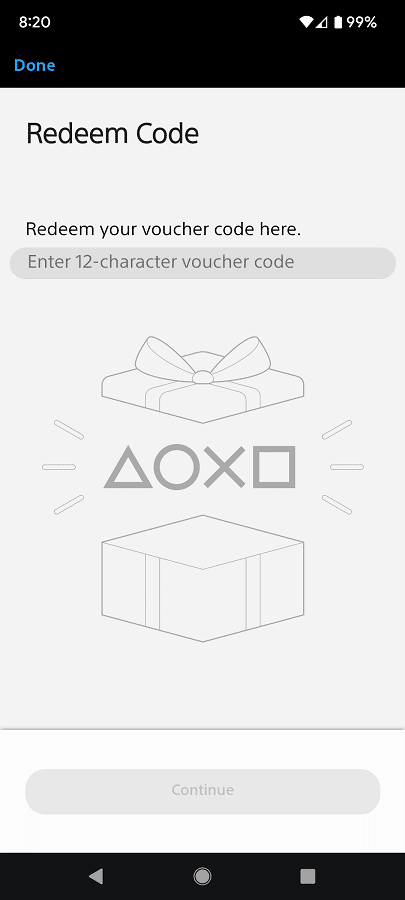
Redemption Options PlayStation Store App on console 

PlayStation App on smartphone 

PlayStation Store website 
PlayStation Store App on console 

PlayStation App on smartphone 

PlayStation Store website
PricingCheck price on Amazon.(#CommissionsEarned)Check price on Amazon.(#CommissionsEarned)

Denominations 

The two cards offer different denominations.  

The PlayStation Store Gift Cards offer funds based on general purchases that you can make on the digital storefront of your PlayStation gaming console.  

On the other hand, the denominations of PlayStation Plus Wallet Funds are based on the fees of the different PlayStation Plus tiers with tax included. For instance, you should be able the $70 PlayStation Plus Wallet Funds should cover 1 year of PlayStation Plus Essential and sales tax in the U.S region. The $110 card should be able to over 1 year of PlayStation Plus Extra with sales tax. 

To learn more about the different PS Plus tiers that are available, you can take a look at this versus article.

You can find the currently available denominations for both types below: 

PlayStation Store Gift Card: 

  • $10 
  • $25 
  • $50 
  • $75 
  • $100 

PlayStation Plus Wallet Funds: 

  • $30 
  • $55 
  • $70 
  • $110 

Branding 

The PlayStation Store Gift Cards feature a white color scheme to go along with the PlayStation Plus and PlayStation Store logos. 

The PlayStation Plus Wallet Funds feature a yellow color scheme. These cards will only show the PlayStation Plus logo. 

Availability 

You can find the physical versions of PlayStation Store Gift Cards and PlayStation Plus Wallet Funds at major retailers.  

Alternatively, you can also buy these cards as digital voucher codes at major online retailers. The codes should then be sent to you shortly after you made your purchase. 

Redemption Options 

These cards are redeemed in the same way as you can use the following options: 

  • PlayStation Store App on your console 
  • PlayStation App on your smartphone 
  • PlayStation Store website 

After redemption, the amount of funds from your card will be added directly to the digital wallet of your PlayStation Network account. You can then use the funds to pay for PlayStation Plus, other subscriptions, digital games, downloadable content and/or microtransactions.