How to fix God of War Ragnarök: Valhalla infinite loading issue

When you try to open the new Valhalla DLC from the main menu of God of War Ragnarök, you may notice that the game stay stuck in loading. To see how you can fix this issue, you can take a look at this guide from Seeking Tech.

The infinite loading for the DLC may occur if you try to play the downloadable content before fully installing the base game. So, in order to fix this issue, we recommend that you try doing the following:

1. Close God of War Ragnarök.

You can do so by pressing and holding the PS button to bring up the PlayStation 5 home menu. From there move the cursor over to the God of War Ragnarök icon and then press the Options button. Finally, select the Close Game option.

2. Next, you need to wait until the download and installation for God of War Ragnarök is completed.

In order to check, press the PS button to bring up the Control Center quick menu. From there, select the Downloads/Uploads option at the bottom. You should then see the current progress for the download.

3. Once the base game has been fully downloaded, boot up God of War Ragnarök and then select Valhalla from the main menu.
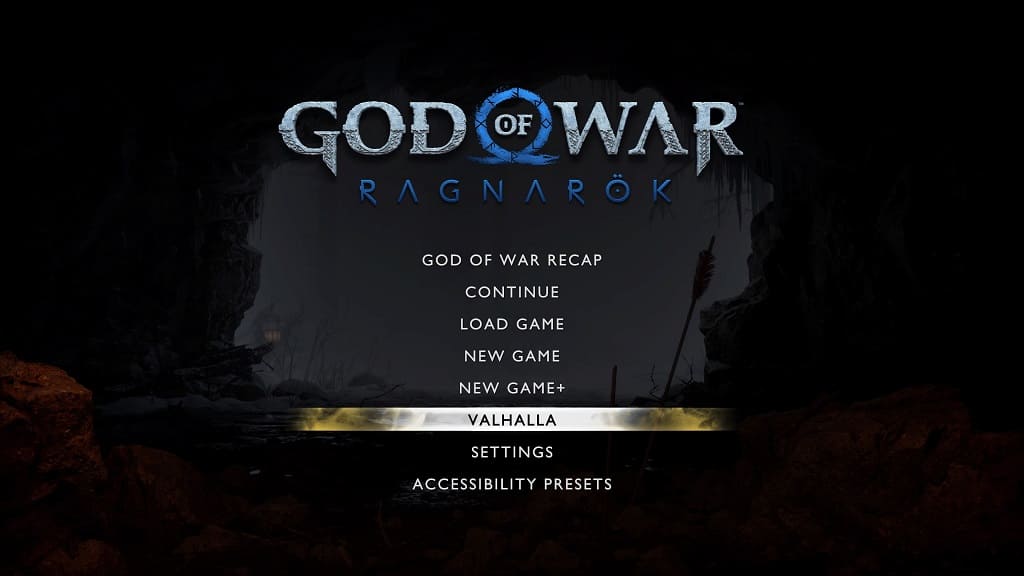
The DLC should now load properly without any issues.

How to turn off the controller speaker in God of War Ragnarök 

When playing God of War Ragnarök on your PlayStation 4, PlayStation 4 Pro, PlayStation 5 or PlayStation 5 Digital Edition console, you may hear sound coming out of the controller’s speakers. You may find this to be too distracting and/or causing the battery life of your DualShock 4 or DualSense to drain faster than normal. 

If you want to turn off the controller sound in God of War Ragnarök, then you can check out this tutorial at Seeking Tech to see how you can properly do so. 

1. For the first step, turn on your game console and then boot up the game if you haven’t done so already. 

2. Next, you need to head over to the Settings menu. In order to do so from the start screen, you can simply select Settings from the list of available options. 

If you are currently inside of the actual game, then you need to press the Options button in order to pause the action and then bring up the Options menu. From there, you should be able to select Settings. 

3. From the Settings menu, you need to head over to Audio & Subtitles. 

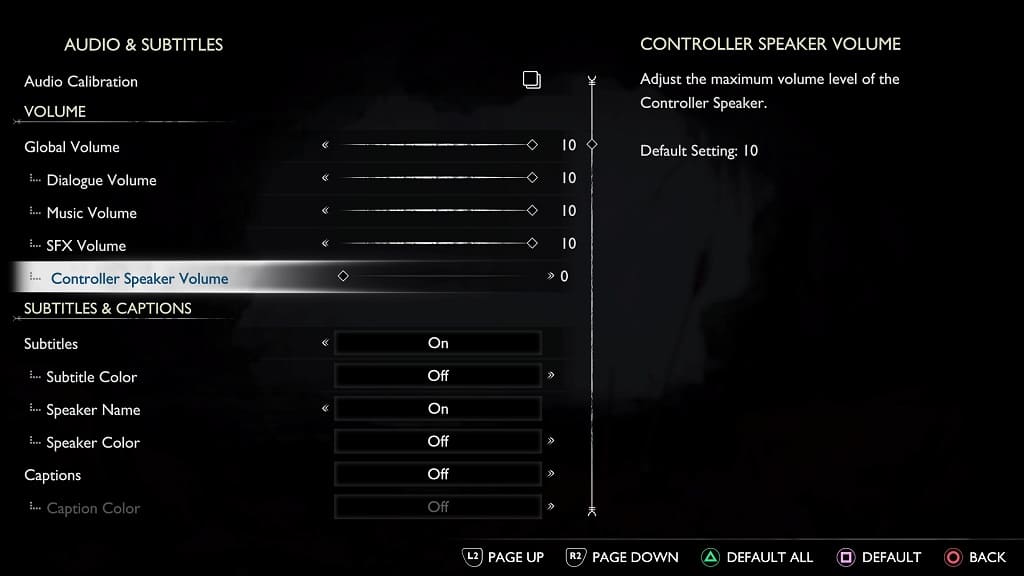
4. After getting to the Audio & Subtitles screen, you should find the Controller Speaker Volume slider located in the Volume section at the top. 

5. By default, the Controller Speaker Volume slider is set to a value of 10, which is the loudest for the built-in speaker of the DualShock 4 or DualSense.

In order to decrease the volume, you need to move the slider to the left. 

If you want to mute the controller sound altogether, you need to move this slider all the way to the left until you hit 0.

How to change audio language in God of War Ragnarök on PS5

God of War Ragnarök support multiple languages when it comes to spoken dialogue. Changing the audio language can be somewhat confusing, however. To find out how to do so on the PlayStation 5 and PlayStation 5 Digital Edition consoles, you can follow the steps laid out in this tutorial at Seeking Tech. 

Before we start, it should be noted that this guide is based on the digital version of the game that was bought from the U.S. PlayStation Store. 

1. If you are play God of War Ragnarök currently, then you need to close it.  

In order to do so, press and hold the PS button on the DualSense controller to open the home menu. From there, you need to move the cursor to the God of War Ragnarök icon and then press the Options button on the controller. 

In the pop-up window, you then need to select the Close Game option. 

2. Once the game has closed, move the cursor over to the God of War Ragnarök icon and then press the Options button on your DualSense again.  

3. In the pop-up menu, you then need to select Manage Game Content. 

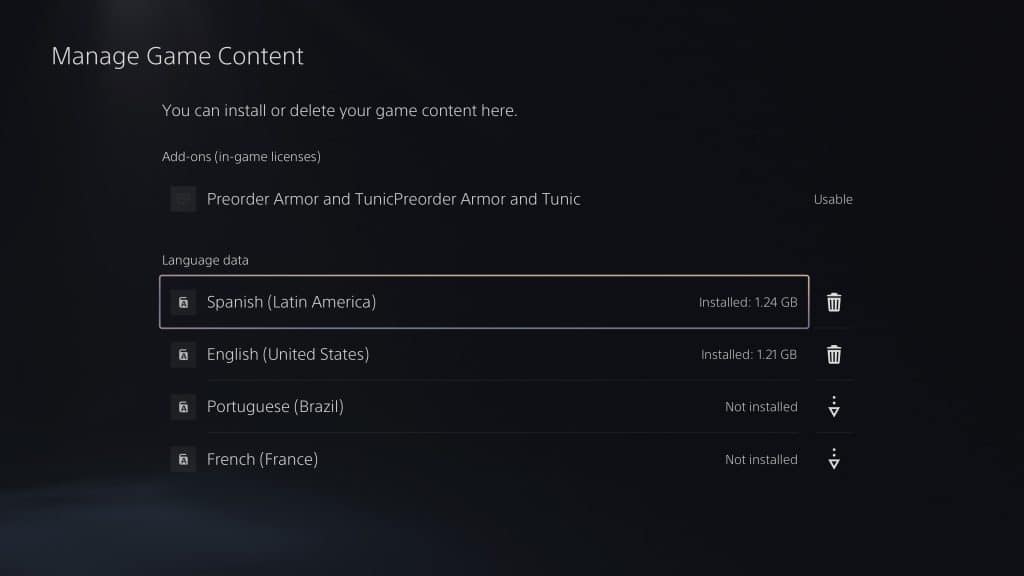
4. From the Manage Game Content for God of War Ragnarök, you should see the Language Data section. Here, you can select the language pack to download.  

In the U.S., the following languages are available to download: 

  • English (United States) 
  • Spanish (Latin America) 
  • Portuguese (Brazil) 
  • French (France) 

Keep in mind that the download and installation of these language packs can’t be completed unless the game is closed.  

5. Once you downloaded the audio language, boot God of War Ragnarök back up. 

6. In the start screen menu, you need to select Settings. 

7. From the Settings menu, select Language. 

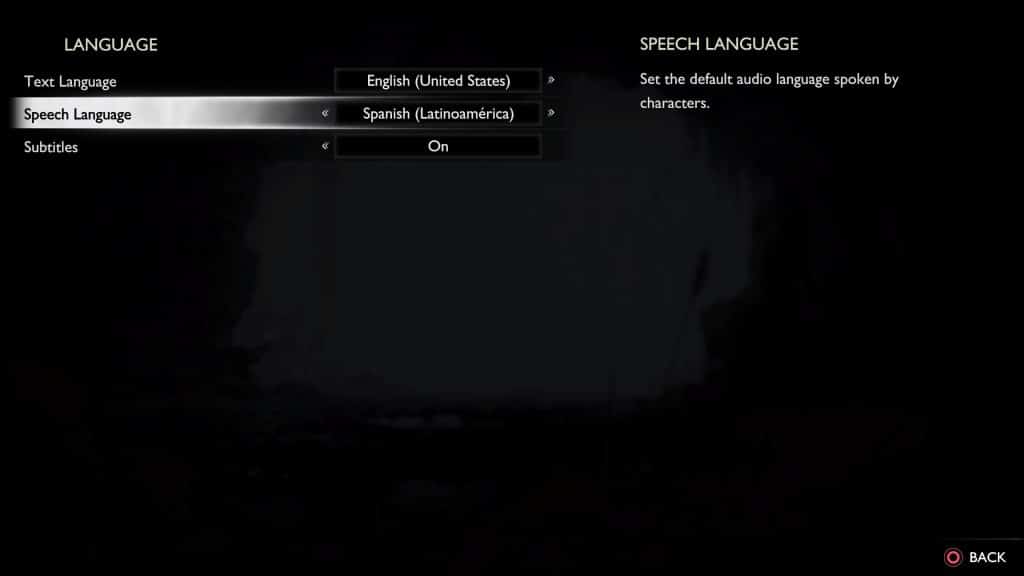
8. After getting to the Language menu, move the cursor over to Speech Language.  

9. You should be able to change the audio language with this setting.  

If the language you are trying to enable is greyed out, then you need to close the game and then make sure that you have the language pack downloaded and installed. 

10. In the same Language menu, you will also be able to change the text language, which does not require any additional downloads. You will be able to choose between the following: 

  • English (United States) 
  • Spanish (Latin America) 
  • Spanish (Spain) 
  • Portuguese (Brazil) 
  • Portuguese (Portugal)  
  • French (France) 
  • Italian  
  • Dutch 
  • Hungarian 
  • Polish 
  • Russian  
  • Turkish 
  • Thai 
  • Arabic 
  • Czech 
  • Croatian 
  • Traditional Chinese 
  • Simplified Chinese 
  • Korean 
  • Japanese 
  • German

How to enable and customize gyro aiming in God of War Ragnarök  

God of War Ragnarök supports gyro aiming as it uses the built-in accelerometer and gyroscope of the DualSense and DualShock 4. If you enable this feature, you will be able to use the motion of your controller to fine tune the aim with your weapon, giving you more accuracy.  

To see how you can turn on, as well as customize, gyro aiming in this PlayStation 4 and PlayStation 5 game, you can take a look at this tutorial from Seeking Tech.  

1. To start off, you need to head over to the Settings menu in God of War Ragnarök. 

In the start screen, all you have to do is select Settings. 

If you are actively playing the game, then you need to press the Options button during gameplay in order to open the Options menu. From there, you should be able to select Settings. 

2. Inside of the Settings menu, head over to Graphics & Camera. 

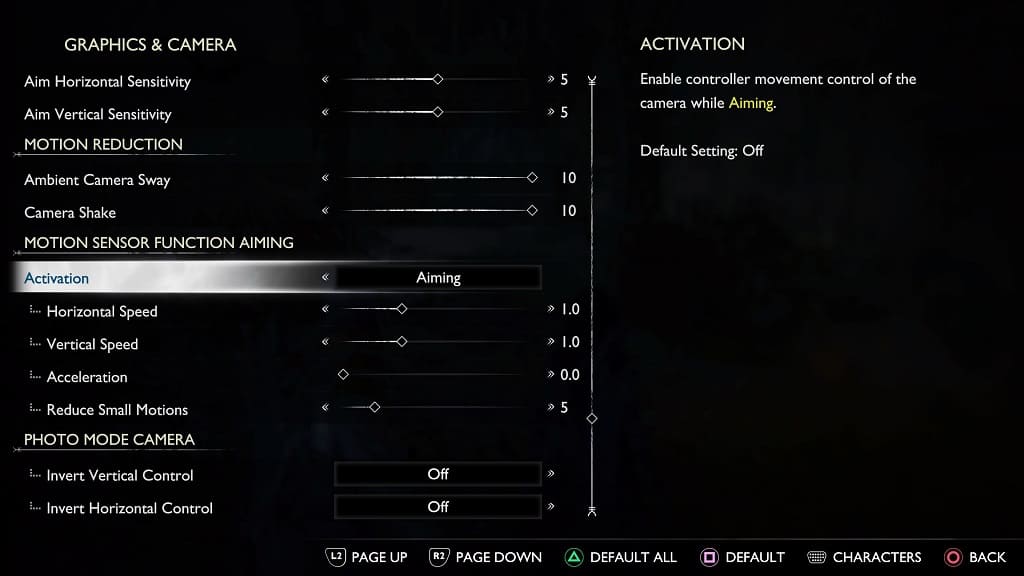
3. From the Graphics & Camera menu, scroll down until you reach the Motion Sensor Function Aiming section. 

4. Here, you need to set Activation to Aiming in order to use gyro aiming. 

5. Once you activated motion controls, you will be able to customize the following aspects: 

The Horizontal Speed slider will let you change the speed at which the aiming cursor will move on the horizontal axis. The default value is 1.0. You will be able to change it, in increments of 0.1, from a range of 0.1 to 3.0. 

The Vertical Speed slider will let you adjust the speed of the aim cursor on the vertical axis. This also has a default value of 1.0 as you will be able to adjust it, in increments of 0.1, from 0.1 at the minimum to 3.0 at the maximum. 

The Acceleration slider will let you determine the speed of the aiming cursor in relations to how fast you are moving your controller. So, if you move the controller at a slower rate, then the cursor will travel a shorter distance. If you move the controller at a faster rate, then the cursor will travel at longer distances. By default, this setting is disabled as it has a value of 0. You will be able to change it, in increments of 5, from 0 to 10. 

The Reduce Small Motions slider will let you adjust the amount of camera movement when you are using gyro aiming. This is used to prevent any accidental camera movement while aiming. The default value for this setting is 5 while you are able to adjust it, in increments of 1, from a minimum of 0 to a maximum of 30.

How to customize film grain and motion blur in PS5 version of God of War Ragnarök

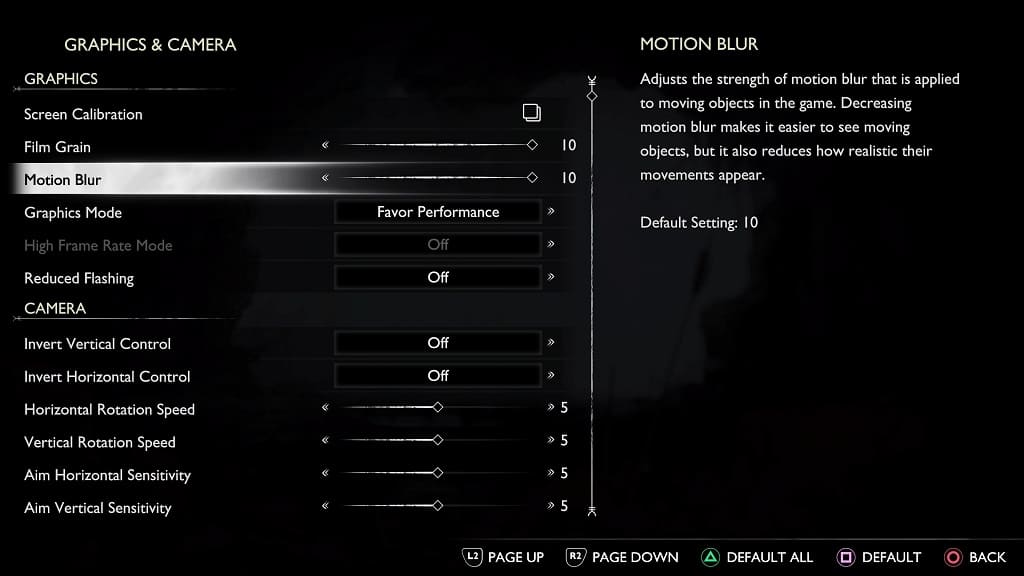
The PlayStation 5 version of God of War Ragnarök features both film grain and motion blur. If you find that these visual effects to be too intense, then you are able to dial both down. You can even turn the two settings off completely if you like how they make the game look. 

To find out how to customize film grain and motion blur in this PS5 game, you can follow the steps laid out in this tutorial from Seeking Tech. 

1. To begin, you need to head over to the Settings menu of God of War Ragnarök. 

At the start screen, you can simply Settings from the list of available options to get there. 

If you are currently playing God of War Ragnarök, then you need to press the Options button (which is the small button with the three horizontal lines icon located at the top) on the DualSense controller in order to bring up the Options menu. From there, you need to select Settings from the left column. 

2. Once you arrived in the Settings menu, you need to select Graphics & Camera.  

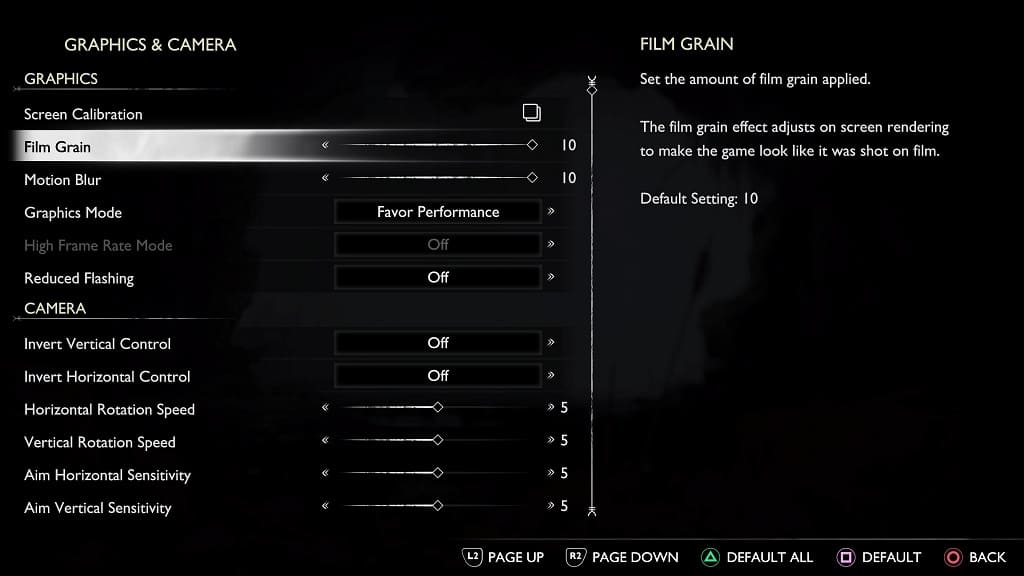
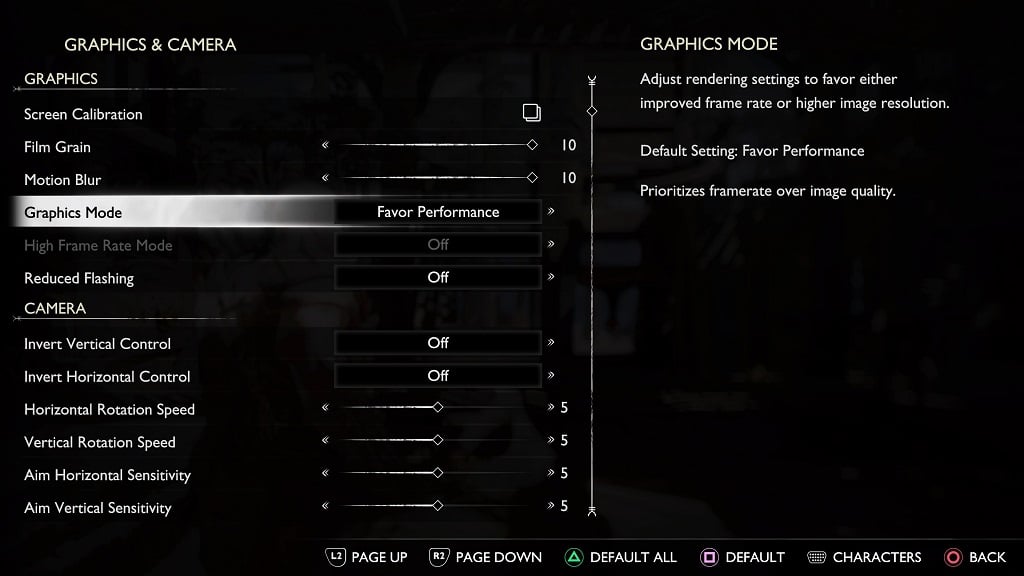
3. From the Graphics & Camera menu, make sure you are in the Graphics section, which should be at the top of the screen. 

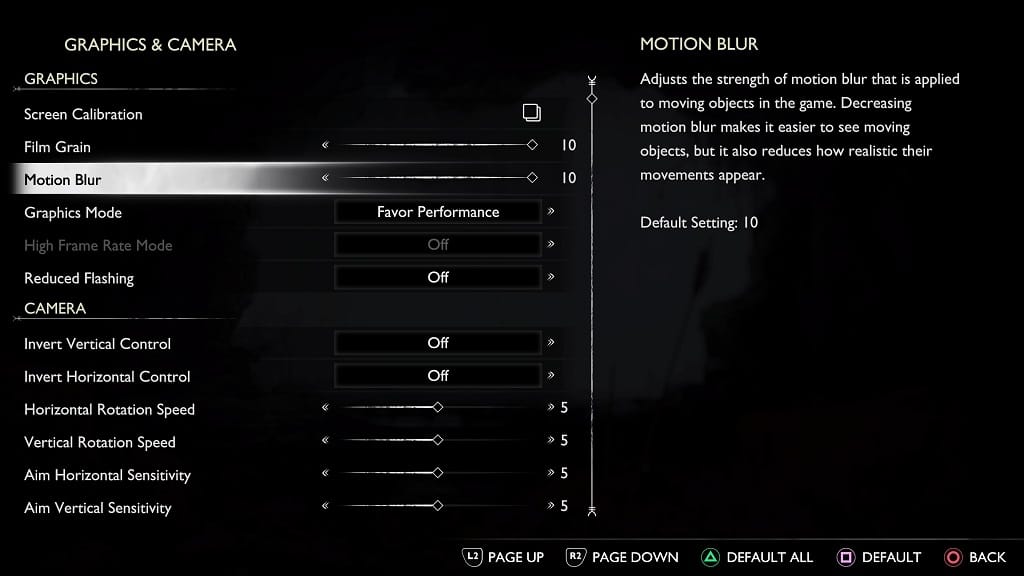
4. From there, you will be able to adjust the slide for Motion Blur and Film Grain to any of the following values: 

  • 9  
  • 10 

By default, both Motion Blur and Film Grain are set to 10. So, you need to lower the value in order to lessen these effects. We recommend lowering these settings and then test them out while playing God of War Ragnarök so that you can find a good balance between visibility and visual enhancements. 

If you don’t like the Motion Blur and/or Film Grain visual effects at all in this game, however, then you can simply set both values to 0 from this menu. 

For the uninformed, Film Grain makes the image quality noisier as the game tries to mimic the look of a movie. This could lead to less-than-sharp image.  

Motion Blur will add blur effects to moving objects, which can may some scenes hard to see. It is really noticeable when your spin the camera around the character.

How to disable adaptive triggers and vibrations in God of War Ragnarök

The PlayStation 5 version of God of War Ragnarök takes advantage of the adaptive triggers and haptic feedback features of the DualSense. If you would rather have these two functions disabled when playing this action-adventure title, then you can check out this tutorial at Seeking Tech to see how you can properly do so. 

How to turn off rumble in God of War Ragnarök 

There are two ways that you can turn off vibrations in this game.  

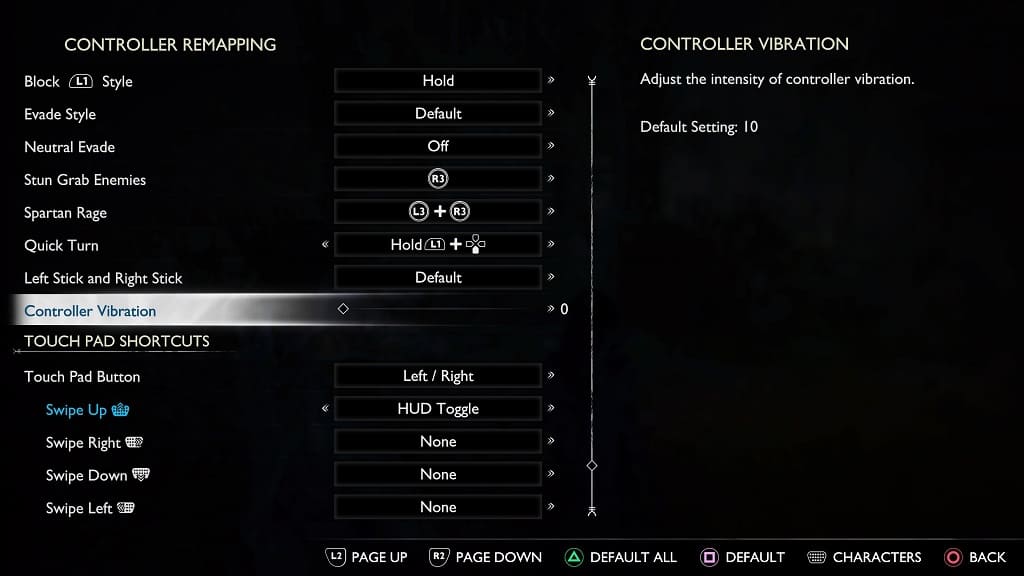
For the first method, you need to head over to the Settings menu in God of War Ragnarök. You can do so by selecting Settings from the main menu or pause menu. Afterwards, select Controller Remapping and then move the cursor down to Controller Vibration. You can use this slider to customize the rumble intensity of the DualSense. To turn it completely off, set this slider to 0. 

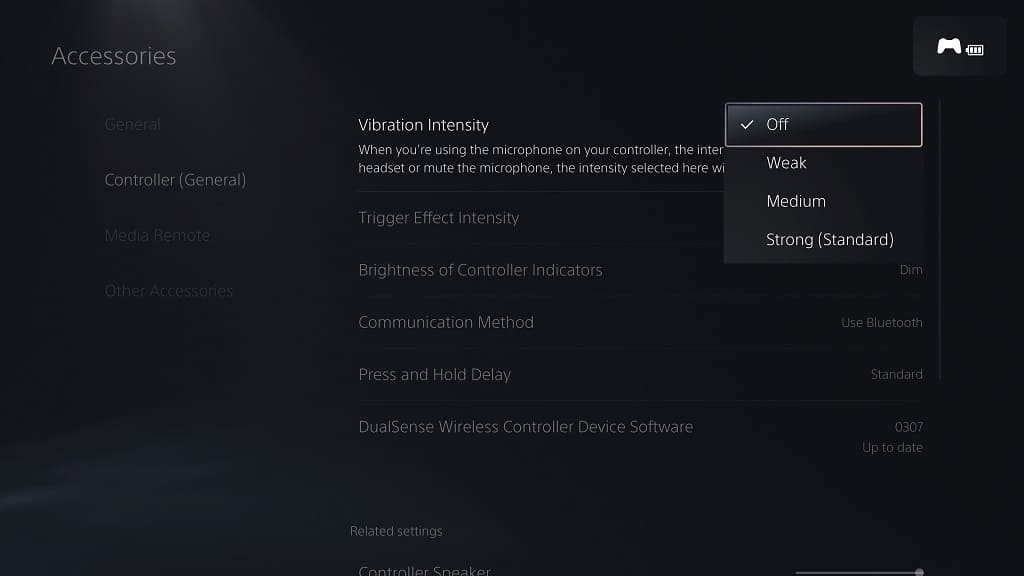
You can also turn off the DualSense haptic feedback on the system level. In order to do so, press and hold the PS button on the controller for around a second to open the home menu, where you need to select Settings on the top right side. In Settings, select Accessories > Controller (General) > Vibration Intensity. In the pop-up menu, you can customize the rumble intensity or simply set it to Off. 

By disabling haptic feedback on the system level, you will also disable rumble on other games being played on your PlayStation 5. So, make sure you enable the Vibration Intensity setting for games that you want to have rumble turned on. 

How to turn off adaptive triggers in God of War Ragnarök 

There is currently no way to disable adaptive triggers directly in-game when playing God of War Ragnarök. Instead, you have to turn off this feature at the system level. 

To do so, you need to take the following steps: 

  • If you are currently playing God of War Ragnarök, then you need to press and hold the PS button to open the home menu. 
  • Select Settings at the top right corner of the home menu. 
  • Inside Settings, scroll down and then select Accessories. 
  • You then need to select Controller (General) on the left column of the Accessories menu. 
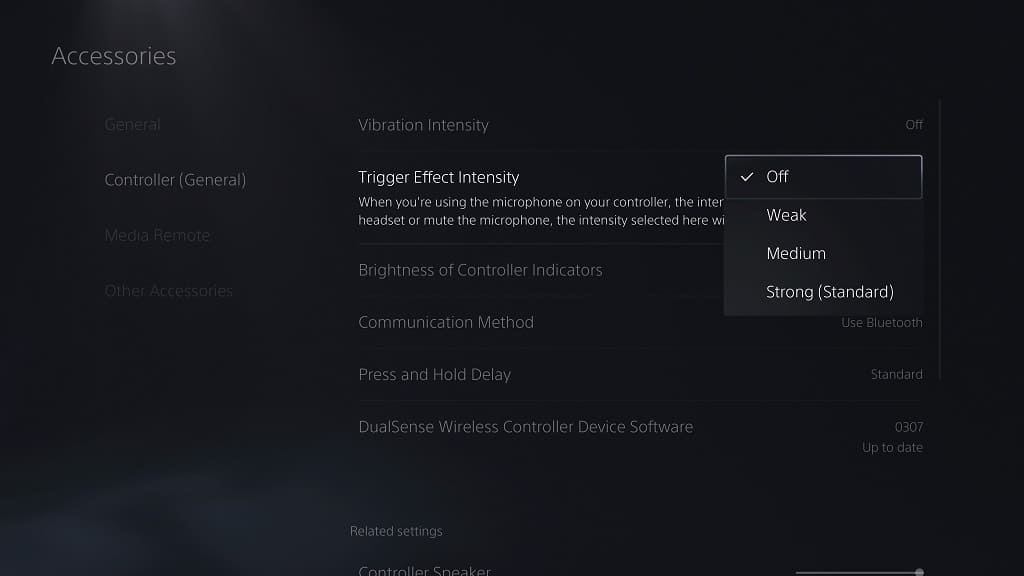
  • On the right side of the same screen, select Trigger Effect Intensity. 
  • In the pop-up window, you can change the intensity level or simply set it to Off. 

Changing the Trigger Effect on the system level effects will apply to all the PlayStation 5 games being played on your console. Therefore, you need to enable this setting anytime you want to use adaptive triggers when playing games other than God of War Ragnarök.

How to make it easier to see in God of War Ragnarök 

God of War Ragnarök has a lot going on when it comes to gameplay. With the camera up close, it can be very hard to see the enemy, item as well as the location you need to go next.  

To see how you can make things easier to track in this PlayStation 4 and PlayStation 5 videogame, you can follow the steps laid out in this tutorial at Seeking Tech.  

1. To begin, you need to go to the Settings menu of God of War Ragnarök.  

You can do so by select Settings from the title screen. Alternatively, you can also press the Options button on your gamepad when playing the game and then select Settings from the Options menu.  

2. Inside the Settings menu, you need to select Text & Color. 

3. In the Text & Contrast section of the Text & Color menu, you will be able to change the text and icon sizes as well as enable a high contrast HUD. 

4. In the Color section, you can add a color filter as well as change the color of the user interface. 

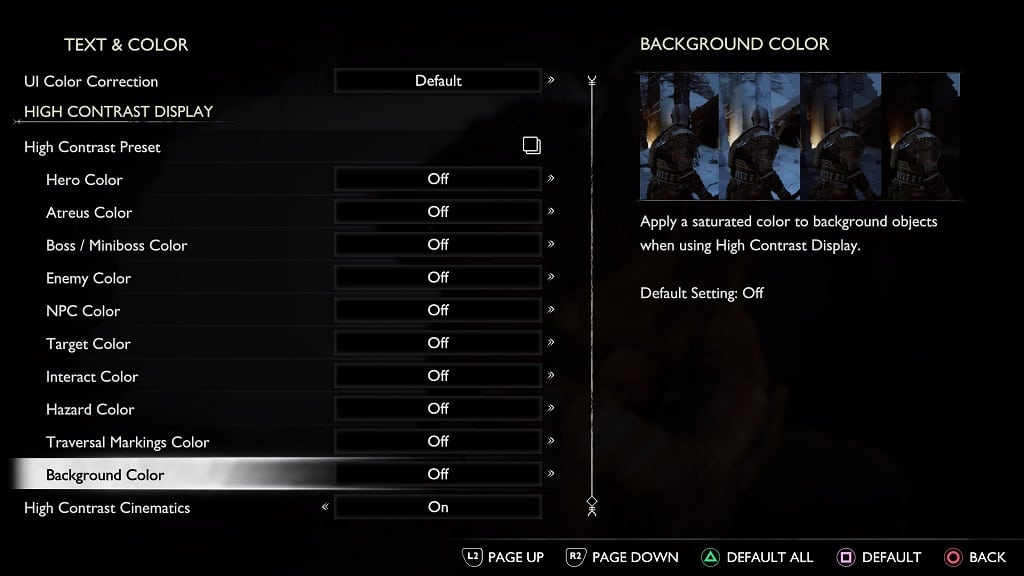
5. In the High Contrast Display section, you can select between several high contrast presets. You can also customize the following individual elements to make them easier to see: 

  • Hero Color 
  • Atreus Color 
  • Boss and Miniboss Color 
  • Enemy Color 
  • NPC Color 
  • Target Color 
  • Interact Color 
  • Hazard Color 
  • Traversal Markings Color 
  • Background Color 
  • High Contrast Cinematics


6. Once you are done with the Text & Color menu, go back to the front page of Settings and then select Accessibility. 

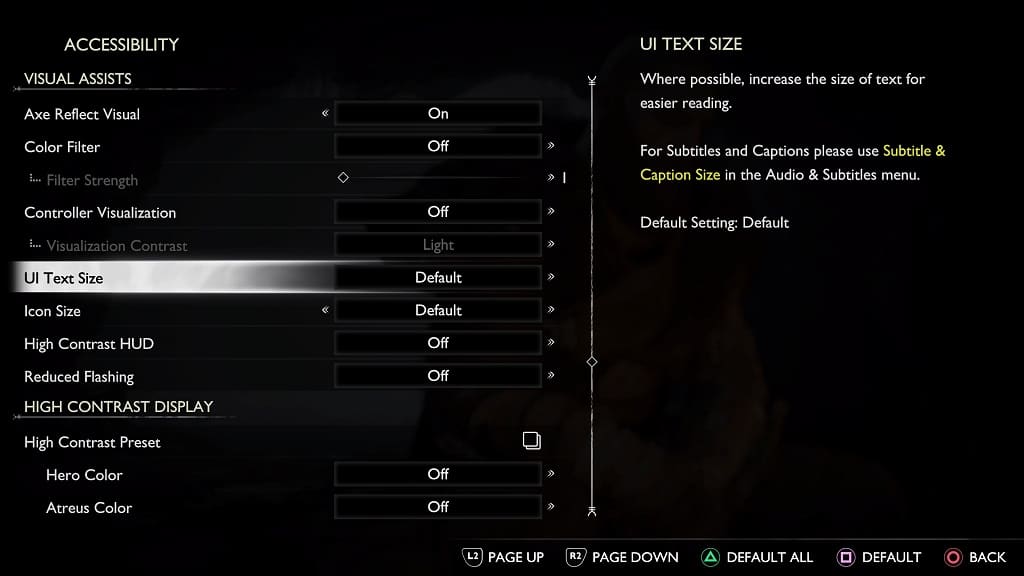
7. From the Accessibility menu, scroll down to the Visual Assists section. From there, you will be able to adjust the following: 

  • Axe Reflect Visual 
  • Color Filter 
  • Controller Visualization 
  • UI Text Size 
  • Icon Size 
  • High Contrast HUD 
  • Reduce Flashing 

8. You can also use the High Contrast Display section in the Accessibility menu although it is the same as the one in the Text & Color menu. 

9. In the Subtitles and Captions section, you will be able to change the following settings: 

  • Subtitles 
  • Captions 
  • Direction Indicators  
  • Subtitle & Caption Size 
  • Subtitle & Caption Background 
  • Subtitle & Caption Blur 

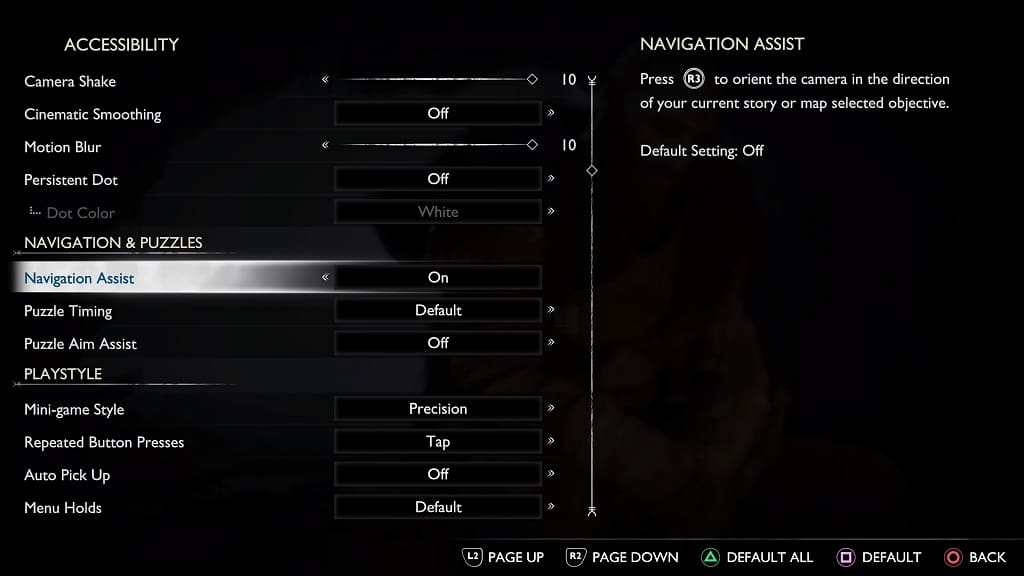
10. In the Accessibility menu, we also highly recommend that you scroll to the Navigation and Puzzles section. From there, you can enable Navigation Assist. 

By doing so, the camera will show you which direction you need to go for your next object when you press the R3 button outside of combat. This can be very helpful if you are constantly getting lost in the game.  

How to prevent motion sickness when playing God of War Ragnarök

When playing God of War Ragnarök, you may start to feel a little dizzy or nauseous. Thankfully, the PlayStation 4 and PlayStation 5 game comes with several graphics and accessibility options that should help with motion sickness. 

You can check out this guide from Seeking Tech to see how you can adjust these helpful settings. 

1. To start off, make sure you turn on your console and open God of War Ragnarök if you haven’t done so already. 

2. Next, you need to go to the Settings menu in the game.  

You can do so from the start screen. If you are currently playing the game, then you need to press the Options button on the DualShock 4 or DualSense controller and then select Settings from the Options menu. 

3. Inside of Settings, select Graphics & Camera. 

4. From the Graphics & Camera menu, you will be able to reduce Motion Blur in the Graphics section. 


5. Furthermore, we also recommend changing the Graphics Mode to Favor Performance as the higher frame rate should make the game run smoother and potentially help reduce motion sickness. 

6. If your television or monitor set supports 120 Hz and/or Variable Refresh Rate, then we also recommend using these features to get even higher and smoother frame rates. 

7. You can reduce film grain and flashing lights as well in the Graphics section. 

8. In the Camera section of the Graphics & Camera menu, you will be able to adjust the rotation speed of the in-game camera. 

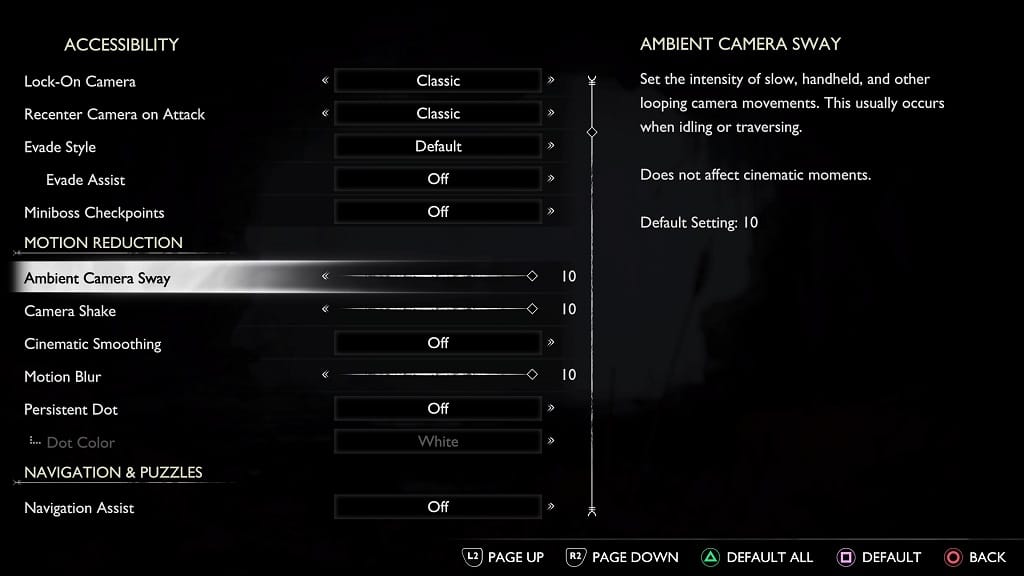
9. You can also use the Motion Reduction section in order to reduce the ambient camera sway and camera shake. 

10. Once you are done with the Graphics & Camera menu, return to the front page of Settings and then select Accessibility. 

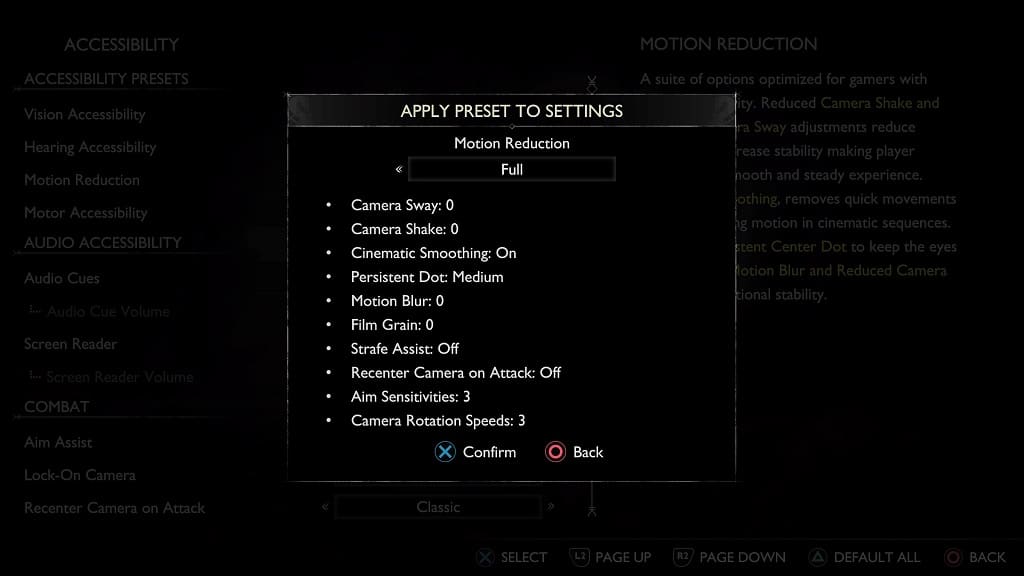
11. Inside of the Accessibility menu, select Motion Reduction. Afterwards, you will be able to choose between the None, Some and Full presets. 

12. For further customization options, you scroll down to the Motion Reduction section of the Accessibility menu. From there, you will be able to adjust the following: 

  • Ambient Camera Sway 
  • Camera Shake 
  • Cinematic Smoothing 
  • Motion Blur 
  • Persistent Dot  

The Persistent Dot is helpful as it focuses your eyes towards the middle of the screen. You are able to change the size and color of the dot.  

13. After making any changes in the Settings menu, make sure you test it out in the game to see if additional adjustments need to be made.

How to fix God of War Ragnarok HDR issues

When playing God of War Ragnarok with HDR enabled, you may notice that some scenes are overly dark while others may be a little too bright. The colors may also seem off as they may appear to be a little washed out.

To see how you can fix these visual issues on the PlayStation 5, PlayStation 5 Digital Edition, PlayStation 4 and PlayStation 4 Pro, you can check out this troubleshooting article from Seeking Tech.

1. The first step you can take is to make sure that you have HDR properly set up for your screen and console.

For the TV or monitor, try to search the Settings menu to see if there is an option to enable or disable HDR. If there is, then make sure you enable this feature.

You should then do the same for the game console. On the PS5 and PS5 Digital Edition system, you need to go to Settings > Screen and Video > Video Output. From this menu, you need to make sure you do the following:

  • Set HDR to On When Supported.
  • Set Deep Color Output to Automatic.
  • Set RGB to Automatic (Recommended).

For the PS4 and PS4 Pro, you need to head over to Settings > Sound and Screen > Video Output Settings. You then need to do the following:

  • Set RGB Range to Automatic (Recommended).
  • Set HDR to On When Supported.
  • Set Deep Color Output to Automatic.

2. You should also make sure that you properly calibrated the HDR brightness output of your game console.

For the PlayStation 5 and PlayStation 5 Digital Edition, you need to go to Settings > Screen and Video > Video Output and then select Adjust HDR. You then need to follow the on-screen instructions.

For the PlayStation 4 and PlayStation 4 Pro, you should head over to Settings > Sound and Screen > Video Output Settings and then select Adjust HDR. Afterwards, follow the on-screen steps.

3. If the HDR for God of War Ragnarok is still not working correctly, then you can try adjusting the aforementioned RGB settings on your console.

You can change it to Limited or Full and then test to see if you can get a better HDR picture.

4. Of course, you can also change the in-game brightness settings. In order to do so, you need to press the options button on your controller while playing the game.

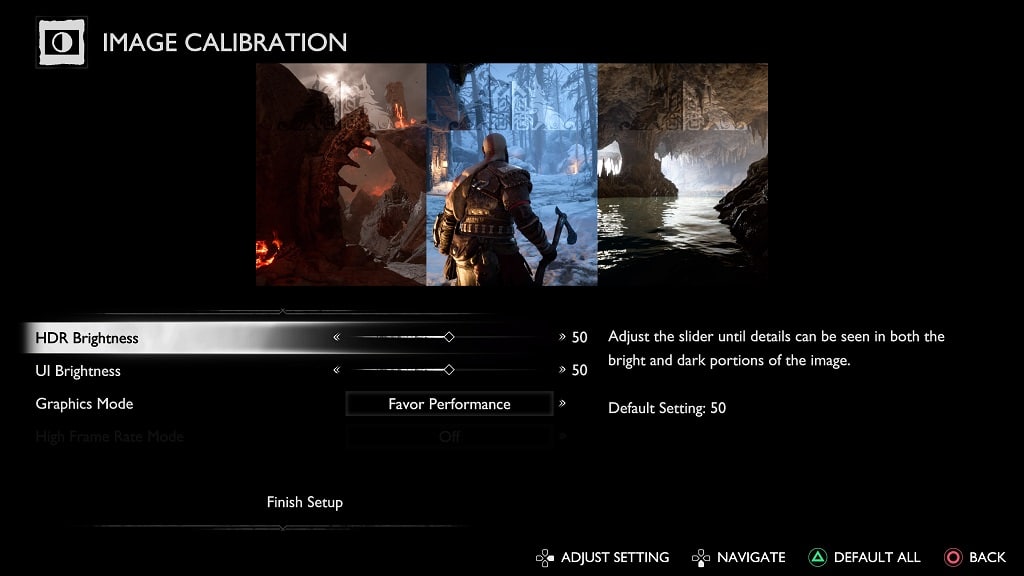
From the Options menu, you then need to go to Settings > Graphics & Camera > Screen Calibration. In the Image Calibration menu, you can adjust the slider for the HDR Brightness setting.

It is important to note that some television sets and monitors made not have good HDR performance. Therefore, you may have to use the aforementioned HDR Brightness setting frequently if some scenes appear to be overly bright or overly dark.

5. If you still can’t get HDR to display properly in God of War Ragnarok then we recommend that you play the game is SDR mode by disabling the HDR setting on your console.

How to fix God of War Ragnarok input lag issues

When playing God of War Ragnarok on your PlayStation 4, PlayStation 4 Pro, PlayStation 5 or PlayStation 5 Digital Edition system, you may notice some input lag. To see how you can potentially improve the latency, you can take a look at this article from Seeking Tech.

1. The first step you can take is to make sure that your console is directly connected to your television set or monitor.

If you use any splitter or HDMI pass-through devices in-between, then these may cause the extra delay between your button presses and the corresponding actions that appear on the screen.

2. We also recommend that you take a look at the Settings menu of your TV.

Most modern screens come with a Game Mode, Game Optimizer Mode or similarly named picture setting that will let you play videogames with low input lag.

So, if your TV has this mode available, you need to enable it if you haven’t done so already.

3. You should be able to reduce input lag by increasing the frame rate of God of War Ragnarok.

Therefore, we recommend playing the game in performance mode. In order to enable this mode, you can try taking the following steps:

  • While playing God of War Ragnarok, press the Options button on the controller.
  • After opening the Options menu, you need to go into Settings.
  • In the Settings menu, select Graphics & Camera.
  • Once you are in the Graphics & Camera, highlight Graphics Mode.
  • Finally, you need to select Favor Performance.

Keep in mind that, if you are playing God of War Ragnarok on a standard PlayStation 4, then you won’t be able to switch to a performance mode.

4. You can also try playing the game in high frame rate mode in order to further reduce its input delay. In order to do so, you need the PlayStation 5 version of Ragnarok as well as a TV or monitor that supports 120 Hz refresh rate with Variable Refresh Rate support.

If you meet these requirements, then you can take the following steps:

  • Go to the Settings menu of your PS5 console.
  • Inside of Settings, select Screen and Video.
  • From the Screen and Video menu, select Video Output from the options available on the left column.
  • On the right side of the screen, set VRR to Automatic.
  • You then need to set 120 Hz Output to Automatic.
  • Open God of War Ragnarok.
  • While playing the game, press the Options button on your controller.
  • Select Settings from the Options menu.
  • You then need to select Graphics & Camera from the Settings menu.
  • In the Graphics & Camera menu, make sure that you set the Graphics Mode setting to Favor Performance.
  • Next, you need to highlight the High Frame Rate Mode setting and then change it to HFR + VRR so that you can play the game at up to 120 frames per second with Variable Refresh Rate enabled.

5. If you are still getting noticeable input lag, then you can try playing the game on a different TV or monitor to see if you can get better results.