How to fix ‘registration of the trophy information could not be completed’ error

When trying to start a PS3 game over cloud streaming on your PlayStation 4, PlayStation 4 Pro, PlayStation 5 or PlayStation 5 Digital Edition console via the PlayStation Plus Premium service, you may encounter the following error message:

  • “Registration of the trophy information could not be completed. The game will quit. (80022D86)”

To see how you can fix this trophy issue and get the game to boot normally, you can check out this troubleshooting article from Seeking Tech.

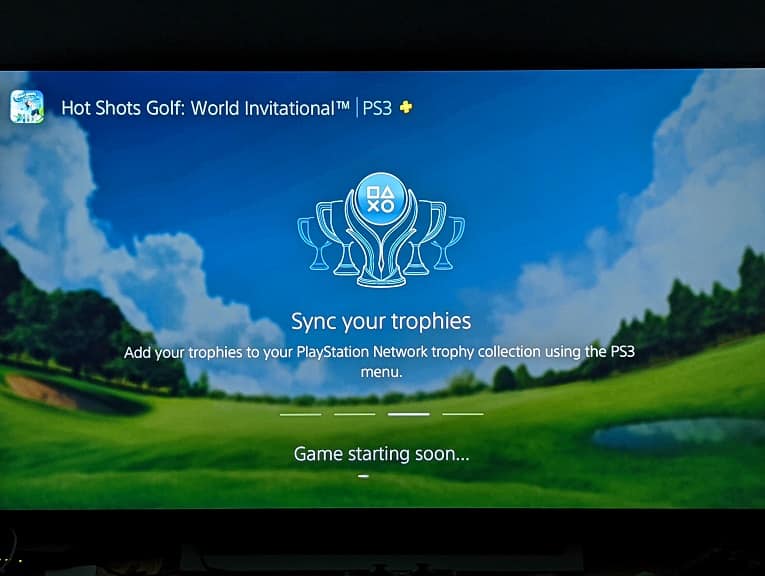
1. For the first step, you can try syncing your PlayStation 3 trophies to the PlayStation Network. In order to do so, you need to take the following steps:

  • First off, try to open the stream for another PS3 game.
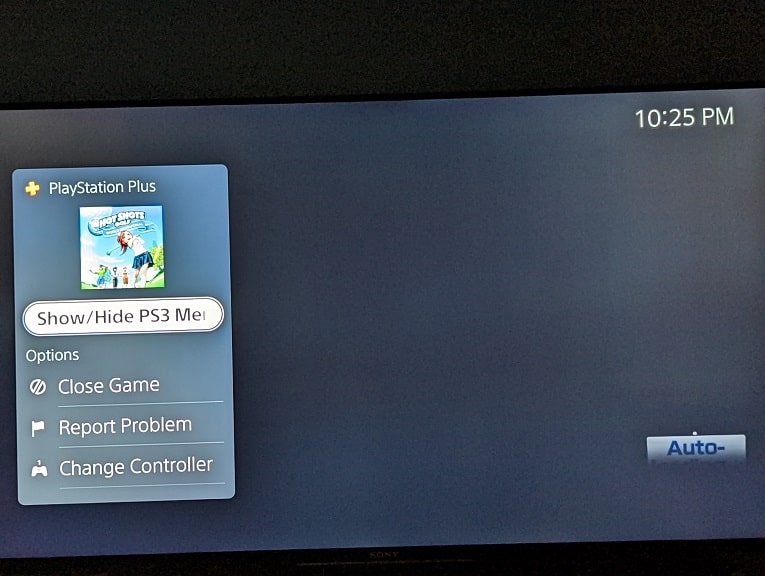
  • Next, you need to open the PS3 Menu. On the PlayStation 4 or PlayStation 4 Pro, you can do so by pressing the PS button and then select Display PS3 Menu. On the PlayStation 5 or PlayStation 5 Digital Edition, you need to press the PS button, select the Now Streaming card and then select Show/Hide PS3 Menu.
  • Inside the PS3 Menu, move right to the PlayStation Network tab and then select Trophy Collection.
  • Wait for the trophies to be synced to the PlayStation Network.
  • Finally, close the currently streaming videogame and then try to open the game where you previously encountered the 80022D86 error.
2. You can also try not touching your controllers for 10 minutes.

Once the server detects that there haven’t been any controller inputs for over 10 minutes, it will start to kick you out of the cloud streaming game. After the game has closed, try to open it again to see if you are still getting the “registration of the trophy information could not be completed” error.
3. Restarting your PS4, PS4 Pro, PS5 or PS5 Digital Edition may also help as well.

4. There may be some widespread server issues where save files and trophy data are either lost and/or causing the cloud streaming PS3 game not to boot up correctly.

In this case, we recommend that you avoid streaming the game until Sony fixes the problems on the server blades.

5. If you can’t afford to wait, then you can try contacting the PlayStation Support team to see if they can provide some additional help with your issue.

What to do if the Disney Plus PS5 App can’t be opened

When trying to open the official Disney Plus streaming application on your PlayStation 5 or PlayStation 5 Digital Edition console, you may notice that it doesn’t get past the initial splash screen. To see how you can potentially get this app to open properly, you can take a look at this troubleshooting guide from Seeking Tech.

1. When we saw that the Disney+ logo stuck on the screen after trying to open the video streaming application, it was due to an Internet connection issue we have on our network.

So, for the first step, make sure that your home network is online. Furthermore, you should also make sure that your PS5 is connected to the Internet.

You can also try power cycling your modem and router by turning off both devices, waiting for at least two minutes and then turning them back on again.

2. Moreover, you may have to restart the app to get past the splash screen.

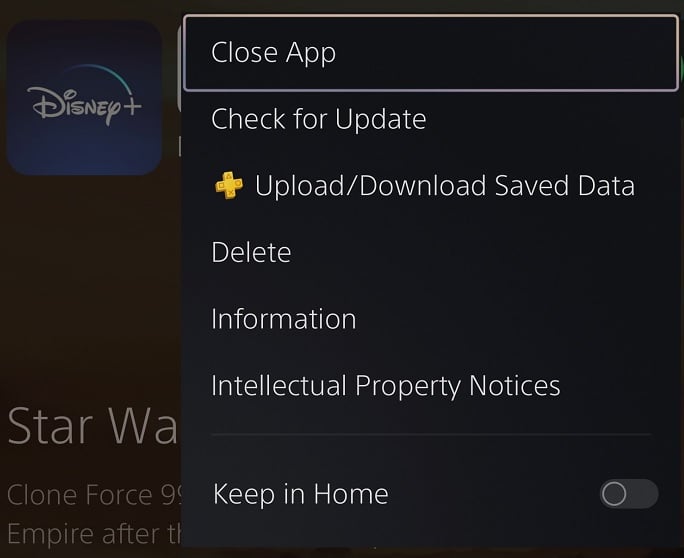
In order to do so, you first need to long press the PS button on the controller in order to get to the home screen of your PlayStation 5. From there, you then need to move the cursor over to the Disney+ logo. Afterwards, press the Options menu to open the pop-up window, which is where you can select the Close App option.

Once the app has completely close, try to open it again to see if it can launch normally this time.

3. Restarting your PS5 may also help as doing so will close the streaming application as well as refresh the connection from your home network to the console as well as from the console to the Disney+ servers.

To restart your system, quick press the PS button to Control Center. From there, select the Power option located on the right side of the bottom-side menu and then the Restart PS5 option.

4. Updating the application may also help as the new version may contain a fix for the hang-ups.

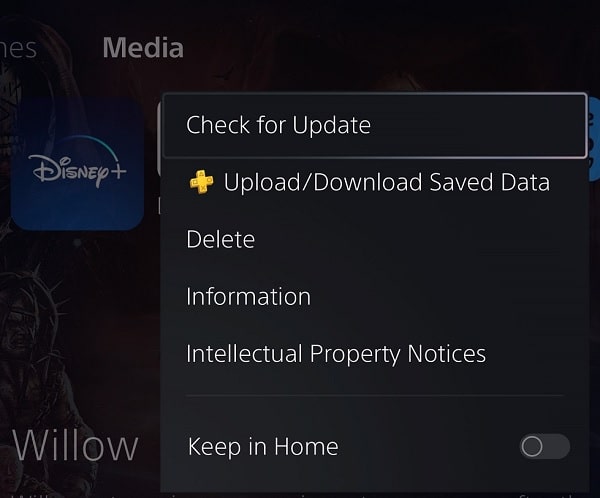
To update, move the cursor over to the Disney+ icon again and then select Check for Update. If there is a new version available, then make sure you have it downloaded and installed before you try to open the application.

How to prevent ‘your streaming game closed due to inactivity’ error on PS4 and PS5

When playing a cloud streaming game on your PlayStation 4 or PlayStation 5 via PlayStation Plus Premium, you may end up getting kicked out of the stream even if you have a stable Internet connection. To see how you can prevent this from happening, you can take a look at this troubleshooting article from Seeking Tech.

Why you’re getting discounted form cloud streaming

Before you get disconnected, you may see the following message with a countdown clock:

  • “You have been inactive for a while. This game will close to make room on the server for other players.”

If you want to continue you session, then you need to press any button on your DualSense or DualShock 4 controller before the countdown ends.

Otherwise, you will be booted off of your current session, losing any unsaved progress. You should also see the following message appear on the screen:

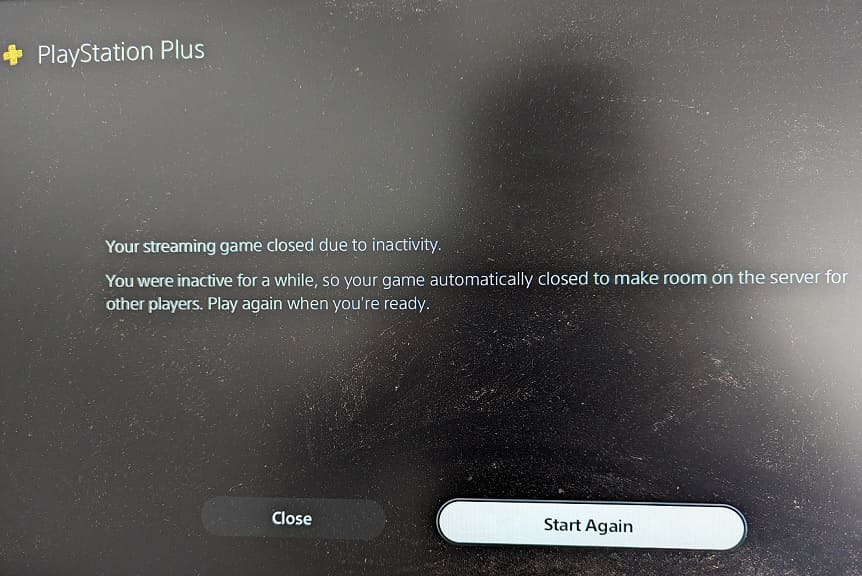
  • “Your streaming game closed due to inactivity. You were inactive for a while, so your game automatically closed to make room on the servers for other players. Play again when you’re ready.”

If you select the Start Again option in this screen, then the stream will restart.

How to prevent from being kicked when cloud streaming

If you want to prevent the “you have been inactive for a while” and or “your streaming game closed due to inactivity” messages from showing up, then you need to make sure that don’t leave the game inactive for 10 minutes.

This is because the servers will kick you off in order to make room for another player when it detects that you haven’t been using your controller for at least 10 minutes. Therefore, you should make sure that you are actively using your controller so that you won’t get disconnected.

If you are watching a long cut scene, then you should make sure that you move one of the analog sticks or press one of the directional pad buttons occasionally to avoid the disconnection. You can also try pressing other buttons although dosing so may cause the cut scene to be skipped.

If you need to leave the cloud streaming game on for more than 10 minutes without any controller inputs, then we recommend pausing the game first. Afterwards, place the DualSense or DualShock 4 face down in a way where the left or right analog sticks are moving upwards. This will be registered as an input by the cloud stream servers and, therefore, prevent any disconnections due to inactivity.

If you are getting an “closing your last game session” error when trying to stream PS3 games on your PlayStation 4 or PlayStation 5, then you can check out this guide to see how you can potentially fix this problem.

How to fix ‘closing your last game session’ error on PS4 and PS5

With a PlayStation Plus Premium subscription, you can play a selection of PlayStation 3 games through cloud streaming on the PS4, PS4 Pro, PS4 and PS5 Digital Edition consoles.

When trying to start up a stream for a game you previously played, you may see the “closing your last game session” error. To see how you can potentially fix this issue, you can take a look at this troubleshooting article from Seeking Tech.

1. The first step we recommend taking is to put your controller down and then wait for at least 10 minutes.

This is because the severs should kick you out of your current gaming session once it detects that you have been inactive for 10 minutes. After that, you should see the following message:

  • “Your streaming game closed due to inactivity. You were inactive for a while. Sop your game automatically closed to make room on the servers for other players. Play again when you’re ready.”

In this screen, you need to select the Start Again option.

2. If waiting 10 minutes did not work, then you can try restarting your PlayStation 4 or PlayStation 5 console. By doing so, you should be able to refresh your Internet connection as well as your connection to the PlayStation Plus Premium cloud streaming server.

3. You can also try starting another PlayStation 3 game stream. If the other title works without any issues, then you can close it and then start your previous game.

4. There is a possibility that the “closing your last game session” issue is due to a problem with the server blades. In this case, we suggest that you simply wait until PlayStation fixes their servers before you try to play the same game again.

5. You can also try contacting the PlayStation Support team in order to get additional support.

If you managed to boot back into your streaming PS3 game but noticed that all your save files for it is gone, then the data may have been corrupted.

If you have these saved data backed up to the cloud storage, then you should be able to download them again. To find out how to download your cloud saves for these PS3 cloud streaming titles, you can take a look at the steps laid out in this previous tutorial.

There is also a possibility that any trophies you earned in your previous session may not have sync properly to your PlayStation Network. Unfortunately, you may need to re-earn them again.

How to fix ‘data is corrupted’ error on PS5

With the PlayStation 5 and PlayStation 5 Digital Edition console, you can play select PS3 games over cloud streaming. In order to do so, you need to subscribe to the PlayStation Plus Premium service.

When trying to load the game, however, you may end up seeing the following message:

  • “The data is corrupted. (80029206)”

To see how you can potentially fix this issue when playing PlayStation 3 titles on your PS5, you can take a look at this troubleshooting article from Seeking Tech.

When you see the 80029206, then it means that your save file for the currently streaming game has been corrupted. This may happen if you disconnect from the virtual PS3 console when your progress was being saved.

As a result, you most likely lost your save file and won’t be able to continue from where you last left off. If you want to start over from the beginning for the same game, then you need to do the following:

1. Open the game that you want to stream on your PS5.

2. When the stream starts, press the PS button on the controller.

3. In the quick menu, you then need to select the Now Streaming card.

4. Next, select the Show/Hide PS3 Menu option.

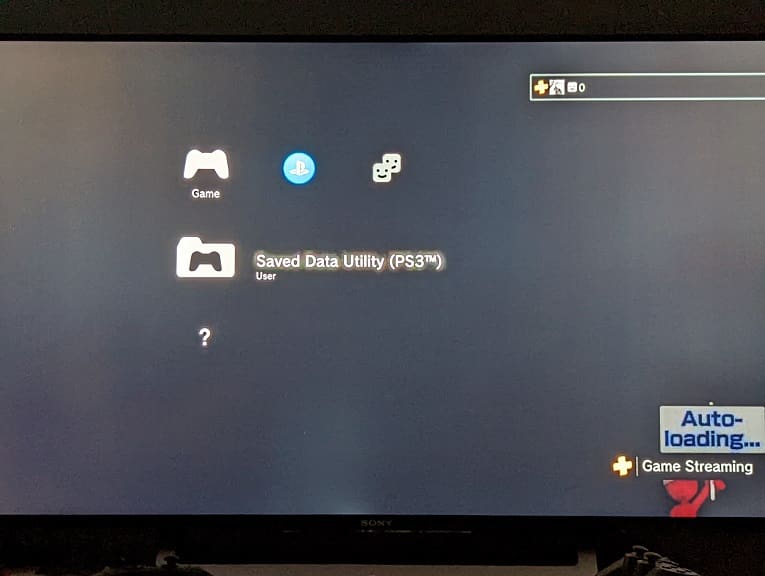
5. You should now be in the XMB menu of the virtual PS3 console. Here, you need to select Saved Data Utility.

6. A message should show up that says you need to quit the game in order to continue. Select Yes to move to the next screen.

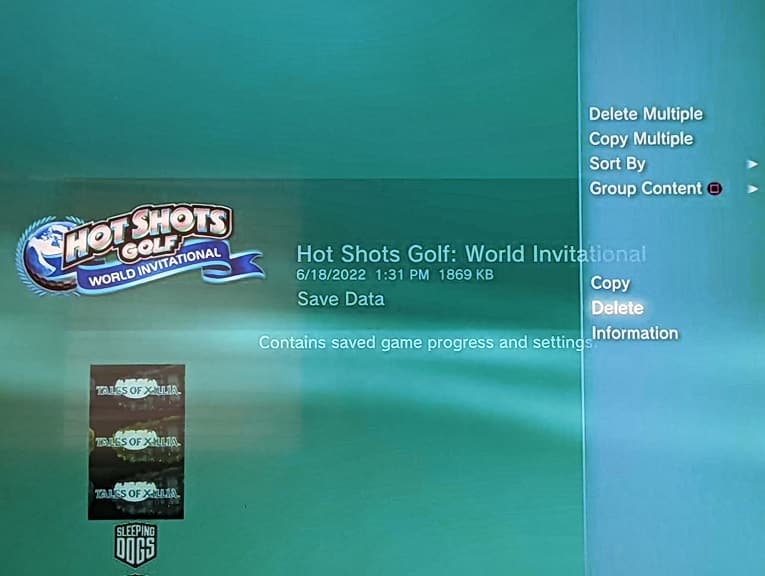
7. In the Saved Data Utility menu, you will see a list of save files you have stored on the virtual PS3 console. Select the saved data for the game you are currently streaming.

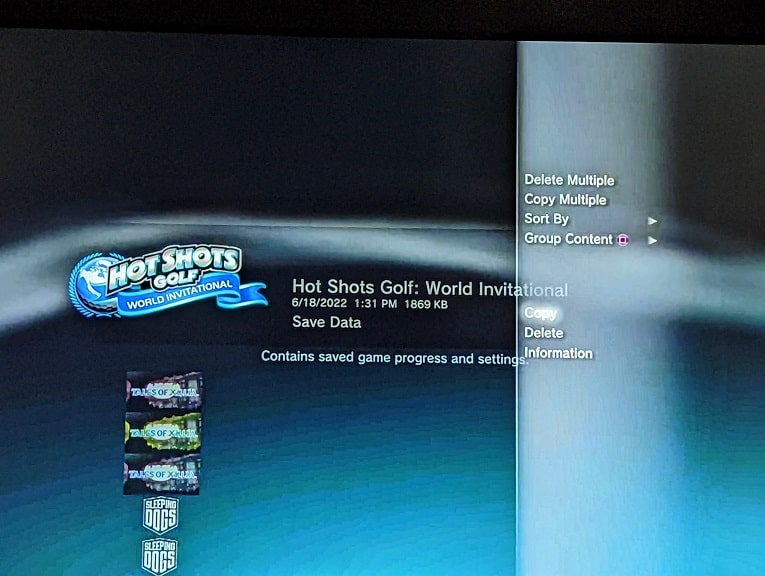
8. A menu should then appear on the right side of the screen. From there, select the Delete option.

9. When asked if you want to continue with the deletion progress, select Yes.

10. Once the corrupted save file has been deleted, press the PS button and then select the Now Streaming Card.

11. Afterwards, select the Show/Hide PS3 Menu option.

12. You should see a message saying that the Saved Data Utility menu will close and the game you are currently streaming will boot back up. Select Yes to continue.

If you are still getting the “data is corrupted,” then you can try returning to the aforementioned Saved Data Utility menu. This time, we recommend that you delete all the save files from the virtual PS3 console.

How to enable Dolby Atmos in the Disney Plus PS5 App

Thanks to a recent update, the Disney Plus App on the PlayStation 5 and PlayStation 5 Digital Edition now supports Dolby Atmos. To see how you can take advantage of this audio format, you can follow the steps laid out in this article from Seeking Tech.

1. To start off, make sure that you have a Dolby Atmos listening device connected to your game console. Furthermore, you should also make sure that it is set up correctly.

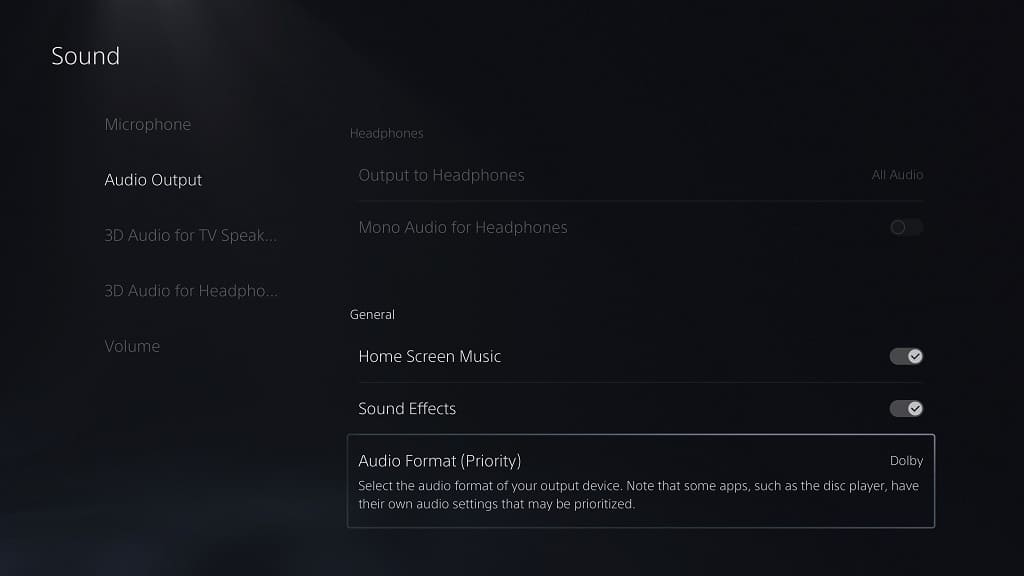
In order to check, you need to go to the home menu of your PS5, which you can do by pressing and holding the PS button on your controller. From there, go to Settings by selecting the gear icon located on the top right side of the screen. In Settings, select Sound and then Audio Output.

In the Audio Output menu, you will be able to change and adjust the sound output of your PlayStation 5. Depending on how the sound output device is connected to the console, you may need to change the Audio Format (Priority) setting in order to get Dolby Atmos.

2. Next, you need to make sure that you have the latest version of the Disney Plus App installed on your PS5.

In order to do so, you need to take the following steps:

  • Turn on your game console and make sure it is connected to the Internet.
  • In the home screen, switch over to the Media tab by pressing the R1 button.
  • From the Media tab, move the cursor over to the Disney+ App icon and then press the Options button.
  • Finally, select the Check for Update option in the pop-up menu for the streaming application.
  • With the newest version installed, you should be able to start using Dolby Atmos.

3. Of course, not all of the videos streaming on Disney Plus support this audio format. In order to find a movie or series that take advantage of Dolby Atmos, you need to do the following:

  • Open the Disney Plus App on your PS5.
  • Next, you need to select a video that you are interested in watching. Do not select a movie or episode from the Continue Watching section as this will load you starting into the video. Instead, you need to select it from a different section so that you will get to the product page instead.
  • On the video’s product page, move the cursor down once and then to the right until you can select Details.
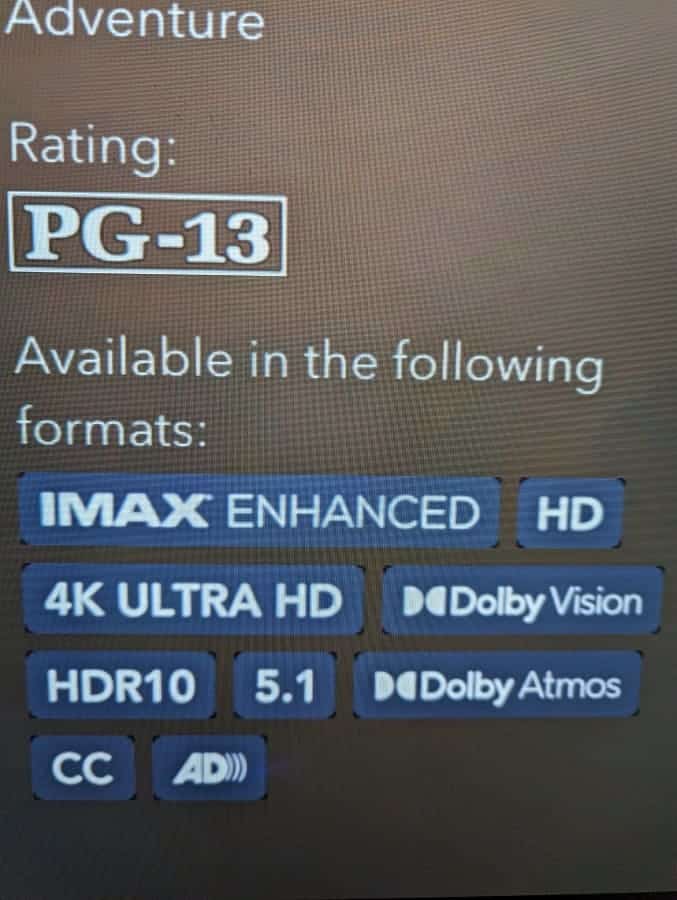
  • In the Details page, you can see a list of supported audio and video formats. If the movie or series supports Dolby Atmos, then you should find it listed in the “Available in the following formats” section on the lower right corner of the screen.
  • To watch the video, press the circle button to return on its product page. From there, you can simply select the Play option in order to open the stream.

What to do if the Disney Plus PS5 App is stuck on loading screen

When trying to watch videos using the official Disney Plus streaming application on your PlayStation 5 or PlayStation 5 Digital Edition console, you may notice that it may stay be stuck on a loading screen with an animated circle.

You can take a look at this troubleshooting guide at Seeking Tech to see how you can get this app to load normally.

1. For the first step, you can try restarting the Disney Plus App.

In order to do so, you need to go back to the home screen of your PS5, you can do so by long pressing the PS button on the controller. From there, you need to move the cursor in order to highlight the Disney Plus icon. Next, you need to press the Options button and then select the Close App option in order to exit out of the streaming application.

Once the application has been successfully closed, you can try opening it again to see if the infinite loading screen has gone away.

2. Restarting your PS5 may also help as this action will close the Disney application, refresh the console’s internet connection and clear up any potential bugs or conflicts that may have been causing the app to not load properly.

3. You should also make sure that you have a stable internet speed.

Disney Plus has a minimum download speed requirement of 5.0 Mbps. For 4K streaming, you will need at least 25.0 Mbps.

If possible, try to pause or cancel downloads and any other streams you have running concurrently. By doing so, you should able to free up bandwidth that may help fix the stuck loading screens in the Disney Plus PS5 App.

4. A new version of the application may resolve this particular issue.

To see if there is a patch to download and install, press the Options button while the Disney+ icon is highlighted on the home screen of your PS5. From there, you need to select Check for Update to get the console to check if there is a new version to download.

5. A fresh installation may help as well.

To do so, you need to press the Options button while the cursor is on the app’s icon on the PS5 home screen. Afterwards, select Delete.

Once the application has been deleted, you can download and install it again from the PlayStation Store.

How to fix Disney Plus PS5 App Error Code 42

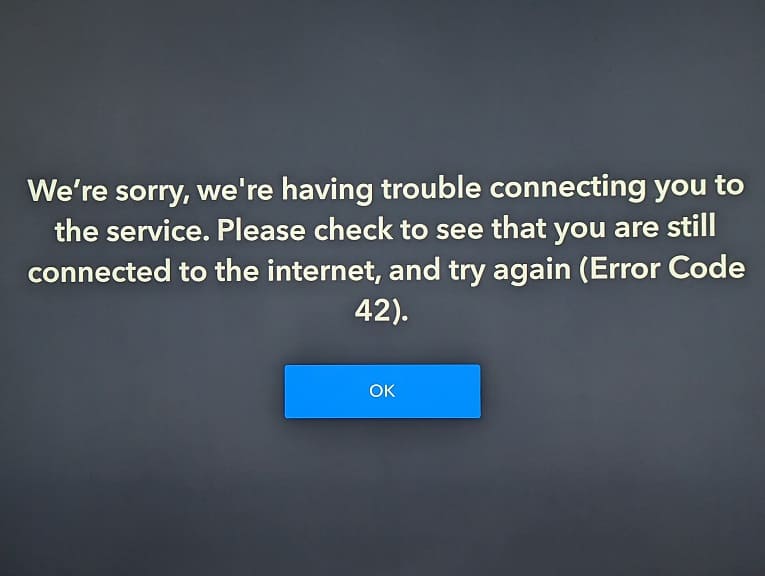
When watching a video by using the official Disney Plus streaming application on your PlayStation 5 or PlayStation 5 Digital Edition console, you may see the following error message:

  • “We’re sorry, we’re having trouble connecting you to the service. Please check to see that you are still connected to the internet, and try again (Error Code 42).”

To see how you can potentially fix this problem, you can take a look at this troubleshooting article from Seeking Tech.

1. The Error Code 42 popped up when we left the video we were watching paused while we needed to do something else for a couple of minutes.

In our case, we select the OK option to exit the error message and then re-select the same video. By doing so, the video was able to play without any issues.

2. If you are still getting the same error after re-trying, then you can try restarting the application.

In order to do so, you need to press and hold the PS button on the controller to bring up the home screen of your PlayStation 5. From there, move the cursor over to the Disney+ app icon and then press the Options button on the controller. Finally, select Close App from the pop-up window.

After closing the Disney Plus PS5 App, you can try opening it again.

3. You can also try restarting your game console as doing so will close the application as well as refresh your internet connection.

4. If you are downloading and/or streaming at the same time you are watching a video on Disney Plus, then you may not have enough bandwidth.

In this case, you can try pausing or cancelling other downloads and streams to see if the Error Code 42 message goes away.

4. You may also want to consider power cycling your internet connection.

To do so, turn off your PS5 and then shut down/unplug the modems and routers from your home network. After waiting for at least two minutes, turn the modems and routers back on again.

Once your home network is back online, you can turn on your game console and then open the Disney Plus App.

5. There is a possibility that the issues may be related to the Disney Plus servers. In this case, there is nothing you can do aside from waiting until the servers are fixed before watching a video.

How to fix the ‘PlayStation Plus subscription needs to be upgraded’ error on PS5

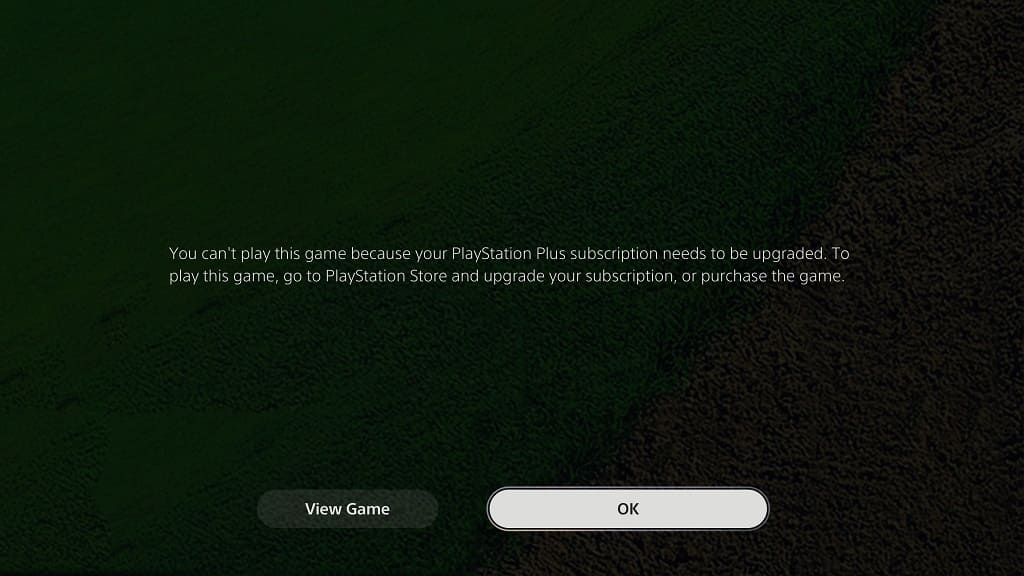
When trying to play a game you downloaded from the PlayStation Plus service, you may end up seeing the following message:

“You can’t play this game because your PlayStation Plus subscription needs to be upgraded. To play this game, go to PlayStation Store and upgrade your description, or purchase the game.”

To see how you can potentially fix this error, you can take a look at this troubleshooting article from Seeking Tech.

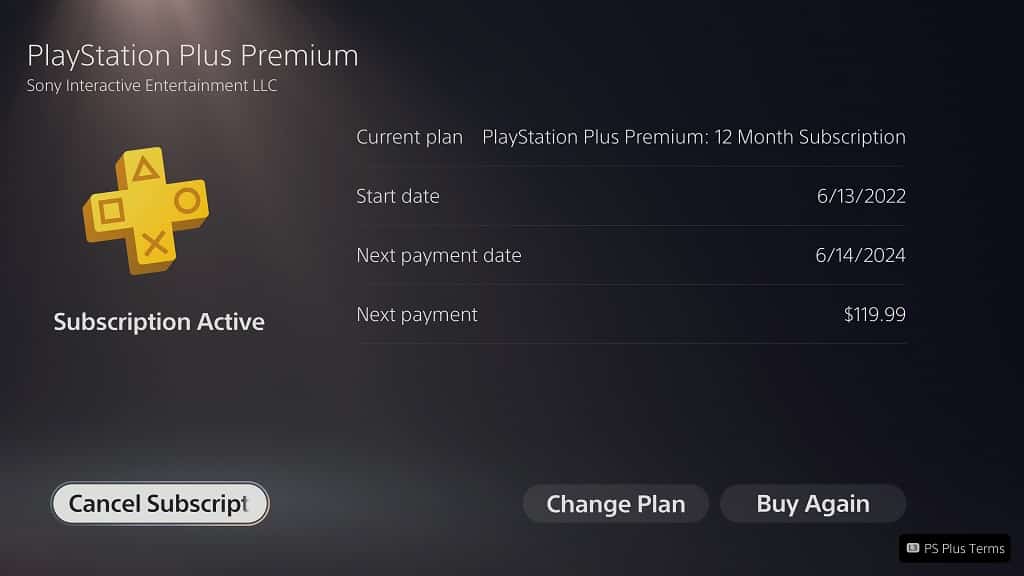
1. For the first step, we recommend that you check our PlayStation Plus status. If your subscription has expired or downgraded, then you will no longer have access to playing the game unless you re-sub to the correct tier.

In order to check your PlayStation Plus status, go to the PlayStation Store App on your PlayStation 5 and then select the three dots icon on the top right corner. You then need to select Subscriptions, followed by PlayStation Plus.

2. It is important to note that access rule to the PlayStation Plus game you downloaded is different depending on which catalog you redeemed it from. The service features the Monthly Games Catalog, PlayStation Plus Collection, Game Catalog and Classics Catalog.

To see what the differences are, you can check out this versus article.

3. If you are sure that you are still subscribed to the correct PlayStation Plus plan, then you can try deleting and re-downloading the game.

This fix worked for us when we saw the “PlayStation Plus subscription needs to be upgraded” error message after trying to play Hot Shots Golf 2, which we downloaded from the Classics Catalog through our PlayStation Plus Premium plan.

4. You should also make sure that you are using the PlayStation Network account that is paying for PlayStation Plus when you try to play the game.

If you are using a different account, then you can take a look at this instructional guide to see how you can share PS Plus benefits across multiple accounts on the same console.

5. Restoring the game licenses on your PSN account may also help.

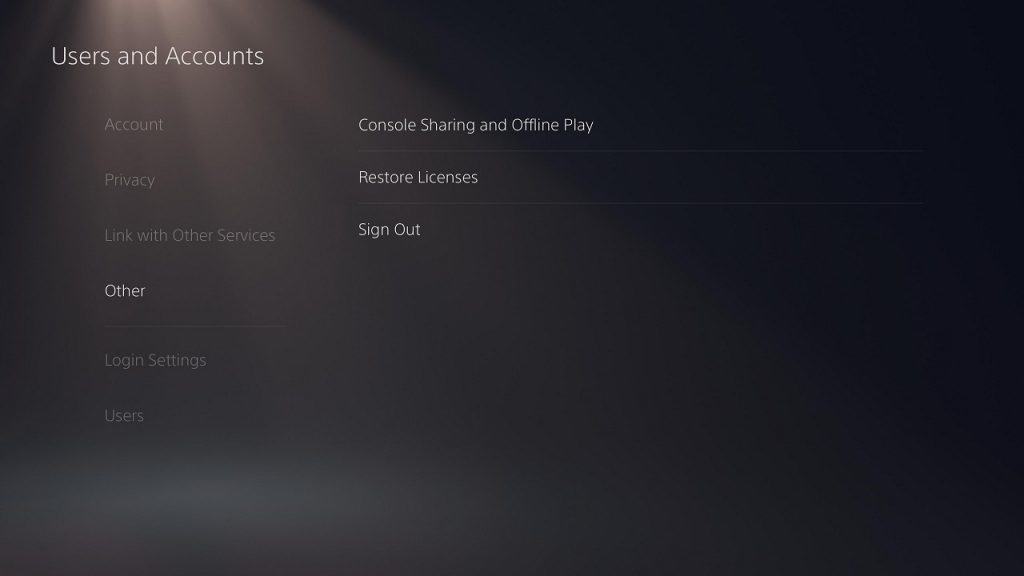
In order to do so, head over to the Settings menu and then select Users and Accounts > Other > Restore Licenses > Restore.

6. You can also try doing a database rebuild by taking the following steps:

  • Turn off your PlayStation 5.
  • Hold the power button on the PS5 console until you hear a second beep.
  • You should then be asked to connect your controller to the console via a USB cable and then press the PS button.
  • After doing so, you should be in the Safe Mode menu. Here, you need to select Clear Cache and Rebuild Database.
  • Finally, select Rebuild Database.

7. If you still can’t get the error message to go away, then we recommend that you contact the PlayStation support team to see if you can get them to sort it out for you.

From our experience, the licenses for PlayStation Plus games have been a little but glitchy since the new plans were added; therefore, you may need to get a representative from PlayStation to restore your access.

What to do if there is no surround sound playback in the Disney Plus PS5 App

The Disney Plus streaming application supports surround sound playback on the PlayStation 5 and PlayStation 5 Digital Edition consoles. If this feature does not appear to be working, then you can check out this article from Seeking Tech.

1. Before we start with the troubleshooting, it is very important to note that the Disney+ PS5 App is only able to output 5.1 surround sound.

7.1 surround sound is not supported.

2. For the first step, we recommend making sure you have your surround sound speakers set up properly on your PlayStation 5 console. You can do so by taking the following steps:

  • Press and hold the PS button to open the home menu of your console.
  • Select the gear icon located on the upper right corner of the home menu to head into Settings.
  • In Settings, scroll down and then select Sound from the list.
  • You should then select Audio Output from the Sound menu.
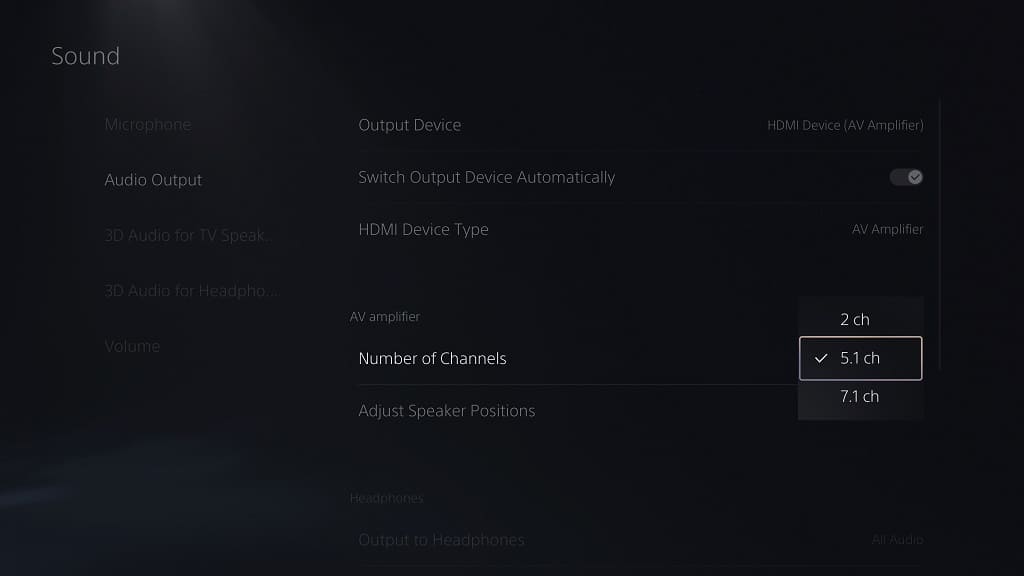
  • On the right side of the same screen, you may need to use the Output Device, HDMI Device Type, Number of Channels, Adjust Speaker Positions and/or Audio Format (Priority) Settings depending on your surround sound setup.

3. If you are sure that you have surround sound set up correctly, then you should make sure that the DIsney Plus video you are trying to watch actually supports that particular format.

To see how you can identify which movie or series utilizes 5.1 surround sound output, we recommend follow these steps.

4. You can also try exiting out of the video and then start to play it again as it may be helpful, especially if you made any changes to the sound output settings with the video playing or paused.

In order to do so, press the circle button on the controller to go back to the previous screen. You can then select the same video again to play it.

5. Closing and then re-opening the video streaming application may also help as well.

To do so, you need to take the following steps:

  • Press and hold the PS button to move to the home screen of your PS5.
  • From there, move the cursor over to the Disney+ icon.
  • With the icon highlighted, press the Options button on the controller. This button has the three horizontal lines on top.
  • In the pop-up menu, you need to select Close App.
  • Once the streaming application has closed, open it again and then try to play the same video to see if you are able to get surround sound output.