Should you use the HDMI cable that comes with PS5?

The PlayStation 5 and PlayStation 5 Digitial Edition console comes with a HDMI cable included inside their packaging box. So, should you use this included cable or can you use something else? You can find out in this article from Seeking Tech.

About HDMI 2.1

A HDMI 2.1 cable is included with each PS5 system. This cable is capable of delivering transfer speeds of up to 48 Gbps. Depending on your television set or monitor, you may be able to use the Variable Refresh Rate and 120 FPS features without any compromises or limitations.

If you use a HDMI cable that has a lower specification instead, then you may not be able to take full advantage of VRR or playing games at 120 frames per second due to the slower bandwidth. For the uninformed, Variable Refresh Rate will make games that have inconsistent frame rate look smoother as well as remove any potential screen tearing.

It is also important to note that the HDMI 2.1 cable is also backwards compatible with older HDMI ports. For example, you can use a HDMI 2.1 cable to connect your PlayStation 5 to a HDMI 2.0 port of your TV; however, the bandwidth will be limited to the HDMI 2.0 specification.

How to find identify the PS5 HDMI cable

If you have a bunch of HDMI cables lying around but don’t know which one came with your PlayStation 5, then you need to look for the one with box-shaped connectors at the end:
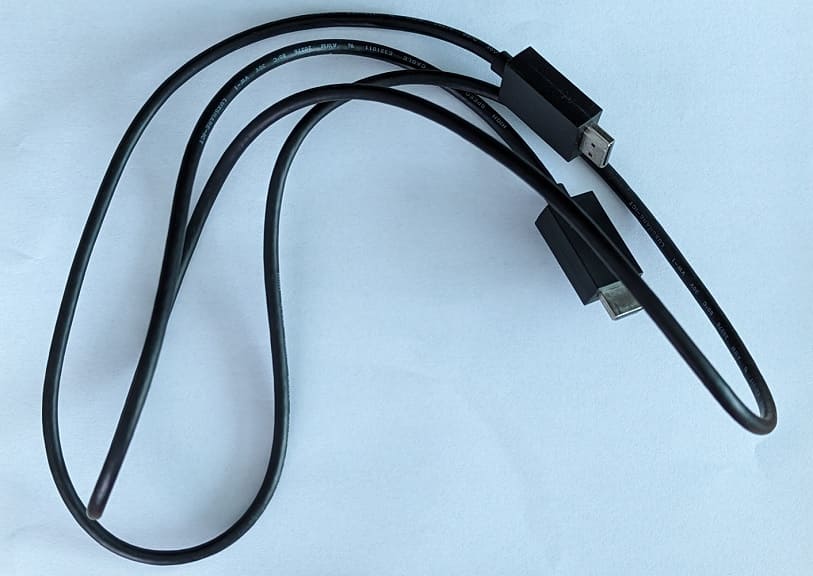
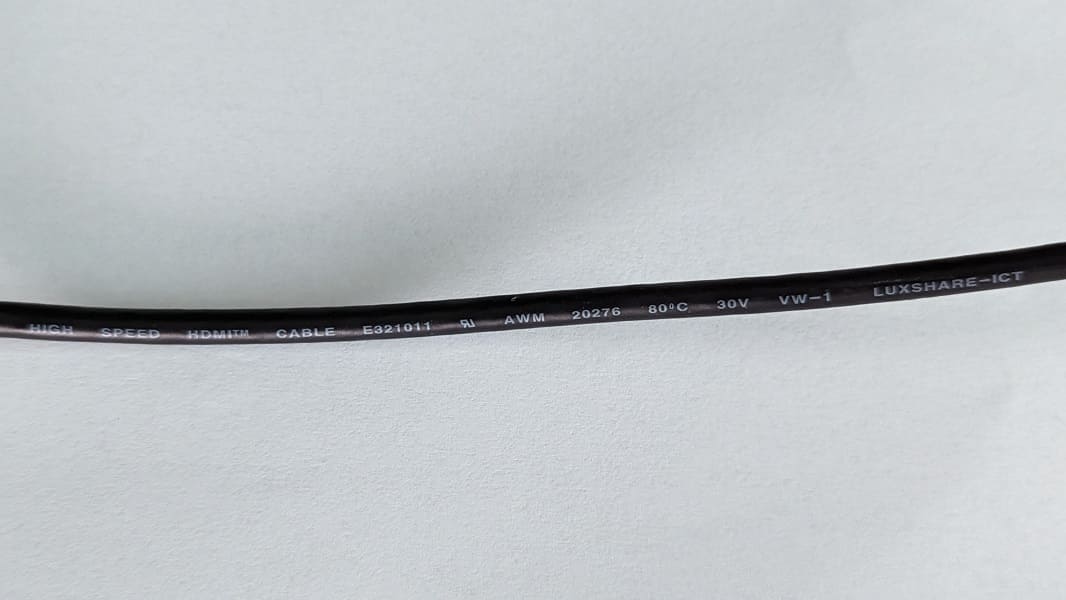
Our PS5 HDMI cable also came with the following printed on:

  • High Speed HDMI Cable
  • E321011
  • AWM
  • 20276
  • 80°C
  • 30V
  • VW-1
  • LUXSHARE-ICT

Should you use the included HDMI cable for PS5?

Unless you already have an extra HDMI 2.1 cable lying around, we highly recommend using the HDMI cable that came with your PlayStation 5 or PlayStation 5 Digital Edition console.

With the 48 Gbps transfer speed, this video cable will allow your console to take full advantage of the Variable Refresh Rate and 120 Hz refresh rate features of your TV or monitor without any compromises.

The cable is also backwards compatible with older HDMI ports. Therefore, you can still use it even if your screen does not support VRR or being able to display games at up to 120 frames per second.

The HDMI 2.1 cable that comes with the PS5 is around 5.5 feet long. If you find that this length is too short to connect your console to your screen based on your current gaming space setup, then you can check out this guide to find longer alternatives.

How to fix ‘can’t use the USB extended storage drive’ error on PS5

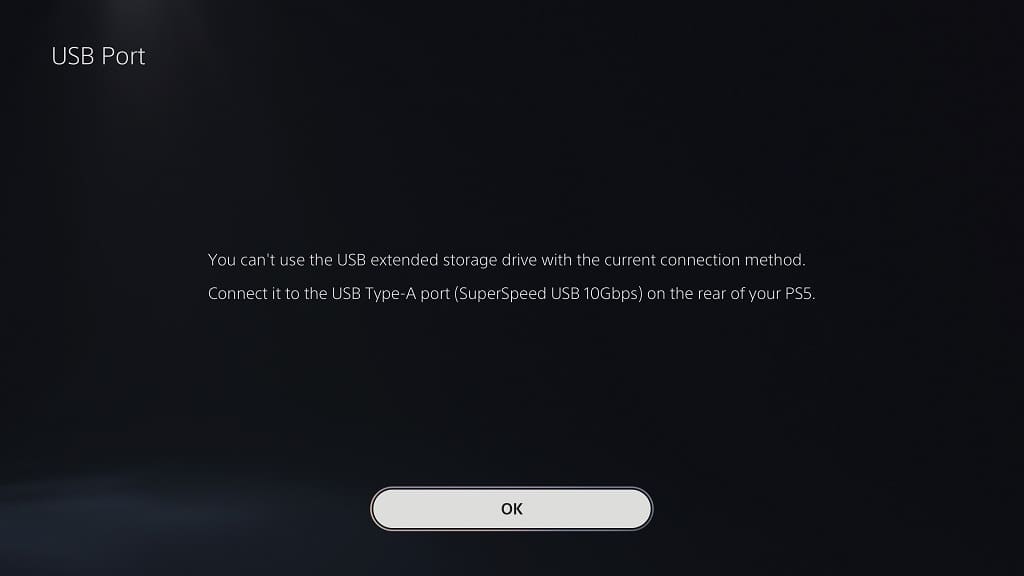
When you try to connect an external USB drive to your PlayStation 5, you may encounter the following error:

  • “You can’t use the USB extended storage drive with the current connection method. Connect it to the USB Type-A port (SuperSpeed USB 10 Gbps).”

To see how you can fix this issue, you can take a look at this troubleshooting article from Seeking Tech.

Why you are seeing this error

This error message will appear when you try to connect the USB Extended Storage Drive to the front-side USB port. The one on the front of both the PlayStation 5 and PlayStation 5 Digital Edition is USB 2.0, which has a maximum limit of 480 Mbit/s.

While this bandwidth is good enough for recharging your DualSense controller and transferring small files to a thumb drive, it is not fast enough to move bigger game data files or directly play PS4 games from the external drive.

How to fix the ‘USB extended storage drive with the current connection method’ error

In order to fix this external storage drive problem, you need to take the following steps:

1. If your PlayStation 5 or PlayStation 5 Digital Edition console is turned on, then you need to turn it off.

You can do so by pressing the PS logo button on the controller, selecting the Power option located at the bottom menu and then selecting the Turn Off PS5 option.

By turning off the system, you will prevent any potential damage to your USB storage drive. If you try to unplug the external drive while the PS5 is still powered on, then you could cause data corruption and even hardware failure.

2. With the console shut down, wait until your external drive stops spinning. If the drive has a power button, then you should make sure that you turn it off.

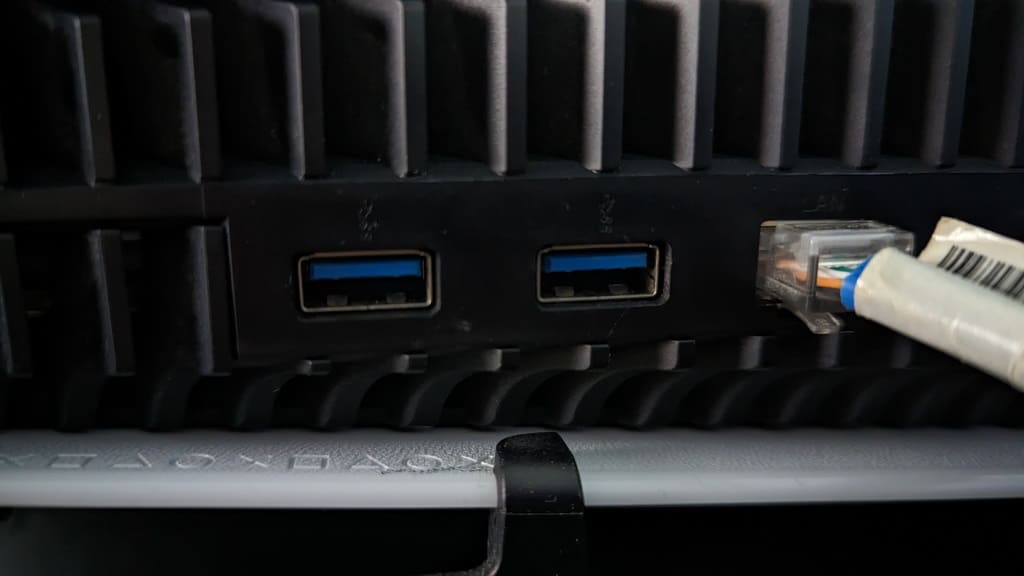
3. Next, you need to plug in the USB drive to any of the two USB ports located on the back of your console.

If you have a hard time finding them, they should have the two blue connectors.

These two ports are USB 3.0, which means that they can support transfer speeds of up to 10Gbps.

4. With the external drive connected, you can then turn back on your PS5.

5. If your USB drive uses an external power source, then you may need to manually turn it on as well.

6. The PlayStation 5 or PlayStation 5 Digital Edition should now be able to detect the USB Storage Drive.

How to fix WD MyPassport PS5 issues

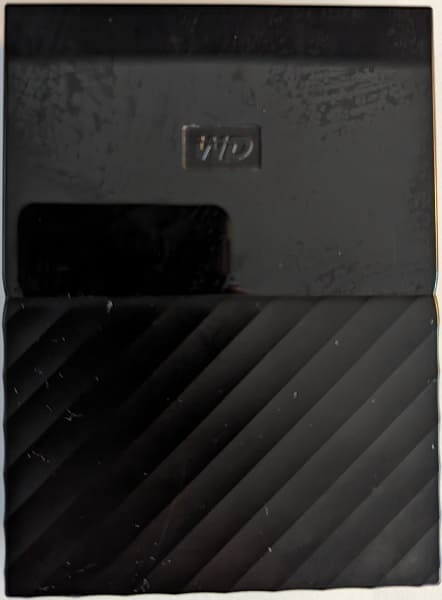
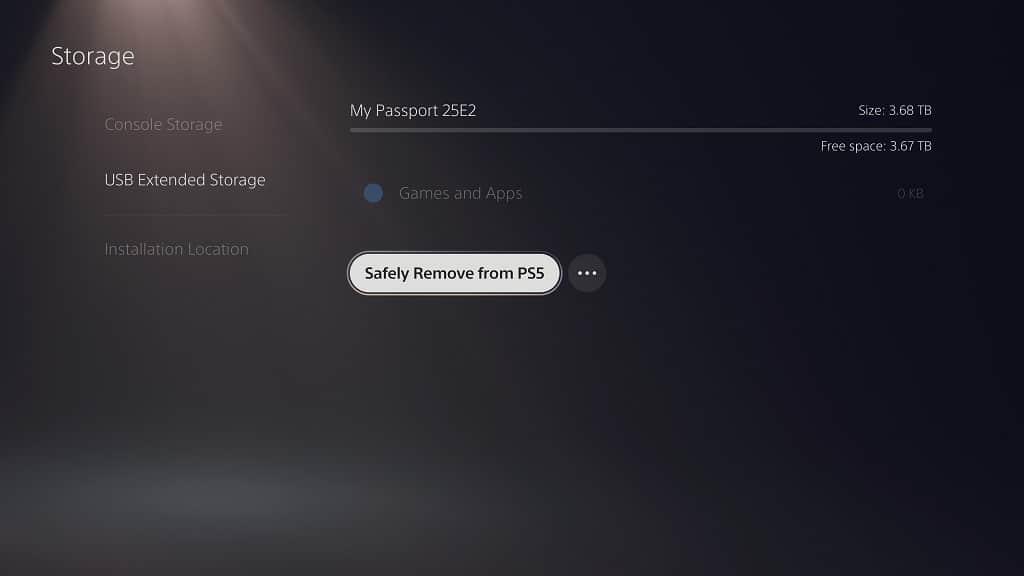
When trying to use the Western Digital MyPassport portable external hard drive on your PlayStation 5 or PlayStation 5 Digital Edition console, you may notice some issues. These may include the system not being able to detect the drive, your PS5 crashing, games freezing and more.

So, if the MyPassport does not appear to be working correctly on your PS5, then you can take a look at this troubleshooting article from Seeking Tech.

Is MyPassport compatible with PS5?

The WD MyPassport should be compatible with the PlayStation 5.

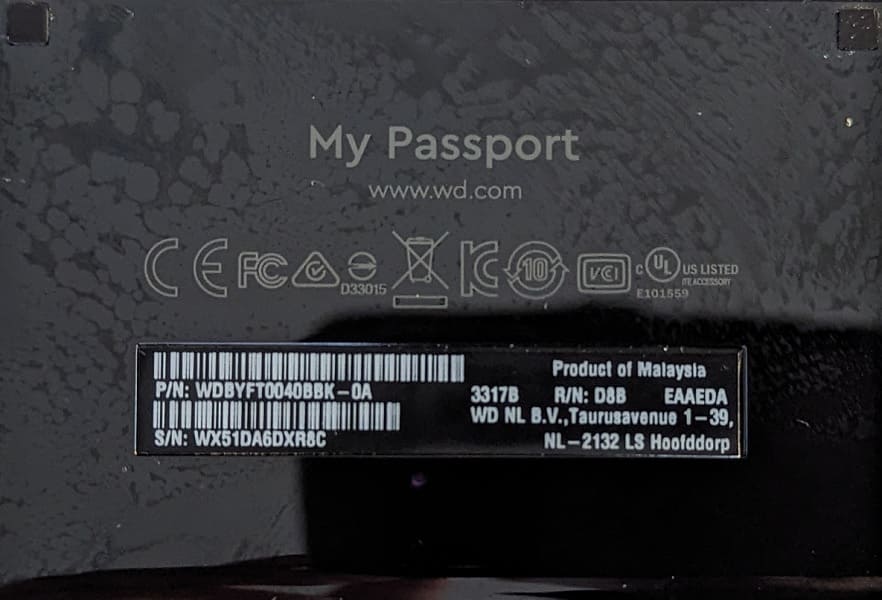
The older 2016 version, which we used, features a 5400 RPM speed.

On the other hand, the newer 2019 version is faster at 7200 RPM; as a result, you should get better load times.

Both of these should work as USB Extended Storage Drive for the PlayStation 5 and PlayStation 5 Digital Edition console.

How to fix MyPassport PS5 crashing issues

While these drives are compatible, they may cause your game or console to crash. To fix these stability problems, you can try doing the following:

1. If the external drive is causing the games to crash, then you can try turning off PlayStation 5.

If your console is completely frozen, then you can try pressing and holding the power button on the system until it shuts off. If that doesn’t work, then you can try unplugging the console from the power outlet.

2. Once the console has turned off, we recommend unplugging the MyPassport.

3. Next, turn back out your PS5. It may need to rebuild its database before it can boot up normally.

4. Once your console has boot back up, plug in your hard drive to see if it can run without any issue.

5. If the external drive works, then we recommend that you properly eject it in the future before turning off your PlayStation 5 or PlayStation 5 Digital Edition to prevent any potential problems.

6. If the PS4 game you are playing is still crashing when being played directly from the MyPassport, then you can try transferring it to the Console Storage to see if it can run more stable from there.

How to fix MyPassport PS5 detection issues

If your PS5 isn’t properly detecting your Western Digital hard drive, then you can try doing the following:

1. If you have been putting your console in rest mode, then you can try turning it off completely. Afterwards, turn the system back on to see if the USB hard drive can be detected.

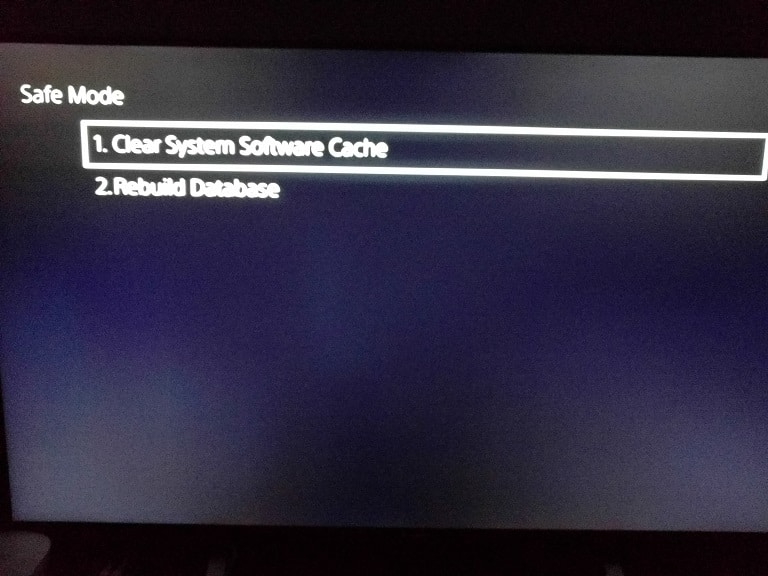
2. You can also try rebuilding the database of your PS5. In order to do so, you need to take the following steps:

  • Turn off your console.
  • Press and hold the power button on the PS5 until you hear a second beep.
  • Plug in your game controller and then press the PS button to go to the Safe Mode menu.
  • From there, select Clear Cache and Rebuild Database.
  • Finally, select Rebuild Database.

3. Reformatting the MyPassport on another device may help as well.

In order to do so, you can use a PlayStation 4 or PlayStation 4 Pro as these will format the drives to exFAT. Of course, you can also use a PC as well for the formatting.

4. If you decide to connect your hard drive to the PC, you can try updating the firmware of the MyPassport to see if doing so will improve its compatibility with the PlayStation 5.

5. Make sure that you have the latest system software installed for your PS5 as well.

6. If the external HDD also does not work on your PC or PS4, then there may be a general hardware issue. In this case, you can try to get it repaired or get a replacement.

How to find a list of PS5 games with accessibility options

If you have a PlayStation 5 or PlayStation 5 Digital Edition console, then you will be able to find a list of games that offer accessibility options. To see how you can locate these titles, you can take a look at this tutorial from Seeking Tech.

1. To start off, you need to head to the home screen of your gaming system if you aren’t there already.

2. From the home screen, you should then head over to the PlayStation Store App.

3. Once you have opened the shopping application, you should be in the Latest tab. Here, you need to press the R1 button to switch over to the Collections tab.

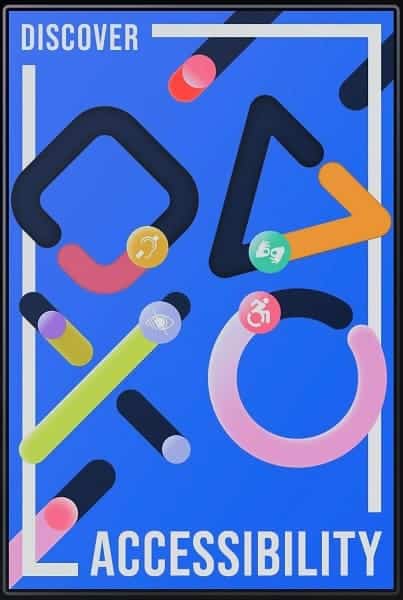
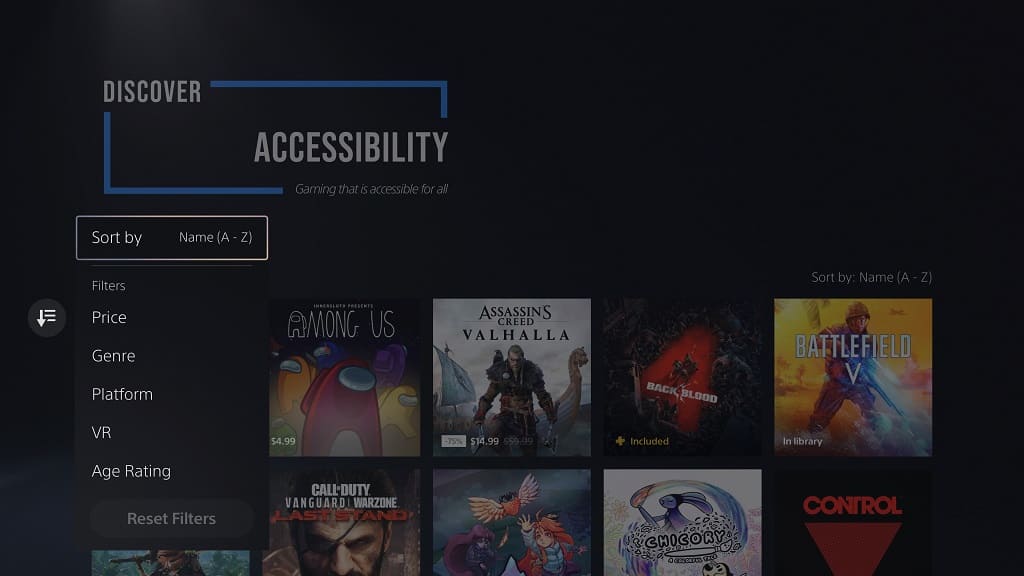
4. Once you get to the Collections tab, you should be able to see the Discover – Accessibility option appear at the top in the Featured Collections section. Make sure you select it.

5. You should now be in the Discover – Accessibility menu, which should show the following description:

  • “Gaming that is accessible to all.”

6. By default, the listing appears to be randomly ordered. In order to sort this list, you can select the Sort and Filter option that appears on the left edge of the screen.

7. You can then select the “Sort by” option from the pop-up menu.

8. Next, you can select to sort the listing based alphabetical order or other options.

9. You can also filter out the listing from the Sort and Filter menu.

10. To see the accessibility options for a specific game, select it from the Discover – Accessibility menu.

11. On the product page of the video game, you then need to press the Triangle button.

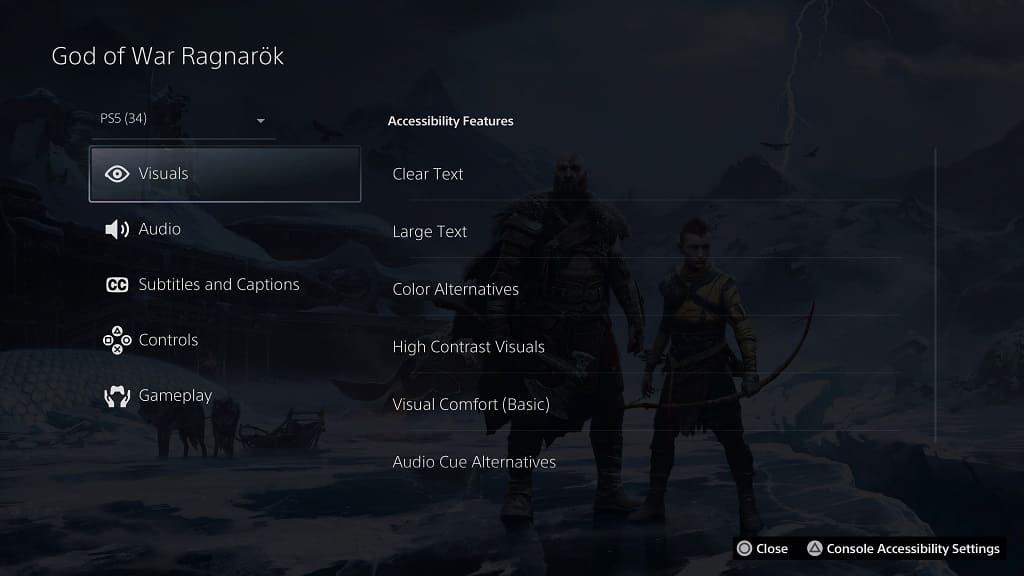
12. In the Accessibility Features menu of the game, you may see a drop-down option on the top left side. You can use it to check the accessibility options for the PS4 or PS5 version of the game. By default, you will be viewing the options available on the PlayStation 5 release.

13. You can use the rest of the Accessibility Features menu to look at the available options for the game.

With God of War Ragnarök, for example, you should see the following:

Visuals:

  • Clear Text
  • Large Text
  • Color Alternatives
  • High Contrast Visuals
  • Visual Comfort (Basic)
  • Audio Cue Alternatives
  • Directional Audio Indicators

Audio:

  • Volume Controls
  • Mono Audio
  • 3D Audio
  • Screen Reader (Basic)
  • Visual Cue Alternatives

Subtitles and Captions:

  • Subtitles (Basic)
  • Clear Subtitles
  • Large Subtitles
  • Captions (Basic)
  • Clear Captions
  • Large Captions

Controls:

  • Controller Remapping (Basic)
  • Adjustable Stick Sensitivity (Basic)
  • Adjustable Stick Inversion (Basic)
  • Playable with Button Holds
  • Playable without Rapid Button Presses
  • Playable without Motion Controls
  • Playable without Touch Controls
  • Playable without Controller Vibration
  • Playable without Adaptive Trigger Effect

Gameplay:

  • Adjustable Difficulty (Basic)
  • Game Speed (Basic)
  • Control Reminders
  • Tutorial Reminders
  • Practice Mode
  • Game Pausing
  • Manual Saving

How to record videos by using voice commands on PS5

Thanks to a new update, you are now able to use voice commands in order to tell your PlayStation 5 or PlayStation 5 Digital Edition console to record gameplay. To find out how you can use this new feature, you can take a look at this tutorial from Seeking Tech.

1. If you haven’t already, make sure your console has the latest system software installed as the ability to use your voice to start a gameplay recording was added through a firmware update.

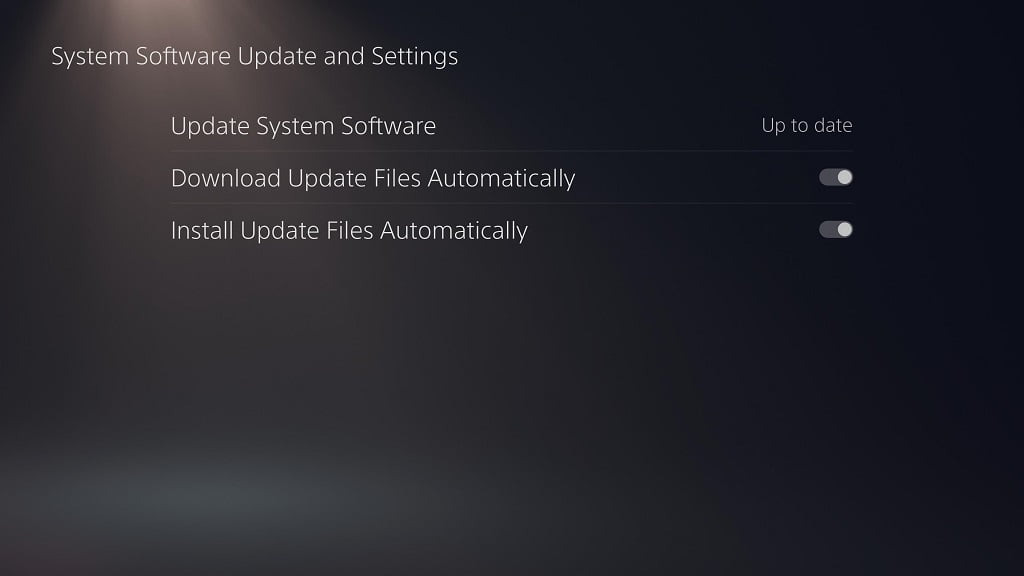
To manually download and install the new system software, you can go to your PS5’s Settings menu and then select System > System Software > System Software Update and Settings > Update System Software > Update Using the Internet.

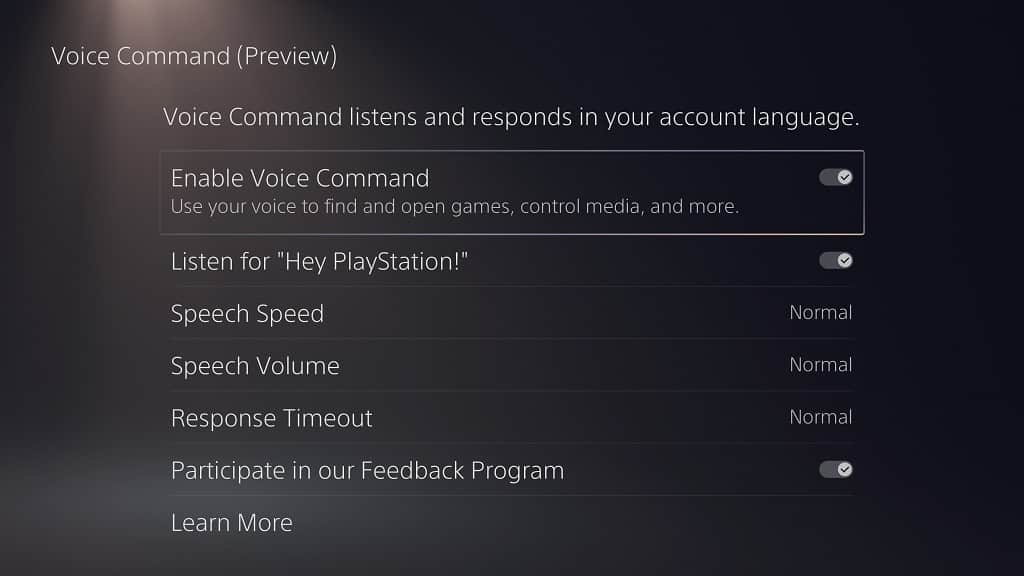
2. Next, you need to make sure that you have Voice Command enabled. This feature is currently available as a Preview in the U.S. and U.K.

If you are from those regions, then you need to open the Settings menu on your console and then select Voice Command > Enable Voice Command. Afterwards, turn on the Listen for Hey PlayStation feature from the same Voice Command menu.

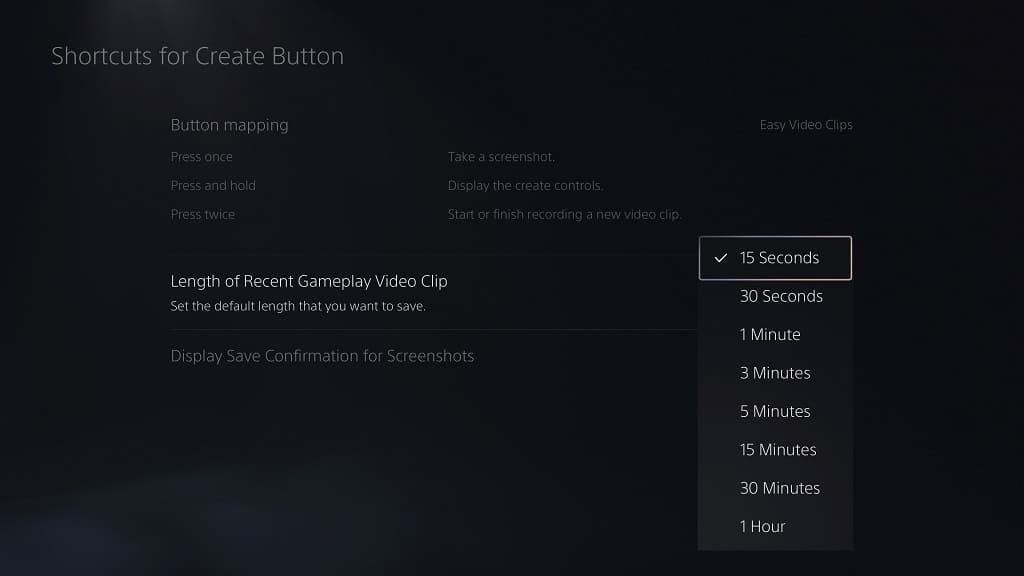
3. If you want to specific the default length of the recorded videos, then you need to head to Settings > Captures and Broadcasts > Captures > Shortcuts for Create Button > Length of Recent Gameplay Clip. You can then pick between the following length options:

  • 15 seconds
  • 30 seconds
  • 1 minute
  • 3 minutes
  • 5 minutes
  • 15 minutes
  • 30 minutes
  • 1 hour


4. Of course, you should also make sure that you don’t have the microphone on your DualSense or headset muted. Otherwise, the PS5 won’t be able to listen and act out your voice commands.

5. If you want to capture your past gameplay, then you need to say the following:

“Hey PlayStation, capture that.”

The console should then capture your previous gameplay based on the time you set from the aforementioned Shortcuts for Create Button menu. For example, if you set the Length of Recent Gameplay Clip to 1 hour, then saying, “Hey PlayStation, capture that,” will tell the PS5 to capture the last hour of gameplay.

6. You can also manually start a recording session of your current gameplay. In order to do so, you need to say Hey PlayStation, start recording.”

To stop an active recording, you need to say, “Hey PlayStation, stop recording.”

How to start or request share screen on PS5

The new firmware update for the PlayStation 5 and PlayStation 5 Digital Edition console makes it easier to share your screen with a friend and watch a shared screen from your friend. To see how you can set up the Share Screen feature, you can take a look at this tutorial from Seeking Tech.

1. To start off, we recommend updating the system software of your PS5 if you haven’t done so already as it streamlines the share screen access.

To manually update the console, you need to go to the Settings menu from the home screen. Afterwards, you need to select System > System Software > System Software Update and Settings > Update System Software > Update Using the Internet.

If there is a new firmware available, then the console will download and install it. The system will then restart on its own in order to complete the installation process.

2. Once you have the latest firmware installed, make sure that you added your friend’s PlayStation Network username to your Friends list if you haven’t done so already.

3. You should also make sure that your friend is currently online. You and/or your friend may also need to change some privacy settings on the PS5 in order to get the Share Screen feature to work.

4. Next, you need to press the PS logo button on your DualSense controller in order to bring up the Control Center menu.

5. From the Control Center menu, select Game Base located at the bottom. This setting should be in between the NotiCom and Music options.

6. In the Game Base menu, select a friend.

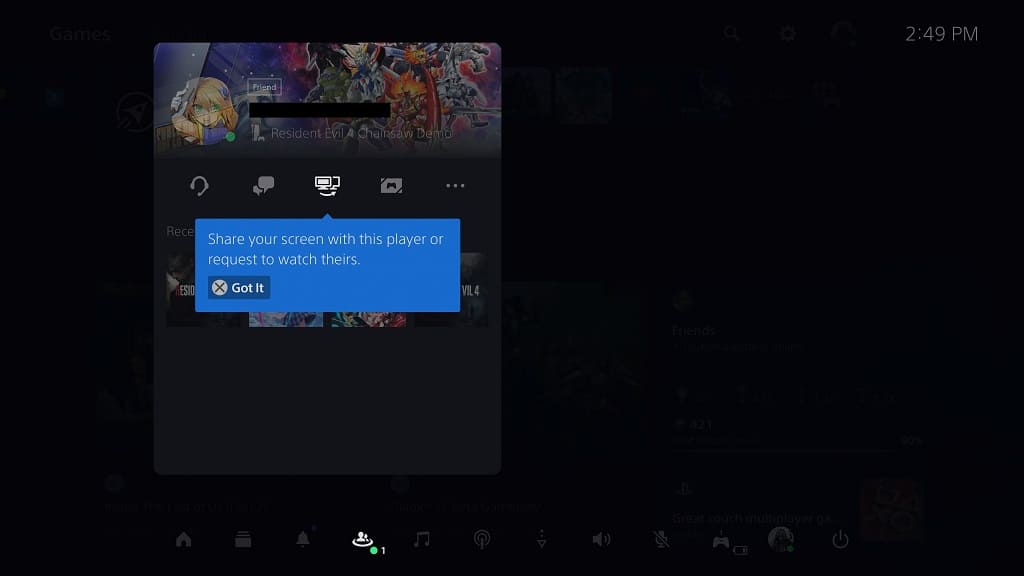
7. On your friend’s profile screen, you should find the Share Screen option located in the middle.

8. In the pop-up menu, you can select the Share Your Screen option, which has the following description:

  • “Share your gameplay in a party. Share Screen isn’t supported on PS4.”

This option will let your friend watch what you are currently playing on your PlayStation 5.

9. In the same pop-up menu, you can also select Request Share Screen, which has the following description:

  • “Request to watch the player’s gameplay.”

This option will let you watch what your friend is currently playing on their PS5 console.

How to set up multiplayer presets on PS5

Thanks to a new firmware update, you are able to set up presets for online multiplayer sessions on your PlayStation 5 or PlayStation 5 Digital Edition console. As a result, the game you are playing may automatically apply your preferences when it comes to who you let join or who you invite in online lobbies.

To see how you can set up these new presets, you can take a look at this tutorial from Seeking Tech.

1. As we stated above, the ability to use online multiplayer presets was added in a recent firmware update. So, if you haven’t done so already, make sure you have the latest system software installed.

In order to check, you need to head to the home menu of your PS5 and then go to Settings from there. Afterwards, you should select System > System Software > System Software Update and Settings > Update System Software > Update Using the Internet.

2. After making sure that your PlayStation 5 or PlayStation 5 Digital Edition console has been updated, you need to head back to the front page of Settings. From there, you need to select Settings > Saved Data and Game/App Settings > Game Presets.

3. On the right side of the Game Presets menu, you should be able to find and select Online Multiplayer Sessions, which has the following description:

“Select which players can join and invite other players to your online multiplayer sessions.”

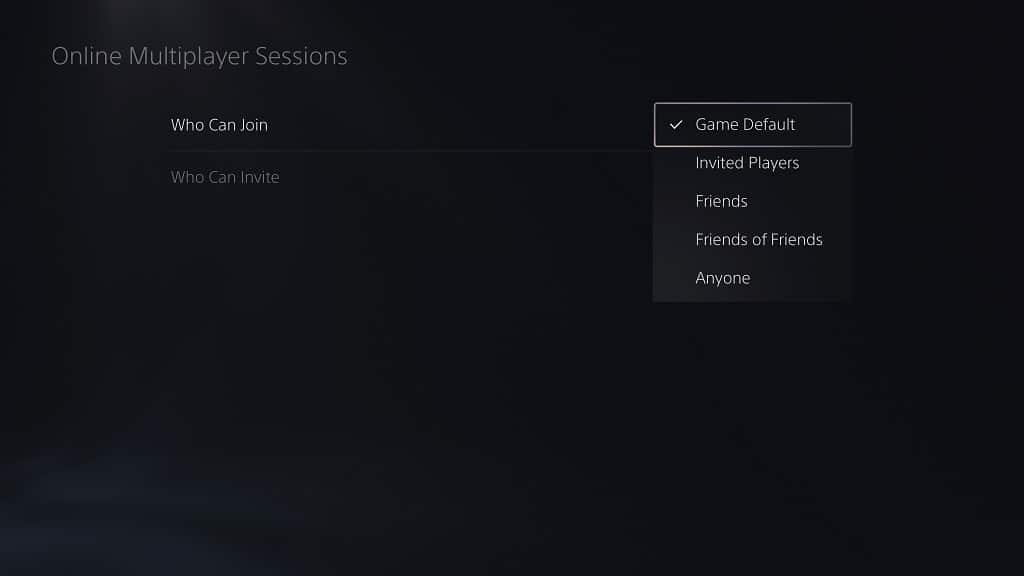
4. In the Online Multiplayer Sessions menu, you can select Who Can Join to bring up a small window with the following options:

  • Game Default
  • Invited Players
  • Friends
  • Friend of Friends
  • Anyone

The Game Default option means that nothing will be changed as your joining preferences will be based on the game’s matchmaking settings.

The “Friends” terminology mentioned above refers to PlayStation Network users that have been added to Friends list. You can find this list by pressing the PS button on the controller and then select Game Base from the bottom menu.

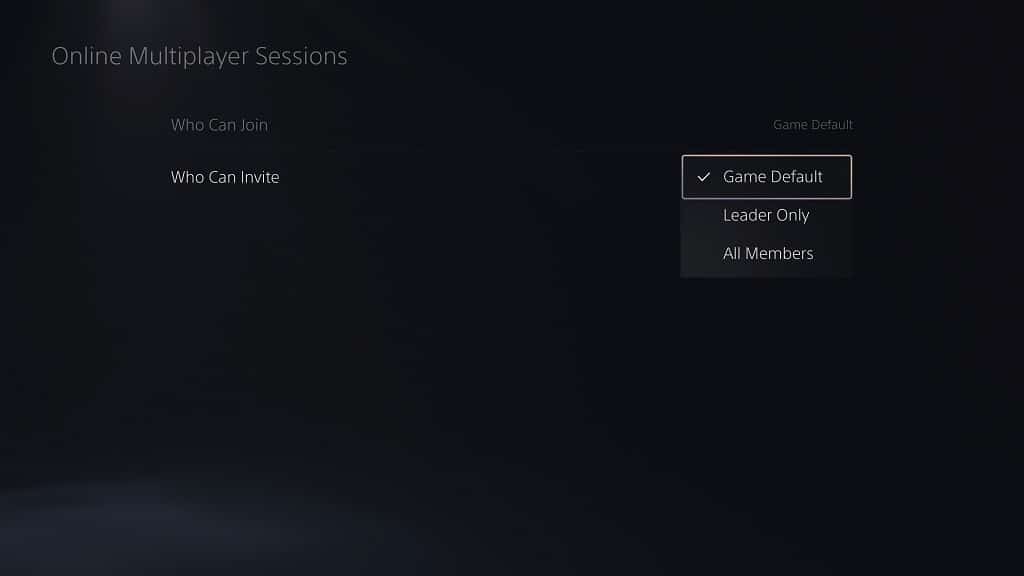
5. The Who Can Invite setting offers the following options:

  • Game Default
  • Leader Only
  • All Members

The Game Default option means that the PS5 will let the game decide who can do the inviting in an online multiplayer session.

How to update the DualSense wirelessly on PS5

Thanks to a recent firmware release, you can now update the DualSense controller without having to connect it to your PlayStation 5 or PlayStation 5 Digital Edition console by using a USB cable. To find out you can do so, you can take a look at this tutorial from Seeking Tech.

The ability to update the DualSense controller wirelessly was added through a recent system software for the PS5. Therefore, you should make sure that your console is updated if you haven’t done so already. You should get an update prompt when you turn on the gaming system and connect it to the PlayStation Network.

You can also manually update the console by taking the following steps:

1. To begin, you need to head over to the home menu of the PlayStation 5 or PlayStation 5 Digital Edition, which can be done quickly by pressing and holding the PS button of the DualSense controller for around 1 second. You can also press and then quickly release the same PS button; afterwards, select the home icon from the Control Center quick menu.

2. Next, you need to head over to the Settings menu, which you can do by selecting the gear cog icon on the top right side from the home menu.

3. Once you get to Settings, you need to select System > System Software > System Software Update and Settings > Update System Software > Update Using Internet.

4. Once your PS5 has been updated, it should automatically reboot. After the system has restarted, you can then turn on the DualSense controller.

5. If there is a new firmware available to be downloaded or installed for the gamepad, then you should see a message appear on the screen.

If you don’t see the notification, then you need to take the following steps:

1. Go back to the home screen of your PlayStation 5 or PlayStation 5 Digital Edition if you aren’t there already.

2. You then need to select the gear icon to head into Settings.

3. From the Settings menu, select Accessories.

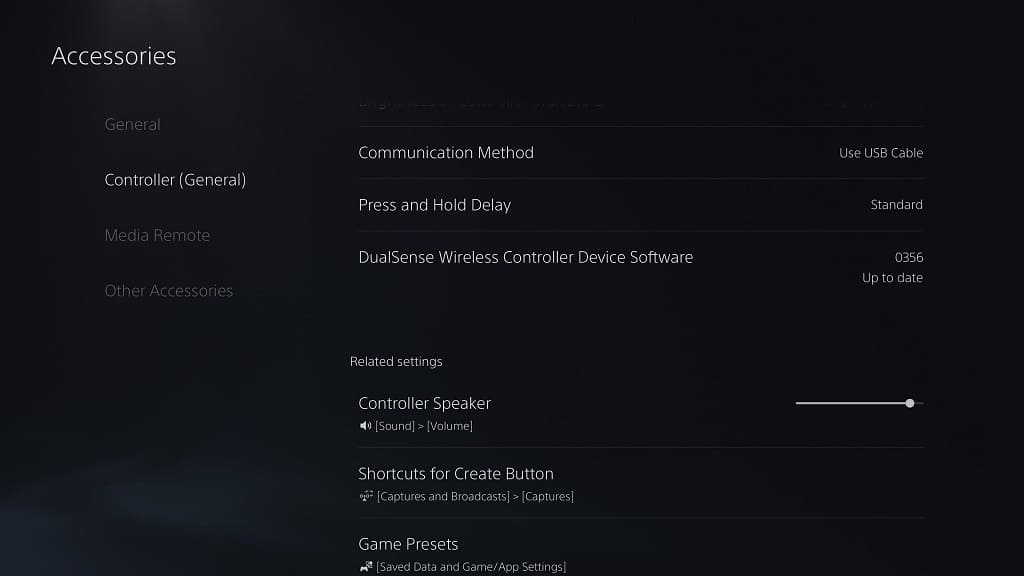
4. After getting to the Accessories menu, you first need to select Controller (General).

5. On the right side of the same screen, scroll down until you see “DualSense Wireless Controller Software” option.

6. If this setting shows that the gamepad is “Up to Date” then it has already been updated to the latest firmware.

Otherwise, you need to select “DualSense Wireless Controller Software” to manually start the update process.

7. Do not turn off the system while the update is occurring. The process should only take seconds to be completed.

How to fix the ‘can’t be bought’ issue when trying to redeem a PS Plus monthly game

When trying to add a video game from the Monthly Games Catalog, you may run into a purchase error code stating that it can’t be bought as you already have it. To see how you can potentially fix this issue, you can take a look at this troubleshooting article from Seeking Tech.

Why you are getting the error code

The likely cause as to why you got this error code is that you may have previously downloaded the same game from the Game or Classics Catalogs.

The Monthly Games Catalog is different than the Game Catalog and Classics Catalog when it comes to licensing.

For the games you added to your library through the Monthly Games Catalog, you will be able to keep playing them as long as you remain a member of PlayStation Plus Essential, PlayStation Plus Extra, PlayStation Plus Deluxe or PlayStation Plus Premium.

For the Game Catalog, you must remain a member of PlayStation Plus Extra, PlayStation Plus Deluxe or PlayStation Plus Premium. For the Classics Catalog, you need to be a member of PlayStation Plus Deluxe or PlayStation Plus Premium. Furthermore, you will also lose access to the game if it gets removed from the Game and Classics Catalogs.

The licensing system for PlayStation Plus is currently buggy as you can’t redeem the same game from the Monthly Games Catalog that you previously redeemed from the Game and Classics Catalogs.

To learn more about the different collections for the PS Plus subscription service, you can check out this comparison post.

How to fix the “can’t be bought” problem

The only way you can fix this specific problem is to get a customer service representative to delete your license for the game. In order to contact the PlayStation Support team, you can visit this link.

Once the license has been removed, you will need to restore your game licenses on your game console.

For the PlayStation 4 or PlayStation 4 Pro, you need to head over to Settings > Account Management > Restore Licenses.

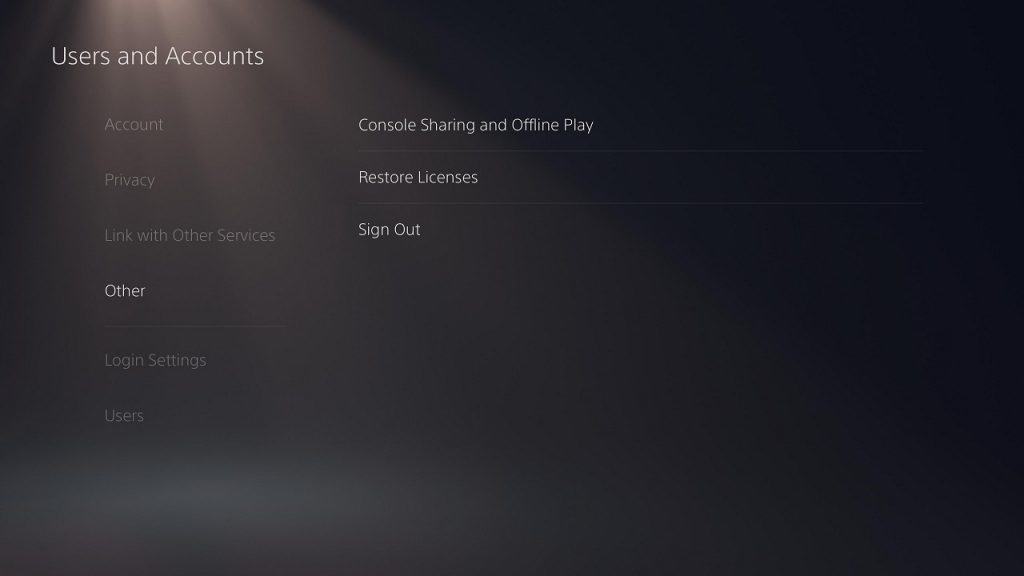
For the PlayStation 5 or PlayStation 5 Digital Edition console, you need to go to Settings > Users and Accounts > Other > Restore Licenses > Restore.

Once the restoration process has been completed, try to add the PlayStation Plus Monthly Game to your library again to see if the transaction will go through without any issues this time around.

If you are still having problems, then you will need to contact the PlayStation Support team to get additional help.

How to fix ‘can’t connect to server to verify your license’ error on PS5

When trying to play a videogame on your PlayStation 5 or PlayStation 5 Digital Edition console, you may run into the following error message:

  • “Can’t use this content. Can’t connect to server to verify your license. Wait a while and then try again.”

You may also see the WS-116521-6 error code pop up on screen when launch a game. To see how you can potentially fix these game license issues, you can check out this troubleshooting article from Seeking Tech.

1. For the first step, you can try enabling the Console Sharing and Offline Play.

In order to do so, open the Settings menu on your PS5 and then select Users and Accounts > Other > Console Sharing and Offline Play. Afterwards, make sure you select Enable.

You may have to enable and disable Console Sharing and Offline Play a few times in order to get the game to launch without any licensing issues.

2. You can also try refreshing the internet connection on your PlayStation 5.

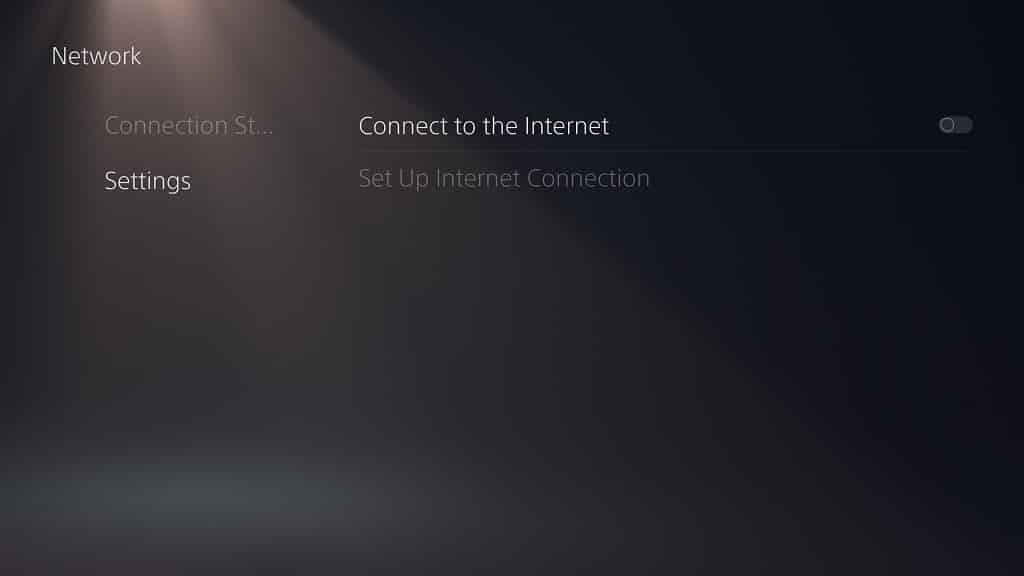
To do so, head over to Settings > Network > Settings. From there, you can disable and then re-enable the “Connect to the Internet” feature. You may have to do this several time to get the game license verification to work.

3. Furthermore, you can try forgetting your internet connection and then set it back up again.

To do so, go to Settings > Network > Settings > Set Up Internet Connection. In this menu, remove all of the registered networks by pressing the Options button on your controller and then selecting Forget in the pop-up menu. Repeat this process until the Registered Networks section is completely empty.

Afterwards, setup the internet connection again by selecting an option in the Networks Found section.

Once you set up the new network connection, try to open a game to see if you are now able to do so without running into any problems.

4. Restoring the game licenses of your PlayStation Network account may also help fix the “can’t connect to server to verify your license” and WS-116521-6 errors.

In order to do so, you need to head into Settings > Users and Accounts > Other > Restore Licenses. In the new screen, you need to select the Restore option.

5. There is a possibility that the PlayStation Network servers could be suffering from some issues, including outages and maintenance. To check the current status of PSN, you can visit the official PlayStation Network Service Status website with this link.

If there appear to be some issues that is related to servers, then we recommend that you wait until PSN is functioning normally again to see if you are still getting any licensing problems.

6. If none of the aforementioned potential solutions have worked, then we suggest contacting the PlayStation Support team to get direct help.