What to do if you can’t watch Disney Plus videos in HDR on PS5

You are able to watch Disney Plus videos in HDR format on your PlayStation 5 and PlayStation 5 Digital Edition console. If you aren’t getting HDR, then you can take a look at this troubleshooting article from Seeking Tech.

1. To start off, it should be noted that the Disney Plus PS5 App supports HDR10 but not Dolby Vision. This applies to all games and applications on the game console.

So, if you are able to change the HDR format of your monitor or television set, then make sure you switch it over to HDR10.

2. Next, you should make sure that you have HDR enabled on your PlayStation 5.

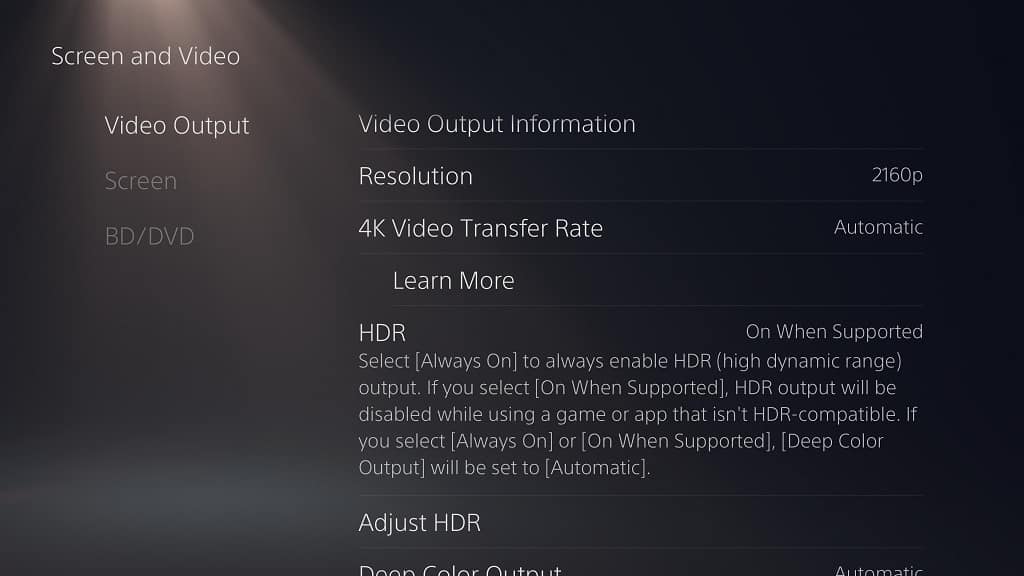
In order to do so, you need to head over to the Settings menu of the console and then select Screen and Video > Video Output. From there, make sure that the HDR setting is set to either Always On or On When Supported.
3. On the Disney Plus App, you should also make sure that the video you are watching actually supports HDR.

In order to do so, you need to take the following steps:

  • Select the video in the Disney Plus PS5 application. Make sure you don’t select it from the Continue Watching section as you will be sent directly to the video instead of the product page.
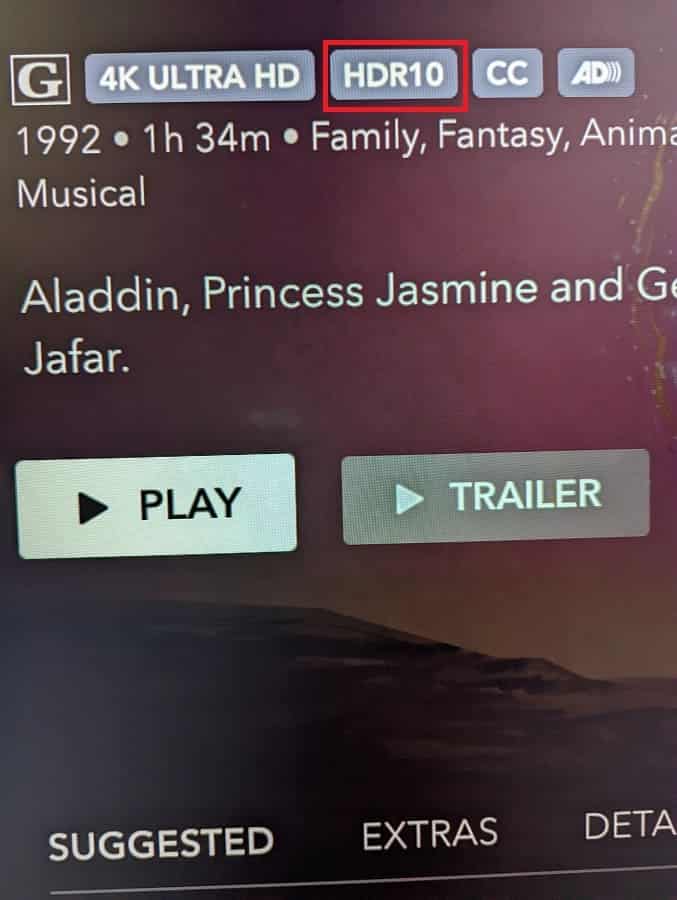
  • If you see HDR10, then it indicates that the video is able to play in that format on the PlayStation 5.
To see how you can find the full list of HDR movies and series on this service, you can check out this guide.

4. If you made any adjustments to HDR on your game console or screen, then you can try exiting the Disney Plus video and then opening it again to see if doing so is able to enable HDR10.

5. You can also try restarting the video streaming application by doing the following:

  • Press and hold the PS button to open the home screen of your PlayStation 5.
  • If you aren’t in the Media tab of the home screen, then you need to press R1 to get there.
  • From the Media section, move the cursor over to the Disney+ icon and then press the Options button on your controller.
  • If done correctly, a pop-up window will show up. You need to select the Close App option from there.
  • Once the Disney Plus App has closed, open it again and try playing the same video to see if you are able to get it to display in HDR10.

How to find the latest releases on the PlayStation Store of PS5 

The PlayStation 5 gets a constant stream of new releases, especially since it is backwards compatible with PlayStation 4 games. Finding the latest titles can be a little difficult, especially when it comes to smaller releases, on the PlayStation Store App of the PS5.  

So, if you have a hard time locating the newest releases, then you can take a look at this tutorial from Seeking Tech. 

To begin, you need to head over to the PlayStation Store App of your PlayStation 5 or PlayStation 5 Digital Edition console. You can do so by selecting the shopping bag icon on the home screen menu. Once you get to the shopping application, you have two ways to finding the latest titles. 

Method #1 

For the first method, you need to take the following steps: 

1. To start off, make sure you are in the Latest tab in the PlayStation Store. You can switch tabs by using the L1 and R1 buttons on the controller. 

2. From the Latest tab, scroll down until you see the New Games row. This row shows some of the highlights when it comes to the latest releases. However, it does not show the whole list. 

3. Next, you need to scroll all the way to the right of the New Games row and then select View All. 

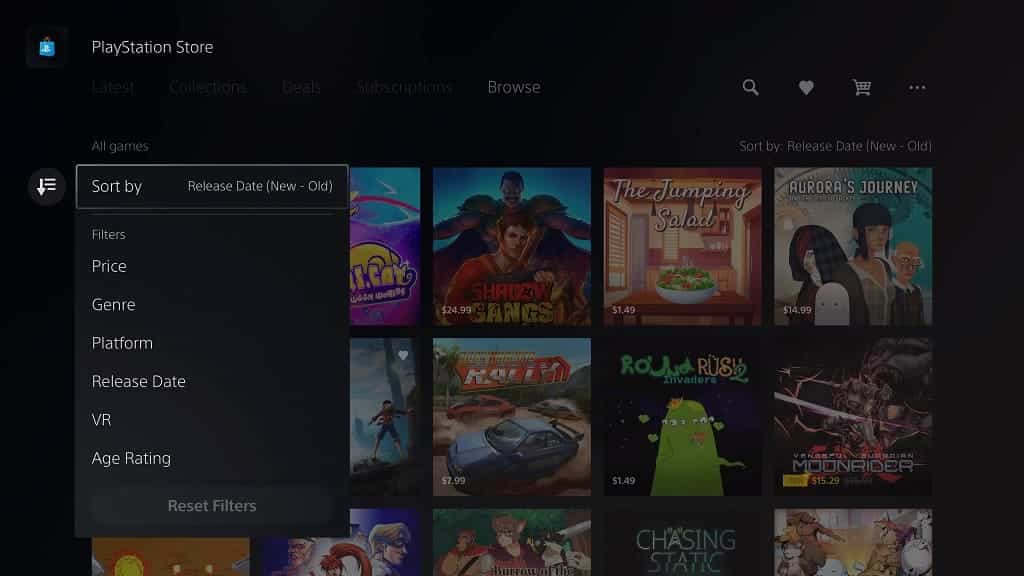
4. In the New Games menu, select the Sort and Filter option located on the left side.  

5. You then need to select the Sort By option in the small pop-up menu. 

6. Finally, select Release Date (New – Old) in order to view the newest game that were made available on the PlayStation Store of the PS5. 

Method #2 

You can also view the latest releases on the store by doing the following: 

1. Inside of the PlayStation Store, switch over to the Browse tab. It is the right-most option; so, you need to press the R1 button on the controller until you get there. 

2. This tab should show all of the games that are on the PlayStation Store of PS5. Here, you need to scroll down and to the left in order to select the Sort and Filter option. 

3. In the pop-up menu, you then need to select the Sort By option. 

4. Lastly, you need to select Release Date (New – Old).  

How to find remastered games on the PlayStation Plus App of PS5

Remastered videogames are a big part of the PlayStation Plus service. To see how you can find these titles in the PS Plus App of your PlayStation 5 or PlayStation 5 Digital Edition console, you can take a look at this tutorial from Seeking Tech. 

1. Before we begin, it should be noted that you most likely need to subscribe to PlayStation Plus Deluxe or PlayStation Plus Premium to get access to remastered games. This is because these titles will most appear in the Classics Catalog, which is limited to those two tiers of the subscription service.  

With that said, you may find some of these games on the Game Catalog, which you can access if you have PlayStation Plus Extra, Deluxe or Premium.  

In a few occasions, you may also find a remastered release on the monthly Game Catalog, which is offered by all tiers of PS Plus.  

2. To start off, power on your PS5 and then sign into the PlayStation Network account that is paying for PlayStation Plus. 

3. In the home screen menu of the console, you then need to open the PlayStation Plus App from the Games section. 

In order to go to the home screen, you can press and hold the PS button located on your controller. To head over to the Games section, if you aren’t there already, you need to press the L1 button. 

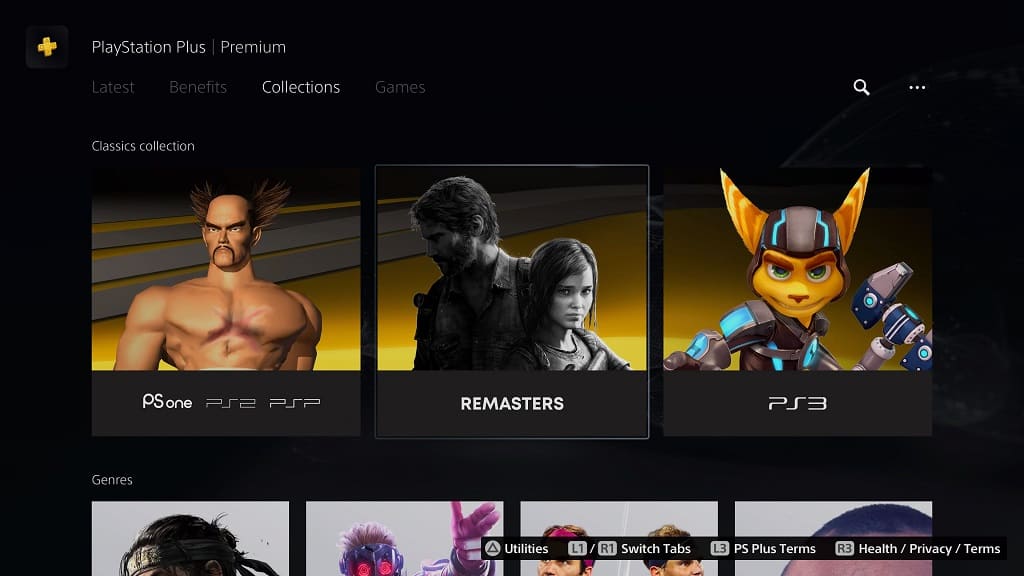
4. Inside of the PlayStation Plus App, press the R1 button to switch tabs until you get to Collections. 

5. From there, move down and then select Remasters from the Classics Collection section. 

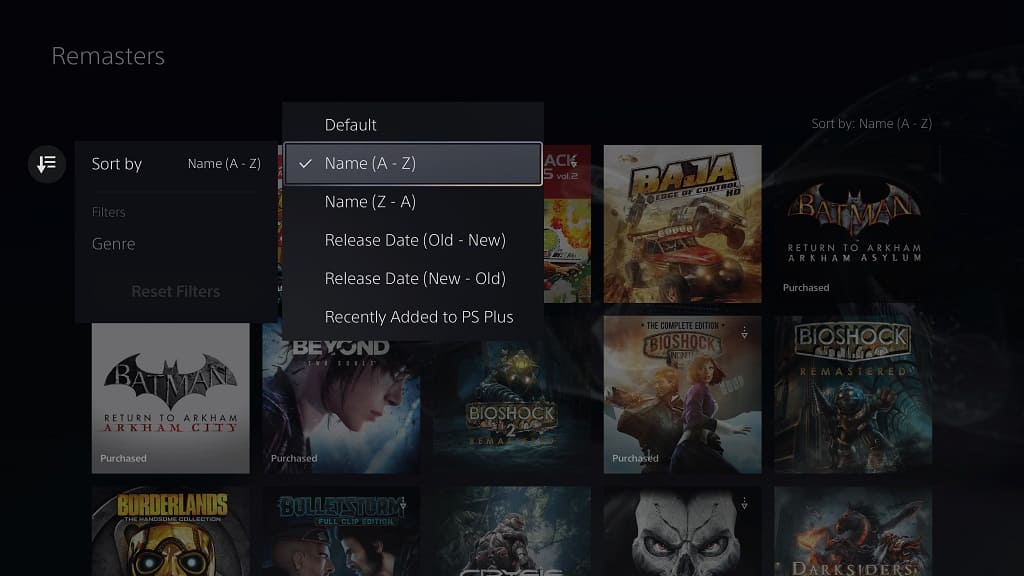
6. You should now see a list of remastered videogames on PlayStation Plus.  

If you would like to sort this listing, then you need to first select the Sort and Filter option, which you can do by selecting the icon that has a down-pointing arrow with three horizontal lines located on the left side. 

7. Afterwards, select the Sort By option and then any of the following listing options: 

  • Default  
  • Name (A to Z) 
  • Name (Z to A) 
  • Release Date (Old to New) 
  • Release Date (New to Old) 
  • Recently Added to PS Plus  

8. In the same Sort and Filter menu, you can also filter the list based on game genres. 

9. To download a remastered game from PlayStation Plus, you first need to select it from the aforementioned Remasters menu. 

10. On the product page, you then need to select the Download option.

How to customize Disney Plus PS5 App subtitle styles  

If you don’t like the default look of subtitles in the Disney Plus application on your PlayStation 5 or PlayStation 5 Digital Edition console, then you can check out this guide at Seeking Tech to see how you can customize the look of the texts.  

1. You aren’t able to change how the subtitles look from within the Disney Plus PS5 App. Instead, you need to use the system menus of your game console.  

So, to start off, you need to return to the home screen menu of your PlayStation 5. To get there, you can press and hold the PS button on the controller.

2. After you get to the home screen, move the cursor to the upper right corner of the screen and then select the gear icon. 

3. If done correctly, you should now be in the Settings menu of your PS5. Here, you need to select Accessibility. 

4. From the Accessibility menu, you first need to select Closed Captions on the left column.  

5. On the right side of the same screen, make sure that the Display Closed Captions setting is enabled and then select Closed Caption Settings.  

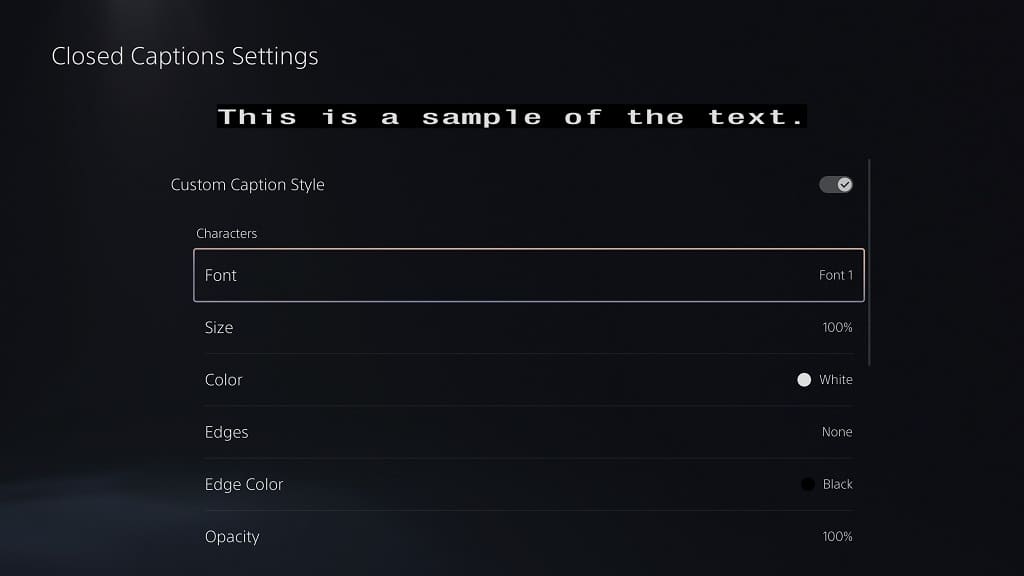
6. You should now be in the Closed Captions Settings menu.  

At the top of the screen, you should see a sample of the current subtitle style that will be shown when watching Disney Plus videos on your PlayStation 5. Any changes you make will be reflected in the sample as well. 

7. To start off, make sure that you enable the Custom Caption Style setting. 

8. Afterwards, you will be able to change the following Character settings: 

Font:  

  • Font 1  
  • Font 2 
  • Font 3 
  • Font 4 
  • Font 5 
  • Font 6 
  • Font 7 

Size: 

  • 50% 
  • 100% 
  • 200% 

Color: 

  • White 
  • Black 
  • Red 
  • Green  
  • Blue 
  • Yellow  
  • Magenta 
  • Cyan 

Edges:  

  • None 
  • Raised 
  • Depressed 
  • Uniform 
  • Drop Shadowed 

Edge Color:  

  • White 
  • Black 
  • Red 
  • Green  
  • Blue 
  • Yellow  
  • Magenta 
  • Cyan 

Opacity: 

  • 25% 
  • 50% 
  • 75% 
  • 100% 

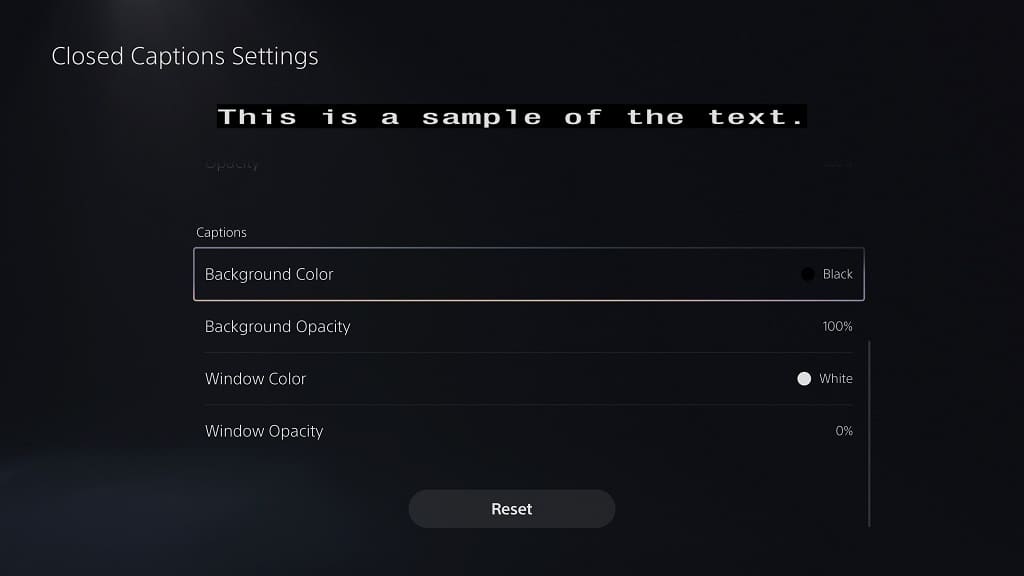
9. You can also change the following Captions settings: 

Background Color: 

  • White 
  • Black 
  • Red 
  • Green  
  • Blue 
  • Yellow  
  • Magenta 
  • Cyan 

Background Opacity:  

  • 0% 
  • 25% 
  • 50% 
  • 75% 
  • 100% 

Window Color: 

  • White 
  • Black 
  • Red 
  • Green  
  • Blue 
  • Yellow  
  • Magenta 
  • Cyan 

Window Opacity: 

  • 0% 
  • 25% 
  • 50% 
  • 75% 
  • 100% 

10. After you are done making the changes, open the Disney Plus PS5 App again and then play a video.  

If the subtitles still look the same, then you need to back out the video and then play it again in order to get the new style to show up.

How to turn on PS5 without the beep 

When turning on your PlayStation 5 or PlayStation 5 Digital Edition console, you will hear an audible beeping noise. This sound is so loud that it could wake up anyone sleeping.  

To see how you can mute this beep when turning on the PS5, you can check out this tutorial at Seeking Tech. 

In order to mute the power on sound of the game console, you need to turn on the system by using the Remote Play feature on a different internet connection. The easiest way to do so is by using the Remote Play App on a smartphone by taking the following steps: 

1. To start off, you need to setup your PlayStation 5 or PlayStation 5 Digital Edition console so that it can be turned on remotely by doing the following: 

  • Open the Settings App. 
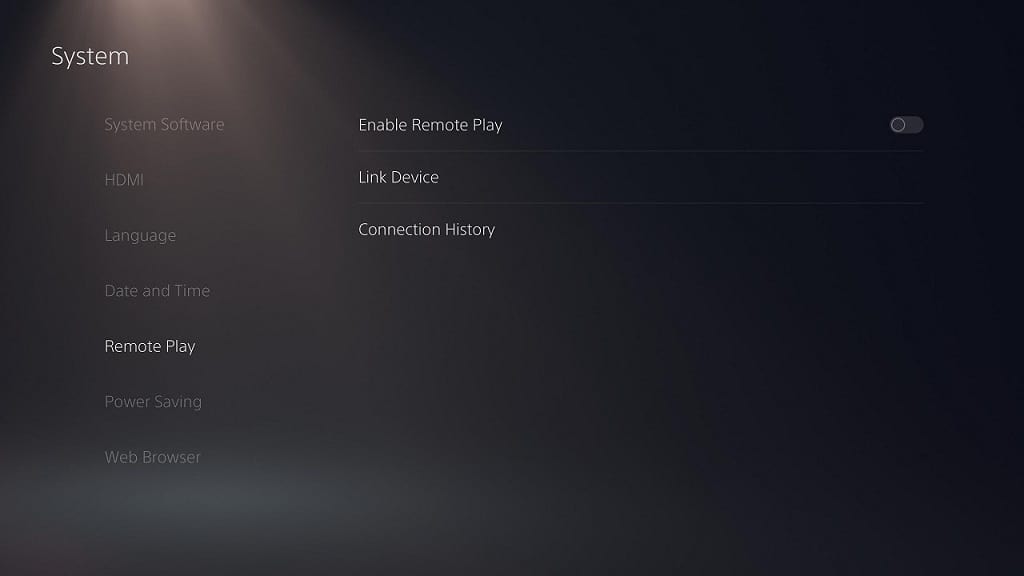
  • From the front page of Settings, go to System > Remote Play and then make sure that the Enable Remote Play setting is turned on. 

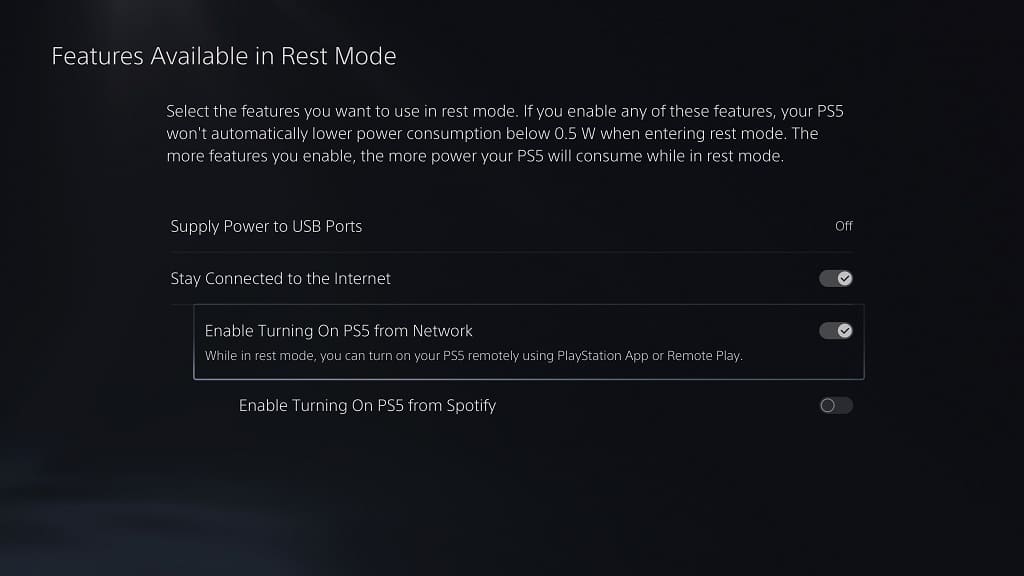
  • Next, you need to go to System > Power Saving > Features Available in Rest Mode. 
  • In the Features Available in Rest Mode menu, make sure that the Stay Connected to the Internet and Enable Turning on PS5 from Network settings are enabled. 
  • Finally, you need to put your console in Rest Mode, which you can do by pressing the power button on the system. You can also press the PS button on your controller, select the Power option in the bottom menu and then select the Enter Rest Mode option.

2. After setting your PS5 console up for Remote Play, you need to do the same on your smartphone by taking the following steps: 

  • Download and install the PS Remote Play App on your phone if you haven’t done so already.  
  • Next, you need to make sure that you are using another network on your smartphone aside from the one you are using to connect your PlayStation 5 to the internet. If your PS5 is using your home network, for example, then you should set your phone to use mobile data only. 

3. Once you are ready, open the PS Remote Play App on your smartphone. 

4. If asked, make sure that you are signed into the same PlayStation Network account that you used for your PlayStation 5.  

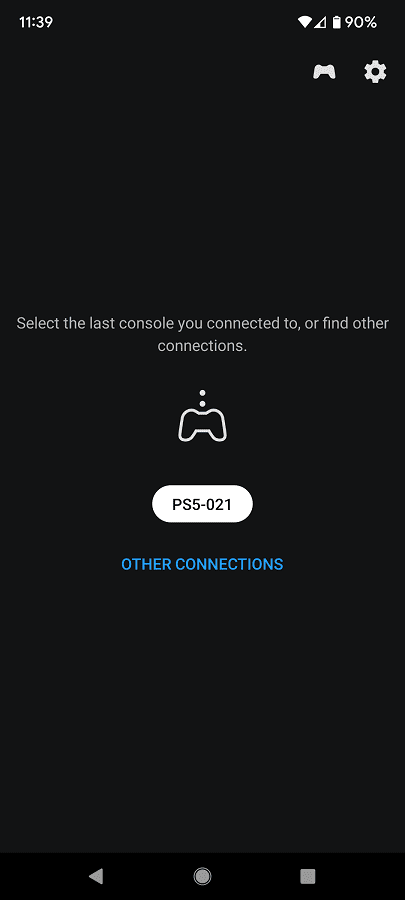
5. Finally, select your PS5 console from the menu of the PS Remote Play App. 

6. If you follow these steps, you should be able turn on the PlayStation 5 without it making a beeping noise.  

Once you powered on your console, we recommend that you disconnect and close the PS Remote Play App on your smartphone as you don’t need to leave it open. By doing so, you will also save on data usage and battery life.

How to find Disney Plus surround sound movies and series on PS5

You will be able to watch videos from the Disney Plus PS5 App with surround sound. Not all movies or shows will support this sound output format, however.  

To find out how you can see which Disney+ video is compatible with surround sound on your PlayStation 5 or PlayStation 5 Digital Edition console, you can take a look at this article.  

1. For the first step, you should make sure you have surround sound set up correctly on your PlayStation 5.  

In order to do so, head over to the Settings menu of your game console and then select Sound > Audio Output. From the Audio Output menu, make sure you change the output device to your surround sound speakers by using the Output Device option.  

Depending on how the surround sound speakers are connected to your PS5, you may have to play around with the Output Device and HDMI Device Type settings to see if are able to get your speakers to output audio coming from the game console. 

In the AV Amplifier section of the same Audio Output menu, you can also change the number of channels and adjust the speaker positions. Keep in mind, however, that the Disney Plus App on the PlayStation currently only supports 5.1 surround sound.  

2. Once you have everything set up on the system-level, you next need to open the Disney Plus App.  

3. Inside of the streaming application, select a video that you want to watch. Do not pick any videos in the Continue Watching section as doing so will send you straight into the video instead of its product page. 

4. Once you get to the product page, scroll down to move the cursor to Suggested.  

5. Next, you need to move the cursor to the right in the same row and then select Details. 

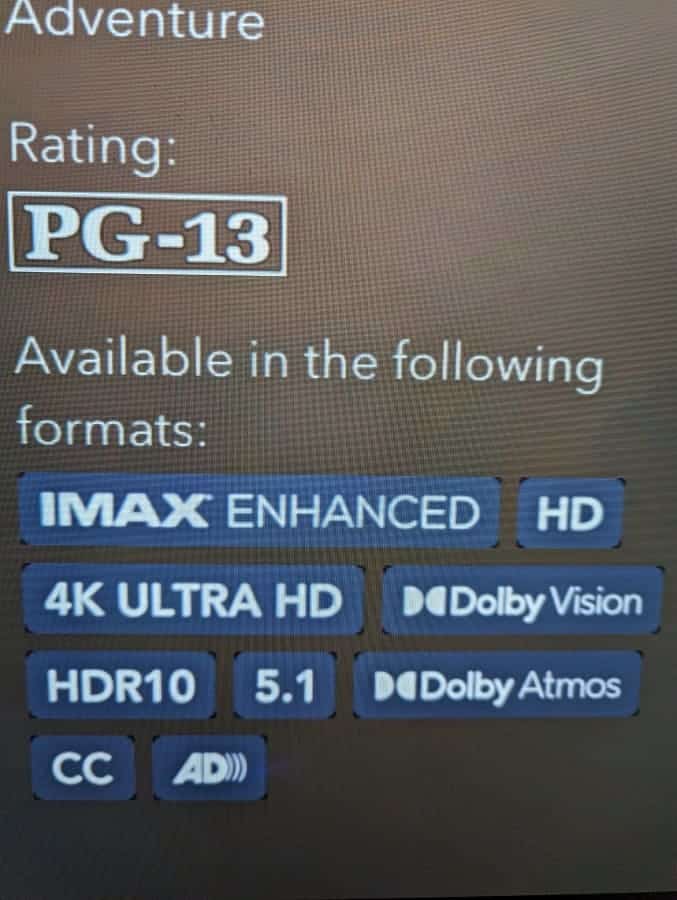
6. In the Details screen of the movie or series you selected, you should see the “Available in the following formats” section located on the bottom right side of the screen.  

7. If the video supports 5.1 surround sound, then you should see “5.1” listed in this section. 

8. To play the video, move upwards and then select Play. 

You should now be able to watch the movie or series with 5.1 surround sound output enabled.

How to fix Disney Plus PS5 App error code 36

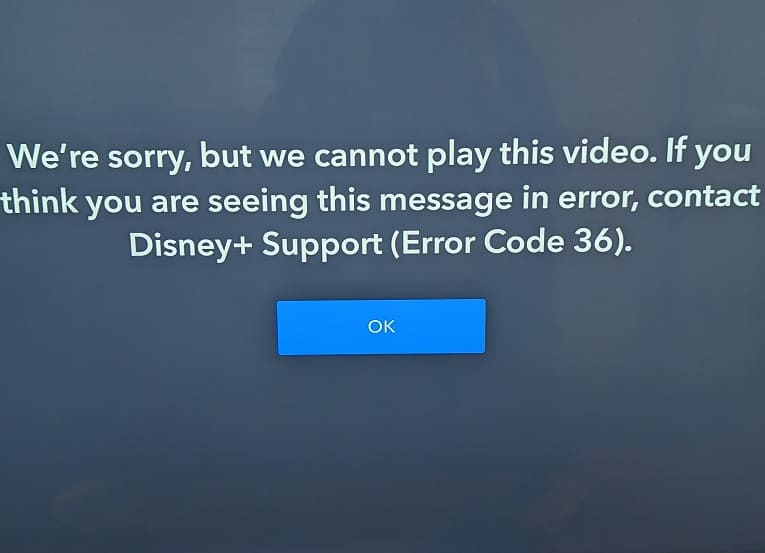
When using the Disney Plus application on your PlayStation 5 or PlayStation 5 Digital Edition console, you may run into the following error screen: 

  • “We’re sorry, but we cannot play this video. If you think you are seeing this message in error, contact Disney+ Support (Error Code 36).” 

To see how you can potentially fix this problem with the video streaming application, you can take a look at this troubleshooting article from Seeking Tech. 

1. Based on our experience, this is a temporary bug that can be fixed by simply restarting the video. 

If you are still viewing the Error Code 36 screen, then you need to select OK to go back to the home menu of the Disney Plus PS5 App.  

From there, select same video again in the Continue Watching section. 

2. If you are still getting the same error, then you can try restarting the application.  

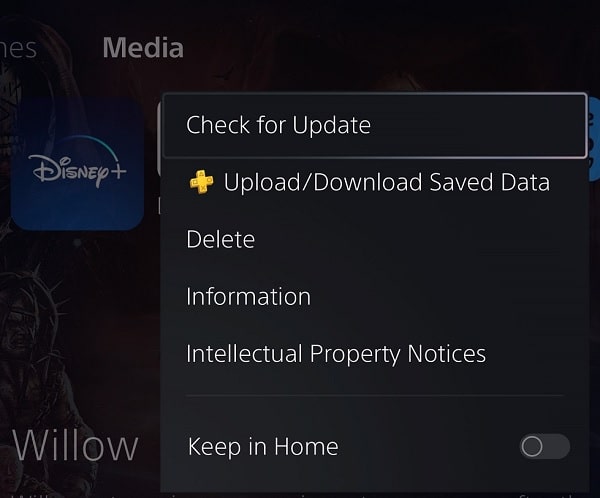
To do so, press and hold the PS button on your controller to bring up the home menu of your PlayStation 5. From there, move the cursor to the Disney+ icon and then press the Options button on the controller to bring up the small window menu where you can then select Close App.  

Once the application has closed, open it again and then try playing the same video. 

3. It is a good idea to keep this streaming app updated as well since a new software version may improve its stability.  

To update manually, move the cursor to the Disney+ icon on the home screen of your PS5 and then press the Options button. Afterwards, select Check for Update in the small pop-up window. 

4. You can also try logging out and then logging back into your Disney+ account on the game console. To find out how to do so, you can follow the steps from this link.  

5. Restarting the console may help with this error code, especially if you have been putting it in rest mode instead of shutting it down completely. 

6. Creating a fresh install of the Disney Plus App on your PlayStation 5 may be helpful as well. 

In order to do so, you need to do the following: 

  • Delete the application first by pressing the Options button with the cursor over the Disney+ icon in the home screen.  
  • You then need to select the delete option in the pop-up menu.  
  • Once the application has been removed, you need to download and install it again from the PlayStation Store. 

6. You can also try clearing the cache of your PS5 by doing the following:  

  • Start by turning off your console completely.  
  • Afterwards, hold the power button on the console until you hear a second beep in order to boot it into Safe Mode.  
  • Next, you need to follow the instructions on screen to connect your controller.  
  • From the Safe Mode menu, you then need to select Clear Cache and Rebuild Database > Clear System Software Cache. 

If you are still getting the Error Code 36, then we recommend contacting the supporting team at Disney Plus in order to get additional help. 

How to test your PS5 internet connection for PlayStation Plus Premium cloud streaming 

If you have PlayStation Plus Premium, then you are able to play games streamed over the cloud on your PlayStation 5 or PlayStation 5 Digital Edition console. In order to do so, however, you need to be able to meet the minimal internet speed requirement. 

When it comes to cloud streaming, Sony recommends that your network is able to support a minimum of 5 Mbps for downloads. For 1080p cloud streaming, the minimum requirement jumps up to 15 Mbps. 

To see how you can test the internet speed of your PlayStation 5 to see if it is suitable for cloud streaming, you can take a look at this tutorial from Seeking Tech. 

Method #1 

The first method is to use the PlayStation Plus App by taking the following steps: 

1. First off, you need to open the PlayStation Plus App from the home screen of your PS5. You can get to the home screen by pressing and holding the PS button on your controller if you doing something else at the moment on the console. 

2. In the PlayStation Plus App, move the cursor to the top right and then select the three dots icon. 

3. Inside the pop-up window that appears on the right side of the screen, you then need to select the Bandwidth Test option. 

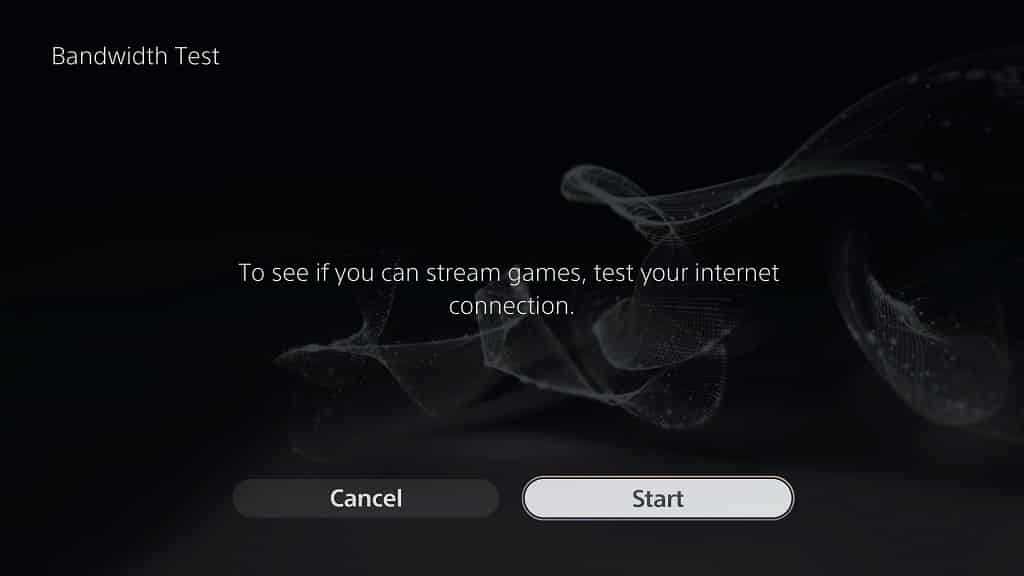
4. You should now be in the Bandwidth Test menu that says the following: “To see if you can stream games, test your internet connection.” Here, you need to select Start. 

5. The PS5 will then start to test your internet speed. If your network is compatible for PS5 cloud streaming then you should see the following message: “Your connection can support streaming.” 

Method #2 

If you want to view the exact internet download speed of your PlayStation 5, then you need to do the following: 

1. Return to the home screen. 

2. In the home screen, move the cursor to the upper right corner and then select the gear icon to head into Settings. 

3. Select Network from the Settings menu. 

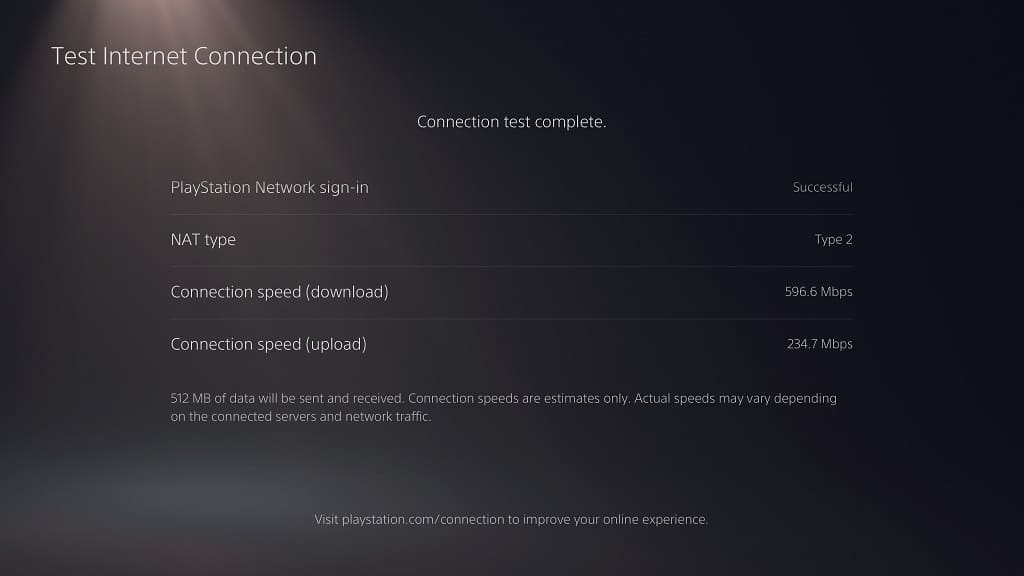
4. Inside the Network menu, select Connection Status on the left column and then Test Internet Connection on the right side.  

5. You should then see a pop-up saying the following: “Internet connection test will start. If you are playing an online game, you might lose connection with the game server.” Here, you need to select Start Test to continue.  

5. Once the test has been completed, you should be able to find the internet download speed of your PS5 in the “Connection speed (download)” section.

As we stated above, your download speeds need to be above 5 Mbps when it comes to playing games over the cloud. For 1080p quality, the speed must stay above 15 Mbps.

How to find delete scenes and other extra content in the Disney Plus PS5 App

You are able to watch extra content in the official streaming application of Disney Plus on your PlayStation 5 or PlayStation 5 Digital Edition console. The content may include any of the following: 

  • Deleted scenes 
  • Extra scenes 
  • Behind-the-scenes footage
  • Interviews
  • Audio commentary 
  • Bonus Features 
  • Trailers 
  • Promo Videos 

Finding these extras can be somewhat confusing, however, if you aren’t familiar with navigating the menus of the Disney+ PS5 App. To see where you can locate these videos, you can take a look at this tutorial at Seeking Tech. 

1. For the first step, make sure you open the Disney Plus App on your PlayStation 5 if you haven’t done so previously.  

2. Inside the video streaming application, you then need to select the film or television series that you are interested in when it comes to watching its extras.  

Do not select a video from the Continue Watching section as doing so will send you right into the video. Instead, you need to select the same video in another section so that you will be sent to its product page. 

3. Once you reach the product page for the movie or TV show, you can press the down directional button or move the left analog stick downwards. 

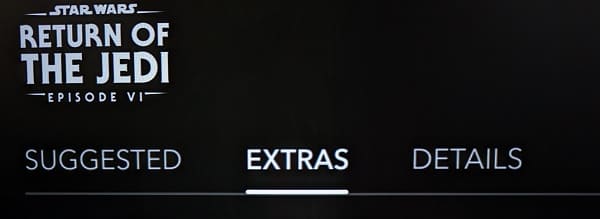
4. You should now be in the Suggested section of the product page. Here, you need to move to the right and then select the Extra section. 

5. After you finally arrived at the Extra section, you should see a list of bonus videos for the film or television show.  

If you are interested in watching one of these clips, then you need to select it in this section.

How to find 4K, HDR and IMAX Enhanced movies in the Disney Plus PS5 App

The Disney Plus streaming application on the PlayStation 5 and PlayStation 5 Digital Edition is capable of playing movies in the 4K Ultra HD, HDR10 and IMAX Enhanced formats. To see how you can locate these supported films, you can take a look at this tutorial from Seeking Tech. 

1. To start off, make sure you open Disney+ on your PS5 if you haven’t done so already.  

2. Inside of the application, press the circle button on the controller until you see a menu slide in from the left side of the screen.  

3. In the left column menu, you need to select Movies. 

4. After getting to the Movies menu, move the cursor up to the categories section and then scroll to the right.  

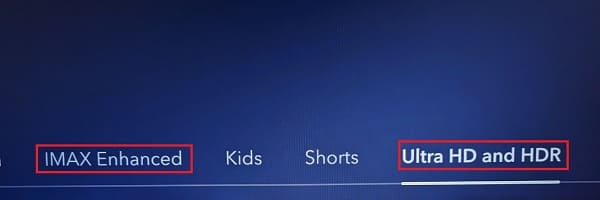
5. Among the listed categories should be IMAX Enhanced as well as Ultra HD and HDR. Here, you can select the category that you want to view. 

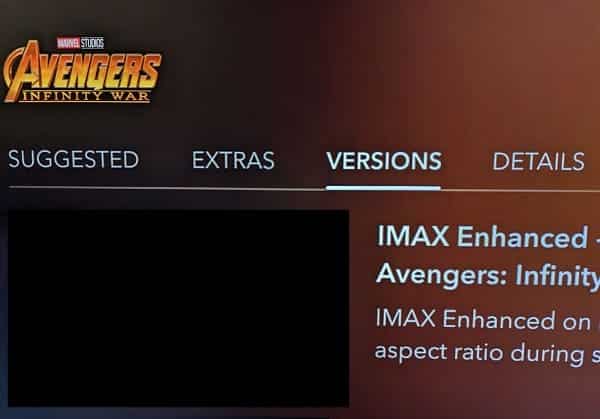
6. If you want to watch IMAX Enhanced, for instance, then you need to select IMAX Enhanced in the categories section and then select a movie from the subsequent listing.  

On the product page of the video, scroll down and then to the right so that you can select Versions. Finally, select the IMAX Enhanced video in the Versions category in order to play the movie in that format. 

7. If you want to watch a movie in 4K and/or HDR10, then you need to select the Ultra HD and HDR category in the Movies section of the Disney Plus App. 

Afterwards, select a film that you want to watch from the listing and then simply start playing the video.  

When it comes to 4K playback, you should make sure that the download speed of your PlayStation 5 reaches 25.0 Mbps at the minimum. Furthermore, the App Settings of the Disney Plus App should be set to Automatic.  

For HDR10 playback, you should make sure that you enable HDR on your PlayStation 5 as well as calibrate the HDR brightness output on the console.

You can do so by pressing and holding the PS button on the controller to open the home menu. Afterwards, select the gear icon on the top right side to head into Settings. From there, select Screen and Video > Video Output. You should then be able to turn on HDR as well as adjust the HDR brightness level.