How to fix Disney Plus PS5 App error code 83

When using the official Disney Plus streaming application on your PlayStation 5 or PlayStation 5 Digital Edition console, you may encounter error code 83. You can check out this troubleshooting article from Seeking Tech. 

1. Error code 83 indicates that there is either a compatibility or internet connection issue with the Disney Plus App. 

So, for the first potential fix, we recommend that you restart your PS5 as doing so will accomplish the following: 

  • Refresh the internet connection of the console. 
  • Re-connect to the Disney Plus App. 
  • Clear out any temporary bugs that may have been causing the error 83 code.  

To restart, press the PS button and then select the Power option at the bottom-side menu. Afterwards, select Restart PS5 from the small window menu. 

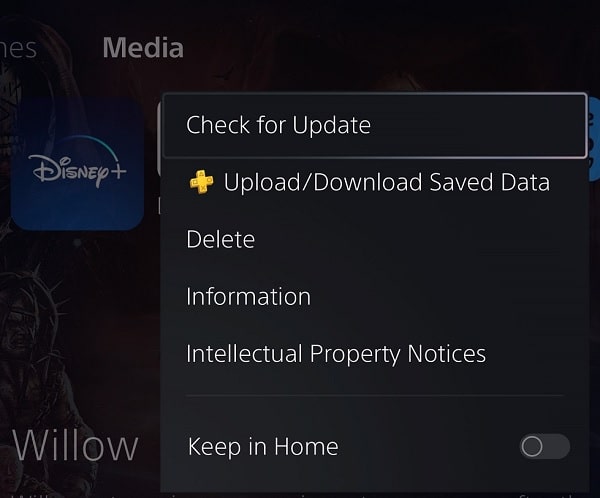
2. If a restart did not help, then you can try checking to see if there is a new update available for the Disney Plus PS5 App as a patch may improve its stability when running on the game console. 

In order to do so, move the cursor over to the Disney+ icon in the Media tab of the PS5’s home screen menu. In the pop-up menu, you can then select the Check for Update option. 
3. You can also try clearing your system cache by doing the following: 

  • Turn off your PS5 completely. 
  • Next, you need to press and hold the power button on the console until you hear a second beep. 
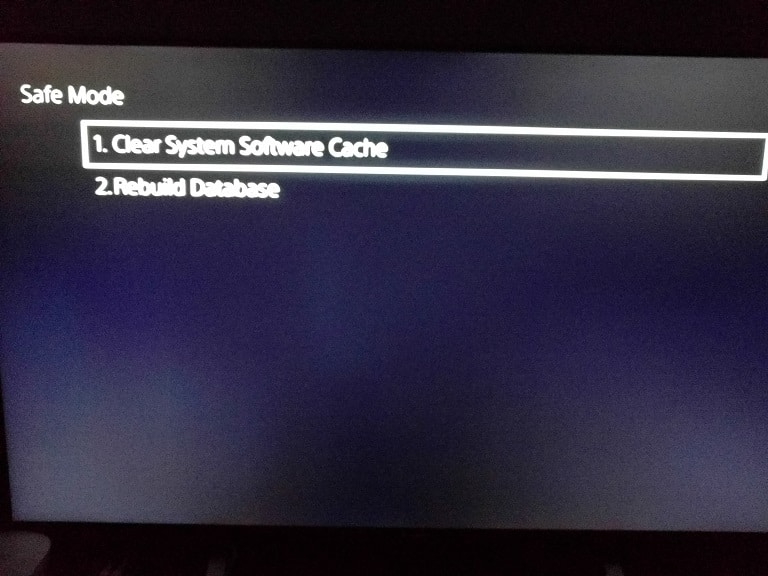
  • If done correctly, a screen should show up asking you to connect the controller to one of the USB ports of the PS5 and then press the PS button. So, make sure you do so in order to open the Safe Mode menu. 
  • In the Safe Mode menu, select “Clear Cache and Rebuild Database.” 
  • You then need to select “Clear System Software Cache.” 
4. Power cycling your home network may also be helpful if this issue is related to your internet connection. In order to do so, you can try taking the following steps: 

  • Turn off your PS5 console if you have it turned on. 
  • You should also turn off your modem and router(s). 
  • Next, you have to wait for a minimum of 2 minutes. 
  • After waiting, turn back on your modem and router(s). 
  • Wait for the home network to go back online again. 
  • You should then turn back on your PS5. 
  • Open the Disney+ App to see if you are still getting the same error code. 

5. If none of the potential fixes have worked so far in regards to the error 83 code, then you can try a fresh install of the Disney+ App. 

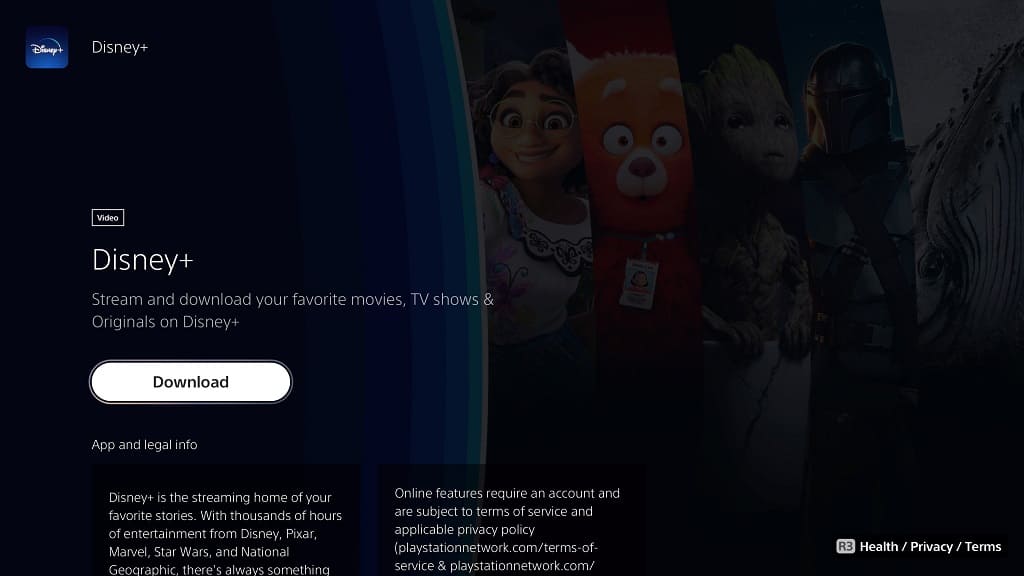
To do so, move the cursor over to the application’s icon on the home screen of your PlayStation 5 and then press the Options button. You then need to select Delete from the pop-up menu. 

Once the app has been deleted, download it again from the PlayStation Store. Afterwards, test out the application again to see if you are still getting the same error code.

How to turn off PS5 controller while watching Disney Plus

You can use the DualSense to control playback in the official Disney Plus application on your PlayStation 5 or PlayStation 5 Digital Edition console. By doing so, however, your controller may remain turned on even if you aren’t using it. This will cause the battery charge of the gamepad to drain. 

Fortunately, there are several ways that you can turn off the PS5 controller without pausing the Disney+ video. To find out how to do so, you can take a look at this tutorial from Seeking Tech.  

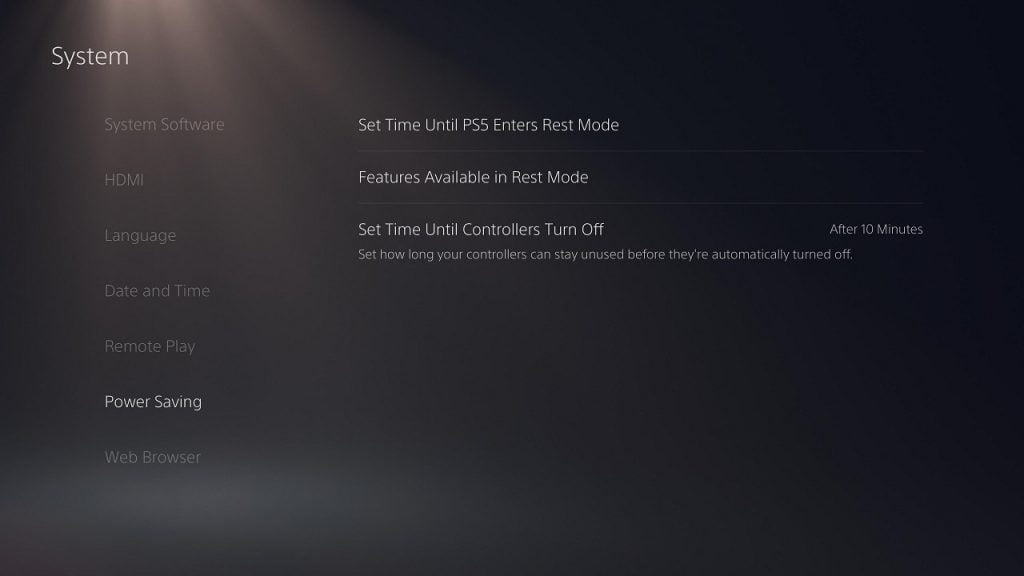
Using the Power Saving Feature 

If you don’t want to miss out on any of the action in the Disney Plus stream while turning off the DualSense, then you can use the power saving feature by taking the following steps: 

  • First off, you need to go to the Settings menu of your PlayStation 5. To do so, press and hold the PS button to open the home menu. From there, select the gear icon on the upper right corner.  
  • After getting to the Settings menu, you need to select System > Power Saving > Set Time Until Controllers Turn Off. In the pop-up menu, select the shortest duration, which should be After 10 Minutes. 

  • When the controllers turn off automatically, you should see a notification. If you don’t want to be distracted by this message, then you need to go back to the Settings menu of the PS5 and then select Notifications. From there, make sure that the Allow Pop-Up Notifications is disabled.  

Using the Control Center Menu 

If you don’t mind missing a few seconds of the Disney Plus video, then you can also use the Control Center Menu to quickly turn off the PS5 controller. You can do so by taking the following steps: 

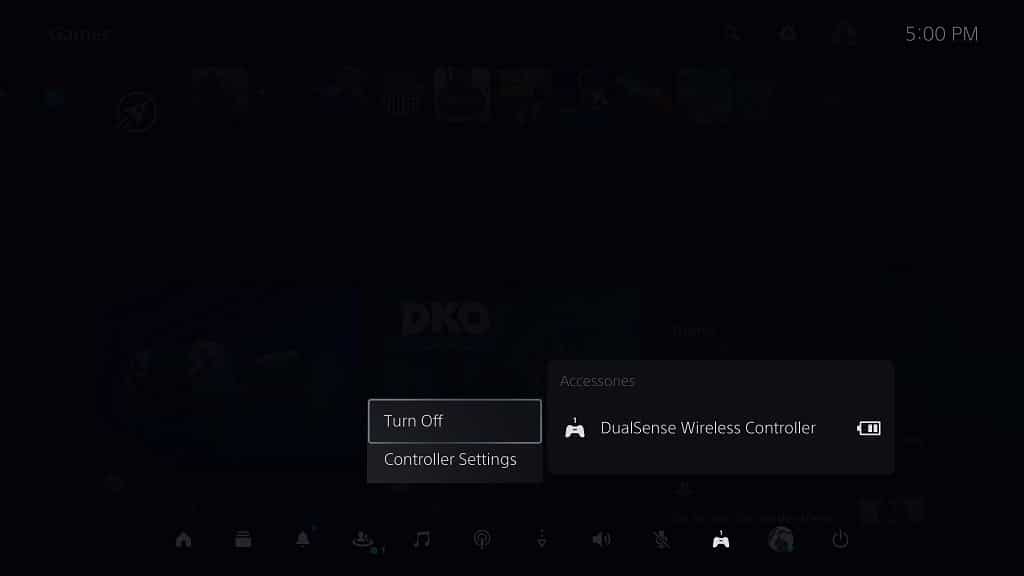
  • While the video is currently playing press the PS button on the DualSense to bring up the Control Center. If done correctly, the video will still be playing in the background. 
  • In the Control Center, move the cursor to the bottom menu and then select Accessories.  
  • From the small pop-up window, select the DualSense Wireless Controller. 
  • You can then select the Turn Off option. 

If you want to use the DualSense again after it has been turned off, then you need to press the PS button in order to power the gamepad back on. Afterwards, you should be able to use the PS5 controller again to control the Disney Plus App.

How to fix Disney Plus PS5 App ‘something went wrong’ error 

When trying to watch Disney Plus streams on your PlayStation 5 or PlayStation 5 Digital Edition console, you may encounter the following error message: 

  • “Sorry, something went wrong. Please try again later.” 

To see how you can potentially fix this issue, you can take a look at this troubleshooting article from Seeking Tech. 

1. For the first step, you can try restarting your PS5. By doing so, you will accomplish the following: 

  • Closed the Disney Plus App. 
  • Refresh the internet connection of the console. 
  • Clear out any temporary glitches. 

Once your system has boot back up again, try to use the video streaming application. 

2. If you are still seeing the “Something went wrong” error, then you can try checking to see if there is a new update available for the application.  

In order to do so, move the cursor over to the Disney+ icon in the home screen menu of your PlayStation 5. Afterwards, press the Options button and then select the Check for Update option. 

3. Of course, you should also keep the system software of your PS5 up-to-date as well if you haven’t done so already.  

4. A fresh install of the streaming application may also help. 

In order to do so, press the Options button with the cursor over the Disney+ icon in the PS5’s home menu. Afterwards, select Delete. Once the app is removed, download it again from the PlayStation Store.  

After the Disney Plus App has been re-installed, test it out. 

5. You can also try power cycling your home network, which you can do by taking the following steps: 

  • Turn off your PlayStation 5. 
  • Turn off your modem and routers. 
  • Wait for at least two minutes. 
  • Turn your modem and routers back on. 
  • Wait for your home network to go back online again. 
  • Turn on your PS5. 

Open the Disney Plus App to see if you are able to use it without any issues. 

7. If possible, you can also try using another internet connection method on your PlayStation 5. You can do so by opening the Settings menu on the console and then selecting Network > Settings > Set Up Internet Connection.  

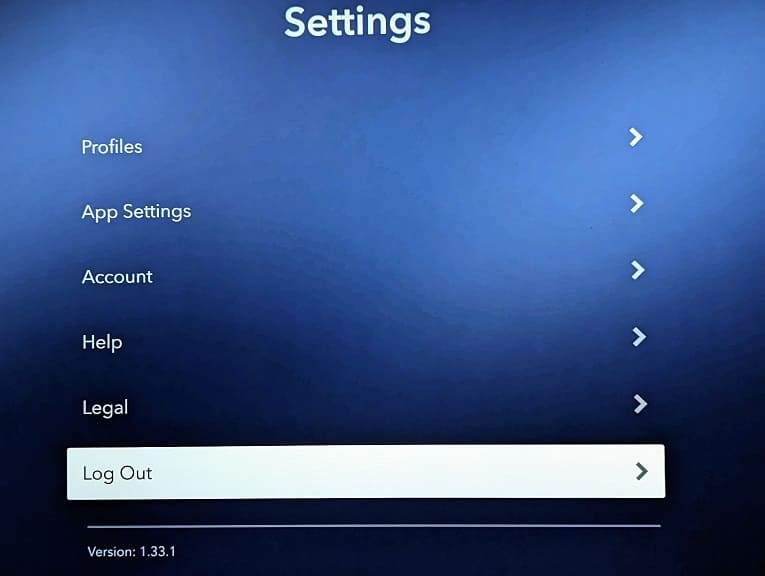
7. If possible, log out of your account on the Disney+ PS5 App, which you can do by following the steps in this prior article.

If the “something went wrong” error is preventing you from signing out, then you need to use a different device. 

If you have a desktop computer, for example, then you can do the following: 

  • Visit https://www.disneyplus.com on a web browser. 
  • Log into your Disney Plus account if you haven’t done so already. 
  • After signing in, move the mouse cursor over to your profile image on the top right side. 
  • In the drop-down menu, select Account.  
  • Finally, click the “Log out of all devices” link. 

By doing so, you will log out of Disney+ on all of the devices that you are currently signed in on. This should include your PlayStation 5.  

After signing out, sign back into the Disney Plus PS5 App to see if you are able to fix the “something went wrong” problem. 

How to find PSVR1 games on the PlayStation Store of PS5

Finding games that require or support the original PlayStation VR headset can be a bit cumbersome on the PlayStation Store of the PlayStation 5 or PlayStation 5 Digital Edition console. If you need help locating these titles, then you can take a look at this tutorial from Seeking Tech. 

1. To start off, you need to go to the PlayStation Store on your PS5. You can get there from the home screen, which is the place where you can select which game to boot up. 

2. Once you arrived at the digital shop, make sure you are in the Latest, Collections or Deals tab.  

In order to switch tabs, you can press the L1 and R1 buttons. 

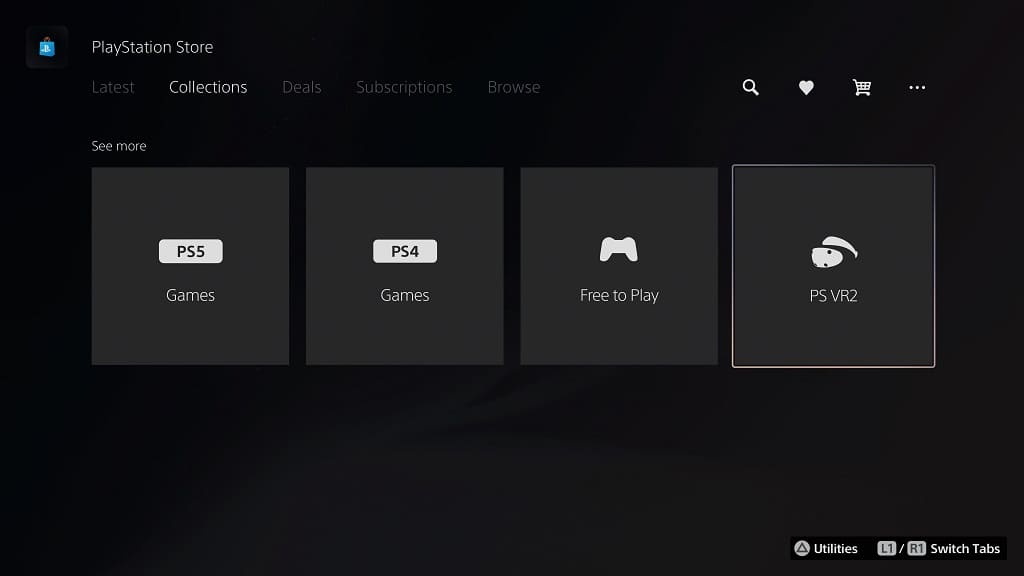
3. Next, scroll all the way down to the See More section and then select PS VR2.  

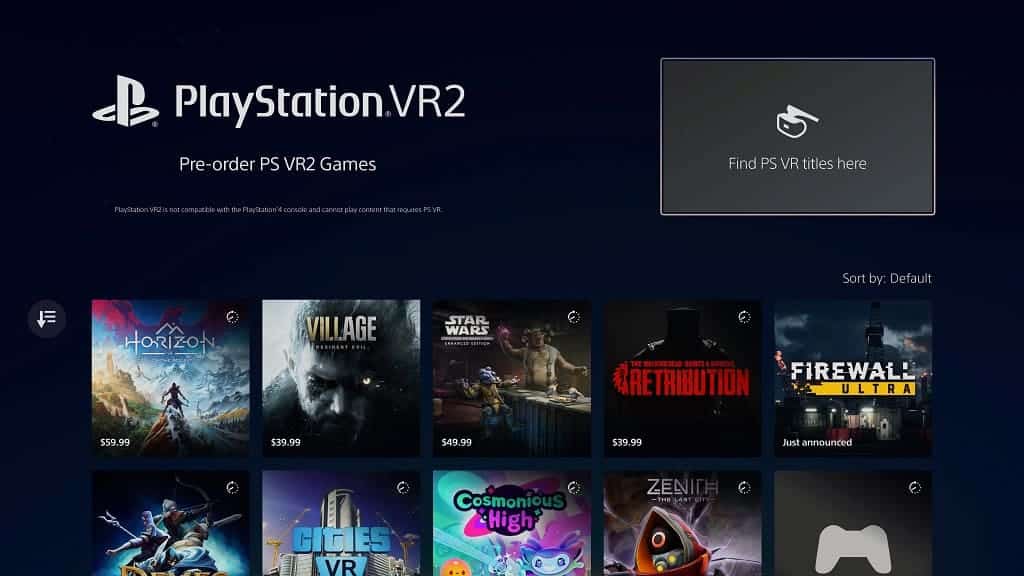
4. You should now be in the PlayStation VR 2 menu of the PlayStation Store. Here, you should see the “Find PS VR titles here” option located on the upper right corner. You need to select it. 

5. You should finally arrive at the PlayStation VR menu of the PlayStation Store on the PS5.  

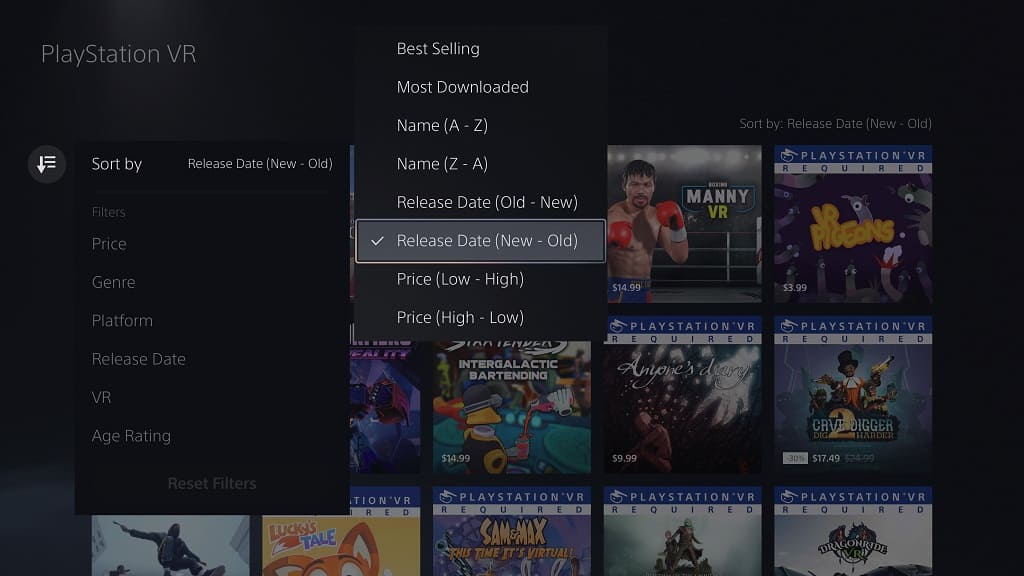
6. If you want to sort the listing, then select the Sort and Filter option, which you can find to the left (its icon is a down-pointing arrow that is overlapping three horizontal lines). Afterwards, you need to select the Sort By option to change the order of the listing based on the following options: 

  • Best Selling  
  • Most Downloaded  
  • Name (A to Z)  
  • Name (Z to A)  
  • Release Date (Old to New)  
  • Release Date (New to Old)  
  • Price (Low to High)  
  • Price (High to Low)

6. In the same Sort and Filter menu, you can also filter out your results based on the following: 

Genre: 

  • Action 
  • Adventure 
  • Shooter 
  • Puzzle 
  • Arcade 
  • Simulation 
  • Causal 
  • Horror 
  • Unique 
  • Family 
  • Sport 
  • Music/Rhythm 
  • Driving/Racing 
  • Role Playing Games 
  • Strategy 
  • Party 
  • Educational 
  • Fighting 
  • Fitness 
  • Simulator 
  • Brain Training  
  • Quiz 

Release Date: 

  • Just Released 
  • Coming Soon 

Age Rating: 

  • Early Childhood 
  • Everyone 
  • Everyone 10+ 
  • Teen 
  • Mature 

While you can also filter out the PSVR1 listing based on Platform, changing it to display PS5 titles only will result in no games showing up. The same is also true if you decide to filter the listing to show only PSVR 2 games. 

For the uninformed, PlayStation VR 1 games are backwards compatible with the PlayStation 5 and PlayStation 5 Digital Edition consoles. However, you will need to use the PSVR 1 headset in order to play these titles. Furthermore, a special adapter is needed, which you can get for free from Sony.

How to change region when playing a PS1 game on PS5 

Sony recently started adding emulated PS1 videogames to the PlayStation 5 and PlayStation 5 Digital Edition consoles. Some of these titles offer PAL and NTSC versions.  

To see how you can properly change regions for these games, you can take a look at this tutorial from Seeking Tech. 

1. For the first step, you need to turn on your game system if you haven’t done so already. 

2. Next, you need to be playing the emulated PS1 game.  

It doesn’t matter if you are playing the PS4 or PS5 version of the PS1 game on your PlayStation 5 console as the ability to change region should work on both. 

3. You then need to pause the PS1 game.  

In order to do so, you need to press the Options button on the controller. On the DualSense, this is the small button with the three horizontal lines on top. It should be in between the touch pad and the triangle button. 

4. With the game paused, scroll down and then select Settings from the emulated menu.  

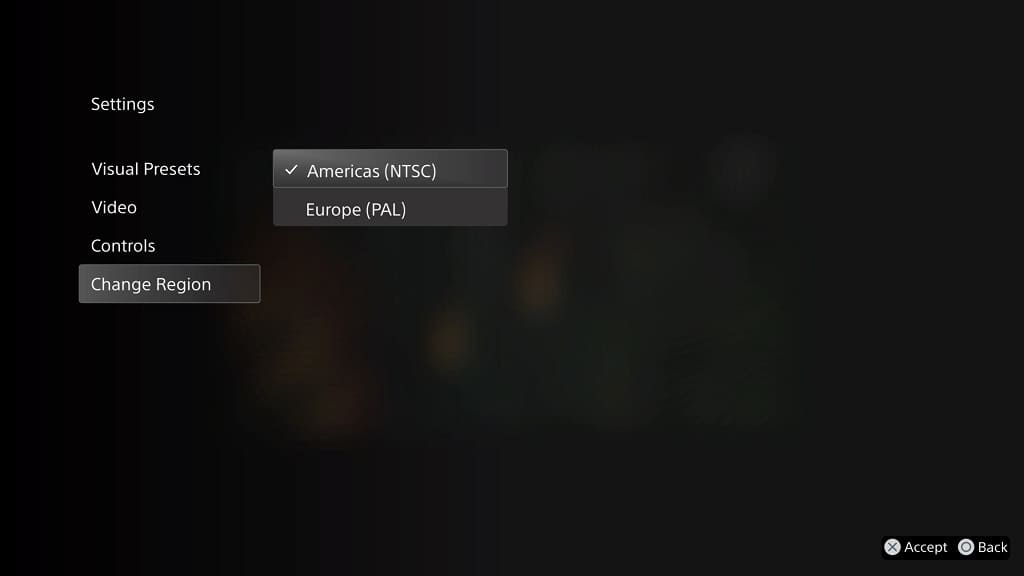
5. In the Settings menu, scroll down and select the Change Region option. 

6. Afterwards, you will be given the following two options:  

  • Americas (NTSC)  
  • Europe (PAL) 

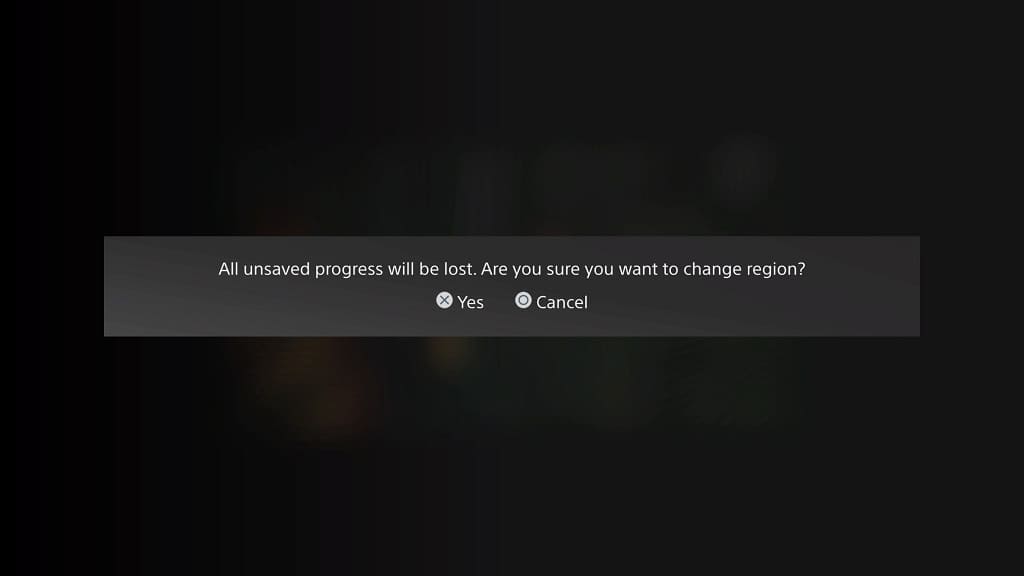
7. A pop-up message will then warn you that you will lose any unsaved process when you switch region. Select the Yes option to continue with the change.

In a vast majority of cases, PS1 games from the Americas (NTSC) region should end up running faster and/or feature a smoother frame rate. However, you are limited to just one language, which is most likely in English, most of the time.  

On the other hand, Europe (PAL) may offer multiple language options. While the PAL version may have a higher internal resolution, it shouldn’t be too noticeable as the emulator upscales both versions. 

If you don’t mind playing PS1 games in English, then the NTSC version of an emulated game on PlayStation 5 should be the best choice in a vast majority of cases.  

For the uninformed, old-school CRT television either offers a 50 Hz refresh rate or 60 Hz refresh rate. TVs from the PAL region, which are made for the U.K and the rest of Europe, use 50 Hz. The screens from NTSC regions, which includes Japan and North America, utilize 60 Hz. 

As a result, many games that came out for the PS1, as well as the PS2, end up either running slower or with a worse frame rate in PAL regions when compared to the NTSC regions. 

Thankfully, 60 Hz because the standard on flat-screen televisions with the advent of the HD TV and now the 4K TV.

How to download and update the Paramount Plus PS5 App

An official application for Paramount Plus was recently added to the PlayStation 5 and PlayStation 5 Digital Edition consoles. You can take a look at this tutorial to see how you can download, install and update this video streaming app. 

How to download and install Paramount+ on PS5 

To get Paramount Plus on your PlayStation 5 console, you need to do the following: 

1. If you haven’t done so already, make sure you head to the Media section of the home screen menu on your PS5. 

In order to get to the home screen, you can press and hold the PS logo button from the controller connected to the console for around a second.  

To switch to the Media section in the home screen, you need to press the R1 button. 

2. Next, you have two methods when it comes to going to the Paramount Plus product page. 

The first is to press the triangle button and then select the Search icon. In the search menu, you need to input Paramount with the on-screen keyboard. Finally, select Paramount+ from the search results page. 

Alternatively, you can select the All Apps option from the Media section. You should then be able to find and select the streaming app from the listing.  

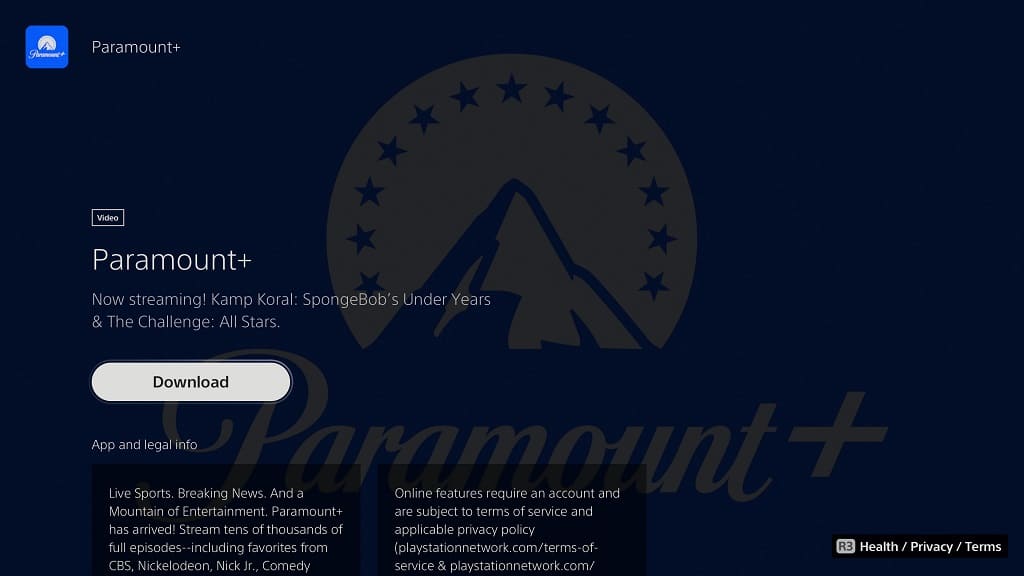
3. On the product page of this app, you need to select Download. 

4. Once the download has been completed, the Paramount+ App should automatically be installed on your PS5. 

You can start the video streaming application from its product page or directly from the Media section of the home menu. Afterwards, you should be able to start streaming videos from this service.  

How to update the Paramount Plus PS5 App 

The Paramount+ App may get a new update to fix bugs, improve performance and/or add new features. To manually update this application on your PlayStation 5 or PlayStation 5 Digital Edition system, you need to take the following steps: 

1. Go back to the aforementioned Media section of the home screen. 

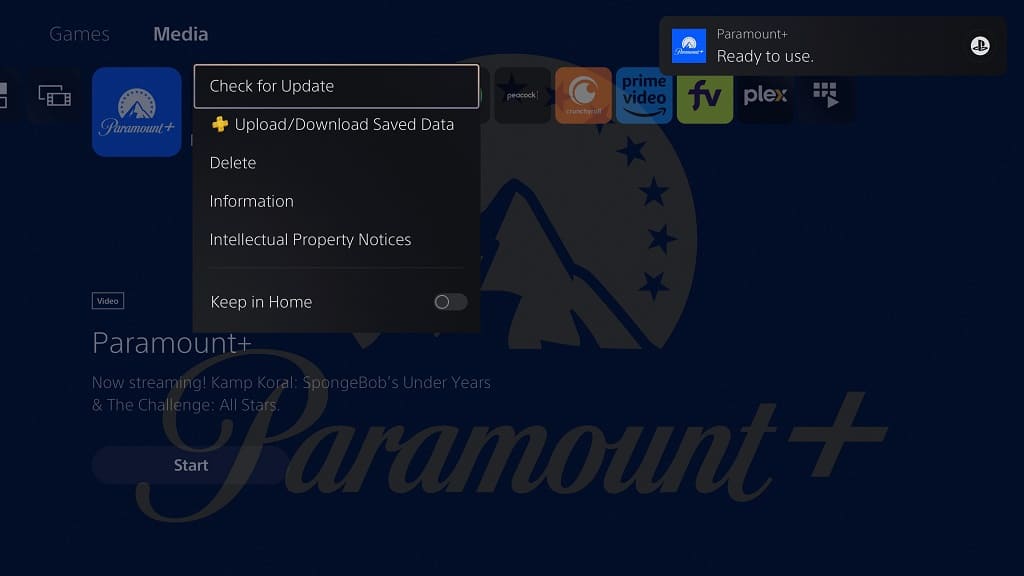
2. From there, you need to move the cursor to the Paramount+ logo. 

3. With the app’s icon highlighted, press the Options button on the controller. On the DualSense, this button is the one with the three horizontal lines on top (it is directly to the left of the triangle button). 

4. If done correctly, you should open a small pop-up window. From there, you need to select the Check for Update option.  

5. If there is a new patch available, your PS5 should start the download and installation process.  

How to find list of PS4 games that have been upgraded to PS5

Several games that first came out on the PlayStation 4 have been upgraded to play natively on the PlayStation 5. The upgrades usually feature better resolution, faster and smoother frame rates in addition to other visual enhancements. The PS5 version may also take advantage of the 3D Audio, adaptive triggers and haptic feedback features on the next-generation system. 

To see how you can find a list of PS4 games that were upgraded to have native PS5 versions, you can take a look at this tutorial from Seeking Tech. 

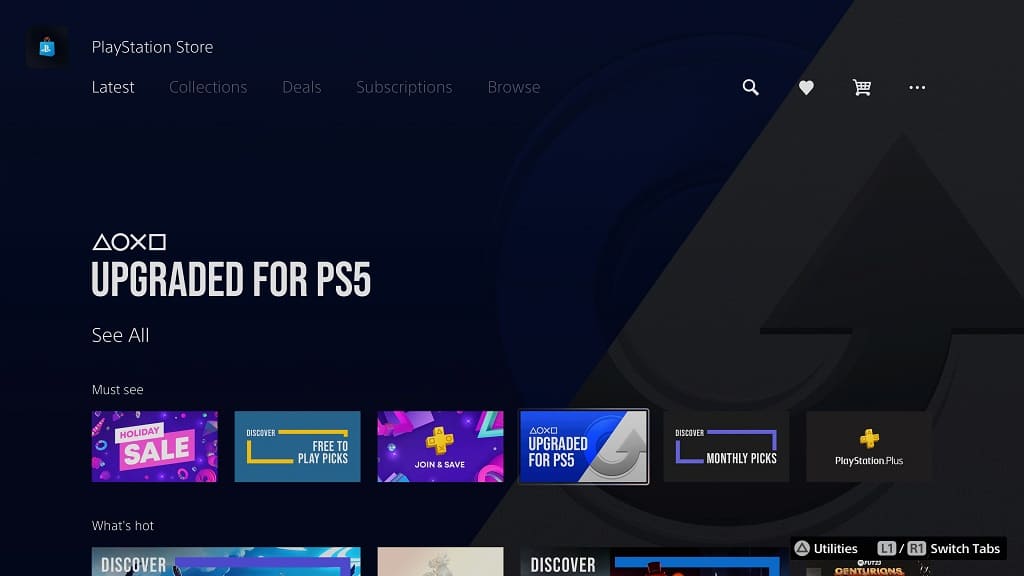
1. First off, make sure you turn on your console and then head over to the PlayStation Store from its home screen. 

To go to the home screen quickly, if you are doing other tasks on the PS5, you can long press the PS button on the controller for around 1 second. 

2. In the front page of the PlayStation Store, select the Upgraded for PS5 option. 

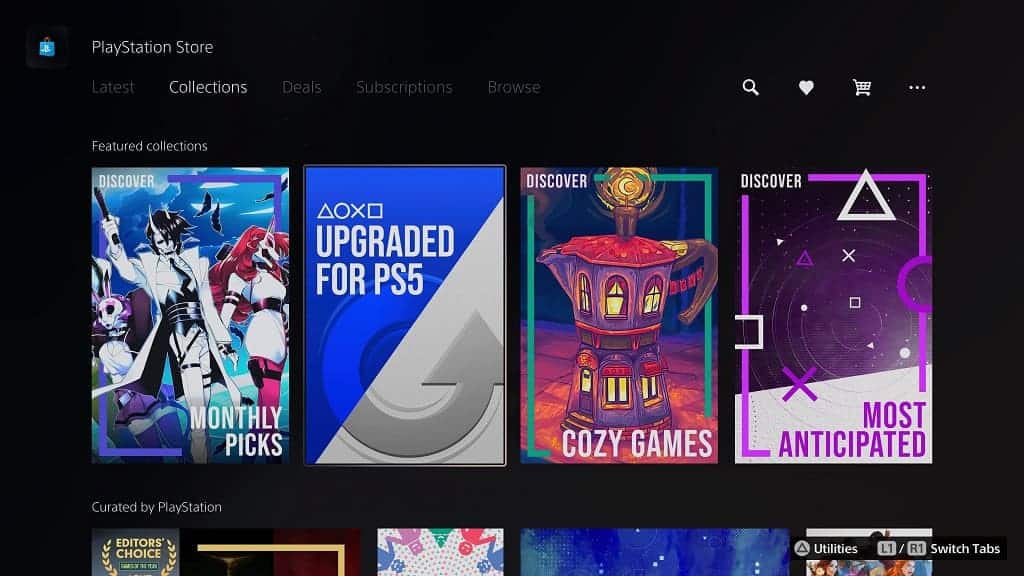
If you don’t see it on the front page, then you can try pressing the R1 button to switch from the Latest tab to the Collection tab. You should be able to find the Upgraded for PS5 option from there. 

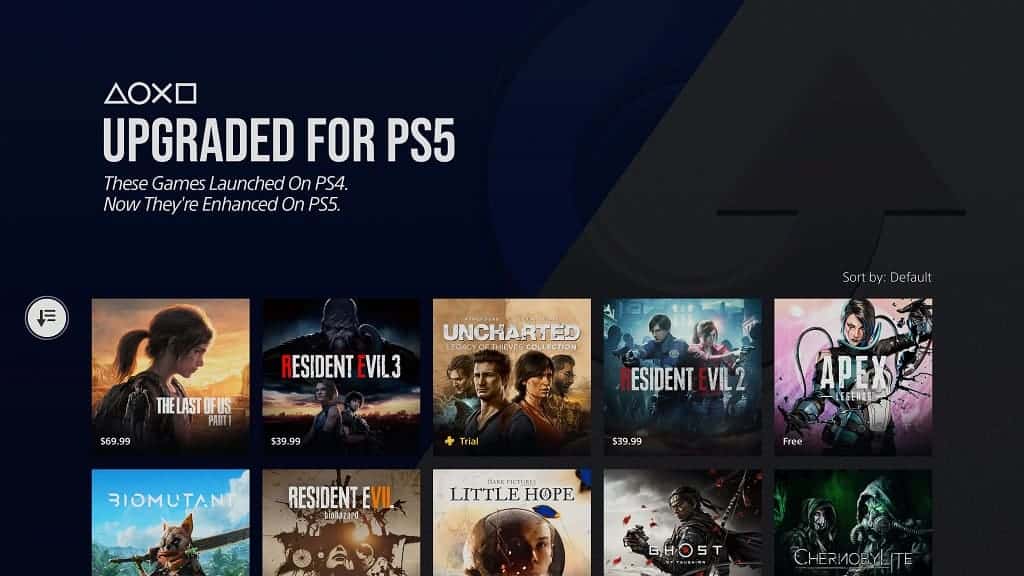
3. In the Upgraded for PS5 menu, you should find a list of games that originally came out for the PlayStation 4 and then received an upgraded native PlayStation 5 version.  

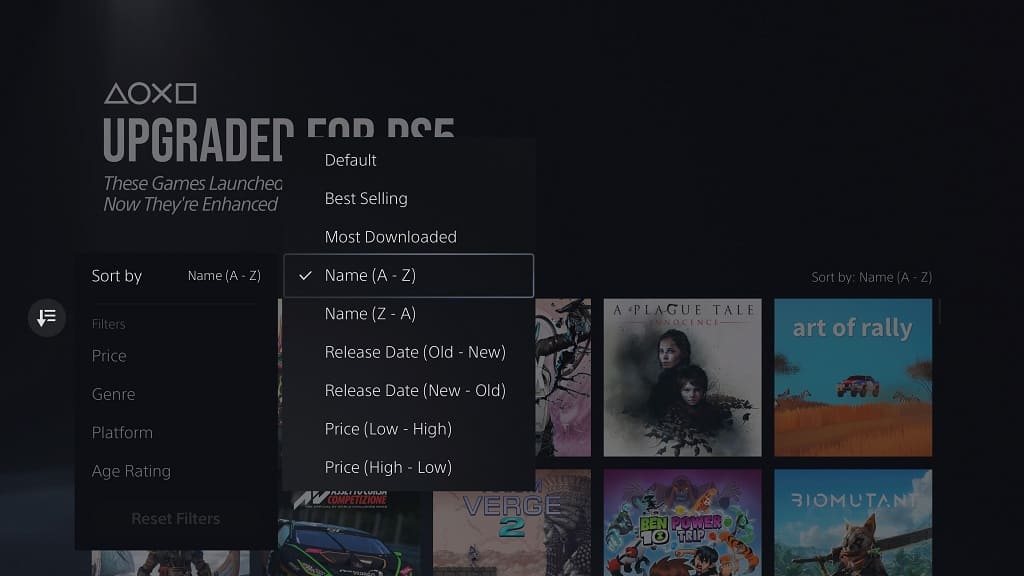
4. If you want to sort and/or filter this listing, then you can select the Sort and Filter option. You can find it on the left side as it is represented with the icon that features a down-pointing arrow with three horizontal lines.  

In the small window, you can select the Sort By option and then the following order options: 

  • Default  
  • Best Selling  
  • Most Downloaded  
  • Name (A to Z)  
  • Name (Z to A)  
  • Release Date (Old to New)  
  • Release Date (New to Old)  
  • Price (Low to High)  
  • Price (High to Low) 

You can also filter the listing based on genre, platform and age rating.  

When it comes to PS4 games that were upgraded to PS5, you will be able to download some of these titles at no additional costs if you previously acquire the PS4 version. For other titles, you are required to pay a small feed to upgrade to the native PS5 version. 

Furthermore, some games don’t offer any upgrade paths whatsoever. In these cases, you need to buy the game at its full listed price if you want the native PS5 version.

How to check if a game supports Remote Play on PS5

One of the cooler features of the PlayStation 5 and PlayStation 5 Digital Edition consoles is Remote Play, which lets you play a game on a different device. To see how you can see whether or not a game is compatible with this feature, you can take a look at this step-by-step tutorial from Seeking Tech. 

1. Start off by turning off your console and then going to the home screen. 

If you don’t know how to go home, then you can simply press and hold the PS button. You can also press the PS button and then select the house icon from there. 

2. Open the PlayStation Store from the home screen. 

3. Inside the PlayStation Store, select the game that you want to check its Remote Play compatibility status for. 

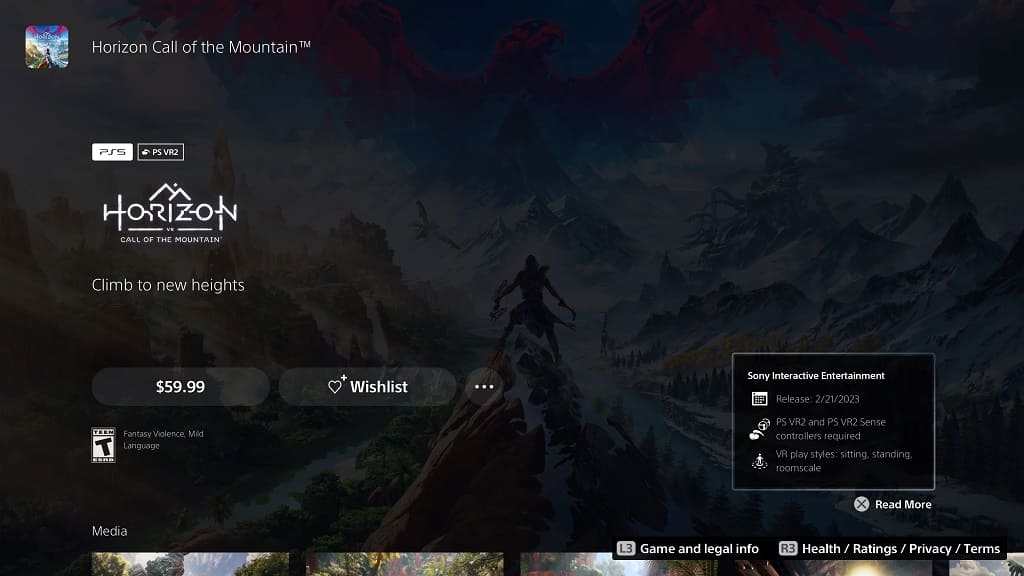
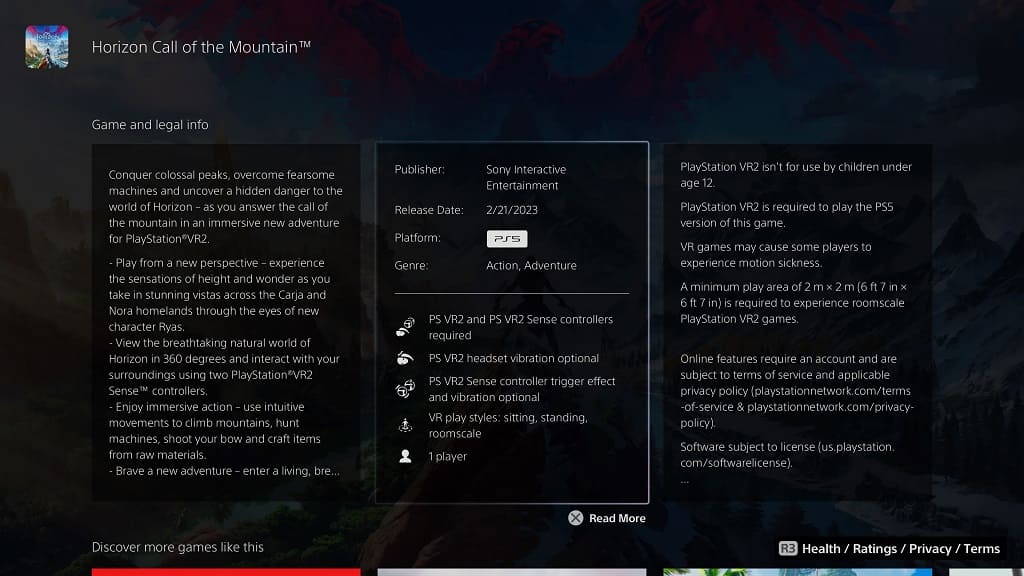
4. On the game’s product page you can either select the box on the right side near the top or the middle box in the Game and Legal Info section near the bottom. 

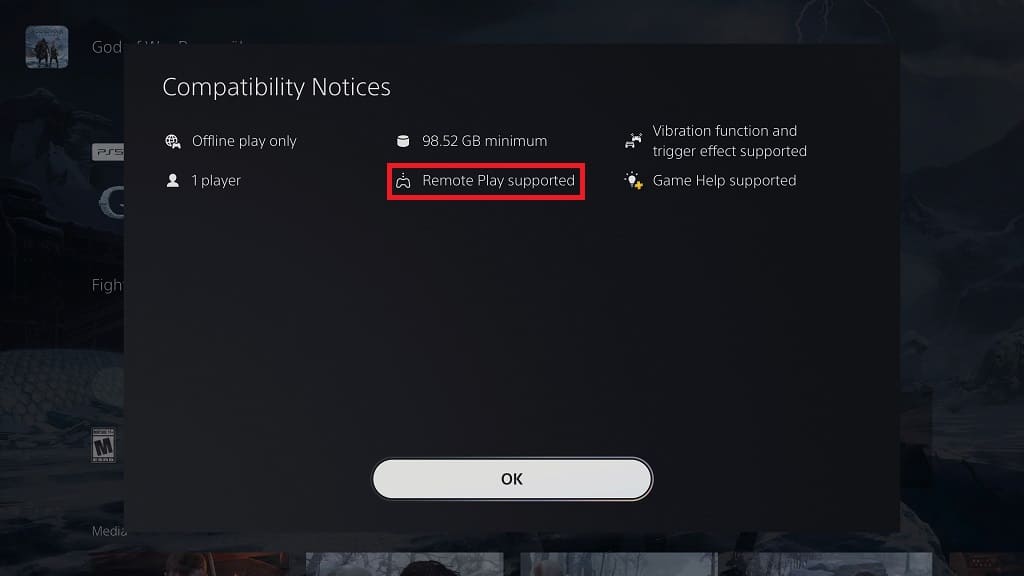
5. If done correctly, you should bring up the Compatibility Notices menu for the game. Here, you should see the “Remote Play supported” listed if the game can be played on other devices.  

6. It is important to note that, even if “Remote Play supported” is not listed in the Compatibility Notices menu, the game may still work with the feature. 

To really make sure, you can try starting the game if you have it installed on your PlayStation 5. If you are able to boot into the main menu successfully, then the game supports Remote Play. 

In order to enable Remote Play on your PS5, you need to go to Settings > System > Remote Play and then turn on the Enable Remote Play feature. 

If you want to turn on your PS5 remotely via Remote Play, then you need to go to Settings > System > Power Saving > Features Available in Rest Mode. From there, you need to turn on both the Stay Connected to the Internet and Enable Turning on PS5 from Network features. 

Keep in mind that a vast majority of PlayStation 4 and PlayStation 5 games support Remote Play. The only exceptions are game that requires the PlayStation Camera, PlayStation VR, PlayStation VR 2 as well as any other controllers or accessories that aren’t the DualShock 4 or DualSense.  

You also won’t be able to stream games from PlayStation Plus Premium. Instead, you need to use the official PlayStation Plus App to stream PS3 and PS4 games on the device.

How to find PlayStation VR 2 games on the PlayStation Store of PS5

You are now able to purchase and pre-order PlayStation VR 2 games on the PlayStation Store of your PS5 or PS5 Digital Edition system. Finding these virtual reality titles can be a little tricky, however, as Sony does not make it completely obvious where to look.  

If you are having problems locating them, then you can check out this tutorial at Seeking Tech to see how you can find PS VR2 games on the shopping app of your PlayStation 5 console. 

1. Start off by turning on your PS5 and then heading into its home screen if you aren’t there already.  

If you are doing something else on your console at the moment, then you can go home quickly by long pressing the PS button on your controller for a second. 

2. From the home screen, you need to go to the PlayStation Store. 

3. Inside of the store, make sure that you are in the Latest, Collections or Deals tab. You can switch section from the main menu by pressing the L1 and R1 buttons on the controller. 

4. Next, you need to scroll down until you get to the See More section. 

5. You should be able to find and select PS VR2 from there. 

6. Once you get to the PlayStation VR 2 menu of the PlayStation Store, you should see a list of games that either require or optionally support the virtual reality headset. 

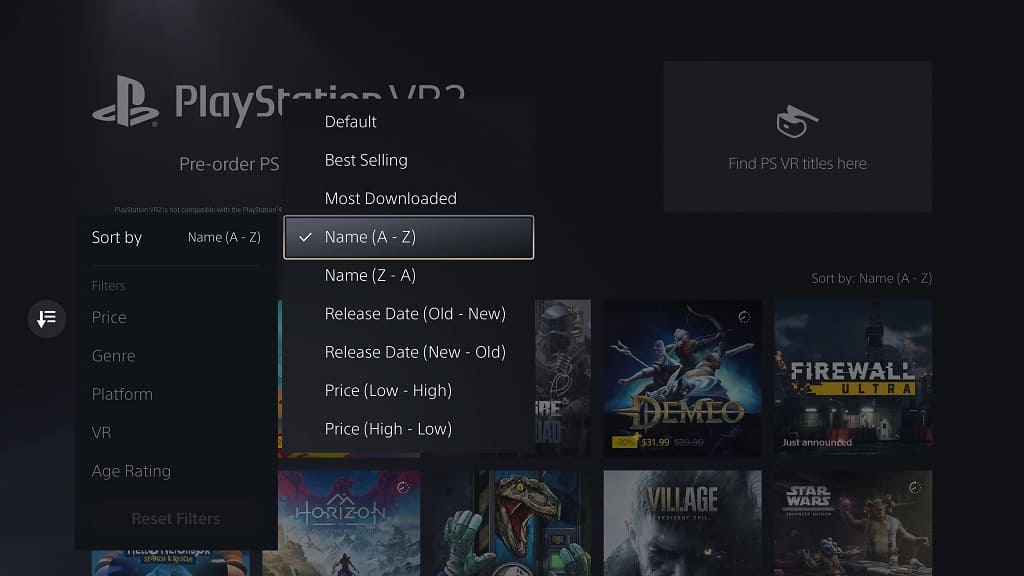
If you want to sort the listing, then you need to move the cursor to the right and then select the Sort and Filter option. 

In the pop-up menu on the left side, you should select the Sort By option and then any of the following: 

  • Default 
  • Best Selling 
  • Most Downloaded 
  • Name (A to Z) 
  • Name (Z to A) 
  • Release Date (Old to New) 
  • Release Date (New to Old) 
  • Price (Low to High) 
  • Price (High to Low) 

7. You can also use the Sort and Filter menu to filter the listing based on Price, Genre and Age Rating. 

While you can also filter based on Platform, PlayStation VR 2 games only support the PS5. Therefore, the list will be completely empty if you only select PS4. 

You can also filter based on VR. Since you are already in the PlayStation VR 2 menu, however, it should already show all of the games that are compatible with the virtual reality headset.

How to check supported PS VR2 features for any game on PS5

The PS VR 2 is a new virtual reality headset for the PlayStation 5 and PlayStation 5 Digital Edition systems. It comes with new features such as OLED display, eye tracking and headset vibration. The PlayStation VR 2 Sense controllers also includes adaptive triggers and haptic feedback. 

To see which specific game is compatible with these unique virtual reality headset and controller features on the PS5, you can take a look at this tutorial from Seeking Tech. 

1. To start off, you need to turn on your PlayStation 5 if you haven’t done so already. 

2. Next, you need to head over to the PlayStation Store from the home menu. 

If you aren’t in the home menu at the moment, then you can get there quickly by pressing and holding the PS button on the controller for around 1 second. 

3. In the PlayStation Store, head over to the product page of a PlayStation VR 2 game. 

To find a list of PSVR2 titles, make sure you are in the Latest, Collections or Deals tab of the PlayStation Store. From there, you should be able to find and select the PS VR2 option in the See More section at the bottom.  

You can also simply search for the game if you know what specific title you are looking for. 

4. On the game’s product page, you can select the box located on the right side. The Read More option should pop-up when the box is highlighted. 

Alternatively, you can also scroll to downloads and then select the middle box in the Game and Legal Info section. 

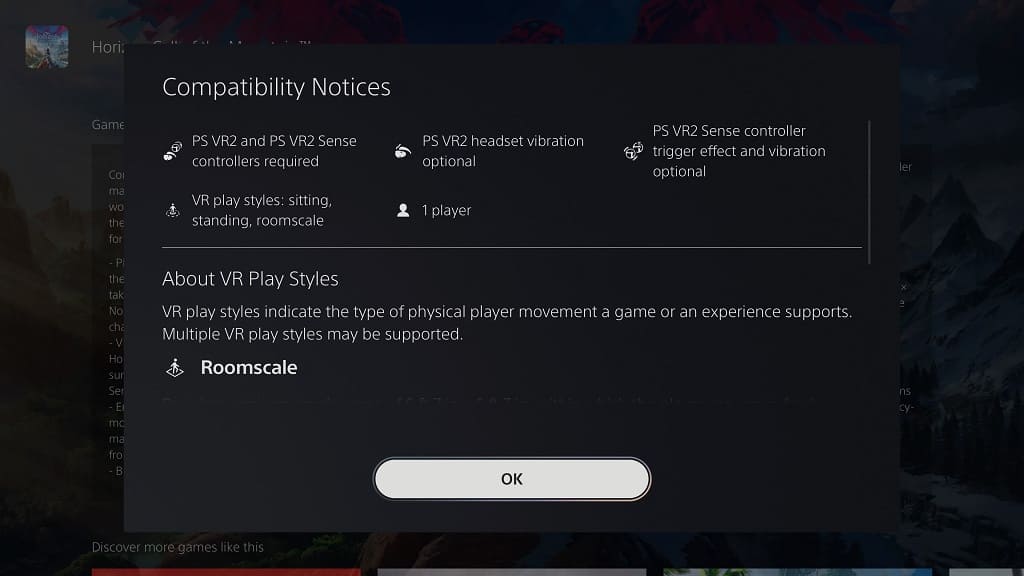
5. If done correctly, you should see a Compatibility Notices menu for that specific game. 

Here, you will see a list of supported PlayStation VR 2 features, including the following:  

  • PS VR2 and PS VR2 Sense controllers required 
  • PS VR headset vibration optional 
  • PS VR2 Sense controller trigger effect and vibration optional 
  • VR play styles: sitting, standing, room scale  

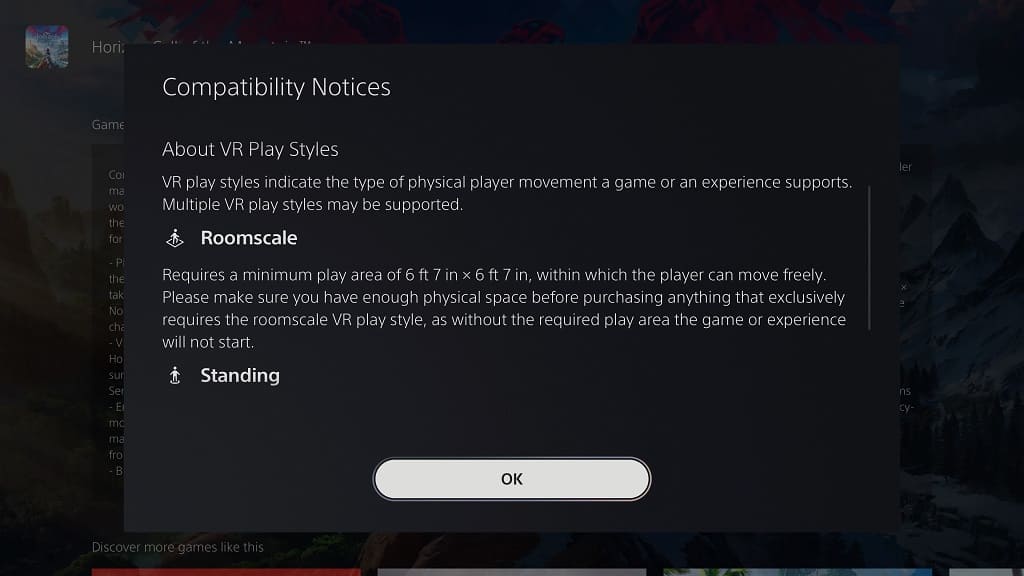
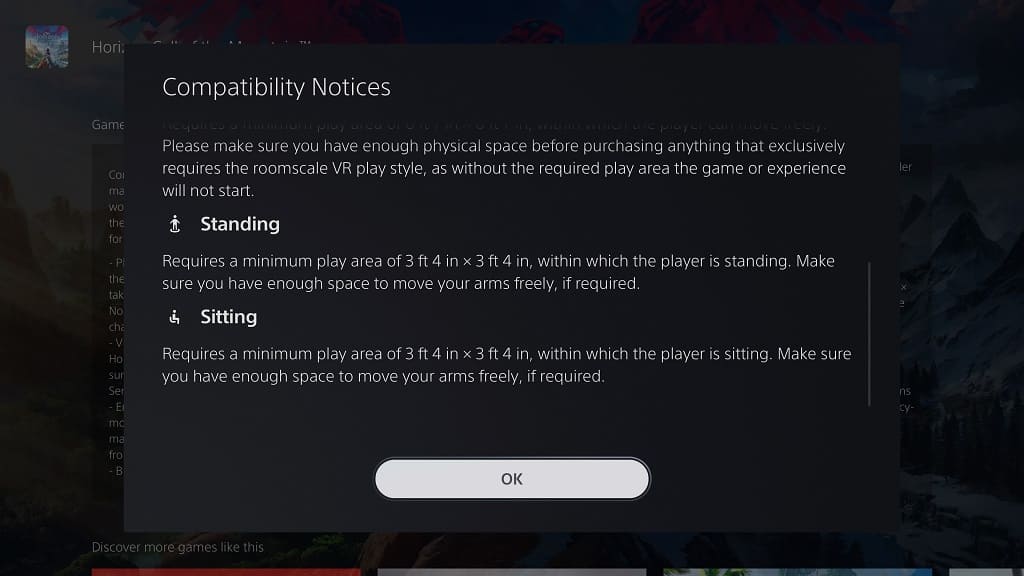
You should also see a description for the types of VR Play Styles.  

The “Sitting” style means that you can play the game while sitting down while the “Standing” style means that it can be played while you are standing on your feet. Both of these requires a minimum play area that is 3 ft. 4 in. x 3 ft. 4 in. 

There is also the “Roomscale” option, which will allow you to move around. This style requires a much larger play area at 6 ft. 7 in. x 6 ft. 7 in.