How to fix DualSense battery drain issues

If you have a DualSense, you may have noticed that the battery of the controller will mysteriously drain when not in use.

If you are experiencing this problem, then you can follow this guide at Seeking Tech to find some potential fixes.

Unplug the DualSense from USB port

If you keep your DualSense plugged into a USB port, even after the controller and the PlayStation 5 (or PC) are turned off, then it may lead to battery drainage overnight or over an extended period of time.

Therefore, we recommend disconnecting the DualSense from the USB port when you are not recharging its internal battery.

If you are recharging the battery for the PS5 controller, then you can wait until it is fully charges before unplugging it from the USB port.

Resetting the DualSense

The battery drainage could also be related to the software inside the DualSense. Thus, you may want to perform a factory reset on the controller and then update to the latest firmware.

In order to do so, you need to take the following steps:

1. Locate the small hole located on the back of the DualSense. It should be the right of the SONY trademark.
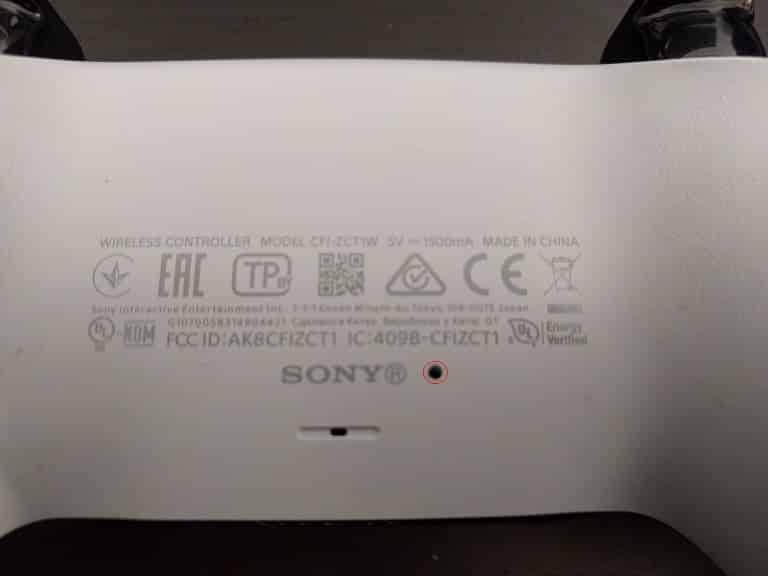
2. Use a pin, toothpick or another similarly sized object to press down on the reset button at the bottom of this small hole.

3. Hold down this button for around 3 to 5 seconds in order to reset the PS5 controller.

4. After holding the reset button down for the aforementioned length of time, let go of the button.

5. Now connect the DualSense to your PlayStation 5 via an USB cable.

6. Turn on the PlayStation 5 system.

7. Press the PS button on your DualSense.

8. Select your user profile to go the home screen menu.

9. If the system detects that there is a new firmware for the DualSense, it will prompt you to update. Follow the on-screen instructions to update to the latest firmware for the PS5 controller.

How to automatically turn off the DualSense controller

If you are still experiencing issues with your DualSense draining battery power when not in use, you can also automatically turn off the controller after a set amount of time.

In order to do so, you need to do the following:

1. First off, you need to be in the home screen, which is the main menu where you can select which game to play.

2. From the home screen, select the gear cog icon, which represents Settings, located on the top right corner.

3. From the Settings menu, select System from the list of available options.

4. From the System menu, select Power Saving from the list of options on the left side.

5. On the right side of the same System menu, select Set Time Until Controllers Turn Off.
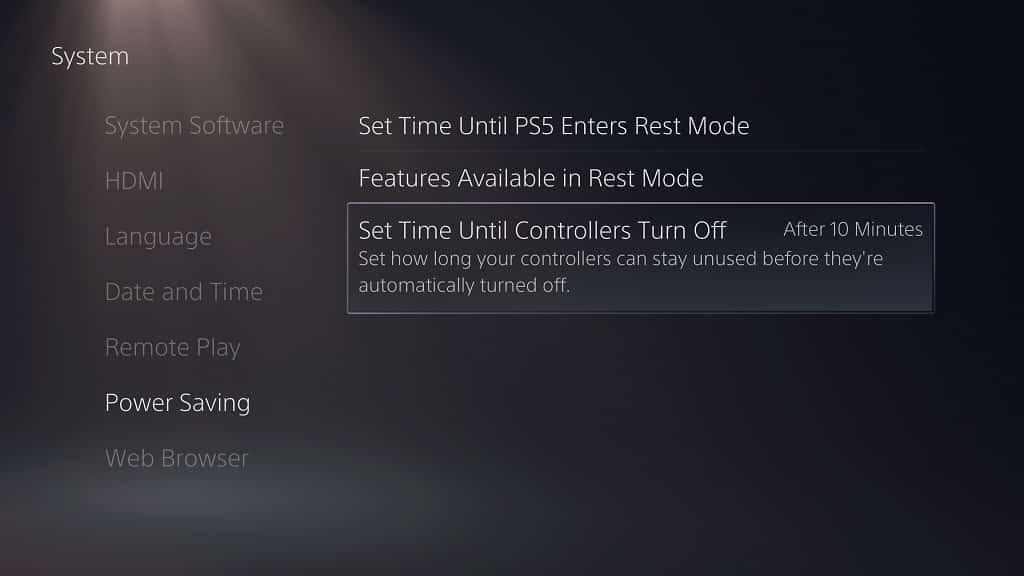
With this option, you can set how long your gamepad will stay unused before it automatically shuts down.

6. In the pop-up menu, you have the following options:

  • After 10 Minutes
  • After 30 Minutes
  • After 60 Minutes
  • Don’t Turn Off

To prevent any battery drainage, we recommend choosing any of the After 10 Minutes, After 30 Minutes and After 60 Minutes options.

For the best option when it comes to saving the battery life of the DualSense from depleting, you should select the After 10 Minutes option.

If you are looking for more tips in regards to increasing the battery life of your DualSense before having to recharge the controller again, then you can check out this tutorial.

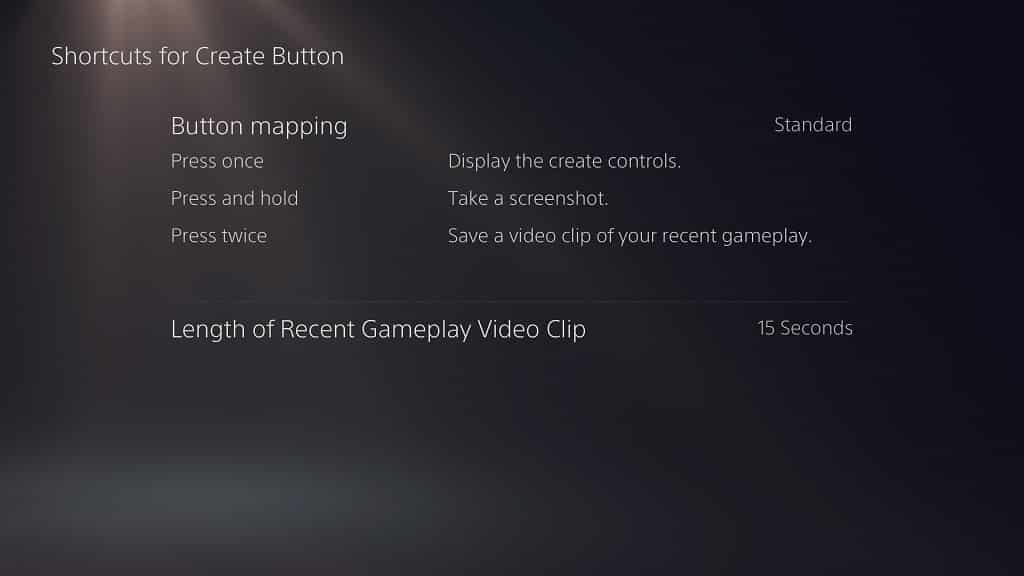
How to change the Create button functions for DualSense on PS5

With the PlayStation 5 and PlayStation 5 Digital Edition, Sony decided to rename the Share button to the Create button.

The Create button on the DualSense is designed to capture screenshots and videos. There are several ways you can customize how this button functions.

If you are interested in doing so, then you can follow this guide from Seeking Tech.

How to change the DualSense Create button functionalities on PS5

To change how the Create button on the DualSense works when connected to the PlayStation 5, you need to do the following:

1. If you haven’t done so already, you need to go to the home screen. This is the main system menu you use to browse through which game to play.

2. From the home screen menu, look for the gear cog icon on the top right corner. Select the icon to head into “Settings.”

3. Once you are in the “Settings” menu, you should select the “Captures and Broadcasts” options at the very bottom of the list.

4. In the “Captures and Broadcasts” menu, you should select the “Captures” option on the left.

5. On the right side of the same “Captures and Broadcasts” menu, you should select the “Shortcuts for Create Button” option.

6. In the “Shortcuts for Create Button” menu, select the “Button mapping” option.

7. In the pop-up menu, you will have three choices:

  • “Standard”
  • “Easy Screenshots”
  • “Easy Video Clips”

You can take a look at what each of these custom settings does below:

Standard:

  • Press Create Button Once: Open the create control quick menu.
  • Press and Hold Create Button: Capture a screenshot.
  • Press Create Button Twice: Record a clip of your recently gameplay.

Easy Screenshots:

  • Press Create Button Once: Capture a screenshot.
  • Press and Hold Create Button: Open the create control quick menu.
  • Press Create Button Twice: Record a clip of your recently gameplay.

Easy Video Clips:

  • Press Create Button Once: Capture a screenshot.
  • Press and Hold Create Button: Open the create control quick menu.
  • Press Create Button Twice: Manually start or end a video recording.

Select to whichever option you feel is best based on your screenshot and video capturing needs.

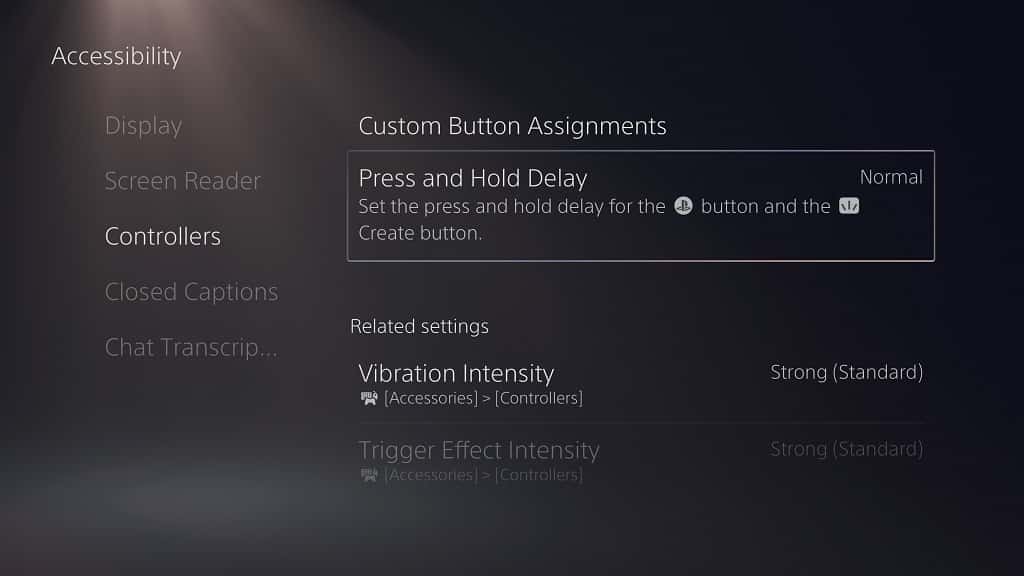
To set how long you are required to press and hold the Create button in order for it to be registered as a different function as opposed to a single press, you need to take the following steps:

1. Inside the home screen menu, you need to head to “Settings.”

2. From inside the “Settings” menu, you need to select the “Accessibility” option near the top of the list.

3. Inside the “Accessibility” menu, you have to select the “Controllers” option on the left side of the screen.

4. On the right side of the same “Accessibility” menu, you need to select the “Press and Hold Delay” option.

5. In the pop-up menu, you can select either “Normal” (if you want the press and hold action for the Create button to be shorter) or “Long” (if you want the press and hold action for the Create button to be longer).

How to become close friends with another PSN user on PS5

With the PlayStation 5, as well as the PlayStation 5 Digital Edition, you have the ability to add a PlayStation Network user as a “close friend.”

You can follow this tutorial from Seeking Tech to find out what this feature does and how to access it.

What does being close friends mean on PS5?

Being close friends with a PSN user mean that you are able to view each other’s real names and profile pictures while playing in a game as well as in other situations.

How to follow a PSN user on PS5

In order to be close friends with a PSN user, you need to be friends first.

To add a friend, you can take the following steps:

1. Press the PS button on your DualSense to bring up the control center quick menu.

2. In the control center, navigate down to the bottom menu and then select the “Game Base” option.

3. In the pop-up menu, press the Options button on your DualSense and then select the “Go to Game Base” option.

4. In the “Game Base” menu, press the R1 button on your PS5 controller until you get to the “Search” section.

5. In the “Search” section, you can select the “Search for players” field to manually type in the user name that you want to add as a friend. The “Search” section also provides a list of players you may know through a mutual friend.

6. Select the user name you want to add as a friend.

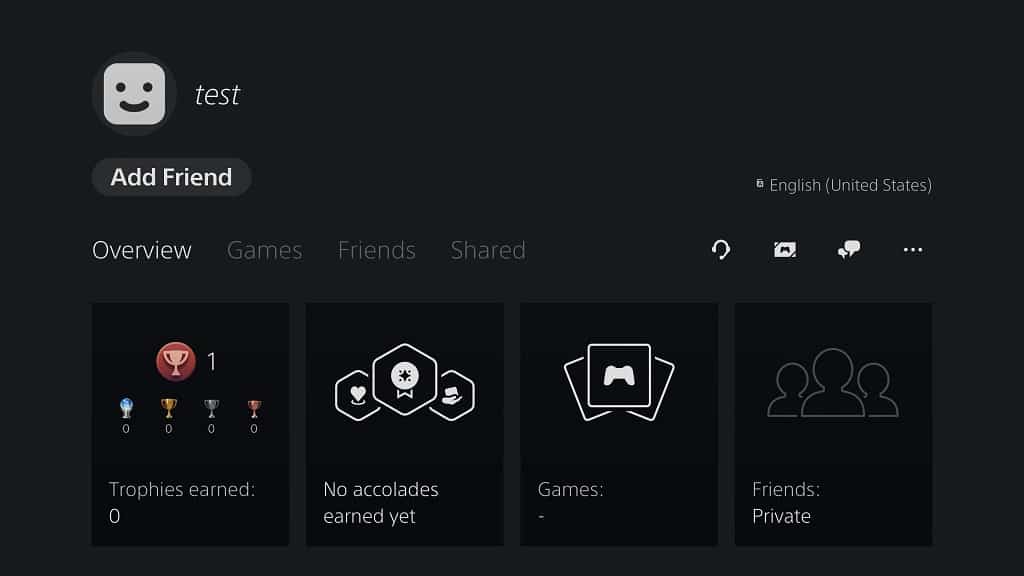
7. In the next screen, select the “Add Friend” option.

8. The PSN user you sent the friend request to must accept the invitation on their end in order for the two user accounts to become friends.

How to become close friends on PS5

To become close friends with another PSN user, you need to do the following:

1. Press the PS button on your DualSense.

2. Select “Game Base” from the control center.

3. Press the Options button on your DualSense and then select the “Go to Game Base” option.

4. In the “Game Base” menu, press R1 button on your DualSense until you get to the “Friends” section.

5. In the “Friends” section, select the PSN user name which you want to become close friends with.

6. In the next screen, select the “…” option, which is located all the way to the right in the top menu.

7. In the pop-up menu, select the “Become Close Friends” options to send the request.

8. The other PlayStation Network user must accept the offer in order for the two accounts to become close friends.

How to customize close friends settings on PS5

If you want to customize your close friends settings on the PlayStation 5, you can do so with the following steps:

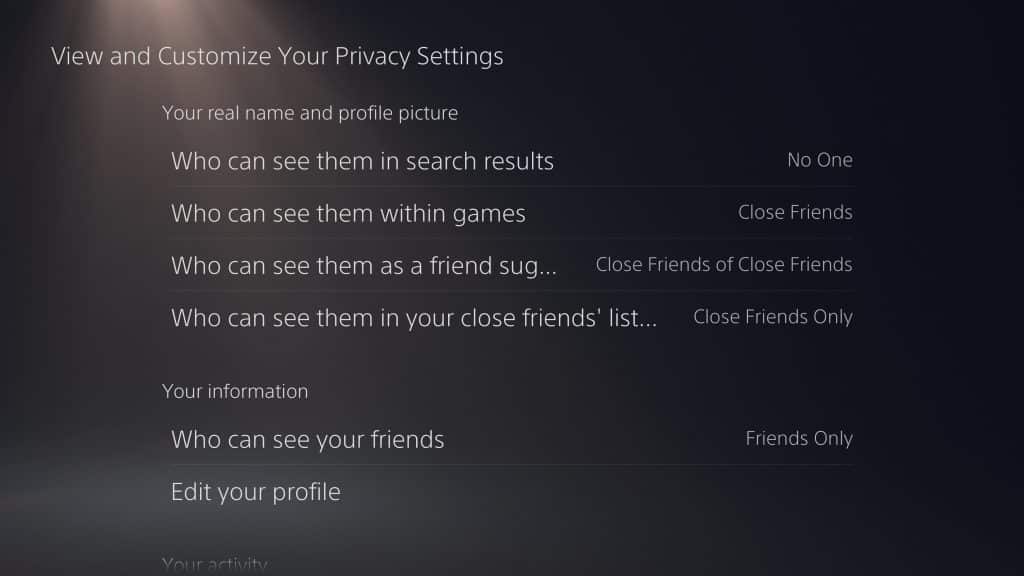
1. The first step is to go to the “View and Customize Settings Your Privacy Settings” menu. There are two ways to get to this location:

The first is to go to the home screen, which is the main system menu where you can pick out which game to play. From the home menu, select your profile picture on the top right corner of the screen and then select the “Profile” option from the pop-up menu. In your profile menu, select “Privacy Settings,” which is the right-most option from the top menu.

The other method is by selecting “Settings,” which has a gear cog symbol located on the top right corner, from the home screen. In the “Settings” menu, select “Users and Accounts.” In the “Users and Accounts” menu, select the “Privacy” option on the left side and then the “View and Customize Settings Your Privacy Settings” option on the right side of the same screen.

2. In the “View and Customize Settings Your Privacy Settings” menu, you will be able to adjust three settings related to close friends:

The “Who can see them within games” setting will let you display your real name and profile picture when playing a game. You can set this to “No One” or “Close Friends.”

The “Who can see them as a friend suggestion” setting will let you show your real name and profile picture during a friend suggestion. You can set this to “No One” or “Close Friends of Close Friends.”

The “Who can see them in your close friends’ list of friends” setting will let you show your real name and profile picture on your close friend’s list of friends. You can set this to “Close Friends Only” or “Close Friends of Close Friends.”

There are other privacy settings in the “View and Customize Settings Your Privacy Settings” menu that you can customize as well in regards to your general friends.

How to view the file sizes for games on PS5

The PlayStation 5, as well as the PlayStation 5 Digital Edition, only comes with 825 GB of console storage space. Not to mention that a big chunk of the solid state drive has already been allocated for the user interface and system files.

Thus, it is very important to keep track of the file sizes for your video game.

You can check out this tutorial from Seeking Tech to see how you can view the file size for a game on the PS5.

How to view the file size for an individual installed game

In order to find the file size of an individual game that is installed on your PlayStation 5 system, you need to take the following steps:

1. First off, you need to be in the home screen. This is the main system menu where you can choose between a list of games to play.

2. Next, navigate over to the game that you want to view the file size for.

If you can’t find your game on the home screen, select the “Game Library” option, which is located all the way to the right of the Games section. In the “Game Library” menu, press the R1 button on your remote to go to the “Installed” section, which shows a list of games that are currently installed.

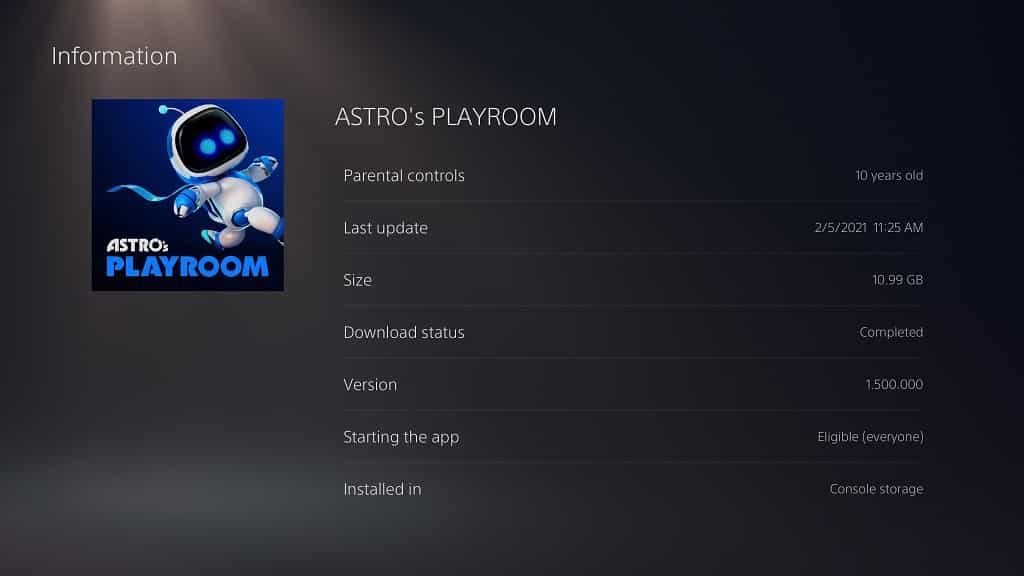
3. With the game highlighted, press the Options button on your DualSense. The Options button has three vertical lines on top of it and is located directly to the left of the Triangle button on the PlayStation 5 controller.

4. In the pop-up menu, select the “Information” option.

5. In the “Information” page, you will find the size of the game.

How to view the file sizes for multiple installed games

To view the file sizes for multiple games installed on your PS5, you need to do the following:

1. From the home screen, you need to select the “Settings” option. You can find this on the top right corner as it is attached to the gear cog symbol.

2. Once you are in the “Settings” menu, you need to select the “Storage” option from the list.

3. In the “Storage” menu, you can select either “Console Storage” or “USB Extended Storage.”

You need to select the “Console Storage” option to view the file sizes of games that are installed on the internal solid state drive of your PlayStation 5.

You need to select “USB Extended Storage” option to view the file sizes of games that are installed on the external storage drive connected to your PS5.

5. On the right side of the same “Storage” menu, select the “Games and Apps” option.

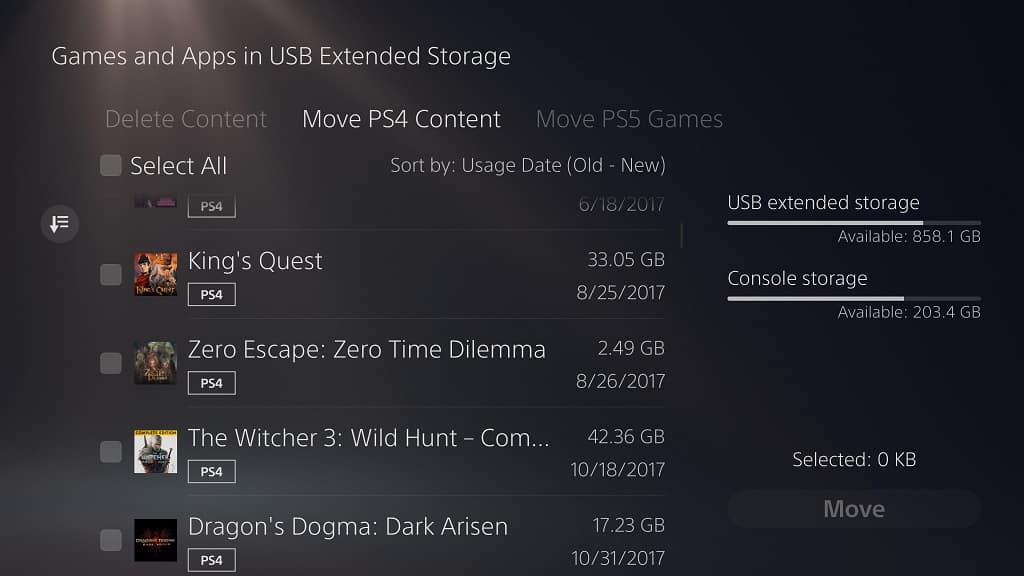
6. In the “Games and Apps” menu, you will see a list of games that are installed on the drive as well as their file sizes. You can sort the listing by using the “Sort” option, which has a symbol that is a combination of a down pointing arrow and three horizontal lines, to the left.

In the “Games and Apps” menu, you can also delete the game files or move them over to another drive.

How to view the file sizes for games not installed on PS5

To view the file sizes for games you don’t have installed on your PlayStation 5, you need to take the following steps:

1. From the home screen, go to your “Game Library.”

2. In the “Game Library” menu, select the game you want to view the file size for by pressing the X button on your DualSense controller.

3. On the game’s menu, select the “…” option.

4. In the pop-up menu, select “View Product.”

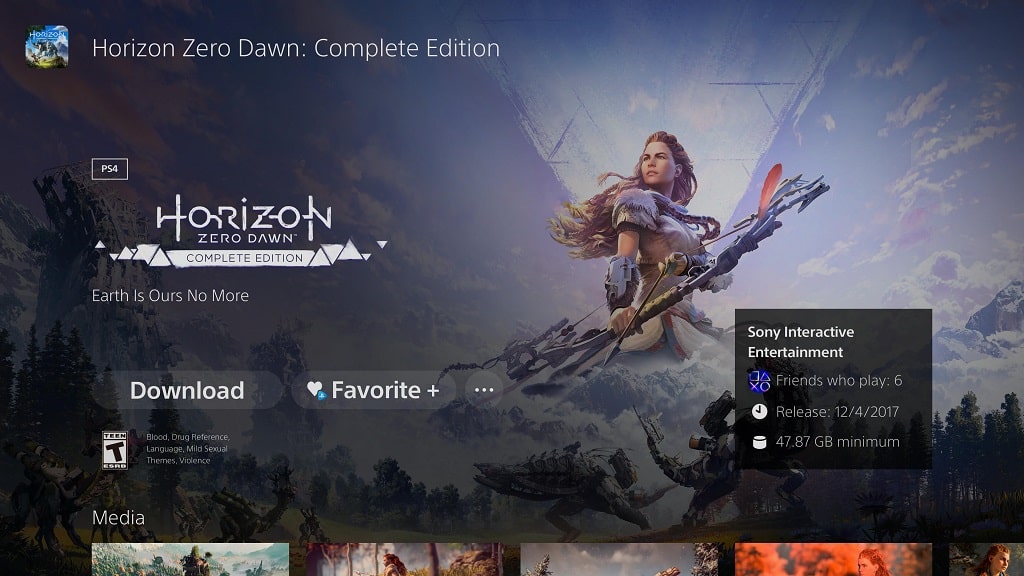
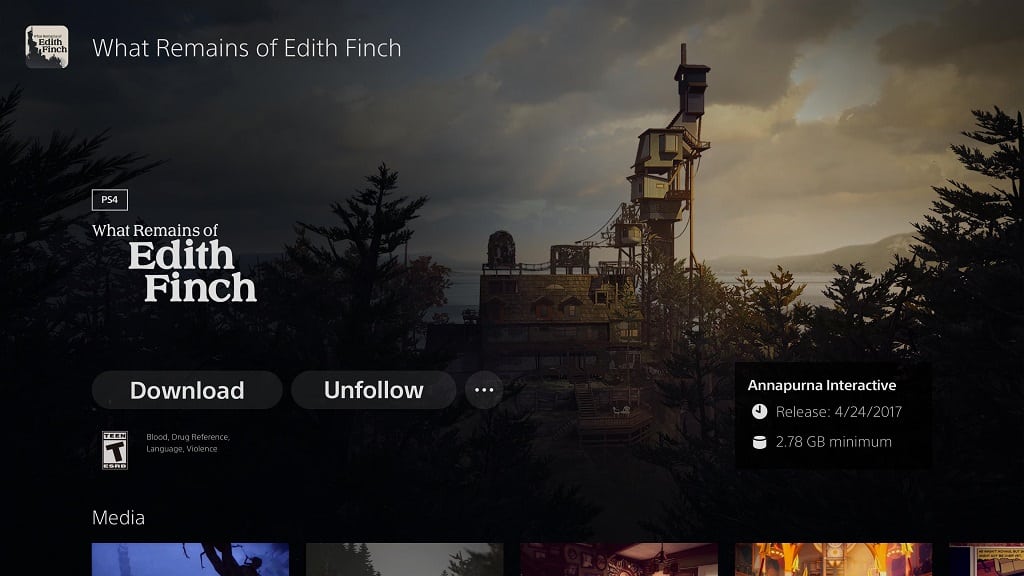
5. On the lower right side of the next screen, you will see the minimum file size requirements for the game.

How to view the file sizes for games on the PlayStation Store on PS5

If you want to view the file size for a game that you haven’t purchased and/or downloaded, you need to do the following:

1. From the home screen, go to the PlayStation Store, which has the blue shopping bag symbol.

2. Once you are inside the PlayStation Store, you need to select the “Search” option on the upper right corner of the menu.

3. In the next screen, select the “Search for games and add-ons” field to bring up a virtual keyboard.

4. Type in the game’s title using the virtual keyboard.

5. Press the R2 button on the DualSense or select the “Done” key from the virtual keyboard to confirm the search result.

6. Select the game from the search results.

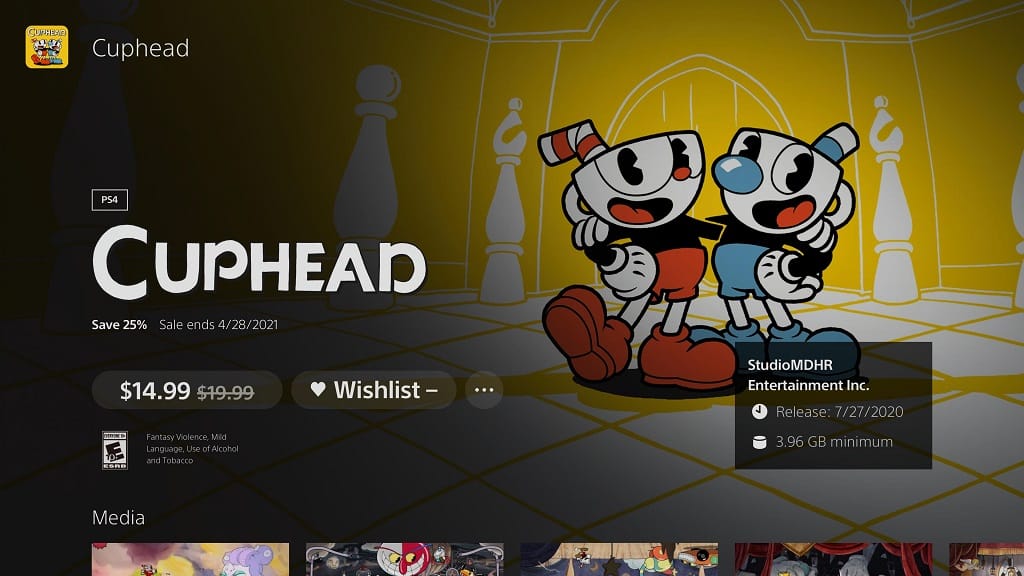
7. On the game’s product page, you will see the minimum file size requirements for the game on the lower right side of the screen.

Are the file sizes on PlayStation 5 accurate?

The file sizes of games you have installed on the console storage or USB Extended Storage should be accurate. With that said, games will take up additional space that the PS5 categorizes as “Other.” You can find out more about the “Other” data with this article.

The file sizes of games that you don’t have installed is the minimum required to install on your PlayStation 5 system. So, the actual file size may end up being bigger. The console will warn you when you don’t have enough space to install a game.

How to safely disconnect the external HDD or SSD from PS5

With the PlayStation 5 or PlayStation 5 Digital Edition, you can connect an USB extended storage drive.

You can move games to the external storage to save space on the console storage. You can also play PlayStation 4 games directly on the external drive.

With that said, disconnecting the USB extended storage drive from your PlayStation 5 incorrectly may end up damaging your external drive as well as your system.

You can follow this guide at Seeking Tech to find out how to safely disconnect the external drive from your PS5 console.

Method #1: Turning off the PlayStation 5

The first method to safely disconnecting the USB extended storage drive from your PlayStation 5 is by completely turning off the system.

We don’t recommend keeping your external drive connected to the PS5 if you are using rest mode as it could cause problems. Not to mention that disconnecting while your system is in rest mode could also cause issues to both the USB extended storage drive and the PlayStation 5 as well.

There are two ways to turn off the PS5.

The first method shutting down the console is to simply press and hold the power button on the system. You should hear an initial beeping noise and then a second beeping noise. You should also get the “Preparing to turn off your PS5” message on the screen as well.

The second method is to press the PS button on your DualSense as it will open the control center quick menu. Here, you need to navigate down to the bottom menu and then select the “Power” option. In the following pop-up menu, select the “Turn Off PS5” option. You should then get the “Preparing to turn off your PS5” message on the screen.

Wait for your system to completely power off. You can tell that your PS5 is no longer turned on when there aren’t any lights being displayed out of it.

Once the system is off, you should be able to safely unplug your external hard disk drive or solid state drive from the USB port.

Method #2: Disconnecting by using the PS5 menu

You can also safely disconnect the USB extended storage drive by using the system menu of your PlayStation 5. This method is for those who want to disconnect the storage drive but keep the PS5 system turned on.

If you are interested if following this method, then you need to take the following steps:

1. From the home screen, which is the main system menu you use to select a videogame to play, go to “Settings.” The “Settings” option is located on the upper right side of the menu and is attached to a gear cog icon.

2. Once you are in the “Settings” menu, select “Storage” from the list of available options.

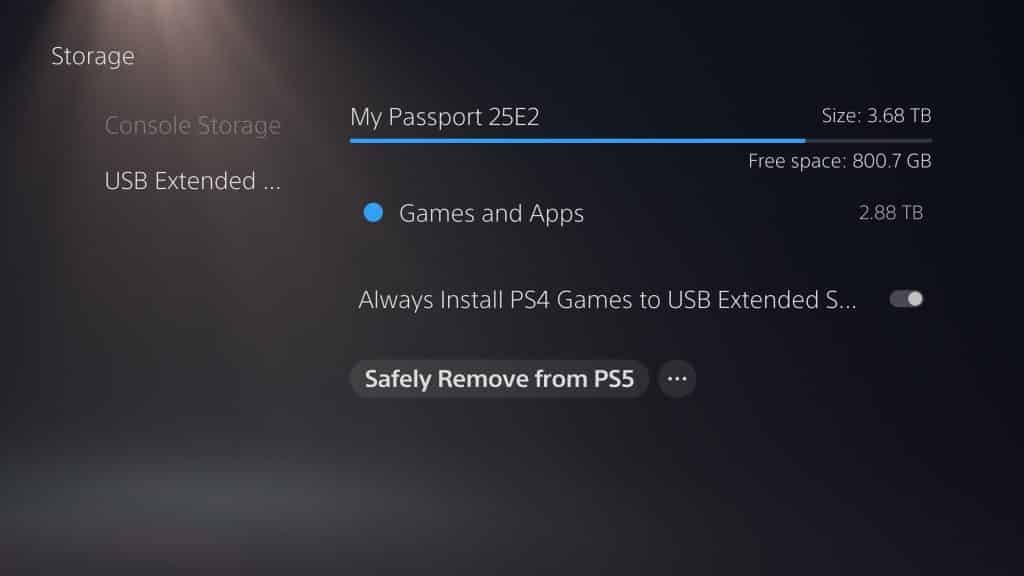
3. Once you are in the “Storage” menu, select the “USB Extended Storage” option on the left side.

4. You can then select the “Safely Remove from PS5” option on the right side from the same “Storage” menu.

If you don’t see the “Safely Remove from PS5” option, then you may have to wait a little bit for the system to detect your USB Extended Storage.

You can try backing out the “Storage” menu and then going back in again to see if the “Safely Remove from PS5” option appears.

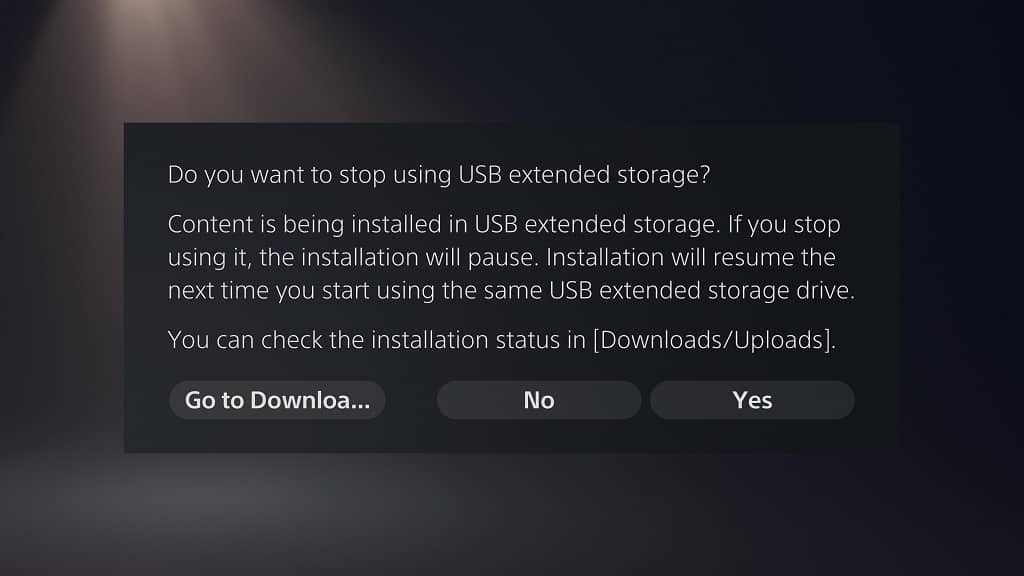
5. In the pop-up screen, select the “Yes” option when it asks if you want to stop using the USB extended storage.

You may also see a message saying that content is being installed on the external drive. If you stop using the USB drive, then the installation will pause. The next time you connect the same external storage, the installation will resume where it left off.


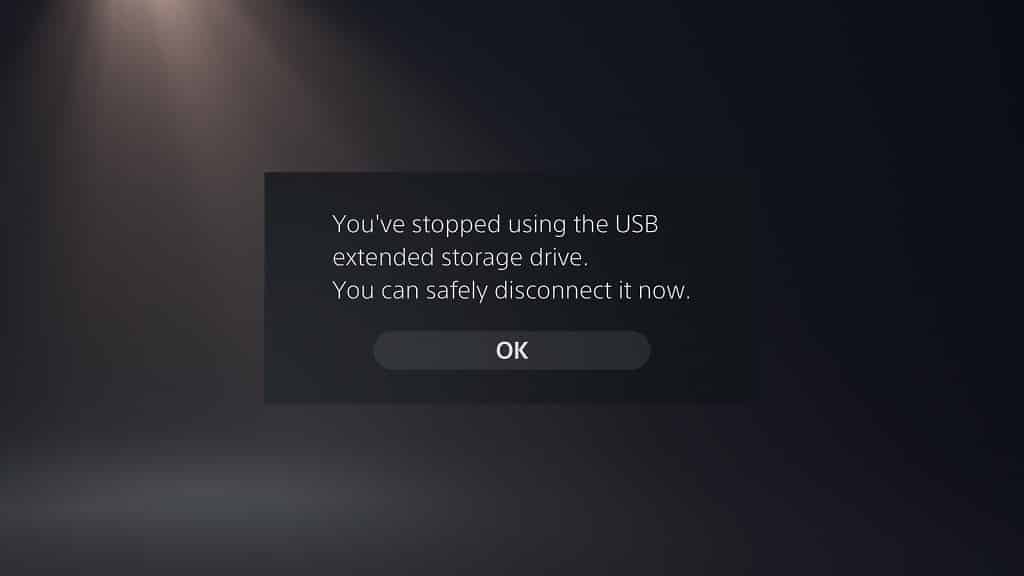
6. Afterwards, you will get a message saying that you can safely disconnect the external drive from the PlayStation 5.

How to disable PS5 menu music, menu sound effects and screen reader

By default, you will hear music and sound effects when using the menus of your PlayStation 5 or PlayStation 5 Digital Edition.

If you don’t enjoy listening to the audio, then you can follow this tutorial from Seeking Tech to see how you can disable these features.

How to disable menu music and game menu music on PlayStation 5

In order to disable the PlayStation 5 menu music, as well as the music that plays when a game is highlighted in the menu, you need to take the following steps:

1. Make sure you are in the home screen. This is the main menu where you can pick which games to play.

2. In the top right corner of the home screen, you should see the gear cog symbol, which is for “Settings.” Select the “Settings” option.

3. Under the “Settings” menu, select the “Sound” option from the list.

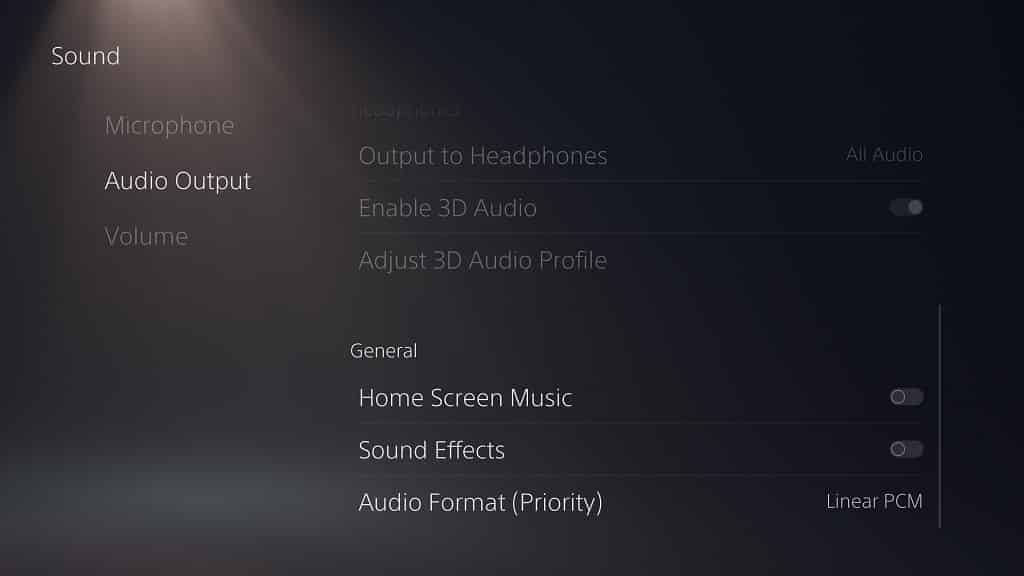
4. Under the “Sound” menu, select the “Audio Output” option from the list of the left side.

5. On the right side of the same menu, scroll down until you see the “Home Screen Music” option.

If the switch to the right of the option is white, select the option to turn the switch black, which indicates that the menu music has been turned off. You should also no longer hear any music, even when a game is highlighted, when this option is disabled.

How to disable menu sound effects on PS5

You can also turn off the sound effects you hear when navigating the PlayStation 5 menus.

In order to do so, you need to do the following:

1. In the home screen, go into the “Settings” menu.

2. Once you are in the “Settings” menu, go to “Sound.”

3. Once you are inside the “Sound” menu, select “Audio Output” from the list of options of the left side.

4. On the right side of the same screen, scroll down to the “Sound Effects” option.

If the switch to the right of the “Sound Effects” option is white, select the option to turn the switch black. This will indicate that the music sound effects have been turned off. Furthermore, you won’t be able to hear any effects when navigating the menus of the PS5.

How to disable the PS5 screen reader

The screen reader is an optional feature for the PlayStation 5 where a voice will read the texts and other relevant information when you are navigating through the menus.

If you want to turn this off, you need to take the following steps:

1. Head to the “Settings” menu from the home screen.

2. In the “Settings” menu, select the “Accessibility” option from the list.

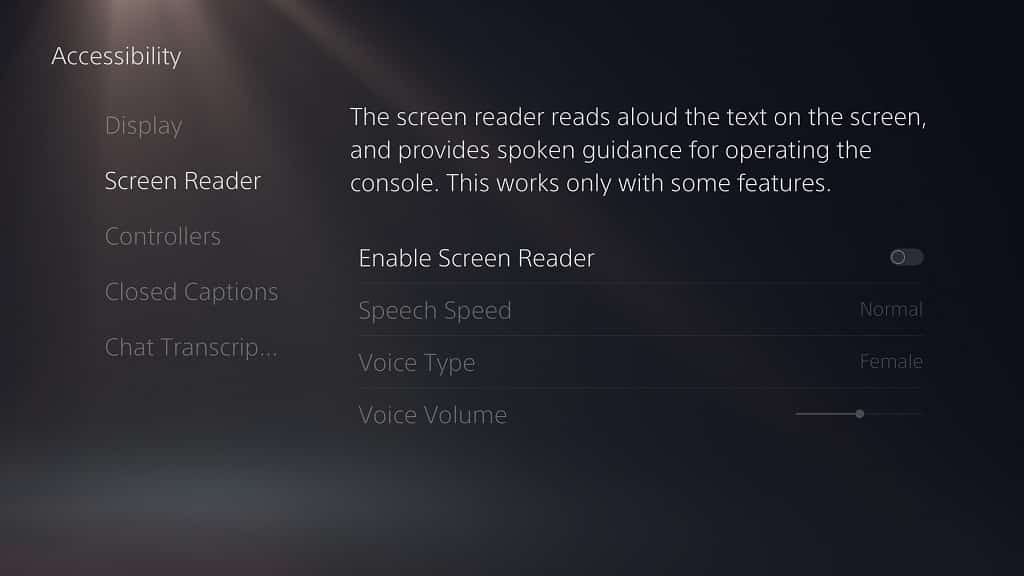
3. In the “Accessibility” menu, select “Screen Reader” from the list of options on the left side of the screen.

4. On the right side of the same “Accessibility” menu, you will see the “Enable Screen Reader” option.

If the switch to the right of the “Enable Screen Reader” option is white, select the option to turn the switch black. This will disable screen reader, which means that you no longer hear any voices when going through the system menus of your PlayStation 5 system.

Alternatively, you can leave the screen reader enabled and then customize several settings underneath the “Enable Screen Reader” option to make it a better listening experiencing.

The “Speech Speed” setting will let you change the speed of the screen reader’s voice as you can pick between the following:

  • Slow 3
  • Slow 2
  • Slow 1
  • Normal
  • Fast 1
  • Fast 2
  • Fast 3
  • Fast 4
  • Fast 5

The “Voice Type” setting will let you switch between a Male or Female sounding screen reader voice.

Last but not least, the “Voice Volume” setting will let you adjust the volume level of the screen reader voice.

How to mute the PS5 menu music, menu sound effects and screen reader

You can also mute the PlayStation 5 menu music, sound effects and screen reader with your controller.

To do so, you have to do the following:

1. First off, you need to be using a DualSense controller that is paired to your PlayStation 5 system.

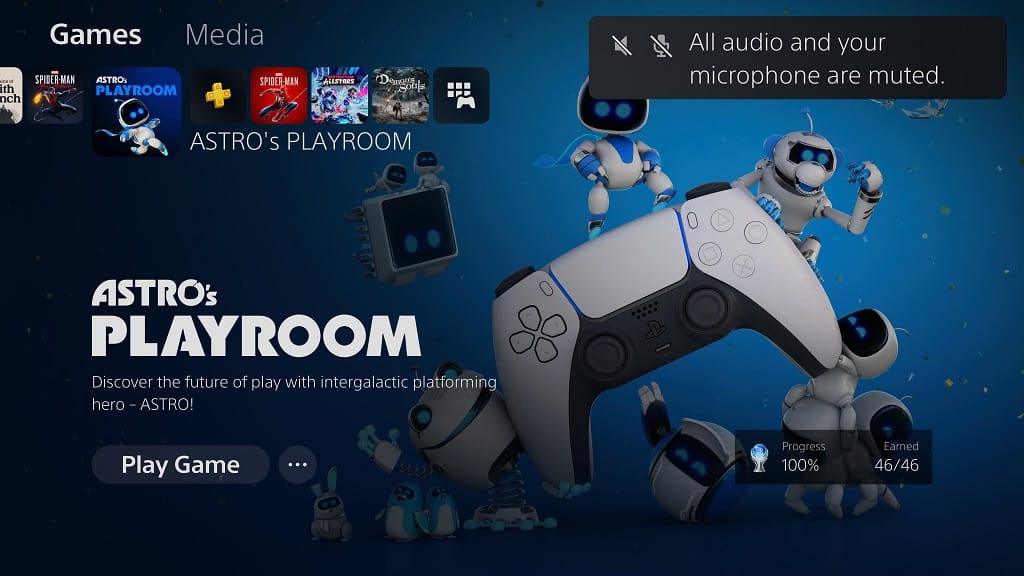
2. With the DualSense connected to your system, press and hold the Mute button. This button is a white stripe that is directly underneath the PS button.

3. Hold the button until you hear nothing and see a pop-up notification that states the following:

“All audio and your microphone are muted.”

Keep in mind that this action will also mute the audio when you are playing a game.

If you want to unmute the audio on your PlayStation 5 at any time, simply press the Mute button.

How to fix the ‘can’t find the game or app’ error on PS5

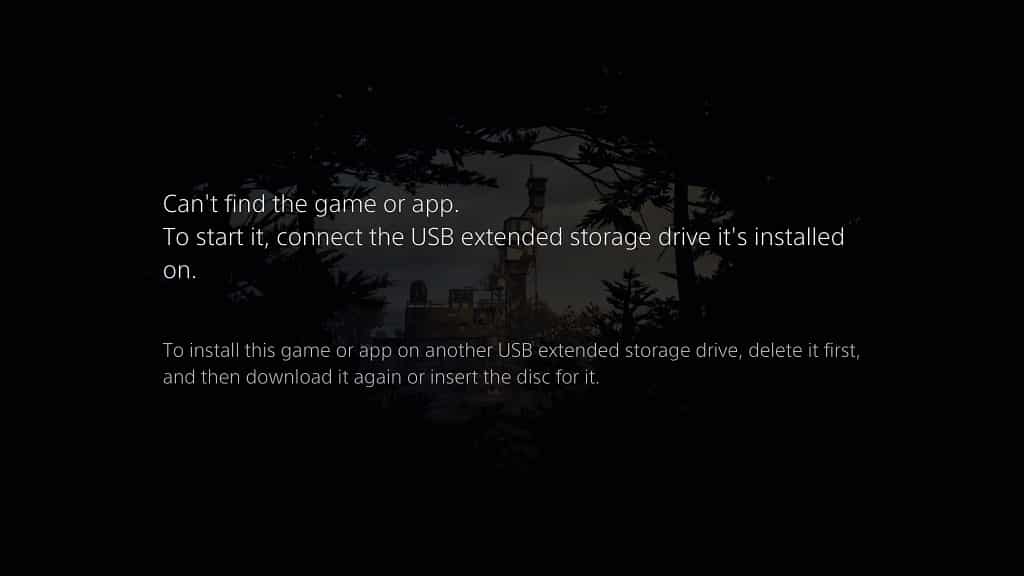
When trying to play a game on the PlayStation 5, or the PlayStation 5 Digital Edition, you may encounter the “can’t find the game or app” error.

You can follow this troubleshooting guide at Seeking Tech to see how you can fix this problem on your system.

What is the ‘can’t find the game or app’ error?

The “can’t find the game or app” message appears when you try to play a game from an USB extended storage drive that is currently not connected to your PS5 system.

This issue will pop up when you connect and use an USB extended storage drive on your console. Your PS5 system will register the games on the external drive as games that can only be played when the external drive is connected.

As a result, you won’t be able to play the game with the “can’t find the game or app” error.

Fix #1: Reconnecting the USB extended storage drive

The first fix we recommend doing is by simply reconnecting the USB external storage drive where the game was stored to the PlayStation 5. You can plug in the drive to one of the two USB ports located at the backside of the PS5 system.

After the system recognize the USB external storage drive, you should then be able to play the game.

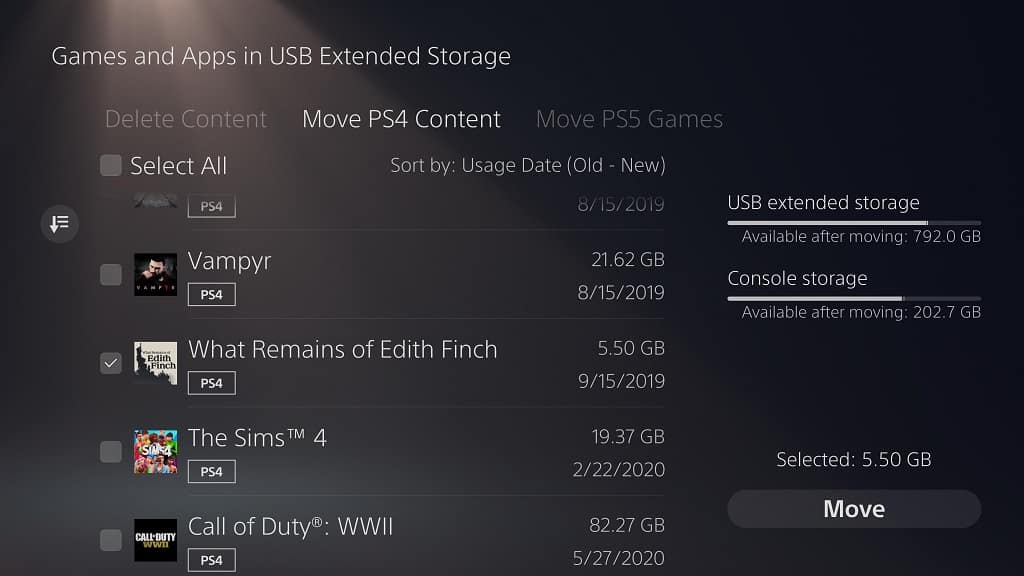
If you would like to move the game from the USB external storage drive to the console storage of your PS5 so that you no longer have to plug in the external drive to play the game, you need to do the following:

1. From the home screen (this is the main system menu where you can select which game to play), go to “Settings,” which you can find on the upper right side.

2. In the “Settings” menu, head over to “Storage.”

3. In the “Storage” menu, first select the “USB Extended Storage” option on the left side and then the “Games and Apps” options on the right side of the same screen.

4. On the top tap of the “Games and Apps in USB Extended Storage” menu, select either “Move PS4 Content” if you are moving a PS4 game or “Move PS5 Content” if you are moving a PS5 game.

5. Select the game or games you want to move from the external storage to the internal SSD of the PS5 and then select the “Move” option on the bottom right side of the menu.

6. In the pop-up menu, select the “OK” option.

Fix #2: Downloading the game directly to the PS5 internal SSD

If connecting the USB Extended Storage does not work or you simply don’t have access to the USB Extended Storage containing the game, then you can try redownloading the game directly on the PlayStation 5 console storage.

To do so, you need to take the following steps:

1. From the home screen, scroll all the way to the right from the Games section and then select the “Game Library” option.

2. In the “Game Library” menu, highlight the game with the “can’t find the game or app” error and then press the Options button (this is the button that has the three horizontal lines that is directly left of Triangle).

In the pop-up menu, select “Remove from Home.” If you don’t see this option, then you can skip this step.

3. Go back to the “Game Library” menu and then highlight the same game.

This time, press the X (Cross) button on the DualSense to bring up the game’s product page.

4. In the game’s product page, select the “Download” option.

If you don’t see the “Download” option, make sure that the game does not appear on the home screen. If it does appear on it, you can follow the previous “Remove from Home” step.

You can also try selecting the “…” option to go to the new screen, which may show the “Download” option.

Fix #3: Clearing the Cache, Restoring the Database and Resetting the PS5

If none of the options work, you can try clearing the cache, restoring the database and or resetting your PlayStation 5 system.

To do so, you can take the following steps:

1. First, make sure that your PS5 is powered off.

2. Next, press and hold the power button on your PlayStation 5 system. You should hold one beeping noise almost immediately. Keep holding the button until you hear a second beep.

3. Plug your DualSense into your PS5 system by using the USB cable and then press the PS button on your controller.

4. In the Safe Mode menu, select the “5. Clear Cache and Rebuild Database” option.

5. In the next screen, you can either select the “1. Clear Cache” or “2. Rebuild Database” option.

6. You can also go back to the Safe Mode menu and then select the “6. Reset PS5” option.

How to find your PlayStation Store transaction history on PS5

With the PlayStation 5, as well as the PlayStation 5 Digital Edition, you can find your transactions made on the PlayStation Store.

You can follow this step-by-step guide at Seeking Tech to see how you can check out your transaction history on the game system.

How to view your transaction history on the PlayStation Store of PS5

To view your transaction history on the PlayStation Store of the PlayStation 5, you need to do the following:

1. From the home screen, which is the main menu where you can select a game to play, navigate to the left and then select the PlayStation Store icon.

2. In the PlayStation Store menu, navigate upwards to the top options and then go all the way to the right to select the “…” option.

3. In the pop-up menu, select the “Transaction History” option.

How to view your transaction history on the system menu

You can also view your transaction menu without going to the PlayStation Store.

To do so, you need to take the following steps:

1. From the home screen, head into “Settings.” You will find this option on the top right section of the menu as it has a gear cog symbol.

2. Inside the “Settings” menu, navigate downwards and then select the “User and Accounts” option.

3. Inside the “Users and Accounts” menu, select the “Account” option from the left side and then the “Payment and Subscriptions” option on the right side of the same screen.

4. Inside the “Payment and Subscription” menu, select “Transaction History.”

How to sort your transaction history on PS5

Now that you are in the “Transaction History” menu, you will be able to view and sort your transactions from the PlayStation Store.

To do so, you have to do the following:

1. Once you are in the “Transaction History” menu, you need to select a user account. Make sure you choose the email that is attached to the transactions you want to view.

2. After choosing your user account, select the “Continue” option at the bottom.

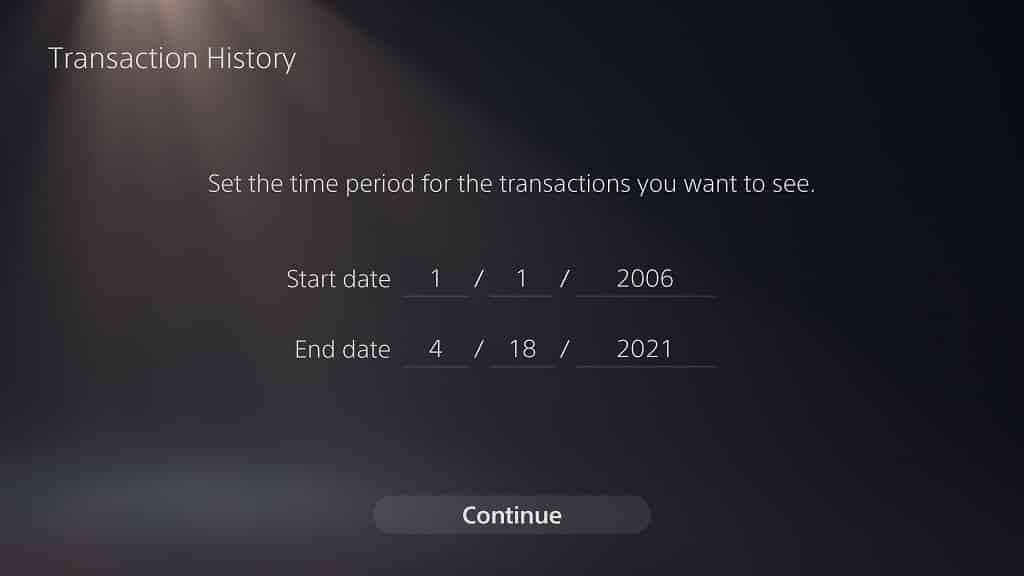
3. In the next screen of the “Transaction History” menu, you will be able to set the time period for your transactions. Be default, the time is set to the past 30 days.

You will be able to set the start date to all the way back to 1/1/2006.

4. Once you are done setting the start and end dates to sort your PlayStation Store transactions, select the “Continue” option at the bottom.

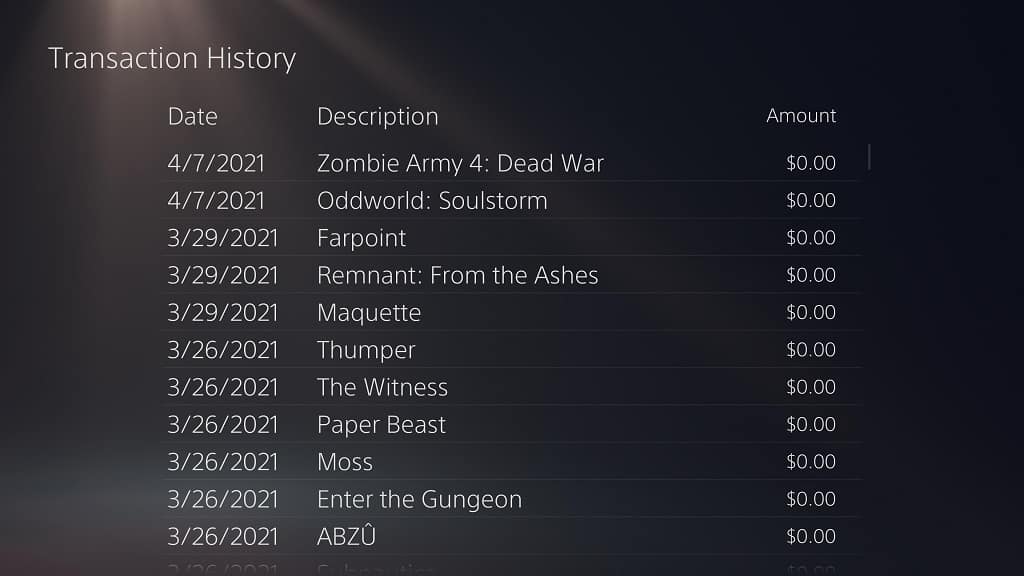
5. In the next screen of the “Transaction History” menu, you will see all the transactions you made on the PlayStation Store during the aforementioned set time period.

The list, which is displayed from newest to oldest from the top down, includes direct purchases, free game downloads and funds added to your PlayStation Store wallet.

It also covers the PlayStation 3 (PS3), PlayStation Portable (PSP), PlayStation Vita (PSV) and PlayStation 4 (PS4) transactions in addition to the PlayStation 5 transactions.

You will be able to view the date of the transaction, description of the product as well as dollar amount.

How to automatically enable 120 frames per second support on PS5

Thanks to the latest firmware update, you can now enable automatic support for 120 frames per second on the PlayStation 5 and PlayStation 5 Digital Edition.

If you are interested in using the 120 Hz mode, then you can check out this step-by-step tutorial from Seeking Tech.

Prerequisites

Before we start, it is important to note that 120 Hz is not supported by all monitors or television sets. So, make sure you check out the specifications for your display to see if 120 FPS is possible. For monitors, you need to make sure that 120 Hz is supported over the HDMI connection.

You should also be using the right HDMI cable. Fortunately, the PlayStation 5 does come with HDMI 2.1, which is enough to play games at 120 frames per second in a resolution of up to 4K. If you are looking for an alternative HDMI cable, especially one that is longer in length, than you can check out this guide.

Last but not least, you need to have the latest software version of your PlayStation 5 system. To manually update the console to the latest firmware, you can do the following:

1.Go to the “Settings” menu from the home screen. The home screen is the main menu of the PS5 where you can select a videogame to play. On the top right corner of the screen, you should see the gear cog symbol. Select that symbol to open the “Settings” menu.

2. Now that you are in the “Settings” menu, head to “System.”

3. Now that you are in the “System” menu, select “System Software” from the options available on the left side.

4. On the right side of the same “System” menu, select the “System Software Update and Settings” option.

5. Now that you are in the “System Software Update and Settings” menu, select the “Update System Software” option from the list.

6. Now that you are in the “System Software update” menu, select either “Update Using Internet” (which we recommend if using if your PS5 is connected to the Internet) or “Update from USB Drive.”

How to enable automatic 120 Hz support on PS5

In order to enable automatic 120 Hz support on your PlayStation 5, you need to take the following steps:

1. First off, make sure you are using a compatible monitor/TV, HDMI cable and PlayStation 5 firmware version. The game you are planning to play at 120 frames per second should also support that frame rate as well.

2. Go to the home screen menu and then select the “Settings” option.

3. Inside the “Settings” menu, find and head into “Screen and Video.”

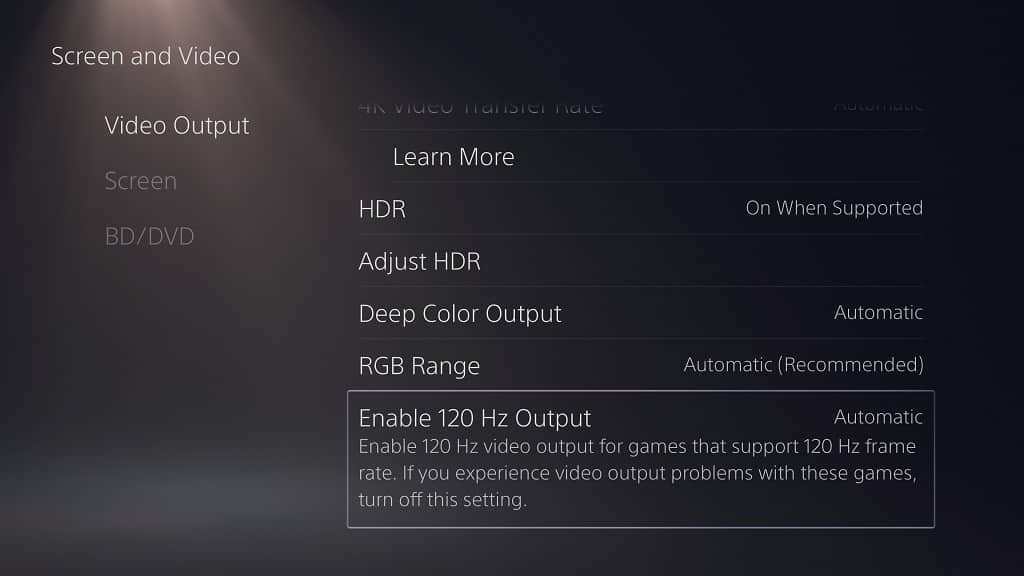
4. Inside the “Screen and Video” menu, select “Video Output” from the list of options on the left side.

5. On the right side of the same “Screen and Video” menu, select the “Enable 120 Hz Output” option.

6. In the pop-up menu, you have two choices: Off and Automatic.

7. Select the Automatic option to enable support for 120 Hz.

If you are experiencing visual issues when playing a game after setting the “Enable 120 Hz Output” option to Automatic, the you may set it to off. Instead, you can try to manually enable 120 FPS support through the menu for that specific game.

How to enable Performance Mode on PS5

If using the “Enable 120 Hz Output” option is causing issues, then you can also try another method to automatically enable support 120 frames per second on PlayStation 5.

If you are interested in doing so, then you need to do the following:

1. From the home screen, you should select the “Settings” option.

2. From the “Settings” menu, you should select the “Saved Data and Game/App Settings” option.

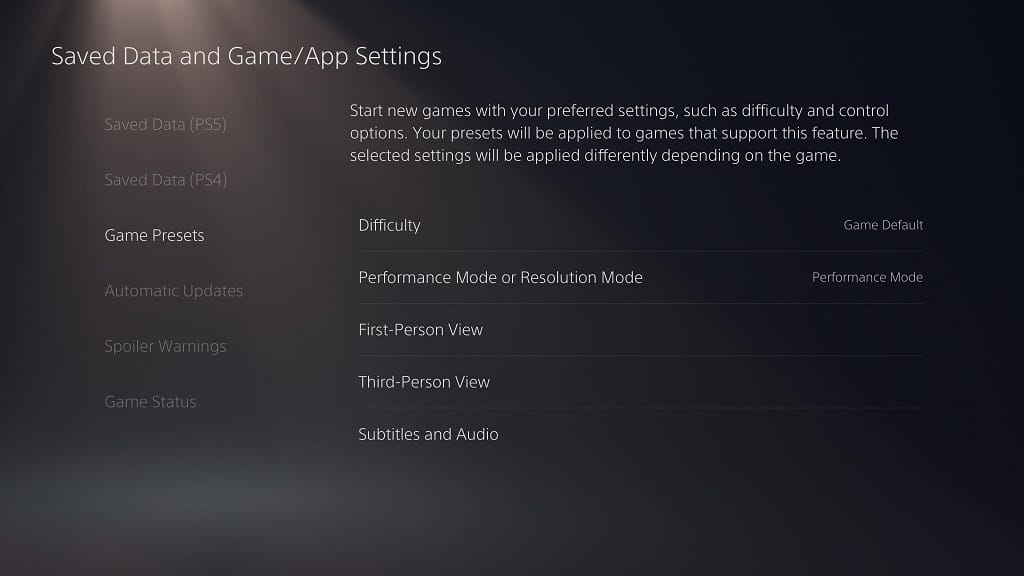
3. From the “Saved Data and Game/App Settings” menu, you should select the “Game Presets” option on the left side.

4. From the same “Saved Data and Game/App Settings” menu, you should select the “Performance Mode or Resolution Mode” option on the right side.

5. In the pop-up menu, you will have three choices: Game Default, Performance Mode or Resolution Mode.

Select the Performance Mode, which will make the PS5 signal to a game that it should run at a visual setting that provides the best frame rates. This should include games that support 120 Hz.

How to fix PS5 bricking, crashing, freezing and random shut off issues

When playing the PlayStation 5 or PlayStation 5 Digital Edition, you may experience the console bricking, crashing, freezing and/or randomly turning off.

If you are constantly running into these problems, then you can follow this guide at Seeking Tech to find some potential fixes.

How to shut down the PS5

The first step we recommend taking is to shut down the console. You can do so by taking the following steps:

1. Press the PS button on your DualSense to bring up the quick menu.

2. In the quick menu, navigate down to the bottom options.

3. Here, you need to select the “Power” option, which is located all the way to the right.

4. In the “Power” menu, select the “Turn Off PS5” option.

5. If your PlayStation 5 is not responding to your controller, you can press and hold the power button on the system until you see the “Preparing to turn off your PS5” screen. Your system should then shut down a few seconds later.

6. If none of the aforementioned methods work, you can simply unplug the system from the power outlet. With that said, you may cause additional damage to your PS5 by pulling the plug. Therefore, we recommend only doing this if you have no other ways to turn off the system.

Fix #1: Checking the AC power cord on PS5

The first solution you can try is to unplug your PS5 from the power cord, wait a few minutes, and then plug it back in again.

To do so, you need to take the following steps:

1. Once the PlayStation 5 has been completely turned off, remove the AC power cord from the back of the system. You should also remove the other end from the power outlet if you haven’t done so already.

2. Inspect the AC power cable carefully to see if there is any damage to it.

3. If there is some visible damage, you can try using another AC cord. The PS5 and PS5 Digital Edition use the standard C7 power cord. This is the same cord that also comes with the PlayStation 4 and PlayStation 4 Slim.

If you need to purchase a replacement, then we recommend picking up the Amazon Basics Replacement Power Cable with this link. (#CommissionsEarned).

4. If the original AC power cord looked fine and/or you have a new cable, use it to plug your PlayStation 5 into the power outlet to see if this method fixes the bricking, crashing and freezing problems.

5. If you are still experiencing issues, try to use a different power outlet.

How to rebuild the database on PS5

If the aforementioned solution does not work, then we recommend rebuilding the database on the PlayStation 5.

To do so, you need to do the following:

1. With the system turned off, press and hold the power button on your PlayStation 5. You should hear one beeping sound initially. Keep holding until you near a second beep. This will enable the Safe Mode on the PS5.

2. In Safe Mode, connect your DualSense to your PlayStation 5 system via the USB port by using an USB cable and then press PS button on the controller.

3. In the Safe Mode menu, select the “5. Rebuild Database” option.

4. In the next screen, select the “OK” option to start the database rebuilding. Keep in mind that this process may take several hours to complete.

How to reinstall PS5 firmware

If you are still experiencing problems, then you can try re-installing the firmware of your PlayStation 5.

To do so, you can take the following steps:

1. First off, you will need an USB drive that has been formatted as FAT32.

2. Connect the USB drive to the USB port of your computer.

3. Download the PS5 update file with the following link:

4. Open the USB drive from your computer.

5. On the root directory of your USB drive, you need to create a folder and name it PS5.

6. Open the PS5 folder on your USB drive and create another folder. You need to name the new folder UPDATE.

7. Copy the PS5 update file you downloaded into the aforementioned UPDATE folder on your USB drive.

8. Disconnect the USB drive from your computer and then plug the same storage drive into your PS5.

9. Power on your PlayStation 5 in Safe Mode by pressing and holding the power button on the system until you hear the second beeping sound.

10. Connect your DualSense controller to the system using one of the other USB ports aside from the port where you plugged in the USB drive.

11. In the Safe Mode menu, select the “7. Reset PS5 (Reinstall System Software).”

12. In the next screen, select the “OK” option to being the installation process.

If none of our suggested fixes work, then the next best option is to contact PlayStation. The bricking, crashing, freezing and random shut off issues could be hardware related. Thus, you may need to send your system in to PlayStation for repair.