How to automatically run in Unicorn Overlord

By default, you have to hold down on a button in order to run in the overworld. If you want the characters to automatically run instead, then you can check out this guide at Seeking Tech.

1. Open the Options menu in the game.

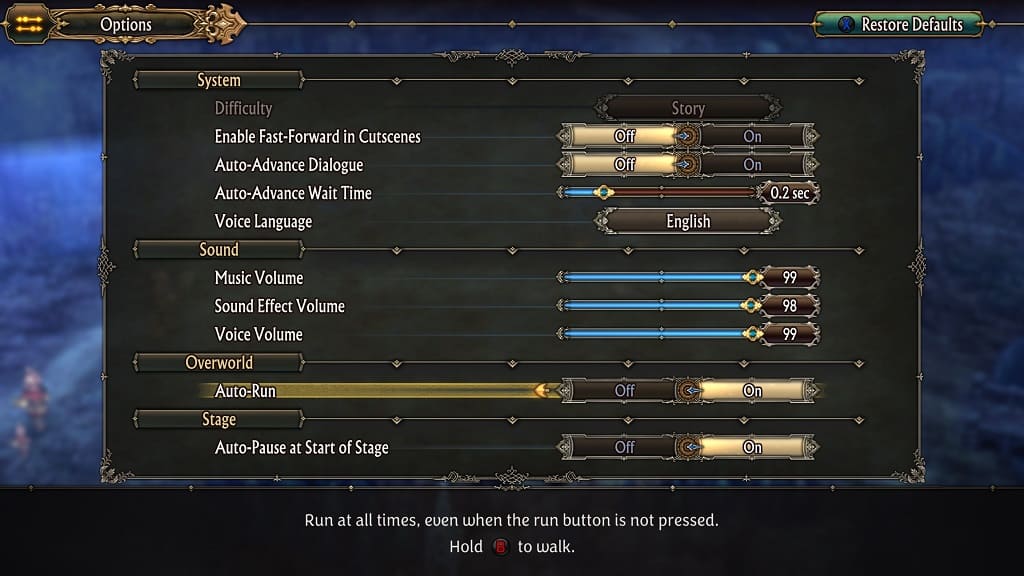
2. From there, scroll down until you get to the Overworld section.

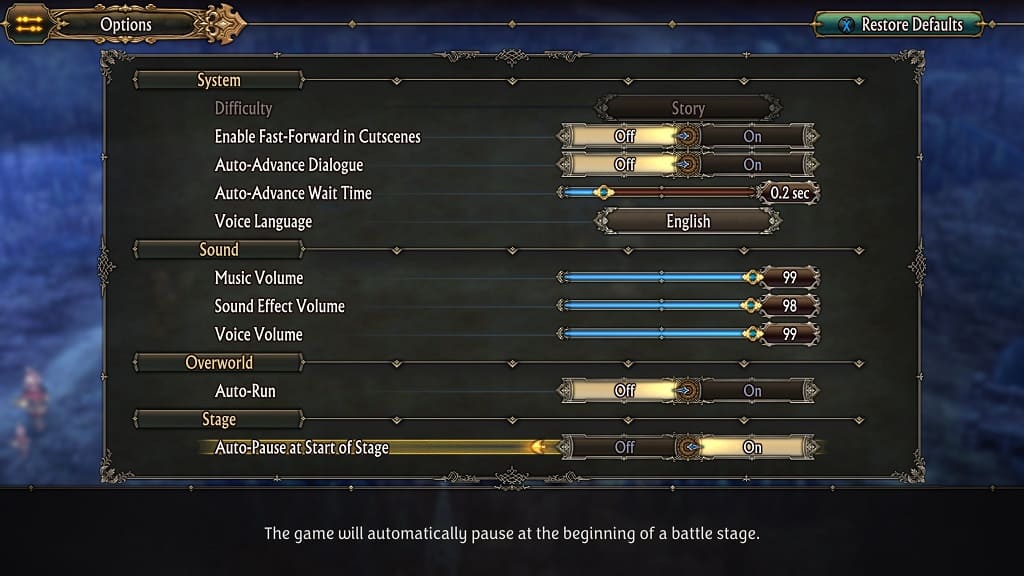
3. You should find the Auto-Run option here. Make sure you change it to On. You should see the following description if you do:

Run at all times, even when the run button is not pressed.
4. Exit the Options menu.

You should no longer have to press down on run button in order to sprint in Unicorn Overlord.

How to automatically pause in Unicorn Overlord

By default, the enemies will start moving once you enter a stage in Unicorn Overlord. To see how you can automatically pause at the beginning of the level, you can take a look at this tutorial at Seeking Tech.

1. Head over to the Options menu if you haven’t done so already.

2. From there, move the cursor down to the Stage section.

3. Make sure you set Auto-Pause at Start of Stage to On.

The action should now be paused at the beginning of each level in Unicorn Overlord.

How to change voice language in Unicorn Overlord

Unicorn Overlord supports both English and Japanese voice overs. To see how you can change the voice language in this tactical role-playing game, you can check out this guide at Seeking Tech.

1. Head to the Options menu.

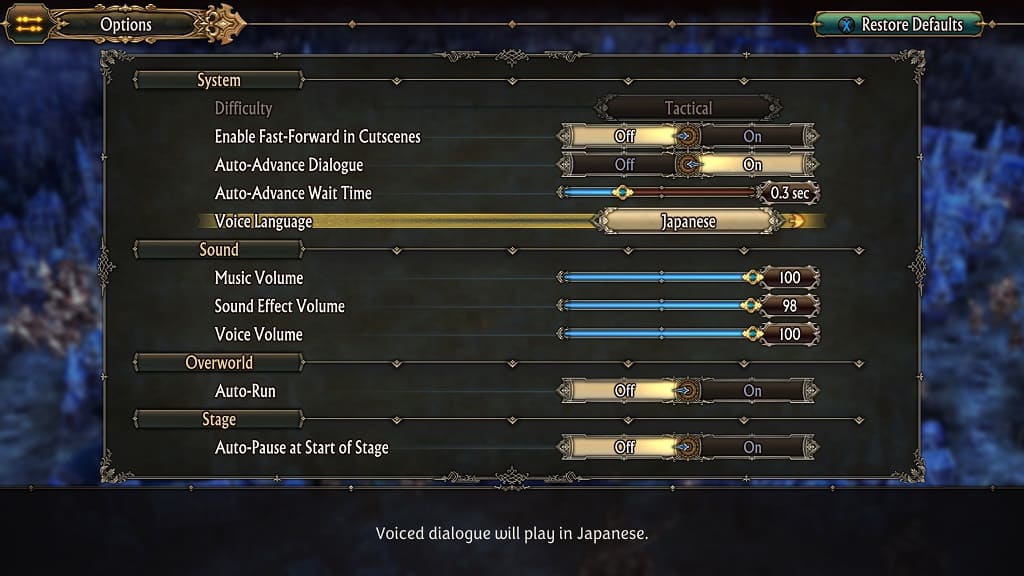
2. In the System section, look for the Voice language setting.

3. Change it to your preferred language.

4. You can then exit the menus.

When you start playing Unicorn Overlord again, the voice acting should now be in your preferred language.

How to change aiming style in Contra: Operation Galuga

Contra: Operation Galuga supports two different aiming styles. If you have a hard time aiming with one method, then you can try using the other. In order to do so, you can check out this guide at Seeking Tech.

1. Head over to the Options menu if you haven’t done so already. This can be done from the title screen or pause screen.

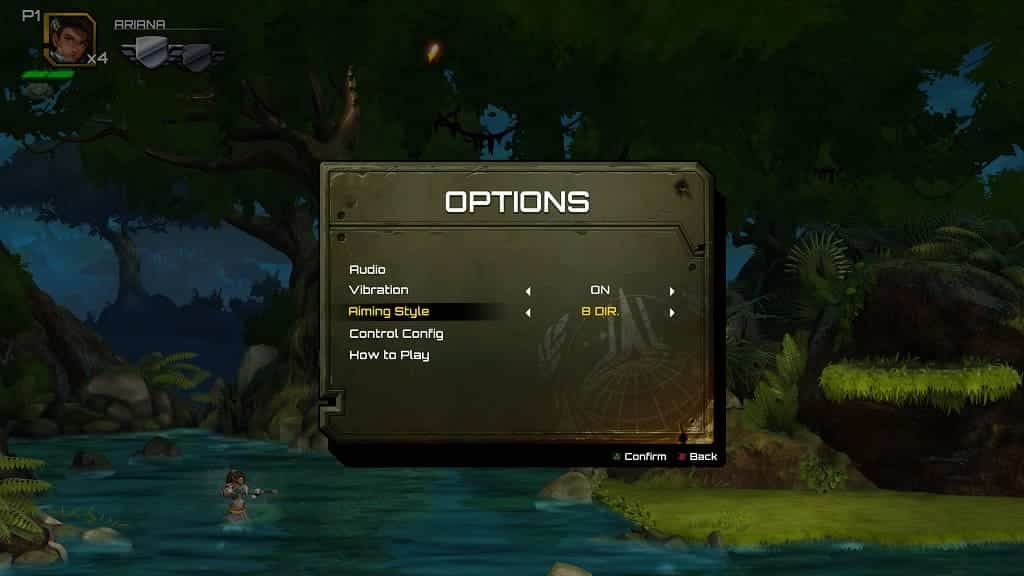
2. In Options, move the cursor down to Aiming Style.

3. You can then switch between the two styles: 360 Aim or 8 Directions.

4. Once you are done, exit the Options menu and then return to the game.

If you need to change the aiming style again, head back to the Options screen.

How to change difficulty settings in Persona 3 Reload

You are able to change the difficulty mode in Persona 3 Reload. To find out how you can properly do so in this JRPG remake, you can take a look at this tutorial from Seeking Tech.

Before we begin, it is important to note the limitations when it comes to the Merciless difficulty. If you started a new game at a lower difficulty level, then you won’t have access to Merciless at all. If you started at Merciless, then you can drop down to a lower difficulty mode. However, you won’t be able to go back to Merciless again if you do.

1. To start off, you need to open the Menu screen and then head over to System > Config.

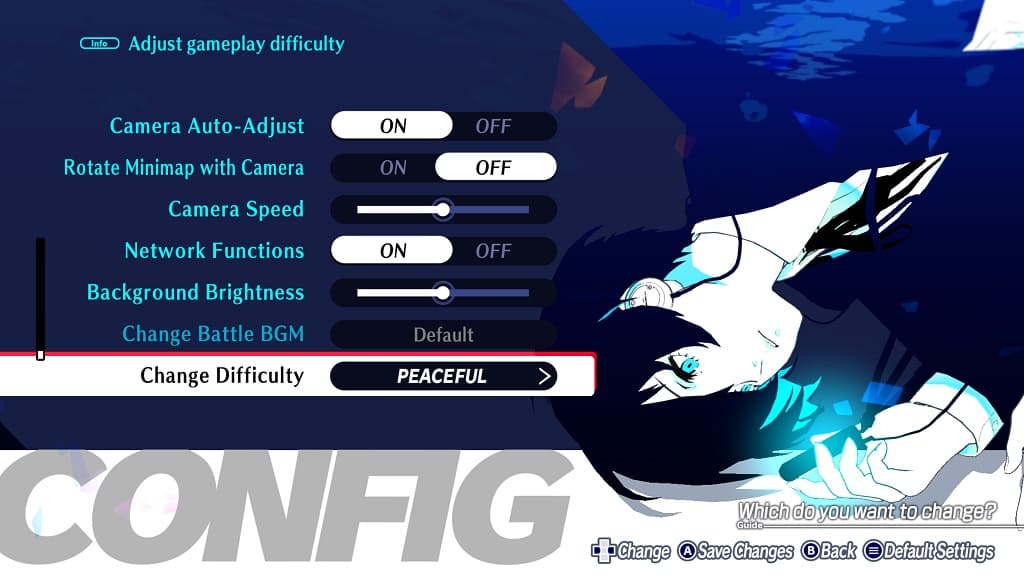
2. From there, scroll all the way down to the Change Difficulty setting.

3. Change to a new difficulty level. Keep in mind that the story of the game will remain the same no matter which mode you choose.

4. Save your change and then exit the Menu screen.

The new difficulty setting should be applied when you return to the game.

How to turn off vibrations in Persona 3 Reload

By default, Persona 3 Reload enables vibrations for supported controllers. To see how you can stop your gamepad from rumbling, you can take a look at this tutorial from Seeking Tech.

1. To start off, you need to open the in-game menu. This can be done outside of cutscenes, dialogue and combat.

2. From the in-game menu, select System and then Config.

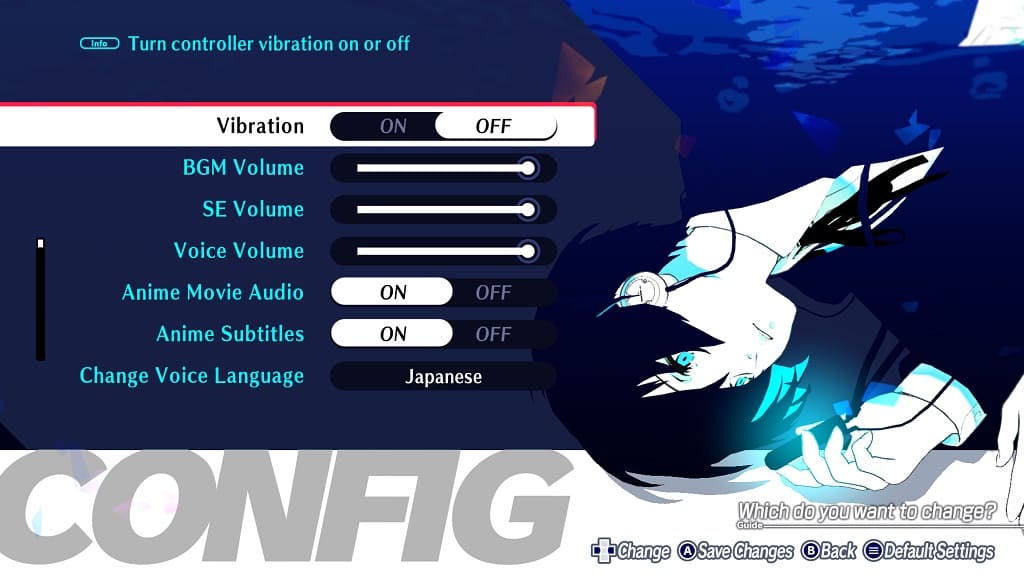
3. You should find the Vibration setting on top of the Config screen.

Set it to Off and then save the change.

When you return to play Persona 3 Reload, the controller should no longer rumble.

How to fix brightness issues in Persona 3 Reload

You may notice that the brightness level looks a little off in Persona 3 Reload. To see how you can potentially fix this issue, you can take a look at this troubleshooting article from Seeking Tech.

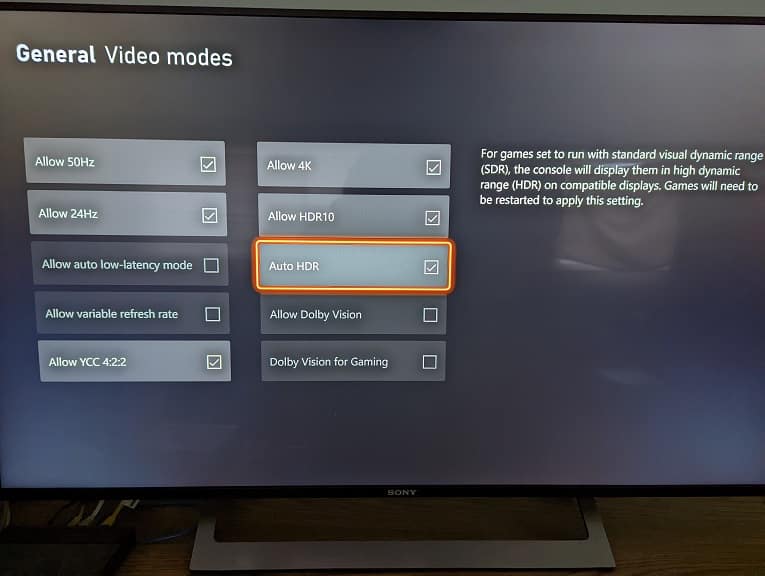
1. It is important to note that Persona 3 Reload does not support HDR10. So, if the brightness in the game does not look right, then you can try disabling any HDR conversion features on your television set or monitor.

You should also make sure that you disable any Auto HDR feature on your PC or console as well.

2. Afterwards, head over to the Config menu in Persona 3 Reload.

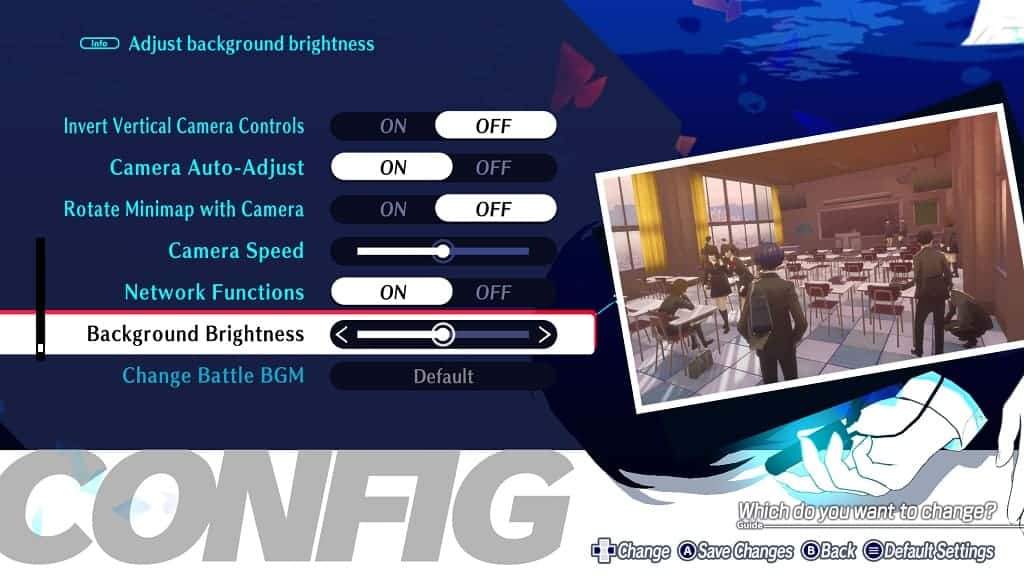
If you have already loaded into your save file, open the menu when you exploring. From there, select System and then Config. Next, you need to scroll all the way down to Background Brightness slider.

From there, you will be able to adjust the in-game brightness. Use the screeshot on the right side of the menu as a reference.

How to change the voice language in Persona 3 Reload

Persona 3 Reload supports both English and Japanese voice overs. To see how you can switch between these two options, you can take a look at this tutorial from Seeking Tech.

1. To start off, open the in-game menu. This can be done by pressing Triangle on PlayStation or Y on Xbox if you are outside of combat, cinematics and dialogue.

2. From there, select System and then Config.

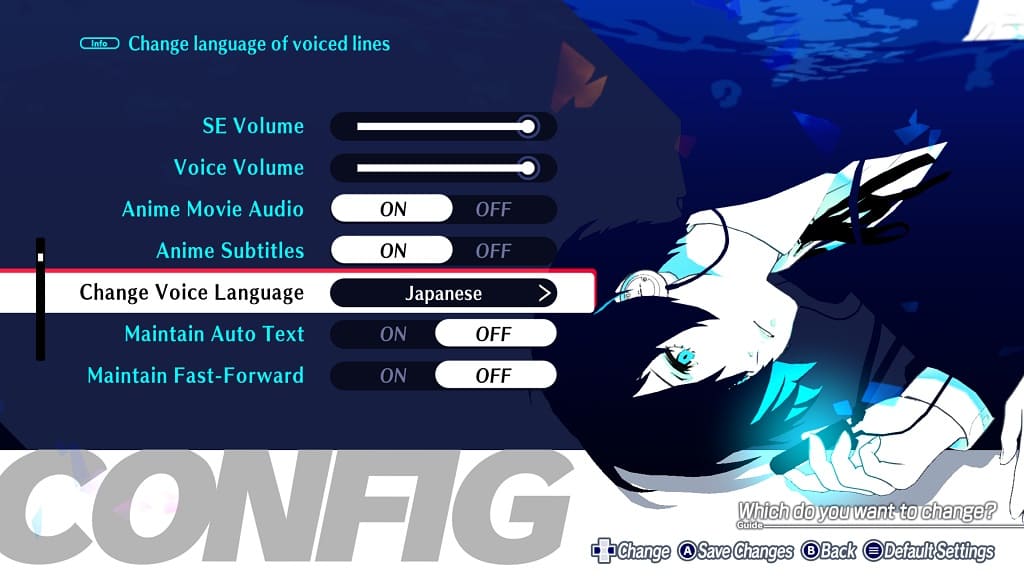
3. Scroll down the next screen until you get to Change Voice Language. Select either English or Japanese.

4. Press X on the PlayStation controller or A on the Xbox controller to save the change.

The voiced dialogue should now be changed in the game.

How to make massive egg incubation faster in Palworld

If you don’t want to wait around to incubate a massive egg in Palworld, then you can check out this Seeking Tech guide to see how you can reduce the waiting time.

1. To start off, you need to head back to the title screen.

So, if you have already loaded into your world, open the pause menu, go to Options and then select Return to Title.

2. From the title screen, select Start Game.

3. In the World Select screen, select your world.

4. Afterwards, select the “Change World Settings” option at the bottom of the screen.

5. Inside the World Settings menu, select Custom Difficulty.

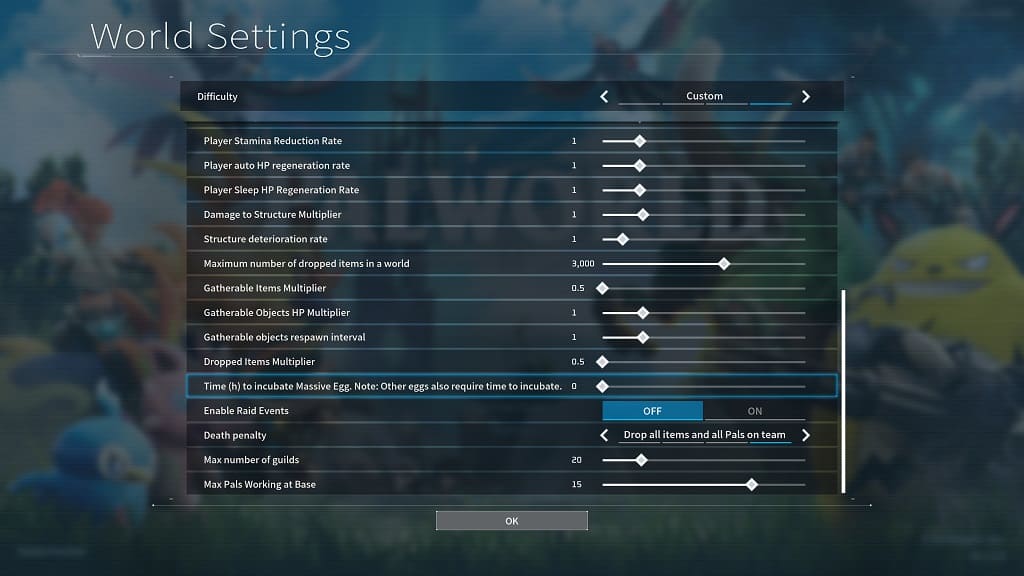
6. On the next screen, scroll all the way down until you see the following setting:

Time (h) to incubate Massive Egg. Note: Other eggs also require time to incubate.

7. To decrease the incubation time, move the slider to the left. You can reduce the wait all the way to 0.

8. Once you are done, select OK.

9. Back at the World Settings menu, select OK again.

10. Finally, select Confirm when you see a notification asking if you want to save your new settings.

How to decrease the hunger rate in Palworld

While you can’t completely disable the hunger of your playable character in Palworld, you can significantly slow down the depletion rate. You can check out this guide at Seeking Tech to see how you can properly do so in this survival game.

1. Head back to the title screen, if you aren’t there already, and then select Start Game.

2. Next, select your world in the World Select Screen and then select Change World Settings at the bottom.

3. Select Custom Difficulty from the World Settings menu.

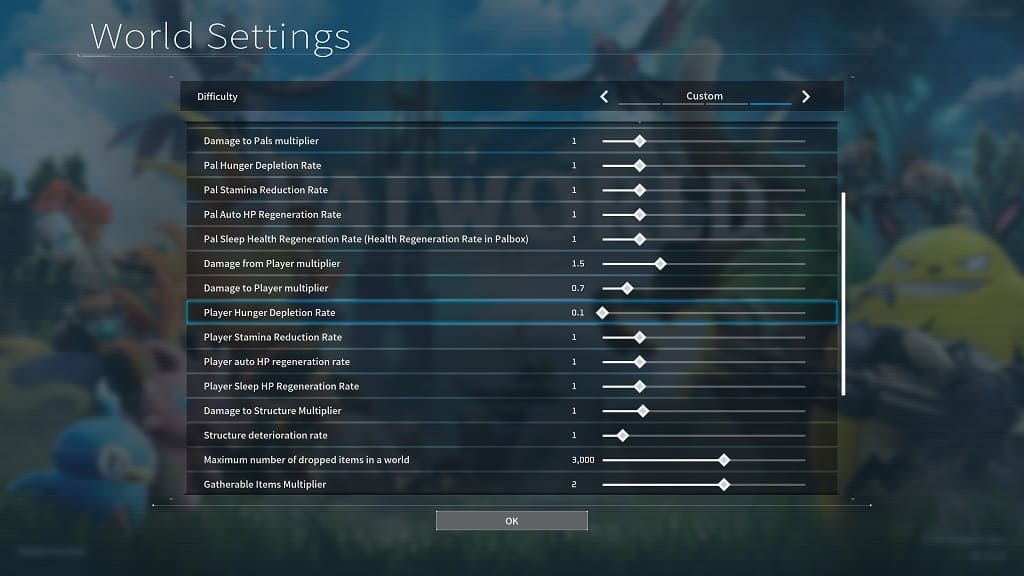
4. In the next screen, move down until you see Player Hunger Depletion Rate.

5. Move the slider to the left. You can go as low as 0.1.

6. Afterwards, select OK at the bottom of the screen.

7. Select OK again when you return to the World Settings menu.

8. Finally, select Confirm when the game asks if you want to save your new settings.

When you start playing Palworld again, you should notice that you won’t be starving as often.