How to disable trophy and other notifications when playing PlayStation VR2

When playing with the PlayStation VR2 on your PlayStation 5 or PlayStation 5 Digital Edition console, you may end up seeing notifications pop-up on the screen. These may include trophies that you unlocked in the PS VR2 game. Not only do these graphics break your virtual reality immersion, but they can also block off important sections of the screen.

To see how you can turn off these system messages from showing up, you can take a look at this step-by-step tutorial at Seeking Tech.

1. To start off, you need to head back to the home screen of your PS5.

In order to do so, you can press and hold the PS button on the DualSense, left PlayStation VR2 Sense controller or right PlayStation VR2 Sense controller.

You can also press the PS button on either of these controls and then select the house icon located on the bottom menu to head to the home screen.

2. From the home screen, you need to make your way to the top right corner of the screen, where you can then select the gear icon.

3. You should now be in Setting, which is where you need to scroll down and then select Notifications.

4. After getting to the Notifications menu, make sure that the Allow Pop-Up Notifications setting is disabled.
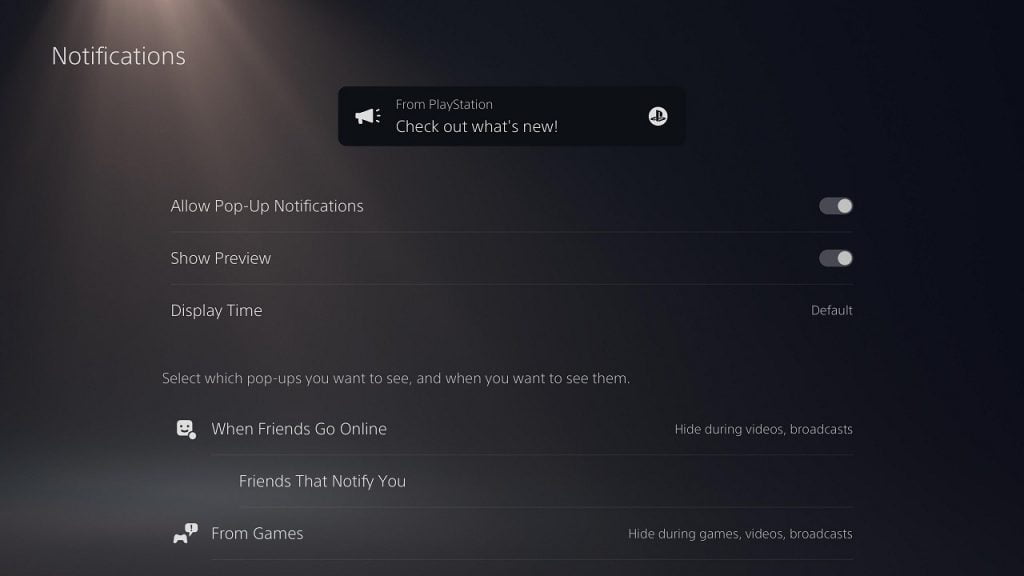
By turning it off, you should no longer see any trophy or another system messages pop-up when you are playing a game with your PlayStation VR2 headset.

It is important to note that disabling Allow Pop-Up Notifications setting will also prevent them from showing up when you are playing flat screen titles.

If you want to re-enable these pop-up messages, then you need to go back to the Settings > Notifications menu. Once you get there, you should then make sure that Allow Pop-Up Notifications is turned back on again.

What are PlayStation Plus Wallet Funds?

When trying to purchase PlayStation Plus from a third-party merchant, you may have run into a product called PlayStation Plus Wallet Funds. So, what is this product? You can find out in this article from Seeking Tech.

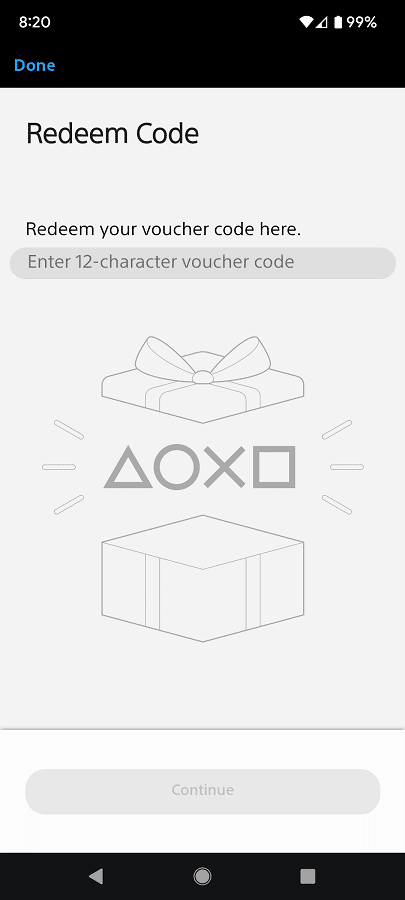
To put it simply, PlayStation Plus Wallet Funds will add funds to your wallet for your PlayStation Network account. You can then use these funds to purchase digital games, add-ons, subscriptions and other content on the PlayStation Store.

PlayStation Plus Wallet Funds is the same as the regular PlayStation Gift Cards since you are able to redeem these vouchers in the same places in order to add funds.

However, PlayStation Plus Wallet Funds offers a slightly different branding. Not to mention that the denominations are different as well since you will be able to buy these codes in increments of $30, $55, $70 or $110.

While these increments may seem strange at first, they are the amount you can use to purchase a PlayStation Plus subscription plus any applicable tax.

If you purchase a $30 PlayStation Plus Wallet Funds card, then it will cover three months’ worth of PlayStation Plus Essential.

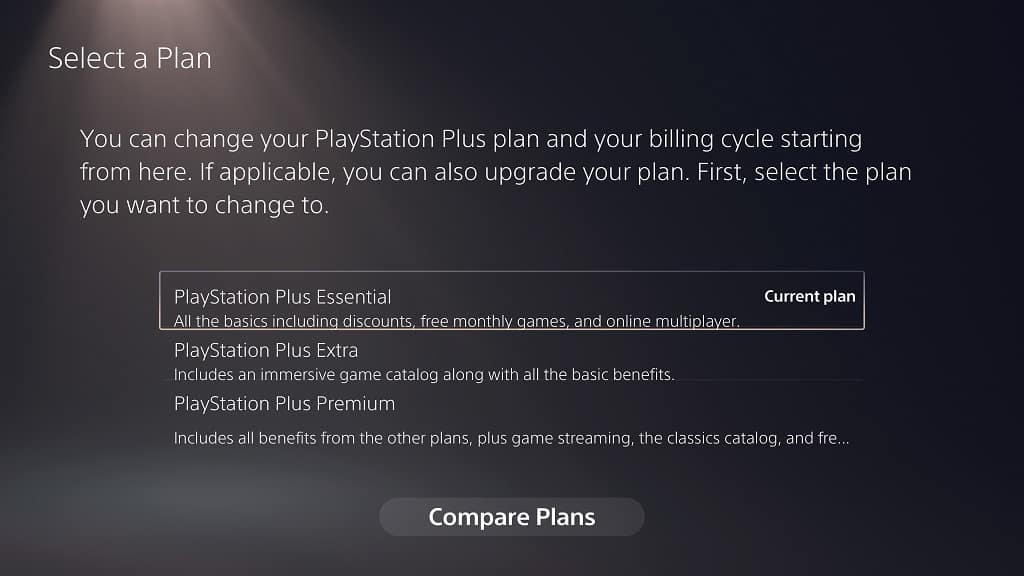
The $55 card should cover three months’ worth of PlayStation Plus Extra (which is currently priced at $39.99) and potentially three months of PlayStation Plus Premium ($49.99).

The $70 PlayStation Plus Wallet Funds denomination should cover the yearly payment of PlayStation Plus Essential.

Last but not least, the $110 card is designed for those who want a 1-year PlayStation Plus Extra membership.

For the uninformed, you can find the pricing structure of all the PlayStation Plus tiers in the U.S. region below:

PlayStation Plus Essential:

  • Monthly: $9.99
  • Quarterly: $24.99
  • Yearly: $59.99

PlayStation Plus Extra:

  • Monthly: $14.99
  • Quarterly: $34.99
  • Yearly: $99.99

PlayStation Plus Premium:

  • Monthly: $17.99
  • Quarterly: $49.99
  • Yearly: $119.99

As you can see above, you will get a discount if you don’t mind paying a large sum upfront for the yearly option instead of the monthly or quarterly option.

To find out more about the differences between these three PS+ tiers, you can check out this versus guide. To learn more about how the PlayStation Plus Wallet Funds compares to the regular PlayStation Gift Cards, you can look at this post.

If you are interested in purchasing the wallet funds, then you can find them on Amazon with this link. (#CommissionsEarned).

Can you download games from PlayStation Plus Premium?

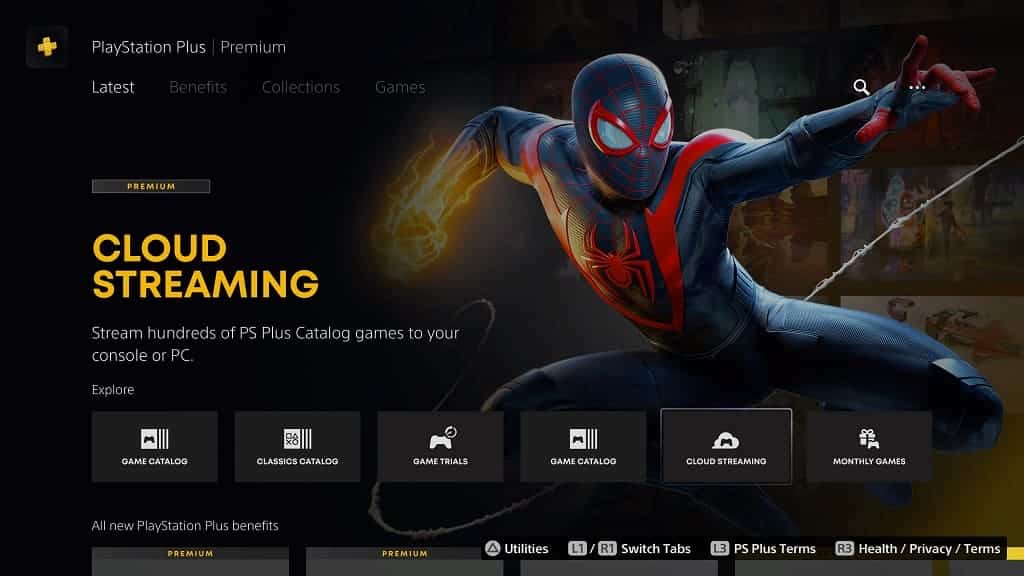
If you subscribe to PlayStation Plus Premium, then you will have full access to hundreds of games. So, can you download titles from this service? You can find out in this guide from Seeking Tech.

Platforms

PlayStation Plus Premium is supported on the PC, mobile, PlayStation 4, PlayStation 4 Pro and PlayStation 5.

If you want to play games from the PS Plus Premium Plus subscription on a PC or mobile platform, then you can only do so through streaming. You won’t be able to download these titles and play them natively on your non-PlayStation hardware.

If you are using PS+ Premium on your PS4 or PS4 Pro, then you can download and play the PS4 games being offered by the service. However, you won’t be able to download or stream PS5 titles on these last-generation consoles.

On the PlayStation 5, you should be able to download and stream a vast majority of PS4 and PS5 games from the Premium tier. The only exceptions are PS4 games that have major backwards compatibility issues with being played on PlayStation 5 as these are only accessible through streaming.

About PlayStation 3 Games

The PlayStation Plus Premium subscription will also let you play select PS3 games.

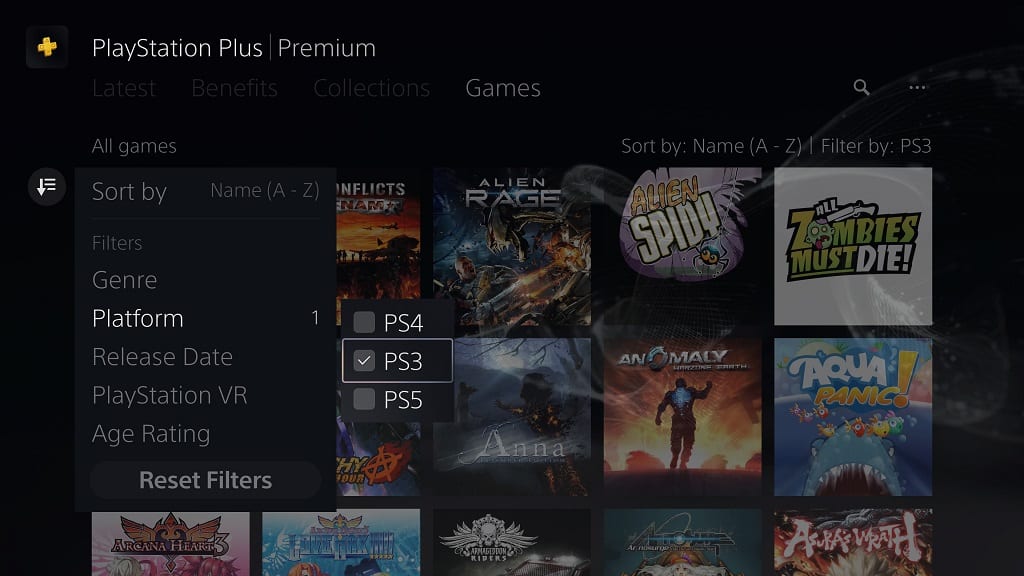
These titles are currently available only through streaming as you can’t download them on your PC, mobile, PlayStation 4, PlayStation 4 Pro and/or PlayStation 5. This is due to PlayStation 3 games being hard to emulate on the PS4 and PS5 consoles.

How to tell if you can download a game from PS Plus Premium?

You can tell whether or not a PlayStation Plus Premium game supports download by visiting its product page from the PlayStation Store.

If you are signed into your PlayStation Network account that is linked to your subscription, then you should see the Download option right away. If the game is limited exclusively to streaming, then you should only see the Stream option appear on the listing.

How to find PS VR2 games on PlayStation Plus

Sony recently started adding PlayStation VR2 games to the PlayStation Plus subscription. To see how you can find and locate these virtual reality titles, you can take a look at this tutorial from Seeking Tech.

1. If you haven’t done so already, then your first step is to open the PlayStation Plus App from the home screen menu of your PlayStation 5 or PlayStation 5 Digital Edition console.

To go to the home menu, press and hold the PS button on your controller. You can also quick press the PS button and then select the house icon on the bottom left to head home.

From the home menu, select the PlayStation Plus App. If you can’t find it, then make sure you are viewing the Games section. If you are in the Media section, then you have to press L1 to change over to Games.

2. Inside of PlayStation Plus App, press the R1 buttons several times until you get to the Games tab.

3. The Games tab shows you a full list of games that are being offered for PlayStation Plus members.

Here, you need to move to the left until you can find and select the Sort and Filter option.

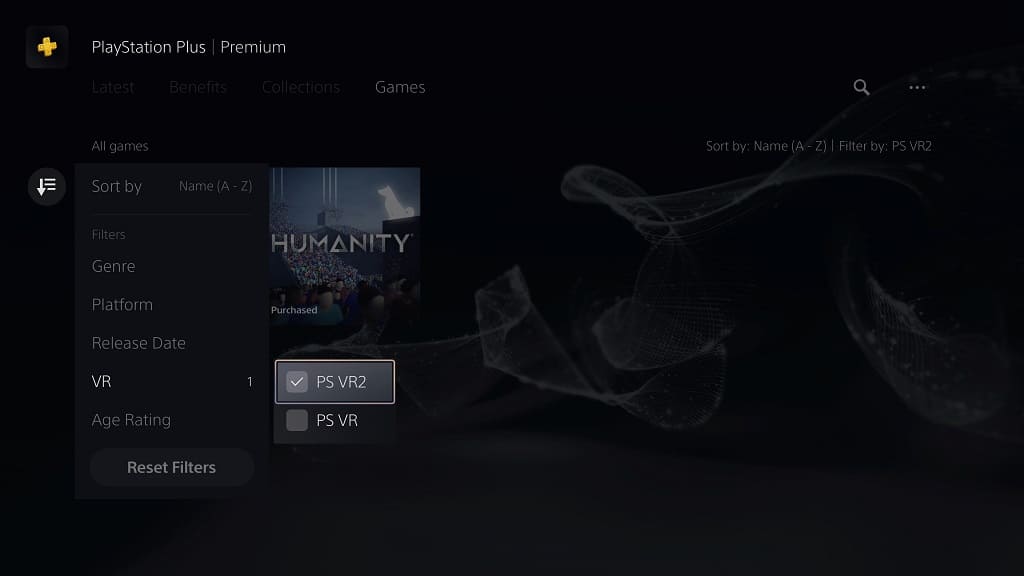
4. In the pop-up window, you should select VR.

5. Afterwards, make sure that only PS VR2 is selected.

By doing so, the listing will be filtered to only show games that are compatible with the PlayStation VR 2 headset.

6. From the same Sort and Filter window, you can also select the “Sort by” option, which lets you sort the list of games based on the following orders:

  • Name (A to Z)
  • Name (Z to A)
  • Release Date (Old to New)
  • Release Date (New to Old)
  • Recently Added to PS Plus

7. Once you are done filtering and sorting the list, exit out of the Sort and Filter window by pressing the Circle button on the controller.

You should now be able to see a list of PS VR2 games that are currently being offered for PlayStation Plus members.

If you are interested in playing one of these virtual reality titles, then you can select it from the list. On the product page, you can then select the Download option.

Can you disable dynamic resolution in The Legend of Zelda: Tears of the Kingdom?

In order to keep a stable frame rate, The Legend of Zelda: Tears of the Kingdom uses dynamic resolution. As a result, the image quality can end up looking blurrier when the action on the screen gets too intense.

So, are you able to disable this graphical feature? You can find out in this Seeking Tech article.

About the output resolution for The Legend of Zelda: Tears of the Kingdom

The Legend of Zelda: Tears of the Kingdom can be played on the Nintendo Switch, Nintendo Switch Lite and Nintendo Switch OLED.

For the uninformed, you can only play this open-world action-adventure game in portable mode with the Nintendo Switch Lite. If you are running the software on a Nintendo Switch or Nintendo Switch OLED, then you can opt for either the portable or docked mode.

According to an analysis done by Digital Foundry, The Legend of Zelda: Tears of the Kingdom targets a maximum resolution of 720p in portable mode.

In docked mode, the game targets a maximum resolution of 900p. To reach the full HD resolution, which is 1080p, it uses software upscaling, presumably the AMD FidelityFX Super Resolution (FSR1).

You can find the Digital Foundry analysis of the graphical performance for Tears of the Kingdom below:

Can the dynamic resolution be turned off?

Unfortunately, the dynamic resolution can’t be turned off officially. The only way to increase the resolution for this game is to play it in docked mode by putting your Nintendo Switch or Nintendo Switch OLED consoles on the dock.

Afterwards, make sure that the power cable and HDMI cable I plugged in. By doing so, you will be able to unlock the extra processing power of your console, which will lead to an increase of resolution. As a result, you will get a sharper image on your television screen or gaming monitor.

By playing in docked mode, the dynamic resolution should be less active as well since the increased processing power means that the console will be able handle more demanding scenarios. Thus, the resolution won’t be lowered in order to prevent the frame rate from dropping.

Can you keep the games from PlayStation Plus Extra?

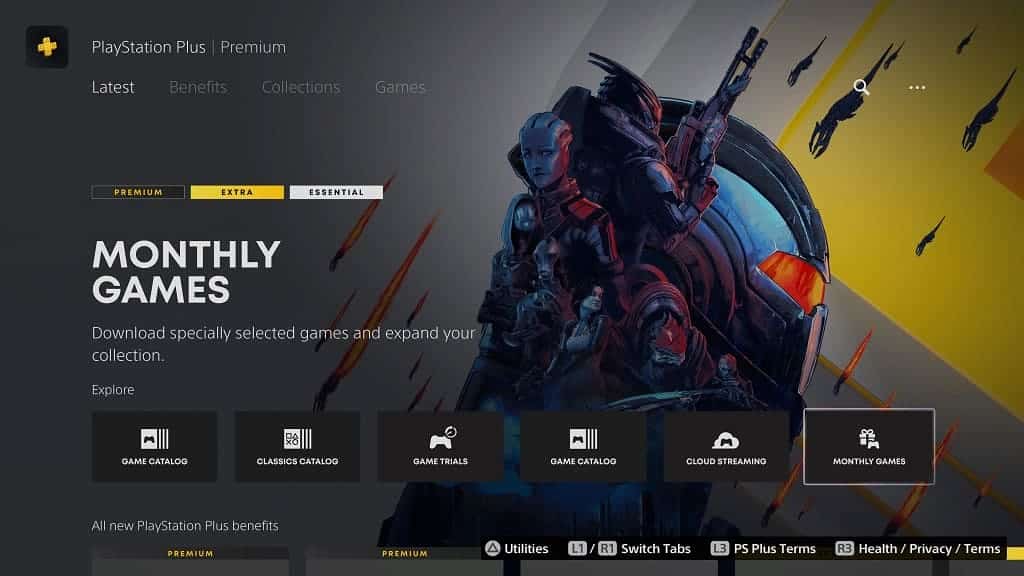
PlayStation Plus Extra is a subscription that gives you access to hundreds of videogames for the PlayStation 4 and PlayStation 5. So, can you keep the titles you downloaded from this service? You can find out in this guide from Seeking Tech.

PlayStation Plus Extra catalogs

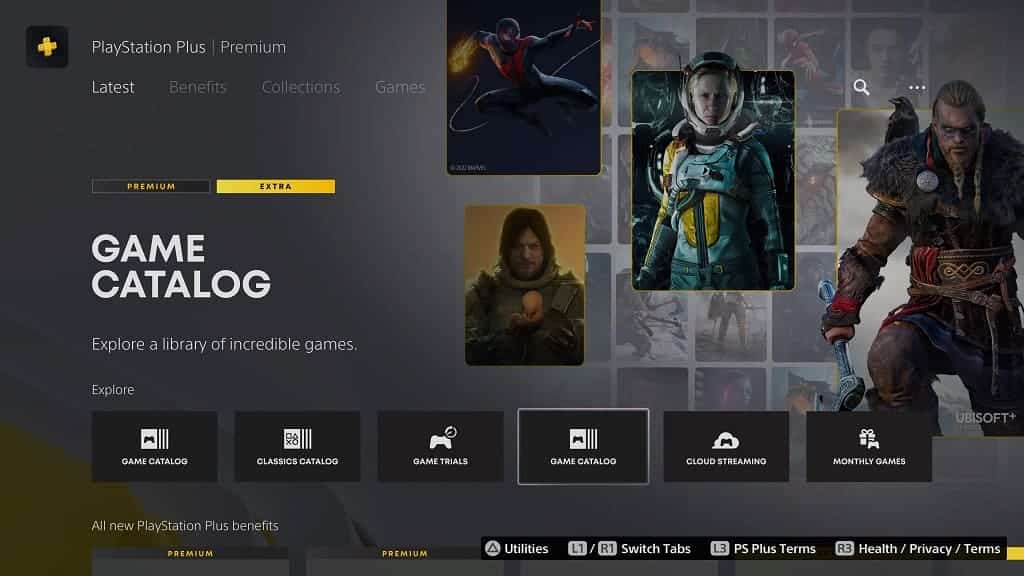
Before we begin, it is important to note that the Extra tier offers the following software catalogs:

  • Monthly Games Catalog
  • PlayStation Plus Collection
  • Game Catalog

Do you keep monthly games from PlayStation Plus Extra?

If you are an active member of PS+ Extra, then you should be able to keep playing the titles you downloaded from the Monthly Games Catalog.

For the uninformed, this catalog features a handful of titles that you can get if you are a member of PlayStation Plus Extra as well as PlayStation Plus Essential, PlayStation Plus Deluxe and PlayStation Plus Premium.

So, as long as you redeem these titles before they are removed from the Monthly Games Catalog, then you should be able to keep them if you are an active subscriber to any of the PlayStation Plus tiers.

If you no longer subscribe to any of the PS Plus plans, then you will lose access to the monthly games unless you become a member again.

Can you keep PlayStation Plus Collection from the Extra tier?

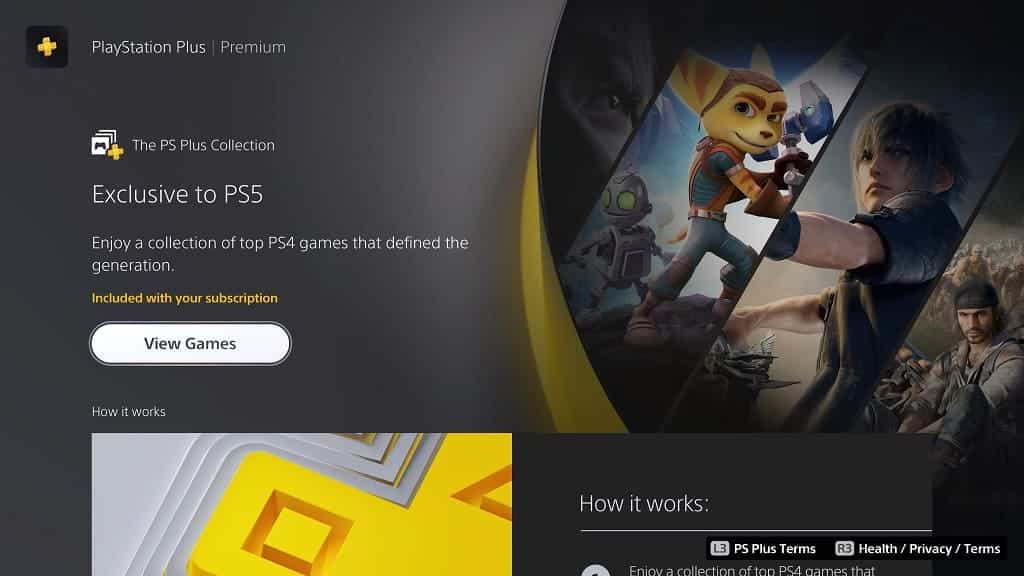
The PlayStation Plus Collection is a catalog of 20 PS4 games that you can get during the early years of the PlayStation 5 console. This catalog is no longer available as of May 9, 2023.

If you managed to get games from this catalog before they were removed, then you will be able to keep playing them as long as you remain a member of PlayStation Plus Extra. If you decide to downgrade your plan to the Essential tier, or upgrade to the Deluxe/Premium tier, then you will also be able to have access to games from this collection.

If you don’t remain a member to any of the PS Plus plans, then you won’t be able to play the software you got through The PlayStation Plus Collection unless you resubscribe.

Do you keep Game Catalog titles on PS Plus Extra?

A majority of games from PlayStation Plus Extra are offered through the Game Catalog.

These titles have an expiration date. Once the game has expired, it won’t show up in the Game Catalog. Furthermore, you will lose access to playing the software even if you stay a member of PlayStation Plus Extra (or higher) and redeem the software before the expiration date.

If you want to keep playing an expired title from this catalog, then you have to purchase the game.

Of course, you will also lose access to these games if you are no longer a member of PlayStation Plus Extra, PlayStation Plus Deluxe or PlayStation Plus Premium.

If you re-sub before the expiration date, however, then you will be able to play them until they leave the catalog.

What to do if your Xbox Series X or S can’t detect your Wi-Fi network

When setting up the Xbox Series X or Xbox Series S to connect to your Wi-Fi, you may notice that your console wasn’t able to detect your wireless network. To see how you can fix this issue, you can take a look at this troubleshooting article from Seeking Tech.

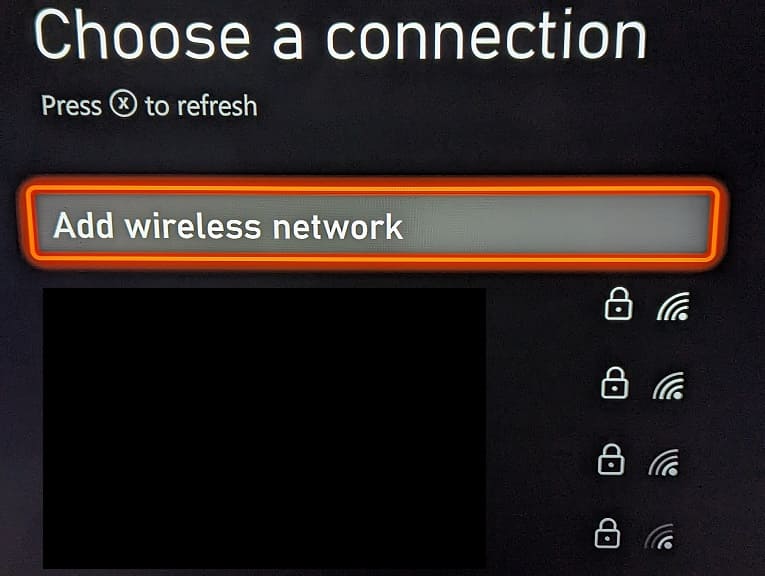
1. For the first step, you can try refreshing the list of networks from the “Choose a connection” menu on your Xbox.

In order to do so, head over to Settings > General > Network settings > Set up wireless network. From the “Choose a connection” screen, press the X button to refresh the list.

2. If your Wi-Fi still can’t be found, then you can select the “Add wireless network” option from the aforementioned “Choose a connection” menu.

Afterwards, use the on-screen keyboard to manually input your input the SSID of your WiFi network and then press the Menu button on the controller to begin the search.

3. If manually inputting the SSID doesn’t work, then you can try moving your modem, router and/or gateway closer to the game console.

4. You should also make sure that there aren’t any walls or metal objects that may be blocking the direct line of sight between the Wi-Fi access point and your Series X or Series S.

5. Other wireless devices, such as a wireless headset, may also cause interference with the Wi-Fi internet connection as well.

So, if you have these in the same vicinity as your Xbox and/or wireless access point, then you can try turning them off.

6. If possible, you can also try extending your Wi-Fi signal by using a repeater, extender, node or bridge.

7. A factory reset of your Xbox Series X or Xbox Series S may help too. In order to do so, you need to head over to Settings > System > Console info > Reset console > Reset and Keep My Games & Apps.

8. Power cycling your networking devices could help get your Wi-Fi detected as well. In order to do so, you can try taking the following steps:

  • Turn off your game console.
  • You also need to turn off your modem, router and other devices connected to your home network. If some of these electronics don’t have a power switch, then you need to unplug their power cords.
  • Wait for at least 5 minutes.
  • Turn your modem, router and other networking devices back on.
  • You then need to wait until the Internet is back online again on your home network.
  • Turn on your Xbox and then go to Settings > General > Network settings > Set up wireless network to see if your console is now able to detect your Wi-Fi network.

9. There is a possibility that either your networking device or the Wi-Fi card on your Xbox may be defective. If your Wi-Fi works with other devices, then there may be something wrong with your Series X or Series S.

In this case, you may need to get your console repaired or replaced.

How to prevent motion sickness when playing Humanity in PSVR or PSVR2

Humanity can be played in virtual reality with the PlayStation VR1 or PlayStation VR2. If you start to feel a little motion sick when trying to solve the creative puzzles in VR, then you can take a look at this guide to see how you can potentially make your nausea go away.

1. To start off, you need to head over to the Options menu from either the main menu or the pause screen.

2. Once you get to the Options menu, you need to select VR on the left side.

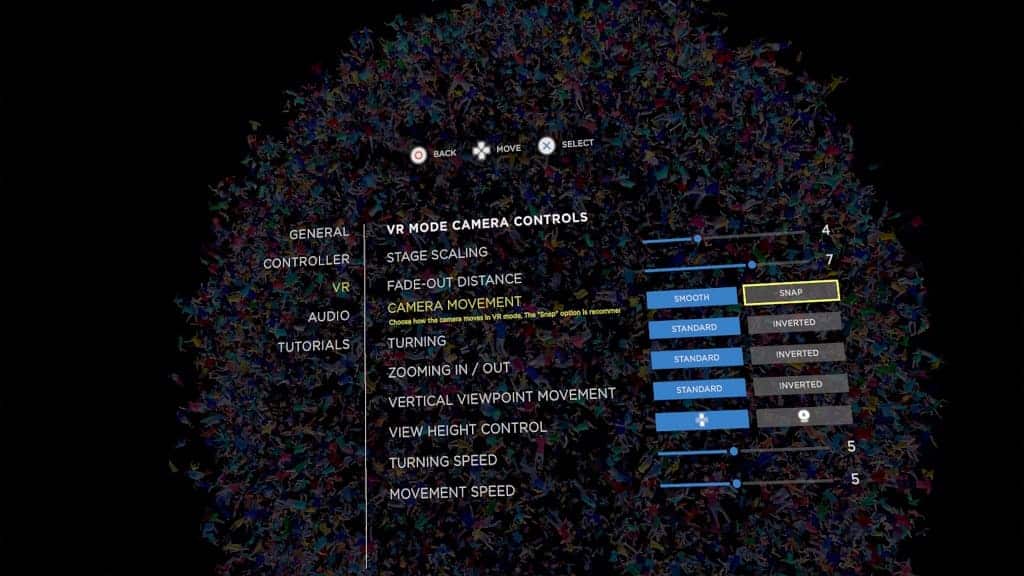
3. Afterwards, you should see a list of VR Mode Camera Controls on the right side of the same screen. Here, you should find the Camera Movement setting, which has the following description:

Choose how the camera moves in VR mode. The “Snap” option is recommended for those who are easily disoriented by VR experiences.

Set Camera Movement to Snap.

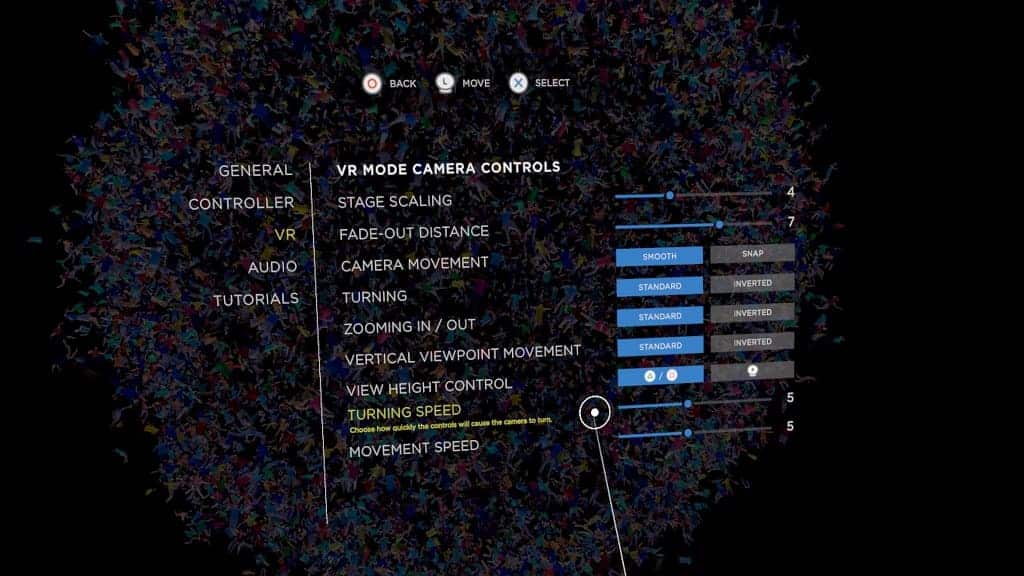
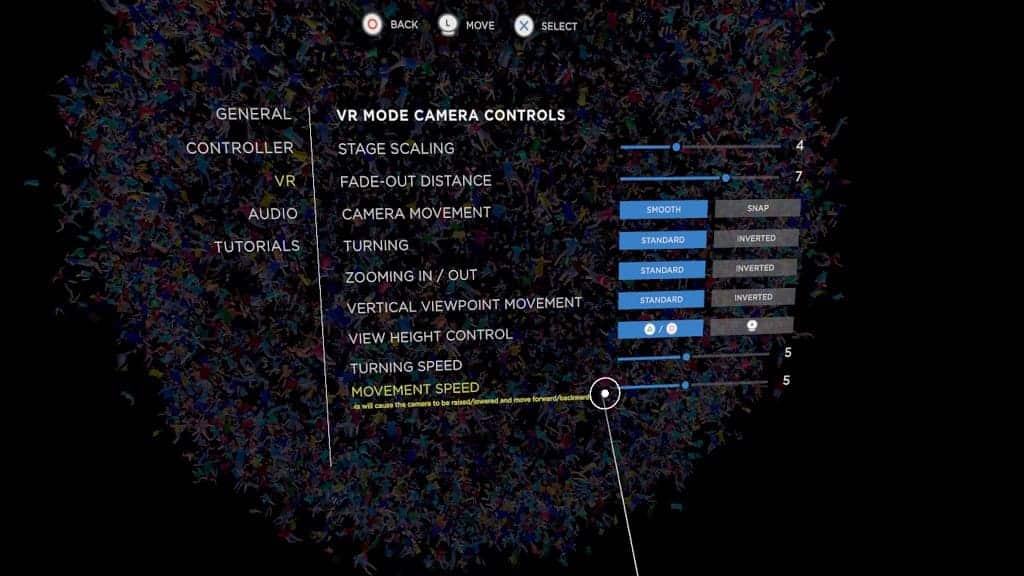
4. If you want to keep the Camera Movement setting to Smooth, then you can try adjusting the Turning Speed and Movement Speed of the camera while playing the game in VR.

You will find the Turning Speed near the bottom of the VR Mode Camera Controls menu with the following description:

Choose how quickly the controls will cause the camera to turn.

You will also find the Movement Speed at the very bottom of the same screen with the following description:

Choose how quickly the controls will cause the camera to be raised/lowered and move forward/backward.

5. If you decide to change the Turning Speed and/or Movement Speed, then make sure you test the new settings while playing Humanity.

If you start to feel sick, then you can return to the VR Mode Camera Controls screen to re-adjust these sliders. If none of the speeds help alleviate your nausea, then we recommend that you change the Camera Movement setting to Snap.

How to fix input lag in The Legend of Zelda: Tears of the Kingdom

When playing The Legend of Zelda: Tears of the Kingdom, you may notice that Link may not be as responsive to your inputs as you would like. To see how you can potentially fix the input lag issue with this Switch title, you can take a look at this troubleshooting article from Seeking Tech.

1. If you are playing the game on the Nintendo Switch Lite, undocked mode of the Nintendo Switch or undocked mode of the Nintendo Switch OLED, then you can try using the Joy-Cons when they are attached to your console.

2. If you can only play the game with wireless controllers, then you should make sure that you aren’t sitting too far away from the console.

Furthermore, avoid blocking the direct line of sight between your controller and the console. Turn off any other wireless devices that are nearby as well in order to prevent any potential interference.

3. If you are playing the game on your Switch or Switch OLED in docked mode and are experiencing input lag, then you should check your television settings.

If possible, try to enable the Game Mode or Game Optimizer Mode picture setting as this is designed to limit input latency when it comes to playing The Legend of Zelda: Tears of the Kingdom and other video games.

You should also make sure that you turn off any A.I. picture settings as these may add extra lag to your controller inputs.

4. When connecting the Switch to your TV, avoid using HDMI pass-through or splitter devices as these may introduce additional delay. Instead, the portable console should be connected directly to the screen.

5. If you are only experiencing lag when aiming or looking around, then you can check out this article to see how you can adjust the camera sensitivity in Tears of the Kingdom.

6. If you are seeing a lot of latency for both analogs, then you can try re-calibrating the two sticks by taking the following steps:

  • Start by opening the home menu of your Nintendo Switch by pressing the home button.
  • Select System Settings from the home screen.
  • In System Settings, you first need to select Controllers and Sensors on the left side.
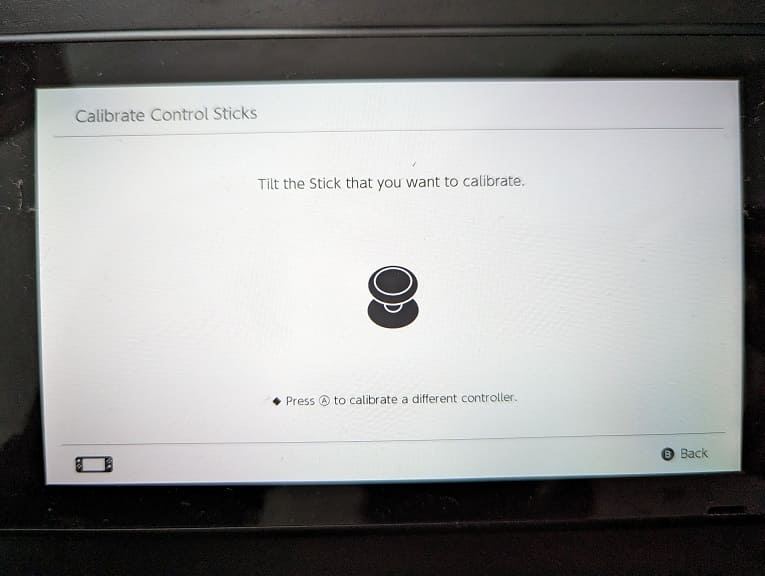
  • On the right side of the same screen, scroll down and then select Calibrate Control Sticks.
  • Tilt the analog stick that you want to re-calibrate.

  • Move the analog as instructed on screen.
  • Once you are done with one analog stick, re-calibrate the other one as well.

7. If you haven’t done so already, make sure you have the latest patch for Tears of the Kingdom installed. The new title update may help fix your input lag issues.

How to improve Zelda: Tears of the Kingdom frame rate performance

When playing The Legend of Zelda: Tears of the Kingdom, you may notice that the frame rate will drop in some instances. You can take a look at this guide from Seeking Tech to see how you can potentially improve the performance in this open-world action-adventure title.

1. If you are playing the game on a Nintendo Switch or Nintendo Switch OLED, then make sure you have the console docked so that it will output the image to a television screen or computer monitor.

By doing so, you will be able to unlock the extra processing power on the system, which should lead to a higher resolution as well as a more consistent frame rate.

2. You can also try turning on the Airplane Mode on your Nintendo Switch as doing so should free up more hardware resources to improve the fps in Tears of the Kingdom since the Bluetooth and Wi-Fi connections will be disabled.

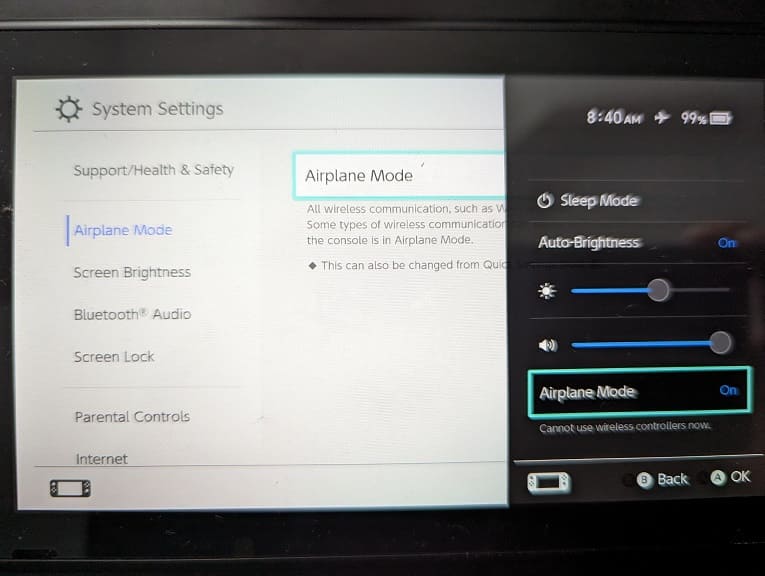
You can do so by first pressing and holding the home button to open the quick menu. From there, make sure that Airplane Mode is set to On.

Alternatively, you can press the home button to head to the home screen of your Nintendo Switch. After getting there, select System Settings and then Airplane Mode. Finally, make sure that this setting is enabled.

Keep in mind that you won’t be able to turn on Airplane Mode if your console is docked. Instead, this setting can only be used if you are playing the Nintendo Switch or Nintendo Switch OLED in handheld mode. Since the Nintendo Switch Lite can’t be docked, this setting will always be accessible.

3. Restarting the game may help with fixing the slowdowns as well.

To do so, press the home button to go back to the Switch’s home screen. From there, move the cursor over to The Legend of Zelda: Tears of the Kingdom icon and then press the X button to close the software. Afterwards, open the same game again.

4. Of course, you should also make sure that you have the latest patch downloaded for this title. In fact, a launch day update helped improve the frame rate performance.

If you haven’t installed the latest title update for this videogame, then you need move the cursor over to the Tears of the Kingdom icon on the home screen menu of your Switch. Afterwards, press the + button and then select Software Update > Via the Internet.