How to fix Zelda: Tears of the Kingdom brightness and bloom issues

You may find that some of the environments can be too bright in The Legend of Zelda: Tears of the Kingdom. This is especially true if you are exploring a snowy area or one of the sky islands. To see how you can potentially fix these brightness and overbloom problems, you can take a look at this troubleshooting article from Seeking Tech.

1. If you are playing Tears of the Kingdom in handheld mode on your Switch, then your options are very limited. The only thing you can really try is to turn down your screen brightness.

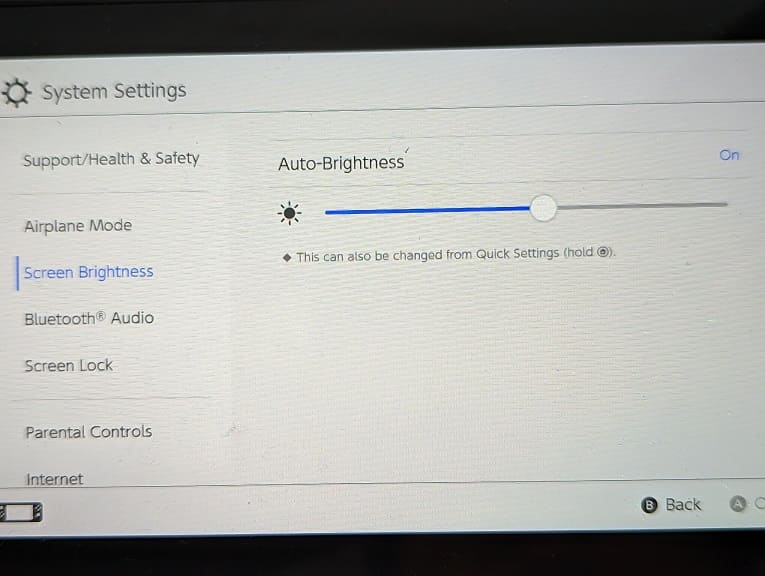
In order to do so hastily you can press and hold the home button to open the quick menu that should appear on the right side of the screen. From there, you should see the screen brightness slider. Furthermore, we also recommend that you turn off the Auto-Brightness feature in the same menu if you have it enabled.

Alternatively, you can press the home button to head back to the home screen. From there, select System Settings and then Screen Brightness. You should then find the same automatic brightness and brightness slider options.
2. If you are playing the game with your Nintendo Switch or Nintendo Switch OLED in dock mode, then you can try adjusting the Brightness, Color and Contrast settings of your television set or gaming monitor.

You may have to do re-adjust these same settings if you are moving from a bright environment back to a dark environment and vice versa.

3. Hopefully, Nintendo will add the ability to adjust the brightness and contrast levels by using the in-game menu in a future patch.

To see if there is a new update available for The Legend of Zelda: Tears of the Kingdom, you need to first press the home button to go back to the home screen menu. From there, move the cursor to the game’s icon and then press the + button. Afterwards, select Software Update and then Via the Internet.

How to fix PlayStation Plus Extra or Premium expiring license issues

When playing a PlayStation 4 or PlayStation 5 game from the PlayStation Plus Extra or PlayStation Plus Premium catalog, you may get a message saying that the license will expire in 15 minutes.

If you continue to play the game, then you will get another message saying that it will close in 5 minutes.

If you still decide to keep playing, then the game will eventually close and you will be kicked back out to the home screen menu of your console.

To see how you can potentially fix this issue, you can take a look at this troubleshooting article from Seeking Tech.

1. For the first step, we recommend that you try opening the same title after its license has supposedly expired. If you are able to play the game again, then there is likely something wrong with the authentication servers of the PlayStation Network.

In this case, there is not much else you can do but to patiently until Sony fixes the server issues on their end. You should still be able to play the game normally as long as you make sure you save before the license “expires” just in case so that you won’t lose any progress when you open the game again and then reload your save file.

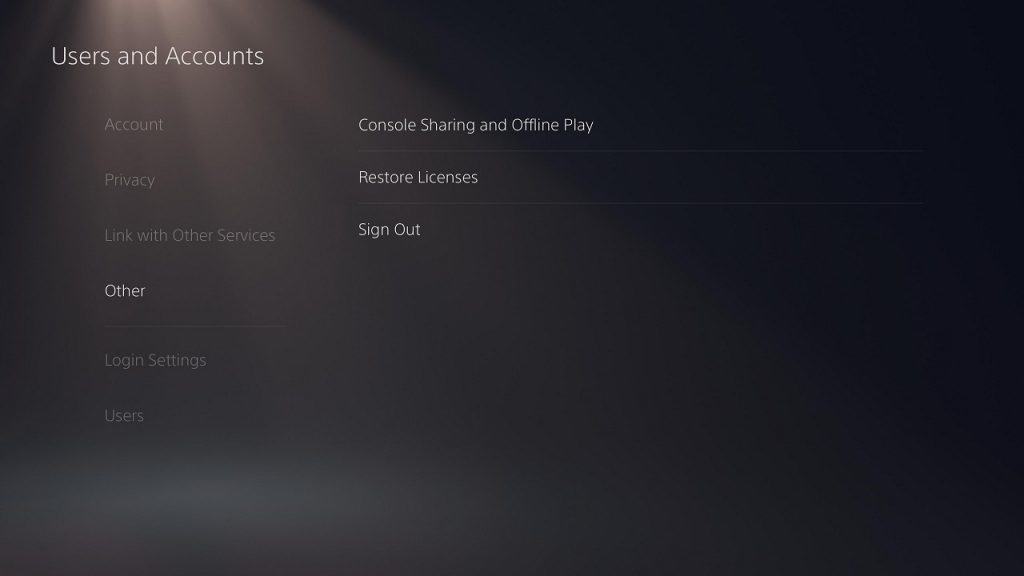
2. If you can’t re-open the game that has the expired license, then you can try using the Restore Licenses feature.

On the PlayStation 4 or PlayStation 4 Pro, you need to open the Settings menu and then select Users and Accounts > Other > Restore Licenses > Restore.

On the PlayStation 5 or PlayStation 5 Digital Edition console, you need to head over to the Settings menu and then select Users and Accounts > Other > Restore Licenses > Restore.

3. If you are logged into the same PlayStation Network account that is used to subscribe to PlayStation Plus Extra or PlayStation Plus Premium, then you should make sure that your subscription hasn’t expired.

4. If you are using a different PlayStation Network account, then you should make sure that the PSN account with the PS Plus subscription has set your PlayStation 4 or PlayStation 5 as the primary console.

For the PS4 and PS4 Pro, you need to go to Settings > Account Management > Activate as Your Primary PlayStation 4 > Activate.

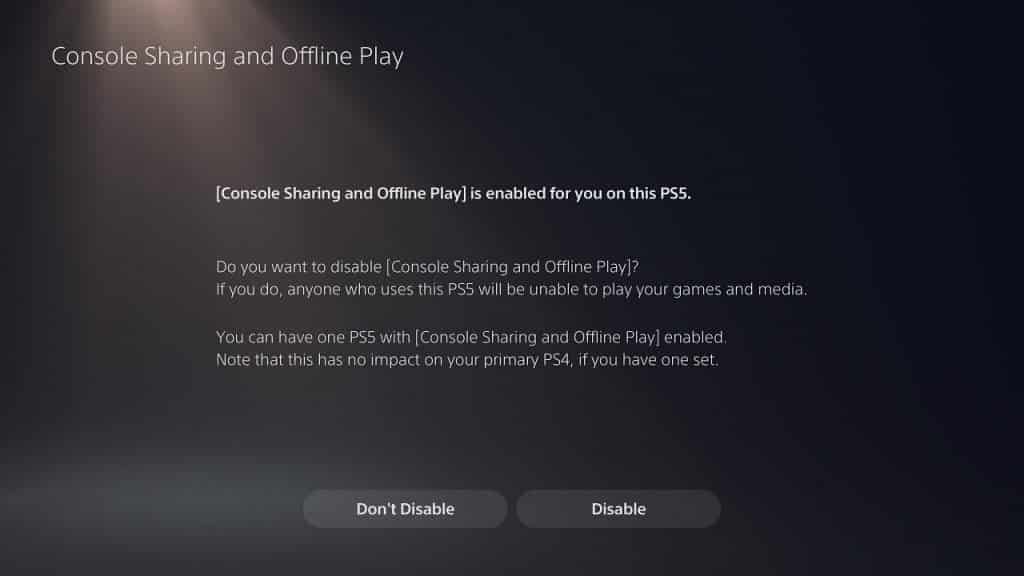
On the PS5 and PS5 Digital Edition, you have to select Settings > Users and Accounts > Other > Console Sharing and Offline Play > Enable.

5. If you are still getting the “this game will expire in 15 minutes” or “this game will expire in 5 minutes” errors when trying to play a title from the Game Catalog or Classics Catalog, then we recommend that you contact PlayStation Support to get additional help.

How to fix Humanity trophy glitches

When playing Humanity on PlayStation 4 or PlayStation 5, you may notice that you aren’t earning any trophies. To see how you can fix this issue with the platforming puzzle game, you can take a look at this troubleshooting article from Seeking Tech.

Based on your experience, the trophy tracking is not working properly when playing Humanity in virtual reality mode on the PlayStation VR1 or PlayStation VR2. If you start playing the game in VR, or enter the VR mode at some point, then some of the trophies may not unlock after meeting the requirements.

Even if you try playing the game in the flat screen mode again after trying it out in virtual reality, you may not see these achievements pop up as intended.

How to fix the trophy bug in Humanity

If you are willing to start from a new save file and don’t mind playing this game without PSVR1 or PSVR2, then you can try deleting your current save file.

In order to delete the save data on your PS5, go to Settings > Saved Data and Game/App Settings > Saved Data (PS5) > Console Storage > Delete. Afterwards, select the Humanity save file and then delete it.

On the PS4 and PS4 Pro, you need to head over to Settings > Application Saved Data Management > Saved Data in System Storage > Delete. From there, select the Humanity save data and then delete it.

When you start the game again after deleting your original save, you should avoid entering the VR mode as doing so may cause the trophy tracking problems to pop up again.

If you aren’t willing to start over your progress, then we recommend that you wait until Humanity gets a new patch that fixes this trophy glitch.

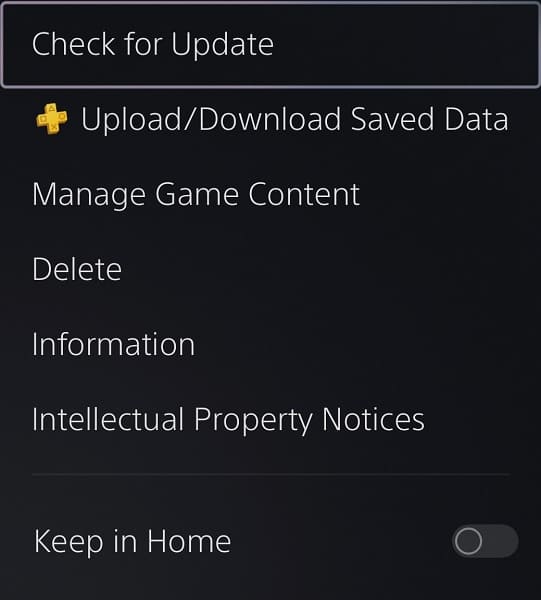
You can manually update the game by moving the cursor over to the Humanity icon on the home screen and then pressing the Options button. You can then select the Check for Update option in the pop-up window.

How to fix distorted and glitchy Netflix videos on Xbox Series X and S

When trying to stream a video through the Netflix App on the Xbox Series X or Xbox Series S, you may end up getting a distorted and/or glitchy picture. To see how you can fix this issue, you can take a look at this troubleshooting article from Seeking Tech.

1. Based on our experience, the distortion will most likely occur when you are streaming Dolby Vision content in the Netflix App on a compatible television screen without first enabling DV support on your Xbox.

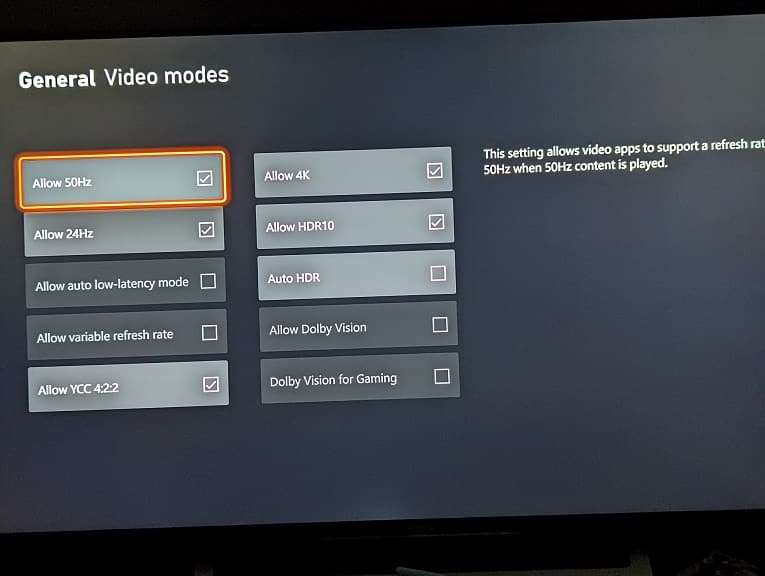
To fix this problem, you need to open the Settings App of your Series X or Series S. Afterwards, head over to the General > TV & display options > Video modes menu. From there, make sure that the Allow Dolby Vision setting is enabled.

Afterwards, you need to do a hard reset of your console. In order to do so, go back to the front page of the Settings App and then select General > Network settings > Advanced settings > Alternate MAC Address. Afterwards, select Clear and then Restart.

Once that is done, you can try playing the same problematic Netflix video to see if it can display properly.

2. If you have Dolby Vision already enabled but are still seeing the glitchy image, then you can try factory resetting your Xbox.

To do so, head over to the Settings App and then select System > Console Info > Reset Console > Reset and Keep My Games & Apps.

3. You can also try turning off the Allow Dolby Vision setting from the General > TV & display options > Video modes menu and hen hard resetting your console.

4. You should also make sure that you have the latest patch installed for the Netflix App as well.

To manually update, press the Menu button on the controller while the cursor is over the Netflix icon in the system menus of your Xbox. Afterwards, select Manage app > Updates.

5. Power cycling the console may help as well.

In order to do so, turn off your Series X or Series S and then unplug the power cord from the system. Afterwards, wait for at least 5 minutes before plugging the power cord back in and turning on your console.

6. If you are still getting a distorted picture, then you can try unplugging the HDMI cable and then plugging it back in.

7. If possible, you can try using a new HDMI cable to connect your Xbox to the television set.

What to do if the Humanity PSVR or PSVR2 mode is not working

Humanity supports both the PlayStation VR1 and PlayStation VR2. If you can’t seem to play this puzzle platformer in virtual reality on the PS4 and PS5 consoles, then you can check out this troubleshooting article from Seeking Tech.

1. Before we begin, it is important to note that you can only play the PlayStation 4 version of Humanity in virtual reality with the PlayStation VR1 headset. To play the PS5 version of the same game in VR, you will need the PS VR2.

So, if you are playing on a PlayStation 4 or PlayStation 4 Pro, make sure you launch into the game with your PlayStation VR1 headset connected and turned on.

For the PlayStation 5 or PlayStation 5 Digital Edition, you need to make sure you have the PS5 version of the game downloaded. You can tell by going to the home screen of your console, which you can do by pressing and holding the PS logo button on the DualSense. From there, move the cursor to the Humanity icon to see if it has the PS5 label. If it has a PS4 label, then you need to delete it and then download the PS5 version from the PlayStation Store.

After making sure that you have the PS5 version, open the game with the PlayStation VR2 headset connected and turned on.

Keep in mind that you can also play the PS4 version of Humanity in virtual reality on the PlayStation 5 console thanks to backwards compatibility. In order to do so, you need to connect the PSVR1 headset with the PlayStation Camera adaptor for PS5 before starting the game.

2. Even with the correct VR headset connected, the game will boot up in big screen mode with the graphics looking flat when you look through the lenses of your PlayStation VR or PlayStation VR2.

In order to enable the VR mode in Humanity, you need to select Enter VR Mode from the title screen.

If you are currently playing the game, then you need to open the pause menu and then quit back to the title screen to turn on the virtual reality mode.

3. You should be able to tell immediately once you activate VR in Humanity as you should no longer see any borders. Not to mention that the graphics will be displayed in stereoscopic 3D.

Xbox Elite Wireless Controller Series 2 settings for Diablo IV

To improve your performance when playing Diablo IV on your Xbox One, Xbox One S, Xbox One X, Xbox Series S or Xbox Series X, you can try playing the game with the Xbox Elite Wireless Controller Series 2.

You can check out this Seeking Tech guide to see what are the best settings for the gamepad you can use when it comes to playing this action role-playing game.

P1, P2, P3 and P4 Button Assignments

You can find the default Xbox button layout for Diablo 4 below:

  • A: Interact or Use Basic Skill Set
  • B: Evade or Dismount when Mounted
  • X: Use Core Skill Slot or Use Mount Combat Dismount when Mounted
  • Y: Use Skill Slot #1
  • LB: Use Potion
  • LT: Use Skill Slot #3
  • RB: Use Skill Slot #2
  • RT: Use Skill Slot #4 or Spur Mount when Mounted
  • Press Down on Left Analog: Show Item Labels
  • Press Down on Right Analog: Lock On Target
  • Up Directional Button: Open Action Wheel
  • Down Directional Button: Use Town Portal
  • Left Directional Button: Respond to Social Request
  • Right Directional Button: Use Mount
  • View Button: Map Screen
  • Menu Button: Character Panel

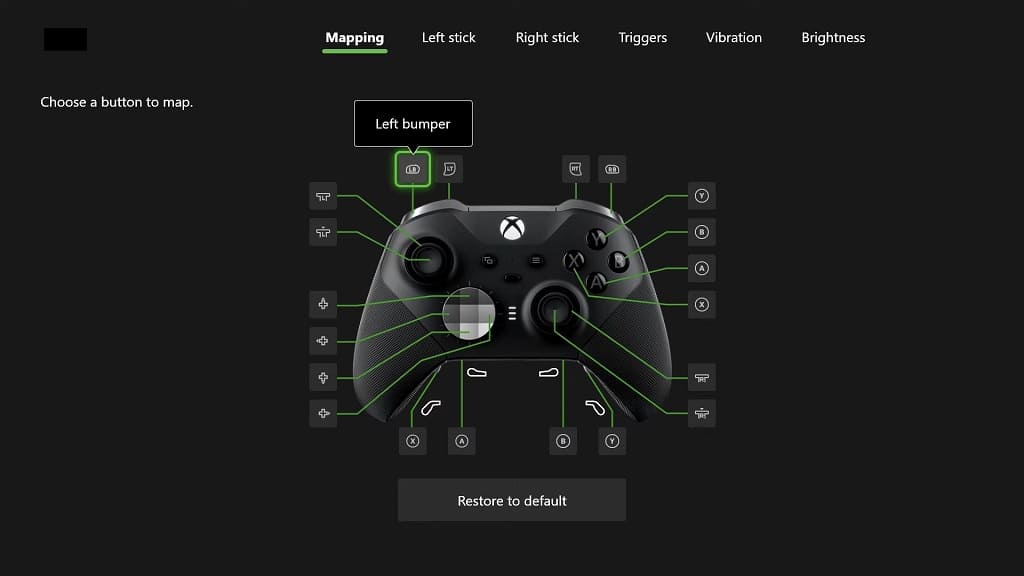
You can reassign any of the above buttons to the P1, P2, P3 and P4 paddles located on the back of the Xbox Elite Wireless Controller Series 2.

What we ended by doing was assign the back buttons to the four skill slots. By doing so, you only have to use the LB button to use a healing potion and you don’t have to worry about reaching for the other shoulder buttons when using a skill.

Of course, you can also experiment with reassigning any of the buttons to the back paddles in order to make controlling your character is the action RPG feel as natural as possible.

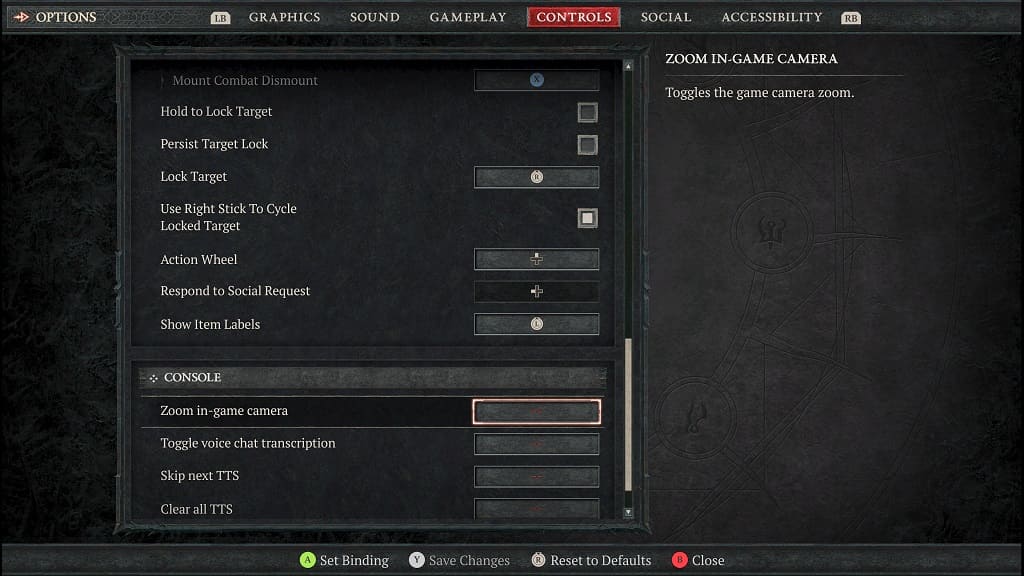
In addition to using the Mapping menu of the Elite Wireless Controller Series 2 to assign the back buttons, you can also use the in-game Controls menu in Diablo 4 to change the layout for the other buttons on the gamepad.

Trigger Locks

If you decide to keep using the LT and RT buttons frequently, then we recommend pulling the trigger lock sliders located on the back of the controller all the way down.

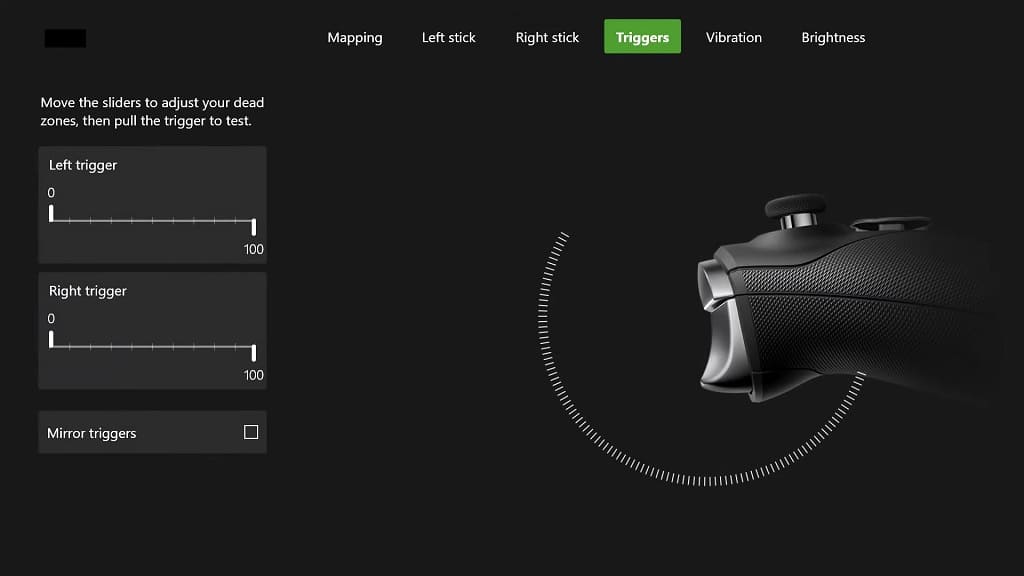
By doing so, your LT and RT inputs should be recognized by the game a lot sooner. You will also be able to further adjust the dead zones of the triggers by using the Triggers menu of the Xbox Elite Wireless Controller Series 2.

Stick Deadzones

If you feel that your character isn’t as responsive as you would like when it comes to moving the left analog stick, then you can adjust the inner and outer dead zones by using the in-game Controls menu while playing Diablo IV.

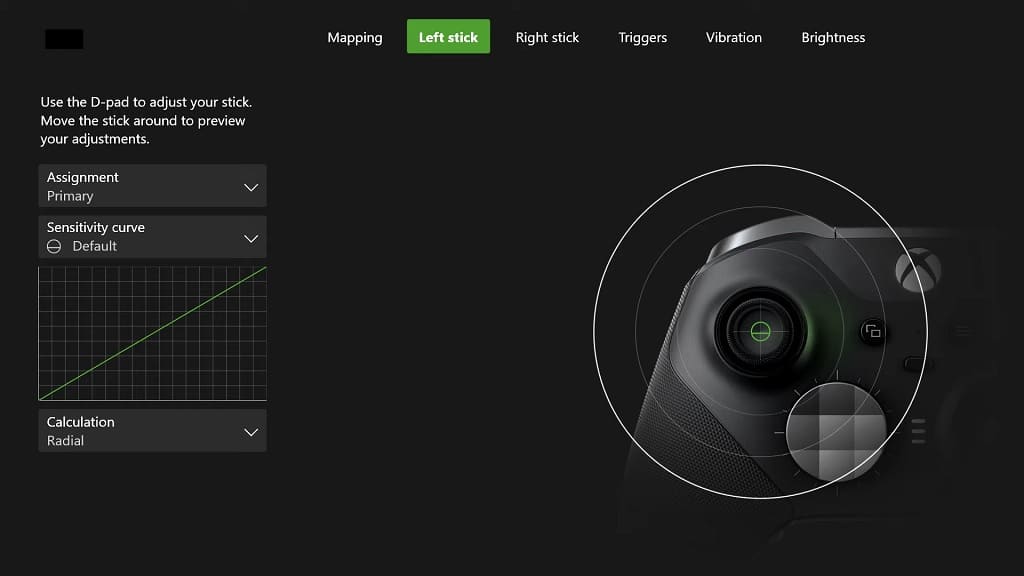
To further fine tune the dead zone of the left analog, you can also use the Left Stick menu of the Xbox Elite Wireless Controller Series 2.

How to fix Diablo IV 315405 and 300010 error codes

When trying to log into the Diablo IV servers, you may end up seeing the following error messages:

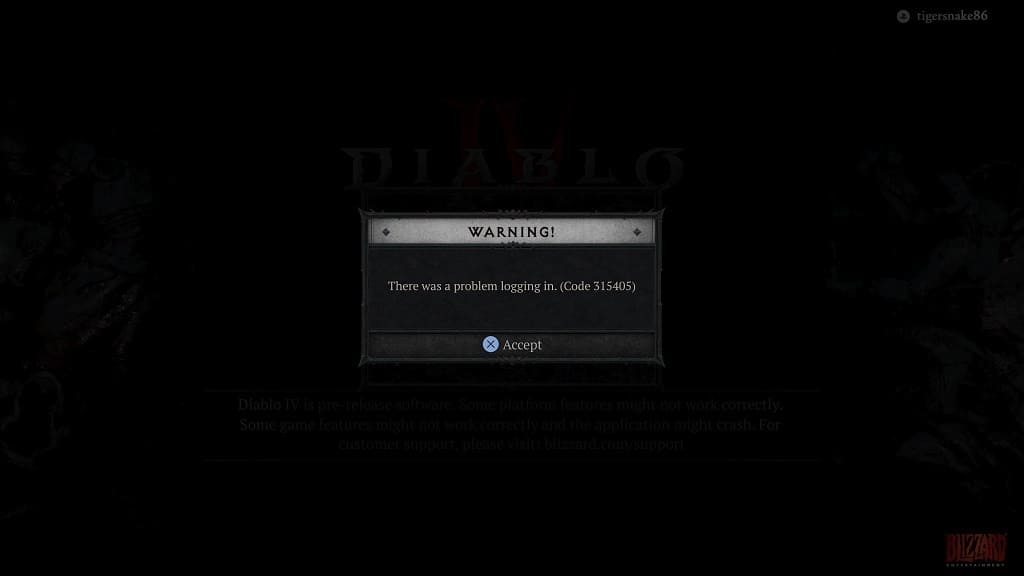
  • “There was a problem logging in. (Code 315405)”
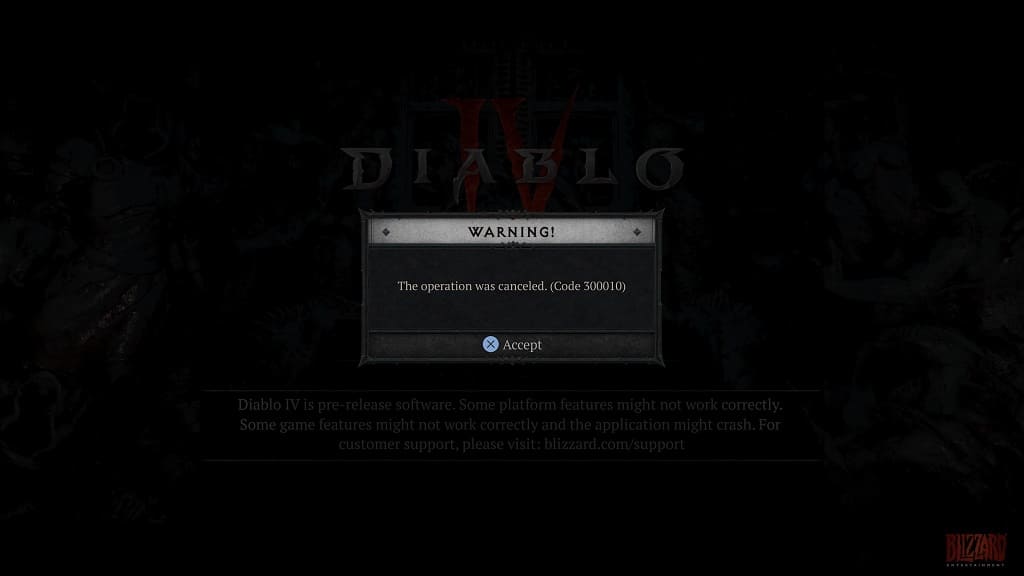
  • “The operation was canceled. (Code 300010)”

To see how you can fix these sign-in problems for this action role-playing game, you can check out this troubleshooting article here at Seeking Tech.

1. We encountered these error codes when trying to link our PlayStation Network account with our Battle.net account while logging into the game on our PlayStation 5.

If you are trying to link your PSN account from your PS5 or PS5 Digital Edition system, then we recommend that you try doing it from the web browser instead.

In order to do so, you need to visit the Connected Accounts page from Battle.net. Once you are logged into your Battle.net account, select the Connect option next to PlayStation Network.

If you have a different PlayStation Network account already connected to Battle.net, then you need to disconnect your currently linked account before you can add your new PSN username.

2. If you still can’t log into Diablo 4 after linking your account, then you should make sure that you have the latest patch downloaded and installed.

3. If you are playing on consoles, then you should check to see if the PlayStation Network or Xbox Live servers are fully operational.

For the PlayStation 4, PlayStation 4 Pro and PlayStation 5 PSN servers, you can visit this link.

If you are playing the game on an Xbox One, Xbox One S, Xbox One X, Xbox Series S or Xbox Series X, then you can check out this page.

4. There is also a possibility that the Diablo IV servers are experiencing issues with login authentication.

If there are server downtime, maintenance and other problems, then you will most likely find the announcement from the official Diablo Twitter account.

You can’t do anything but patiently wait until things get fixed if there are issues with the PlayStation Network, Xbox Live and/or game servers.

How to enable negative edge inputs in Street Fighter 6

Street Fighter 6 supports negative edge inputs. To see how you can turn this feature on, you can take a look at this guide from Seeking Tech.

What is negative edge input?

Negative edge inputs will allow you to execute a string of commands by holding down and then releasing the button instead of having to properly time each input.

If you decide to throw a Hadoken fire ball, for example, then you can hold the punch button, perform the quarter circle motion with the left analog stick and then release the punch button to perform the special move with negative edge input.

Without this feature, you will need to perform the quarter circle motion first and then press the punch button.

So, if you are having a hard time with executing butting inputs for special moves and super arts in Street Fighter 6, then you may want to enable this setting.

How to turn on negative edge inputs

If you want to use this feature, then you need to take the following steps:

1. To begin, you need to head over to the Mode Select screen as you won’t be able to change controls from the pause menu while you are in the middle of a match.

2. From the Mode Select screen, press the Options button if you are playing with a DualShock 4, DualSense or PlayStation fighting stick to open the Multi Menu. If you are playing with an Xbox controller or arcade stick, then you need to press the Menu button.

3. Once you get to the Multi Menu, select Options.

4. From the Options menu, switch over to the Controls tab. You can do so by pressing R1 on a PlayStation controller or RB on an Xbox controller.

5. Next, you need to select which controller you want to enable negative edge inputs for.

If you want to enable this feature for the gamepad you have connected in the first controller slot, then you need to select Player 1 Side Control Settings (Battle).

For the second controller, you need to select Player 2 Side Control Settings (Battle).

6. From the P1 Control Settings or P2 Control Settings section, move the cursor down to Button Release Input.

7. Set the Button Release Input setting to On.

8. Press the Circle button on PlayStation or B button on Xbox to go back out.

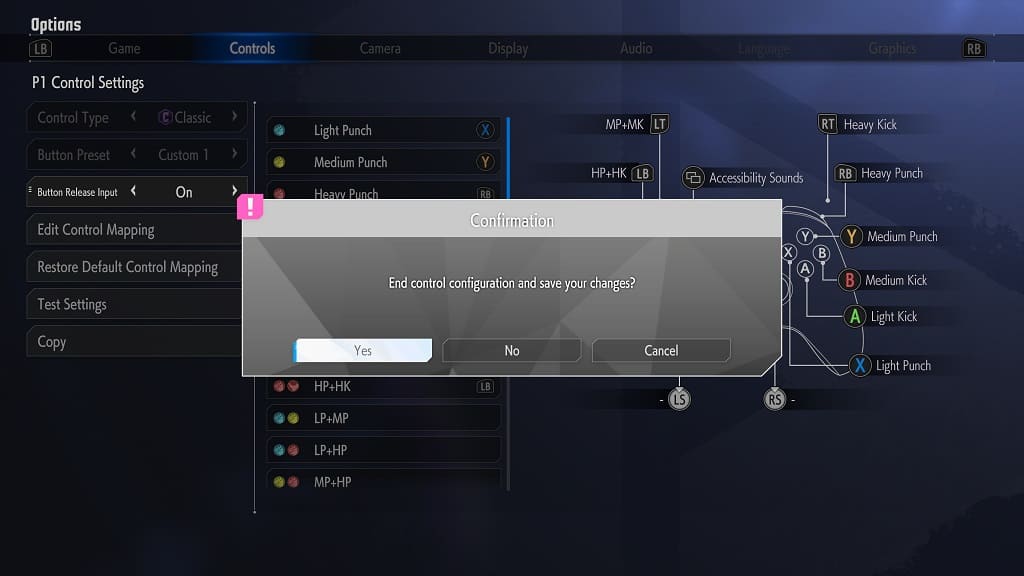
9. You will be asked if you want to save the change you just made. Here, you need to select Yes to apply the negative edge inputs.

You should now be able to use button release inputs while fighting in the sixth mainline installment of the Street Fighter series.

How to fix Diablo IV ‘unable to connect to Battle.net’ issue

When trying to load your save file in Diablo IV, you may end up seeing the following error message:

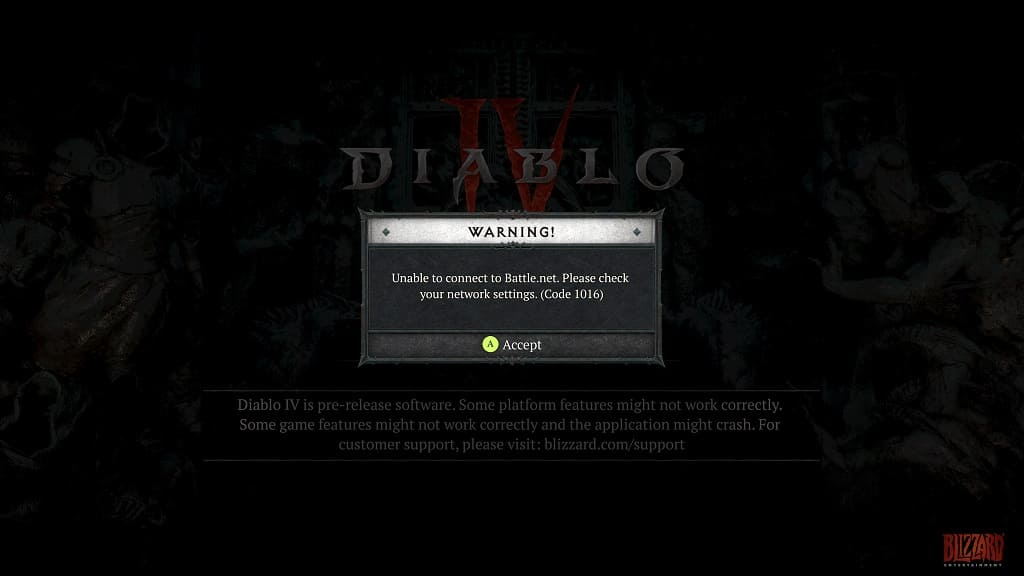
  • “Unable to connect to Battle.net. Please check your network settings. (Code 1016)”

To see how you can fix this connection issue with this action RPG, you can take a look at this troubleshooting article from Seeking Tech.

1. For the first step, you can simply try to log back into the game again. When we encountered this error code, we were able to get connected to the server on our next attempt.

2. If you are still getting the 1016 error after trying to load your save data even after multiple retries, then you should make sure that you aren’t using the same home network to download, stream or play other online games at the same.

In you are using a lot of bandwidth, then you can try to pause or stop the other internet activities to see if you are able to log into the Battle.net without any errors.

3. If possible, we also recommend connecting your PC, PlayStation 4, PlayStation 4 Pro, PlayStation 5, PlayStation 5 Digital Edition, Xbox One, Xbox One S, Xbox One X, Xbox Series S or Xbox Series X to the internet by using a wired Ethernet connection.

By doing so, you will get a faster and more stable internet when compared to using Wi-Fi.

If you can only use Wi-Fi, then you can try moving your gaming system closer to the Wi-Fi access point. You should also make sure that there aren’t any physical objects blocking the direct line of sight between the access point and your system. Furthermore, try to remove any other wireless devices that are nearby as these could also hinder your Wi-Fi signal strength.

4. If you haven’t done so already, you should download the latest patch for Diablo 4 as it may contain a fix for the 1016 error. While you are at it, make sure you have the latest firmware installed on your PC or console as well.

5. A power cycle may also fix your login problems in the latest Diablo game. In order to perform this action, you need to turn off your modem and router(s), wait for several minutes and then turn them back on again.

Once your internet connection has gone back online, try to load your save file to see if you are able to connect to the server.

6. There is also a possibility that the game servers are down at this moment. In this scenario, you won’t be able to connect to Battle.net no matter what you do unless the servers get fixed.

What to do if The Legend of Zelda: Tears of the Kingdom motion controls is not working

You can use motion controls in The Legend of Zelda: Tears of the Kingdom. If you don’t think that the gyro is working correctly on your Joy-Con and/or Nintendo Switch Pro Controller when playing this open-world action-adventure title, then you can take a look at this troubleshooting article from Seeking Tech.

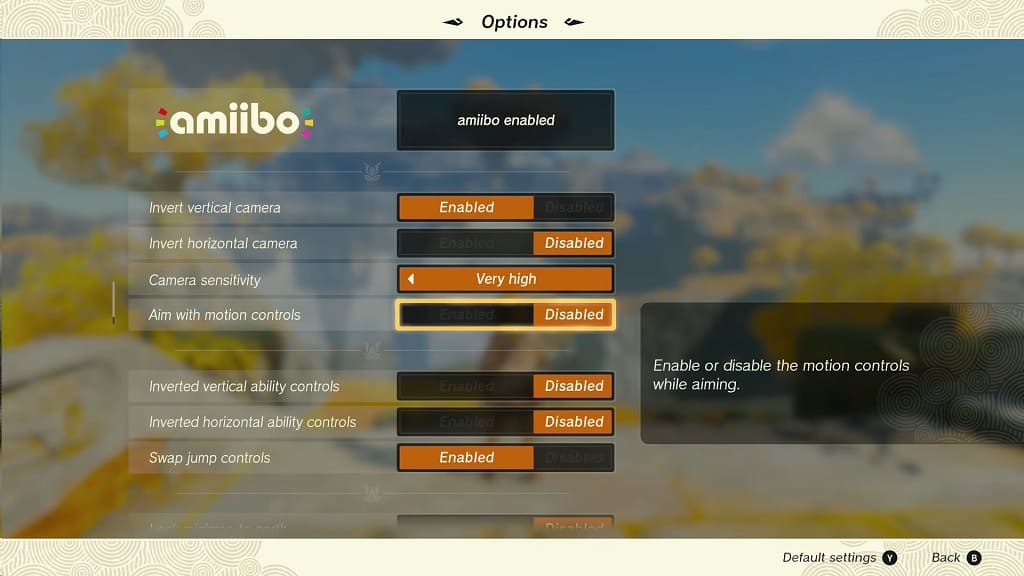
1. If the motion controls aren’t working at all, then make sure that you have the “Aim with motion controls” setting enabled in The Legend of Zelda: Tears of the Kingdom.

You can find this feature by opening the Pause Menu and then navigating to System > Options. Afterwards, make sure that “Aim with motion controls” is set to Enabled.

2. You should also make sure that you have the latest firmware installed on your Nintendo Switch, Nintendo Switch Lite or Nintendo Switch OLED.

To manually update, press the home button to return to the home screen of your console. From there, you need to select System Settings > System > System Update.

3. After updating your console, you should also make sure that you have the latest update installed on your controller.

To do so, head back to the home screen of your Nintendo Switch. Afterwards, select System Settings > Controllers and Sensors > Update Controllers.

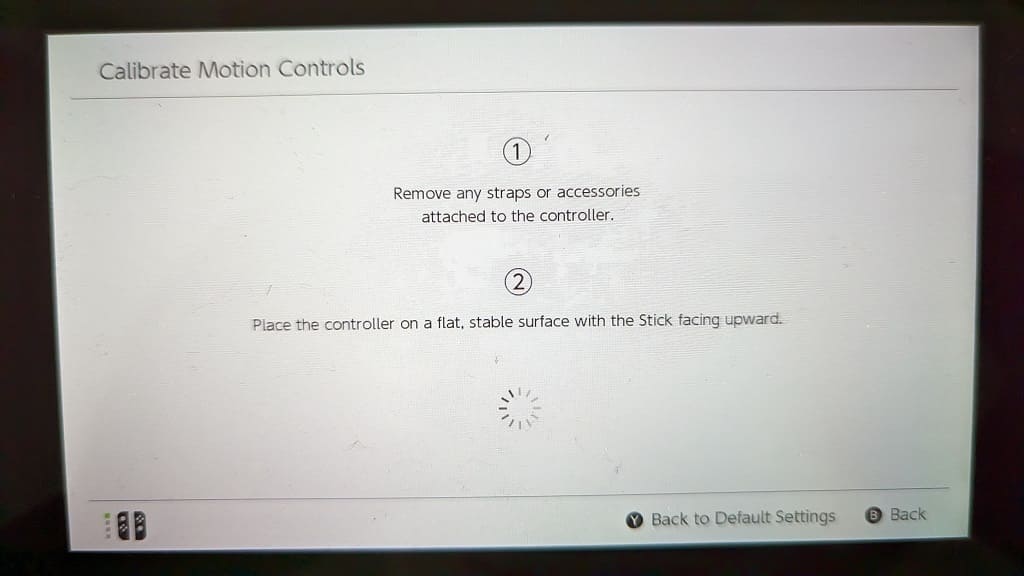
4. If your console and controllers are up to date but the motion controls don’t seem to be functioning normally, then you can try calibrating the gyros by taking the following steps:

  • Go to the home menu of your Nintendo Switch if you aren’t there already.
  • From there, go to System Settings > Controllers and Sensors > Calibrate Motion Controls.
  • After getting to the Calibrate Motion Controls menu, select Calibrate Console.
  • Detach the Joy-Con from the screen and then place the console and a flat console facing forward.
  • You should now be back in the Calibrate Motion Controls menu. This time, you need to select Calibrate Controllers.
  • If you are using the Joy-Cons to play Tears of the Kingdom, then you need to press and hold the – button on the Left Joy-Con or + button on the Right Joy-Con to start the calibration. Afterwards, lay the Joy-Con on a flat surface with the analog stick pointed upwards and the controller facing forward.
  • If you are playing the open-world game with a Nintendo Switch Pro Controller, then you can press and hold with the – button or + button. Next, laid the gamepad down on a flat surface with the analogs pointed upwards and the pad facing forward.

Once you are done re-calibrating the gyros of your console and controller, test to see if the motion controls are more accurate in The Legend of Zelda: Tears of the Kingdom.

5. If you still can’t get motion control to work, then there may be something wrong with your controller. In this case, you may need to get it repaired or replaced.

6. Of course, you can also try playing the game with the gyros disabled. To find out how to do so, you can take a look at this tutorial.