How to remove no signal message and screen saver on A1, B1, C1 and G1

When the LG A1, B1, C1 and G1 can’t detect a video input signal, then these television sets will display a no signal message and screen saver. To remove, both of these, you can check out this step-by-step guide at Seeking Tech.

Updating the firmware of LG A1, B1, C1 and G1

The ability to remove the no signal messages from the A1, B1, C1 and G1 was added to a recent firmware update for these television sets. In order to download and install it, you need to take the following steps:

1. Before we begin, you need make sure that the A1, B1, C1 or G1 is already connected to the internet.

2. To start, press the gear button on your Magic Remote to bring up the Quick Settings menu.

3. Inside Quick Settings, select All Settings.

4. Next, you should select Support.

5. Afterwards, select Software Update.

6. In the Software Update menu, you will see the current software version of your A1, B1, C1 or G1.

7. In this same menu, you can also manually check for a new firmware update. Furthermore, you can also turn on automatic updates.

How to disable no signal messages on LG A1, B1, C1 and G1

With your LG 2021 OLED updated, you simply have to press the red button on the TV remote to hide the no signal message.

The message will stay hidden unless you press the red button again or you decide to power off and then power on your television set again.

How to turn off screen saver on LG A1, B1, C1 and G1

Along with the no signal message, the A1, B1, C1 and G1 will also display a wallpaper screen saver when no video signal is detected. To remove these series of images, you need to do the following:

1. On the Magic Remote of your LG television, press the mute button three times in quick succession. If done successfully, this should bring up the “Select a menu item” display on the right side of the screen.

2. In “Select a menu item,” make sure that the “No signal image” setting is disabled.

While this setting will disable the wallpaper screen saver, a different “no signal” message will appear on the screen again. You won’t be able to remove this message unless you enable the aforementioned “No signal image” setting.

LG C2 wall mount specs

In 2022, LG released the new C2 television model. If you want to put this new OLED TV directly on a wall, then you can take a look at this wall mount compatible guide.

What is the LG C2?

Unlike 2021’s C1, the LG C2 comes with an OLED evo panel that provide higher peak brightness levels in addition to offering better protection against screen burn-in. By using a new processor, the new TV model should also do a better job at upscaling video when compared to its predecessor. Furthermore, it is capable of outputting virtual 7.1.2 surround sound through the TV speakers.

With the C2, LG also introduced the new 42” screen size, which is a great alternative if you don’t have a lot of space in your room and/or want to use the television set as a computer monitor.

LG C2 Screen Sizes

Along with the 42-inch model, the LG C2 can also be bought in the 48-inch, 55-inch, 65-inch, 77-inch and 83-inch screen sizes.

You can find the model number for each available size for this television series below:

  • 42” LG C2 4K Smart OLED TV (OLED42C2)
  • 48” LG C2 4K Smart OLED TV (OLED48C2)
  • 55” LG C2 4K Smart OLED TV (OLED55C2)
  • 65” LG C2 4K Smart OLED TV (OLED65C2)
  • 77” LG C2 4K Smart OLED TV (OLED77C2)
  • 83” LG C2 4K Smart OLED TV (OLED83C2)

LG C2 Dimensions without Stand

Dimensions without Stand (in millimeters):

  • 42” LG C2: 932 mm x 540 mm x 41.1 mm
  • 48” LG C2: 1071 mm x 618 mm x 46.9 mm
  • 55” LG C2: 1222 mm x 703 mm x 45.1 mm
  • 65” LG C2: 1441 mm x 826 mm x 45.1 mm
  • 77” LG C2: 1711 mm x 982 mm x 47.1 mm
  • 83” LG C2: 1851 mm x 1062 mm x 55.3 mm

Dimensions without Stand (in centimeters):

  • 42” LG C2: 93.2 cm x 54 cm x 4.11 cm
  • 48” LG C2: 107.1 cm x 61.8 cm x 4.69 cm
  • 55” LG C2: 122.2 cm x 70.3 cm x 4.51 cm
  • 65” LG C2: 144.1 cm x 82.6 cm x 4.51 cm
  • 77” LG C2: 171.1 cm x 98.2 cm x 4.71 cm
  • 83” LG C2: 185.1 cm x 106.2 cm x 5.53 cm

Dimensions without Stand (in inches):

  • 42” LG C2: 36.69 inches x 21.26 inches x 1.62 inch
  • 48” LG C2: 42.17 inches x 24.33 inches x 1.85 inch
  • 55” LG C2: 48.11 inches x 27.68 inches x 1.78 inch
  • 65” LG C2: 56.73 inches x 32.52 inches x 1.78 inch
  • 77” LG C2: 67.36 inches x 38.66 inches x 1.85 inch
  • 83” LG C2: 72.88 inches x 41.81 inches x 2.18 inches

LG C2 Weight without Stand

Weight without Stand (in pounds):

  • 42” LG C2: 19.84 lbs.
  • 48” LG C2: 32.85 lbs.
  • 55” LG C2: 28 lbs.
  • 65” LG C2: 32.63 lbs.
  • 77” LG C2: 45.86 lbs.
  • 83” LG C2: 71.21 lbs.

Weight without Stand (in kilograms):

  • 42” LG C2: 9 kg
  • 48” LG C2: 14.9 kg
  • 55” LG C2: 12.7 kg
  • 65” LG C2: 14.8 kg
  • 77” LG C2: 20.8 kg
  • 83” LG C2: 32.3 kg

LG C2 VESA Mounting Pattern

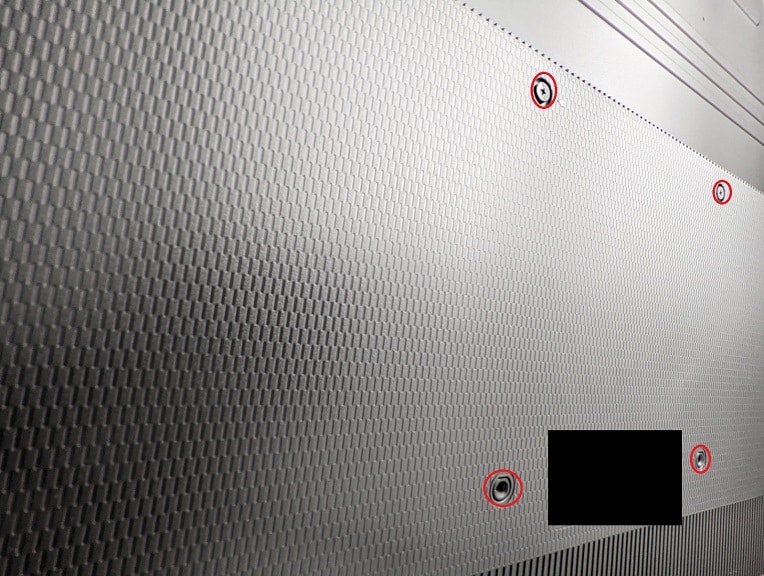
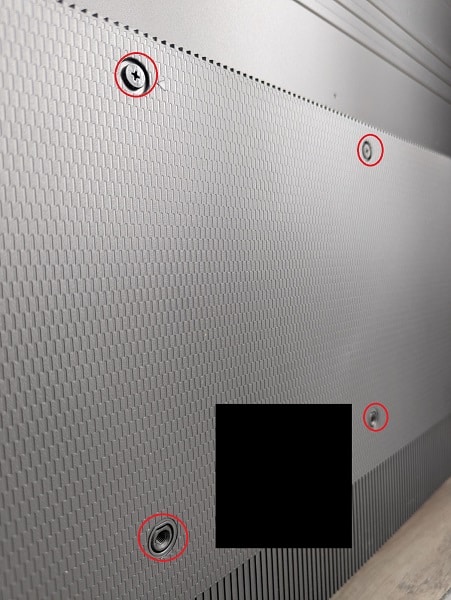
One last specification you need to pay attention for is the VESA Mounting Pattern. This spec measures the horizontal and vertical distances in between the four mounting screw holes that are located on the backside of your LG C2.

The wall mount needs to support the VESA Mounting Pattern. Otherwise, it won’t be compatible with your television set.

The VESA patterns for the 42-inch, 48-inch, 55-inch- 65-inch and 77-inch screen sizes are the same. For the 83-inch version, the distances are a lot longer.

You can find the distances for all the screen sizes of the C2 below:

  • 42” LG C2: 300 mm x 200 mm
  • 48” LG C2: 300 mm x 200 mm
  • 55” LG C2: 300 mm x 200 mm
  • 65” LG C2: 300 mm x 200 mm
  • 77” LG C2: 300 mm x 200 mm
  • 83” LG C2: 400 mm x 400 mm
VESA Mounting Pattern (example from different TV).

What third-party wall mounts are compatible with the LG C2?

As long as a wall mount fits into the VESA Mounting Pattern and is able to hold the television weight, then it should be compatible with your LG C2 TV.

Fixed mounts are usually the most affordable in addition to providing the slimmest distance between the wall and the screen when compared to the other mounting types.

With tilting mount, you can avoid screen glares and get better viewing angles if you decide to mount your C2 higher up on the wall.

The full motion mount provides the most customization options as you will be able to extend, swivel and tilt your LG OLED.

If you are looking for a specific wall mount product that supports the C2, as well as other helpful mounting tools, then you can take a look at our recommendation guide.

Resource:

Samsung QN85B and QN90B wall mount specs

The QN85B and QN90B are two Neo QLED 4K Smart TVs that were released by Samsung in 2022.

If you want to mount these premium television sets on a wall, then you can take a look at this wall mount compatibility guide from Seeking Tech.

QN85B and QN90B Screen Sizes

This article will be covering the following screen sizes for the QN85B and QN90B television sets:

  • 55” Samsung QN85B Neo QLED 4K Smart TV (QN55QN85BAFXZA)
  • 65” Samsung QN85B Neo QLED 4K Smart TV (QN65QN85BAFXZA)
  • 75” Samsung QN85B Neo QLED 4K Smart TV (QN75QN85BAFXZA)
  • 85” Samsung QN85B Neo QLED 4K Smart TV (QN85QN85BAFXZA)
  • 55” Samsung QN90B Neo QLED 4K Smart TV (QN55QN90BAFXZA)
  • 65” Samsung QN90B Neo QLED 4K Smart TV (QN65QN90BAFXZA)
  • 75” Samsung QN90B Neo QLED 4K Smart TV (QN75QN90BAFXZA)
  • 85” Samsung QN90B Neo QLED 4K Smart TV (QN85QN90BAFXZA)

QN85B and QN90B Dimensions without Stand

When installing these Neo QLEDs on a wall, it is important to know their sizes as you will need to make enough room.

You can find the approximate dimensions (measured in millimeters, centimeters and inches) for both the QN85B and QN90B below:

Dimensions without Stand (in millimeters):

  • 55” QN85B: 1227 mm x 706 mm x 27 mm
  • 65” QN85B: 1446 mm x 829 mm x 27 mm
  • 75” QN85B: 1670 mm x 957 mm x 28 mm
  • 85” QN85B: 1892 mm x 1082 mm x 27 mm
  • 55” QN90B: 1227 mm x 706 mm x 26 mm
  • 65” QN90B: 1446 mm x 829 mm x 26 mm
  • 75” QN90B: 1670 mm x 957 mm x 27 mm
  • 85” QN90B: 1892 mm x 1082 mm x 27 mm

Dimensions without Stand (in centimeters):

  • 55” QN85B: 122.7 cm x 70.6 cm x 2.7 cm
  • 65” QN85B: 144.6 cm x 82.9 cm x 2.7 cm
  • 75” QN85B: 167 cm x 95.7 cm x 2.8 cm
  • 85” QN85B: 189.2 cm x 108.2 cm x 27 cm
  • 55” QN90B: 122.7 cm x 70.6 cm x 26 cm
  • 65” QN90B: 144.6 cm x 82.9 cm x 26 cm
  • 75” QN90B: 167 cm x 95.7 cm x 27 cm
  • 85” QN90B: 189.2 cm x 1082 cm x 27 cm

Dimensions without Stand (in inches):

  • 55” QN85B: 48.3″ x 27.8 “x 1.1”
  • 65” QN85B: 56.9″ x 32.6″ x 1.1″
  • 75” QN85B: 65.7″ x 37.7″ x 1.1″
  • 85” QN85B: 74.5″ x 42.6″ x 1.1″
  • 55” QN90B: 48.3″ x 27.8″ x 1″
  • 65” QN90B: 56.9″ x 32.6″ x 1″
  • 75” QN90B: 65.7″ x 37.7″ x 1.1″
  • 85” QN90B: 74.5″ x 42.6″ x 1.1″

QN85B and QN90B Weight without Stand

Wall mounts have a capacity limit in terms of how much television weight it can hold; therefore, it is also very important that you know the weight of your QN85B or QN90B.

You can check out the weight specifications, in pounds and kilograms, for these two Samsung TVs below:

Weight without Stand (in pounds):

  • 55” QN85B: 37.9 lbs.
  • 65” QN85B: 52.2 lbs.
  • 75” QN85B: 75 lbs.
  • 85” QN85B: 94.1 lbs.
  • 55” QN90B: 39 lbs.
  • 65” QN90B: 53.8 lbs.
  • 75” QN90B: 77.2 lbs.
  • 85” QN90B: 98.1 lbs.

Weight without Stand (in kilograms):

  • 55” QN85B: 17.3 kg
  • 65” QN85B: 23.7 kg
  • 75” QN85B: 34 kg
  • 85” QN85B: 42.7 kg
  • 55” QN90B: 17.7 kg
  • 65” QN90B: 24.4 kg
  • 75” QN90B: 35 kg
  • 85” QN90B: 44.5 kg

QN85B and QN90B VESA Mounting Pattern

The wall mount also needs to support the VESA Mounting Pattern of your QN85B or QN90B. This pattern measures the horizontal and vertical distances of the four mounting screw holes located on the back of the Neo QLED sets.

You can find the VESA Mounting Patterns below:

VESA Mounting Pattern (in millimeters):

  • 55” QN85B: 200 mm x 200 mm
  • 65” QN85B: 400 mm x 300 mm
  • 75” QN85B: 400 mm x 400 mm
  • 85” QN85B: 600 mm x 400 mm
  • 55” QN90B: 200 mm x 200 mm
  • 65” QN90B: 400 mm x 300 mm
  • 75” QN90B: 400 mm x 400 mm
  • 85” QN90B: 600 mm x 400 mm
VESA Mounting Pattern (example from different TV).

QN85B and QN90B Wall Mount Screw Type

Of course, you need to be using the right screws to install these televisions on the wall mount. Both the QN85B and QN90B series support the M8 type screws with a depth of 11 mm to 13 mm.

What wall mounts are compatible with the QN85B and QN90B?

When looking for a wall mount for your Samsung QN85B or Samsung QN90B, you need to match the aforementioned weight and VESA Mounting Pattern of your TV set.

If you are looking to simply put your television on a wall, then you can get a fixed wall mount.

If you are planning to mount the QN85B or QN90B in a bright room, then you might want to get a tilting mount instead to prevent screen glares.

If you would like to tilt and swivel your TVs, then we suggest getting a full motion mount.

If you are looking for specific wall mount recommendations for the QN85B or QN90B, then we recommend taking a look at this guide.

Resource:

Sony X80K wall mount specs

The X80K is a new television model released by Sony in 2022. If you are planning to mount this TV set on a wall, then you can take a look at this wall mount compatibly guide from Seeking Tech.

X80K Screen Sizes

The Sony X80K 4K LED TV is available in five different screen sizes as you can pick between the 43-inch, 50-inch, 55-inch, 65-inch and 75-inch.

You can find the model numbers for each of these sizes below:

  • 43” Sony X80K 4K HDR LED TV (KD-43X80K)
  • 50” Sony X80K 4K HDR LED TV (KD-50X80K)
  • 55” Sony X80K 4K HDR LED TV (KD-55X80K)
  • 65” Sony X80K 4K HDR LED TV (KD-65X80K)
  • 75” Sony X80K 4K HDR LED TV (KD-75X80K)

X80K Dimensions without Stand

Dimensions without Stand (in millimeters):

  • 43” Sony X80K: 964 mm x 563 mm x 69 mm
  • 50” Sony X80K: 1,119 mm x 649 mm x 70 mm
  • 55” Sony X80K: 1,233 mm x 713 mm x 72 mm
  • 65” Sony X80K: 1,452 mm x 836 mm x 72 mm
  • 75” Sony X80K: 1,675 mm x 962 mm x 73 mm

Dimensions without Stand (in inches):

  • 43” Sony X80K: 37.95 inches x 22.17 inches x 2.72 inches
  • 50” Sony X80K: 44.06 inches x 25.55 inches x 2.76 inches
  • 55” Sony X80K: 48.54 inches x 28.07 inches x 2.83 inches
  • 65” Sony X80K: 57.17 inches x 32.91 inches x 2.83 inches
  • 75” Sony X80K: 66 inches x 37.88 inches x 2.88 inches

X80K Weight without Stand

Weight without Stand (in pounds):

  • 43” Sony X80K: 22.3 lbs.
  • 50” Sony X80K: 27.4 lbs.
  • 55” Sony X80K: 35.1 lbs.
  • 65” Sony X80K: 47.8 lbs.
  • 75” Sony X80K: 71 lbs.

Weight without Stand (in kilograms):

  • 43” Sony X80K: 10.1 kg
  • 50” Sony X80K: 12.4 kg
  • 55” Sony X80K: 15.9 kg
  • 65” Sony X80K: 21.7 kg
  • 75” Sony X80K: 32.2 kg

X80K VESA Mounting Pattern

The wall mount will also need to fit the VESA Mounting Pattern of your Sony X80K television set. This pattern is the horizontal and vertical distances in between the four screw holes on the back of the TV.

You can find the measurements, in millimeters and inches, for all the available screen sizes from the X80K series below:

VESA Mounting Pattern (in millimeters):

  • 43” Sony X80K: 200 mm x 200 mm
  • 50” Sony X80K: 200 mm x 200 mm
  • 55” Sony X80K: 300 mm x 300 mm
  • 65” Sony X80K: 300 mm x 300 mm
  • 75” Sony X80K: 300 mm x 300 mm

VESA Mounting Pattern (in inches):

  • 43” Sony X80K: 7.87 inches x 7.87 inches
  • 50” Sony X80K: 7.87 inches x 7.87 inches
  • 55” Sony X80K: 11.81 inches x 11.81 inches
  • 65” Sony X80K: 11.81 inches x 11.81 inches
  • 75” Sony X80K: 11.81 inches x 11.81 inches
VESA Mounting Pattern (example from different TV).

Official Sony wall mounts for X80K

Sony does have an official wall mount that should be compatible with the 55-inch, 65-inch and 75-inch versions of the X80K.

With the Sony SU-WL855 Ultra Slim Wall-Mount Bracket, you will be able to swivel your screen to the left or right.

If you are interested, you can purchase the product on Amazon with the following link:

What third-party wall mounts are compatible with the Sony X80K?

If you are looking for a third-party mount for your X80K, then make sure that the wall mount supports the aforementioned VESA Mounting Pattern and is capable of holding the weight of your screen size.

Fixed mounts are usually the most affordable as these will simply keep your Sony 4K LED TV in a fixed position on a wall.

Tilting mounts are great in terms of preventing screen glares and getting good viewing angles if you want to install your X80K high up on the wall.

Full motion mounts will let you extend, tilt and swivel your screen.

If you are looking for specific recommendations for your TV, then you can take a look at this article.

Resource:

Sony A80K, A90K, A95K, X80K, X85K, X90K, X95K and Z9K LED light indicator guide

The A80K, A90K, A95K, X80K, X85K, X90K, X95K and Z9K are part of Sony’s 2022 television lineup. These TVs feature a LED indicator at the bottom that will display the status of the device.

You can take a look at this guide from Seeking Tech to see what the various LED light and blinking patterns represent.

Blinking White Light

If the LED indicator of your Sony A80K, A90K, A95K, X80K, X85K, X90K, X95K or Z9K is blinking a white light, then it indicates that a firmware update is currently in progress.

If the light is only blinking when you are using the television remote, then this is perfectly normal as it means that the TV is receiving the signal from the remote.

Solid White Light

If your 2022 Sony TV is showing a solid white light, then it indicates that the Picture Off mode has been enabled.

If you can’t disable the Picture Off mode with your remote, then you need to unplug the television set from the power outlet and then wait 30 seconds. You can then plug the TV back in and turn it back on to see if the screen is showing a picture.

Blinking Cyan Light

If your A80K, A90K, A95K, X80K, X85K, X90K, X95K or Z9K is blinking a cyan color, then it may indicate that it is connected to a smartphone, tablet or mobile device.

Alternatively, this cyan light may mean that your television set has been set to Demo Mode.

Solid Amber Light

If you are seeing your Sony TV displaying a solid amber light, then it indicates that a timer has been set. This could be related to the On Timer, Sleep Timer, Reminder Timer and/or REC Timer that was previously set up.

Solid Pink Light

If the LED indicator displays a solid pink light, then it means that either a recording has started or the content being displayed on screen is currently paused.

Solid Green Light

If you are getting a solid green light from your A80K, A90K, A95K, X80K, X85K, X90K, X95K or Z9K, then it indicates the built-in camera and/or built-in microphone are currently enabled.

If you are seeing a solid green light with no picture, then you need to unplug the TV from the power outlet and wait 30 seconds. After waiting, plug the television back into the power outlet and then turn it back on to see if you can get a picture to appear on the screen.

Solid Yellow Light

If your Sony TV is displaying a yellow light, then it means that the built-in microphone is enabled while the television screen is set to Standby Mode.

Blinking Red Light

If the A80K, A90K, A95K, X80K, X85K, X90K, X95K or Z9K is blinking red, then the television set is experiencing some issues.

To potentially fix the blinking red light problem, you can try doing the following:

  • Turn off your TV and turn it back on again using the remote.
  • Turn off your TV and turn it back on again using the power button located on the TV.
  • Unplug the power cord from the power outlet, wait 30 seconds and then plug it back in again. Afterwards, turn on your TV.
  • Turn off your TV and then disconnect any USB cable, USB device, HDMI cable as well as other cables and/or devices you have attached. Afterwards, turn the television back on again.

If you are still seeing a blinking red light after taking all of the aforementioned recommended actions, then you may have to contact Sony as you may need to send your TV set in for repair due to a hardware issue.

Samsung QN800B wall mount specs

The QN800B is one of several Samsung Neo QLED 8K Smart TV that was released in 2022. If you want to mount these big television sets on a wall, then you can take a look at this compatibility guide at Seeking Tech.

QN800B Screen Sizes

The Samsung QN800B Neo QLED is available in the following screen sizes:

  • 65”
  • 75”
  • 85”

QN800B Model Numbers

You can take a look at the associated model number for each available size for this TV series below:

  • 65” QN800B: QN65QN800B
  • 75” QN800B: QN75QN800B
  • 85” QN800B: QN85QN800B

QN800B Dimensions without Stand

Dimensions without Stand (in millimeters):

  • 65” QN800B: 1429 mm x 804 mm
  • 75” QN800B: 1651 mm x 929 mm
  • 85” QN800B: 1872 mm x 1053 mm

Dimensions without Stand (in centimeters):

  • 65” QN800B: 142.9 cm x 80.4 cm
  • 75” QN800B: 165.1 cm x 92.9 cm
  • 85” QN800B: 187.2 cm x 105.3 cm

Dimensions without Stand (in inches):

  • 65” QN800B: 56.3 in x 31.7 in
  • 75” QN800B: 65 in x 36.6 in
  • 85” QN800B: 73.7 in x 41.5 in

QN800B Weight without Stand

Weight without Stand (in pounds):

  • 65” QN800B: 51.4 lbs.
  • 75” QN800B: 71 lbs.
  • 85” QN800B: 97.7 lbs.

Weight without Stand (in kilograms):

  • 65” QN800B: 23.3 kg
  • 75” QN800B: 32.2 kg
  • 85” QN800B: 44.3 kg

QN800B VESA Mounting Pattern

These QN800B television sets feature four screw holes located on the back that you need to use in order to attach the screen to the wall mount. You can find the approximate width and height measurements for the mounting screw holes below:

VESA Mounting Pattern (in millimeters):

  • 65” QN800B: 400 mm x 300 mm
  • 75” QN800B: 400 mm x 400 mm
  • 85” QN800B: 600 mm x 400 mm

VESA Mounting Pattern (in centimeters):

  • 65” QN800B: 40 cm x 30 cm
  • 75” QN800B: 40 cm x 40 cm
  • 85” QN800B: 60 cm x 40 cm
VESA Mounting Pattern (example from different TV).

QN800B Wall Mount Screw Type

The screw holes of these television sets are designed to fit with the M8 type screws that have a depth of 5 mm to 6 mm.

Official Samsung wall mounts for QN800B

Samsung does have several official wall mounts that are compatible with the QN800B series.

If you want a simple fixed wall mount that stays in a fixed position, then you can get the Samsung Slim Fit Wall Mount, which supports all three sizes of the Samsung QN800B. The Samsung Large Size Bracket Wall Mount is also compatible with the 85” version of the QN800B.

If you want to tilt and/or swivel your 8K television, then the Samsung Full-Tilt Wall Mount is compatible with the 65” and 75” sizes of the Samsung QN800B while the Samsung Large Size Full-Tilt Wall Mount should work with the 85” version.

If you are interested, you can purchase any of the aforementioned official wall mounts on Amazon with the following links:

What third-party wall mounts are compatible with the QN800B?

If you would rather get a non-Samsung wall mount, then you need to make sure you get one that supports the weight and VESA mounting pattern of your specific television set.

If you are looking for specific recommendations, then we suggest checking out this article to find the best available options.

Resource:

How to enable VRR on the Sony X90J, X95J, A80J, A90J and Z9J

Sony has added Variable Refresh Rate support to the X90J, X95J, A80J, A90J and Z9J television series. To see how you can use this feature, you can take a look at this tutorial from Seeking Tech.

Before we start, it should be noted that this guide will be based on the following Sony Bravia television models:

  • 50″ X90J (XR-50X90J)
  • 55″ X90J (XR-55X90J)
  • 65″ X90J (XR-65X90J)
  • 75″ X90J (XR-75X90J)
  • 65″ X95J (XR-65X95J)
  • 75″ X95J (XR-75X95J)
  • 85″ X95J (XR-85X95J)
  • 55″ A80J (XR-55A80J)
  • 65″ A80J (XR-65A80J)
  • 77” A80J (XR-77A80J)
  • 55″ A90J (XR-55A90J)
  • 65″ A90J (XR-65A90J)
  • 83″ A90J (XR-83A90J)
  • 75″ Z9J (XR-75Z9J)
  • 83″ Z9J (XR-85Z9J)

What is the Variable Refresh Rate feature for X90J, X95J, A80J, A90J and Z9J?

Variable Refresh Rate, or VRR, sync the refresh rate of the input source to the refresh rate of your television set. As a result, this feature will help smooth out games that run at an inconsistent frame rate as well as eliminate screen tearing.

VRR is currently support by the latest graphics cards on the PC as well as the Xbox Series X and Xbox Series S consoles. The PlayStation 5 and PlayStation 5 Digital Edition will also support this feature if it hasn’t already by the time you are reading this article.

Updating the Sony X90J, X95J, A80J, A90J and Z9J to firmware version 6.5660

If you haven’t done so already, you will need to update the firmware of your television set in order to add Variable Refresh Rate support to your X90J, X95J, A80J, A90J or Z9J. The fastest way to do so is by connecting your Sony TV to the internet.

If you previously enabled the “Automatically check for update” feature, then you should get a notification. Otherwise, you need to the press the gear button on your TV remote to open the Quick Settings menu. Afterwards, you need to select Settings, then System, then System software update and, finally, Software update.

You can also update the firmware of your television set through the USB port although it is a lot more complicated than simply downloading the file directly on your TV.

Variable Refresh Rate was added to the X90J, X95J, A80J, A90J and Z9J on the firmware version 6.5660. Along with VRR support, this update also contains the following improvements:

  • Built-in mic sensitivity setting for TVs with built-in microphone
  • Dolby Atmos and 4K mirroring for AirPlay Mirroring
  • Improved audio output switching in Quick Settings
  • General performance improvements

During the firmware installation, make sure you don’t turn off your Sony television. Otherwise, you risk potentially damaging your TV.

How to enable VRR on X90J, X95J, A80J, A90J and Z9J

After updating the firmware of your television set to at least 6.5660, you then need to manually enable Variable Refresh Rate support by taking the following steps:

1. Once the firmware has been updated, you next to make sure you are connecting your PlayStation 5, PlayStation 5 Digital Edition, Xbox Series S, Xbox Series X or compatible PC to a HDMI 2.1 port on your television.

2. You also need to be using a HDMI 2.1 cable. The PlayStation 5, PlayStation 5 Digital Edition and Xbox Series X come with HDMI 2.1 included in the box.

If you have a PC or Xbox Series S, however, then you might need to buy one. Microsoft’s Series X only comes with a HDMI 2.0 cable.

If you are looking for a HDMI 2.1 cable, then we recommend picking up the Monoprice 8K Certified Braided Ultra High Speed HDMI 2.1 Cable, which you can find on Amazon with this link. (#CommissionsEarned).

Once you are done setting everything up, press the gear button on your remote once again.

4. In the Quick Settings menu, select Settings.

5. Inside of Settings, select Channels & Inputs.

6. In the Channels & Inputs, select External inputs.

7. After getting to the “External inputs” menu, select HDMI signal format.

8. In the “HDMI signal format” menu, select the HDMI 2.1 port that is connected to your PS5, PS5 Digital Edition, Xbox Series X, Xbox Series S or compatible PC.

9. In the next screen, you need to select Enhanced format (VRR).

10. You may also need to enable Variable Refresh Rate on the menus of your game console or PC.

By enabling Variable Refresh Rate, you should be able to get rid of a vast majority of frame rate and screen tearing issues on your Sony Bravia X90J, X95J, A80J, A90J or Z9J.

However, this format will also lock you into the Game Picture Mode in addition to restricting you from using picture quality features like black frame insertion and noise reduction.

How to fix picture issues with the Hisense U6G, U7G and U8G

When using the Hisense U6G, U7G or U8G, you may experience screen issues such as having no picture, black picture, white picture, distorted picture, blurriness, flickering, random cut outs, tinted picture and/or wavy picture.

To see how you can fix these problems with the new Hisense televisions, you can take a look at this troubleshooting guide from Seeking Tech.

To begin, it should be noted that this article is based on the following TV models from the U6G, U7G and U8G series:

  • 50″ U6G (50U6G)
  • 55″ U6G (55U6G)
  • 65″ U6G (65U6G)
  • 75″ U6G (75U6G)
  • 55″ U7G (55U7G)
  • 65″ U7G (65U7G)
  • 75″ U7G (75U7G)
  • 55″ U8G (55U8G)
  • 65″ U8G (65U8G)

1. The first step you can take is to try to switch to a different channel or input source.

If another channel or input is working correctly, then you can try disconnecting and then reconnecting the antenna, HDMI and/or other inputs.

If you are experiencing issues with your television channels, then you can try readjusting the antenna position to see if the blurriness, flickering and/or random cut offs will still appear.

2. You should also make sure that the game system, set top box, media player and/or other devices connected to your Hisense television set is working normally and have the correct display settings.

3. If you are not getting any pictures at all, then you can try unplugging your Hisense U6G, U7G or U8G from the power outlet and then wait for 60 seconds.

Afterwards, you can plug it back into the power outlet and then try to turn it on to see if the screen will show any pictures.

If you aren’t getting any pictures, then you can try plugging your TV into another power outlet.

4. If you are only getting a black or white screen, then you can try adjusting the color saturation of your television.

To do so, press the home button on your TV remove and then select the gear icon. You then need to do to Picture > Calibration settings > Color Tuner.

Make sure that saturation is set to at least 50.

5. The sharpness features could also be causing picture blurriness, flickering and/or randomly cut-offs with your Hisense television.

To adjust the sharpness setting, press the home button on the remote and then select the gear icon.

Afterwards, head over to Picture > Sharpness. You can then decrease or increase the sharpness setting to see if that will improve the picture quality.

6. If your TV screen appears to be tinted in pink, purple, red or other colors, then you need to adjust the white balance.

To find this setting, press the home button and then select the gear icon.

You then need to go to Settings > Picture > Calibration Settings > White Balance. Next, decrease or increase the white balance to remove the tinted picture from the television screen.

7. Other electronics, such as smartphones, may cause display issues if they are placed close to your U6G, U7G or U8G.

So, if you are getting picture quality issues, try to make sure that there aren’t any electronic devices that may cause distortions to your television screen.

How to fix Hisense U6G, U7G and U8G speaker audio issues

If you have a Hisense U6G, U7G or U8G, then the television speaker may sound distorted or randomly cuts out. The TV volume may also sound too low or be completely muted even if the screen is showing a picture.

In order to fix the sound quality issues with these TV sets, you can take a look at this troubleshooting guide at Seeking Tech.

Before we begin, it should be noted that this article is based on the following screen sizes from the Hisense U6G, U7G and U8G television series:

  • 50″ U6G (50U6G)
  • 55″ U6G (55U6G)
  • 65″ U6G (65U6G)
  • 75″ U6G (75U6G)
  • 55″ U7G (55U7G)
  • 65″ U7G (65U7G)
  • 75″ U7G (75U7G)
  • 55″ U8G (55U8G)
  • 65″ U8G (65U8G)

1. If you are getting audio issues while watching an over-the-air or cable channel, then you can disconnect and then reconnect the cable from the ANT/Cable tuner.

2. If you are using an antenna to get a signal for your television channels, then you can also try repositioning the antenna to see if you can get a stronger signal strength to see if you can get better audio.

3. If you are connecting another device through the composite input or HDMI input, then you can try disconnecting and then re-connecting the cables.

4. You can also try adjust the sound settings of the devices you have connected to your U6G, U7G or U8G.

5. Of course, you should make sure that you didn’t accidentally turn down the volume or mute the devices you have connected to your Hisense television.

6. Moreover, you can try to unplug the TV set from the power outlet, wait 30 seconds, re-plug it back into the power outlet and then turn it back on again.

7. If none of the aforementioned potential solutions work when it comes to fixing the sound quality of your TV speaker, then you might want to try changing the sound mode by taking the following steps:

  • Press the home button on your Hisense TV remote.
  • Select the gear icon in the menu.
  • Select Sound.
  • Select Sound Mode.
  • Select a preset.

8. You can also try enabling or disabling sound settings. In order to do so, press the home button on the remote, select the gear icon and then select Sound.

In the Sound menu, you will get the following customization options:

  • Audio Output
  • WiSA Speaker
  • eARC
  • TV Speaker
  • TruBass HDX
  • TruSurround: X
  • Dialog Clarity
  • TruVolume HD
  • Dolby Atmos

Keep in mind that you won’t be able to turn on the TV speakers if you are using eARC or enabled Bluetooth audio output through the Audio Output settings. So, make sure to turn these off in order to turn on the TV speakers of your Hisense television.

9. Furthermore, you can try adjusting the various sound parameters of your U6G, U7G or U8G.

To do so, press the home button on your remote, select the gear icon, select Sound and then select Advanced Settings.

You can then adjust the following:

  • Balance
  • Volume Level
  • Auto Volume Control
  • Digital Audio Out
  • Digital Audio Delay
  • Lip Sync
  • Equalizer
  • Preferred Audio Language
  • Headphone Mode
  • Headphone Volume

10. You can also reset the sound settings of your Hisense television to its original factory defaults, which may help resolve your sound issues.

To do so, press the home button on the Hisense remote, select the gear icon, select Sound and then select Reset.

11. Keep in mind that the U6G, U7G and U8G does not support the DTS CD bitstreams. As a result, playing back audio from that particular format may cause issues.

How to prevent and fix overheating issues with the Hisense U6G, U7G and U8G

Your Hisense U6G, U7G or U8G television set may feel hot when touched. You may also occasionally hear clicking or popping noises from your TV.

To see how you can prevent and fix these potential overheating issues, you can take a look at this troubleshooting guide at Seeking Tech.

Before we begin, it should be noted that this article should cover the following screen sizes from the U6G, U7G and U8G series:

  • 50″ U6G (50U6G)
  • 55″ U6G (55U6G)
  • 65″ U6G (65U6G)
  • 75″ U6G (75U6G)
  • 55″ U7G (55U7G)
  • 65″ U7G (65U7G)
  • 75″ U7G (75U7G)
  • 55″ U8G (55U8G)
  • 65″ U8G (65U8G)

Why does the Hisense U6G, U7G and U8G feel hot when touch?

In order to output sound and a picture, your Hisense U6G, U7G or U8G will need to use electricity. Like all electronics, the energy being utilized will generate heat.

Normally, the heat is dissipate from the U6G, U7G or U8G through the vents. If you use your TV for an extended length of time, however, then the heat dissipation system will get a little overwhelmed. As a result, your television set will feel hot when touched.

With that said, feeling hot to touch is completely normal as, according to Hisense, the heat won’t have a negative impact to the functionality and performance of your U6G, U7G or U8G.

Why do your Hisense U6G, U7G and U8G TV make clicking or popping noises?

When you are using your U6G, U7G or U8G, you may hear the TV making a clicking or popping noise. This happens when your television set heats up or cools down, causing the plastic on the television set to expand when heating up or contract when cooling down.

According to Hisense, these noises are perfectly normally and won’t hinder your TV’s functionality or performance.

How to prevent your U6G, U7G and U8G from getting hot

In order to prevent your Hisense U6G, U7G or U8G from getting hot, then you can try taking the following precautions:

1. First off, make sure that the room temperature is not too hot when you are using your Hisense television.

2. Furthermore, you should avoid placing the TV set near any heat source such as a space heater.

3. You should also avoid using the television in a high humidity environment.

4. Moreover, you shouldn’t place the U6G, U7G or U8G anywhere where it will have direct contact with sunlight.

5. Last but not least, you need to make sure you don’t cover the vents of your Hisense TV as these are needed to blow the hot air out of your set.

How to cool down a hot U6G, U7G and U8G

If you feel that your Hisense U6G, U7G or U8G is getting a little too hot, then you should be able to cool it down by doing the following:

1. Turn off the TV.

2. Unplug the power cable from the power outlet.

3. You may also want to consider cleaning any noticeable dust that may be blocking the vents. In order to do so, we recommend using a dry, lint-free cloth.

4. After unplugging the television set, and potentially cleaning it, we recommend waiting for the TV to cool down.

5. After waiting for the TV to reach a cooler temperature, you should be able to re-plug the power cable and then turn your U6G, U7G or U8G back on again.