How to find your PlayStation Store transaction history on PS5

With the PlayStation 5, as well as the PlayStation 5 Digital Edition, you can find your transactions made on the PlayStation Store.

You can follow this step-by-step guide at Seeking Tech to see how you can check out your transaction history on the game system.

How to view your transaction history on the PlayStation Store of PS5

To view your transaction history on the PlayStation Store of the PlayStation 5, you need to do the following:

1. From the home screen, which is the main menu where you can select a game to play, navigate to the left and then select the PlayStation Store icon.

2. In the PlayStation Store menu, navigate upwards to the top options and then go all the way to the right to select the “…” option.

3. In the pop-up menu, select the “Transaction History” option.

How to view your transaction history on the system menu

You can also view your transaction menu without going to the PlayStation Store.

To do so, you need to take the following steps:

1. From the home screen, head into “Settings.” You will find this option on the top right section of the menu as it has a gear cog symbol.

2. Inside the “Settings” menu, navigate downwards and then select the “User and Accounts” option.

3. Inside the “Users and Accounts” menu, select the “Account” option from the left side and then the “Payment and Subscriptions” option on the right side of the same screen.

4. Inside the “Payment and Subscription” menu, select “Transaction History.”

How to sort your transaction history on PS5

Now that you are in the “Transaction History” menu, you will be able to view and sort your transactions from the PlayStation Store.

To do so, you have to do the following:

1. Once you are in the “Transaction History” menu, you need to select a user account. Make sure you choose the email that is attached to the transactions you want to view.

2. After choosing your user account, select the “Continue” option at the bottom.

3. In the next screen of the “Transaction History” menu, you will be able to set the time period for your transactions. Be default, the time is set to the past 30 days.

You will be able to set the start date to all the way back to 1/1/2006.
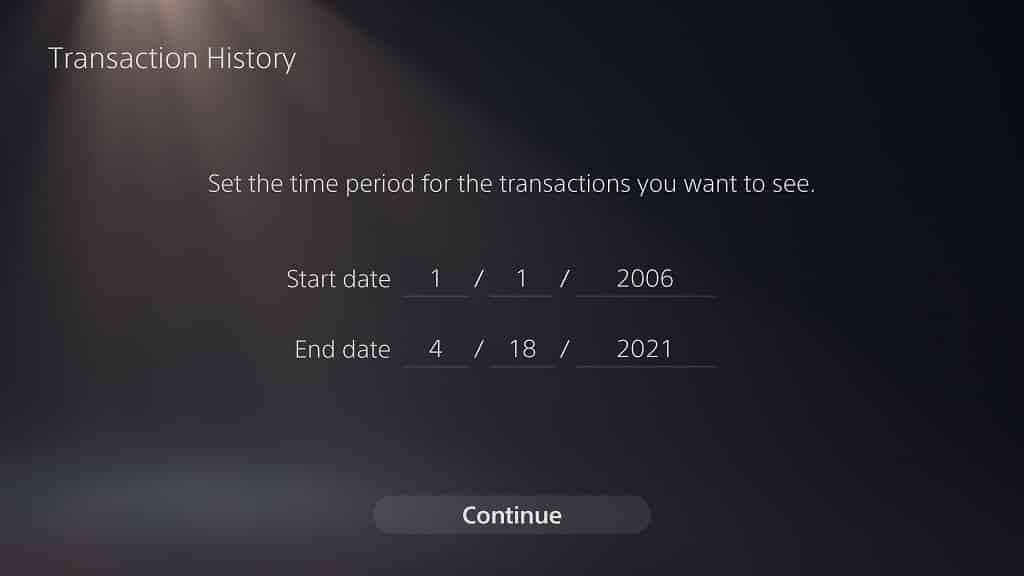
4. Once you are done setting the start and end dates to sort your PlayStation Store transactions, select the “Continue” option at the bottom.

5. In the next screen of the “Transaction History” menu, you will see all the transactions you made on the PlayStation Store during the aforementioned set time period.

The list, which is displayed from newest to oldest from the top down, includes direct purchases, free game downloads and funds added to your PlayStation Store wallet.
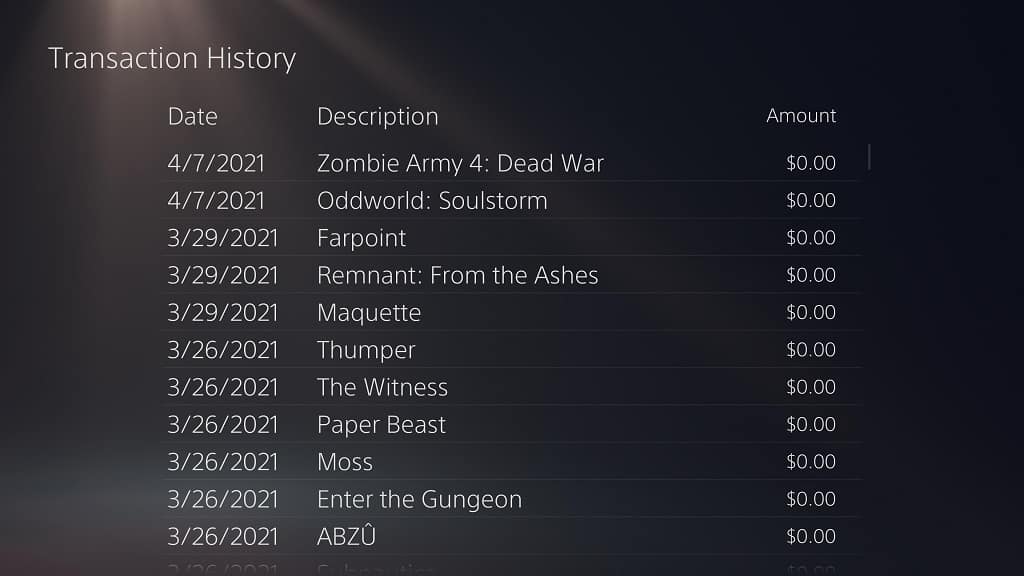
It also covers the PlayStation 3 (PS3), PlayStation Portable (PSP), PlayStation Vita (PSV) and PlayStation 4 (PS4) transactions in addition to the PlayStation 5 transactions.

You will be able to view the date of the transaction, description of the product as well as dollar amount.

How to automatically enable 120 frames per second support on PS5

Thanks to the latest firmware update, you can now enable automatic support for 120 frames per second on the PlayStation 5 and PlayStation 5 Digital Edition.

If you are interested in using the 120 Hz mode, then you can check out this step-by-step tutorial from Seeking Tech.

Prerequisites

Before we start, it is important to note that 120 Hz is not supported by all monitors or television sets. So, make sure you check out the specifications for your display to see if 120 FPS is possible. For monitors, you need to make sure that 120 Hz is supported over the HDMI connection.

You should also be using the right HDMI cable. Fortunately, the PlayStation 5 does come with HDMI 2.1, which is enough to play games at 120 frames per second in a resolution of up to 4K. If you are looking for an alternative HDMI cable, especially one that is longer in length, than you can check out this guide.

Last but not least, you need to have the latest software version of your PlayStation 5 system. To manually update the console to the latest firmware, you can do the following:

1.Go to the “Settings” menu from the home screen. The home screen is the main menu of the PS5 where you can select a videogame to play. On the top right corner of the screen, you should see the gear cog symbol. Select that symbol to open the “Settings” menu.

2. Now that you are in the “Settings” menu, head to “System.”

3. Now that you are in the “System” menu, select “System Software” from the options available on the left side.

4. On the right side of the same “System” menu, select the “System Software Update and Settings” option.

5. Now that you are in the “System Software Update and Settings” menu, select the “Update System Software” option from the list.

6. Now that you are in the “System Software update” menu, select either “Update Using Internet” (which we recommend if using if your PS5 is connected to the Internet) or “Update from USB Drive.”

How to enable automatic 120 Hz support on PS5

In order to enable automatic 120 Hz support on your PlayStation 5, you need to take the following steps:

1. First off, make sure you are using a compatible monitor/TV, HDMI cable and PlayStation 5 firmware version. The game you are planning to play at 120 frames per second should also support that frame rate as well.

2. Go to the home screen menu and then select the “Settings” option.

3. Inside the “Settings” menu, find and head into “Screen and Video.”

4. Inside the “Screen and Video” menu, select “Video Output” from the list of options on the left side.

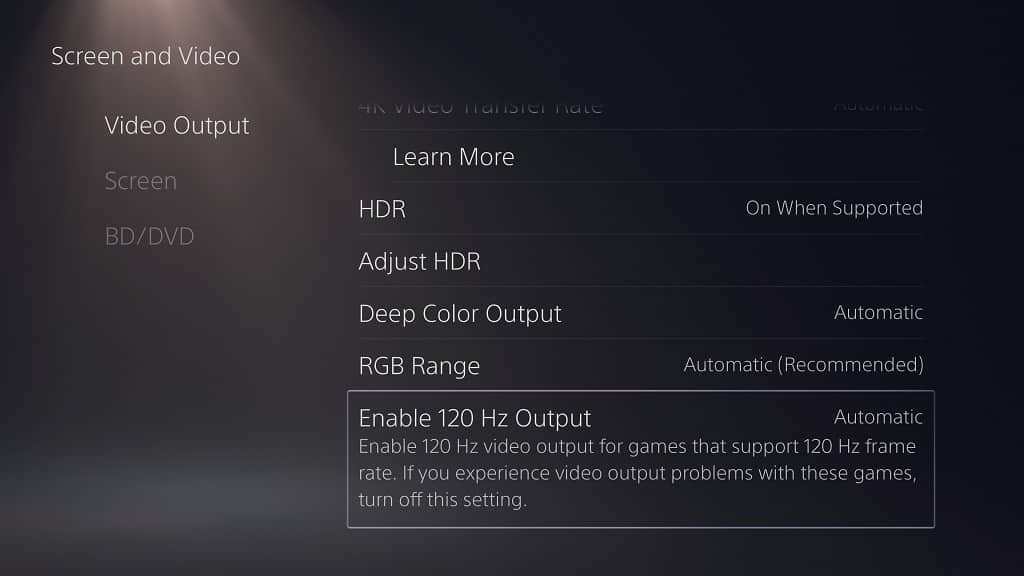
5. On the right side of the same “Screen and Video” menu, select the “Enable 120 Hz Output” option.

6. In the pop-up menu, you have two choices: Off and Automatic.

7. Select the Automatic option to enable support for 120 Hz.

If you are experiencing visual issues when playing a game after setting the “Enable 120 Hz Output” option to Automatic, the you may set it to off. Instead, you can try to manually enable 120 FPS support through the menu for that specific game.

How to enable Performance Mode on PS5

If using the “Enable 120 Hz Output” option is causing issues, then you can also try another method to automatically enable support 120 frames per second on PlayStation 5.

If you are interested in doing so, then you need to do the following:

1. From the home screen, you should select the “Settings” option.

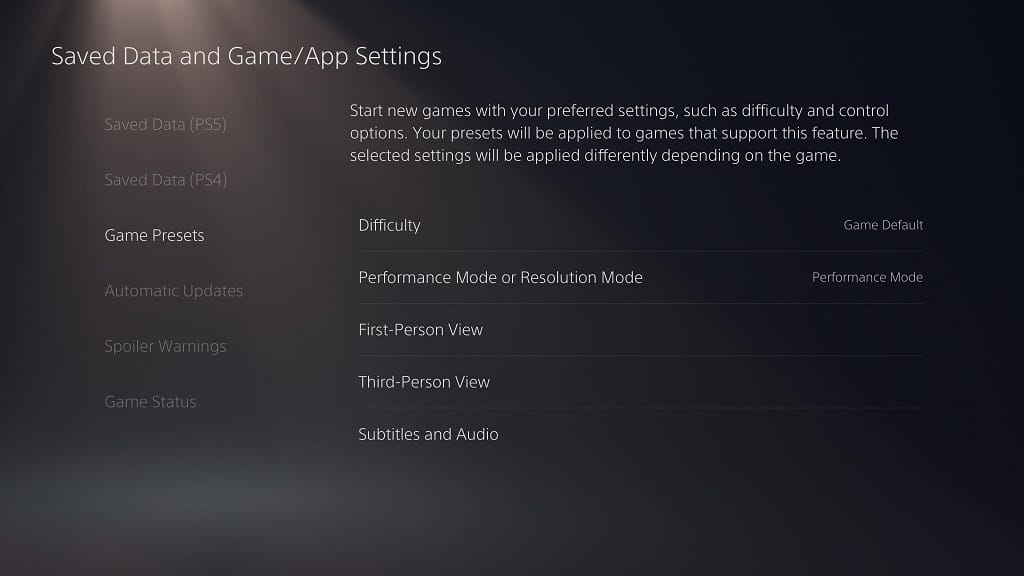
2. From the “Settings” menu, you should select the “Saved Data and Game/App Settings” option.

3. From the “Saved Data and Game/App Settings” menu, you should select the “Game Presets” option on the left side.

4. From the same “Saved Data and Game/App Settings” menu, you should select the “Performance Mode or Resolution Mode” option on the right side.

5. In the pop-up menu, you will have three choices: Game Default, Performance Mode or Resolution Mode.

Select the Performance Mode, which will make the PS5 signal to a game that it should run at a visual setting that provides the best frame rates. This should include games that support 120 Hz.

How to connect, setup and optimize Arctis 7P to PS5

One of the best wireless gaming headsets for the PlayStation 5 and PlayStation 5 Digital Edition is the SteelSeries Arctis 7P.

You can follow this tutorial from Seeking Tech to see how you can connect, setup and optimize the Arctis 7P on your game console.

Updating the SteelSeries Arctis 7P firmware

Before connecting to the PlayStation 5, you should see if there is a firmware update available for the SteelSeries Arctis 7P. It is also a good idea to occasionally check for any new software versions to keep the wireless headset up-to-date.

To see if you need a firmware update, you need to take the following steps:

1. Download and install the SteelSeries Engine on your computer. This program requires Windows 7 (or newer) if you have a Windows PC or macOS 10.12 (or newer) if you have a Mac.

2. Open the SteelSeries Engine program.

3. Connect the SteelSeries Arctis 7P to your computer.

If your computer has a USB-C port, you just need to connect the USB-C Wireless Dongle.

If your computer only has USB-A ports, you need to connect the USB-C Wireless Dongle to the USB-C to USB-A Adapter Cable. You can then connect the other end of the USB-C to USB-A Adapter Cable to the USB-A port of your computer.

The Arctis 7P comes with both the USB-C Wireless Dongle and USB-C to USB-A Adapter Cable included in the box.

4. Turn on the Arctis 7P by pressing and holding the power button on the wireless headset. After around three seconds, you will hear a tone and lights will be displayed on the headset.

5. The SteelSeries Engine should detect the Arctis 7P and will notify you if there is a firmware update available.

How to connect SteelSeries Arctis 7P to PlayStation 5

There are two ways to connect to the SteelSeries Arctis 7P to the PS5 as you can use the USB-C port or the USB-A ports.

For the USB-C port, you just have to connect the USB-C Wireless Dongle to the USB-C port on the front side of the PlayStation 5. With that said, the wireless dongle will block the USB-A port next to the USB-C port at the front of the system.

To connect using any of the three USB-A ports on the PS5, you firrst need to connect the USB-C Wireless Dongle to the USB-C to USB-A Adapter Cable. You can then connect the USB-C to USB-A Adapter Cable to any of the USB-A ports on the game system.

With the USB-C Wireless Dongle connected to the PS5, turn on both the game system and the headset. For the Arctis 7P, you need to press and hold the power button until you hear a chime and see illuminating lights.

After connecting the dongle in addition to powering on both the headset and PlayStation 5, the game system should automatically detect and switch the audio output and microphone input over to the headset.

To optimize the Arctis 7P for the PS5, there are several settings you can configure.

How to maximize the Arctis 7P audio volume on PS5

SteelSeries recommends setting the audio output volume on the PlayStation 5 to the maximum so that the Arctis 7P is able to utilize the full volume range. You can then use the volume control on the headset to increase or decrease the volume level.

In order to maximize the audio output on the PS5, you need to do the following:

1. First off, you need to be in the home screen, which is the main menu for the system where you can select which game to play.

2. In the home screen, you need to find and select the gear cog symbol on the upper right corner of the screen, which should bring you to the Settings menu.

3. In the Settings menu, you need to select Sound.

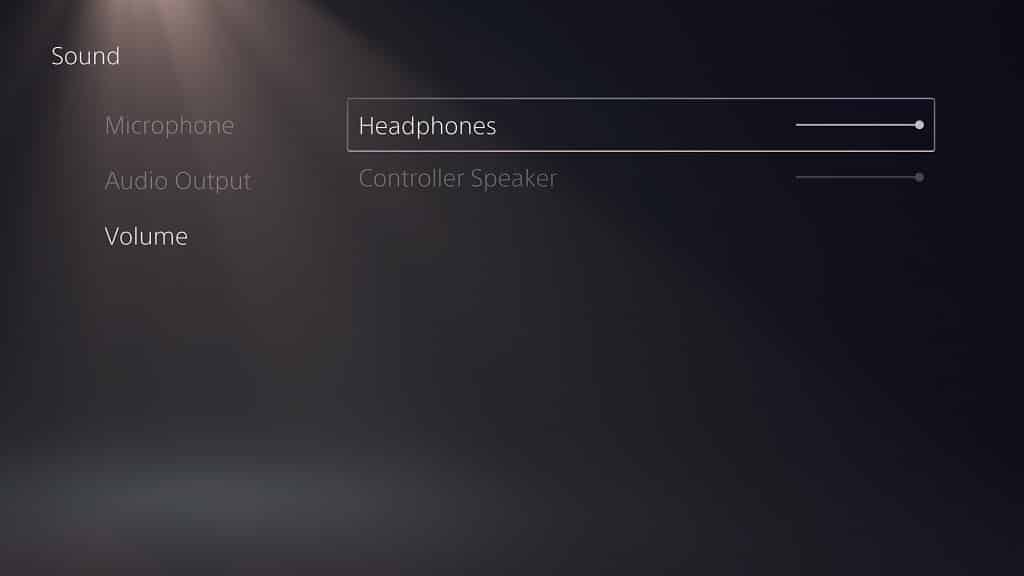
4. In the Sound menu, you need to select Volume on the left side.

5. On the right side in the same Sound menu, you need to select Headphones.

6. Use the analog stick or directional pad to move the circle all the way to the right.

How to use and optimize 3D audio with Arctis 7P on PS5

If you want to use the PlayStation 5’s 3D audio with the Arctis 7P, you need to do the following:

1. Go to the Settings menu from the home screen.

2. Inside the Settings menu, select Sound.

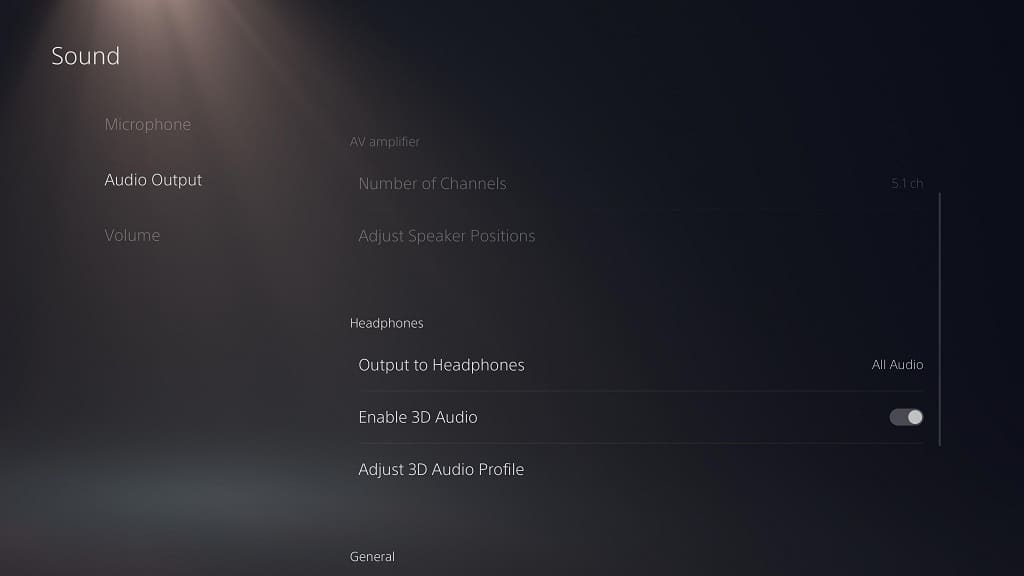
3. Inside the Sound menu, you will see the Enable 3D Audio option. If the switch to the right of the wording is black, select the option to turn it white as this will enable 3D audio.

It should be noted that 3D audio may cause audio issues when used with games that don’t support that feature. If you are experiencing problems, you can disable 3D audio.

For more information on headset audio issues, you can check out this troubleshooting guide.

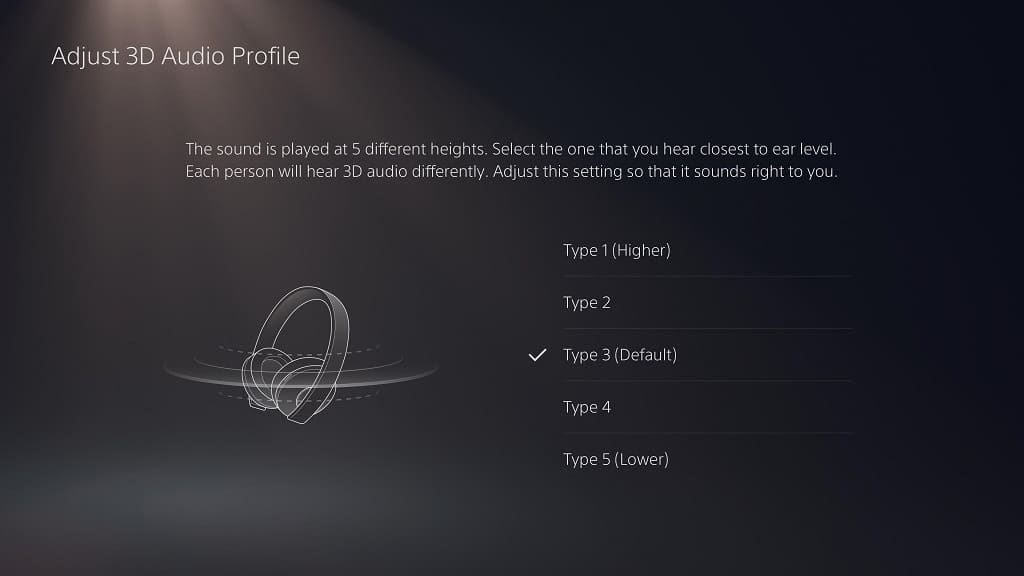
4. In you want to use 3D Audio, then you optimize the feature by selecting the Adjust 3D Audio Profile option that is just below the Enable 3D Audio option.

5. In the Adjust 3D Audio Profile menu, you can select between five different height types. Choose the type that is closest to your ear level.

How to optimize microphone audio with Arctis 7P on PS5

To optimize the microphone audio with the SteelSeries Arctis 7P on PlayStation 5, you can take the following steps:

1. From the home screen, go into Settings.

2. From the Settings menu, go into Sound.

3. From the Sound menu, select Microphone on the left side of the screen.

4. On the right side of the same Sound menu, select Adjust Microphone Level.

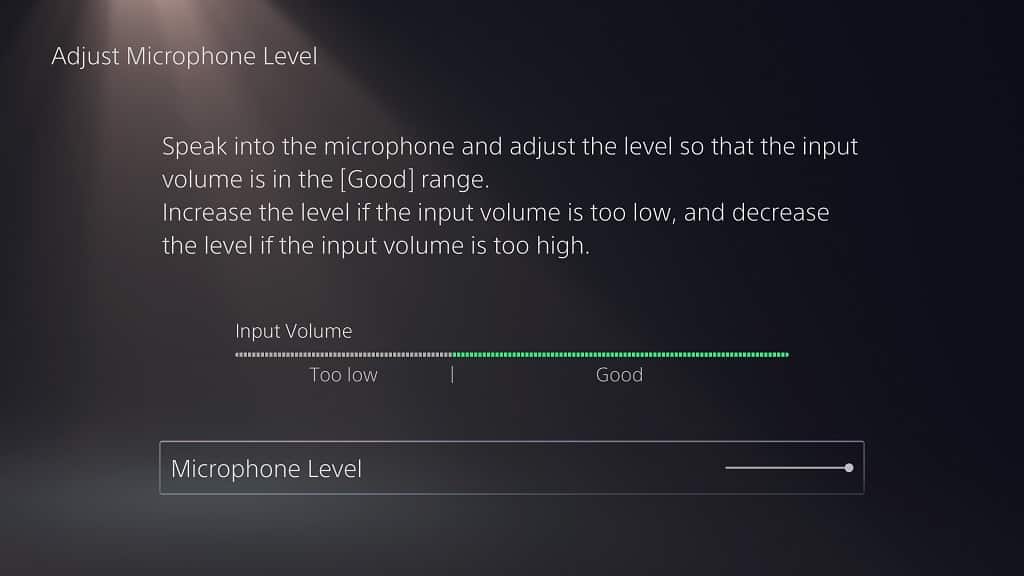
5. In the Adjust Microphone Level menu, you can increase or decrease the mic level of your Arctis 7P. You will also see Input Volume, which measures the current mic volume.

Speak into the mic and then check out the Input Volume to see if your voice consistently hit the good portion of the measurement gauge.

If not, you can use the Adjust Microphone Level. option below to adjust the mic level.

How to fix PS5 bricking, crashing, freezing and random shut off issues

When playing the PlayStation 5 or PlayStation 5 Digital Edition, you may experience the console bricking, crashing, freezing and/or randomly turning off.

If you are constantly running into these problems, then you can follow this guide at Seeking Tech to find some potential fixes.

How to shut down the PS5

The first step we recommend taking is to shut down the console. You can do so by taking the following steps:

1. Press the PS button on your DualSense to bring up the quick menu.

2. In the quick menu, navigate down to the bottom options.

3. Here, you need to select the “Power” option, which is located all the way to the right.

4. In the “Power” menu, select the “Turn Off PS5” option.

5. If your PlayStation 5 is not responding to your controller, you can press and hold the power button on the system until you see the “Preparing to turn off your PS5” screen. Your system should then shut down a few seconds later.

6. If none of the aforementioned methods work, you can simply unplug the system from the power outlet. With that said, you may cause additional damage to your PS5 by pulling the plug. Therefore, we recommend only doing this if you have no other ways to turn off the system.

Fix #1: Checking the AC power cord on PS5

The first solution you can try is to unplug your PS5 from the power cord, wait a few minutes, and then plug it back in again.

To do so, you need to take the following steps:

1. Once the PlayStation 5 has been completely turned off, remove the AC power cord from the back of the system. You should also remove the other end from the power outlet if you haven’t done so already.

2. Inspect the AC power cable carefully to see if there is any damage to it.

3. If there is some visible damage, you can try using another AC cord. The PS5 and PS5 Digital Edition use the standard C7 power cord. This is the same cord that also comes with the PlayStation 4 and PlayStation 4 Slim.

If you need to purchase a replacement, then we recommend picking up the Amazon Basics Replacement Power Cable with this link. (#CommissionsEarned).

4. If the original AC power cord looked fine and/or you have a new cable, use it to plug your PlayStation 5 into the power outlet to see if this method fixes the bricking, crashing and freezing problems.

5. If you are still experiencing issues, try to use a different power outlet.

How to rebuild the database on PS5

If the aforementioned solution does not work, then we recommend rebuilding the database on the PlayStation 5.

To do so, you need to do the following:

1. With the system turned off, press and hold the power button on your PlayStation 5. You should hear one beeping sound initially. Keep holding until you near a second beep. This will enable the Safe Mode on the PS5.

2. In Safe Mode, connect your DualSense to your PlayStation 5 system via the USB port by using an USB cable and then press PS button on the controller.

3. In the Safe Mode menu, select the “5. Rebuild Database” option.

4. In the next screen, select the “OK” option to start the database rebuilding. Keep in mind that this process may take several hours to complete.

How to reinstall PS5 firmware

If you are still experiencing problems, then you can try re-installing the firmware of your PlayStation 5.

To do so, you can take the following steps:

1. First off, you will need an USB drive that has been formatted as FAT32.

2. Connect the USB drive to the USB port of your computer.

3. Download the PS5 update file with the following link:

4. Open the USB drive from your computer.

5. On the root directory of your USB drive, you need to create a folder and name it PS5.

6. Open the PS5 folder on your USB drive and create another folder. You need to name the new folder UPDATE.

7. Copy the PS5 update file you downloaded into the aforementioned UPDATE folder on your USB drive.

8. Disconnect the USB drive from your computer and then plug the same storage drive into your PS5.

9. Power on your PlayStation 5 in Safe Mode by pressing and holding the power button on the system until you hear the second beeping sound.

10. Connect your DualSense controller to the system using one of the other USB ports aside from the port where you plugged in the USB drive.

11. In the Safe Mode menu, select the “7. Reset PS5 (Reinstall System Software).”

12. In the next screen, select the “OK” option to being the installation process.

If none of our suggested fixes work, then the next best option is to contact PlayStation. The bricking, crashing, freezing and random shut off issues could be hardware related. Thus, you may need to send your system in to PlayStation for repair.

How to automatically switch between SDR and HDR on PlayStation 5

Thanks to a recent firmware update, you can now automatically switch between SDR and HDR on the PlayStation 5 and PlayStation 5 Digital Edition.

If you are interested in this new feature, then you can take a look at this step-by-step guide at Seeking Tech to see how you can enable it.

Upgrade to the latest PS5 firmware

Without the latest firmware for your PlayStation 5, you would have to manually enable and disable HDR. So, if you haven’t done so already, you need to update to the latest software versions of your system.

To manually download the newest firmware, you can take the following steps:

1. Make sure that you are in the home screen. This is the main menu where you select which game to play.

2. From the home screen, head into “Settings.” You can find the “Settings” option on the upper right corner of the screen with the gear cog icon.

3. Inside the “Settings” menu, head to “System.”

4. Inside the “System” menu, select to “System Software” option from the left side and then the “System Software and Update Settings” option on the right side of the same screen.

5. Inside the “System Software and Update Settings” menu, select the “Update System Software” option.

6. In the “Update System Software” menu, select “Update Using Internet.”

You can also select “Update from USB Drive” if you have the latest firmware update on a USB drive that is connected to your system. Thie update file must be in the PS5 > UPDATE folder in order for the system to recognize it and initiate the firmware update.

How to enable auto switching for SDR and HDR on PS5

In order to enable the auto-switching for SDR and HDR on the PlayStation 5, you need to take the following steps:

1. As we stated above, make sure you have the latest firmware for your PlayStation 5.

2. Go to the home screen, which is the main menu where you can select games to play.

3. In the home screen, select the “Settings” option, which has a gear cog icon located on the top right corner of the screen.

4. In the “Settings” menu, select “Screen and Video.”

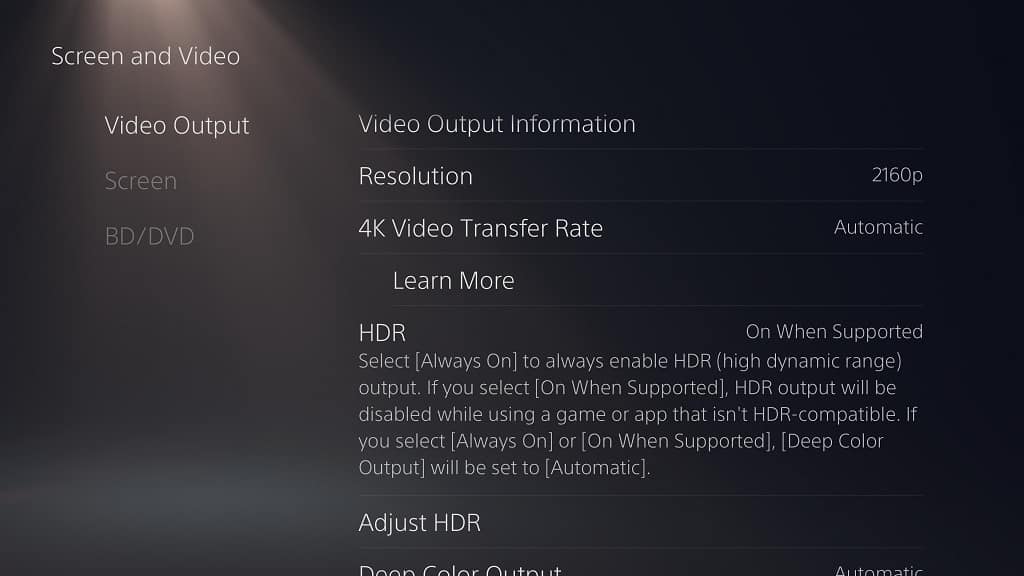
5. In the “Screen and Video” menu, select the “Video Output” option on the left side and then the “HDR” option.

6. In the pop-up menu, you will have three choices.

The “Off” option will disable HDR for all game and video content, including those that support HDR.

The “Always On” option will enable HDR for all games and other content, including those that can only display in SDR.

The “On When Supported” option will enable HDR when it is supported and disable the SDR to HDR conversion when only SDR is supported. This option is helpful since you don’t have to manually enable or disable HDR depending on the content.

Keep in mind that using the “Always On” option or the “On When Supported” option will set “Deep Color Output” to the “Automatic” setting. The “Deep Color Output” setting is required to be enabled for HDR. If you set “Deep Color Output” to “Off,” then HDR will automatically be disabled as well.

It should also be noted that converting SDR to HDR will change how a game will look for better or worse. We recommend testing out both the “Off” and “Always On” options to see which you prefer. If you want to use the developer’s intent, then we suggest using the “On When Supported” option.

How to use voice search on PS5

With the PlayStation 5, as well as the PlayStation 5 Digital Edition, you can use your voice to quickly search for a game, movie, television show, application as well as another player.

If you are interested in using voice search, then you can check out this step-by-step tutorial from Seeking Tech.

How to check the microphone status on PS5

Before you can use voice search, you need a way to “talk” to your PlayStation 5. Fortunately, the DualSense comes with a built-in microphone. Not to mention that you can use a headset as well as other compatible devices as well.

To check what microphone is currently active when using your PS5, you need to do the following:

1. First off, you need to be on the home screen, which is the main system menu where you can choose a game to play.

2. In the home screen, you will need to go to “Settings,” which can be found in the top right side of the main menu.

3. In the “Settings” menu, you will need to select the “Sound” option.

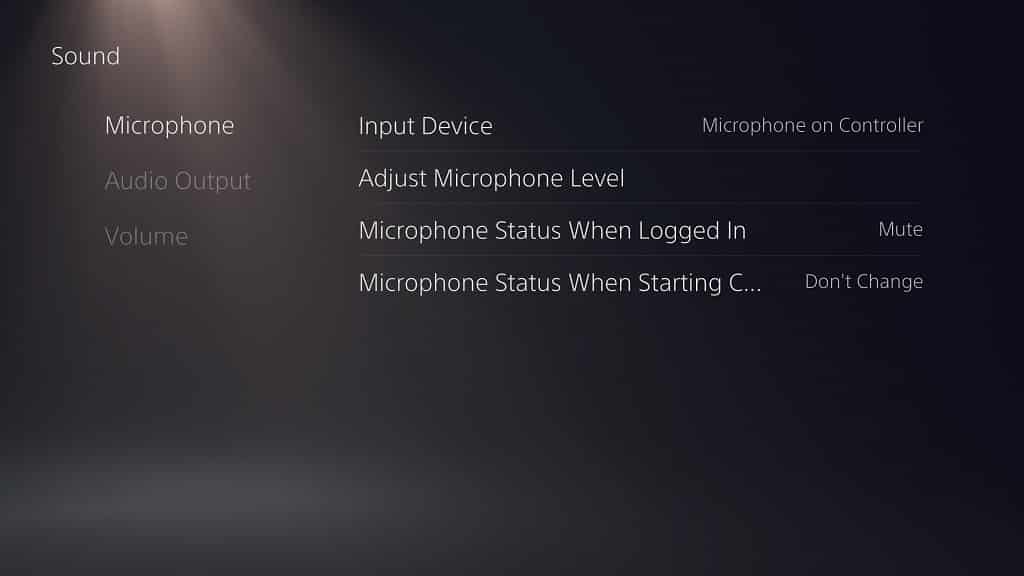
4. In the “Sound” menu, you will need to select the “Microphone” option from the list located on the left side of the screen.

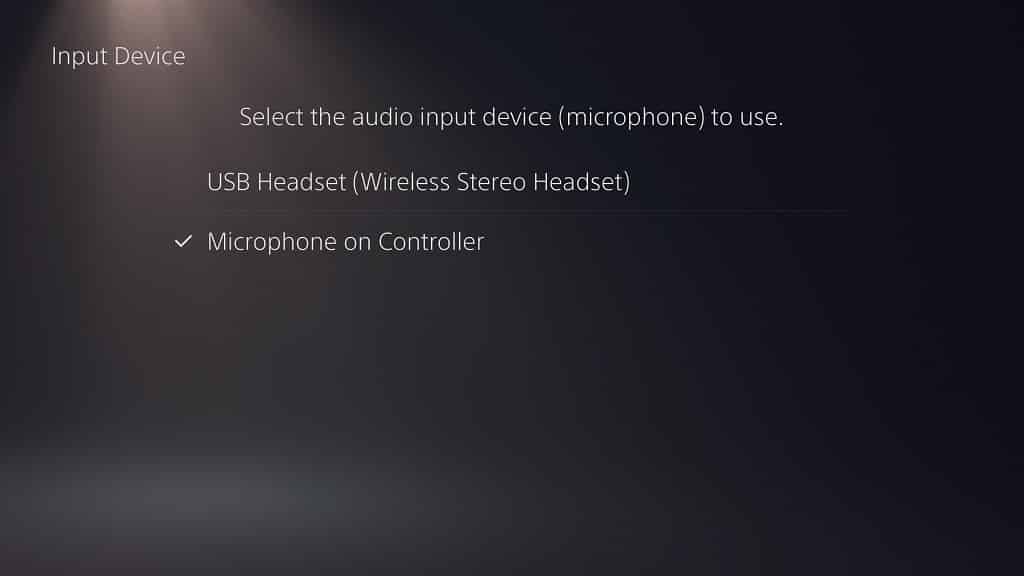
5. On the right side, you will see the “Input Device” option, which shows the currently enabled microphone that your PS5 is recognizing.

If you want to change the microphone input to a different device, select the “Input Device” option and then you will see a list of alternatives.

For best compatibility, we recommend using the “Microphone on Controller” option, which is the built-in mic of the DualSense.

6. Underneath the “Input Device” option from the “Sound” menu is “Adjust Microphone Level,” an option that lets you adjust the microphone input level.

You can use this setting to adjust the input volume level if PlayStation 5 system is having a hard time recognizing your voice input.

How to use the search bar with your voice

To take advantage of the voice search feature, you need to do the following:

1. From the home screen, press the Triangle button on you DualSense controller. This will quickly navigate you to the “Search” option located on the top right corner of the screen.

2. Select the “Search” option to go to the “Search” menu.

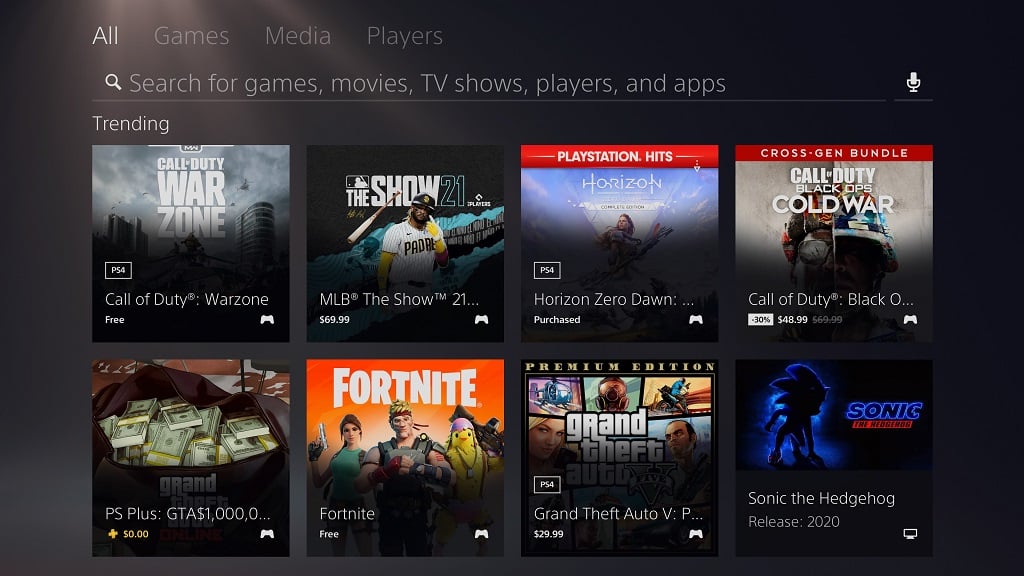
3. In the “Search” menu, you will see a microphone symbol to the right of the “Search for games, movies, TV shows, players and apps” field. Select the microphone symbol to use voice search and you should hear an audio cue.

Keep in mind that, if you are using the DualSense, the built-in microphone in your controller will be unmuted when using voice search. If you have the controller muted by default, then it will automatically become muted once you are done with using voice search.

You can tell that the built-in microphone on your DualSense is muted by looking at mic button that is located directly underneath the PS button. If the mic button is displaying an orange light, then it is currently muted. If the mic button isn’t displaying any lights, then it is currently enabled.

4. Next, you need speak into the microphone so that the PlayStation 5 will convert your dialogue into text in the search field.

5. Once you are done using the voice search, you can either press the R2 button on the DualSense controller or select the “Done” option.

6. In the search results, you can press the L1 and R1 buttons to sort the results based in the following categories:

  • All
  • Games
  • Media
  • Players

How to use voice search on PS5’s PlayStation Store

You can also use voice search on the PlayStation Store of the PlayStation 5.

To do so, you need to do the following:

1. Head to the PlayStation Store from the Home Screen by selecting the blue shopping bag.

2. Inside the PlayStation Store, press the Triangle button on your DualSense to quickly navigate to the “Search” option.

3. Select the “Search” option to go to the “Search” menu.

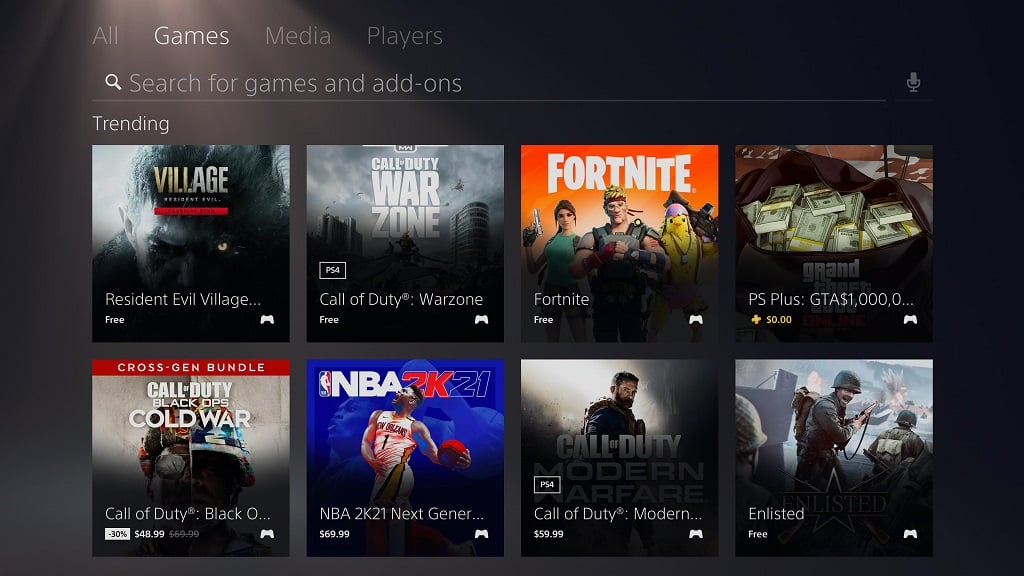
4. Inside the “Search” menu of the PlayStation Store, select the microphone option that is located to the right of the “Search for games and add-ons” field.

5. Speak into the microphone input and the system should convert you voice input into text.

6. Press the R2 button or select the “Done” option to confirm your voice search.

7. In the search results, you can sort the findings by using the L1 and R1 buttons on the DualSense in the following categories:

  • All
  • Games
  • Media
  • Players

How to customize PS5 trophy screenshot and video captures

The new firmware update for the PlayStation 5 and PlayStation 5 Digital Edition added further customization options when it comes to capturing screenshots and videos when you earn a trophy while playing a game.

You can follow this tutorial from Seeking Tech to see how you can customize the PS5 trophy screenshot and video captures.

Updating to the latest firmware

As we stated above, you need the latest software version of the PlayStation 5 in order to use the new customization features for trophy screenshots and videos.

You can manually update your system by taking the following steps:

1. From the home screen (this is the main menu that you use to select which game to play), head into “Settings.” You can find the option to do so in the upper right corner of the screen with the gear cog symbol.

2. Now that you are in the “Settings” menu, select “System” from the list of options.

3. From the “System” menu, first select “System Software” on the left side of the screen and then select “System Software Update and Settings” on the right side of the same screen.

4. In the menu, select “Update System Software.”

5. In the “System Software Update” menu, select either “Update Using the Internet” or “Update from USB Drive.”

How to customize when trophy screenshots are captured

To customize when a trophy screenshot is captured on PlayStation 5, you need to take the following steps:

1. Head to “Settings” from the home screen.

2. Inside the “Settings” menu, scroll down and then select the “Captures and Broadcasts” option.

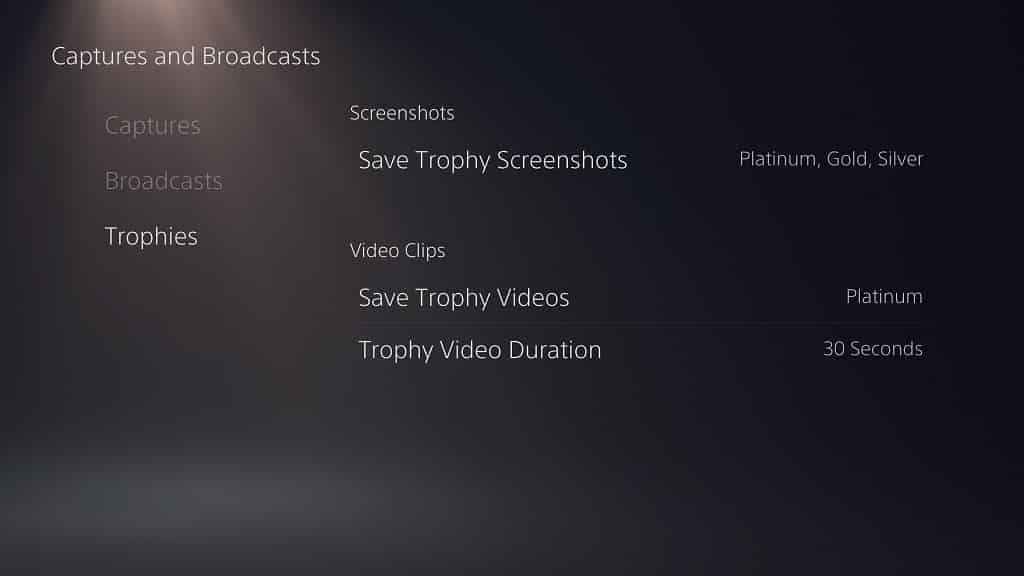
3. Inside the “Captures and Broadcasts” menu, select the “Trophies” option on the left side and then the “Save Trophy Screenshots” option on the right side of the same screen.

The “Save Trophy Screenshots” setting will let you set when the PS5 system will take a screenshot when a specific trophy grade is earned.

4. In the pop-up menu, you have the following options:

“All Trophy Grades”

“Platinum, Gold, Silver”

“Platinum, Gold”

“Platinum”

“None”

How to customize when trophy videos are captured

If you want to customize when a trophy video is recorded, you need to do the following:

1. From the home screen, you need to head to the “Settings” menu.

2. Once you are in “Settings,” select the “Captures and Broadcasts” option from the list.

3. Once you are in the “Captures and Broadcasts” menu, select the “Trophies” option from the list of the left side of the screen and then the “Save Trophy Videos” option on the right side of the same screen.

4. You will get the following options in the pop-up menu:

“All Trophy Grades”

“Platinum, Gold, Silver”

“Platinum, Gold”

“Platinum”

“None”

5. Right underneath the “Save Trophy Videos” option in the “Captures and Broadcasts” menu is “Trophy Video Duration.”

With “Trophy Video Duration,” you can set the recording to “15 Seconds” or “30 Seconds.”

If you want to change the screenshot and/or video format when capturing, then you can take a look at our previous tutorial with this link.

How to change the screenshot and video capture formats on PS5

Just like the PlayStation 4 and PlayStation 4 Pro, you can capture screenshots and videos on the PlayStation 5 and PlayStation 5 Digital Edition. With the new consoles, you will be able to change the output formats.

You can check out this step-by-step tutorial from Seeking Tech to see how you can change the formats for capturing screenshots and videos on the PS5.

How to change the format for screenshot captures on PS5

In order to change the screenshot format on the PlayStation 5, you need to take the following steps:

1. First off, you need to be in the home screen. This is the main system menu where you can choose which game to play.

2. From the home screen, you need to get to “Settings.” You can find the “Settings” option on the upper right corner of the screen.

3. In the “Settings” menu, scroll all the way down and then select the “Captures and Broadcasts” option.

4. In the “Captures and Broadcasts” menu, you need to select the “Captures” from the list of options on the left side.

5. On the right side of the same “Captures and Broadcasts” menu, you need to select the “Screenshot Format” option.

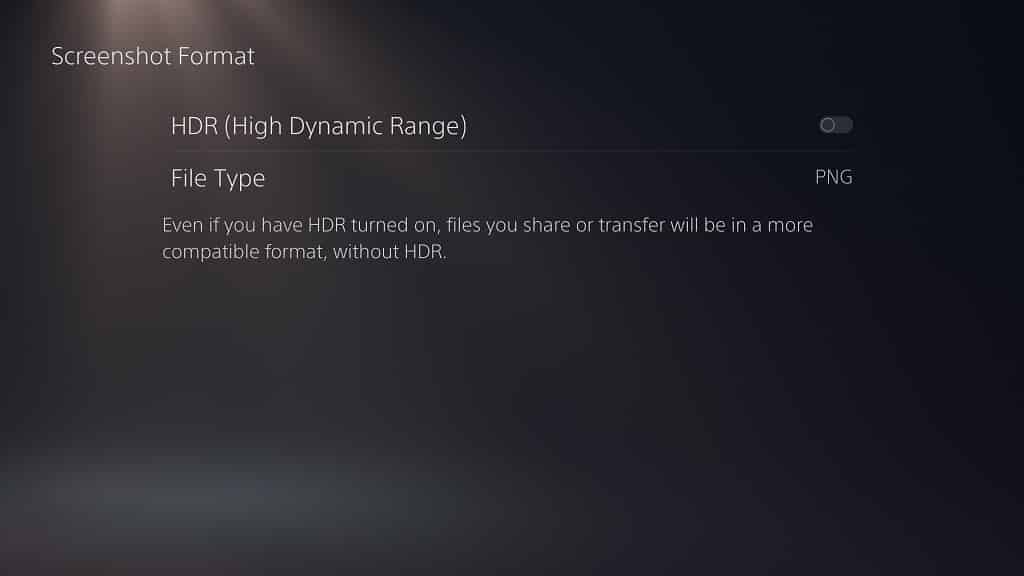
6. In the “Screenshot Format” menu, you need to select “File Type.”

7. In the pop-up menu, you can choose between “JPG” or “PNG.”

8. On the same “Screenshot Format” menu, you also have the option to enable HDR by selecting the “HDR (High Dynamic Range)” option.

Doing so will lock the file type to “Auto,” which means that you can only use the JPG format to capture screenshots in HDR on the PlayStation 5.

It should be noted that the HDR enhancements will be lost when the JPG file is transferred or shared even if you enabled HDR support.

PNG vs. JPG for PS5 screenshot captures

So, which is the better format when it comes to screenshots captures on the PlayStation 5: the PNG or the JPG?

The main advantage the PNG has over the JPG is better lossless compression. As a result, you will get a higher quality screenshot when compared to JPG.

On the other hand, JPG files are a lot smaller than PNG files of the same content. Furthermore, as we stated above, you can only capture HDR with the JPG format.

So, if you want the best-looking screenshot captures on PlayStation 5, then we recommend using PNG.

If you want to save space and/or want to take screenshots in HDR for PS5 games, then the JPG is the better image format.

How to change the format for video recordings on PS5

To change the format for video captures, you need to do the following:

1. In the home screen, you have to go to “Settings.”

2. Inside the “Settings” menu, you have to go to “Captures and Broadcasts.”

3. Inside the “Captures and Broadcasts” menu, you have to select “Captures” on the left side.

4. On the right side of the same “Captures” menu, you have to select “Video Clip Format.”

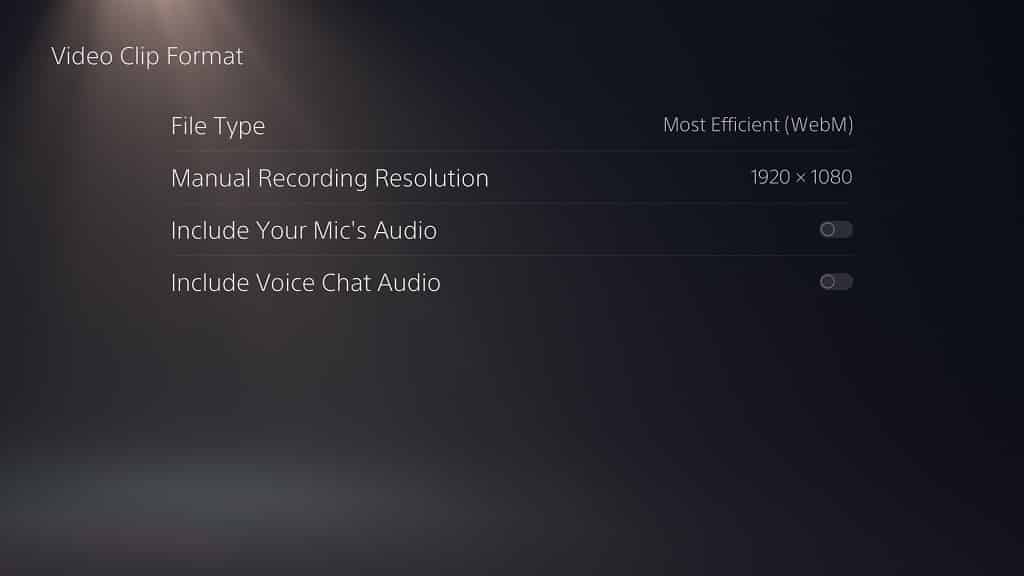
5. Inside the “Video Clip Format” menu, you have to select “File Type.”

6. In the pop-up menu, you can choose the “Most Efficient (WebM)” option or the “Most Compatible (MP4)” option.

As a result, you will be able to record your recent gameplay in either the WebM or MP4 format.

To record your recent gameplay when playing a game you can press the “Create” button on your DualSense controller. Doing so will save a clip of the previous 15 seconds of gameplay.

You can also press the “Create” button on your DualSense controller once to bring up the capture menu. In the menu, you can select “Save Recent Gameplay.”

In the pop-up menu, you can select “Save Short Clip” (which will record the last 15 seconds) or “Save Full Video” (which can record up to the last 60 minutes of gameplay).

7. In the “Video Clip Format” menu, you can also change the “Manual Record Resolution” to “1920 x 1080” or “3840 x 2160.” If you change the resolution to “1920 x 1080,” then you can use either the WebM or MP4 format. If you change the resolution to “3840 x 2160,” then you can only use the WebM format.

To manually record gameplay, press the “Create” button on your DualSense. In the capture menu, select the “Start New Recording” option. To stop a recording, press the “Create” button to bring up the capture menu again and then select the “Stop” recording option.

8. The last two options in the “Video Clip Format” menu are “Include Your Mic’s Audio” and “Include Voice Chat.”

The “Include Your Mic’s Audio” will add the audio recorded through your microphone, which includes the mic on your DualSense.

The “Include Voice Chat” option will add audio recorded in a voice chat session as long as the other players in the voice chat group allowed for their voices to be shared.

If you want to enable these options, makes sure the switches to the left of them are white. If the switches are black, you can select the options to turn the switches white.

MP4 vs. WebM for PS5 video recordings

So, which is the best format when it comes to recording gameplay videos on the PlayStation 5: the MP4 or the WebM?

The main advantage for MP4 is that the video quality is better when compared to the WebM when you are recording at 1080p. Furthermore, MP4 is the more widely used format of the two.

On the other hand, file sizes for WebM videos are smaller than the file sizes of MP4 videos when capturing at the same content and at the same resolution. As we stated above, WebM is also the only format on the PS5 to support 4K manual recording.

So, for best video quality when it comes to capturing PS5 gameplay videos at 1080p, we recommend using the MP4 format.

If you want to save as much space as possible and/or want to manually record videos in 4K, then you should use WebM instead.

How to clear the cache on PS5 in Safe Mode

The new firmware update for the PlayStation 5 (and PlayStation 5 Digital Edition) adds the ability to clear the cache of the system without having to unplug it.

To find out how can delete the temporary files in the menu of the system, you can check out this guide at Seeking Tech.

Why you should clear the cache on PS5

If you are experiencing issues with a game crashing or not even launching, then clearing the system cache is a potential fix for these problems.

How to clear the PlayStation 5 cache in Safe Mode

In order to clear the cache of the PlayStation 5 in Safe Mode, you have to take the following steps:

1. As we stated above, the ability to clear the cache in the menu was added in the latest software version of the PS5.

So, if you haven’t done so already, you need to update to the latest firmware. To do a manual update, first head to the home screen, which is the main system menu where you can select a game to play.

2. From the home screen, you will see a gear cog symbol on the upper right corner. Select it to go to the “Settings” menu.

3. From the “Settings” menu, select the “System” option from the list.

4. From the “System” menu, select the “System Software” option from the list on the left side.

5. On the right side of the same menu, select the “System Software Update and Settings” option from the list.

6. From the “System Software Update and Settings” menu, you will see the “Update System Software” option.

If you see the “Up to date” wording to the right of this option, then you don’t need to update the firmware of your PlayStation 5.

Otherwise, select the “Update System Software” option.

7. From the “System Software Update” menu, select either the “Update Using Internet” option, which we recommend, or the “Update from USB Drive” option.

8. With your PlayStation 5 updated to the latest firmware, you need to completely turn off the system. To do so, press the PS button on the DualSense and then navigate down to a list of icons.

9. Select the “Power” icon, which is located all the way to the right by default.

10. In the pop-up menu, select the “Turn Off PS5” option.

11. Make sure that your PS5 system isn’t displaying any lights. If you are seeing an orange light, then it means that your console is in rest mode.

If your system is in rest mode, turn it back on and then repeat steps 8 through 10 to turn it off completely.

12. With your PlayStation 5 turned off, locate the power button on the system. You need to press and hold the button for several seconds. You will hear one beeping noise initially and another beeping noise after a few moments later.

13. If done correctly, the PS5 will booth up in Safe Mode.

14. Follow the instructions on the screen to connect your DualSense to your PS5 by using as USB cable.

15. Press the PS button on your DualSense.

16. You should be in the Safe Mode menu.

Here, you need to select the “5. Clear Cache and Rebuild Database” option from the list.

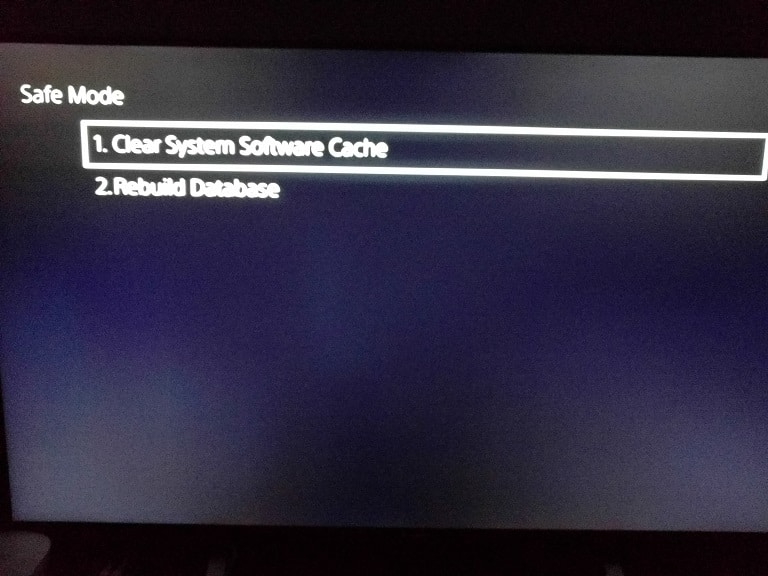
17. In the next menu, select the “1. Clear System Software Cache” option.

18. In the next screen, select the “OK” option to delete the temporary files on your PS5.

19. Your system will automatically restart after the deletion is completed.

How to clear the PS5 cache without Safe Mode

You can also clear the PlayStation 5 cache without using the Safe Mode. Before the new firmware, the process to deleting the temporary files was to unplug the system from the power outlet, wait for a little bit and then plug it back into the power outlet.

If you are interested in doing so, you need to take the following steps:

1. Make sure that your PlayStation 5 is completely turned off as it should not be displaying any lights.

2. Once you are sure that your PS5 is turned off, unplug the power cord from the power outlet.

Make sure that the system is not in rest mode when you unplug its power cord as doing so may cause damage to the PlayStation 5.

3. Wait for at least 30 seconds.

4. After waiting, plug the PS5 system back into the power outlet.

5. Turn on the game console. The cache should be cleared.

How to manually follow games on PS5

With the PlayStation 5 and PlayStation 5 Digital Edition, you are able to keep up to date on the latest news for a particular game in the Explore tab every time you turn on your system. In order to do so, you need to follow a game.

You can check out this Seeking Tech tutorial to find out how you can manually follow a game on the PS5.

How to check if a game is already being followed on PS5

If you downloaded a game on your user account, then the game should be automatically be followed on the PlayStation 5.

In order to check a list of already followed games, you need to do the following:

1. The followed games menu was added in a recent firmware update. If you haven’t done so already, make sure your PS5 system is on the current software version.

To update the firmware from the home screen (which is the main menu you use to select which game to play), you need to go to “Settings.” You will find this option on the upper right corner of the screen with the gear cog symbol.

In the “Settings” menu, select “System.”

In the “System” menu, select “System Software” from the options available on the left side and then “System Software Update and Settings” on the right side.

In the “System Software Update and Settings” menu, select the “Update System Software” option.

In the “System Software Update” menu, select the “Update Using the Internet” or “Update from USB Drive” option to start the firmware update process.

2. Now that you are on the latest software version of the PlayStation 5, returned to the aforementioned “Settings” menu.

3. In “Settings,” find and select the “Saved Data and Game/App Settings.”

4. In “Saved Data and Game/App Settings,” select the “Followed Games” options on the left side and then “Manage Followed Games” on the right side.

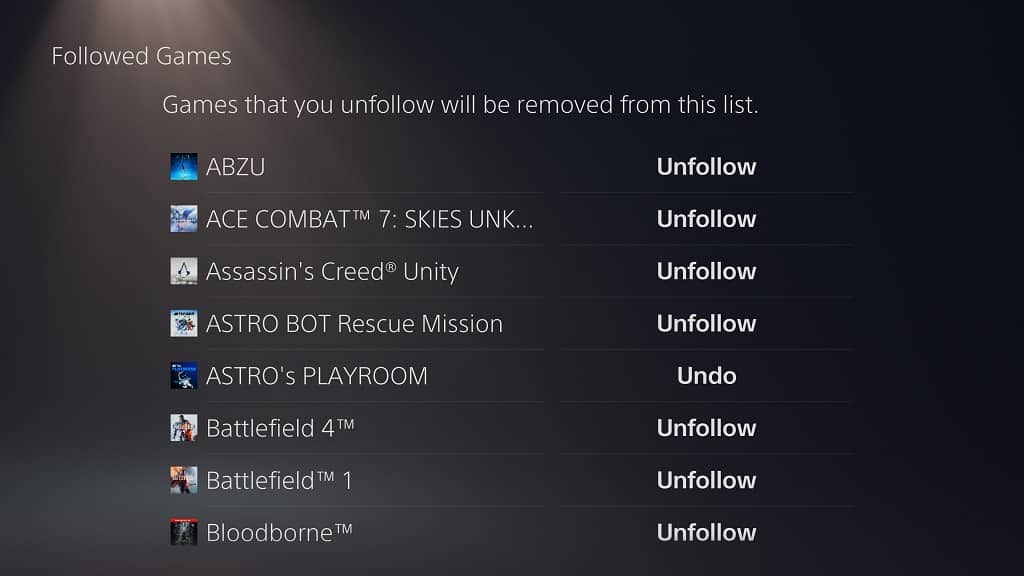
5. In the “Followed Games” menu, you will see a list of games that you are currently following. This list is in alphabetical order. You can also use this menu to unfollow games you no longer want to appear on the Explore tab.

How to manually follow your games on PS5

To manually follow a PS4 or PS5 game you downloaded on your account, you need to take the following steps:

1. From the home screen, go all the way to the right in the Games section and then select the “Game Library” option.

2. In the “Game Library” menu, you find your collection of games you have tied to your user account. These are the games you have played, downloaded and/or purchased with your PSN account.

If you have a huge list of games, you can try using the “Sort and Filter” option located to the left of the listed games. It has a symbol that features three horizontal lines with a down-pointing arrow.

3. Select the game you want to follow to open the game’s page on your PlayStation 5.

4. On the game page, select the “…” option.

5. In the pop-up menu, select the “Follow” option. If you only see the “Unfollow” option available, then it means that the game is already being followed.

How to follow a game you haven’t bought or downloaded on PS5

To follow a game you haven’t bought or downloaded yet using your PSN user account on the PlayStation 5, you need to do the following:

1. From the home screen, head to the PlayStation Store.

2. In the PlayStation Store, select the Search icon located at the top right of the menu.

3. In the search menu, select the “Search for games and add-ons” section.

4. Using the virtual keyboard on screen, type in the game’s title. Press the R2 button, or select the “Done” key from the virtual keyboard, once you are done typing.

5. Select the game from the results to enter the game’s product page. If you can’t find your game, then make sure you spell out its title correctly. There is also a chance that the game has not yet been listed or have been delisted from the PlayStation Store.

6. In the game’s product page, select the “…” option.

7. In the new pop-up menu, select the “Follow” option.