One of the best wireless gaming headsets for the PlayStation 5 and PlayStation 5 Digital Edition is the SteelSeries Arctis 7P.
You can follow this tutorial from Seeking Tech to see how you can connect, setup and optimize the Arctis 7P on your game console.
Updating the SteelSeries Arctis 7P firmware
Before connecting to the PlayStation 5, you should see if there is a firmware update available for the SteelSeries Arctis 7P. It is also a good idea to occasionally check for any new software versions to keep the wireless headset up-to-date.
To see if you need a firmware update, you need to take the following steps:
1. Download and install the SteelSeries Engine on your computer. This program requires Windows 7 (or newer) if you have a Windows PC or macOS 10.12 (or newer) if you have a Mac.
2. Open the SteelSeries Engine program.
3. Connect the SteelSeries Arctis 7P to your computer.
If your computer has a USB-C port, you just need to connect the USB-C Wireless Dongle.
If your computer only has USB-A ports, you need to connect the USB-C Wireless Dongle to the USB-C to USB-A Adapter Cable. You can then connect the other end of the USB-C to USB-A Adapter Cable to the USB-A port of your computer.
The Arctis 7P comes with both the USB-C Wireless Dongle and USB-C to USB-A Adapter Cable included in the box.
4. Turn on the Arctis 7P by pressing and holding the power button on the wireless headset. After around three seconds, you will hear a tone and lights will be displayed on the headset.
5. The SteelSeries Engine should detect the Arctis 7P and will notify you if there is a firmware update available.
How to connect SteelSeries Arctis 7P to PlayStation 5
There are two ways to connect to the SteelSeries Arctis 7P to the PS5 as you can use the USB-C port or the USB-A ports.
For the USB-C port, you just have to connect the USB-C Wireless Dongle to the USB-C port on the front side of the PlayStation 5. With that said, the wireless dongle will block the USB-A port next to the USB-C port at the front of the system.
To connect using any of the three USB-A ports on the PS5, you firrst need to connect the USB-C Wireless Dongle to the USB-C to USB-A Adapter Cable. You can then connect the USB-C to USB-A Adapter Cable to any of the USB-A ports on the game system.
With the USB-C Wireless Dongle connected to the PS5, turn on both the game system and the headset. For the Arctis 7P, you need to press and hold the power button until you hear a chime and see illuminating lights.
After connecting the dongle in addition to powering on both the headset and PlayStation 5, the game system should automatically detect and switch the audio output and microphone input over to the headset.
To optimize the Arctis 7P for the PS5, there are several settings you can configure.
How to maximize the Arctis 7P audio volume on PS5
SteelSeries recommends setting the audio output volume on the PlayStation 5 to the maximum so that the Arctis 7P is able to utilize the full volume range. You can then use the volume control on the headset to increase or decrease the volume level.
In order to maximize the audio output on the PS5, you need to do the following:
1. First off, you need to be in the home screen, which is the main menu for the system where you can select which game to play.
2. In the home screen, you need to find and select the gear cog symbol on the upper right corner of the screen, which should bring you to the Settings menu.
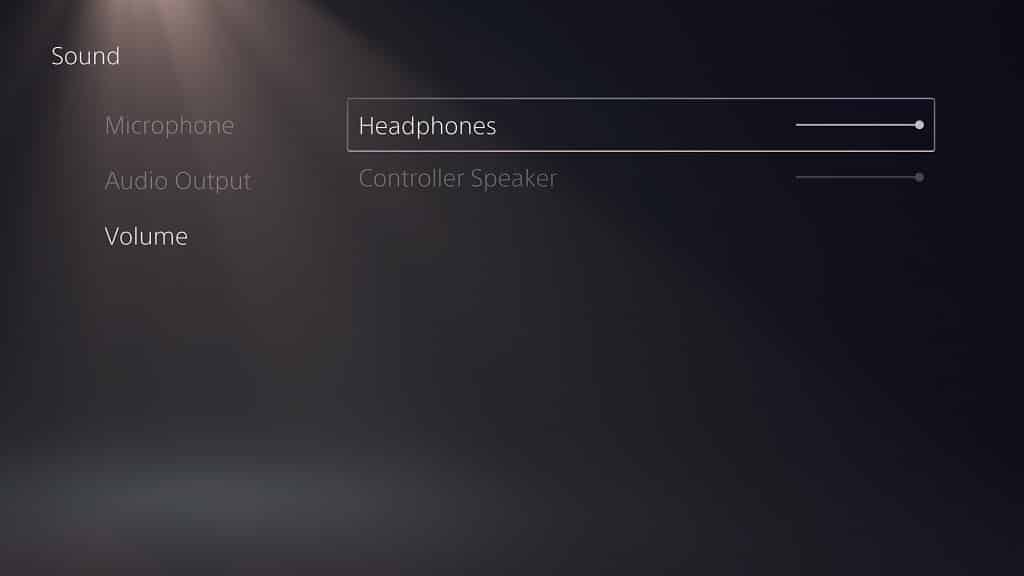
3. In the Settings menu, you need to select Sound.
4. In the Sound menu, you need to select Volume on the left side.
5. On the right side in the same Sound menu, you need to select Headphones.
6. Use the analog stick or directional pad to move the circle all the way to the right.
How to use and optimize 3D audio with Arctis 7P on PS5
If you want to use the PlayStation 5’s 3D audio with the Arctis 7P, you need to do the following:
1. Go to the Settings menu from the home screen.
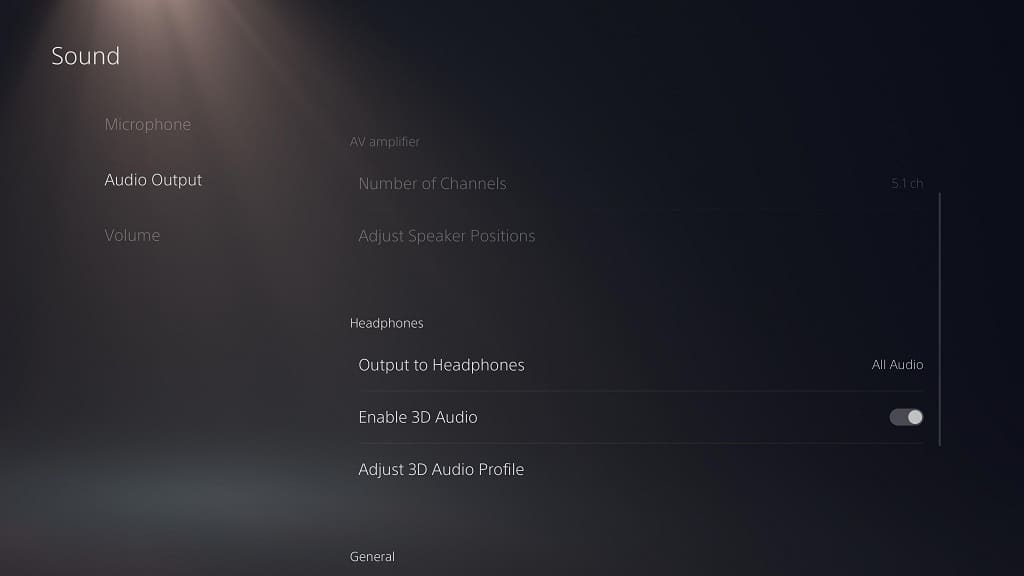
2. Inside the Settings menu, select Sound.
3. Inside the Sound menu, you will see the Enable 3D Audio option. If the switch to the right of the wording is black, select the option to turn it white as this will enable 3D audio.
It should be noted that 3D audio may cause audio issues when used with games that don’t support that feature. If you are experiencing problems, you can disable 3D audio.
For more information on headset audio issues, you can check out this troubleshooting guide.
4. In you want to use 3D Audio, then you optimize the feature by selecting the Adjust 3D Audio Profile option that is just below the Enable 3D Audio option.
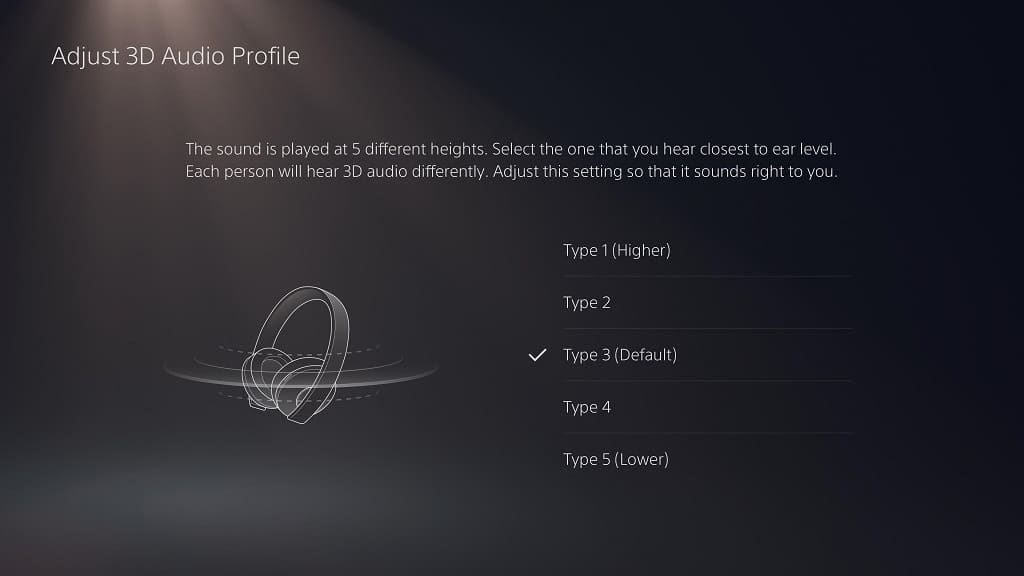
5. In the Adjust 3D Audio Profile menu, you can select between five different height types. Choose the type that is closest to your ear level.
How to optimize microphone audio with Arctis 7P on PS5
To optimize the microphone audio with the SteelSeries Arctis 7P on PlayStation 5, you can take the following steps:
1. From the home screen, go into Settings.
2. From the Settings menu, go into Sound.
3. From the Sound menu, select Microphone on the left side of the screen.
4. On the right side of the same Sound menu, select Adjust Microphone Level.
5. In the Adjust Microphone Level menu, you can increase or decrease the mic level of your Arctis 7P. You will also see Input Volume, which measures the current mic volume.
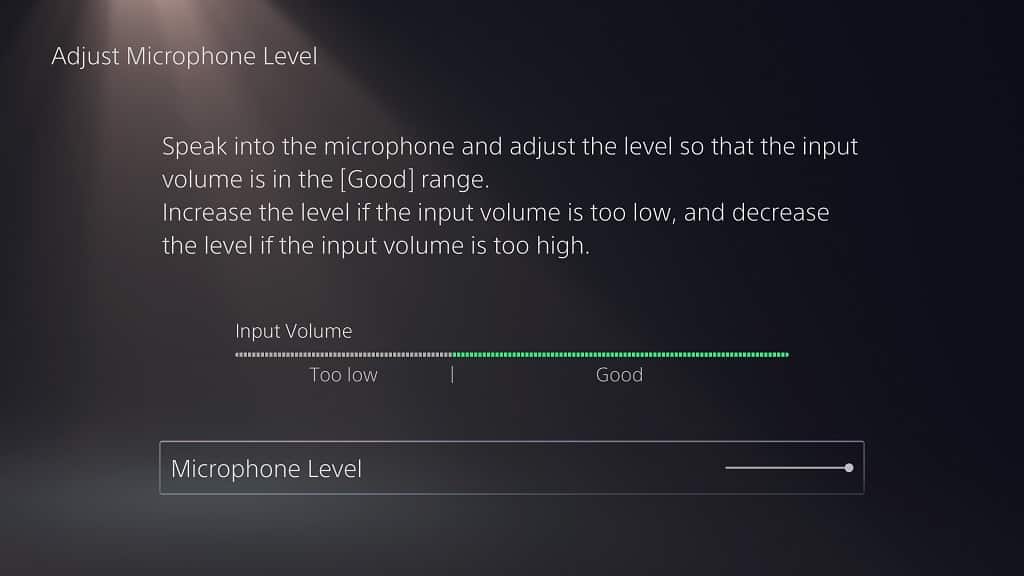
Speak into the mic and then check out the Input Volume to see if your voice consistently hit the good portion of the measurement gauge.
If not, you can use the Adjust Microphone Level. option below to adjust the mic level.