Just like the PlayStation 4 and PlayStation 4 Pro, you can capture screenshots and videos on the PlayStation 5 and PlayStation 5 Digital Edition. With the new consoles, you will be able to change the output formats.
You can check out this step-by-step tutorial from Seeking Tech to see how you can change the formats for capturing screenshots and videos on the PS5.
How to change the format for screenshot captures on PS5
In order to change the screenshot format on the PlayStation 5, you need to take the following steps:
1. First off, you need to be in the home screen. This is the main system menu where you can choose which game to play.
2. From the home screen, you need to get to “Settings.” You can find the “Settings” option on the upper right corner of the screen.
3. In the “Settings” menu, scroll all the way down and then select the “Captures and Broadcasts” option.
4. In the “Captures and Broadcasts” menu, you need to select the “Captures” from the list of options on the left side.
5. On the right side of the same “Captures and Broadcasts” menu, you need to select the “Screenshot Format” option.
6. In the “Screenshot Format” menu, you need to select “File Type.”
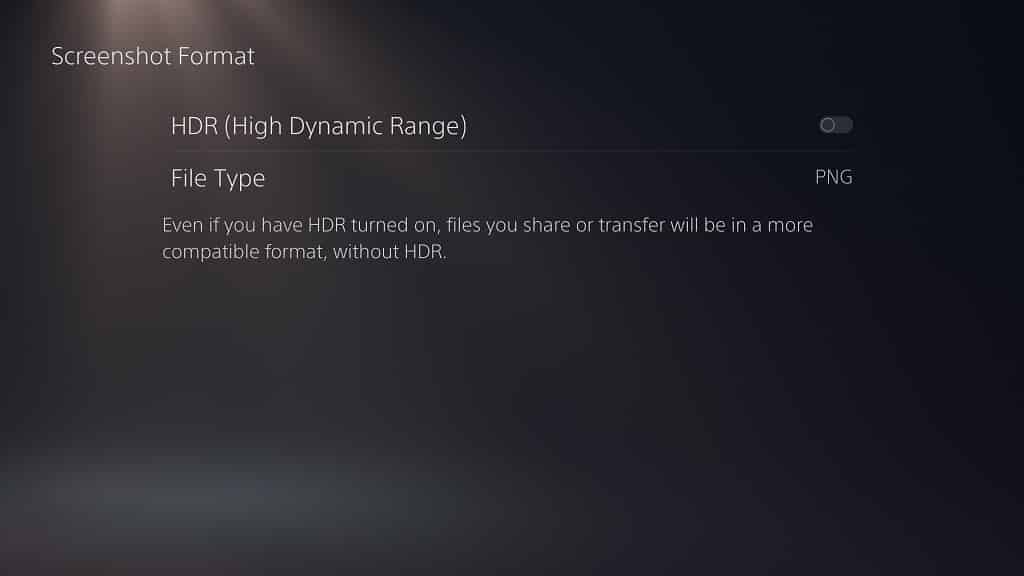
7. In the pop-up menu, you can choose between “JPG” or “PNG.”
8. On the same “Screenshot Format” menu, you also have the option to enable HDR by selecting the “HDR (High Dynamic Range)” option.
Doing so will lock the file type to “Auto,” which means that you can only use the JPG format to capture screenshots in HDR on the PlayStation 5.
It should be noted that the HDR enhancements will be lost when the JPG file is transferred or shared even if you enabled HDR support.
PNG vs. JPG for PS5 screenshot captures
So, which is the better format when it comes to screenshots captures on the PlayStation 5: the PNG or the JPG?
The main advantage the PNG has over the JPG is better lossless compression. As a result, you will get a higher quality screenshot when compared to JPG.
On the other hand, JPG files are a lot smaller than PNG files of the same content. Furthermore, as we stated above, you can only capture HDR with the JPG format.
So, if you want the best-looking screenshot captures on PlayStation 5, then we recommend using PNG.
If you want to save space and/or want to take screenshots in HDR for PS5 games, then the JPG is the better image format.
How to change the format for video recordings on PS5
To change the format for video captures, you need to do the following:
1. In the home screen, you have to go to “Settings.”
2. Inside the “Settings” menu, you have to go to “Captures and Broadcasts.”
3. Inside the “Captures and Broadcasts” menu, you have to select “Captures” on the left side.
4. On the right side of the same “Captures” menu, you have to select “Video Clip Format.”
5. Inside the “Video Clip Format” menu, you have to select “File Type.”
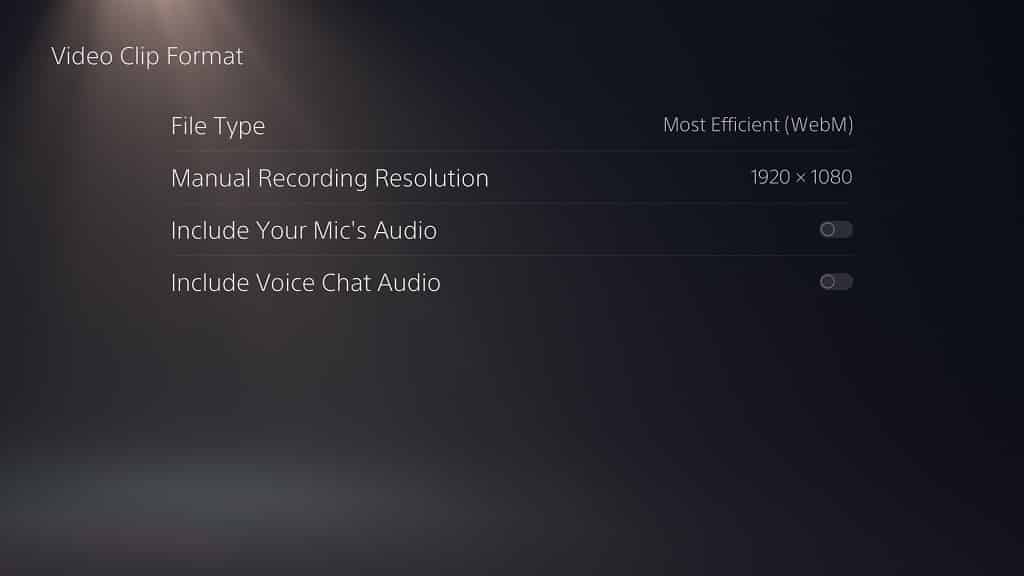
6. In the pop-up menu, you can choose the “Most Efficient (WebM)” option or the “Most Compatible (MP4)” option.
As a result, you will be able to record your recent gameplay in either the WebM or MP4 format.
To record your recent gameplay when playing a game you can press the “Create” button on your DualSense controller. Doing so will save a clip of the previous 15 seconds of gameplay.
You can also press the “Create” button on your DualSense controller once to bring up the capture menu. In the menu, you can select “Save Recent Gameplay.”
In the pop-up menu, you can select “Save Short Clip” (which will record the last 15 seconds) or “Save Full Video” (which can record up to the last 60 minutes of gameplay).
7. In the “Video Clip Format” menu, you can also change the “Manual Record Resolution” to “1920 x 1080” or “3840 x 2160.” If you change the resolution to “1920 x 1080,” then you can use either the WebM or MP4 format. If you change the resolution to “3840 x 2160,” then you can only use the WebM format.
To manually record gameplay, press the “Create” button on your DualSense. In the capture menu, select the “Start New Recording” option. To stop a recording, press the “Create” button to bring up the capture menu again and then select the “Stop” recording option.
8. The last two options in the “Video Clip Format” menu are “Include Your Mic’s Audio” and “Include Voice Chat.”
The “Include Your Mic’s Audio” will add the audio recorded through your microphone, which includes the mic on your DualSense.
The “Include Voice Chat” option will add audio recorded in a voice chat session as long as the other players in the voice chat group allowed for their voices to be shared.
If you want to enable these options, makes sure the switches to the left of them are white. If the switches are black, you can select the options to turn the switches white.
MP4 vs. WebM for PS5 video recordings
So, which is the best format when it comes to recording gameplay videos on the PlayStation 5: the MP4 or the WebM?
The main advantage for MP4 is that the video quality is better when compared to the WebM when you are recording at 1080p. Furthermore, MP4 is the more widely used format of the two.
On the other hand, file sizes for WebM videos are smaller than the file sizes of MP4 videos when capturing at the same content and at the same resolution. As we stated above, WebM is also the only format on the PS5 to support 4K manual recording.
So, for best video quality when it comes to capturing PS5 gameplay videos at 1080p, we recommend using the MP4 format.
If you want to save as much space as possible and/or want to manually record videos in 4K, then you should use WebM instead.