How to reset your position in the PS VR2 version of Beat Saber

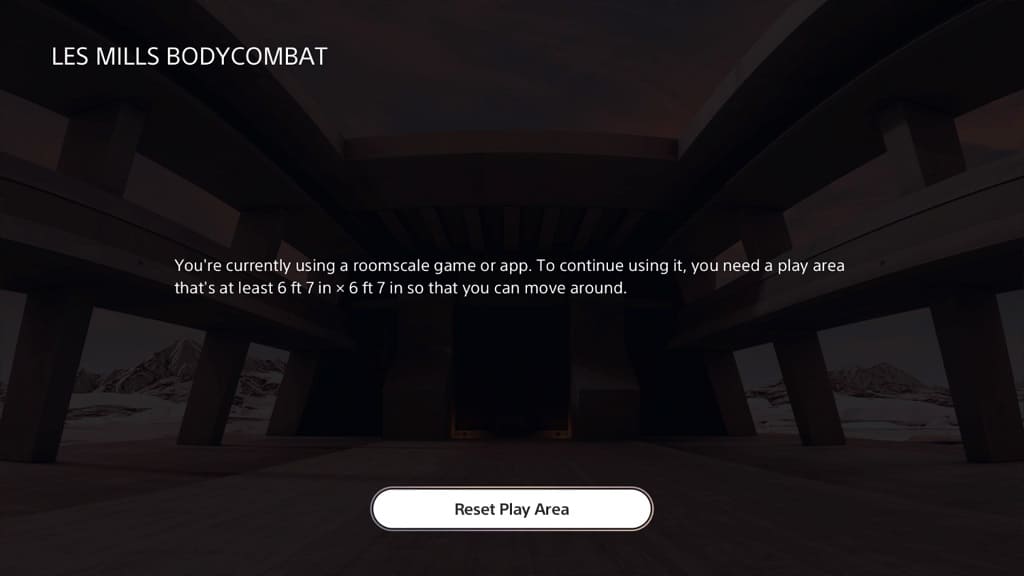
If you find that you are standing off centered in the PlayStation VR2 version of Beat Saber, then you can check out this tutorial from Seeking Tech to see how you can reset your position.

Method #1

For the first method, you can try using the system wide feature of the PS VR2 headset to re-center your display screen. In order to do so, you need to take the following steps:

1. If you are currently playing a level in Beat Saber, then we recommend pausing the action. You can do so by pressing any of the Square, Triangle, Circle or X buttons on the Left or Right PlayStation VR2 Sense controller.

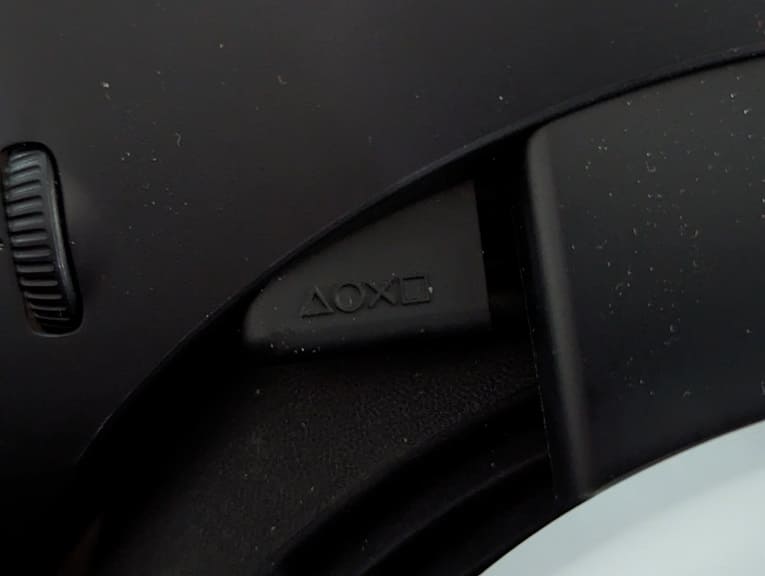
2. Next, make sure you are standing on the spot that you want to be center position. You may want to press the Function button on the PlayStation VR2 headset to view your surroundings in order to get you’re your preferred location in the room.

3. You should also make sure you are looking straight ahead.

4. Finally, press and hold the Options button on the Right PlayStation VR2 Sense Controller until the screen re-centers itself.

Method #2

If your standing position still does not feel quite right, then you can try doing the following:

1. If you are currently playing through a stage, then you can either finish the level or quit back out to the level selection screen.

2. From the level selection screen, you have to select the back option to return to the mode selection menu.

3. Once you return to the mode selection menu, select the gear icon.

4. You should now be in the Options menu, which is where you have to select Settings.

5. After getting to the Settings menu, you should be viewing the Room Adjust tab by default. If you are viewing another tab, then make sure you select the Room Adjust option.

6. In the Room Adjust tab, you will be able to adjust the following:

  • Rotation
  • X Offset
  • Y Offset
  • Z Offset

You can also select the Reset Room option to return the sliders to the default values.

7. Once you are done adjusting your orientation, test it out by playing a level.

If your view still does not feel right, then you should return to the Room Adjust tab in the Settings menu and then re-adjust these sliders. Afterwards, re-test your new position by playing through a stage. Repeat these steps until you get to a spot where you feel the most comfortable.

How to disable vibrations in Street Fighter 6

If you find that the force feedback in Street Fighter 6 to be too distracting and/or hindering your performance in fights, then you can check out this tutorial from Seeking Tech to see how you are able to disable this feature.

1. For the first step, you need to head over to the Options menu.

If you are currently fighting in a match, then you can press the Options button on the DualShock 4 or DualSense gamepad to open the Pause Menu. For the Xbox One or Xbox Series controller, you have to press the Menu button instead. You should then be able to head into Options from the pause screen.

If you are in the Mode Select screen, then you have to press the Options/Menu button to open the Multi Menu. From there, you have to select Options.

2. Inside of the Options menu, press R1 if you are playing with a PS4/PS5 controller or RB if you are playing with an Xbox One/Xbox Series controller to switch over to the Controls tab.

3. In the Controls tab, select the Other Input Settings on the left side.

4. On the right side of the same screen, you should then see the Controller Vibration setting, which should show the following description:

  • “Enable or disable controller vibration.”

5. You can use the left directional pad, right directional pad, move the left analog to the left or move the left analog to the right to change the Controller Vibration setting from On to Off.

6. Once you are done disabling the rumble in Street Fighter 6, you can exit out of the Options menu. Any changes you made should automatically be saved and applied in the fighting game.

Once you start playing SF6 again, you should no longer feel any rumble from your gamepad.

How to disable directional arrows in PS VR2 version of Beat Saber

Beat Saber on PlayStation VR2 features notes that must be hit from a certain direction. If you find that you keep messing up the directions of your swings, then you may want to disable this feature. If you are interested in doing so, then you can take a look at this tutorial from Seeking Tech to find out how you can do so.

1. You won’t be able to disable the arrows from the pause menu. Instead, you have to exit out of the level you are currently playing.

In order to do so with the PS VR2 version, pause the game by pressing the Square, Triangle, Circle or X buttons. From the pause menu, you then need to select Menu.

2. Once you get to the level selection screen, turn your head to the left to see list of options.

3. From the left-side menu, make sure you are in the Modifiers tab. If you aren’t then you need to move the pointer over to the “Modifiers” word and then press the L2 or R2 button to select it.

4. From the Modifiers tab, select the No Arrows options.

Keep in mind that this mod will reduce your total score by 30%. Furthermore, your maximum rank will be no more than A.

5. Once you are done with disabling arrows, turn your head to the right side again to the level selection screen.

6. Select a select and then start playing it.

You should notice that you only get notes with a dot in the middle. You will be able to hit these from any directions to register as successful hits.

We find that we have a much easier time by disabling directional notes when playing at the Hard, Expert, Expert+ difficulty levels. Once you get use to the rhythm of the harder settings, then you may want to re-enable arrows to see if you can fare better this time around when using the default rules.

How to enable modifiers in PS VR2 version of Beat Saber

You will be able to customize a song to your liking while playing the PlayStation VR2 version of Beat Saber. To find out how you can use modes with this music rhythm game, you can take a look at this tutorial from Seeking Tech.

1. The modifiers can only be used in the Solo Mode or Party Mode. So, if you are playing Beat Saber in different mode, you need to back all the way out to the mode selection screen.

From there, you can select Solo Mode or Party Mode.

2. When selecting a level in either of the two aforementioned modes, turn your head left to see a list of options. By default, you should be looking at the Modifiers tab.

If you aren’t, then you need to move the PlayStation VR2 Sense controller to the “Modifiers” wording and then select it by pressing the L2 button if you are using the left motion controller or the R2 button if you are using the right motion controller.

3. In the Modifiers tab, you should see the following options:

  • The No Fail mod will let you continue to play through the entire level even if you run out of lives. If you turn this on, then your total song will be reduced by 50% if you run out of lives. If you managed to get through the stage without triggering the failure state, then your total score won’t be penalized.
  • The 1 Life modification means that your energy will be fully depleted for every single mistake you make on the stage.
  • The 4 Lives mod will let you make four mistakes before depleting all of your energy.
  • With the No Bombs modification, you should no longer see any bombs in the levels. If you use this, then your total score will be reduced by 10% and the maximum rank you can get is S.
  • No Walls will disable walls from showing up in the level. This modification will drop your score by 5% although you can still get a SS ranking.
  • With the No Arrows mod, you don’t have to worry about the directions of hitting a note with your saber. If you turn this on, then your total score will drop by 30% and you can only earn a maximum ranking of A.
  • Ghost Notes will make the notes invisible as you will only see arrows. With that said, the arrows will also disappear as they get closer to you. This modification will add 11% to your total score.
  • For the Disappearing Arrow mod, the notes are visible but the arrows will disappear as they get closer to you. This will add 7% to your total score.
  • The Small Notes modification makes the note half as small as the default size.
  • The Pro Mod mode makes the hit boxes a lot smaller.
  • The Strict Angles modification makes it stricter when it comes to cutting the notes at the correct angles with your saber.
  • Zen Mode lets you enjoy the sound and visuals of a level without having to worry about any notes, bombs or walls. Your total score will be reduced by 100% while your max rank will be E.
  • The Slower Song mod reduced the speed of the level by 15%. This will lead to a 70% reduction in total score as well as limit the maximum rank to A.
  • Th Faster Song mod will increase the speed of the music track by 20%. If you turn this on, then you will be able to add 8% to your total score.
  • Last but not least, the Super Fast Song modification speeds up the stage by 50%. By doing so, you will add 10% to your total score.

Currently, the Small Notes, Pro Mode and Strict Angles mods are in beta. Therefore, these may end up getting changed in the future. As of right now, they don’t affect your total score.

You can also mix and match some of the modifications to your liking. With that said, some mods will deactivate others when enabled.

4. Once you are done selecting the modifiers, look back to the right to the list of songs. Select a level you want to play and then the Start option.

You should now be able to experience the stage with the mods you previously enabled.

How to turn off vibrations for PS VR2 version of Beat Saber

The PlayStation VR2 Sense Controllers will rumble any time you hit a note, wall or bomb in Beat Saber. In the menus, you will also feel vibrations when you the pointer movers over a selectable option.

If you don’t like the force feedback feature and would like to turn it off, then you can take a look at this tutorial from Seeking Tech to see how you can properly do so.

Before we begin, it should be noted that there is no in-game option to disable vibrations in the PS VR2 version of Beat Saber. Instead, you have to turn off this feature by using the system menus of your PlayStation 5 or PlayStation 5 Digital Edition console.

1. For the first step, you need to head over to the home screen of your PS5. You can do so by pressing and holding the PS button on either the left or right PlayStation VR2 Sense Controller.

2. From the home screen menu, go to the top right side and then select the gear icon.

3. You should now be in the Settings menu, which is where you need to scroll down and then select Accessories.

4. From the Accessories sub-menu, you first need to select Controller (General) on the left side and then Vibration Intensity on the right side.

5. On the small pop-up window, you will see the following four options:

  • Off
  • Weak
  • Medium
  • Strong (Standard)

To complete disable vibrations in Beat Saber, you need to select the Off option. If you want to keep the rumble support but make it less intensive, then you can try pick Weak or Medium instead.

6. Exit the Settings menu of the PS5 and then return to playing Beat Saber.

If you set Vibration Intensity to Off, then you should no longer feel any rumble when playing the game.

Keep in mind that this setting applies to all controllers connected to your PlayStation 5. So, the DualSense will also be affected along with the Left and Right PlayStation VR2 Sense Controllers. Not to mention that it will be applied to other PS5 games aside from Beat Saber as well.

If you want to re-enable vibrations, then you need to open the Settings menu of your PlayStation 5 and then select Accessories > Controller (General) > Vibration Intensity. You should then be able to turn the force feedback feature on again.

How to turn off fails in PS VR2 version of Beat Saber

If you lose too many lives when playing the PlayStation VR2 version of Beat Saber, then you will get a game over screen that says Level Failed. You can then choose to restart the same level at the beginning or head back to the level selection screen.

If you would like to play a stage without it having to prematurely end if you happened to miss a lot of notes and/or couldn’t dodge the obstacles, then you can take a look at this tutorial from Seeking Tech to see how you can properly do so.

1. You won’t be able to disable the failure state from the pause menu. Instead, you have to do so before starting the level.

So, if you are currently playing a stage, press any of the face buttons (Triangle, Square, X or Circle) on the Left or Right PlayStation VRS Sense Controller to bring up the pause screen. From there, select the Menu option to return to the level select screen.

2. Once you get back to the menu where you can select which song to play, look to the left side to see the customization menu.

3. From there, make sure you are in the Modifiers tab. If you aren’t then you need to select it.

4. In the Modifiers tab, select No Fail. By doing so, you won’t get any game overs that stops you in the middle of the stage. However, your final score will be reduced by 50%.

Alternatively, you can select the 4 Lives option instead, which allows you to make four mistakes before you get the game over screen. This option does not impose a penalty to your score.

5. Once you are done setting the modifiers, look back to the right and then start the stage.

You should no longer see a fail state if you make a lot of mistakes when playing through a song.

How to fix frame rate issues when playing Beat Saber on PlayStation VR2

You may notice some stuttering when playing the PlayStation VR2 version of Beat Saber. To see how you can potentially fix these frame rate drops, you can take a look at this troubleshooting article from Seeking Tech.

Based on our experience so far with this release, the frame rate will drop when a wall shows up on screen. It is especially noticeable when you look at the blocks while trying to dodge the obstacle as you can tell that it isn’t moving as smoothly as before.

According to a Twitter post, a member of the development team at Beat Games has acknowledged the stuttering issue, especially from one of the levels that can be found in the Panic! At The Disco Music Pack. The development team is planning to release a patch that will hopefully smooth out the frame rate.

In order to manually update the PlayStation VR2 version of Beat Saber, you can do the following:

  • Turn on your PlayStation 5 or PlayStation 5 Digital Edition console and then make sure it is connected to the internet.
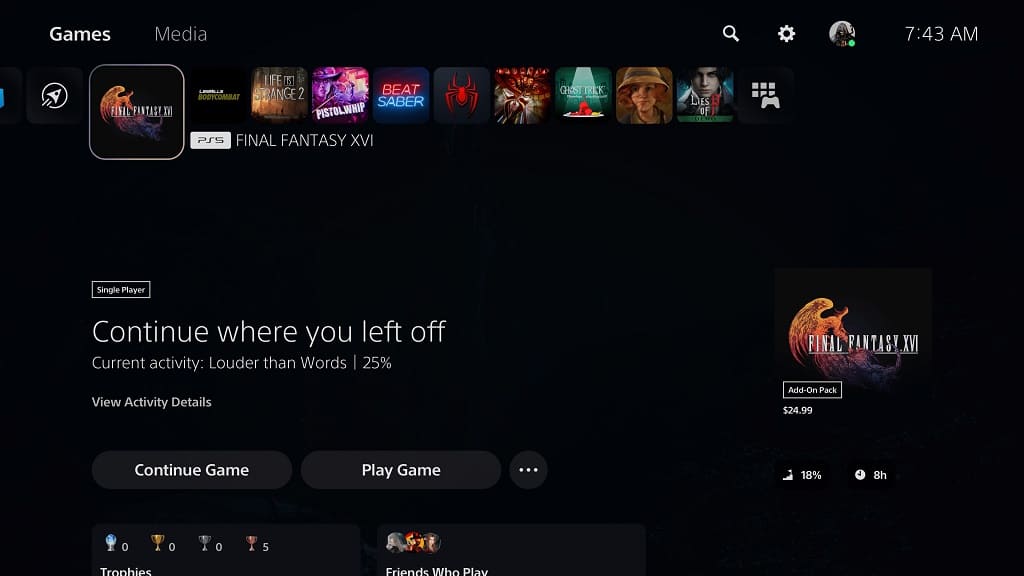
  • Next, you need to go to the home screen. A quick short cut to do so is to press and hold the PS logo button on the controller.
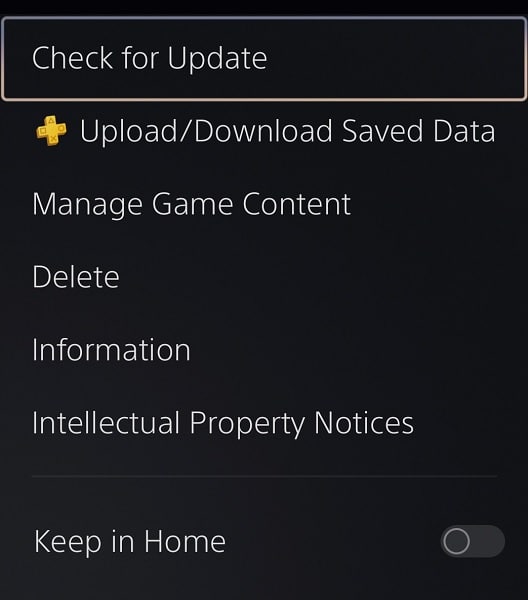
  • In the home screen, move the cursor over to Beat Saber and then press the Options button.
  • Finally, select the Check for Update option that appears in the small pop-up window.

If there is no update available, or the update did not fix the fps drops, then we recommend that you disable walls from appearing in the level. This should help fix the jitteriness when the walls move past you.

In order to do so, look to the left side before starting a level. You should see a list of customizations. From there, make sure that you are in the Modifiers tab. After, select the No Walls setting.

When you start the level, you should no longer see any walls appear in the song. As a result, the frame rate should remain consistently smooth.

Can you download custom songs to the PS VR2 version of Beat Saber?

Beat Saber has officially been released for the PlayStation VR2 headset? So, can you download custom songs for this version? You can find out in this article from Seeking Tech.

Just like the PlayStation VR1 version, the upgraded PS VR2 game does not let you download custom songs. Instead, there is a list of curated DLC tracks and music packs that you can buy and download.

If you want to get free fan-made tracks, then you have to buy the PC version of Beat Saber and then mod the game yourself.

Modding isn’t typically supported on consoles like the PlayStation 4 or PlayStation 5 due to potential security risks and, in the case of Beat Saber, copyright issues. Therefore, a company like Sony would rather disable this feature than deal with any legal problems.

On an open platform such as PC, the potential security risks and copyright issues are passed through to the end user. Therefore, there are a lot of cases (such as Beat Saber) where modding can be done for the PC version but not the console release.

While there are some cases where the development team added official mod support for the console version, these are extremely rare and often a lot more limited in terms of what you can download when compared to the PC release.

There is also very little incentive for the development team at Beat Games to support modes on consoles as well since they won’t earn any revenue from players using custom songs that can be downloaded for free. To pay the bills, they would rather you buy the DLC music tracks that have been officially licensed for this game.

If you try to look through the full song list in the PlayStation VR2 version of Beat Saber, then all you find are the official music tracks for the base game as well as the official DLC releases.

How to fix Beat Saber PS VR2 height level issues

When playing the PlayStation VR2 version of Beat Saber, you may notice that the default height level is either too low or too high. To see how you can fix these issues, you can take a look at this troubleshooting article from Seeking Tech.

1. To change the height level in Beat Saber, you need to first go back to the mode selection screen.

If you are currently playing a level, then you can press the Square, Triangle, Circle or X button to bring up the Pause screen, where you can then select Menu.

If you are in another section of the menu, then you need to select the Back option until you get all the way back to the mode selection screen.

2. Next, you need to select the gear icon to head into the game’s settings.

3. Once you get to the Options menu, you need to select Settings.

4. After getting to the Settings menu, make sure you are in the Room Adjust tab. If you are in the Audio or Others tab instead, then you have to select Room Adjust before moving on to the next step.

5. From there, you should see the Y Offset slider. By default, this value is set to 0.00.

To raise the height level, you have to increase the number. To lower the height level, you have to decrease this value instead.

6. Once you are done, you can need to head back to the Options menu and then select Player Options.

7. Inside the Player Options menu, make sure that the Automatic Player Height setting is enabled. You can also manually select the ruler icon next to the Player Height setting.

8. Test out your new height level by playing a stage.

If you still find that your view is either too tall or too short, then you need to repeat the previous steps over again until you can find your optimal and/or most comfortable zone.

How to play PS VR2 version of Beat Saber one handed

If you would like a different kind of challenge, then you are able to play the PlayStation VR2 version of Beat Saber one-handed. To find out how you can properly do so, as well as switch your primary hand, you can take a look at this tutorial from Seeking Tech.

1. For the first step, you need to open the game on your PlayStation 5 or PlayStation 5 Digital Edition console if you haven’t done so already.

2. From the main menu, you need select Solo.

3. In the song selection screen, you should see some customization options located above the Play option. Keep in mind that not all of the songs support the one saber play style.

If a level supports the one-handed mode, then you should see an icon that shows the avatar holding only one saber.

If you point your pointer over to that icon, then you should see the “One Saber” words pop up. Make sure you Press the L2 on the Left PlayStation VR2 Sense Controller or R2 on the Right PlayStation VR2 Sense Controller to select that mode.

4. By default, you will be using the Right PlayStation VR2 Sense Controller when playing the one-handed mode in Beat Saber.

If you want to switch over to the Left PlayStation VR2 Sense Controller, then you need to move your head to the left of the level selection screen.

From there, select the Player Options tab, where you can then scroll down to find the Left-Handed setting. Make sure you enable it before you move your head to the right.

5. Once you have everything set up, select the Play option for the level you previously selected.

6. You should now be able to play the stage with one saber instead of two. The level will be changed to accommodate the one-handed mode.