How to fix UNDER NIGHT IN-BIRTH II Sys:Celes input lag issues

You may encounter some input lag while fighting in UNDER NIGHT IN-BIRTH II Sys:Celes. To see how you can potentially fix the latency, you can check out this troubleshooting article from Seeking Tech.

1. For the first potential fix, you should double check to see if you have Game Mode (or a similarly name mode) enabled as doing so will reduce the input delay.

2. We also recommend that you play the 2D fighting game with a connected controller as it should be faster and more stable when compared to wireless.

On the PS5, make sure you enabled USB communication by going to the console’s Settings menu and then selecting Accessories > Controller (General) > Communication Method > Use USB Cable.
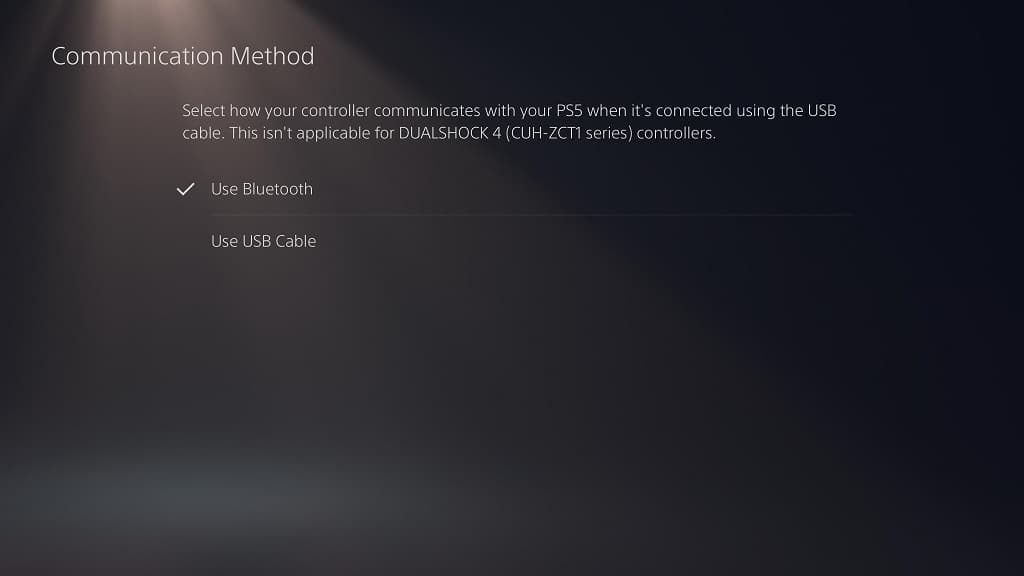
For the PS4, open the console’s Setting menu and then select Devices > Controllers > Communication Method > Use USB Cable.

3. By default, UNDER NIGHT IN-BIRTH II has Vsync enabled. While this prevents screen tearing, it also adds to the input lag.

To disable it, open the Option menu in the game and then select System. From the System Settings screen, make sure that Vertical Sync is set to Off.

4. Return to the Option menu and then head over to the Game section.

From the Game Settings screen, move the cursor down to Input Lag (Network Mode). It should show the following description:

Configures the input lag in Network mode. The lower the value, the more likely screen rollback will occur.
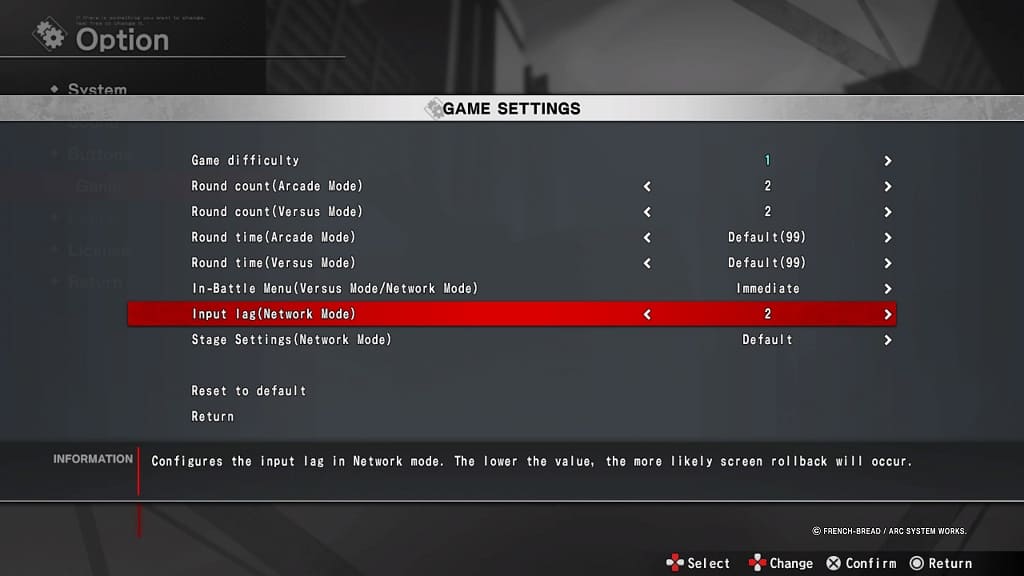
The default value of the Input Lag (Network Mode) setting is 2. You will be able to change it within a range of 1 to 4. After changing the value, test it out during an online match to see if the controls feel more responsive.

How to fix the ‘can’t access your M.2 SSD’ error on PS5

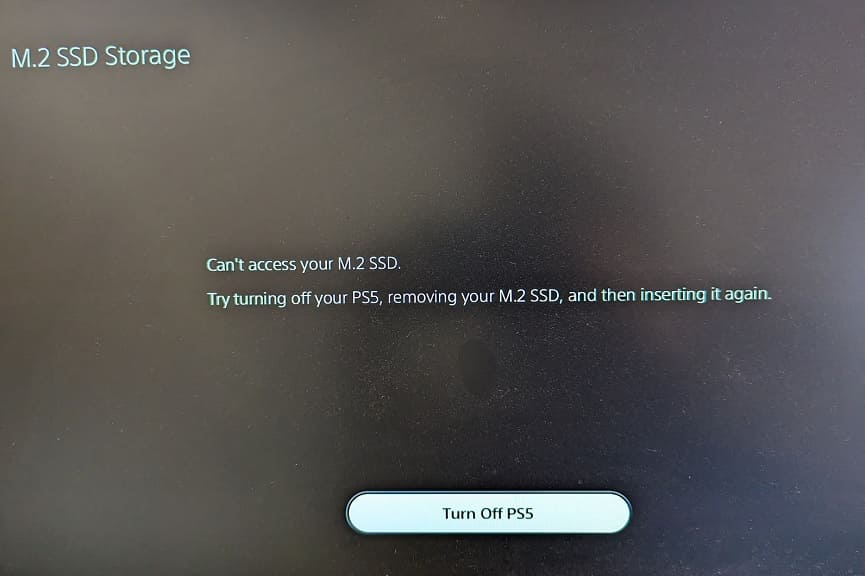
When installing a compatible M.2 solid state drive to your PlayStation 5, you may end up seeing the following error message when booting up the console:

Can’t access your M.2 SSD.

Try tuning off your PS5, removing your M.2 SSD, and then inserting it again.

To see how you can potentially fix this issue, you can take a look at this troubleshooting article from Seeking Tech.

1. If you haven’t done so already, select the Turn Off PS5 option to shut down your console. Afterwards, unplug all cables from the system and then remove the outer cover.

Open up the M.2 SSD expansion bay again and then unscrew and remove the solid state drive from the slot.

When inserting it again, make sure you do so from a diagonally upwards angle. You should hear an audible click and feel it click into place. If you need a visual guide, then you can check out the official M.2 SSD Installation for PS5 Console from the official PlayStation Support Youtube channel below:

2. If re-inserting your solid state drive does not work, try again for several more times. It took us three attempts to get our PlayStation 5 to properly recognize our Crucial P5 Plus 2TB Gen4 NVMe M.2 SSD Internal Gaming SSD with Heatsink. As we stated above, make sure you hear and feel a click.

3. If the console isn’t recognizing the expansion drive after multiple attempts, then you can try inspecting the connectors on both the console and SSD.

If you see a lot of dust, then you can try using an air canister or duster to blow it off.

If it appears to be dirty, then you can use a cotton swap with high concentrated isopropyl alcohol to careful wipe off the dirt and grime.

4. If possible, you can try connecting the solid state drive to a computer and then check to see if there is a firmware update for the storage. A new software version may help fix the PS5 recognition issue.

5. You should also double check to see if you have the latest firmware downloaded and installed on your console as well.

6. You can also try inserting the SSD to another PS5 if you have access to one. If it works, then the M.2 SSD slot of the original console may be defective.

7. There is also a possibility that your solid state drive could be defective. If you can’t get the storage expansion to work across multiple devices, then you may need to get it replaced.

How to prevent accidental pausing in UNDER NIGHT IN-BIRTH II Sys:Celes

If the action gets too intense in UNDER NIGHT IN-BIRTH II Sys:Celes, you may end up accidentally hitting the pause button (which is the Options button on the DualSense/DualShock 4 and the + button on the Nintendo Switch). This will end up throwing the rhythm and the intensity of the fight completely off.

To see how you can prevent accidental pausing in this 2D fighting title, you can check out this guide at Seeking Tech.

1. From the main menu of UNDER NIGHT IN-BIRTH II, open Options.

2. Next, you need to select Game from the Options screen.

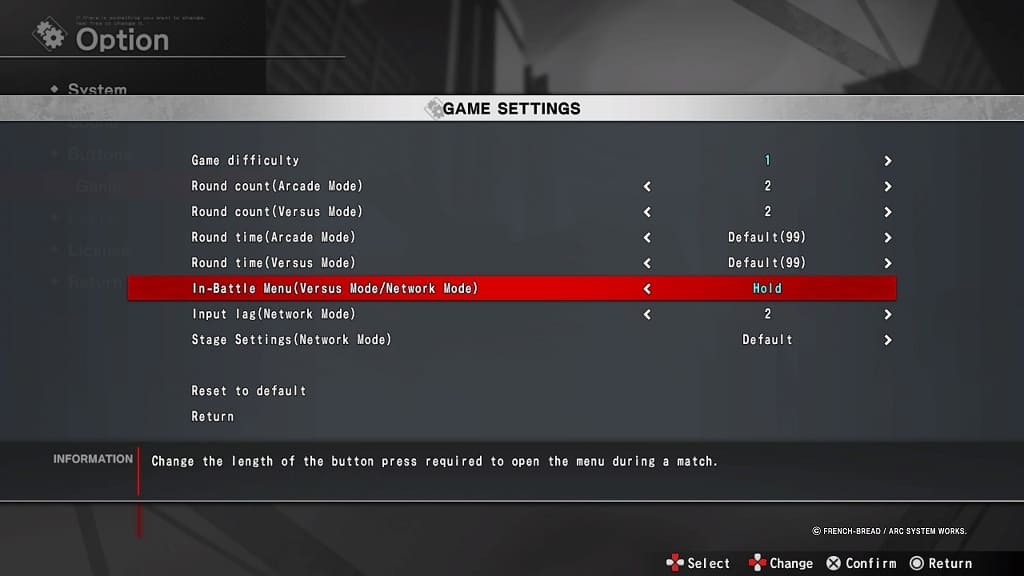
3. In the Game Settings menu, move the cursor down to In-Battle Menu (Versus Mode/Network Mode). You should see the following description appear at the bottom:

Change the length of the button press required to open the menu during a match.

4. Make sure that the In-Battle Menu (Versus Mode/Network Mode) setting is set to On and then exit the Option menu.

To now pause during the middle of the match, you need to hold the pause button. If you quick press it instead, then the battle will keep going.

How to automatically skip intros in UNDER NIGHT IN-BIRTH II Sys:Celes

By default, UNDER NIGHT IN-BIRTH II Sys:Celes will play a short introduction at the start of every versus battle. To skip them, you have to press the Options button on the DualSense/DualShock 4 or the + button on the Nintendo Switch.

If you would rather set it so that the intro is automatically skipped for every versus match, then you can check out this guide at Seeking Tech to see how you can properly do so.

1. To start off, you need to select Option from the main menu.

2. Next, select System from the Option screen.

3. In System Settings, move the cursor down to Auto Skip Vs. Screen, which has the following description:

Toggle auto-skipping of pre-battle Vs. screens.

Make sure that it is set to On.

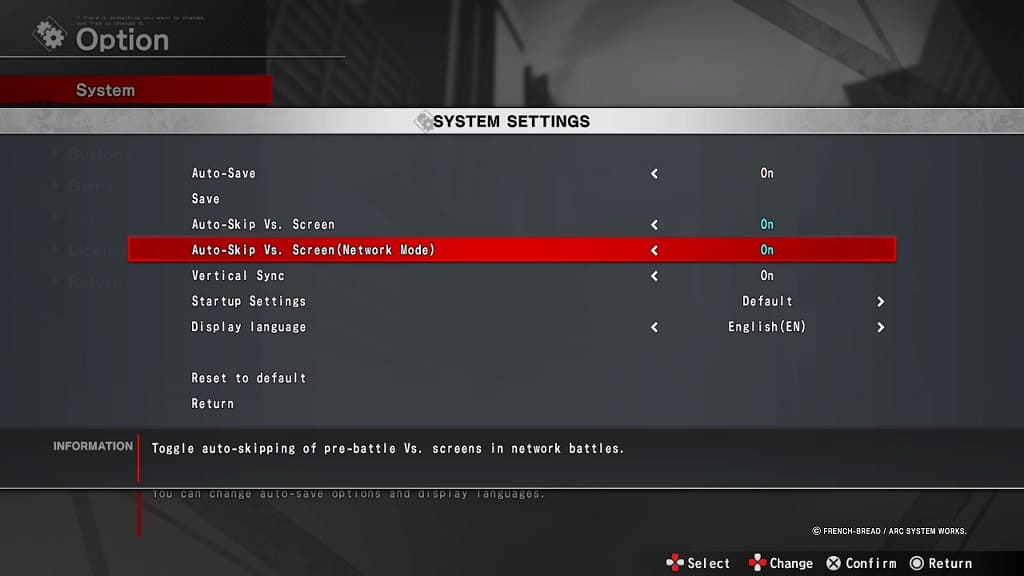
4. From the same screen, move the cursor down to Auto Skip Vs. Screen (Network Mode). You should see the following description:

Toggle auto-skipping of pre-battle Vs. Screens in network battles.

Make sure that Auto Skip Vs. Screen (Network Mode) is set to Off.

5. You can then exit the Options menu.

The next time you play a versus match offline or online, you should no longer see any introduction cut scenes.

How to fix Persona 5 Tactica HDR and brightness issues

You may find that Persona 5 Tactica may look off as the graphics may be too dark, too bright or seemed washed out. To see how you can fix these visual issues, you can take a look at this troubleshooting article from Seeking Tech.

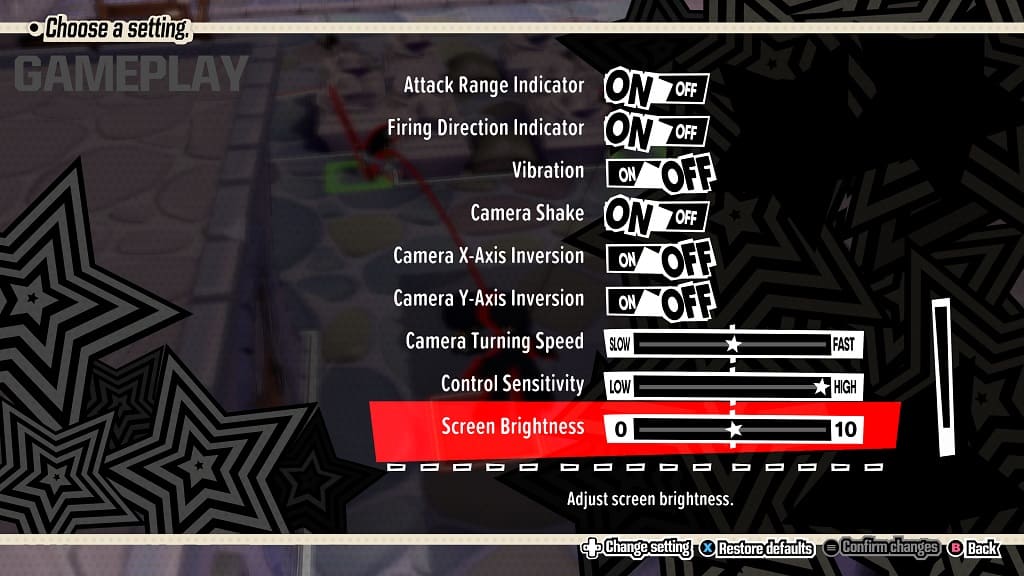
1. Start off by heading into the Settings menu and then selecting Gameplay Settings. From there, scroll down to the bottom to find the Screen Brightness slider.

Use this to adjust the in-game brightness output.

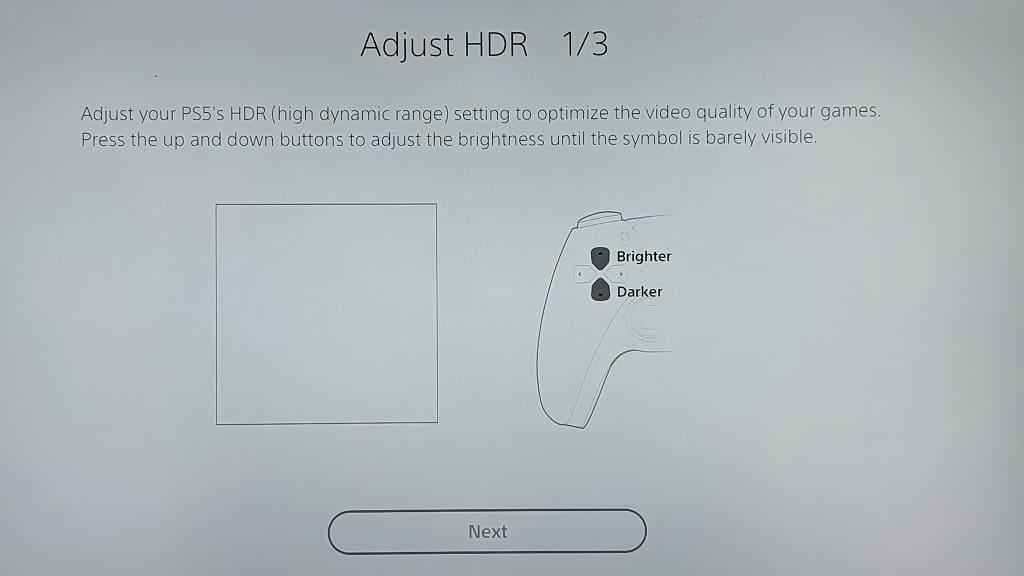
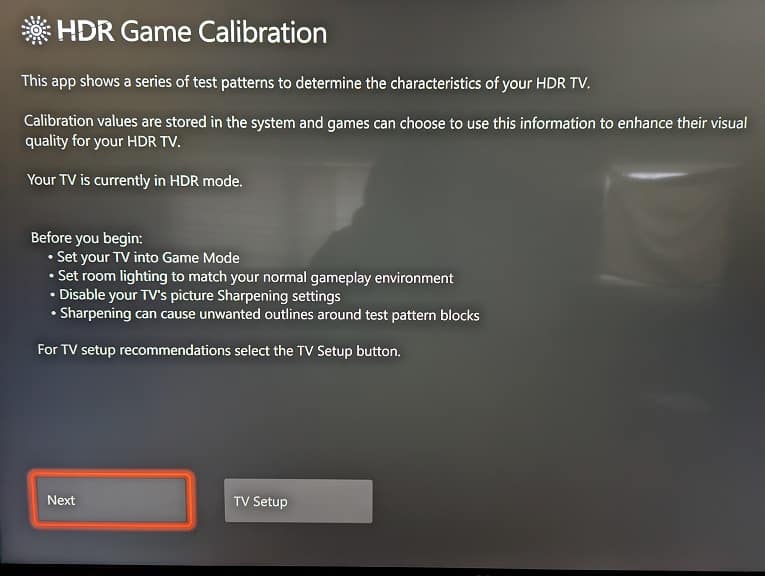
2. If you still get the game to look right, then you can try adjusting the HDR output on your console.

On the PS5, this can be done by going to Settings > Screen and Video > Video Output > Adjust HDR.

For the PS4, go to Settings > Sound and Screen > Video Output Settings > Adjust HDR.

If you are playing on Xbox One, Xbox Series S or Xbox Series X, go to Settings > General > TV & display options > Calibrate HDR for games.

3. Of course, you can also try adjusting the brightness, contrast and/or gamma levels of your television set or monitor.

4. You can also try playing Persona 5 Tatica in SDR to see if the game ends up looking better for you.

In order to do so, disable HDR as well as any SDR-to-HDR conversion features on your TV and gaming system.

How to change the voice language in Persona 5 Tactica

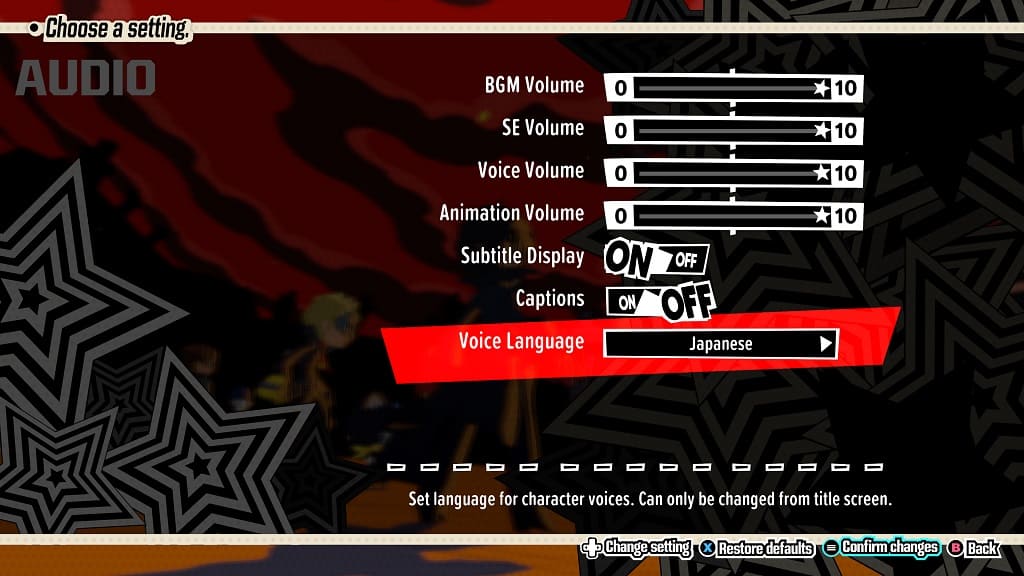
Persona 5 Tactica supports English and Japanese voice overs. To see how you can switch between the two, you can check out this tutorial from Seeking Tech.

1. If you haven’t done so already, you need to go to the title screen in the game. Otherwise, you won’t be able to change the voice acting language.

If you are currently playing, then you can bring up the pause screen and then select the Return to Title option.

2. From the title screen, select Settings.

3. Next, you need to select Audio Settings.

4. In Audio Settings, move the cursor down to Voice Language. It should have the following description:

Set language for character voices. Can only be changed from title screen.

Note: If this option is blocked out, then it indicates that you aren’t viewing the Settings > Audio Settings from the title screen.

5. Use the left analog or directional pad button to switch from English to Japanese or vice versa.

6. Confirm the voice language change by pressing the + button if you are playing with a Nintendo Switch controller, Options button on a PlayStation controller or menu button on an Xbox controller.

When you start playing Persona 5 Tactica, you should be able to hear the new language when a character speaks.

How to adjust the movement sensitivity in Persona 5 Tactica

When playing Persona 5 Tactica, you may notice that moving your controller around feel a little too loose or slippery. To see how you can adjust the movement controls in this game, you can check out this guide from Seeking Tech.

1. To begin, open up the Settings menu.

2. In Settings, navigate over to Gameplay Settings.

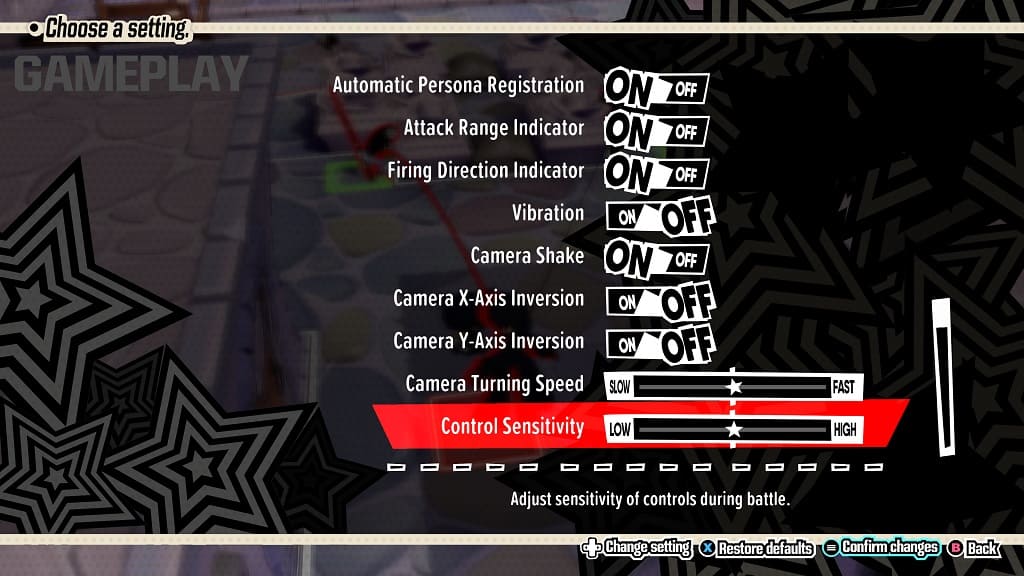
3. Next, scroll all the way down and then move the menu cursor to Control Sensitivity. You should see the following description:

Adjust sensitivity of controls during battle.

4. To make the movement feel weightier, move the slider to the left. Alternatively, you can also move the slider to the right to increase the sensitivity.

5. Once you are done, confirm your edits by pressing the + button on Switch, Options button on PlayStation or Menu button on Xbox.

6. Test out the next sensitivity setting in a battle. If it still does not feel quite right, then you can return to Settings > Gameplay Settings > Control Sensitivity to re-adjust.

How to invert the camera and change its speed in Persona 5 Tactica

You can adjust the camera angle with the right analog stick in Persona 5 Tactica. By default, the controls are non-inverted; so, the camera will follow the same direction as where you are pointing with the analog.

To see how you can invert the camera movement, as well as change its turning speed, you can take a look at this tutorial from Seeking Tech.

1. Open the Settings menu in Tactica if you haven’t done so already.

2. From there, go into Gameplay Settings.

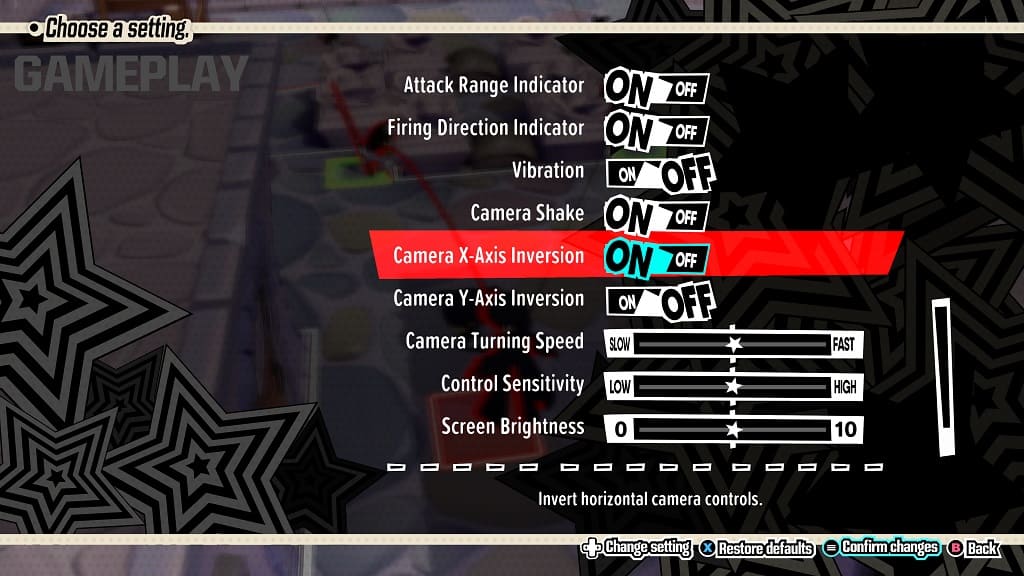
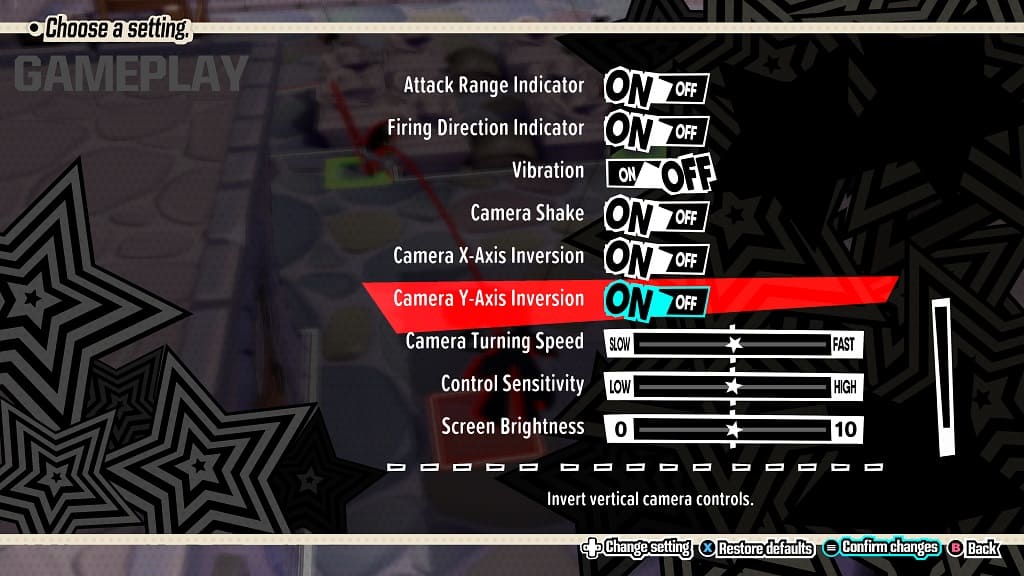
3. You should see the Camera X-Axis Inversion setting.

When turned on, the camera will turn to the left when you move the right analog to the right side and turn to the right when the analog is tilted to the left.

4. You should also find the Camera Y-Axis Inversion setting.

When enabled, the camera will tilt upwards when you move the right analog down and downwards when you title the right analog up.

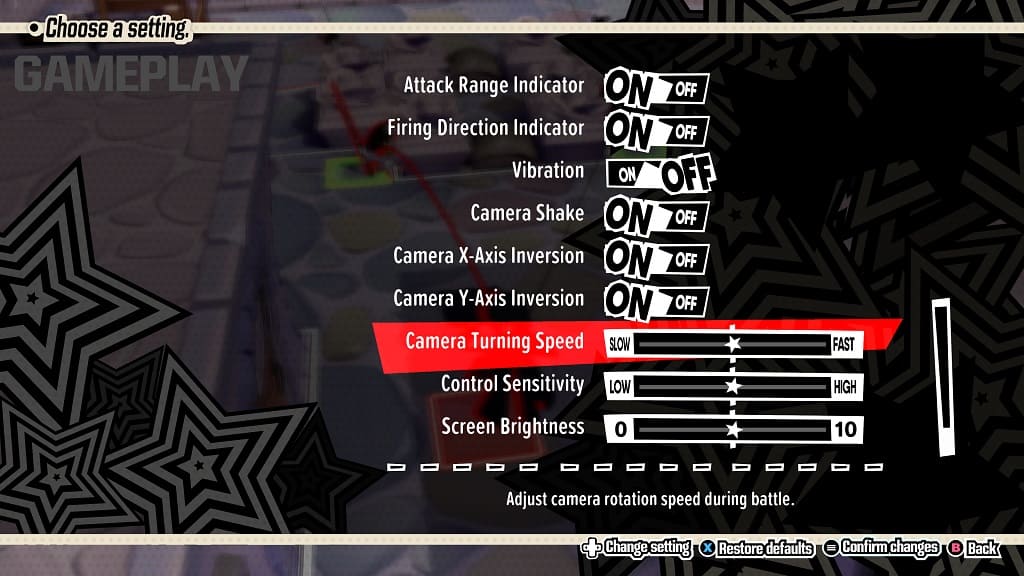
5. From the same Gameplay Settings screen, you should also find the Camera Turning Speed. This slider will adjust how sensitive the camera movement will be when you tilt the right analog stick.

6. Once you are done adjusting the camera settings, press the + button on the Nintendo Switch controller, Options button on the PlayStation controller or Menu button on the Xbox controller to save and apply the changes.

How to turn off camera shake in Persona 5 Tactica

The Persona 5 Tactica in-game camera will shake in some situations. If you don’t like this effect, then you can check out this tutorial from Seeking Tech.

1. Make your way to the Settings screen in this turn-based strategy game if you aren’t there already.

2. Inside of Settings, select Gameplay Settings.

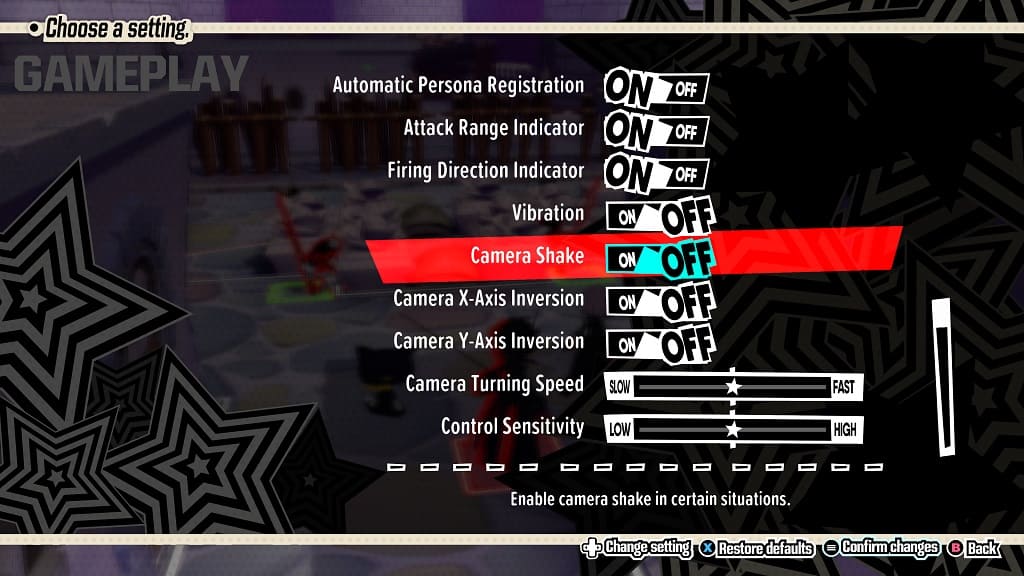
3. On the next screen, move the cursor down to Camera Shake, which should be showing the following description:

Enable camera shake in certain situations.

4. Use the left analog or directional pad buttons to set the Camera Shake settings to Off.

5. Save and apply the change. This can be done by pressing the Options button on PlayStation, + button on Switch or Menu button on Xbox.

The camera shaking should now be disabled in P5T.

How to enable vibration in Persona 5 Tactica

You may notice that your controller isn’t shaking while playing Persona 5 Tactica. If you prefer the extra layer of immersion, then you can check out this guide at Seeking Tech to see how you can turn on vibrations.

1. For the first step, you need to make your way to the Settings menu. This can be done from the title screen, pause screen during combat or from the Prep > System menu in the hideout.

2. From Settings, select Gameplay Settings.

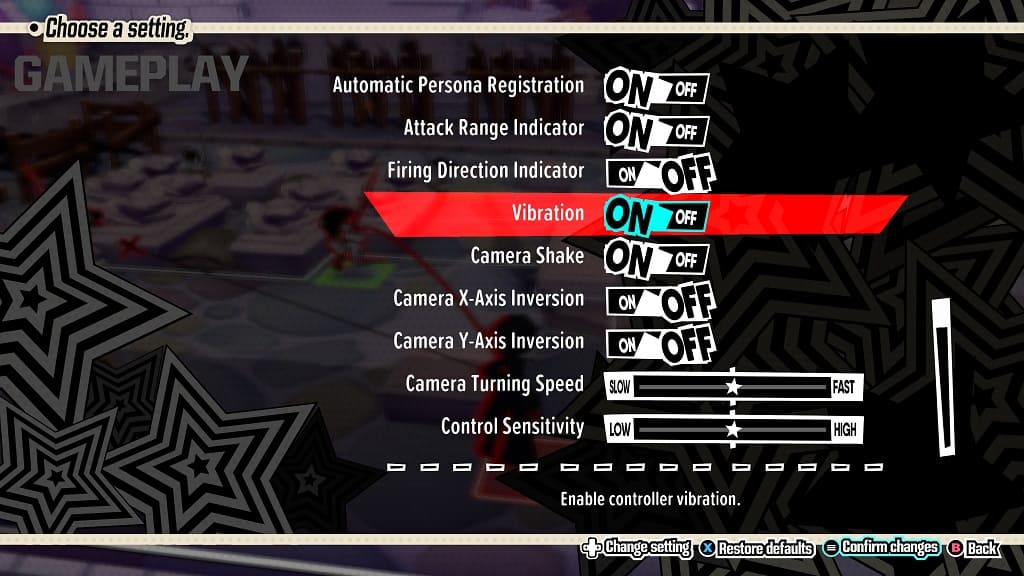
3. Next, move the cursor down to Vibration, which is set to Off by default.

4. Use the analog stick or directional pad to change the setting to On.

5. Confirm and apply by pressing the + button on the Switch pad, Options button on the PlayStation pad or Menu button on the Xbox pad.

6. You can then exit out of the Settings menu.

When you start playing Persona 5 Tactica again, you should be able to feel haptic feedback on your controller.