How to use Final Fantasy Pixel Remaster auto battle on Switch and PS4

The Nintendo Switch and PlayStation 4 versions of Final Fantasy, Final Fantasy II, Final Fantasy III, Final Fantasy IV, Final Fantasy V and Final Fantasy VI added automatic battles. To see how you can enable, as well as use this feature, which can be very helpful when grinding or during very long fights, you can take a look at this tutorial from Seeking Tech.

How to enable auto battle in Final Fantasy Pixel Remaster

In order to enable auto battle during fights in these Final Fantasy Pixel Remaster titles, you can simply press the Y button if you are playing on the Switch, Switch Lite or Switch OLED in encounters. On the PlayStation 4 or PlayStation 5, you need to press the Square button on the DualShock 4 or DualSense.

You can also turn the auto battle feature on permanently by taking the following steps:

1. First off, make sure that you are outside of battle and exploring the field.

2. Next, you need to open the in-game menu by pressing the X button on the Nintendo Switch or Square button on PlayStation.

3. From the in-game menu, you need to select Configuration.

4. Afterwards, move the cursor to the Continue Auto Battle setting, which has the following description:

  • “Set auto-battle to remain on in the next battle.”

5. Set the Continue Auto Battle setting to On to enable this feature.

How does auto battle work?

By turning on the auto battle feature, your characters will repeat the last actions you previously assigned them.

For instance, if you command one of the character to use the cure spell, the other to use a magic attack and the rest of the party members to physically attack the enemies, then each individuals will repeat the same action over and over again unless you manually disable the feature by pressing the Y button on the Nintendo Switch or Square button on PlayStation during the fight.

By enabling auto battle, you will also speed up the encounters significantly.

If you want to level up and/or gain money quickly in the new versions of Final Fantasy, Final Fantasy 2, Final Fantasy 3, Final Fantasy 4, Final Fantasy 5 and Final Fantasy 6, then you can use auto battle to go along with the boosted cheats in order to make the grind a lot faster.

Of course, auto battle is also very helpful if you want to go through the game as fast as possible by doing a speed run.

How to disable Final Fantasy Pixel Remaster random battles on Switch and PS4

The Final Fantasy Pixel Remaster games on the Nintendo Switch and PlayStation 4 feature random battles. If you find that these frequent encounters are annoying, especially if you feel lost exploring the dungeon or world map, then you can take a look at this tutorial from Seeking Tech to see how you can turn off these fights.

Method #1

Square Enix included a quick shortcut if you want to turn off encounters without using the in-game menu in Final Fantasy, Final Fantasy II, Final Fantasy III, Final Fantasy IV, Final Fantasy V and Final Fantasy VI.

In order to do so, you simply press down on the right analog stick if you are playing these games on the Nintendo Switch, Nintendo Switch Lite or Nintendo Switch OLED.

You should press the R3 button to disable random encounters on the PlayStation 4, PlayStation 4 Pro, PlayStation 4 or PlayStation 5 Digital Edition console.

After pressing down on the right analog stick or R3 button, you should see a message appear on screen that says Encounters Off. This indicates that you should no longer be fighting in any random battles.

If you are seeing the Encounters On message instead, then you need to press the same button again if you want to turn off these fights.

Method #2

For the second method, you need to open the in-game menu any time you are outside of battle and exploring the field. You can do so by pressing the X button on Switch or Triangle button on PS4/PS5.

Afterwards, you need to head over to the Configuration section. From there, you should scroll down and then select Boost. Finally, you can set Encounters to Off from the Boost screen.


It is important to note that, unlike the remasters of Final Fantasy VII, VIII and IX, the remastered versions of the first six games of the series do not offer any battle cheats like invincibility.

As a result, you may need to fight some of the random encounters in order to gain enough experience points, as well as Gil and other points, in order to level up to an appropriate level to have a chance in the tougher mandatory boss fights.

Thankfully, you can use the aforementioned Boost menu to significantly increase the EXP, Gil and the other awards by winning an encounter.

These cheats should make grinding in the Switch and PS4 versions of Final Fantasy, Final Fantasy 2, Final Fantasy 3, Final Fantasy 4, Final Fantasy 5 and Final Fantasy 6 a lot easier.

How to change the Final Fantasy Pixel Remaster font on Switch and PS4

When the Final Fantasy Pixel Remaster versions of the first six FF titles came out for smartphones and PC, many fans of the series did not like the new font. Thankfully, the Nintendo Switch and PlayStation 4 versions of these games added the ability to switch to a different font style that blends in better with the 2D pixelated graphics of these classic titles.

You can check out this tutorial at Seeking Tech to see how you can change the font in the remastered versions of Final Fantasy, Final Fantasy II, Final Fantasy III, Final Fantasy IV, Final Fantasy V and Final Fantasy VI.

Before we begin, it is important to note that this guide is based on the Nintendo Switch and PlayStation 4 versions of Final Fantasy Pixel Remaster as the new font was added to the console releases. For the smartphone and PC ports, you have to wait until Square Enix releases a new patch to change the font style. With that said, you are able to mod the game on computer to change it yourself if you don’t feel like waiting for an official solution.

1. For the first step, you need to open the Configuration menu, which can be done from the title screen.

If you are actively playing the game, then you first need to bring up the in-game menu before you can head over to the Configuration menu. To open the in-game menu, you need to press the X button on Nintendo Switch or Triangle button on PS4/PS5 when you are moving around in the field.

2. In the Configuration menu, move the cursor to Font Type, which should have the following description if you are viewing it from the in-game menu:

  • “Set the game’s text font.”

3. By default, the Font Type is set to Modernized. If you don’t like how the text looks, then you can change this setting to Classic.

4. If you make the change from the in-game menu, then you will see a pop-up message saying the following:

  • “Classic. Apply the Settings change?”

Here, you need to select the Yes option.

5. The game will then re-load with the new text style.

The Classic font is more pixelated, which complements the 2D pixelated graphics of Final Fantasy, Final Fantasy 2, Final Fantasy 3, Final Fantasy 4, Final Fantasy 5 and Final Fantasy 6.

If you don’t like the Classic font, then you can change the Font Type back to Modernized from the aforementioned Configuration menu.

How to enable Final Fantasy Pixel Remaster boost features on Switch and PS4

The Final Fantasy Pixel Remaster versions of the first six games in the FF series on the Nintendo Switch and PlayStation 4 feature a number of boosting features that make the games a lot easier and less of a grind to play through.

To see how you can enable these cheats, you can take a look at this tutorial from Seeking Tech.

1. For the first step, you need to bring up the in-game menu while playing Final Fantasy, Final Fantasy II, Final Fantasy III, Final Fantasy IV, Final Fantasy V or Final Fantasy VI.

If you are playing the game on the Nintendo Switch, you need to press the X button when exploring. On the PlayStation 4 or PlayStation 5, you need to be pressing the Triangle button.

2. Next, you need to select Configuration from the in-game menu.

3. After getting to the Configuration menu, scroll down the screen and then select Boost, which should have the following description:

  • “Change the balance for a variety of game settings. Please note that this may have an affect on progression through the game.”

4. Depending on the game you are playing, the Boost menu offers different cheats.

For all six games, you will be able to turn off random encounters. You can also increase the rate at which you earn experience points (with the exception of FF2) and Gil. For some titles, you can also boost the number of other points.

As we stated above, using boosts may stop you from progressing through the game. This warning is most likely due to turning off encounters. So, if you seem to be stuck, then you can try re-enabling encounters to see if you are able to progress.

You can find a breakdown of the available cheats for each of the Final Fantasy Pixel Remaster games below:

Final Fantasy:

  • Encounters
  • EXP
  • Gil

Final Fantasy 2:

  • Encounters
  • Gil
  • Weapon Skill Boost
  • Magic Skill Boost
  • Attribute Boost
  • Compensatory HP

Final Fantasy 3:

  • Encounters
  • EXP
  • Gil

Final Fantasy 4:

  • Encounters
  • EXP
  • Gil

Final Fantasy 5:

  • Encounters
  • EXP
  • Gil
  • ABP

Final Fantasy 6:

  • Encounters
  • EXP
  • Gil
  • Magic AP

These boosts can be changed from 1x (which is the normal rate) to 2x or 4x. You can also reduce the rate of points and money to half or even none.

5. Once you are done enabling these cheats, you can resume your current progress with the boosts enabled.

If you are playing on PlayStation 4 or PlayStation 5, then it may be important to note that using boosts won’t disable the ability to earn trophies.

How to add scan lines to Final Fantasy Pixel Remaster on Switch and PS4

Final Fantasy, Final Fantasy II, Final Fantasy III, Final Fantasy IV, Final Fantasy V and Final Fantasy VI were all remastered for the Nintendo Switch and PlayStation 4. All of these classic Japanese role-playing games were originally designed for CRT televisions; as a result, the pixels may not look like what you previously remembered if you play them years ago.

Thankfully, the development team at Square Enix did add a scan line filter graphical option that you can enable. To find out how you can change the visuals for all six of these games from the Final Fantasy Pixel Remaster collection, you can take a look at this tutorial from Seeking Tech.

1. For the first step, you need to open the in-game menu while playing Final Fantasy, Final Fantasy 2, Final Fantasy 3, Final Fantasy 4, Final Fantasy 5 or Final Fantasy 6.

You can do so by pressing the X button on the Nintendo Switch when you are exploring the field. If you are playing on PlayStation 4 or PlayStation 5, then you need to press the Triangle button.

2. Once you open the in-game menu, you need to select Configuration.

3. From the Configuration, scroll down and then move the cursor to Graphic Display, which should have the following description:

  • “Adjust the look of the on-screen graphics.”

4. By default, the setting is set to Standard.

In order to add scan lines, you will need to change Graphic Display to Classic.

5. Adding scan lines may also change the brightness display.

If you feel that the game has become too dark or too bright, then you can return to the Configuration screen and then move the cursor down to the Brightness slider. Afterwards, you will be able to re-adjust the brightness level.

If you don’t like the look of the scan lines filter, then you can change the Graphic Display setting from the Configuration menu back to Standard.

How to change the music in Final Fantasy Pixel Remaster on Switch and PS4

The Nintendo Switch and PlayStation 4 versions of the Final Fantasy Pixel Remaster games come with the ability to switch from the rearranged soundtrack to the classic soundtrack.

You can check out this tutorial at Seeking Tech to see how you can change from the new background music to the old one or vice versa.

1. To start off, make sure you open Final Fantasy, Final Fantasy II, Final Fantasy III, Final Fantasy IV, Final Fantasy V or Final Fantasy VI on your game console if you haven’t done so already.

The PS4 versions of these games can be played on the PlayStation 4, PlayStation 4 Pro, PlayStation 5 or PlayStation 5 Digital Edition systems. The Switch versions can be played on the standard Nintendo Switch as well as the Switch Lite and Switch OLED models.

2. Next, you need to head over to the Configuration menu in the game. You can do so from the main menu.

If you are currently playing the game, and aren’t engaged in a battle, then you can press the X button on the Nintendo Switch or Triangle button on PlayStation to open the in-game menu. From there, you should be able to head into Configuration.

3. From the Configuration menu, move the cursor until you get to the BGM Type, which should have the following description if you are viewing it from the in-game menu:

  • “Change the type of background music. Certain songs are only available as arrangements.”

For the uninformed, BGM stands for background music.

4. By default, the BGM Type is set to Arrangement, which offers new versions for these classic tracks.

If you want to hear the original songs instead, then you need to change this setting to Classic.

5. Once you are done making the change to the OST playback, you can exit the Configuration menu and then return to your game.

How to find the Final Fantasy I–VI Bundle on the PlayStation Store of PS5

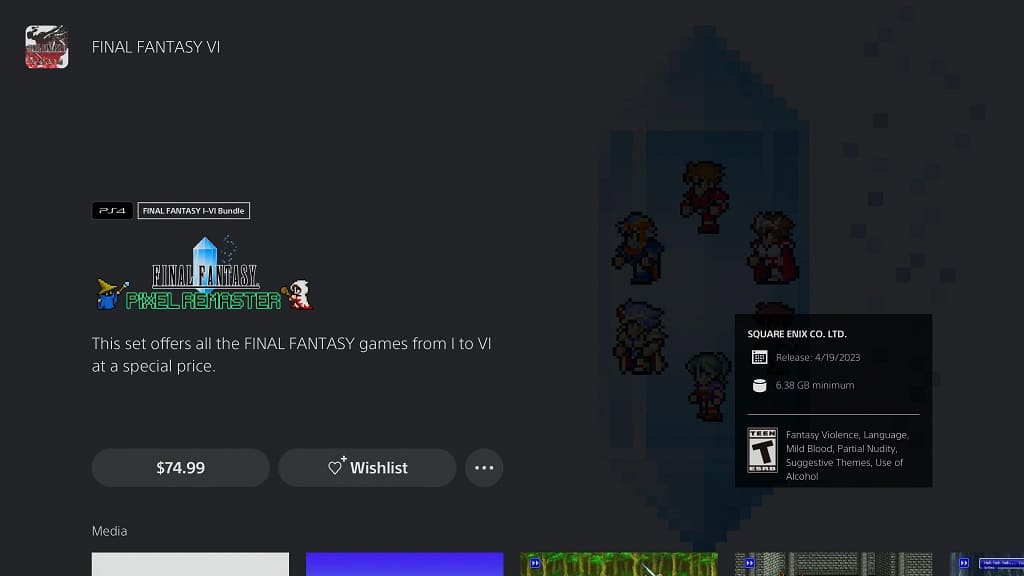
Although Square Enix only released the pixel remasters for Final Fantasy I, II, III, IV, V and VI on the PlayStation 4, these titles can also be bought and played on the PlayStation 5 and PlayStation 5 Digital Edition consoles.

In addition to being available as separate purchases, you can buy the games as part of a bundle. This pack is designed to save you a little bit of money when compared to buying all six titles individually.

If you have a hard time finding the Final Fantasy I–VI Bundle on the PlayStation Store of your PS5, then you can check out this tutorial from Seeking Tech.

1. To start off, you need to open the PlayStation Store App of your console if you haven’t done so already.

2. Inside of the application, press the triangle button on the controller to quickly move the cursor over to the search option. Select it to open the on-screen keyboard.

3. In the on-screen keyboard, we recommend searching for the term “Final Fantasy Pixel Remaster.”

4. If you can’t find the Final Fantasy I–VI Bundle, then you can select any of the following from the listing:

  • Final Fantasy
  • Final Fantasy II
  • Final Fantasy III
  • Final Fantasy IV
  • Final Fantasy V
  • Final Fantasy VI

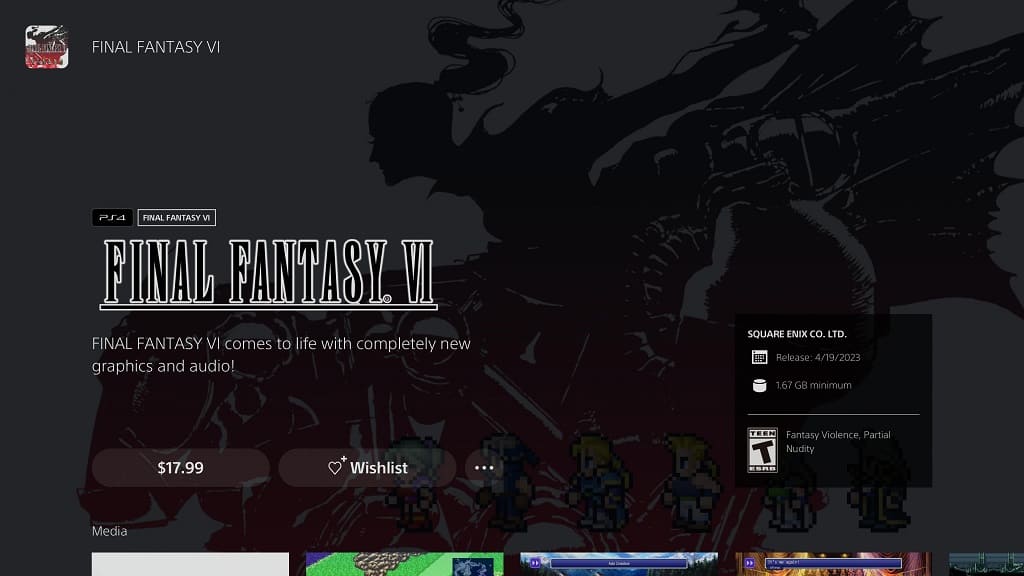
In our case, we ended up selecting Final Fantasy VI.

5. On the product page for the individual pixel remastered Final Fantasy game, you need to select the three dots icon.

6. You should then be able to select the Final Fantasy I–VI Bundle from the small pop-up window.

7. If done correctly, you should now be in the Final Fantasy I–VI Bundle product page, where you can buy the money-saving pack.

8. If you still aren’t able to locate the bundle, then you can use the web browser version of the PlayStation Store. After signing into your PlayStation Network account, you can then visit the Final Fantasy I–VI Bundle product page.

How to disable Minecraft Legends achievements on Xbox

When playing Minecraft Legends on the Xbox One, Xbox One S, Xbox One X, Xbox Series S or Xbox Series X, you may get a notification saying that you earn an achievement. If you find that this pop-up message is distracting you, then you can take a look at this tutorial to see how you can disable this feature.

Before we begin, it is important to note that, while you can’t completely turn off Minecraft Legends achievements, you are able to disable its pop-up notifications that appear during gameplay. In order to do so, you need to take the following steps:

1. To start off, you should head over to the Settings menu of your console. You can find the Settings option in the home menu of the dashboard.

If you are currently playing the real-time strategy game, then you can press the Xbox button to open the Guide menu, which is where you can select Settings from the Profile & System tab.

2. After getting to Settings, move to the left column menu and then select Preferences.

3. On the right side of the same screen, you then need to select Notifications.

4. Once you get to the Preferences – Notifications menu, select Xbox Notifications.

5. From the Preferences – Xbox Notifications menu, select Achievements.

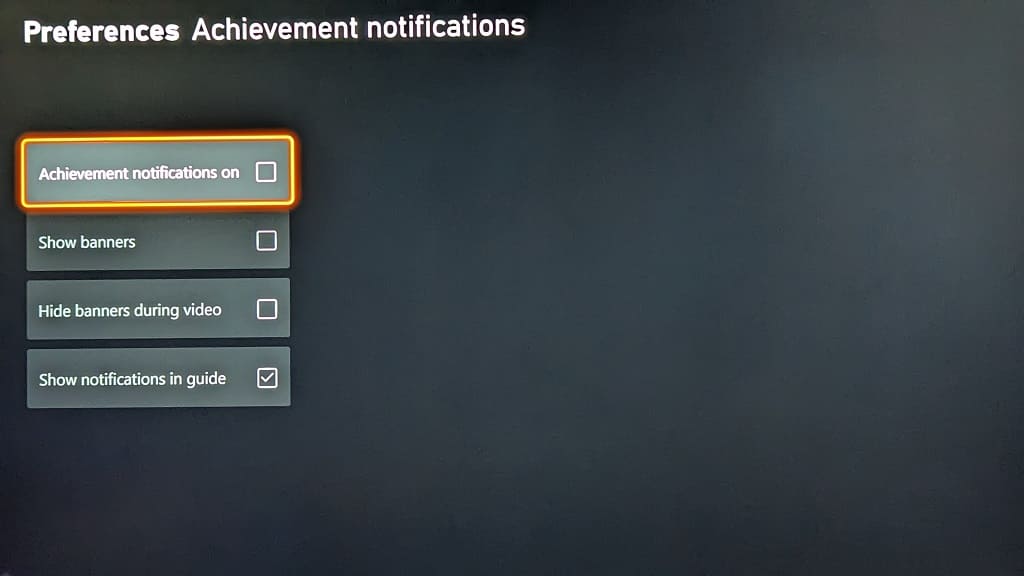
6. After getting to the Preferences – Achievement Notifications menu, make sure that the “Achievement Notifications On” and “Show Banners” settings are deselected.

If you would like, you can also deselect the “Show Notifications in Guide” setting if you don’t want to get a message about earning an achievement when you open the Guide menu.

7. Once you are done making the changes, you should back out of the Settings menu of your console and then resume playing Minecraft Legends.

You should no longer see any pop-up notifications when you earn an achievement in this game.

Keep in mind that, by disabling achievement notifications on a system level, you will be disabling the pop-up messages for all other games. So, if you want to re-enable these notifications in the future, you can do so by returning to Settings > Preferences > Notifications > Xbox Notifications > Achievements menu.

How to fix Minecraft Legends ‘connection lost’ error

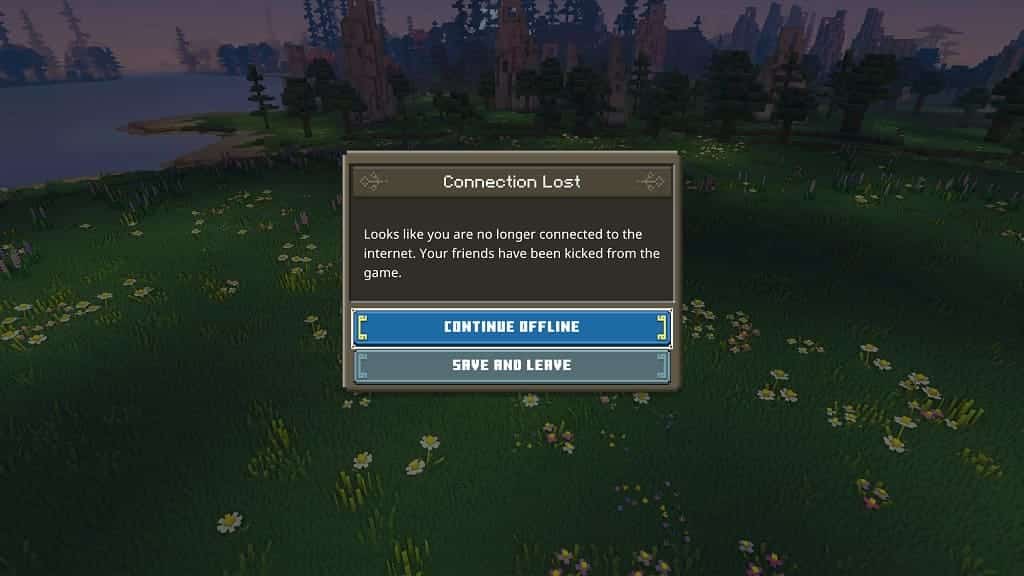
When playing online with others in Minecraft Legends, you may end up getting a “Connection Lost” message. You can take a look at this troubleshooting article from Seeking Tech to see how you potentially fix these connection issues.

1. For the first step, we recommend checking to see if the servers are working normally.

If you are playing the game on Nintendo Switch, PlayStation or Xbox, then you should find whether or not some or part of the Nintendo Switch Online, PlayStation Network or Xbox Liver servers are offline.

On the Xbox One, Xbox One S, Xbox One X, Xbox Series S and Xbox Series X, for instance, you can go to the console’s Settings menu and then select General > Network. You should then find the Xbox Live server status on the right side of the screen.

Of course, you should also check if the Minecraft Legends servers are working at full throttle as well. If there is an issue, you can usually find an announcement on the official Minecraft social media channels.

If there appears to be some server issues, then you can’t do much aside from waiting until things get fixed on the other end if you want to play this game online.

2. If the servers appear to be working normally, then there may be an issue with your internet connection.

To start off, you should make sure that there is nothing wrong with the internet service.

If the ISP is working fine, then you can try pausing or stopping any concurrent downloads and/or streams in order to free up more bandwidth for playing Minecraft Legends. If possible, you can also try using a wired Ethernet instead of Wi-Fi.

You may also want to consider power-cycling your networking equipment. To do so, turn off your modem and routers. Afterwards, wait for several minutes before turning them on again. Once you reestablish your connection to the Internet, try to play Minecraft Legends online again to see if you are still losing your connection.

3. If you put Minecraft Legends in a suspended state, then you will most likely get disconnected from your online lobby. So, if you need to stop playing the game for a few minutes, it is a good idea to just leave it running instead of putting your system in sleep mode and/or going back to the system menus.

By doing so, you should be able to prevent the connection lost errors.

How to fix Minecraft Legends ‘connecting to your account’ error

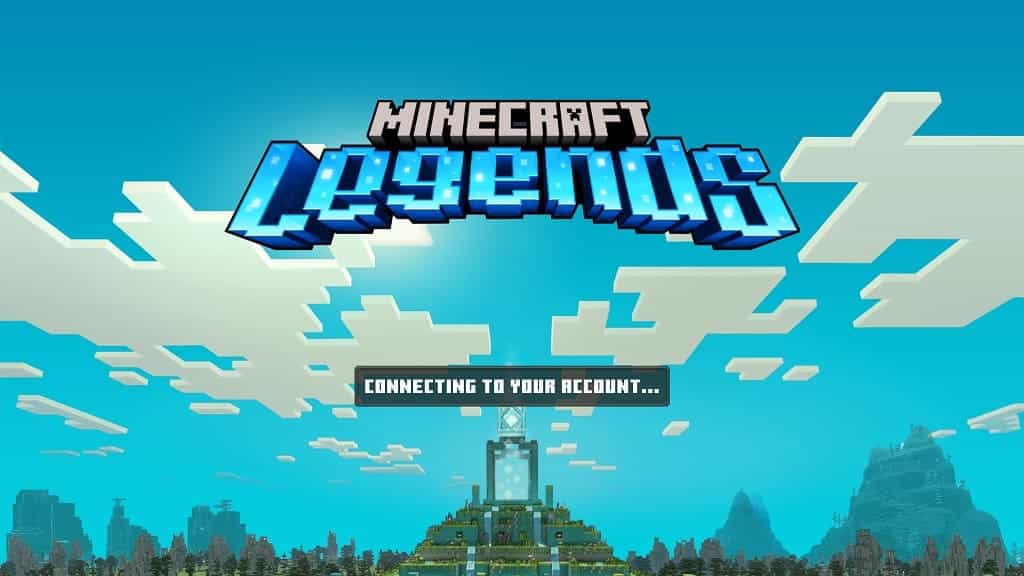
When booting up Minecraft Legends, the game may stay stuck loading at the splash screen with the following message:

  • “Connecting to your account…”

To see how you can potentially fix this error, you can take a look at this troubleshooting article from Seeking Tech.

1. The first solution you can try is to press the A button if you are playing on Xbox (including the Xbox One, Xbox One S, Xbox One X, Xbox Series S and Xbox Series X), B button on Nintendo Switch or X button on PlayStation (including the PS4, PS4 Pro, PS5 and PS5 Digital Edition).

By doing so, the screen should flicker and you may be able to bypass the “connecting to your account…” message to load into the main menu.

You may need to press the same button multiple times if pressing it once did not get you pass the error.

2. If the first potential fix does not work, then there may be a server issue. We recommend taking a look at the official Minecraft media channels, such as its Twitter page, to see if there are any current problems when playing this game online.

If there are, then we suggest waiting until the server problems get fixed before trying to boot up Minecraft Legends.

3. If the servers appear to be fine, then the error message may be related to the internet connection on your end.

If you think that this is the case, then make sure that you have a strong enough Wi-Fi connection if you are connecting your system to the internet wirelessly. If possible, we recommend using a wired Ethernet LAN connection as it should be faster and a lot more stable.

If you are downloading and/or streaming at the same time as trying to play Minecraft Legends, then you may not have enough bandwidth available. Therefore, you can try pausing and cancelling other online activities.

Power cycling your home network may also help. You can do so by taking the following steps:

  • Turn off your game system.
  • Turn off your modem and all of your routers.
  • Wait for at least two minutes.
  • Turn on your modem and routers.
  • Wait until your networking devices have re-connected to your internet service provider.
  • Turn on your game system.
  • Re-launch Minecraft Legends to see if you are able to get past the “Connecting to your account…” screen.