Recommended U8H TV settings for PS5, Xbox Series X and S

The U8H is a mid-range Mini-LED ULED that launched in 2022. You can follow this guide at Seeking Tech to see which recommended settings you should use for this TV when it comes to playing PlayStation 5, Xbox Series X and Xbox Series S games.

This article should be applicable to the following three screen sizes from the U8H series:

  • 55″ Hisense U8H Mini-LED ULED 4K Smart Google TV (55U8H)
  • 65” Hisense U8H Mini-LED ULED 4K Smart Google TV (65U8H)
  • 75” Hisense U8H Mini-LED ULED 4K Smart Google TV (75U8H)

Supported PS5 Features for U8H

With the U8H, you will be able to play PlayStation 5 games at up to 120 frames per second with HDR10 and Variable Refresh Rate.

Supported Xbox Series X and S features for U8H

This Mini-LED ULED is also capable of playing Xbox Series X and S games at a maximum of 120 fps with HDR10 and Variable Refresh Rate. This TV also supports the Dolby Vision format.

How to optimize your U8H for gaming

1. For the first step, we recommend that you update your U8H to the latest firmware if you haven’t done so already as a new update may help improve performance.

You can update by pressing the gear cog button on the TV remote and then selecting Settings > System > About > System Update.

2. With your U8H updated, the next step is to make sure you properly connect your console to the HDMI port of the TV.

The PlayStation 5, PlayStation 5 Digital Edition and Xbox Series X all come with a HDMI 2.1 cable included in the box. You need to use it to connect these consoles to either the HDMI 3 or HDMI 4 port of the Mini-LED ULED.

While the Xbox Series S also supports HDMI 2.1, it only comes with a HDMI 2.0 cable. So, if you decide to go with the HDMI 2.0 connection, then you can connect this system to any of the four HDMI ports of the U8H. You can also get a HDMI 2.1 cable and then connect the Series S to HDMI 3 or HDMI 4.

3. For the next step, you need to change the HDMI format.

To do so, start out by pressing the box button that has two lines inside of it on the U8H remote. In the menu, you then need to select the HDMI port that is connected to your gaming system. Finally, change the HDMI Format for the port to Enhanced Format.

4. You should also make sure that you are using the game mode on your U8H. You can do so by going to the Settings > Display & Sound > Picture > Picture Mode of your TV. Afterwards, make sure the picture mode has been set to Game.

With game mode turned on, it should automatically enable Variable Refresh Rate support on the television side.

5. You should also enable Instant Game Response as it will automatically turn on game mode when it detects that you are playing a game console.

You can find this setting on your Hisense U8H by going to Settings > Display & Sound > Picture > Advanced Settings > Instant Game Response.

6. To prevent the brightness output from constantly changing, we suggest that you turn off the Automatic Light Sensor feature of your screen.

You can do so by navigating over to the Settings > Display & Sound > Picture > Backlight > Automatic Light Sensor.

7. Although there are other settings that you can change on your U8H, we recommend that you don’t mess with them for now as doing so may cause you’re the video games to look off.

8. Once you are done getting your Mini-LED ULED ready for your console, you then need to make sure that you set up your console correctly.

In order to do so on the PlayStation 5 and PlayStation 5 Digital Edition, you first need to open the Settings menu and then head over to Screen and Video > Video Output.

From there, you need to set Resolution to 2160p (which is 4K) as well as HDR to On When Supported. You then need to have the following options set to Automatic:

  • VRR
  • 120 Hz
  • ALLM
  • 4K Transfer Rate
  • Deep Color Output
  • RGB Range

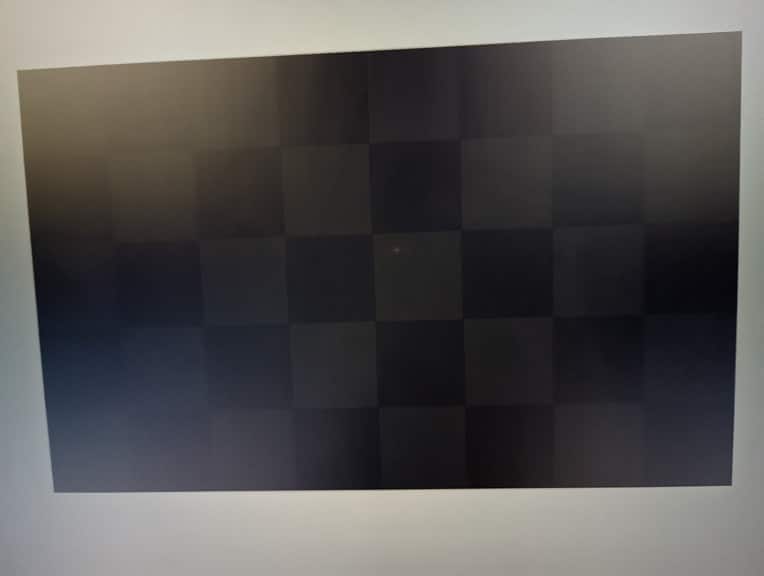
In the same Video Output menu, you should select Adjust HDR and then follow the steps that appear on the screen to calibrate the HDR output for your PS5 when it comes to the U8H.
If you have an Xbox Series X and Xbox Series S, then you can start by going into the Settings App and the navigate over to General > TV & Display Options > Video Modes.

From there, you need to enable Allow Auto-Low Latency Mode, Allow Variable Refresh Rate, Allow 4K, Allow HDR10, Allow Dolby Vision and Dolby Vision for Gaming.

Next, you need to return to General > TV & Display Options and make sure that Resolution is set to 4K. You then need to select Calibrate HDR and then follow the instructions that appear on screen for calibrating your console’s HDR brightness output for the Hisense U8H.

How to fix PS5 audio skipping and stuttering issues

When you are playing games on your PlayStation 5 or PlayStation 5 Digital Edition console, you may notice that the audio may skip or stutter. To see how you can potentially fix these sound issues, you can take a look at this troubleshooting guide from Seeking Tech.

If the listening device you are using is connected wirelessly to your PS5 or PS5 Digital Edition, then there may be some interference that could have caused the audio to skip and/or stutter.

This issue will occur even if you plugged a wired earphone, headphones or headset into the audio jack of the DualSense as the controller communicates wirelessly with the console.

1. For the first step, we recommend that you move the listening device closer to your console.

2. You should also make sure that there aren’t any physical objects that may be blocking the direct line of sight between your listening device and the PS5.

3. Other wireless in the same vicinity may be causing the audio to skip or stutter. These may include your smartphone, microwave and Wi-Fi router.

Therefore, you can try turning off these devices or move your PS5 and listening device to another room if possible.

4. If you are only hearing the audio skip or stutter when playing a specific game, then you can check to see if there is a new patch available.

In order to do so, you need to take the following steps:

  • Turn on your PlayStation 5 and then make sure you are connected to the Internet if you haven’t done so already.
  • Next, you need to go to the Home menu, which is where you can select which game to play. If you aren’t there currently, then you can simply press and hold the PS button on the DualSense to open it.
  • In the Home menu, hover over the game that you want to update. If the game you want to update doesn’t appear in the home menu, then you need to go to Game Library and then select the game. Once the game has launched, return to the Home menu.
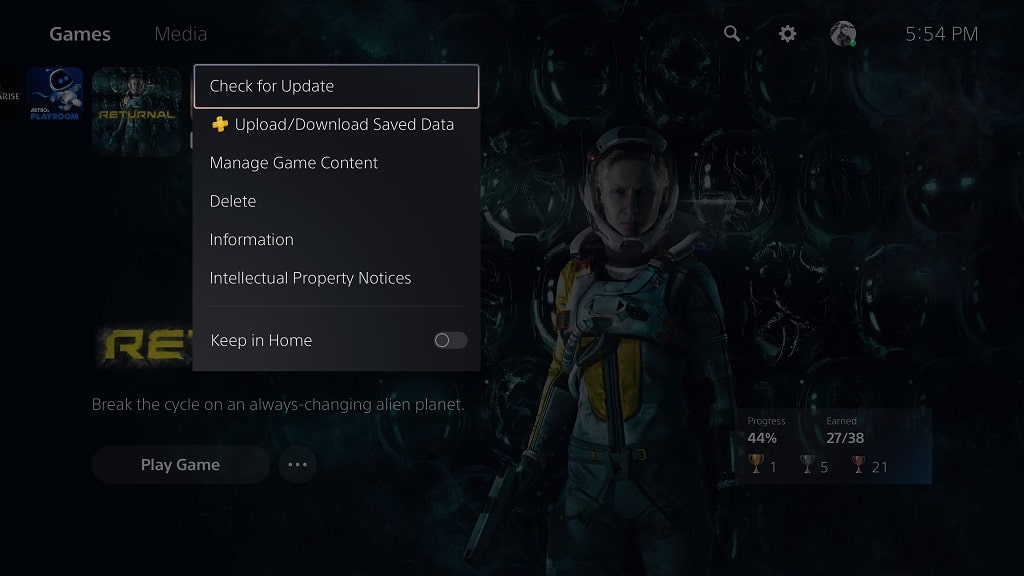
  • With the game highlighted, press the Options button on your controller.
  • You then need to select the Check for Update option from the pop-up menu.

5. It is a good idea to check to see if there is a new firmware update available for your PlayStation 5 or PlayStation 5 Digital Edition console.

In order to do so, you need to do the following:

  • From the Home menu, you need to head over to Settings, which you can do by selecting the gear icon located on the top right side of the screen.
  • After getting inside of the Settings menu, select System from the listing.
  • On the left column of the System menu, you need to select System Software.
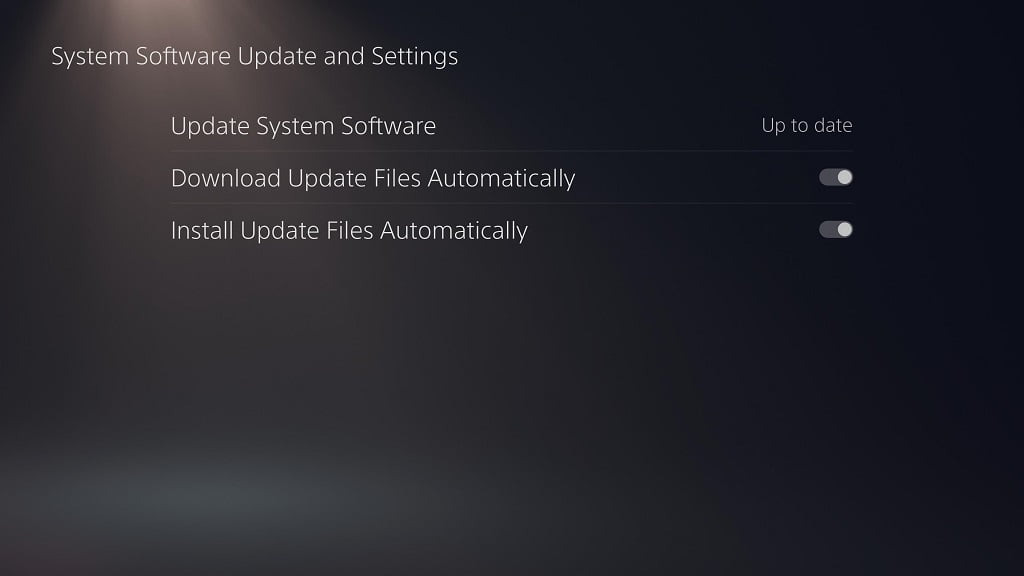
  • On the right side of the system menu, you then need to select System Software Update and Settings from the list.
  • In the System Software update and Settings, you should be able to see whether or not your console is up to date.

  • If there is a new version to download, then make sure you download and install it.

How to fix God of War Ragnarok HDR issues

When playing God of War Ragnarok with HDR enabled, you may notice that some scenes are overly dark while others may be a little too bright. The colors may also seem off as they may appear to be a little washed out.

To see how you can fix these visual issues on the PlayStation 5, PlayStation 5 Digital Edition, PlayStation 4 and PlayStation 4 Pro, you can check out this troubleshooting article from Seeking Tech.

1. The first step you can take is to make sure that you have HDR properly set up for your screen and console.

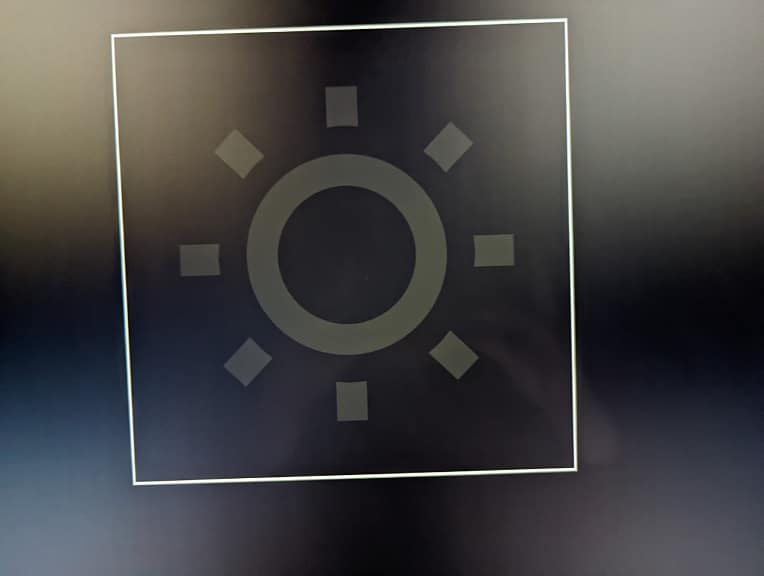
For the TV or monitor, try to search the Settings menu to see if there is an option to enable or disable HDR. If there is, then make sure you enable this feature.

You should then do the same for the game console. On the PS5 and PS5 Digital Edition system, you need to go to Settings > Screen and Video > Video Output. From this menu, you need to make sure you do the following:

  • Set HDR to On When Supported.
  • Set Deep Color Output to Automatic.
  • Set RGB to Automatic (Recommended).

For the PS4 and PS4 Pro, you need to head over to Settings > Sound and Screen > Video Output Settings. You then need to do the following:

  • Set RGB Range to Automatic (Recommended).
  • Set HDR to On When Supported.
  • Set Deep Color Output to Automatic.

2. You should also make sure that you properly calibrated the HDR brightness output of your game console.

For the PlayStation 5 and PlayStation 5 Digital Edition, you need to go to Settings > Screen and Video > Video Output and then select Adjust HDR. You then need to follow the on-screen instructions.

For the PlayStation 4 and PlayStation 4 Pro, you should head over to Settings > Sound and Screen > Video Output Settings and then select Adjust HDR. Afterwards, follow the on-screen steps.

3. If the HDR for God of War Ragnarok is still not working correctly, then you can try adjusting the aforementioned RGB settings on your console.

You can change it to Limited or Full and then test to see if you can get a better HDR picture.

4. Of course, you can also change the in-game brightness settings. In order to do so, you need to press the options button on your controller while playing the game.

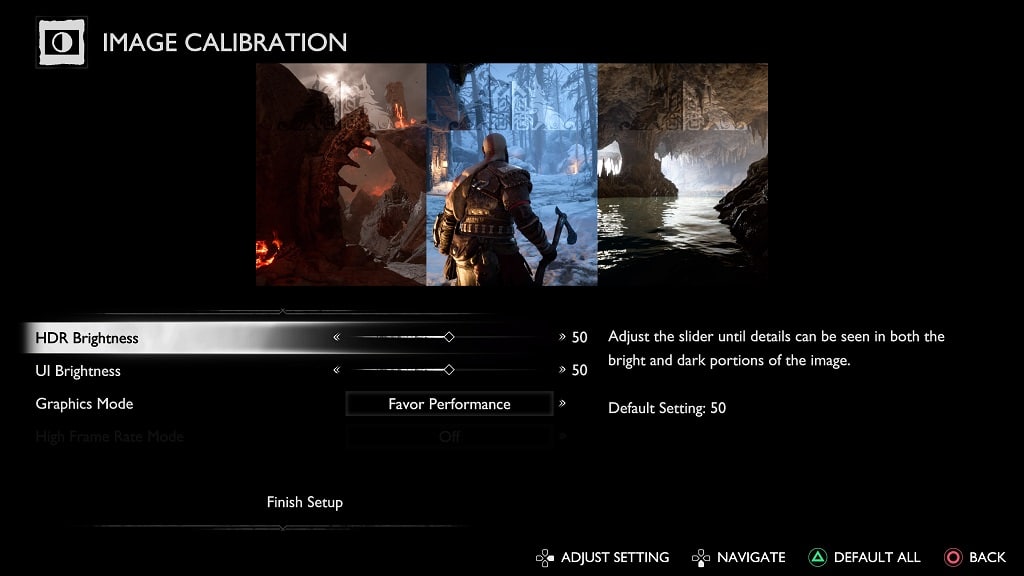
From the Options menu, you then need to go to Settings > Graphics & Camera > Screen Calibration. In the Image Calibration menu, you can adjust the slider for the HDR Brightness setting.

It is important to note that some television sets and monitors made not have good HDR performance. Therefore, you may have to use the aforementioned HDR Brightness setting frequently if some scenes appear to be overly bright or overly dark.

5. If you still can’t get HDR to display properly in God of War Ragnarok then we recommend that you play the game is SDR mode by disabling the HDR setting on your console.

How to fix God of War Ragnarok input lag issues

When playing God of War Ragnarok on your PlayStation 4, PlayStation 4 Pro, PlayStation 5 or PlayStation 5 Digital Edition system, you may notice some input lag. To see how you can potentially improve the latency, you can take a look at this article from Seeking Tech.

1. The first step you can take is to make sure that your console is directly connected to your television set or monitor.

If you use any splitter or HDMI pass-through devices in-between, then these may cause the extra delay between your button presses and the corresponding actions that appear on the screen.

2. We also recommend that you take a look at the Settings menu of your TV.

Most modern screens come with a Game Mode, Game Optimizer Mode or similarly named picture setting that will let you play videogames with low input lag.

So, if your TV has this mode available, you need to enable it if you haven’t done so already.

3. You should be able to reduce input lag by increasing the frame rate of God of War Ragnarok.

Therefore, we recommend playing the game in performance mode. In order to enable this mode, you can try taking the following steps:

  • While playing God of War Ragnarok, press the Options button on the controller.
  • After opening the Options menu, you need to go into Settings.
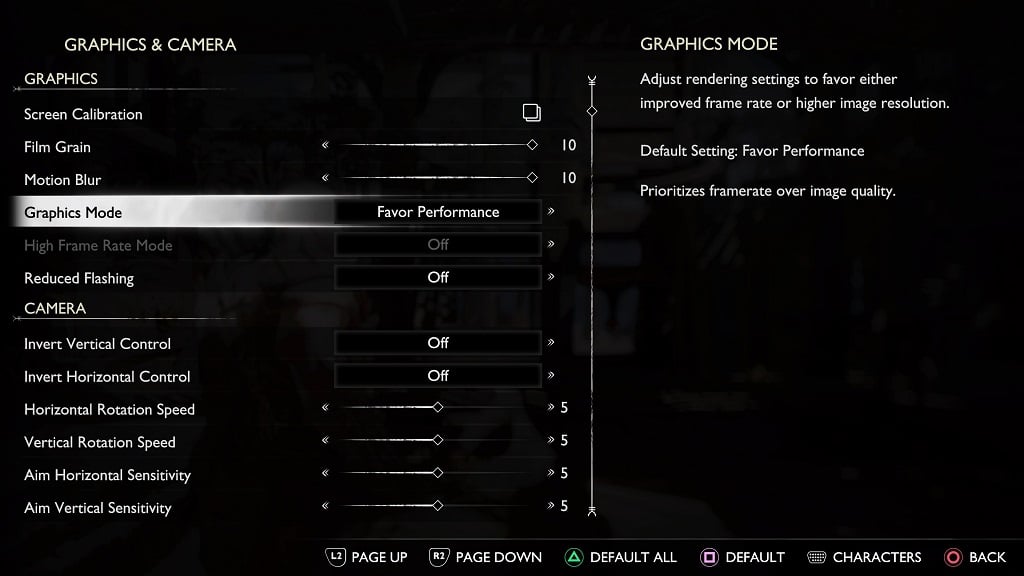
  • In the Settings menu, select Graphics & Camera.
  • Once you are in the Graphics & Camera, highlight Graphics Mode.
  • Finally, you need to select Favor Performance.

Keep in mind that, if you are playing God of War Ragnarok on a standard PlayStation 4, then you won’t be able to switch to a performance mode.

4. You can also try playing the game in high frame rate mode in order to further reduce its input delay. In order to do so, you need the PlayStation 5 version of Ragnarok as well as a TV or monitor that supports 120 Hz refresh rate with Variable Refresh Rate support.

If you meet these requirements, then you can take the following steps:

  • Go to the Settings menu of your PS5 console.
  • Inside of Settings, select Screen and Video.
  • From the Screen and Video menu, select Video Output from the options available on the left column.
  • On the right side of the screen, set VRR to Automatic.
  • You then need to set 120 Hz Output to Automatic.
  • Open God of War Ragnarok.
  • While playing the game, press the Options button on your controller.
  • Select Settings from the Options menu.
  • You then need to select Graphics & Camera from the Settings menu.
  • In the Graphics & Camera menu, make sure that you set the Graphics Mode setting to Favor Performance.
  • Next, you need to highlight the High Frame Rate Mode setting and then change it to HFR + VRR so that you can play the game at up to 120 frames per second with Variable Refresh Rate enabled.

5. If you are still getting noticeable input lag, then you can try playing the game on a different TV or monitor to see if you can get better results.

How to turn off God of War Ragnarok compass and other HUD elements

When playing God of War Ragnarok on the PlayStation 4, PlayStation 4 Pro, PlayStation 5 or PlayStation 5 Digital Edition, you may notice that the game has a rather busy looking head-up display. If you are using an OLED monitor or television set for this game, then these may cause image retention and/or screen burn in problems.

To see how you can disable the compass and other HUD elements in God of War Ragnarok, you can follow this step-by-step guide from Seeking Tech.

1. While you are playing the game, press the Options button on your controller.

On the PS5’s DualSense controller, this button is labeled with the three horizontal lines. With the PS4’s DualShock 4, this button is underneath the Options text.

2. You should now be in the Options menu. From there, you need to select Settings.

3. After getting to Settings, you need to select Gameplay.

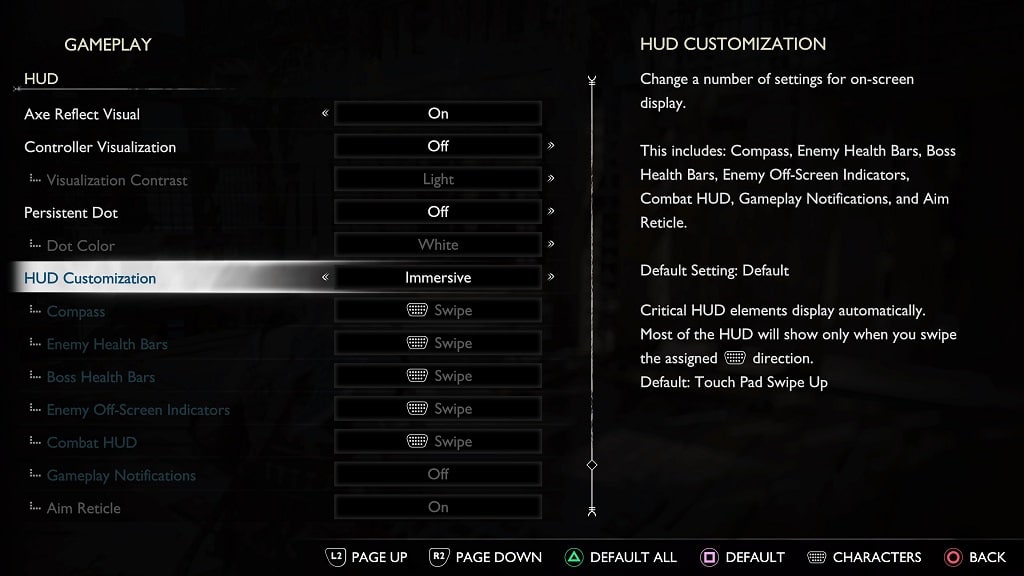
4. From the Gameplay menu, scroll down until you see the HUD section.

5. In the HUD section, highlight HUD Customization.

6. HUD Customization should currently be set to Default.

Here, you can use the analog stick or directional pad to change this setting. We recommend switching it over to Immersive, which will allow you to manually enable and disable the head-up display by swiping the touch pad on the controller.

With that said, you can also select the Hidden option if you want to turn off the HUD completely.

Furthermore, you can also set to HUD Customization to Custom. By doing so, you will be able to set the following HUD elements to On, Swipe or Off:

  • Compass
  • Enemy Health Bars
  • Boss Health bars
  • Enemy Off-Screen Indicators
  • Combat HUD
  • Gameplay Notification
  • Aim Reticle

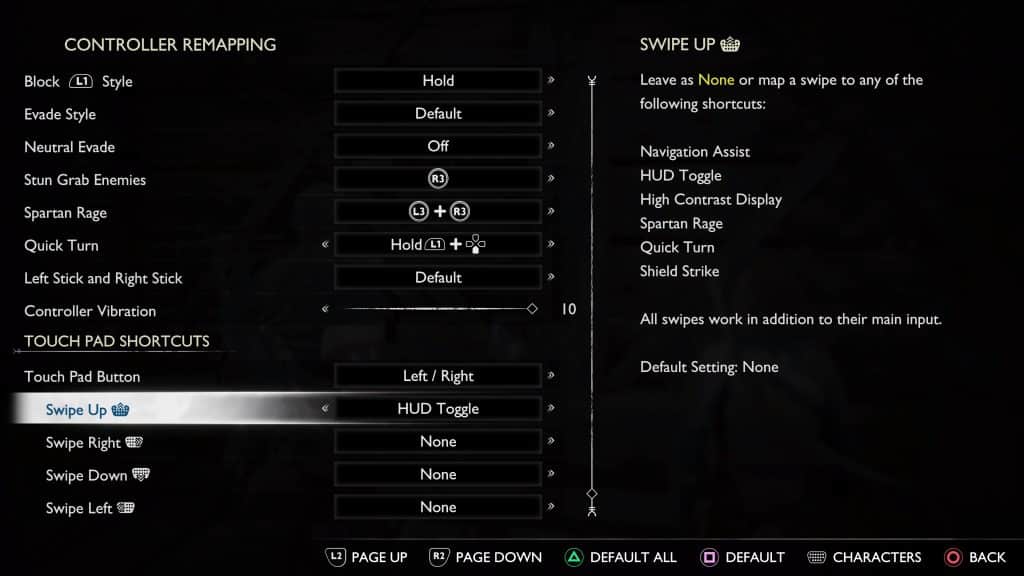
By default, you need to swipe upwards on the touch pad of the DualSense or DualShock 4 to enable and disable the head-up display.

If you want to change the swiping gesture to another direction, then you need to do the following:

1. Go back to the Settings menu by pressing the Options button and then selecting Settings.

2. Next, you need to select Controller Remapping.

3. After you arrived at the Controller Remapping menu, scroll down to the Touch Pad Shortcuts section.

4. You can then set the following options to HUD:

  • Swipe Up
  • Swipe Right
  • Swipe Down
  • Swipe Left

Keep in mind that you can set the enable/disable HUD function to multiple swiping gestures at the same time.

By customizing when the HUD will be shown instead having it always on, you should be able to prevent any image retention and screen burn in problems when playing God of War Ragnarok.

Recommended Hisense U7H settings for PS5, Xbox Series X and S

The U7H is a 2022 4K Quantum ULED TV. You can follow this guide at Seeking Tech to see what recommended settings you should use for this Hisense television set in order to optimize it for the PlayStation 5, PlayStation 5 Digital Edition, Xbox Series X and Xbox Series S.

Before we begin, it should be noted that this optimization tutorial should cover the following screen sizes of this TV series:

  • 55″ Hisense U7H (55U7H)
  • 65″ Hisense U7H (65U7H)
  • 75″ Hisense U7H (75U7H)
  • 85″ Hisense U7H (85U7H)

Supported PS5 Features

With the U7H, you will be able to play games at 120 frames per second in 1080p, 1440p and 4K on the PlayStation 5 and PlayStation 5 Digital Editions system. This Hisense television also supports HDR10 and Variable Refresh Rate.

Supported Xbox Series X and Xbox Series S Features

You can use the U7H to play Xbox Series X and Xbox Series S games at up to 120 fps as well in 1080p, 1440p and 4K. This 2022 4K Quantum ULED TV also supports HDR10, Dolby Vision and VRR for these Microsoft consoles.

Recommended Settings

1. To start off, you need to connect your console to the U7H if you haven’t done so already.

You need to use the HDMI 2.1 cable that came your PlayStation 5, PlayStation 5 Digital Edition or Xbox Series X and then connect it to either the HDMI #3 or HDMI #4 port of the television screen.

The Xbox Series S only comes with a HDMI 2.0 cable; therefore, you can connect it to any of the four HDMI ports of the U7H. You can also get your own HDMI 2.1 cable and then connect the console to either the third or fourth HDMI ports of the Hisense television.

2. If you haven’t done so already, make sure you update your TV to the latest available firmware.

To download a new software version, press the gear button on the remote and then navigate over to Settings > System > About > System Update menu.

3. Next, you need to press the button that has the square icon with two horizontal lines inside on the TV remote.

Afterwards, select the HDMI port that is connected to your game console and the change its HDMI Format to Enhanced Format.

4. The next step you can take is to make sure that the U7H’s game mode is enabled.

In order to do so, press the gear button on the remote and then go to Settings > Display & Sound > Picture > Picture Mode. From there, make sure that Game is selected.

By enabling Game Mode, the Variable Refresh Rate of the TV set should also be automatically turned on as well.

5. We also recommend turning on Instant Game Response, which will enable the Auto Low Latency Mode.

To do so, press the gear button again and then head over to Settings > Display & Sound > Picture > Advanced Settings > Instant Game Response.

6. Next, you should make sure that you disable the Automatic Light Sensor. You can find this feature by going to Settings > Display & Sound > Picture > Backlight > Automatic Light Sensor.

7. You should now be done optimizing the Hisense U7H for the PlayStation 5, PlayStation 5 Digital Edition, Xbox Series X and Xbox Series S.

While there are other settings available, we recommend that you leave them alone for now. Of course, you can play with these options later if you would like.

8. After setting up your U7H, you should make sure that you have the right settings on your console as well.

If you have a PS5 or PS5 Digital Edition, you need to head over to Settings > Screen and Video > Video Output.

In this menu, make sure you match the following settings:

  • Resolution: 2160p
  • HDR: On When Supported
  • VRR: Automatic
  • 120 Hz: Automatic
  • ALLM: Automatic
  • 4K Transfer Rate: Automatic
  • Deep Color Output: Automatic
  • RGB Range: Automatic

Finally, go to Adjust HDR from the Video Output menu. Next, follow the on-screen instructions to calibrate the HDR output of your PS5 to the U7H.

If you have an Xbox Series X or Xbox Series S, then you should head over to General > TV & Display Options > Video Modes.

In this menu, you should make sure you enable the following:

  • Allow Auto-Low Latency Mode
  • Allow Variable Refresh Rate
  • Allow 4K
  • Allow HDR10
  • Allow Dolby Vision
  • Dolby Vision for Gaming

Once you are done, go back to General > TV & Display Options and then select Calibrate HDR. Finally, follow the on-screen instructions to optimize the console’s HDR output for the Hisense U7H.

How to enable and disable live chat in the YouTube PS5 App

When watching a live-streaming YouTube video on your PlayStation 5 or PlayStation 5 Digital Edition system, you may want to view what other people are chatting about.

To see how you can enable and disable this feature, you can follow the steps from this article from Seeking Tech.

How to turn on live chat

Live chat is disabled by default in the YouTube PS5 App. If you want to turn this feature on, then you need to take the following steps:

1. To start off, you need to open the YouTube App on your PlayStation 5.

2. The live chat feature is only available for current live streaming videos. It can’t be accessible in regular videos in this app. This feature also won’t work if the video was previously live streamed but is now archived.

Therefore, once you open the YouTube App, you need to play a live streaming video. If can’t find this type of video on the home section, then you can take the following steps:

  • Navigate all the way to the left to expand on the menu located on the left side.
  • In this menu, you then need to select the More option.
  • After getting to the More section, you then need to navigate over to Live.
  • In the Live menu, you should find a list current live streaming videos in the Live Now row.

3. Once you opened the live streaming video, press the up directional button (or move the left analog stick upwards) to bring up the overlay menu.

4. In the overlay menu, go upwards to highlight the title of the video and then move to the right where you see several icons.

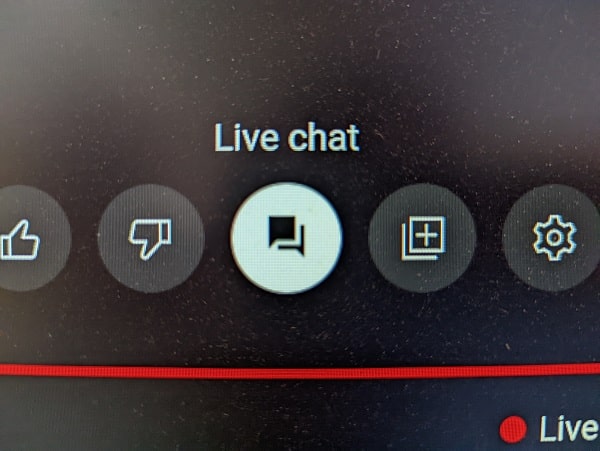
5. In the group of icons, you should see the Live Chat option. It should be in between the Dislike and Save options.

Select the Live Chat option. Its icon should be filled in, which indicates that this feature should now be enabled.

6. Back out of the overlay menu to the currently live streaming video.

You should see a message appear on the bottom right side of the screen that says “Connecting to live chat…”

7. Once the connection has been established, you should then see a “Connection successful” message appear in the same area. Afterwards, you should see a stream of text chats appear on the right side of the screen.

By enabling live chat for your current video, the same feature should automatically be turned on when you play other live streaming videos as well.

How to turn off live chat

If you decide that you no longer what to look at the chat log when watching a live streaming video, then you need to do the following in order to disable it:

1. Open a live streaming YouTube video.

2. When the video is playing, press up to open the overlay menu.

3. In the overlay menu, press up again and the go right until you see the Live Chat option.

4. Select the Live Chat option, which should make it empty. This signifies that the feature has been disabled.

How to change your location in the YouTube PS5 App

You can change your location when using the official YouTube App on your PlayStation 5 and PlayStation 5 Digital Edition system. To find out how to properly do so, then you can follow this step-by-step guide from Seeking Tech.

What does changing your location do?

By changing your location, the YouTube App may show you a list of videos and channels that are popular for that particular region. This can be helpful if you are curious about what other people from around the world is watching on the video streaming website.

Therefore, you could get a different set of recommended content if you set your location to the United Kingdom as opposed to the United States.

How to change location

In order to change the location when using the YouTube App on your PS5 or PS5 Digital Edition system, you need to take the following steps:

1. To start off, you need to turn on your game console and then open the YouTube App.

To open this application, go to the home screen menu of your PlayStation 5 and then press the R1 button to switch to the Media tab. If you don’t see this app, then you need to select the All App option from the Media tab and download YouTube from the listing.

2. Inside of the video streaming application, you need to scroll to the left column menu.

3. From this left column menu, you then need to head into Settings.

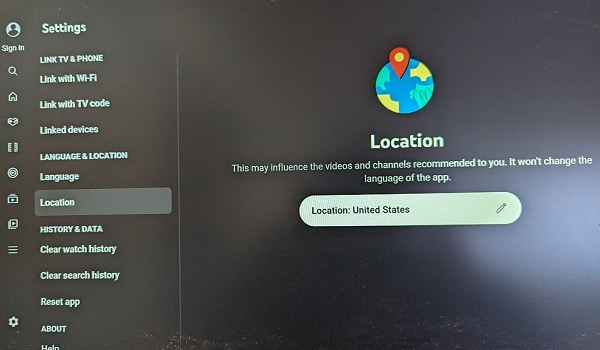
4. After getting to the Settings menu, you then need to navigate downwards and select Location.

5. On the right side of this screen, you should find your currently select location along with the following message:

  • “This may influence the videos and channels recommended to you. It won’t change the language of the app.”

In order to switch to a different one, select the Location option.

6. You should now bring up the Choose Your Location menu. From there, you can select your new location.

The available locations are listed in alphabetical order, from A to Z.

7. After changing to a different location, you should see the following confirmation message:

  • “Your location has been updated to [name of the country you selected].”

When browsing through the YouTube PS5 App, you may start to see recommended videos and channels that reflect the tastes of the location you selected.

How sign into YouTube on PS5 without linking

You can use your YouTube account for the YouTube App on the PlayStation 5 and PlayStation 5 Digital Edition. To see how you can sign into this application without having to link your YouTube account to your PlayStation Network account, you can take a look at this tutorial from Seeking Tech.

1. To start off, you need to open the YouTube App on your PS5.

If you haven’t used this application on your game console before, then you need to go to the home screen menu of the PlayStation 5. In the home screen, you should see the Media tab, which you can go to by pressing the R1 button.

In the Media tab, select YouTube. If the app is not there, then you need to select the All Apps option, select YouTube and then download it. Once the installation has been completed, you should be able to open the app from the Media tab in the home screen.

2. After opening the YouTube App, move all the way to the left until you expand the left column menu.

3. In the aforementioned left column menu, select Sign In, which should be the top-most option.

4. You should now be in the “Sign in and make it yours” menu. Here, you can choose between the following methods in order to sign into your YouTube account:

  • Open the YouTube mobile app
  • Scan or type a code
  • Use your remote

After selecting one of the methods, follow the on-screen instructions to log your account in the YouTube PS5 App.

5. Once you are logged into your account, return to the home screen. You can do so by pressing and holding the PS button on your controller.

6. On the home screen, navigate upwards and then to the right so that you can select the gear icon.

7. You should now be in the Settings menu of your PlayStation 5. From there, select the Users and Accounts option.

8. From the Users and Accounts menu, you first need to select Link with Other Services on the left column.

9. On the right side of the same screen, you then need to select YouTube.

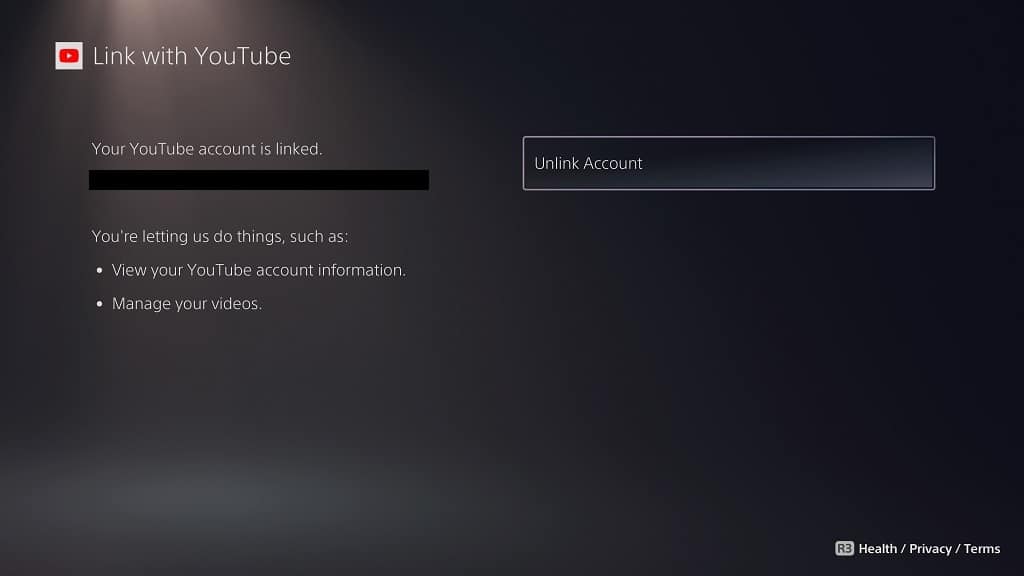
10. You should arrive at the Link with YouTube menu. Here, you need to select Unlink Account.

11. The following message should appear:

“Unlink accounts? You’ll lose the features and benefits that you’re enjoying by being linked.”

In the message, you need to select the Yes, Unlink option.

Your YouTube account should no longer be linked to your PSN account.

How to change YouTube video playback speed on PS5

You are able to change the playback speed when watching YouTube videos on your PlayStation 5 or PlayStation 5 Digital Edition console. This feature is helpful if you want to watch a video faster by speeding it up. You can also slow down a video if you want to spot something you may have missed.

To see how you can change the playback speed in the YouTube PS5 App, you can follow the steps laid out in this tutorial from Seeking Tech.

Before we start, it is important to note that not all videos will let you change the playback speed when using this application on the PlayStation 5. So, if you see that this feature is unavailable, then you can try using YouTube on another device.

In a vast majority of cases, we found that videos being played from the YouTube mobile app and website will let you change the playback speed even if the same feature was disabled on your PS5.

1. To begin, you need to open the YouTube App on your game console.

You can find this application in the Media tab of the Home menu. To get to the Home menu, you can press and hold the PS button on the controller. From the Home menu, you can then press the R1 button to go to the Media tab.

If you can’t find YouTube in the Media tab, then you need to download it. To do so, select the All Apps option from the Media tab, which should bring up a list of video streaming apps that you can install.

2. Once you have launched the YouTube App, you can then play a video that you want to change the playback speed for.

3. While the video is playing, press up on the directional pad to bring up an overlay menu.

4. You can then press the X button on the controller to pause the video.

5. With the video paused, press the up directional pad button again to navigate upwards to highlight the title of the video.

6. Next, you need to move all the way to the right and then select the Settings option.

7. You should now be in the Settings menu on the right side of the screen. Here, you need to select Speed.

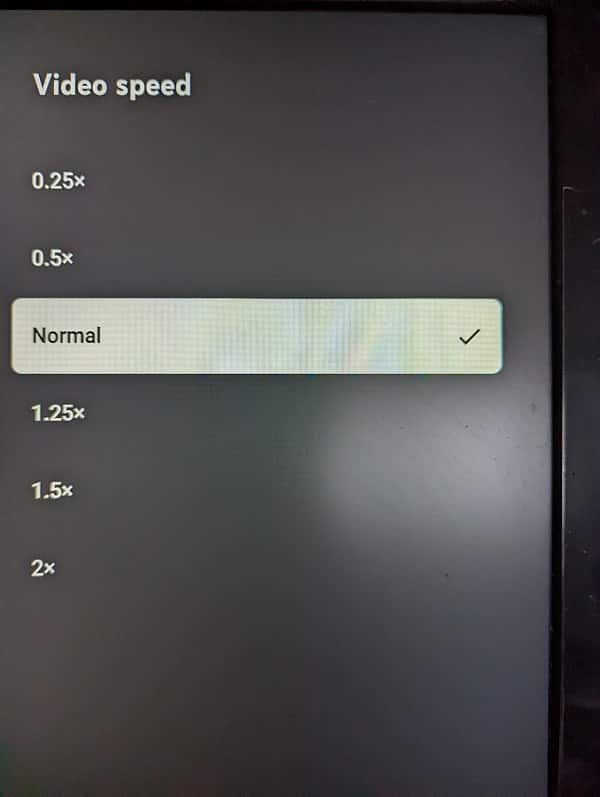
8. In the Video Speed menu, you should be able to change the playback speed based on the following options:

  • 0.25x
  • 0.5x
  • Normal
  • 1.25x
  • 1.5x
  • 2x

If you want to use the 0.75x or 1.75x playback speeds, then you would have to use the YouTube website or YouTube mobile app instead of the YouTube PS5 App.