How to view your Microsoft Rewards on Xbox Series X and S

A new firmware update has made finding your Microsoft Rewards information a lot easier than before on your Xbox Series X or Xbox Series S. To find out how you can properly locate this section, you can take a look at this tutorial from Seeking Tech.

1. For the first step, make sure you updated your Xbox

2. Next, you need to press the Xbox logo button on the controller in order to open the Guide menu.

3. In the Guide menu, press the RB button to change tabs until you made your way over to “Profile & system.”

4. Afterwards, you need to select your account name, which should be the top option of the tab.

5. You should then be able to find and select My Rewards in the pop-up menu.
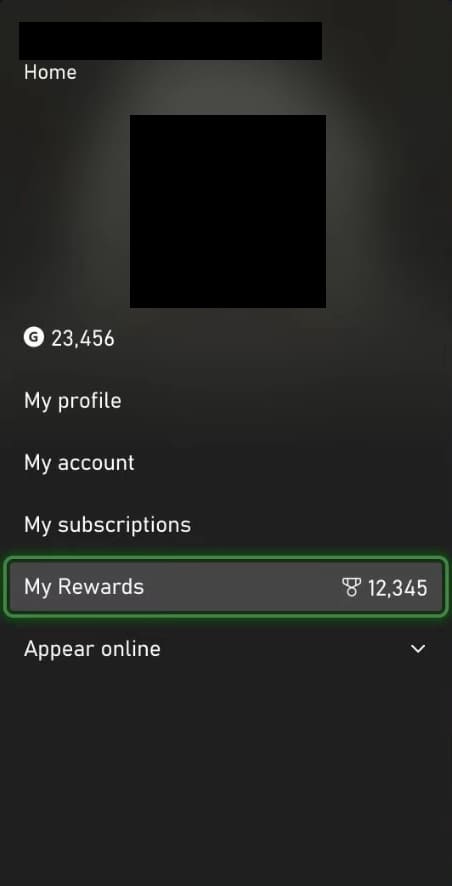
6. In the Rewards section of your profile, you will be able to find your daily, weekly and monthly gaming tasks.

On the top right corner, you can also select the “Redeem points” option. On the next menu, you should be able to redeem your Microsoft Reward Points on a variety of items.

How to enable VRR for gaming only on Xbox Series X and S

The Xbox Series X and Xbox Series S both support Variable Refresh Rate for compatible television sets and gaming monitors. Outside of gaming, this feature may cause flickering, stuttering, inaccurate HDR and other display issues.

Fortunately, a new firmware update allows you to customize when you can enable VRR. To find out how you can properly do so, you can check out this tutorial from Seeking Tech.

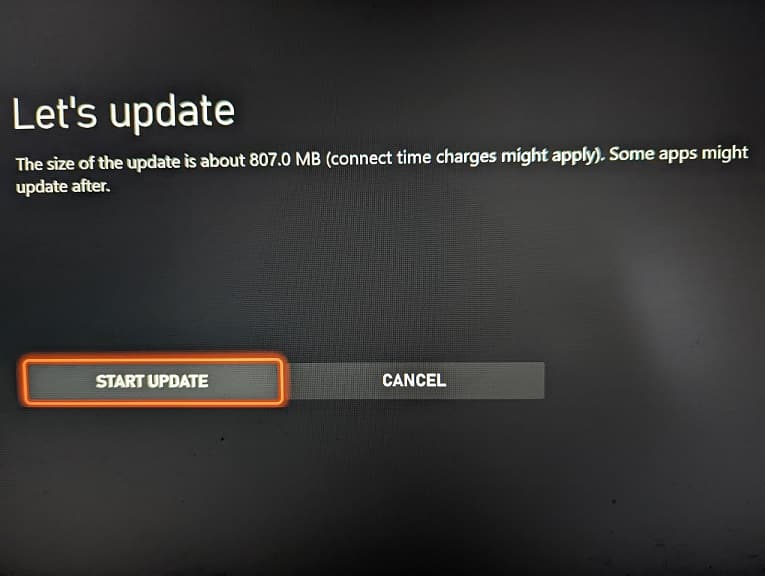
1. To start off, make sure you have the latest firmware downloaded on your Series X or Series S; otherwise, you won’t be able to customize when VRR will be turned on.

To manually update your console, make sure it is connected to the internet. Afterwards, go to Settings > System > Updates.

2. Once your Xbox has been updated, go back to the Settings menu.

3. From the front page of Settings, select General > TV & display options > Video modes.

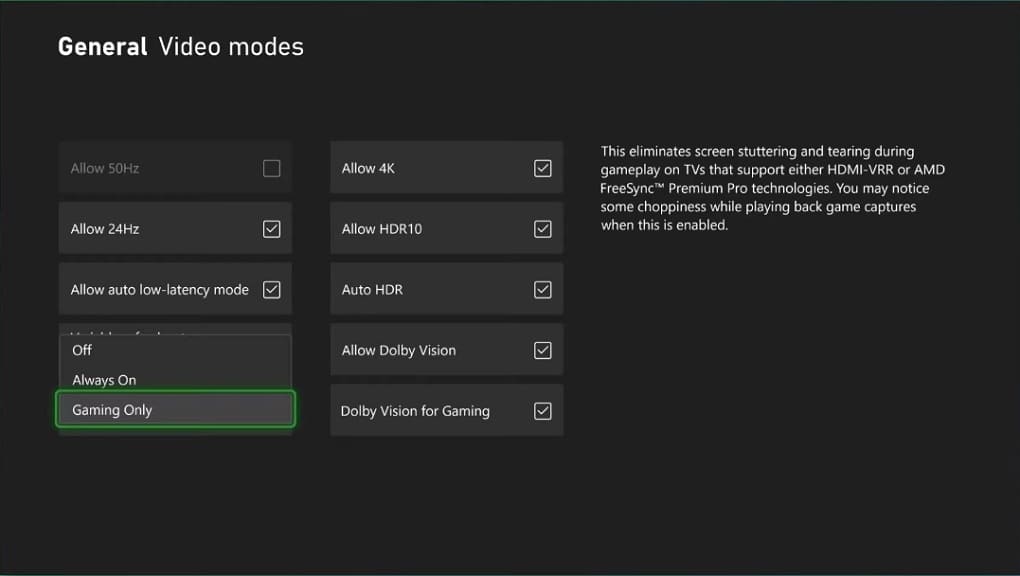
4. In the General – Video modes menu, move the cursor down to Variable Refresh Rate. This setting should show the following description:

This eliminates screen tearing and stuttering during games on TVs that support either HDMI-VRR or AMD FreeSync Premium Pro technologies. You may notice some choppiness while playing back game captures when this is enabled.

5. In the Variable Refresh Rate drop-down menu, you can select to turn this feature completely off, enable it for video games only or set it to be always enabled.

6. Once you are done, you can exit the Settings menu.

How to fix mouse issues in Starfield

If the mouse controls do not appear to be working correctly in the PC version of Starfield, then you can check out this troubleshooting guide from Seeking Tech.

1. For the first step, you should make sure that the game window is active if you are playing in windowed mode. You can do so by pressing the left mouse click button inside the game window or by pressing the Alt and Tab keys at the same time to switch over to Starfield.

2. You can also try pressing ALT and Enter at the same time on the keyboard.

3. Furthermore, you can try pressing the Windows key and D simultaneously.

4. If the mouse pointer is still not working correctly, then you can try removing any other peripheral devices you have plugged into your computer. In order to do so, you recommend taking the following steps:

  • Save your progress and then close Starfield.
  • Unplug any other controllers and other peripherals you have connected to your PC.
  • Go to Settings > Accessories on Windows to double check that only your keyboard and mouse are connected as input devices.

  • Launch Starfield.

5. Make sure you have the latest patch installed for Starfield.

6. If possible, try to make sure that you have the latest drivers downloaded for your mouse.

7. If the mouse is still not working correctly, you can try deleting any mods you have installed for Starfield.

What to do if you can’t fast travel in Starfield

You can use the fast travel feature to quickly move to another area in Starfield. If the game does not allow you to use this feature, then you can check out this troubleshooting article from Seeking Tech.

1. You won’t be able to fast travel if your character is currently in an instanced area. In this case, you need to first move to a different location.

2. Furthermore, you can’t fast travel if your character is falling or jumping. So, make sure that their feet are on the ground.

3. If you see the following message appear on the top right side of the screen:

You cannot fast travel when enemies are nearby.

Then it indicates that you are currently engaged in combat. In these scenarios, you can either defeat all the nearby enemies or run away far enough to break the line of sight of your enemies.

Once the bottom left indicator is no longer red, you should be able to fast travel.

4. When trying to travel to an unexplored system, then you should see the following notification appear:

You have not explored every system along this route. Try jumping to a closer system.

In this case, you need travel to a nearby system and then head into the unexplored system from there.

5. If you are trying to travel to an unexplored planet, then you have to travel there first and then scan it

6. It is also important to note that some planets may be protected by a faction. While you can still fast travel, your ship will be stopped before landing for inspection.

How to fix Starfield game disc installation issues on Xbox Series X or Xbox Series S

If you bought a physical copy of Starfield, then the game may not be installing properly on your Xbox Series X or Xbox Series S. The installation process may be halted early or not start up at all.

To see how you can get this software to installed on your console, you can take a look at this troubleshooting article from Seeking Tech.

1. To start off,check to see if you have the latest firmware installed for your console. You can do so by heading to the Settings menu and then selecting System > Updates.

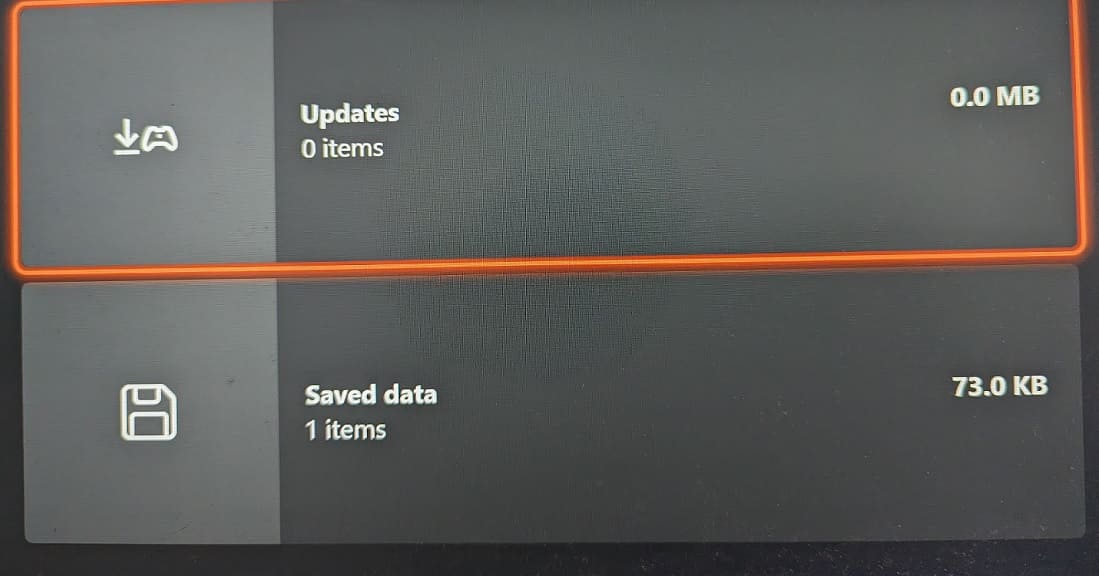
2. you should check to see if you have enough free space on your Xbox Series X or Xbox Series S storage for the game disc installation as well as the update file that will be downloaded.

In order to do so, open the Settings menu of your Xbox and then go to System > Storage devices.

If your SSD does not appear to have enough free space, then you have to delete some games.

3. If you believe that you have enough free space for Starfield but the game is still not installing, then you can try clearing out your local saves.

This can be done by heading to the Settings menu of your Series X or Series S and then selecting System > Storage devices.

4. You can also try installing the game without downloading the update. In order to do so, you need to take the following steps:

  • Disconnect your Xbox from the internet. You can do so by going to Settings > General > Network settings > Go offline.
  • Cancel the download of the Starfield update file. To do so, press the Xbox button to open the Guide menu. From there, select My games & apps > See all > Manage > Queue. From there, move the cursor over to Starfield, press the Menu button on the controller and then select Cancel.
  • Eject the game disc if it is inside your Xbox.
  • Restart your console.
  • Re-insert the game disc and wait for it to install.
  • Once the installation has been completed, re-enable your internet connection by going to Settings > General > Network settings > Go online.
  • The update file for Starfield should automatically start to download and install.
  • Once the patch has been downloaded and installed, you should be able to start playing Starfield.

5. If the game is still not installing, then either the disc or the Xbox disc drive could be defective.

What to do if the items placed on your Starfield ship vanished

While you can store items in your spaceship while playing Starfield, they may end up missing. To see how you can potentially make them appear again, you can take a look at this troubleshooting article from Seeking Tech.

1. If you haven’t done so already, recheck your cargo to see if the items you have been storing on the ship have been relocated.

2. If you previously changed your home ship, then you can try returning to the prior spaceship to see if you can locate your missing inventory.

3. You can try returning to the last instanced area.

4. Try to load up an earlier save file and then check if your items are still stored on your ship.

5. If the items you have stored on your spaceship are still missing, then you can close the game and then restart your PC, Xbox Series X or Xbox Series S.

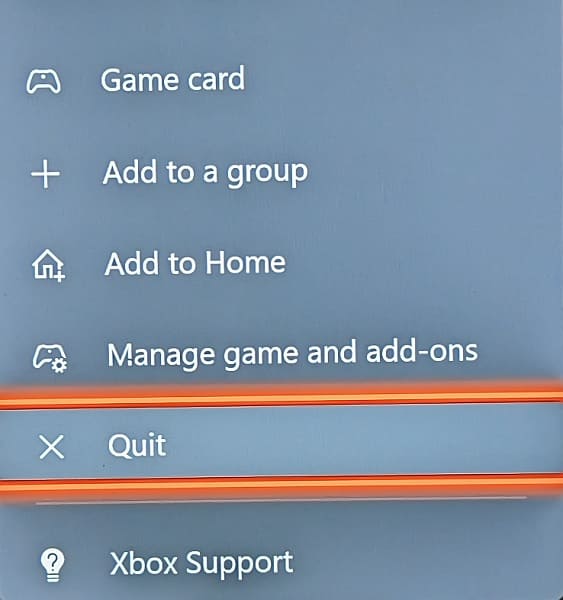
Keep in mind that you need to quit out of Starfield if you are playing on Xbox before restarting. To do so, open the guide menu by pressing the Xbox button. From there, move the cursor over to the game icon and then press the Menu button. You should open the pop-up menu, where you can then select Quit.

6. Check to see if there is an update available for Starfield as a new patch may make the vanished items on the ship appear.

7. If you have mods installed, then you can try disabling and deleting them.

How to disable controller vibrations in Starfield

If you are playing Starfield with a compatible controller, then the gamepad will vibrate by default based on certain actions. If you find that the vibration effect to be distracting, then you can check out this guide at Seeking Tech to see how you can turn it off.

1. To begin, you need to head into Settings from the Main Menu.

If you have already loaded into your save file, then you need to open the in-game menu and then go to System from there. If you are playing with an Xbox controller, then you have to press the Menu button to open the in-game menu and then the same Menu button again to head into System. From there, you can go to Settings.

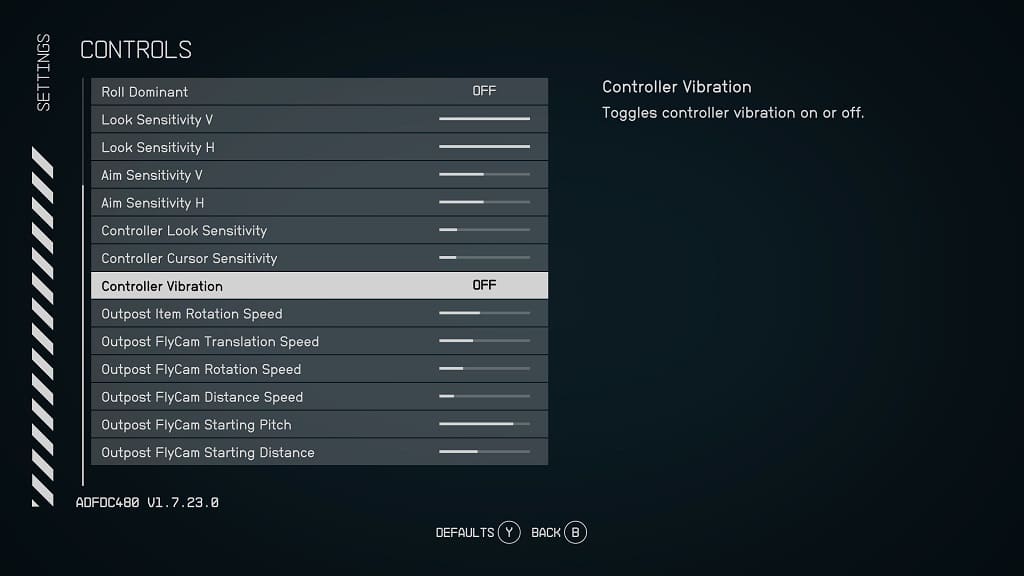
2. From Settings, you need to select Controls.

3. In the Controls section move the cursor to Controller Vibrations. It should display the following information:

Toggle controller vibration on or off.

4. By default, the Controller Vibrations is set to On. To disable haptic feedback, make sure that this is set to Off instead.

5. Exit the Settings menu once you are done disabling rumble.

You should no longer notice any vibrations when you start playing Starfield again.

How to turn off depth of field effects in Starfield

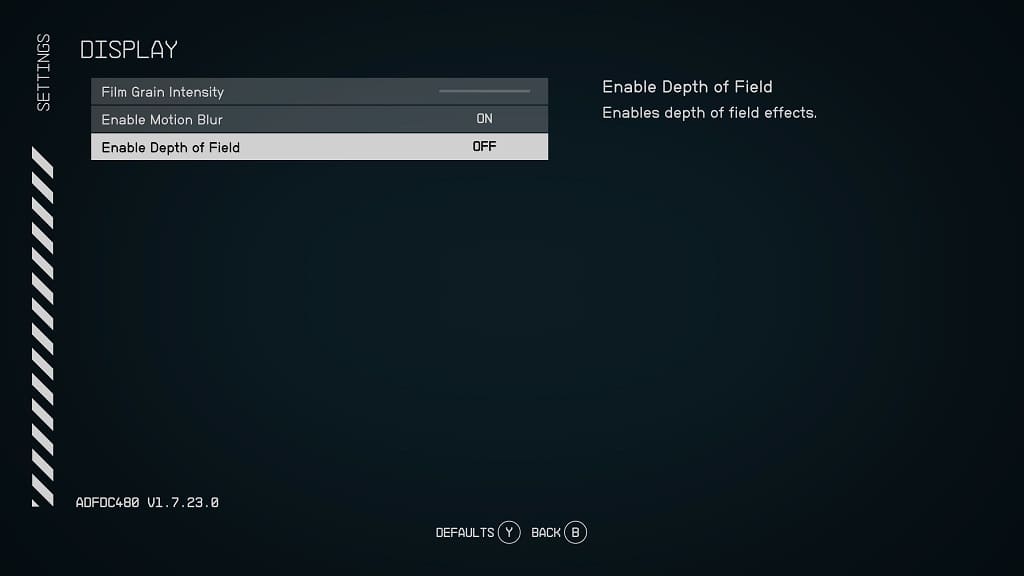
By default, Starfield uses depth of field effects. If you would rather have this graphical feature disabled in this role-playing game, then you can check out this guide at Seeking Tech to see how you can properly do so.

1. For the first step, you need to head into the Settings menu in Starfield.

This can be done from either the main menu or system menu. If you are playing the game, then you can open the in-game menu, go to the System menu from there and then select Settings.

2. Inside of Settings, select Display from the list of available options.

3. Once you get to the Display section, move the menu cursor to Enable Depth of Field, which should show the following description:

Enables depth of field effects.

4. The Enable Depth of Field setting is set to On by default. In order to disable this visual effect, select it so that it is set to Off.

5. Once you are done turning off depth of field, you can exit the Settings menu and then return to your game.

You should no longer notice any out of focused objects in the distance when playing Starfield.

How to fix the poor air quality glitch in Starfield

You may encounter a glitch in Starfield where your character remains inflicted with the “Poor Air Quality” effect. To see how you can potentially fix this bug, you can take a look at this guide from Seeking Tech.

How to normally get rid of the Poor Air Quality effect

The normal way to remove the Poor Air Quality effect on your character is to go to an indoor area as quickly as possible. Otherwise, your character may end up getting lung damage.

How to fix the Poor Air Quality bug

If the poor air quality effect is still showing up even if you moved to an indoor location, then you can try doing the following:

1. Sleep for 24 hours. If that doesn’t help, sleep for the same length two more times to see if you can get rid of the status effect.

2. Try to get inflicted with a different status effect to see if doing so will remove the Poor Air Quality infliction.

3. Reload to an earlier save file when your character hasn’t been inflicted with this status effect.

4. Make sure you have the latest patch downloaded for Starfield as a new update may fix the permanent Poor Air Quality glitch.

5. Disable and delete any mods you have installed.

How to show damage numbers in Starfield

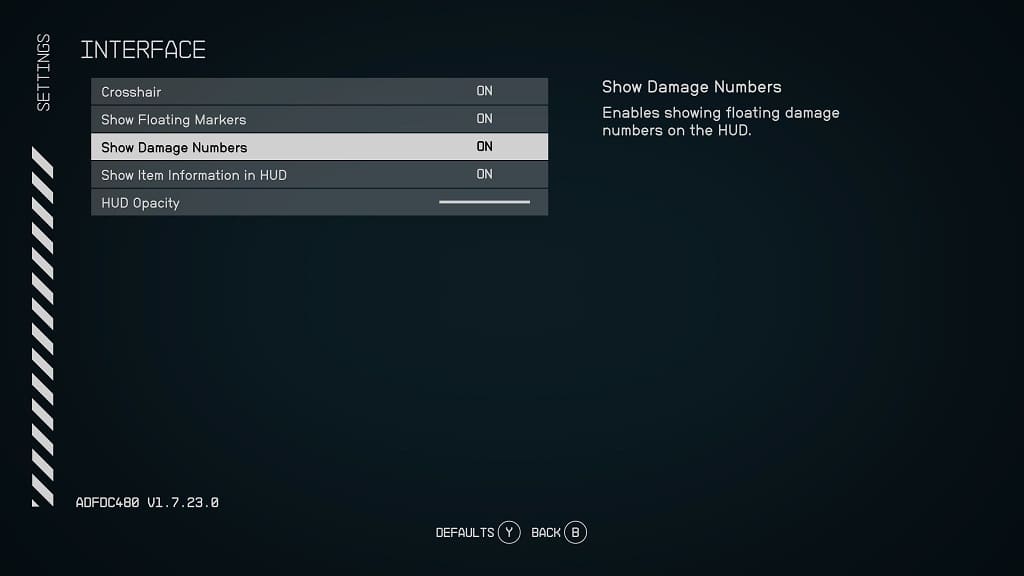
If you want to know the exact amount of damage a weapon is dealing to an enemy in Starfield, then you can check out this Seeking Tech guide to see how you can get the game to show damage numbers.

1. To start off, go to the Settings menu from either the main menu or pause menu in the game.

If you are playing on Xbox or with an Xbox controller, then you have to press the Menu button while you are in the pause menu.

2. From Settings, you need to select Interface from the list of options.

3. Inside the Interface section, move the cursor down to Show Damage Numbers. This should show the following information on the right side of the screen:

Enables showing floating damage numbers on the HUD.

4. By default, Show Damage Numbers is set to Off. You will need to select it in order to toggle the option to On.

5. Afterwards, exit the Settings menu of Starfield.

The next time you deal damage to an enemy, you should see the damage numbers appear on the screen.