How to fix unresponsive controls issues in the PS4 version of Roblox

When launching a Roblox game on your PlayStation 4 or PlayStation 5 console, you may find the controls to be unresponsive. To see how you can potentially fix this issue, you can take a look at this troubleshooting article from Seeking Tech.

Before we begin, it is important to note that Roblox started out as a PC and mobile game before being ported over to consoles. The development team at Roblox Corporation did a straightforward port to the PS4; as a result, menu navigation feels a lot more clunkier than normal.

If you can’t seem to move around, you can try pressing the touch pad on your DualShock 4 or DualSense. This should enable the Game Menu Toggle, which turns the middle dot you see in the game into a giant circle. Similar to a mouse pointer, you should be able to move the circle around to navigate the menu.
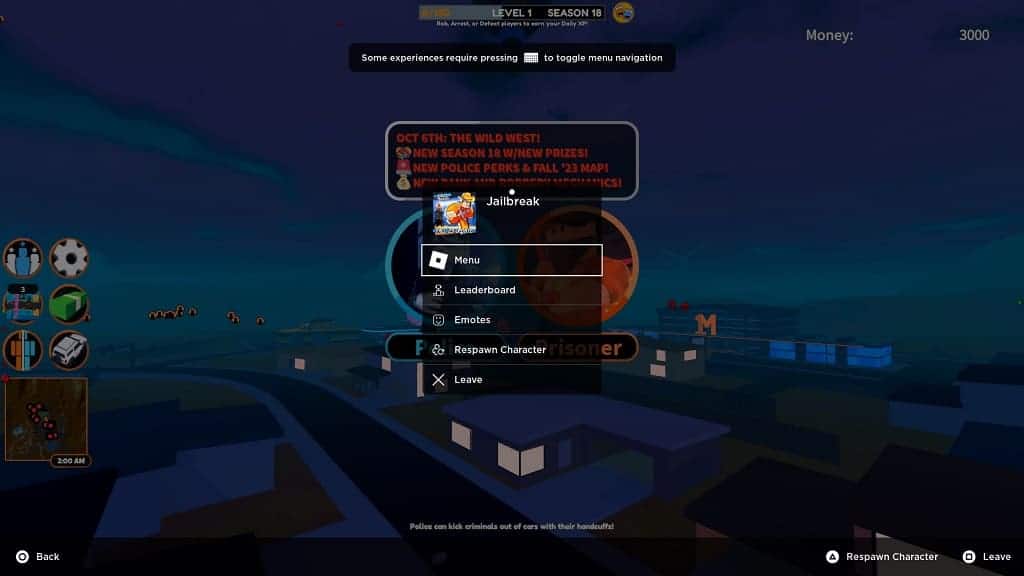
If pressing the touch pad does not work, press the Options button on the controller to open the in-game menu. From there, select the Menu option. In the next screen, press the R1 button several times until you get to the Help tab. You should see a button layout, which may help you find out how to control the Roblox game you are currently playing.

It is also important to note that some Roblox games may not work at all on the PS4 or PS5 even though you can launch them from the home menu.

How to disable crossplay in PS4 version of Roblox

By default, you will be able to play with players on other platforms in the PS4 version of Roblox. If you would rather limit the matchmaking to those on the PlayStation Network, then you can check out this guide at Seeking Tech to see how you can disable cross network play.

1. If you haven’t done so already, make sure you are in the home menu in Roblox. If you are currently playing a game, then you can exit by pressing the Options button and then selecting Leave.

2. From the home menu, select the “…” More option on the upper right corner.

3. Afterwards, you need to select Settings.

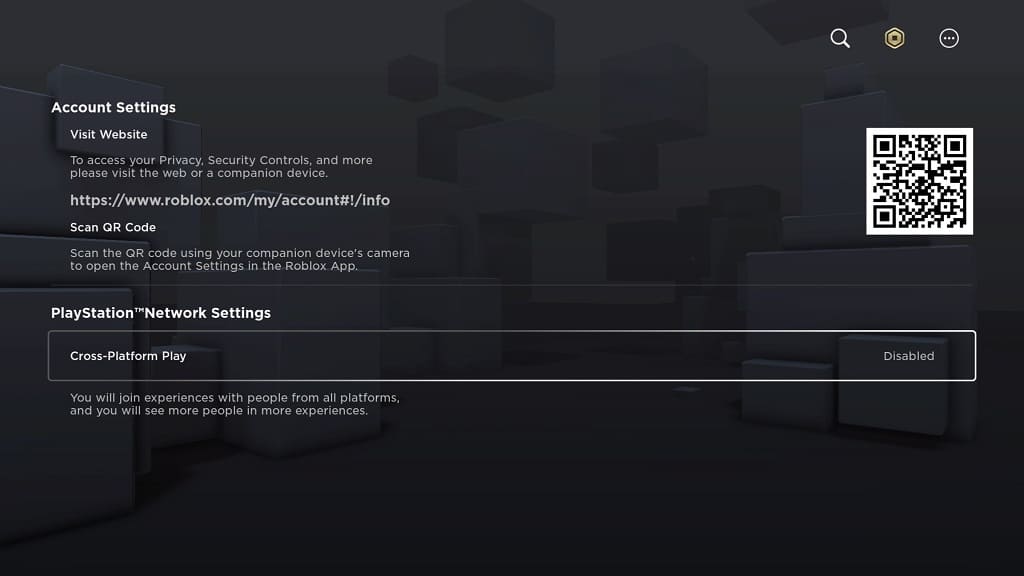
4. In the new screen, scroll down to the Cross-Platform Play option in the PlayStation Network Settings section. It should show the following description:

You will join experiences with people from all platforms, and you will see more people in more experiences.

5. By default, the Cross-Platform Play option is set to (Recommended) Enabled. To disable this feature, select it with the X button.

6. You can then exit the Settings menu and then head back to the home menu.

The matchmaking in Roblox should now be limited to players on the PlayStation 4, PlayStation 4 Pro and PlayStation 5.

How to hold to sprint in the PS5 version of Honkai: Star Rail

By default, you have to tap the R1 button to sprint when exploring the field in the PlayStation 5 version of Honkai: Star Rail. To stop sprinting, you need to press the same button again.

If you find this setup to be clunky, then you can check out this Seeking Tech guide to see how you can change the setting from a toggle to a hold.

1. If you haven’t done so already, boot up Honkai: Star Rail and then load into your save file.

2. When exploring, press the Options button on the controller to bring up the Phone menu.

3. Select the gear icon from there to head into Settings.

4. Inside of the Settings menu, press the R1 button to switch tabs until you get to Others.

5. Afterwards, scroll down to the Controls section.

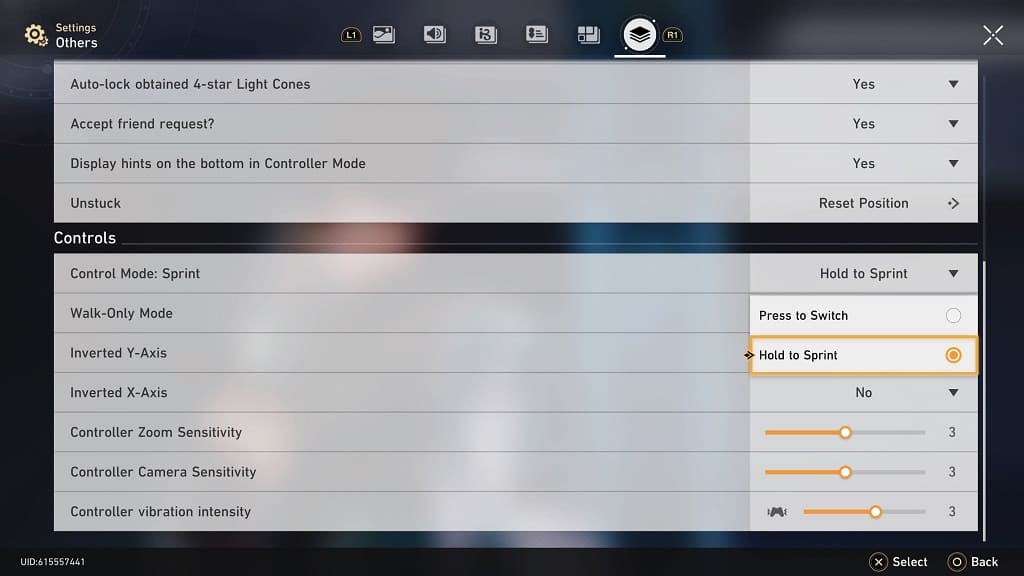
6. Select Control Mode: Sprint.

7. Finally, select Hold to Sprint in the drop-down menu.

8. You can now exit out of the Settings and Phone menu and return to playing Honkai: Star Rail.

To run, you now need to hold down on the R1 button. To stop running, you can simply let go of the same button.

How to disable DualSense vibration in Honkai: Star Rail

The haptic feedback of the DualSense is enabled by default in the PlayStation 5 version of Honkai: Star Rail. If you want to tone down the rumble, or disable it altogether, then you can check out this tutorial from Seeking Tech.

1. For the first step, open Honkai: Star Rail on your PS5 and then log into your account.

2. Next, make sure you are outside of combat, cut scene and any dialogue sequences.

3. Press the Options button on the controller to bring up your phone.

4. From there, select the gear icon to head into Settings.

5. Inside of Settings, use the R1 buttons to change tabs until you get to Others.

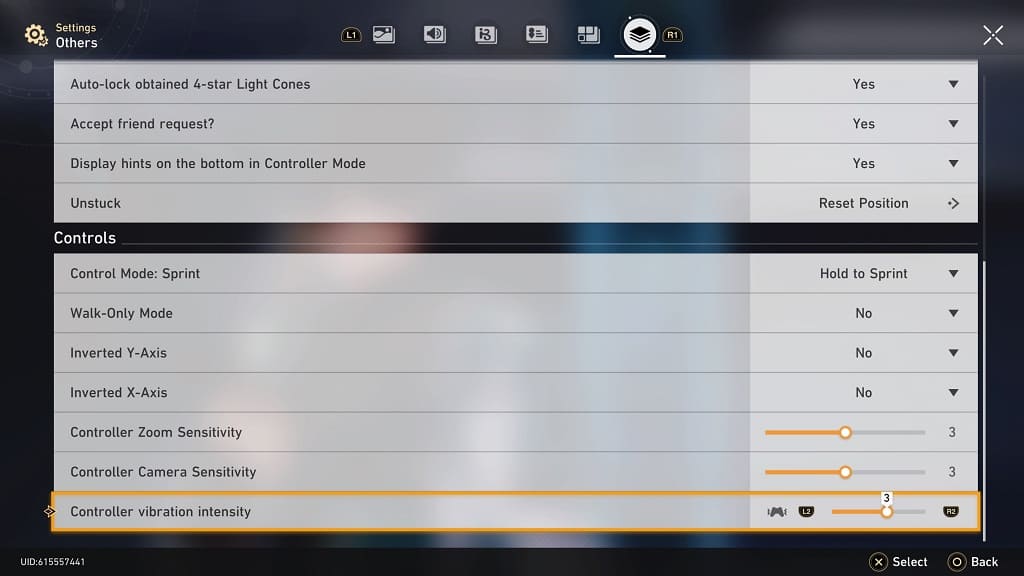
6. From the Other tabs, scroll all the way down to Controller Vibration Intensity.

7. Be default, the intensity level is set to 3. To decrease the strength, you need to press the L2 button. If you want to increase it, you have to press R2 instead.

In order to completely disable haptic feedback, set Controller Vibration Intensity to 0.

8. You can then exit the Settings menu and put your phone down to return to playing the game.

How to change the field of view in Forza Motorsport

You can adjust the field of view in Forza Motorsport. To find out how you can properly do so in this racing sim, you can take a look at this tutorial from Seeking Tech.

1. If you haven’t done so already, head into the Settings menu.

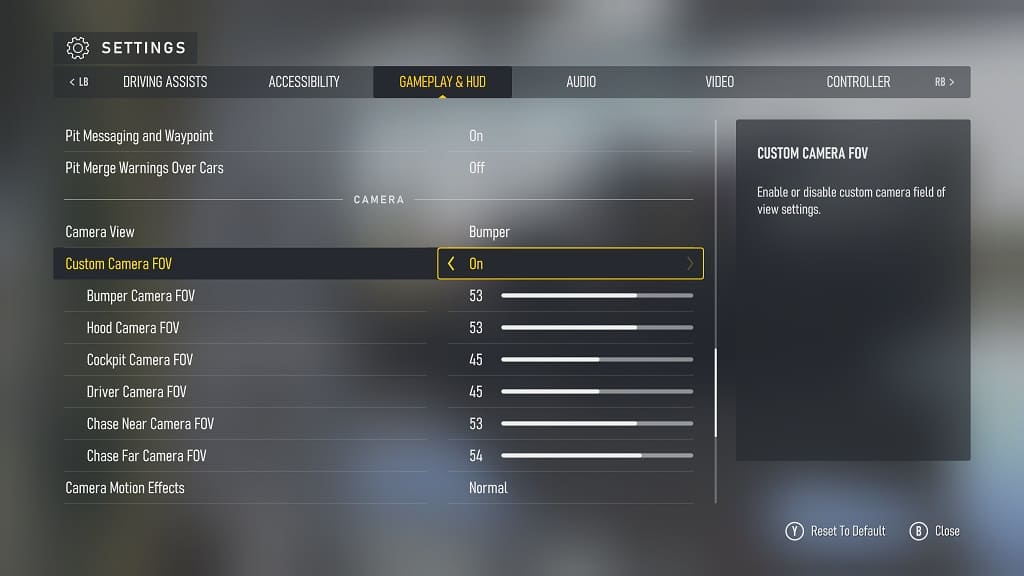
2. In Settings, press the RB buttons to switch tabs until you get to Gameplay & HUD.

3. From there, scroll down to the Camera section.

4. Make sure that the Custom Camera FOV setting is set to On.

5. Afterwards, you will be able to adjust the field of view angles with the following options:

  • Bumper Camera FOV (Default Value: 53)
  • Hood Camera FOV (Default Value: 53)
  • Cockpit Camera FOV (Default Value: 45)
  • Driver Camera FOV (Default Value: 45)
  • Chase Near Camera FOV (Default Value: 53)
  • Chase Far Camera FOV (Default Value: 53)

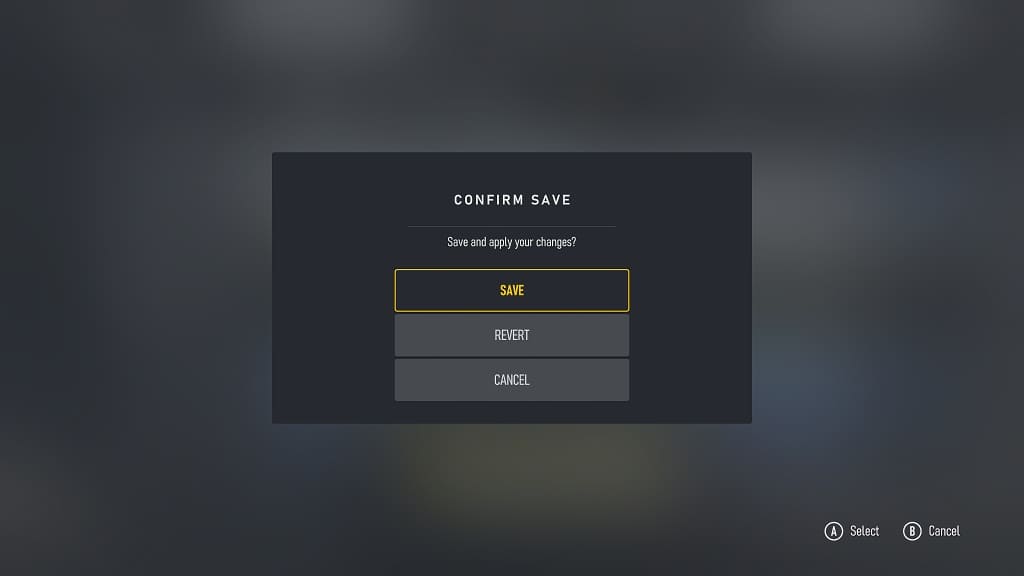
6 After changing the angle, exit the Settings menu. Make sure you select the Save option when the game asks if you want to save and apply the changes.

7. Test out the new field of view in the game. If you need to make additional adjustments, then you can go back to the Controls section in the Settings > Gameplay & HUD screen.

How to change the region server in PS5 version of Honkai: Star Rail

If you want to switch over to a different server region in the PlayStation 5 version of Honkai: Star Rail, then you can check out this guide at Seeking Tech.

Before we begin, it should be stated that the development team at miHoYo has said previously that you won’t be able to manually change regions in the PS5 version of the game even though you can do so on other platforms.

It is also very important to note that you will lose all your progress when changing servers. Therefore, you will have to start over from the very beginning of the game if you do decide to switch regions.

While you can’t change regions directly within Honkai: Star Rail, there is a workaround. The game automatically selects your region depending on the location you set for your PlayStation Network account.

Thus, in order to change the server region, you have to create a new PSN account as you won’t be able to change the region for your existing account.

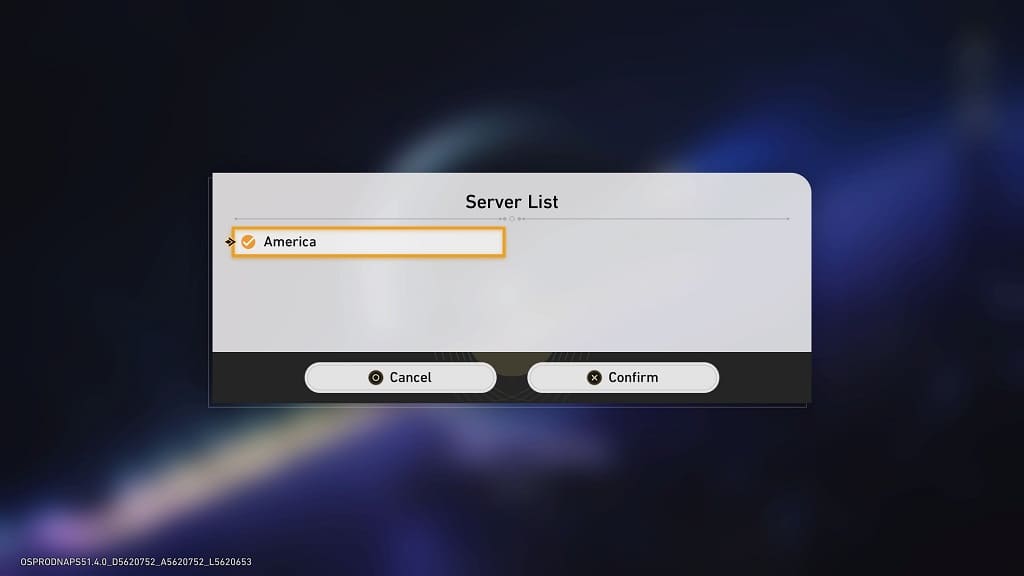
Currently, the PS5 version of Honkai: Star Rail uses the America, Europe, and Asia servers. So, when creating a new PSN account make sure you select your Country or Region from these locations.

Once you are done creating your account, sign into it on your PlayStation 5 and then open the game. You should now be logged into the new server region.

How to adjust the analog stick deadzones in Call of Duty: Modern Warfare 3

If you are playing Call of Duty: Modern Warfare III with a controller, then you may find that the aiming may feel a little clunky or oversensitive. To see how you can adjust the deadzones in this latest CoD videogame, you can check out this tutorial from Seeking Tech.

1. To change the dead zone sensitivity, you first need to open the Settings menu.

You can do so by pressing the Options or Menu button from the main menu. Afterwards, press the R1 or RB buttons to switch tabs until you get to the gear-looking tab. From there, you need to select Controller.

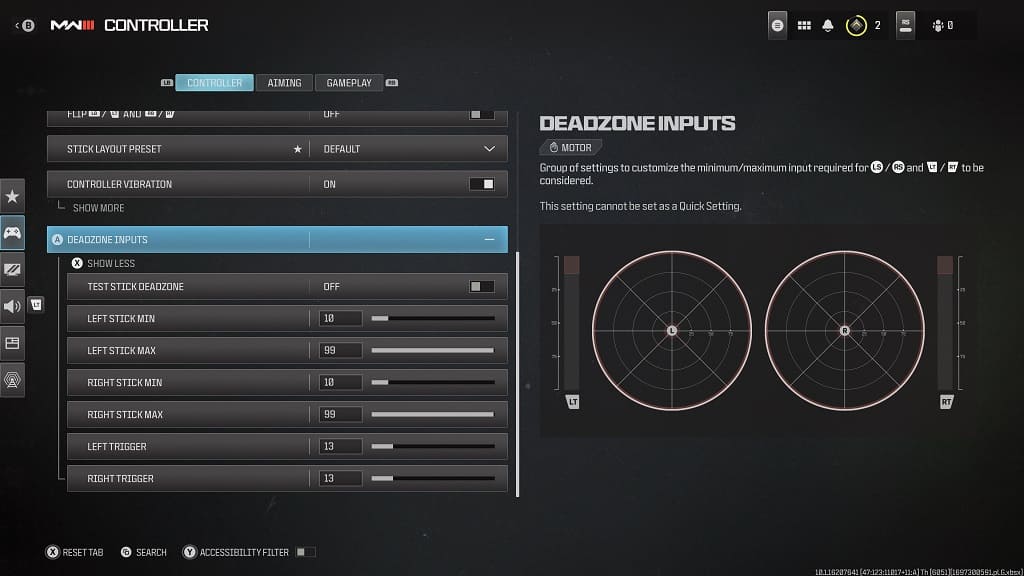
2. After getting to the Controller tab in the Settings menu, scroll down and then select Deadzone Inputs.

3. From there, you will be able to adjust the following:

  • Left Stick Min (Default Value: 10)
  • Left Stick Max (Default Value: 99)
  • Right Stick Min (Default Value: 10)
  • Right Stick Max (Default Value: 99)

4. After you have changed any of the above settings, select Test Stick Deadzone. This will allow you to see how the game registers your analog stick movements.

Of course, you can also test out the new dead zone settings in the actual game as well.

How to disable voice chat in Call of Duty: Modern Warfare 3

Voice chat is enabled by default in Call of Duty: Modern Warfare III. If you don’t want to hear other players while playing the online multiplayer modes, then you can take a look at this tutorial from Seeking Tech to see how you can disable this feature.

1. To Start off, you need to head over to the Audio tab in the Settings menu.

You can go to Settings by pressing the Menu/Options button in the main menu and then using the R1/RB buttons to change tabs until you get to the gear icon. From there, you need to select Audio.

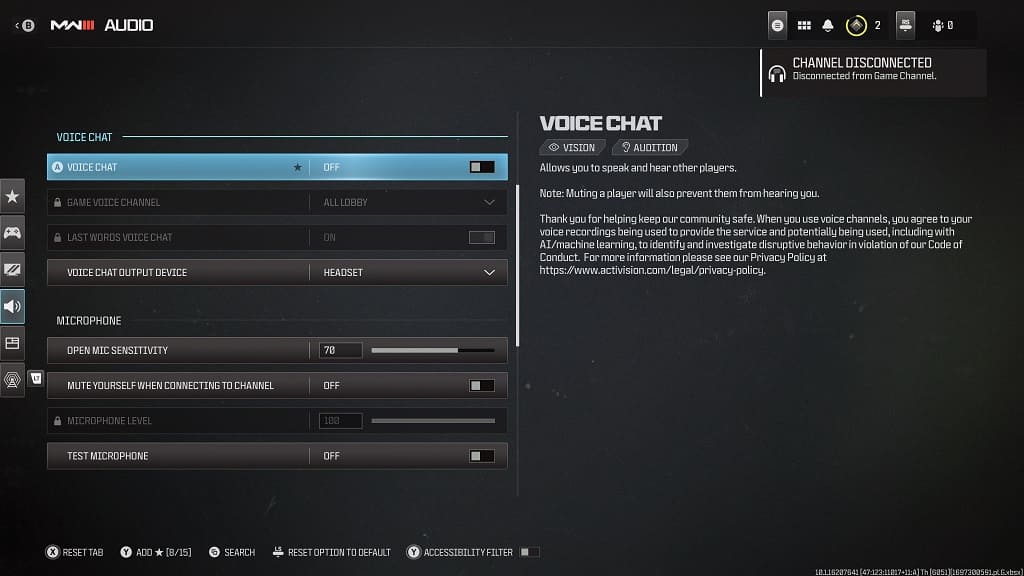
2. In the Audio screen, scroll down to the Voice Chat section.

You should see the Voice Chat setting there with the following description:

Allows you to speak and hear other players

Note: Muting a player will also prevent them from hearing you.

There is also a note saying that your voice may be recorded for service and code of conduct reasons.

3. The Voice Chat setting is set to On by default. To disable it, make sure that it is set to Off instead.

4. You can then exit the Settings menu and then return to playing Modern Warfare 3. When you do, you should no longer hear the voices of other players.

How to change the sprint settings in Call of Duty: Modern Warfare 3

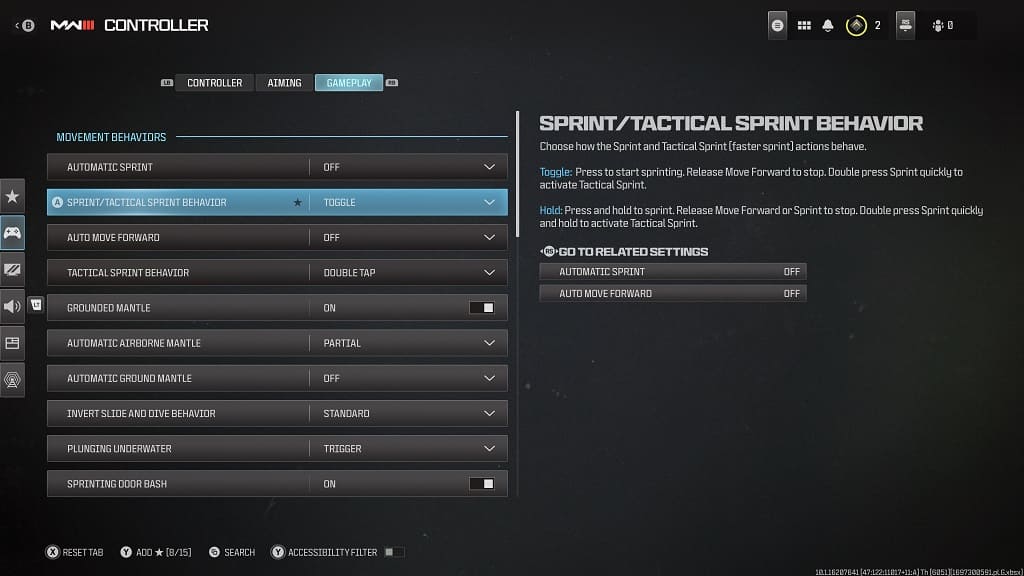
By default, you need to press down on the left analog stick in order to toggle the sprint function in Call of Duty: Modern Warfare III. To perform a tactical sprint, which lets you run even faster in short bursts, you need to double tap on the left analog in the same direction.

To see how you can change the sprint settings for this first-person shooting game, you can take a look at this guide from Seeking Tech.

1. From the main menu, press the Options button on the PlayStation controller or Menu button on the Xbox controller.

In the newly opened menu, press the R1 and RB buttons a few times until you get to the tab with the gear icon. Afterwards, select Controller.

2. In the next screen, use the R1 and RB buttons again to change tabs until you get to Gameplay.

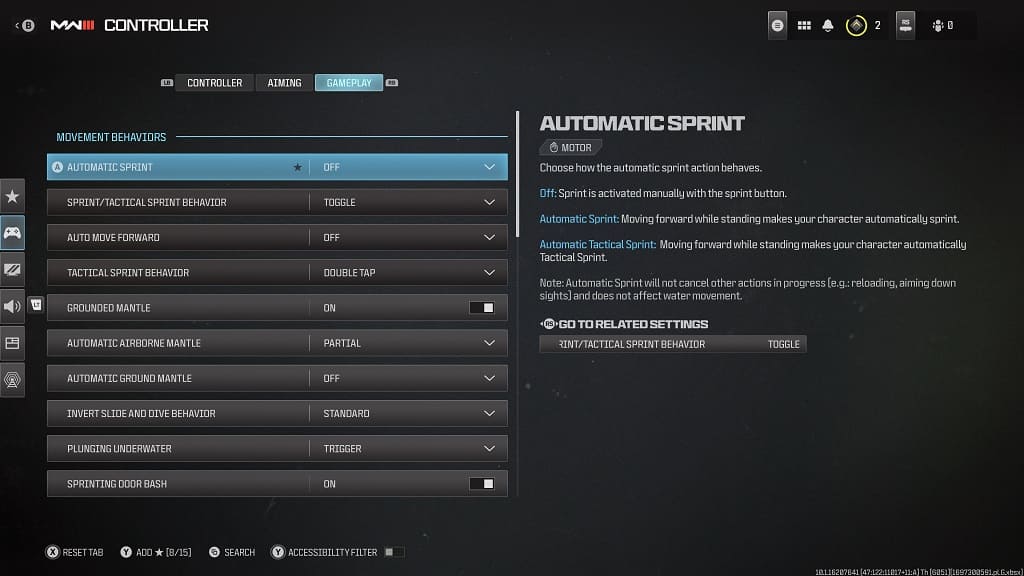
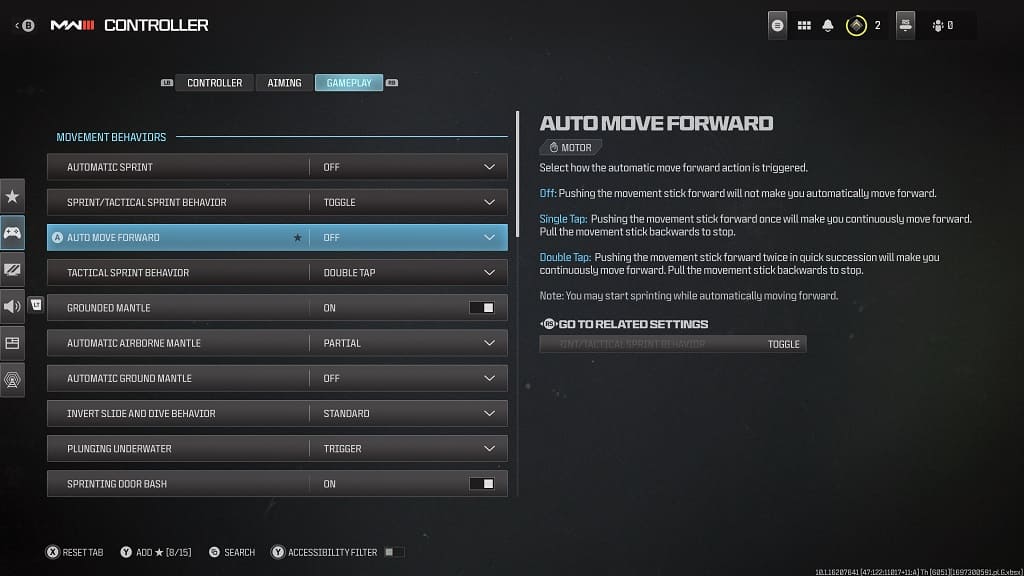
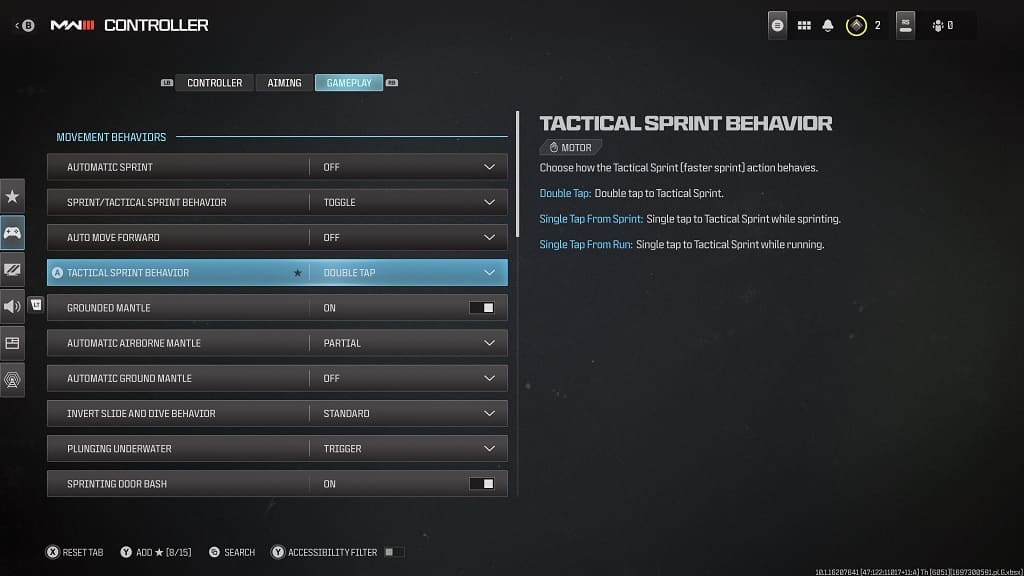
3. From the Gameplay tab, you should be able to adjust the following options:

Automatic Sprint:

  • Off
  • Automatic Sprint
  • Automatic Tactical Sprint

Sprint/Tactical Sprint Behavior:

  • Toggle
  • Hold

Auto Move Forward:

  • Off
  • Single Tap
  • Double Tap

Tactical Sprint Behavior:

  • Double Tap
  • Single Tap from Sprint
  • Single Tap from Run

4. We recommend that you play around with settings until you find the right combination that fits your play style.

How to adjust the aim assist setting in Call of Duty: Modern Warfare 3

You may find the aim assist to feel off when playing Call of Duty: Modern Warfare III with a controller. To see how you can change this setting for the latest CoD installment, you can check out this guide from Seeking Tech.

1. If you haven’t done so already, make your way to the Settings menu in the game.

2. From there, press the L2 button on PlayStation or LT button on Xbox to bring up the menu on the left side. You then need to select Controller.

3. In the Controller section, press the L1 or LB button in order to switch over to the Aiming tab.

4. You should then scroll down until you get to the Aim Assist section.

5. Next, you should make sure that Target Aim Assist is set to On.

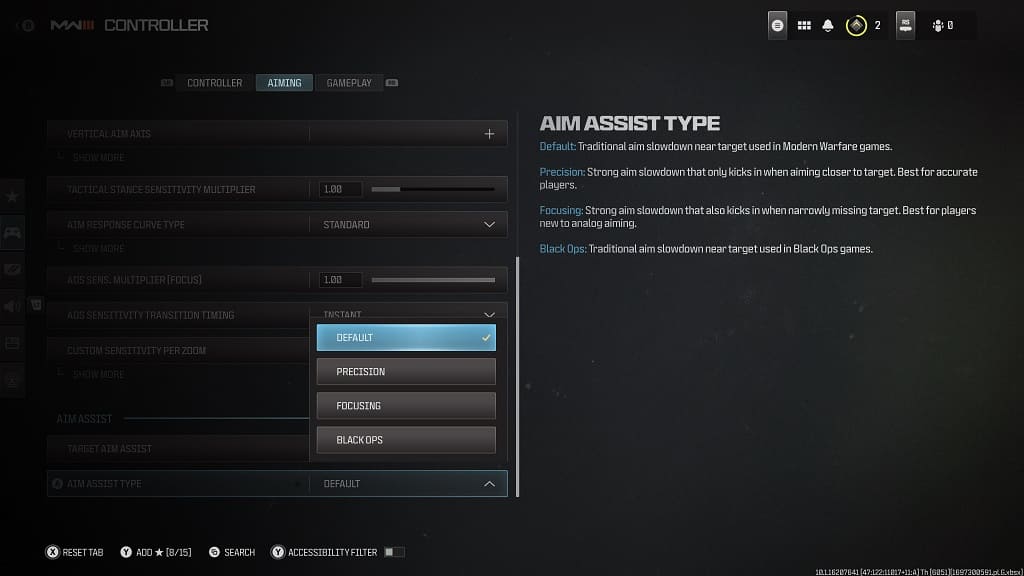
6. Afterwards, you need to select Aim Assist Type.

7. You will be able to change the aiming type to any of the following options:

Default: Traditional aim slowdown near target used in Modern Warfare games.

Precision: Strong aim slowdown that only kicks in when aiming closer to target. Best for accurate players.

Focusing: Strong aim slowdown that also kicks in when narrowly missing target. Best for players new to analog aiming.

Black Ops: Traditional aim slowdown near target used in Black Ops games.

We suggest that you test out all four options to see which type is best suited for your playstyle.