How to view your purchase history from Xbox Series X and S

You are able to check your history for the content you purchased from the Store App of your Xbox Series X and Xbox Series S. This list includes games you bought on the PC, Xbox One, Xbox One S and Xbox One X.

To see how you can view these recent and past purchases, you can take a look at this tutorial from Seeking Tech.

1. For the first step, you need to open the Settings App on your Series X or Series S. You can do so by selecting it on the top right side of the home menu of the dashboard.

You can also get there by selecting the Settings option from the Profile & System tab of the Guide menu. For the uninformed, you can open the Guide menu by pressing the Xbox logo button on your controller. You can then press the RB buttons to change tabs until you get to Profile & System.

2. Once you get to Settings, you need to first select Account on the left side.

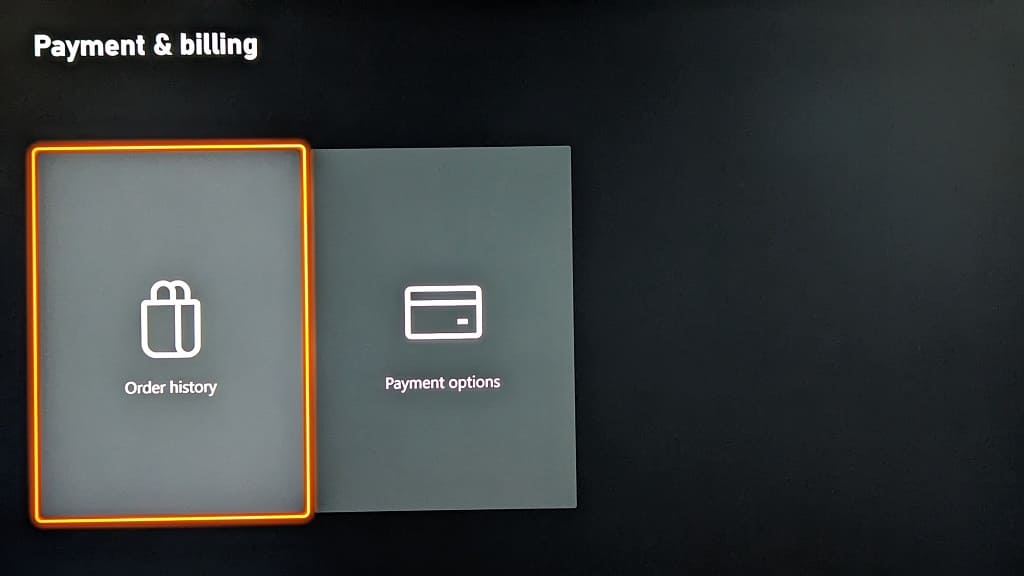
3. On the right side of the same screen, you then need to select Payment & Billing.

4. From the Payment & Billing menu, select Order History.
5. The Order History page should show the purchase you made. By default, you will be able to view your most recent purchases from the past month.

If you don’t see your orders here, then make sure you are logged into the same Xbox account you previously used to make the purchase.

6. To sort the listing, you can select the Show All drop-down menu. Afterwards, you can select any of the following filtering options:

  • All
  • In Progress
  • Returned/Refunded
  • Digital
  • Physical
  • Pre-Orders

7. You can also change how far back you want to view your purchase history. In order to do select the “From past 1 month” drop-down menu from the aforementioned Order History page. Afterwards, you can pick between any of the following timelines:

  • 1 month
  • 3 months
  • 6 months
  • Year
  • All available

How to see all games on the Xbox Store

The Xbox One, Xbox One S, Xbox One X, Xbox Series S and Xbox Series X can play thousands of digital games. To see how you can see the entire catalog of these titles, you can take a look at this guide from Seeking Tech.

Can you view all games on the Microsoft Store App of your Xbox?

Unfortunately, there is currently no way of viewing all the games available on the Microsoft Store App from your Xbox One, Xbox One S, Xbox One X, Xbox Series S and Xbox Series X console. Instead, you will need to visit the store from a web browser in order to do so.

How to see all games from the Xbox Store website

To find all the digital games that are currently available on the Xbox Store, you need to visit the official website from a web browser. If you are in the U.S. region, for example, then you will be able to find the full list of digital releases with this link.

How to sort the full catalog of games on the Xbox Store

From the Browse All Games page of the Xbox Store, you are able to sort the listing from the Sort By drop-down menu located on the left side if you are viewing the desktop version.

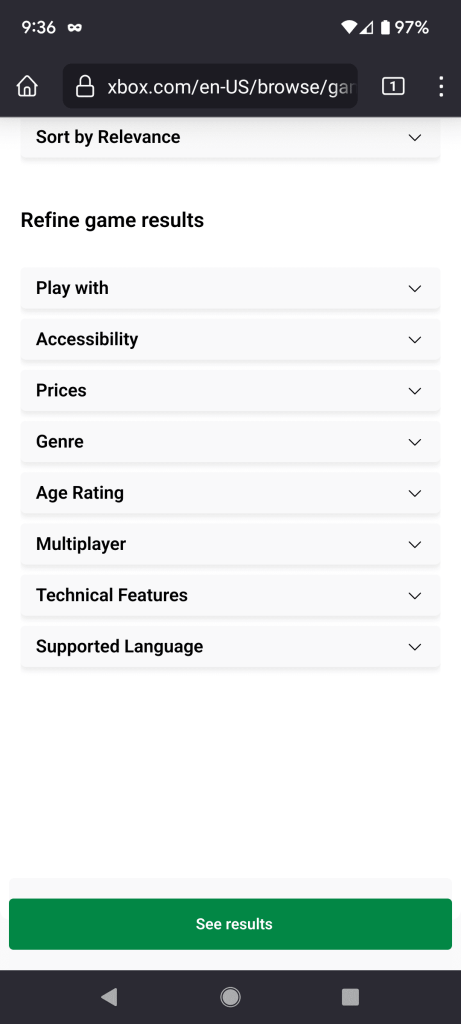
In the mobile version, you need to tap Refine Game Results before you can find the Sort By drop-down menu.

You can then sort the listing based on Relevance, Title A – Z or Title Z – A.

For the desktop version, any changes you made to the sorting order will be applied instantly. For the mobile version, the sorting changes will only be applied after tapping the See Results option located at the bottom.

Sort and filter menu from the Browse All Games webpage of the Xbox Store.

How to filter the complete list of Xbox games from the store

You can also filter the listing in the Filters section on the left side if you are viewing the desktop version of the Browse All Games page.

In the mobile version, you need tap Refine Game Result first to find the filters in the Refined Game Results section.

You will be able to filter the full games list based on the following categories:

  • Play With (aka the platforms you can use to play these digital games)
  • Accessibility
  • Prices
  • Genre
  • Age Rating
  • Multiplayer
  • Technical Features
  • Supported Language

For the desktop version of Browse All Games page, any filters you add will be instantly applied to the listing. For the mobile version, you need to tap the See Results options to apply to filters.

How to fix Microsoft Store App updating issues on Xbox Series X and S

When using your Xbox Series X and Xbox Series S, you may notice that the Microsoft Store App is constantly updating. When you check on the update process, you may also find that it remains stuck. To see how you can fix these issues, you can take a look at this troubleshooting article from Seeking Tech.

1. For the first step, you can try quitting the Store App. In order to do so, you need to take the following steps:

  • Press the Xbox logo button on your controller to bring up the Guide menu.
  • Next, you need to move the cursor over to the Microsoft Store option. If you don’t see it, then you need to open the Store App and then press the Xbox button again to go back to the Guide menu.
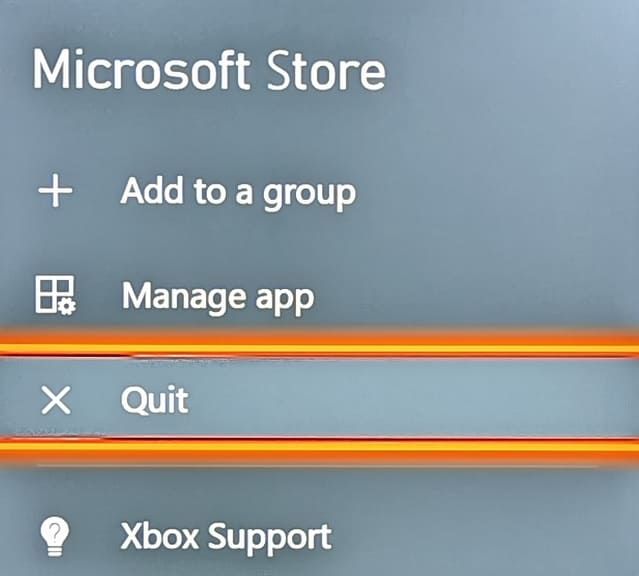
  • Afterwards, press the Menu button to open a pop-up window for the application.
  • Select Quit from the small window.

2. If the application keeps getting stuck in the update process even after you it, then you can try resuming the download after restarting your console by doing the following:

  • Press the Xbox button to open the Guide menu.
  • Select the Microsoft Store option.
  • In the Queue menu, select the Microsoft Store App.
  • Select Pause installation.
  • Afterwards, press and hold the Xbox logo button on the controller.
  • Select the Restart Console option that appears on the screen and then select Restart.
  • Once your Series X or Series S has been restarted, try to resume the installation to see if you can get the shopping to update properly.

3. You can also check to see if there is a new system update available by taking the following steps:

  • Open the Settings App.
  • On the left side in the Settings menu, select System.
  • You then need to select Updates on the right side of the same screen.
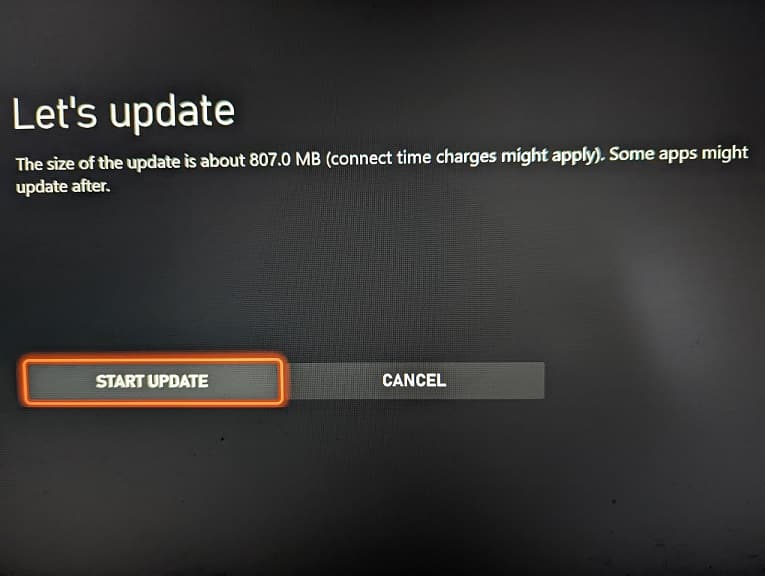
  • The System – Updates menu will let you know if there is a new update available. If there is, make sure you download the latest firmware.

4. If the Store App is still not updating correctly, then you can also try power cycling your gaming system by doing the following:

  • Press and hold the power button on the Series X or Series S for around 10 seconds.
  • With the console turned off, unplug its power cord from the power outlet and then wait for another 10 seconds.
  • Plug the power cord back in and then turn on your console.
  • Check to see if the Microsoft Store application is able to update.

How to turn off Wi-Fi on Xbox Series X and Xbox Series S

The Xbox Series X and Xbox Series S feature a Wi-Fi 5 card as you will be able to connect the console online over a 802.11ac or older wireless connection. If you want to turn off the Wi-Fi connection to these gaming systems for one reason or another, then you can take a look at this tutorial to see how you can do so.

Method #1

For the first method, you can simply set your console to go offline by taking the following steps:

  • To start off, you need to open the Settings menu of the Series X or Series S. You can do so by selecting Settings from the home menu or in the Profile & System tab of the Xbox Guide menu.
  • Inside of Settings, make sure you are in the General section on the left column.
  • On the right side of the same screen, you then need to select Network Settings.
  • After getting to the Network menu, you should be able to select the Go Offline feature.
  • Once your console is offline, you can also select the Forget Wireless Network option if you want to delete the Wi-Fi connection information on the console. Afterwards, you will have to select the Set Up Wireless Network option in the Network menu if you want to set up a new Wi-Fi connection.

Method #2

For the second method, you can head back to the Settings menu of your Xbox Series X or Xbox Series S. From there, select General and then Network Settings.

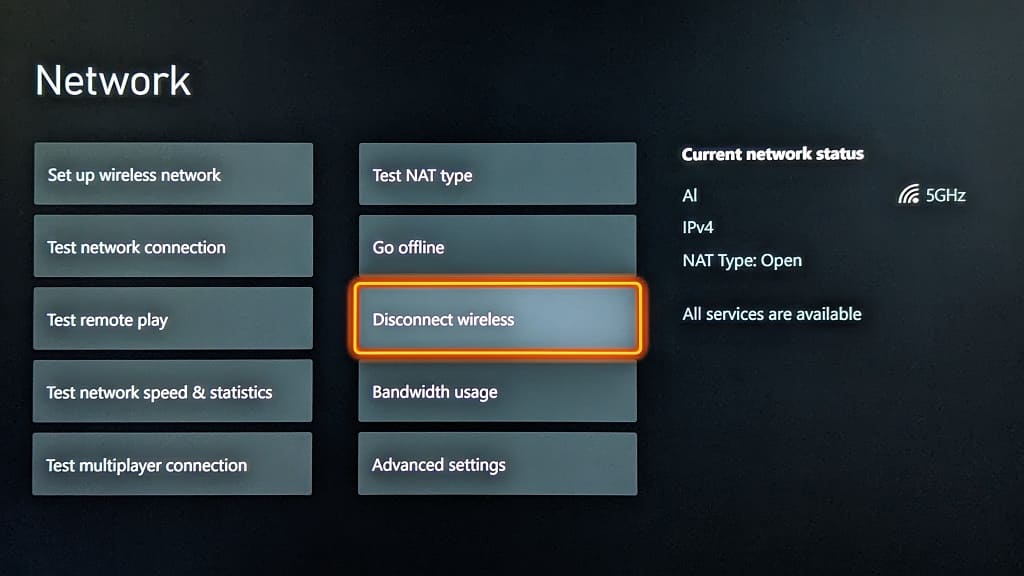
Once you arrive at the Network menu, you can then select the Disconnect Wireless option. By doing so, you will no longer be using the Wi-Fi connection. If you want to use Wi-Fi again afterwards, then you need to select the Set Up Wireless Network option from the Network menu.

Method #3

If you want to use a wired LAN connection instead of Wi-Fi for your Series X or Series S, then you can simply plug in the Ethernet cable to the console.

The system will automatically disable the Wi-Fi connection and switch over to the wired connection.

For the uninformed, a wired LAN connection should provide faster and more stable speeds when compared to Wi-Fi. So, if you are experiencing a lot of lag or slow downloads over Wi-Fi, then switching over to a wired Internet connection may help resolve these issues.

Keep in mind that you won’t be able to play games or use apps online on your Xbox if you disconnected your Wi-Fi without an Ethernet connection.

How to adjust the active hours for Xbox Series X and Series S

In order to make your Xbox Series X or Xbox Series S run more efficiently, Microsoft recently added the ability to adjust the active hours for your console. This will help your system use up less electricity, and therefore save you money on your energy bill, outside of the active hours timeline in Sleep Mode.

To see how you can access this feature, you can take a look at this tutorial from Seeking Tech.

1. If you haven’t done so already, make sure you update the system software of your Series X or Series S as this feature has been added through a firmware update.

To check if there is a new version of the console available to download, you can open the Settings menu and then select System > Updates. If there is a new file available, make sure you download and install it before continuing.

2. Once your Xbox is updated, head back to the Settings menu.

3. From the front page of Settings, you need to select General on the left column and then Power Options on the right side of the same screen.

4. You should now be in the General – Power Options menu. Here, you should make sure that you select Sleep in the “Choose how this console turns off” section. Otherwise, you won’t be able to access the Active Hours feature.

5. After making sure you have Sleep Mode set to Active, you then need to select Customize Power Options on the right side of the General – Power Options menu.

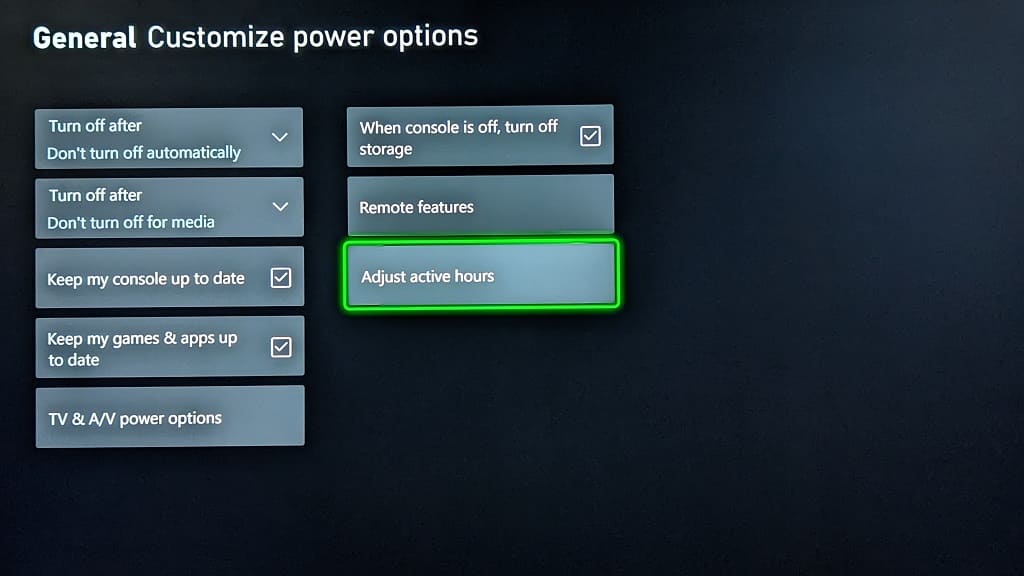
6. In the General – Customize Power Options menu, you need to select Adjust Active Hours.

Note: if you don’t see the Adjust Active Hours option, then you should make sure that you have the latest firmware installed. Restarting your console may also make it appear as well.

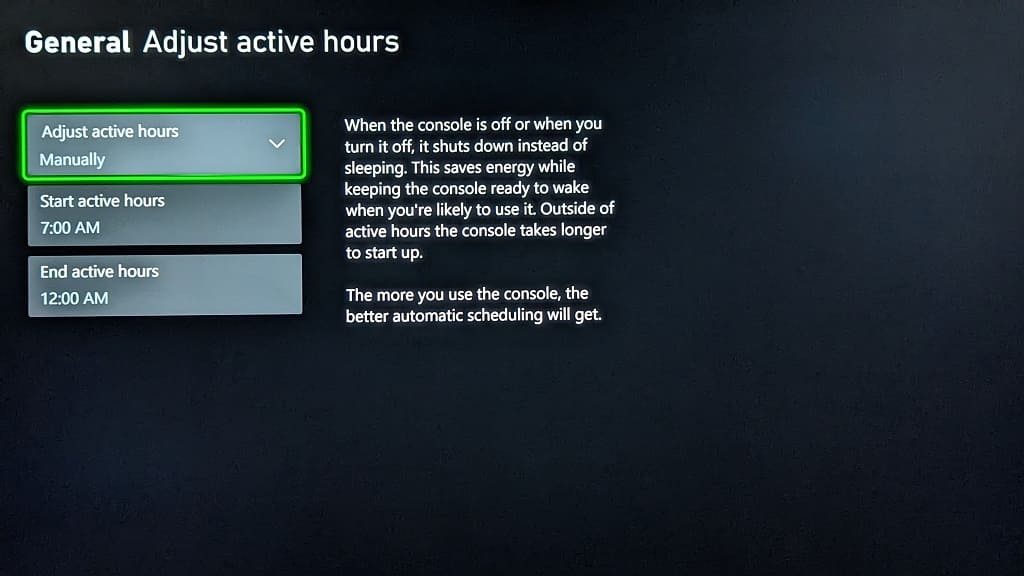
7. You should finally be in the General – Adjust Active Hours menu, which has the following description of the feature:

  • “When the console is off or when you turn it off, it shouts down instead of sleeping. This saves energy while keeping the console ready to wake when you’re likely to use it. Outside of active hours the console takes longer to start up. The more you use the console, the better automatic scheduling will get.”

8. When you select the Adjust Active Hours drop-down menu, you will have the following options:

  • The Always Active option is for those who want to keep their Xbox Series X or Xbox Series S in Sleep Mode at all times. This uses the most energy.
  • The Automatically option will let the console pick the best time. Your Series X or Series S will learn your habits when it comes to when you are actively using the system. It will then adjust the Active Hours to fit your usage schedule. As a result, the console will be put in Sleep Mode during hours where it expects you to use it. During inactive hours, the same console will be completely turned off.
  • The Manually option will let you set the active hours timeline. By selecting this, you should see the Start Active Hours and End Active Hours options appear. You can use these to set the range to your liking.

How to find deals if you are an Xbox Game Pass subscriber

One of the perks of being a member of Xbox Game Pass is that you can get special discounts. To see how you can find deals that are exclusive to subscribers of this service, you can take a look at this tutorial from Seeking Tech.

1. For the first step, make sure you turn on your Xbox One, Xbox One S, Xbox One X, Xbox Series S or Xbox Series X console if you haven’t done so already.

2. You should also make sure that you are signed into the Xbox Live account that is currently subscribed to Xbox Game Pass or Xbox Game Pass Ultimate.

3. Next, you need to open the Store App on your console.

You can do so by selecting Store from the home screen on the dashboard. Alternatively, you can press the Xbox logo button on the controller and then select the shopping bag icon to open the shopping application.

4. Inside of the Store App, move the cursor to the left until you see the left column menu.

5. From there, move the cursor to the Home option and then select the Deals option.

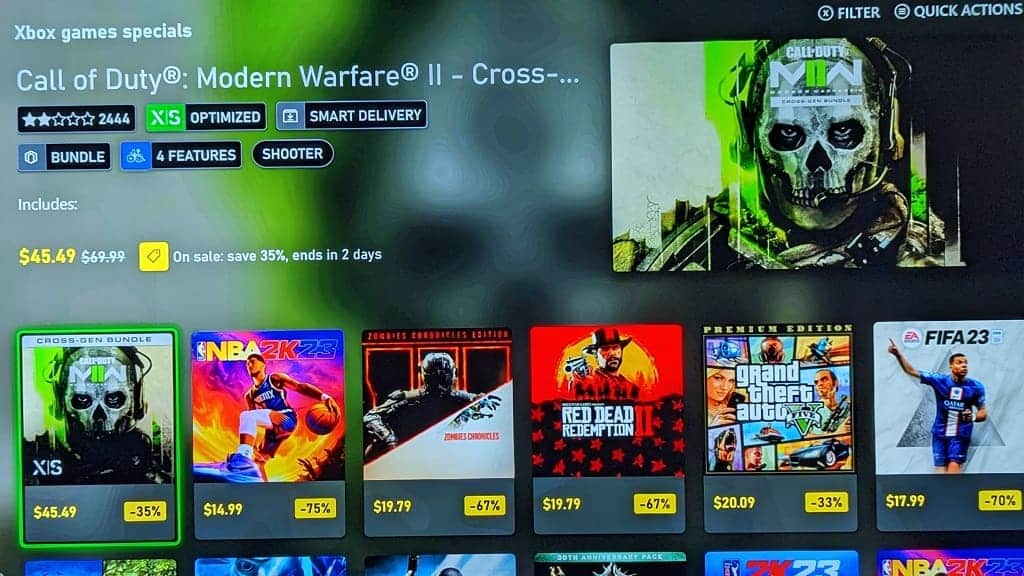
6. Once you get to the Deals section, scroll down until you get to the Xbox Games Specials row.

7. In the aforementioned row, scroll all the way to the right and then select the Xbox Games Special – Show All option.

8. You should now see a full list of games and downloadable content that are currently discounted for Xbox Game Pass subscribers.

9. If you want to filter this list, then you need to press the X button.

10. On the Filter tab, you will be able to filter the sale list based on the following categories:

  • Accessibility
  • Genre
  • Age Rating
  • Multiplayer
  • Play with
  • Prices
  • Supported Language
  • Technical Features

10. If you want to sort the list, then you need to switch over to the Sort tab in the aforementioned Filter menu. Afterwards, you can sort the Xbox Game Pass deals list based on the following order:

  • Relevance
  • Title A – Z
  • Title Z – A

How to enable and disable fast scrolling on Xbox Series X and Xbox Series S

You can use the fast scrolling feature to quickly move through a menu on your Xbox Series X and Xbox Series S. To see how you can enable, as well as disable, this feature, you can take a look at this tutorial from Seeking Tech.

How to turn on fast scrolling on Xbox Series X and Xbox Series S

In order to enable fast scrolling on your console, you can try either of the two following methods:

Method #1:

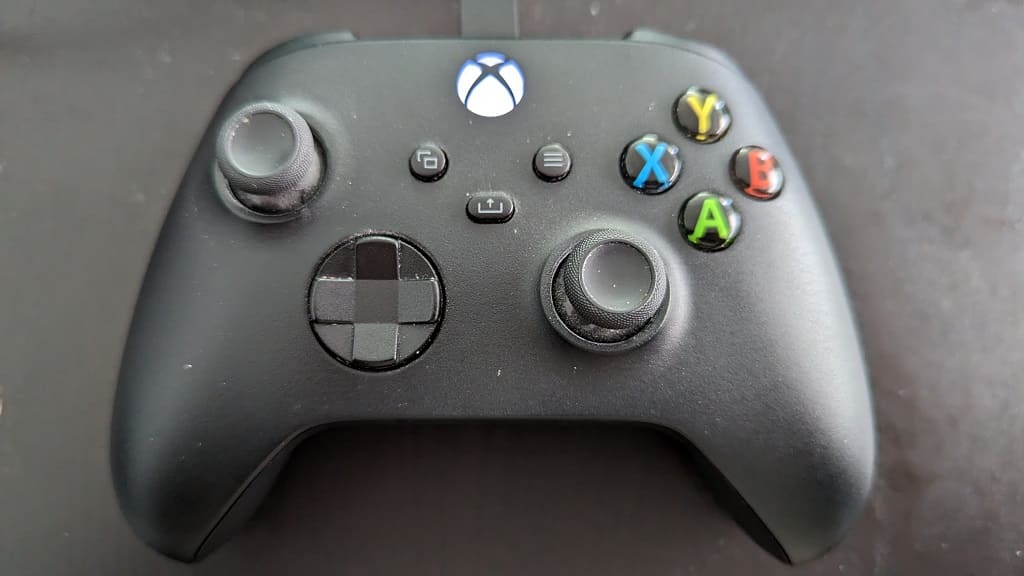
For the first method, you can simply hold the left analog stick or one of the direction button.

Initially, you will only move once space; if you keep holding the same analog position or button for more than one second, however, then fast scroll should automatically activate.

Method #2:

You can bypass the one second wait to activate fast scrolling. In order to do so, you need to press down on the right analog stick and then use either the left analog stick or directional pad to scroll. The fast scrolling feature should work immediately.

How to turn off fast scrolling on Series X and Series S

If you want to turn off fast scrolling on your system, then you can try the following methods:

Method #1:

The first method you can try is to avoid holding down on the right analog stick when you are moving the left analog stick or pressing the directional pad buttons. Otherwise, the fast scrolling feature will automatically be enabled.

Method #2:

For the second method, you should avoid holding the left analog stick in the same direction, as well as holding down on a directional pad button, for more than one second. If you keep holding, then fast scrolling will be activated.

Method #3:

You should also make sure that your left analog stick and directional pad are clean as stick buttons may cause the fast scrolling to turn on.

Furthermore, you should also make sure that the left analog isn’t suffering from any drifting problems.

How to find Xbox Play Anywhere games on Xbox Series X and S

Video games that support Xbox Play Anywhere can be played on Xbox and Windows 10 PC.

What’s neat about this feature is that you only have to purchase the title once to gain access to both the Xbox and PC versions. Furthermore, your save file and achievements will also carry over if you decide to switch from playing the game from one platform to the other.

To see how you can find the complete list of Xbox Play Anywhere games on your Xbox Series X and Xbox Series S, you can take a look at this tutorial from Seeking Tech.

1. To start off, you need to open the Store App on your console. You can find this shopping application from the home menu of the dashboard.

Alternatively, you can press the Xbox logo button on the controller at any time to open the Guide menu. You can then select the shopping bag icon at the bottom of the first tab you see to open the store.

2. Once you arrive at the Store App, navigate to the left side of the screen until you get the left column menu to pop up.

3. From there, select Games.

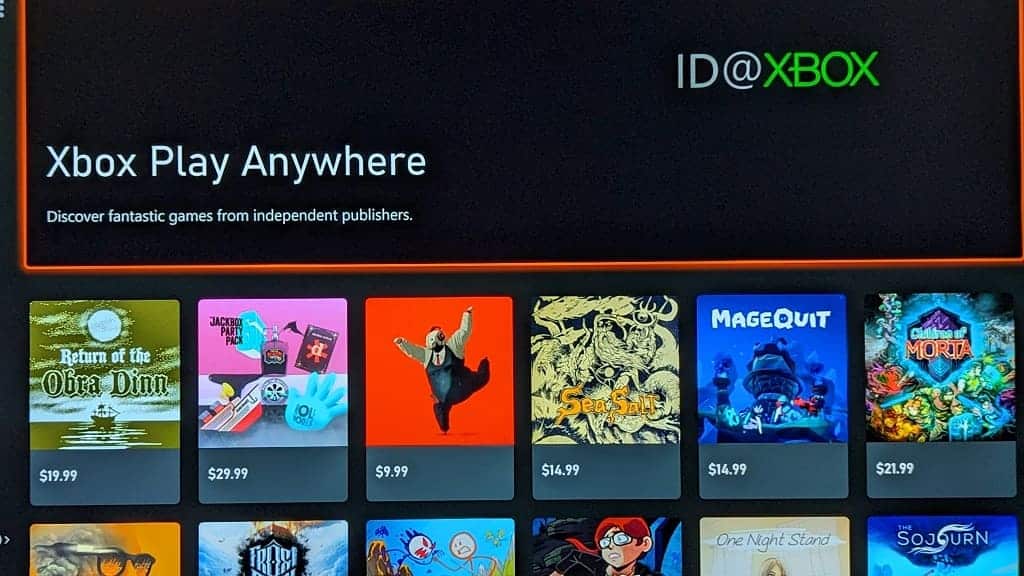
4. In the Games section of the Store App, keep scrolling down until you get to the Xbox Play Anywhere roll.

5. Next, you need to scroll all the way to the right and then select the Show All option.

6. You should now be in the Xbox Play Anywhere menu, which will show the full list of games that support the feature.

7. If you want to filter this listing, then you need to press the X button.

8. In the Filter tab, you will see the following filtering options:

  • Accessibility
  • Genre
  • Age Rating
  • Multiplayer
  • Play with
  • Prices
  • Supported Language
  • Technical Features

9. From the same Filter menu, you can also switch to the Sort tab by pressing the RB button. In the sorting tab, you will be able to order the listing based on the following:

  • Relevance
  • Title A- Z
  • Title Z – A

How to find Games with Gold titles you previous redeemed on Xbox One and Xbox Series X/S

Games with Gold is a feature of Xbox Live Gold where you get to claim 2 to 4 titles on a monthly basis. If you previously redeemed these games on your Xbox One, Xbox One S, Xbox One X, Xbox Series S and Xbox Series X console but don’t know where to find them, then you can take a look at this tutorial from Seeking Tech.

1. Before we begin, it should be noted that you need to previously claim the games when they were made available in Games with Gold. If you didn’t redeem in time, then you won’t be able to find these titles on your Xbox account.

It should also be noted that any Xbox 360 games you claimed previously will be listed separately from the Xbox One and Xbox Series X/S GwG catalog.

2. To start off, turn on your Xbox console and then sign into the Xbox Live account that you used to previously redeem the Games with Gold titles.

3. Next, you need to head over to the home menu on the dashboard if you aren’t there already.

In order to do so, press the Xbox logo button on the controller and then select the house icon at the bottom of the Guide menu.

4. From the home menu, find and select My Games & Apps.

5. On the left side of the new screen, you need to select Full Library.

6. On the right side of the same screen, press the RB button on the controller once to switch over to the Owned Games tab.

7. The Owned Games tab shows a list of games you previously purchased. This listing should include the Xbox 360 games that were claimed through Games with Gold.

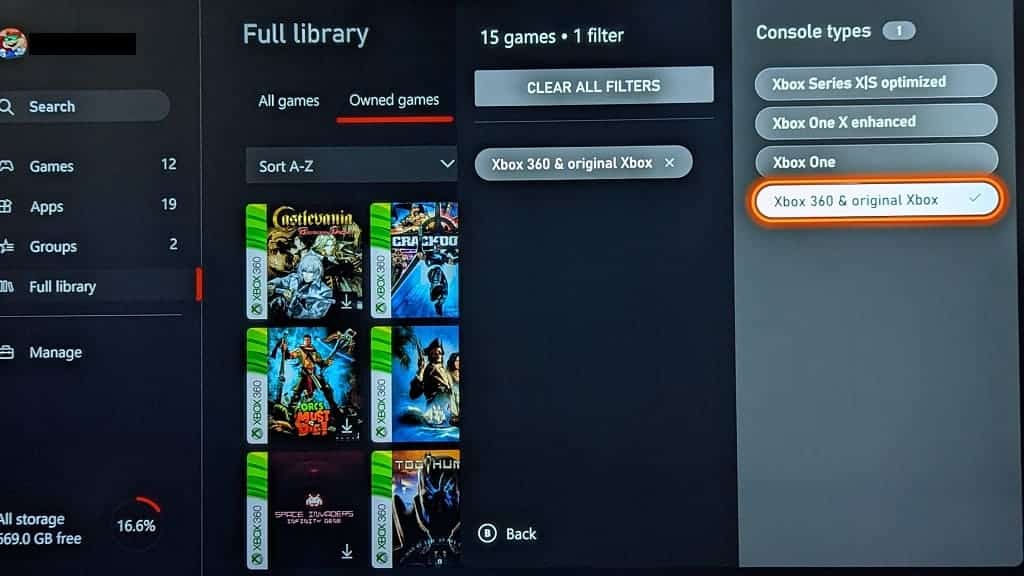
To filter this listing to only show Xbox and Xbox 360 games, select the Filter option in the Owned Games tab. Afterwards, you need to select Console Types and then Xbox 360 & Original Xbox.

For any Xbox 360 game you claimed with Xbox Live Gold, you are able to play them with or without being an active Xbox Live Gold subscriber.

8. To view Xbox One and Xbox Series X/S titles that you previously claimed via Games with Gold, return to the Full Library section in the My Games & Apps menu.

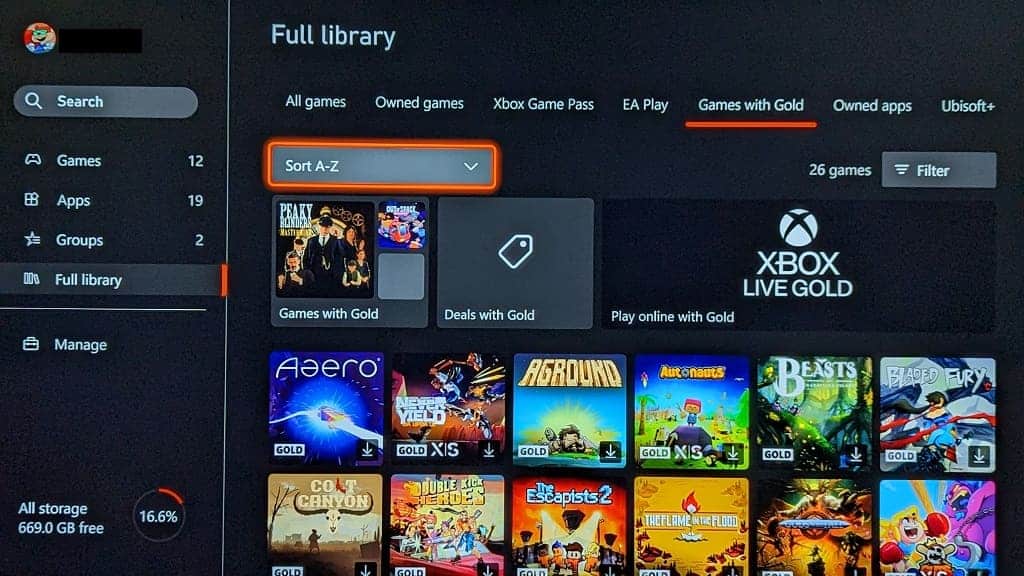
9. Afterwards, press the RB button several times until you get to the Games with Gold tab.

You should be able to view the full list of titles Xbox One and Xbox Series X/S titles that you redeemed.

If you are still an active member of Xbox Live Gold, then you are able to download and play them.

What happens if you cancel Ubisoft+ for Xbox?

Ubisoft+ is now available for the Xbox Series X, Xbox Series S, Xbox One X, Xbox One S and Xbox One consoles. By subscribing to Ubisoft+ Multi Access, you will be able to play Ubisoft games on your Xbox system as well as the PC and cloud streaming (via Amazon Luna).

So, what happens if you decide to change your subscription? You can find out in this article from Seeking Tech.

Remaining Subscription

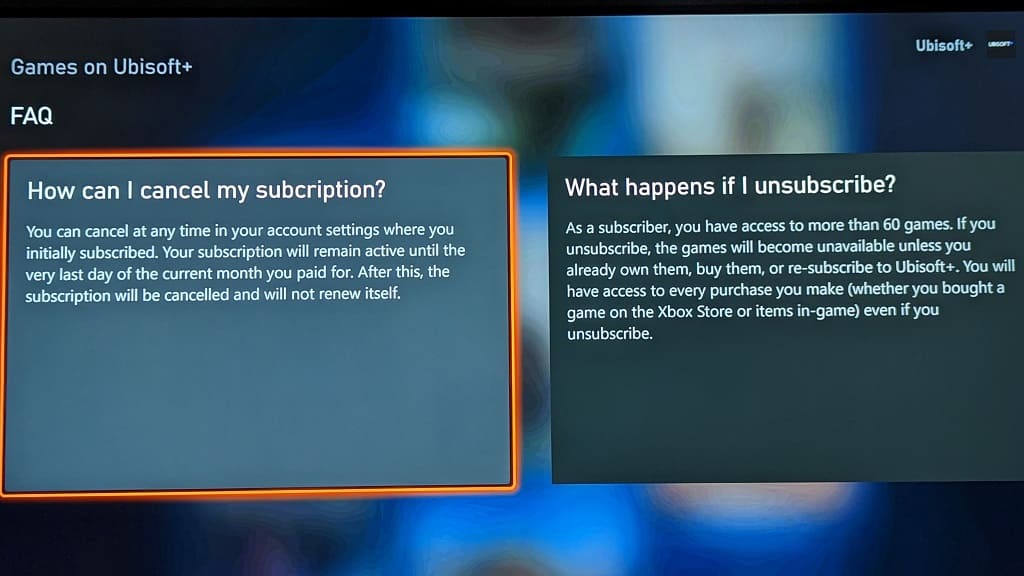
If you decide to unsubscribe from Ubisoft+ in advance, then you can still take advantage of the subscription up until the last day of the current month that you already paid for.

By cancelling, your subscription won’t automatically renew in the next billing cycle.

Full Access to Games

Once your subscription runs out, you will no longer have full access to the games on the service. If you want to play these titles again, you will need to own them previously, buy them on your own or re-subscribe to Ubisoft+ Multi Access.

Full Access to DLC

Some of the Xbox One and Xbox Series X/S games from the Ubisoft+ subscription are Gold, Deluxe or Ultimate Editions. These come with additional downloadable content.

If you cancel your membership, you will also lose access to these DLC (even if you own the base game) useless you purchase them previously, buy them on your own or re-sub.

Save Files

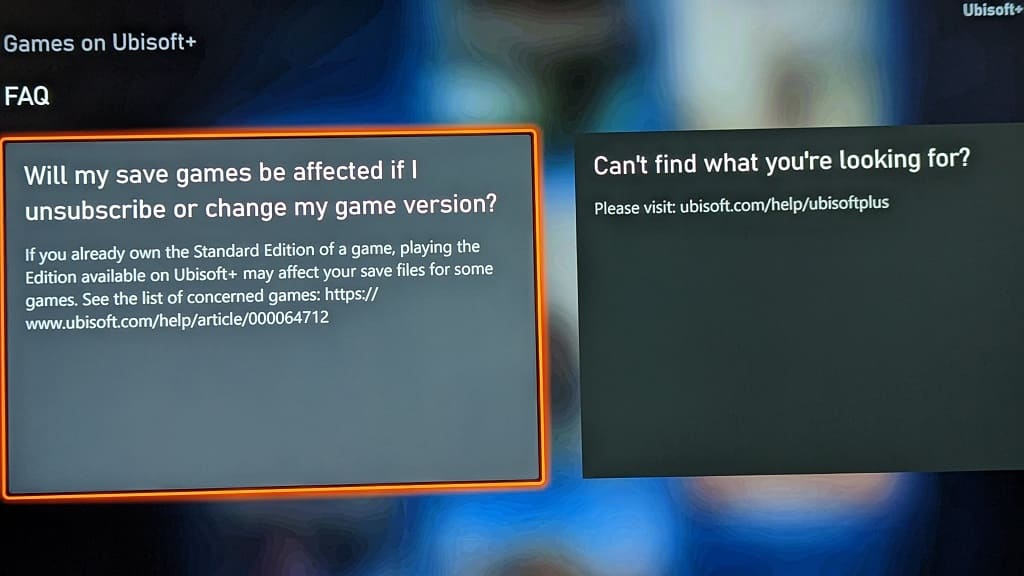
When it comes to save files, these data won’t be deleted from the cloud or local storage even if you are no longer subscribed to Ubisoft Plus. Therefore, you should be able to resume from where you left off as long as you purchase the same edition of the game or become a member to the subscription service again.

If you bought a different edition, then the save file may not work. In some cases, you may even end up corrupting the data and losing the file if you try to load incompatible data.

To find out more about how saves work with the Ubisoft+ service, you can check out this page from the official Ubisoft website.