How to fix issues with bricked or unresponsive DualSense

When playing the PlayStation 5 (or PlayStation 5 Digital Edition), you may encounter issues where your DualSense will be bricked or not responsive.

If you are experiencing this problem, you can follow this guide at Seeking Tech to find some potential fixes.

Updating to latest firmware and patches

The first step we recommend taking is to update to the latest system firmware and software patch files if possible. The issues you are encountering with your DualSense could be related to the software of the system or even a specific videogame.

If you are automatically connected to the internet on your PS5, then you should get a pop-up notification anytime there is an update available for the system or your most recently-played games.

How to manually update the PS5 firmware
To manually update your system, you can take the following steps:

1. Go to “Settings” from the home screen menu. This is located on the upper right corner of the screen as the gear symbol.

2. Under the “Settings” menu, go the “System” from the list.

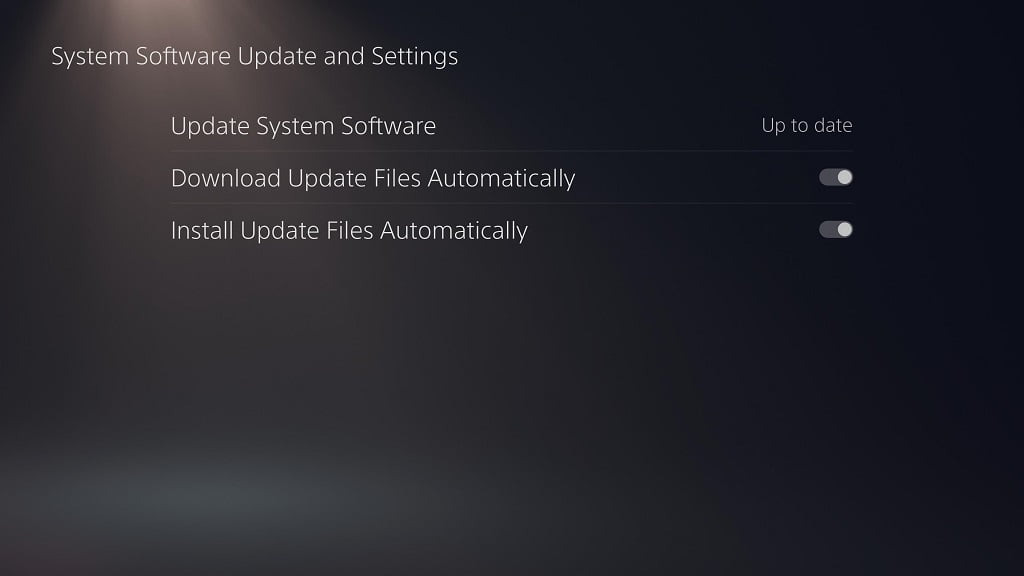
3. Under the “System” menu, select “System Software” from the list to the left and then the “System Software Update and Settings” option on the right side of the same screen.

4. Under the “System Software Update and Settings” menu, select “Update System Software.”

5. In the “Update System Software” menu, select “Update Using Internet.”

6. Follow the instructions on the screen to update to the latest PlayStation 5 firmware.

How to manually update a game on PS5

To manually update a specific game, you need to do the following:

1. In the home screen (this is the menu used to launch games), navigate to the game you want to update.

2. With the game highlighted, press the Options button (which is the button with three horizontal lines located to the left of the Triangle button).

3. In the pop-up menu, select the “Check for Update” option.

How to tell if you need to recharge your DualSense

The unresponsiveness of your PS5 controller could simply be related to its depleted battery power.

To tell if your DualSense still have some battery life left, press the PS button. If there is power, lights will flash from the controller. Your PlayStation 5 will also turn on.

If you don’t see any lights, you should try recharging the DualSense with a charging USB cable. If you don’t have one, you can check out this guide from Seeking Tech.

If you are having problems recharging the controller, then you might want to navigate over to this tutorial for additional help.

How to reset the DualSense controller

If you are sure that your DualSense issue is not related to the battery, then you can try resetting your controller. To do so, you need to take the following steps:

1. First, make sure that your PlayStation 5 is completely turned off. If you don’t know how to shut off the system, then you can check out this tutorial.

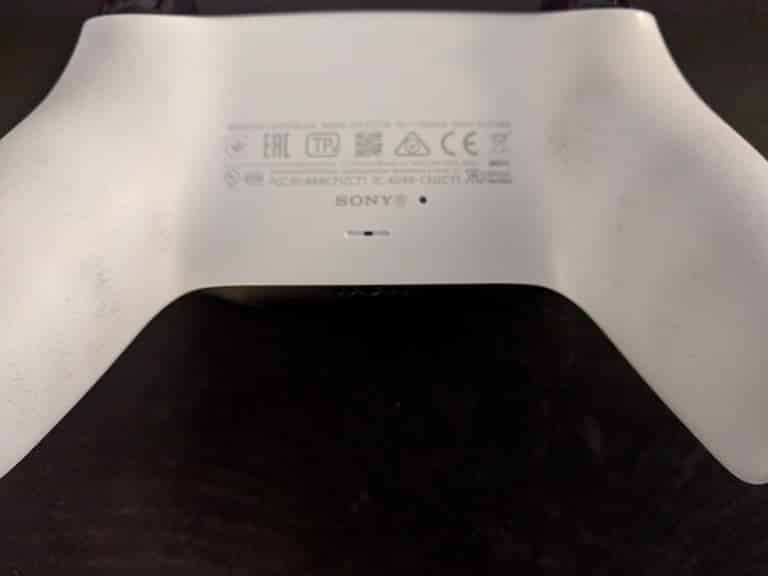
2. Turn over your DualSense and you should see a small hole located to the right of the SONY trademark.
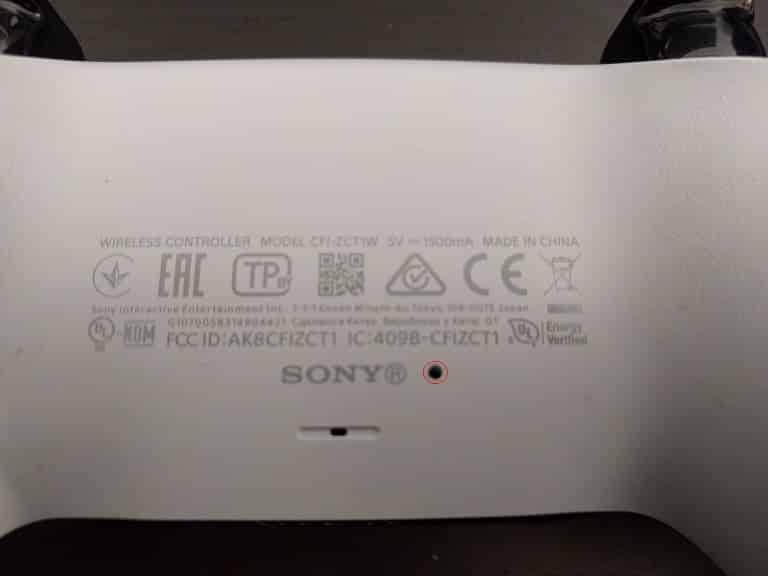
3. Use either a pin or toothpick to press down on this hole until you feel the press of a button.

4. Hold down on this button for 3 to 5 seconds to reset the controller.

5. After you are done with resetting the DualSense, connect it your PlayStation 5 system using an USB cable.

6. Turn on your PlayStation 5. Your system should be able to detect your DualSense. You may also get a notification to update to the latest firmware for the PS5 controller.

7. If recharging and resetting your controller does not work, then you may have to contact PlayStation Support as your issue may be hardware related. You can do so with this website.

If you are too inpatient when it comes to waiting for your DualSense to be repaired, then you might want to pick up a second controller.

How to remap DualSense and DualShock 4 buttons on PS5

With the PlayStation 5, as well as PlayStation 5 Digital Edition, you can reassign buttons on your DualSense and DualShock 4 controllers. If you are interested in doing so, then you can follow this tutorial at Seeking Tech.

How to remap DualSense and DualShock 4 buttons on PS5

To remap the buttons on your controller, you need to take the following steps:

1. Turn on your PS5 and select your user profile. This will bring you to the home screen menu. If you are already playing a game or using an app, you can press and hold the PS button on your controller until the home screen shows up.

2. The remapped buttons will be tied to your user profile. To switch user profiles, you need to select your profile picture from the home screen menu (it is located on the upper right corner of the screen). Afterwards, select the “Switch User” option in the new pop-up menu.

3. After making sure you are on the right profile, go to “Settings” from the home screen (this is also located on the upper right corner of the screen, right next to your profile picture).

4. In the new “Settings” menu, select the “Accessibility” option.

5. In the “Accessibility” menu, select the “Controllers” option on the left side of the screen and then the “Custom Buttons Assignments” option on the right side of the screen.

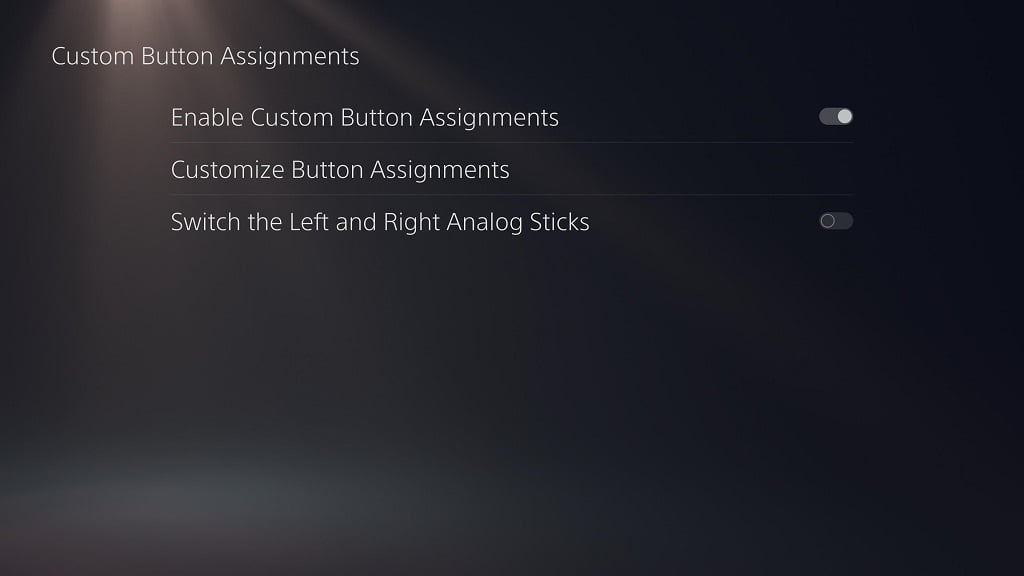
6. In the “Custom Buttons Assignments” menu, select the “Enable Custom Button Assignments” option if it is disabled. You can tell that this feature is enabled by looking at the switch to the right of the wording. The feature is turned on when the switch is white. The other options below will also become selectable.

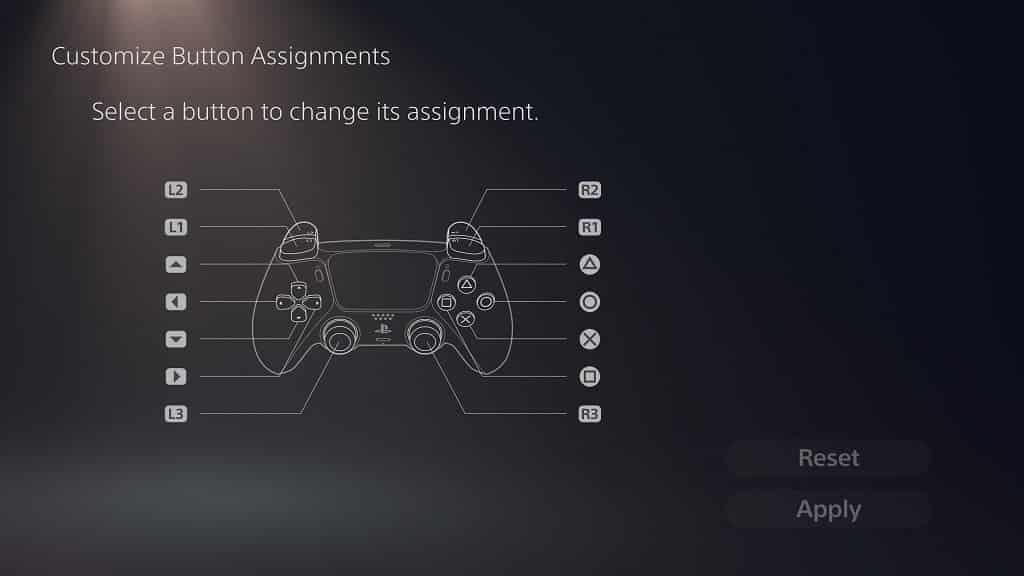
7. After enabling the “Custom Button Assignments” option, select “Customize Button Assignments” from the same menu screen.

In the “Custom Button Assignments” menu, you will be able to remap the following buttons:

  • L1
  • L2
  • L3
  • R1
  • R2
  • R3
  • Triangle
  • Circle
  • Cross (X)
  • Square
  • Up Directional Button
  • Left Directional Button
  • Down Directional Button
  • Right Directional Button

You can switch between any of the aforementioned buttons. For example, if you change the default functionality of the Triangle button to the X button, the default functionality of the X button will automatically change to the Triangle button as well. Keep remapping the buttons until you achieved your desired results.

8. Once you are satisfied with the changes, you can select the “Apply” option to save your remapped button layout.

Common Button Changes

Some of the more common button remaps are L1 to L2 and R1 to R2. Before the PlayStation 4, a lot of games, especially those from the first-person and third-person shooting genres, use the L1 and R1 buttons for aiming and shooting.

The other common change is from X to O. Before the PlayStation 5, a lot of videogames originating from Japan will use the O button as confirmation and the X button as cancel. This button assignment would either stay the same or be switched when a Japanese game is localized for other regions such as North America.

Some gamers may also like to change the functionally of the L3 and R3 as pushing down on the left and right analog sticks of the DualSense or DualShock 4 may not feel all that great, especially if you are using these buttons to run or perform a melee attack.

Can you remap PS, share and options button on PS5?

You can’t remap any of the PS, share or options button on your DualSense/DualShock 4 controller when using the PlayStation 5.

How to disable DualSense and DualShock 4 remapped buttons on PS5

If you want to disable using the remapped buttons on the PlayStation 5, you must take the following steps:

1. From the home screen, go to the aforesaid “Settings” menu.

2. In “Settings,” go to “Accessibility.”

3. In the new screen, select “Controllers” on the left side and then “Custom Button Assignments” on the right side.

4. Select the “Enable Custom Button Assignments” option. You can tell that this setting is disabled if you look at the switch to the right of the wording. If the switch is black (and the other two options below it become non-selectable), then the custom button assignments are disabled.

4. To use the remapped buttons again, you have to re-enable the “Enable Custom Button Assignments.” Doing so will bring back your previous customized buttons layout.

How to reset DualSense and DualShock 4 remapped buttons on PS5

If you would like to reset the remapped controller buttons on the PlayStation 5, you can take the following steps:

1. Return to the aforementioned “Custom Button Assignments” menu. You can do so by going from the home menu to “Setting,” then ““Accessibility,” then “Controller” and, finally “Custom Button Assignments.” Make sure “Enable Custom Button Assignments” is turned on and then select “Custom Button Assignments.”

2. In the menu, select the “Reset” option on the bottom right corner.

How to switch the DualSense/DualShock 4 left and right analog sticks on PS5

To switch the functions of the left and right analogs on the PlayStation 5, you need to do the following:

1. Return to the “Custom” Button Assignments” menu by heading to home screen and then selecting the following options in subsequent order: “Settings,” “Accessibility,” “Controllers” and “Custom Button Assignments.”

2. Make sure that the “Enable Custom Button Assignments” is turned on and then select the “Switch the Left and Right Analog Sticks” option.

How to invert DualSense and DualShock 4 controls on PS5

If you want to invert controls systemwide on your PlayStation 5 for your DualSense and DualShock 4, you can take the following steps:

From the home screen menu, head to “Setting.”

1. In the “Settings” menu, select the “Saved Data and Game/App Settings” from the available options.

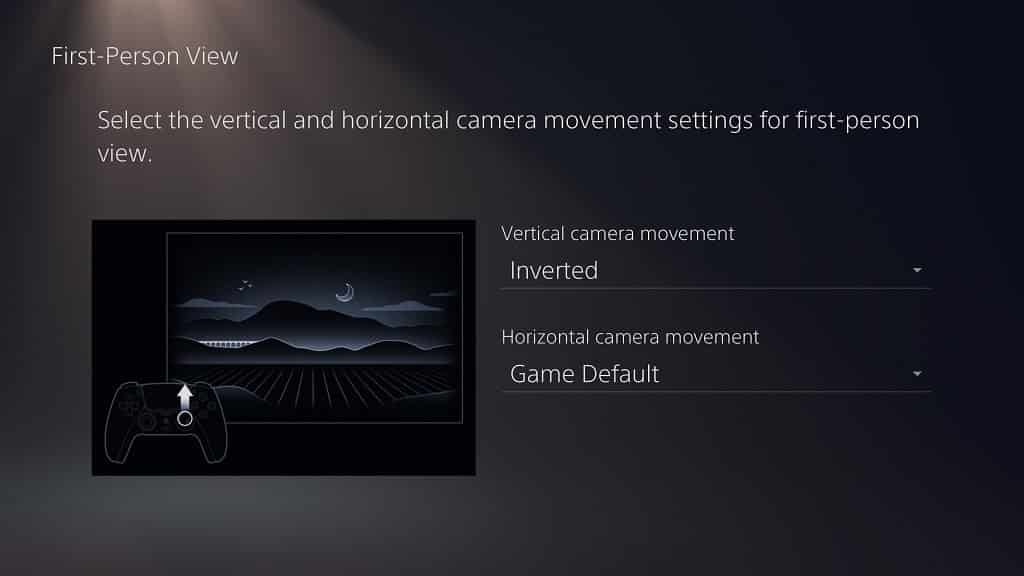
2. In the new “Saved Data and Game/App Settings” menu, select “Game Presets on the left side of the screen and then either “First-Person View” or “Third-Person View” on the right side of the screen.

3. In the new menu, you will be able to change two settings: “Vertical Camera Movement” and “Horizontal Camera Movement.” For both, you have three options “Game Default,” “Normal” or “Inverted.” If you select “Normal” or “Inverted” you will see a short video demonstrating the effect of the new setting.

4. Once you are satisfied with the changes, you can back out, which is the O button on your controller be default, to confirm the changes.

How to fix issues with DualSense not updating to latest firmware

The new DualSense can be updated through software. If you are having problems trying to update to the latest firmware for the PlayStation 5 controller, then you can follow this tutorial at Seeking Tech.

How to view DualSense Firmware Version

Before we begin, you should make sure that the firmware for your DualSense is not outdated.

To check what software version your PS5 controller is currently equipped with, you can take the following steps:

1. From the Home Screen system menu, go to “Setting,” which you can find on the upper right corner.

2. In the new “Settings” menu, go to “Accessories.”

3. In the new “Accessories” menu, select “Controllers.”

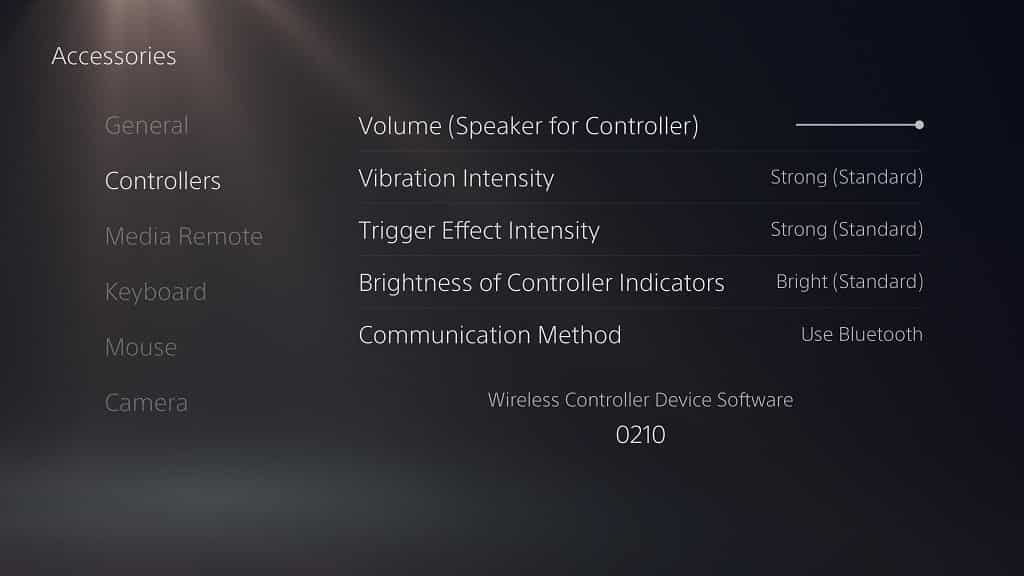
4. On the right side, you will see a number under “Wireless Controller Device Software.” This represents the current software installed on the DualSense.

If the number you see did not match the latest firmware available, then you need to update your controller.

If you aren’t getting an automatic prompt to update the software of your DualSense, you can take the following steps.

How to disconnect PS5 from the Internet

First off, we recommend disabling your Internet connection on the PlayStation 5 or PlayStation 5 Digital Edition.

You can do so with the following steps:

1. Head to “Settings” from the Home Screen.

2. In the “Settings” menu, go to “Network.”

3. In the new “Network” menu, select “Settings” on the left and then “Connect to the Internet” on the right side. If the circle to the right of “Connect to the Internet” is black, then the connection is disabled.

How to manually change the date

The next step is to manually change the date, which you can do with the following steps:

1. Go to “Settings” from the Home Screen system menu.

2. In the “Settings” menu, head to “System.”

3. In the “System” menu, select “Date and Time” on the left side and then “Set Date and Time” on the right side of the same screen.

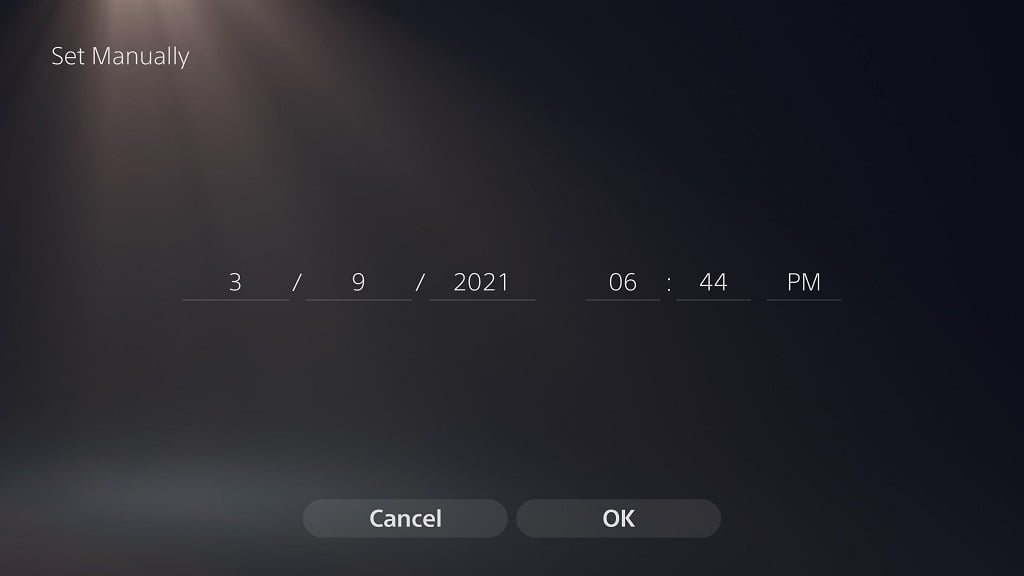
4. In the “Set Date and Time” menu, select “Set Manually.”

5. In the “Set Manually” menu, change the date to one day ahead of your current date.

How to un-pair Dualsense to PS5

The next step is to un-pair your DualSense to your PlayStation 5.

In order to do so, you need to take the following steps:

1. Head back to the “Settings.”

2. Under “Settings,” select “Accessories.”

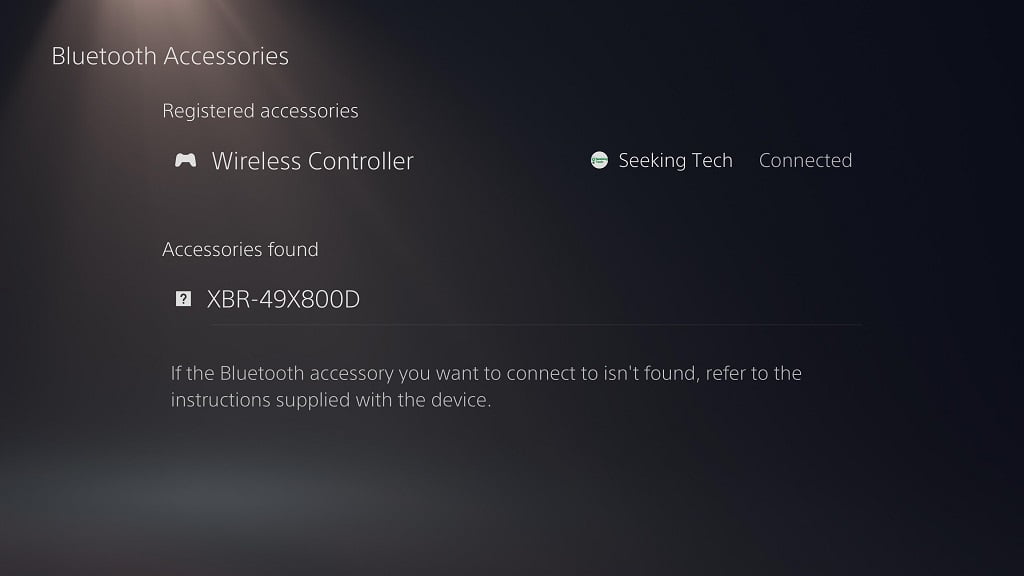
3. In the new “Accessories” menu, select “General” on the left side and then “Bluetooth Accessories” on the right side of the same screen.

4. In the “Bluetooth Accessories” menu, select “Wireless Controller.” Make sure that this is the same controller you want to update.

5. In the new pop-up menu, select “Disconnect.”

How to manually turn off the PS5

After disconnecting your DualSense, you should then manually turn off your PlayStation 5 console.

To shut down the PS5 without a controller, you need to take the following step:

Press and hold the power button on the console until you hear a second beep. On the TV, you will see a message that says that the console is preparing to turn off.

If you have a regular PS5 with a disc drive, this button is the bottom-most button if you decided to put your console on a vertical position. If you decided to lay your console down horizontally, then the button is the right-most button.

If you have a PlayStation 5 Digital Edition, then there is only one button on the system.

How to re-register Dualsense controller to PS5

The final step is to re-register your DualSesne to your PlayStation 5, which you can do with the following steps:

1. With your console turned off, connect your DualSense to your PlayStation 5 using an USB cable. You can use the default cable that came with your PS5. If you don’t have a cable, then you check out this guide for an alternative.

2. Turn on your PlayStation 5 by pressing the power button on the console.

3. Press the PS button located on your DualSense to paired the controller to the system.

4. From the Home Screen main menu, go to “Settings” and then “Network.”

5. In the “Network” menu, go to “Settings” from the left side and then select “Connect to the Internet” on the right side of the same screen. If the circle to the right of “Connect to the Internet” is white, then that means that you have reconnected your PS5 to the Internet.

6. Once your console has been connected to the internet, and you controller have been re-registered to your PS5, you should get a prompt to update to the latest software version for the DualSense.

7. Follow the instructions on screen to get the firmware update for the controller.

8. Afterwards, make sure to change back the date and time. You can do so by going to “Settings,” then “System,” then “Set Date and Time.” Here, select “Set Using Internet” and then “Set Now” in the next screen accurately set the date and time.

How to clean and disinfect the DualSense controller

If you aren’t careful, your DualSense can end up getting quite dirty.

If you notice the controller looking a little less than pristine, you can follow this Seeking Tech guide to find the best way to clean in.

Why the DaulSense gets dirtied easily

Currently, the default DualSense features a two-tone color scheme that is mostly white.

It is a lot easier to notice any grimes on a controller on a white shell as opposed to a black shell or other darker colored shells.

Not to mention that the back grip on the PS5 controller features microscopic circle, cross, square and triangle symbols.

While the coarse textures give you a better grip on the gamepad, it also attracts a lot of dirt, skin, oil and other substances that come from your hand.

You can see what a dirty controller looks like below.

Best cleaning solution for DualSense

The best liquid you can use to clean the DualSense is a highly concentrated isopropyl alcohol.

This solution is designed to dissolve any adhesives, fingerprints, oils, residues and other contaminants on your PlayStation controller.

Not to mention that it will also disinfect bacteria and viruses that may be living on the surface of the gamepad.

Isopropyl alcohol also evaporates very quickly.

Furthermore, it conducts less electricity when compared to pure water. So, you don’t have to worry about potentially damaging the game pad.

The solution is also relatively safe to use as long as you are in a well-ventilated environment with lots of air. With that said, the alcohol may cause skin and eye irritation upon contact.

In terms of concentration, we recommend at least 90% isopropyl alcohol. Although there are less concentrated solutions available, such as the more common 70%, these contain more water that could cause harm to your DualSense if it seeps into its circuitry.

If you don’t have the liquid solution, you can purchase a MG Chemicals 99.9% Isopropyl Alcohol Electronics Cleaner Liquid Bottle on Amazon with this link. (#CommissionsEarned).

Other DualSense cleaning tools

In addition to the isopropyl alcohol, we recommend using microfiber cleaning cloths and cotton swabs (also known as ear swabs and Q-tips) to clean the DualSense. You can also use a new toothbrush or cotton balls.

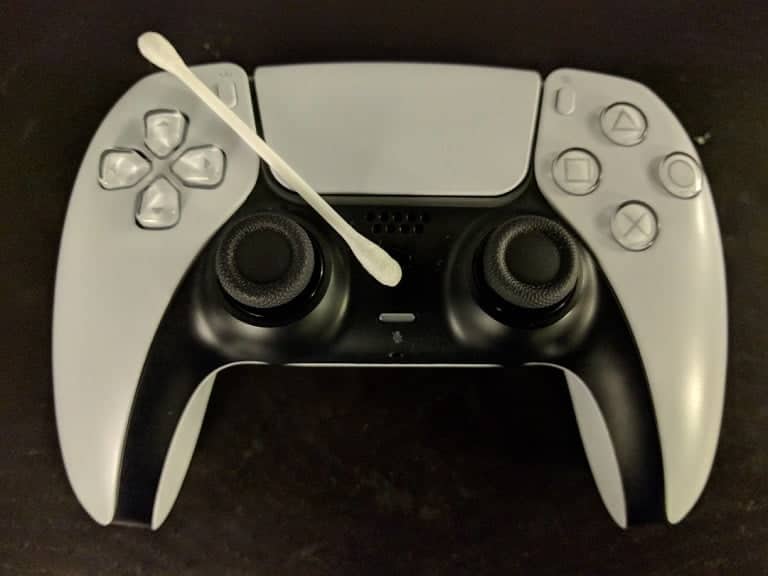
The swabs are especially useful when cleaning the tight spaces in between the buttons and analog sticks as well as the coarse texture of the back grip.

For the back grips, you may have to use more alcohol and force to clean off the stains.

If you skin gets irritated easily, then you might want to use latex gloves during the cleaning procedure when using the isopropyl alcohol.

Precautions

Before cleaning your DualSense, first make sure that the PS5 gamepad is completely turned off. Furthermore, you should not be recharging the accessory when cleaning it at the same.

You can tell that the controller is completely powered off when there aren’t any lights being displayed.

When cleaning, you should also make sure that you don’t accidentally press the PS button located on the front of the controller as doing will power the controller on.

Last but not least, we recommend not using the controller immediately after cleaning until it completely dries out.

As we stated above, the high concentration isopropyl alcohol dries quickly so you won’t have to wait too long. If you are using a 70% concentrated version, then you should wait a little bit longer as an extra precaution.

How to prevent the DualSense from getting dirty

To prevent your DualSense from getting dirtied in the future, you should make sure that whoever is playing the PlayStation 5 thoroughly wash their hands beforehand. You should also avoid eating with your hands when playing games.

When not in use, you should store the PS5 controller on a clean surface.

With that said, a good cleaning of the DualSense is recommended once in a while as you don’t want any buildup, some of which could be hard to spot if you aren’t looking closely enough, to accumulate.

Not to mention that you will be disinfecting your controller from bacteria and viruses as well.

How to fix the DualSense input lag issues on PS5

When playing your PlayStation 5 or PlayStation 5 Digital Edition, you may get noticeable input lag with the DualSense controller.

If you are experiencing latency issues, then you can follow this guide at Seeking Tech to find some potential fixes.

Potential Fix #1: Enable Game Mode on TV

The first step we recommend taking is to check if your television set has a game mode that is designed to reduce input lag.

Thus, you need to make sure you look in the menus of the TV to see if there is a game mode or something similar to it.

If there is one, then you need to enable it to reduce the input lag of your PlayStation 5 controller.

Potential Fix #2: Remove HDMI Passthrough

The latency you are experiencing with your DualSense may be due to the HDMI passthrough.

If you connect your PlayStation 5 to another device (like a sound system or video capture device) before connecting it you’re your television set, then that may be causing the input lag.

So, if you haven’t done so already, you should try connecting your PlayStation 5 system directly to your television set.

Potential Fix #3: Update the Firmware of TV, PS5 and DualSense

We also recommend updating the firmware of your television set. To do so, make sure you follow the steps provided to you by the TV’s manufacturer.

Furthermore, you should make sure the firmware of your PlayStation 5 and DualSense is up to date. Both the system and controller will automatically download and install updates when your PS5 logged into the PlayStation Network.

Potential Fix #4: Download Latest Patch for Affected Game

If your input lag issues are related to a single game, then you can also try downloading the latest patch for the software. If your PlayStation 5 console is already connected to the network, then it should automatically download the latest patch for the game.

You can also manually force a patch to download by first heading to the game from the Home Screen main menu.

Instead of launching it with the X button, press the Options button (which has three horizontal lines) on your DualSense instead. This will bring up a sub-menu where you can select the “Check for Update” option to see if you have the latest version of the game and will download the title update if you don’t.

Potential Fix #5: Enable Performance Mode

Furthermore, you may try enabling the performance/high frame rate mode from the in-game menu. Higher frame rates will usually reduce input lag by sacrificing visual fidelity.

You can also set up your performance mode preferences to be system wide. To do so, head to “Settings” from the Home Screen main menu (it is located on the upper tab with a gear icon).

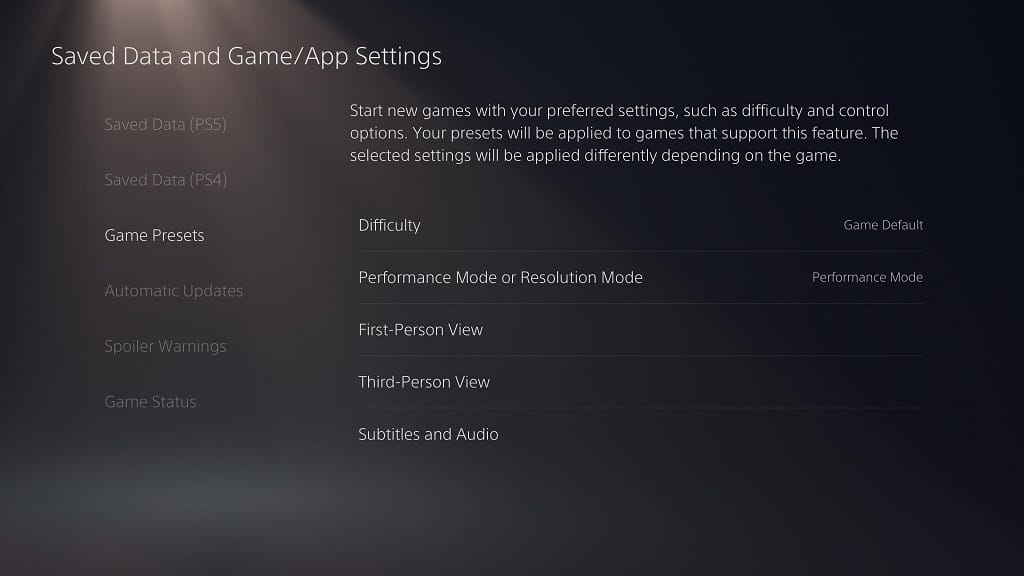
In the “Settings” menu, select “Saved Data and Game/App Settings” and then “Game Presets.”

In the new menu, select “Performance Mode or Resolution Mode” and change that setting to “Performance Mode.”

Potential Fix #6: Restart PS5 and DualSense

If none of the aforementioned fixes do not work, then you can try restarting your PlayStation 5 system and DualSense controller.

To restart the system, press the PS button to bring up the Controls menu. Navigate down and then to the right until you see the “Power” option. Select “Power” and then “Restart PS5” to reboot the system.

To restart your DualSense, press the PS button to bring up the Controls menu. Afterwards, navigate down and then to the right until you see the “Acessories” option. Select “Accessories” and then “Wireless Controller.” In the new sub-menu, select “Turn Off.” After your controller is turned off, press the PS button to turn it back on.

Potential Fix #7: Use Wired Connection for DualSense

You can also try using your DualSense as a wired controller. Your PS5 controller normally uses Bluetooth for connection, which can result in input lag if the signal is hindered in any way.

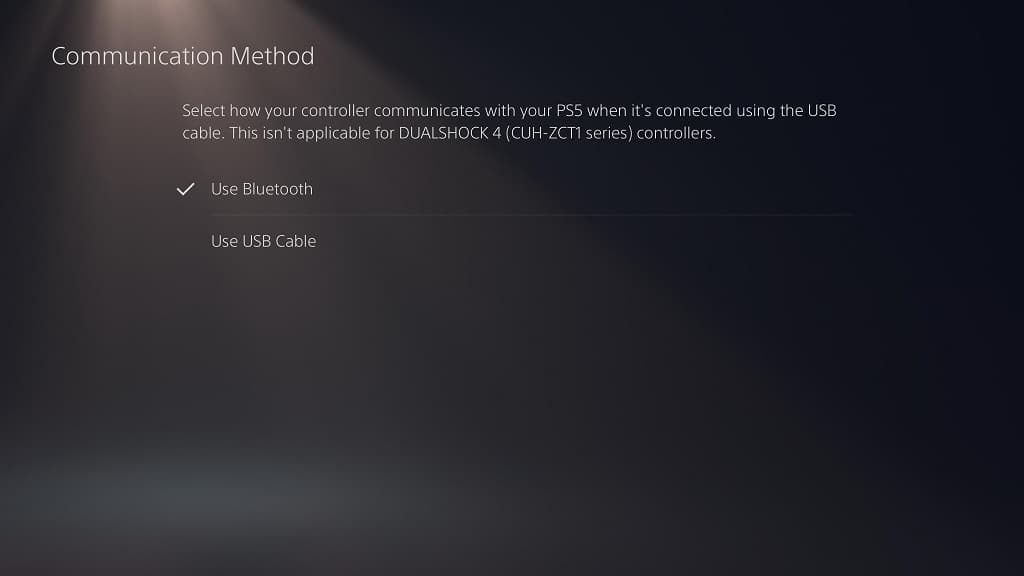
If you are interested in using the wired method, go to “Settings” from the Home Screen. In the “Settings” menu, select “Accessories” and then “Controllers” on the left tab. Afterwards, select “Communication Method” and change it to “Use USB Cable.”

Potential Fix #8: Disable PS4 Tone Mapping

If your input lag is only occurring when you are playing PS4 games on a PlayStation 5 system, you can try disabling HDR tone mapping. This features automatically converts non-HDR games to HDR,which may cause issues with latency.

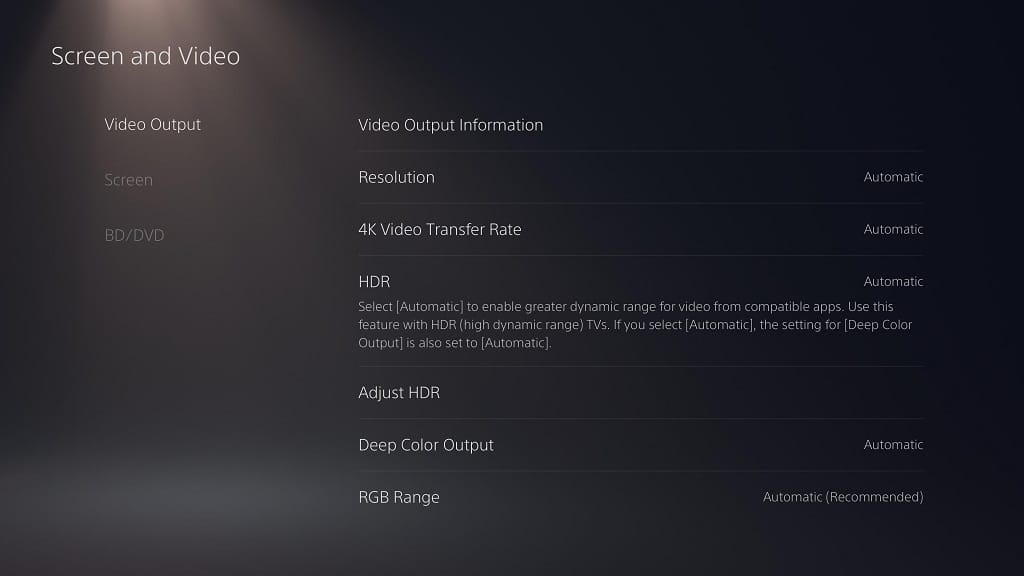
To disable tone mapping, you need to go to “Settings” and then “Screen and Video.” From there, select “Video Output” on the left tab and then “HDR.” In the submenu, select “Off.”

Potential Fix #9: Use DualShock 4 for PS4 Games

If changing the HDR settings did not help reduce the input lag while playing PS4 games on the PlayStation 5, you can try using a DualShock 4 controller with the system to see if it helps.

You can sync your DualShock 4 to the PS5 system by using the USB cable that came with the PS4 console. Once everything is connected, you can press the PS button on the DualShock 4 to sync.

Keep in mind that you can only use the DualShock 4 to play PS4 games on the PS5 system. You will need the DualSense to play PS5 games.

DualSense not recharging? Here are some potential fixes

The DualSense is a new controller made specifically for the PlayStation 5 and PlayStation 5 Digital Edition.

If you are having issues trying to recharge the battery of this gamepad, you can follow this guide at Seeking Tech for some potential fixes.

How to tell if your DualSense battery is charging

There are two ways to tell if your DualSense is currently charging.

The first of which is by simply looking at the controller.

If the light bar is blinking orange, this indicates that the gamepad is correctly recharging its battery.

Once the battery is full, the light bar of the controller will turn off.

How to find the DualSense battery indicator on PS5

The other way is by looking in the menu on your PS5.

If you are recharging your controller with the PlayStation 5 console while it its powered on, you can press the PS button on the controller.

If done correctly, this will bring up the Control Center quick menu.

In the quick menu, navigate downwards to the Controls section that contains various symbols. You should see the controller symbol, which represents “Accessories” and shows the battery life for the current DualSense controller.

The battery symbol will also become animated when the gamepad is being recharged.

If you have more than one DualSense, you can select “Accessories” to show the battery life of other connected controllers. You can connect up to four DaulSense gamepads to the PlayStation 5 at the same time.

You can identify which controller is which by looking at the white LED light on your DualSense. Controller #1 will have one light, Controller #2 will have two lights, Controller #3 will have three lights and Controller #4 will have four lights.

Potential Fix #1

If your DualSense is not recharging, the first step you can try is by using a different USB port.

There have been some reports that the front-facing USB port of the PlayStation 5 and PlayStation 5 Digital Edition is having issues with recharging the internal battery of the PS5 controller.

So, you should try one of the two USB ports located on the back of the system.

If the USB ports in the back aren’t recharging the DualSense’s battery either, then you may try using a USB charger or other USB charging devices you may have lying around your house.

Potential Fix #2

If the DualSense recharging problems are still occurring after using different USB ports, you can try using a different USB Type-C to USB Type-A cable.

The controller is compatible with USB cables that are either “charge and sync” or “charging and data.” It is not compatible with “charge only” cables.

Potential Fix #3

If you are charging your DualSense while the PlayStation 5 is in rest mode, there are also a few potential fixes that you can try.

The first is to make sure that your system is actually in rest mode. You can tell that your PS5 is in a low powered state when the console’s lighting is displaying orange.

Even if your console is in rest mode, it may not be recharging the internal battery of your DualSense.

To make sure it is, first head to the “Settings” menu from the Home Screen, which is the main menu you see when booting up the system. If you are having a hard time finding it, “Settings” is the gear symbol located to the left of your profile picture in the upper section of the menu.

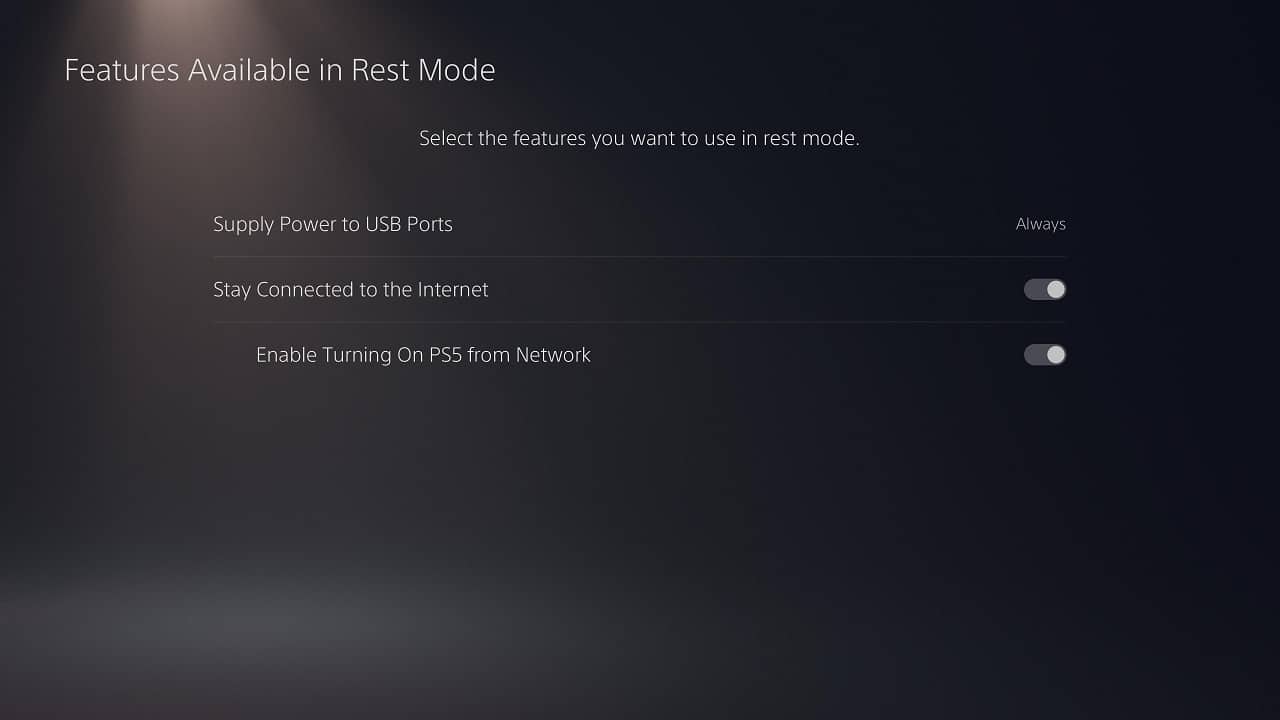
In “Settings,” select “System,” the “Power Saving” and finally “Features Available in Rest Mode.”

In the “Features Available in Rest Mode” menu, select “Supply Power to USB ports.” Doing so will give your three options “Always,” “After 3 Hours” or “Off.” If the setting has already been set to “Off,” you need to change it to either “Always” or “After 3 Hours.”

If none of the aforementioned solutions fix your DualSense recharging issues, then you can try contacting PlayStation Support about a potential faulty PS5 controller.

How to automatically mute the DualSense microphone

One of the new features of the DualSense is the inclusion of a microphone. The mic is automatically activated when the PlayStation 5 controller is powered on. If you want to automatically mute the microphone when your DualSense is turned on, you can follow this guide at Seeking Tech.

1. After choosing a user, you will be at the main system menu of the PlayStation 5. From here, navigate upward and then right until the “Settings” option (which has a gear looking symbol that is directly to the left of your profile picture) is highlighted. Press the X button on your controller to enter settings.

2. In the “Settings” menu, select “Sound” from the list.

3. In the “Sound” menu, select “Microphone” from the list.

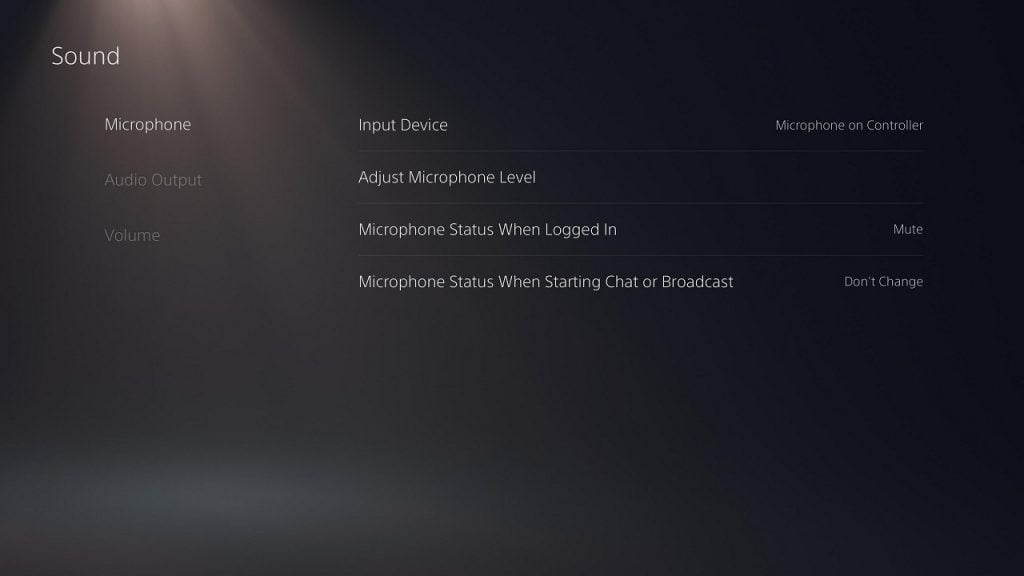
4. In the “Microphone” menu select “Microphone Status When Logged In.” The default option is set to “On” with “Mute” being the other option.

5. To deactivate the microphone on your DualSense when the controller is turned on, you need to change the option to “Mute.”

How to deactivate DualSense microphone when starting chat or broadcast

The microphone on your DualSense will also be automatically activated when you start a chat or broadcast session.

If you want to change this setting, you can take the following steps:

1. In the aforementioned “Microphone Menu,” select “Microphone Status When Starting Chat.” The default option here is “Don’t Change” with the other option being “Switch to Mute.”

2. To mute the microphone, you need to change the option for “Microphone Status When Starting Chat” to “Switch to Mute.”

How to manually mute and unmute the DualSense microphone

If you look at your DualSense, you will notice a white stripe underneath the PS button. When the microphone is muted, the stripe will show an orange indicator. When the mic is activated, the stripe won’t be lighted at all.

You can actually press this same stripe to mute and unmute the microphone of the DualSense. You will also hear a chime and get a visual notification on the top right side of your television when you mute or unmute the DualSense’s microphone.

How to extend the DualSense’s battery life

Although the DualSense contains a bigger battery capacity than the DualShock 4, the PlayStation 5 controller can still drain pretty fast due to the new features that were added. Fortunately, there are a few ways you can extend the battery life of the game pad, which you can find out in this guide at Seeking Tech.

How to automatically turn off your DualSense after set amount of time

The first setting you can change is the automatic shut off for your PS5 controller. This setting will turn your PS5 controller off after a set amount of time of inactivity.

If you are interested in doing so, you can take the following steps:

1. After selecting which user profile to use, you will be at the main system menu.

2. From the main menu, navigate upwards and then go right until you see “Settings” (which has a gear logo). Enter the “Settings” menu.

3. In “Settings,” scroll down and select “System.”

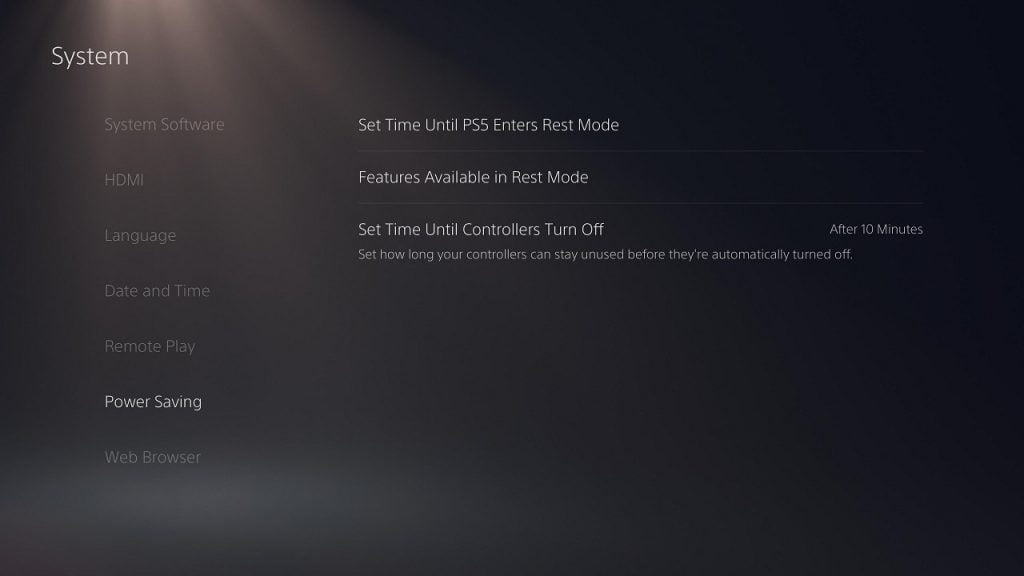
4. In the “System” menu, scroll down and select “Power Saving.”

5. In the “Power Saving” sub-menu, select “Set Time Until Controllers Turn Off.” This setting lets you set how long of a period your DualSense can stay unused before it automatically shuts off. The default option is “Don’t Turn Off” while the other options are “After 10 Minutes,” “After 30 Minutes” and “After 60 Minutes.” To get the best battery life, you should select the “After 10 Minutes” option.

How to lower the volume of the DualSense speaker

To extend the DualSense battery life, you can also try lowering the volume of the controller’s built-in speaker with the following steps:

1. From the aforementioned “Settings” menu, scroll down and select “Accessories.”

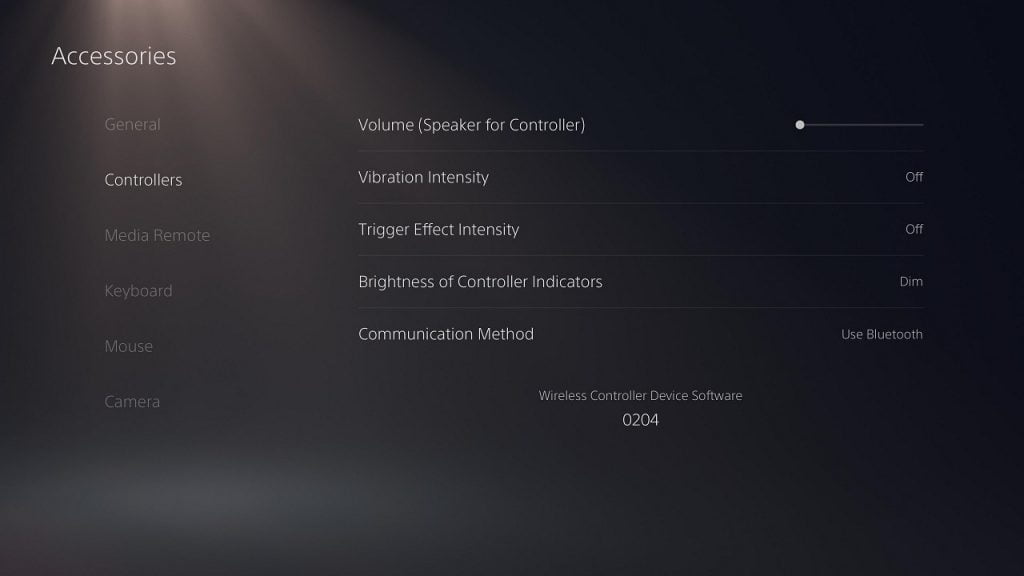
2. In the “Accessories” menu, select “Controllers.”

3. In the “Controllers” sub-menu, select “Volume (Speaker for Controller).” With this option, you can lower the sound output volume of the controller’s speakers. For the best energy saving, we recommend moving the meter all the way to the left to mute it. If you would like to maintain this functionality, you can try one of the lower volume settings instead.

How to lower DualSense vibration intensity

You can also try lowering the strength of the DualSense haptic feedback vibration to increase the battery life of your controller.

If you are interested in doing so, you can take the following step:

In the aforementioned “Controllers” sub-menu, select “Vibration Intensity.” The default option for this feature is “Strong” with the other options being “Medium,” “Weak” and “Off.” To use the least amount of power, you should set the vibration intensity to “Off.” If you would like to still feel vibrations, you can choose “Weak” or “Medium” instead.

How to lower DualSense trigger effect intensity

You can also reduce the intensity of the impulse triggers to save power.

To do so, you can take this step:

In the aforesaid “Controllers” sub-menu, select “Trigger Intensity.” The default option for this is also “Strong” with alternatives being “Medium,” “Weak” and “Off.” To get the best power saving for your controller, set the trigger effect intensity to “Off.” If you would like to keep using impulse triggers, you can try the “Weak” or “Medium” setting instead.

How to lower DualSense indicators brightness levels

You can also lower the brightness levels of the DualSense indicators in an effort to reduce the gamepad’s battery usage.

To do so, you need to do the following:

In the aforementioned “Controllers” sub-menu, select “Brightness of Controller Indicators.” The standard option here is “Bright” with the other options being “Medium” and “Dim.” To get the most efficient power usage, set the brightness to “Dim.”

Keep in mind that lowering the brightness of the indicators may hinder your experience on games and apps that use these indicators of the DualSense. If you are experiencing issues, you can set the brightness back to the “Bright” option.

About using earphones, headphones and headsets

Just like the DualShock 4, you can connect your earphones, headphones and/or headsets to your DaulSense via the 3.5 mm audio port. Doing so will drain the battery life of the PS5 controller, however. In order to extend the battery life of your gamepad, we recommend using another method of sound output (such as television speakers, headsets with USB cables or transmitters, sound bars and more).

About Recharging Your DualSense

Just like other rechargeable batteries, the DualSense batteries will lose their capacity and efficiency every time you recharge. So, it is best that you wait until the battery indicator gets down to one of zero bars before recharging. You should also make sure that the controller’s battery is fully charged before using it again.

Using DualSense as a wired controller for PS5

Even if the internal battery of your DualSense can no longer hold a charge, you can still use your gamepad on the PlayStation 5 as a wired connection. To do so, you need to head to the aforementioned “Controllers” sub-menu and select “Communication Method.”

The default connection method is “Use Bluetooth.” Connect the Dualsense to your PlayStation 5 via an USB cable and then select “Use USB Cable” in order to use your gamepad as a wired controller.