How to sign out of the Disney Plus PS5 App

By default, you will remain signed into your DIsney Plus account if you are using its official application on the PlayStation 5 or PlayStation 5 Digital Edition. If you need to log out of your account in this app for one reason or another, then you can take a look at this step-by-step article from Seeking Tech to see how you can properly do so. 

1. To start off, you need to head over to the Disney Plus App on your PS5. If you don’t know how to do so, then you can try taking the following steps: 

  • To begin, turn on your game console. 
  • Afterwards, you need to go to the home screen. If you aren’t there already, then you can press the PS button on the DualSense controller to bring up the control center overlay menu. From there, you can select the home icon located at the bottom menu.  
  • Once you get to the home menu, you need to be in the Media tab. If you are in the Games tab instead, then you can simply press R1 on the controller to switch over.  
  • Finally, open the Disney+ App from the Media tab. 

2. After opening the video streaming application, you may see a “Who’s Watching?” screen. Here, you can pick any of the available profiles to continue. 

3. Once the app has loaded to the main menu, press the circle button on the controller to open a menu that appears from the left side. 

4. From this side menu, you need to select Settings.  

5. Inside of the Settings menu of the Disney Plus PS5 App, you then need to select the Log Out option located at the bottom of the screen. 
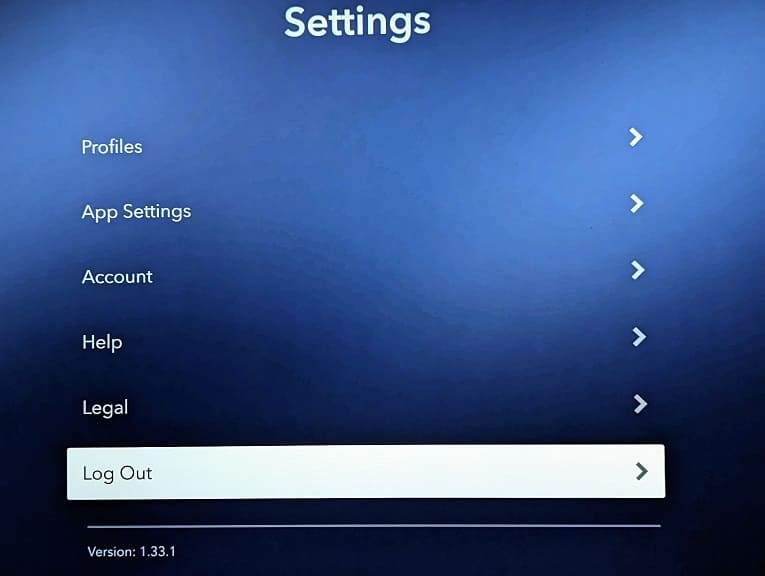
6. You should then see the following message: 

  • “Are you sure you want to log out?” 

Here, you need to select the Log Out option in order to sign out of your account. 

Alternate Method 

An alternate way to sign out of your Disney Plus account on your PlayStation 5 or PlayStation 5 Digital Edition is by simply deleting the application. You can do so by taking the following steps: 

1. Go back to the home screen menu of your PS5. 

2. Next, make sure you are in the Media tab. 

3. You then need to move the cursor over to the Disney+ icon.  

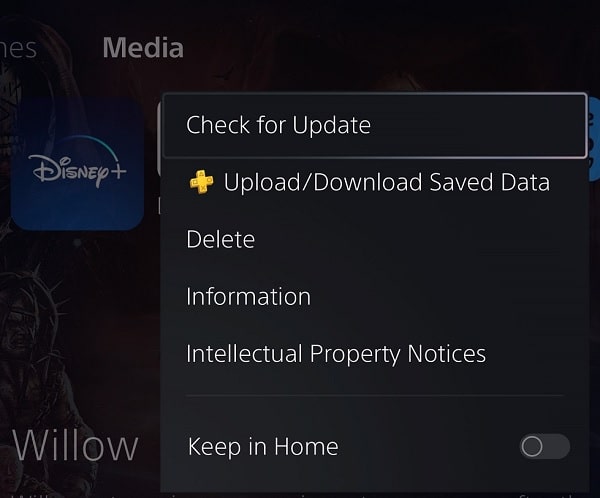
4. Afterwards, press the Options button on the controller. This button has the three horizontal lines symbol if you have a hard time finding it.  

5. You should then see a pop-up window menu, where you can select the Delete option. 

6. The following message should appear: 

  • “This item will be deleted from console storage.” 

Here, you need to select the OK option to continue. 

By deleting the app from your PS5, you should be signed out of your Disney Plus account. If you decide to download and install the same application again, you will need to log back in again as a result.

How to download and update the Disney Plus App on PS5

Disney Plus does not come pre-installed on your PlayStation 5 or PlayStation 5 Digital Edition console. Instead, you need to download it first before you are able to use this application.  

To see how you can download, as well as update, Disney+ on the PS5, you can take a look at this step-by-step tutorial.  

How to download Disney Plus on PS5 

In order to manually download Disney Plus on the PS5, you can take the following steps: 

1. For the first step, boot up your console and go to the home screen. If you are in another screen at the moment, then you can press and hold the PS logo button on the controller to go home.  

2. Next, you need to open the product page of the Disney Plus App. 

One of the ways you can do so is by pressing the triangle button while you are on the home screen. By doing so, you can then select the Search icon at the top right corner. You can then search for the Disney Plus App and then select it from the search results page. 

Alternatively, you can press the R1 button while in the home screen to switch over to the Media tab. From there, select the All Apps card. You should then be able to find Disney Plus from the listing.  

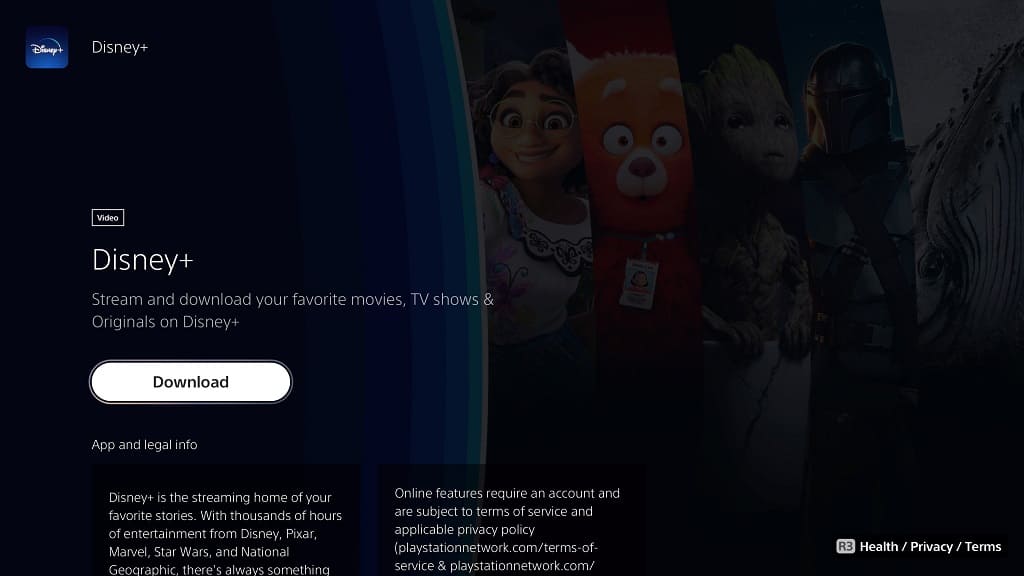
3. On the product page of the Disney+ App, select the Download option. 

4. Once the download has been completed, select the Start option from the same product page screen. 

5. In the future, you should be able to access this video streaming application from the aforementioned Media tab of the home screen menu.  

How to update Disney+ on PS5 

If you want the most stability, best performance and new features for the Disney Plus PS5 App, then you should make sure that it has been updated to the latest software version. 

In order to check to see if there is a new patch to download, you can try doing the following: 

1. Go back to the home screen menu of your PlayStation 5 or PlayStation 5 Digital Edition system. 

2. If you aren’t on the Media tab of the home screen, then you need to press R1 on the controller to switch over. 

3. In the Media tab, move the cursor over to the Disney+ icon. 

4. With the cursor on the app, press the Options button (which has the three horizontal lines icon on top of it) on the controller. 

5. In the small window menu that pops up, you should then select the Check for Update option.  

How to change audio and subtitle languages in the Disney Plus PS5 App

The Disney Plus App on the PlayStation 5 and PlayStation 5 Digital Edition supports multiple languages for both audio and subtitles. If you have a hard time figuring out how to change these settings for this video streaming application, then you can take a look at this step-by-step tutorial from Seeking Tech.  

1. To start off, you need to open the Disney Plus App if you haven’t done so already. 

You can find it in the home screen menu of your PS5. You may need to press the R1 button to switch from the Games section to the Media section in order to find it.  

If you still don’t see this application, then you may need to download it first, which you can do by selecting the All Apps option from the aforementioned Media section.  

2. Once you opened the application, make sure you are signed into your Disney+ account; otherwise, you won’t be able to stream any videos. 

3. Next, start playing the video that you want to change the audio and/or subtitle language for. 

4. While the video is playing, press the cross (X) button on the controller to pause the action and bring up an overlay menu. 

5. With the current video paused, you can use either use the directional pad or left analog stick to move the cursor down one time to the Play option and then to the right once to where you can then select Settings. 

6. You should then see two tabs on the screen, one for Audio and one for Subtitles. 

To change the audio language, select the Audio tab and then select the language that you want to be outputted. 

In order to change the subtitles language, select the Subtitles tab and then select the language of the text that you want to be displayed. 

7. Once you made the changes, press the X button to play the video so that you can being watching it again from where you left off with the new audio and/or subtitle language.  

If the video remains the same as before, then you can try backing out of the video and then playing it again to see if the changes are applied. You can also try closing the video streaming application and then restarting it again.

What to do if the Disney Plus PS5 app keeps buffering

When watching streams from the official Disney Plus application on your PlayStation 5 or PlayStation 5 Digital Edition, the video may constantly buffer or stutter. To see how you can get a smoother streaming experience, you can take a look at this troubleshooting article from Seeking Tech. 

1. To start off, you can try restarting the Disney+ App.  

In order to do so, press and hold the PS button to go back to the home screen. From there, you need to press the Options button when the cursor is on the Disney Plus logo. In the small window that pops up, you then need to select the Close App option.  

Afterwards, select the same application from the home menu to open it and then play the video again to see if it keeps buffering.  

2. For the next step, you should make sure that your internet download speed if fast enough to stream Disney Plus videos. 

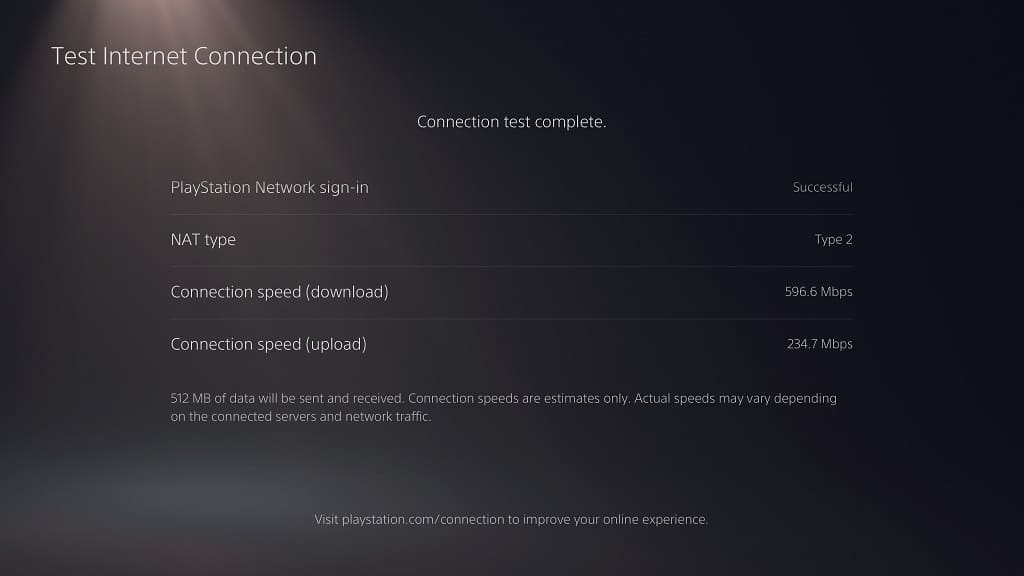
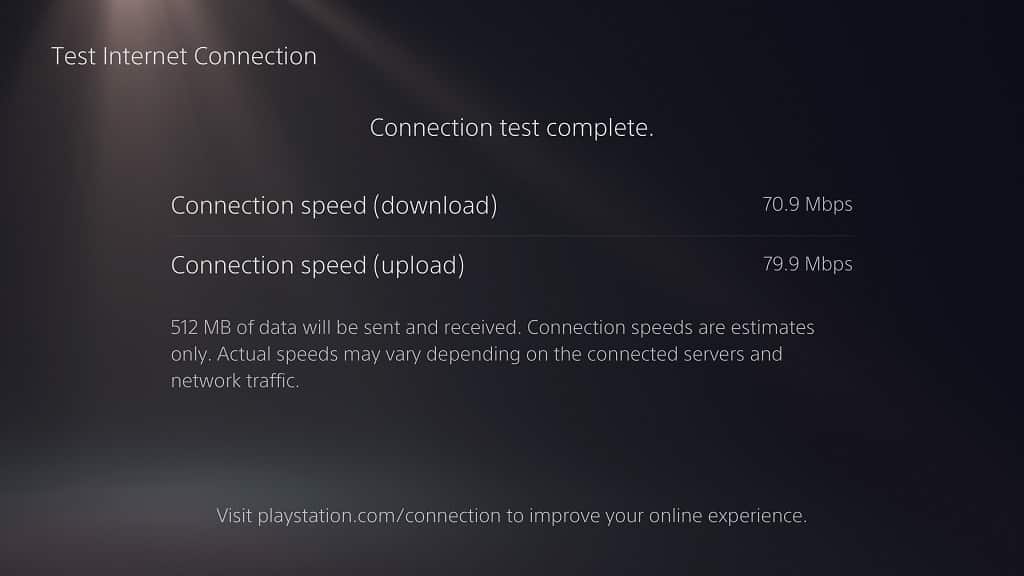
The recommended minimum speed is 5.0 Mbps for HD videos and 25.0 Mbps for 4K Ultra HD videos. On the PS5, you can test the internet speed by going to Settings > Network > Connection Status > Test Internet Connection. 

If your internet speed appears to be too slow or unstable, then you can try doing the following: 

  • If you are using Wi-Fi, then you can try moving your PS5 closer to the Wi-Fi access point to get a stronger signal. 
  • You should also make sure that there aren’t too many physical objects or other wireless devices nearby that may end up weakening the Wi-Fi connection. 
  • If you have the option to do so, we recommend using a wired Ethernet connection as it should be faster and more stable.  
  • Avoid downloading while watching Disney Plus on your PS5 or other devices. 
  • You should also avoid streaming on other devices at the same time. 

3. You can also try changing the App Settings of Disney+ by doing the following:  

  • Open the Disney Plus App on your PlayStation 5 if you haven’t done so already.  
  • Inside of the video streaming application, press the circle button on your controller until you the left column menu opens.  
  • From there, you need to head into Settings.  
  • Select App Settings from the Settings menu. 
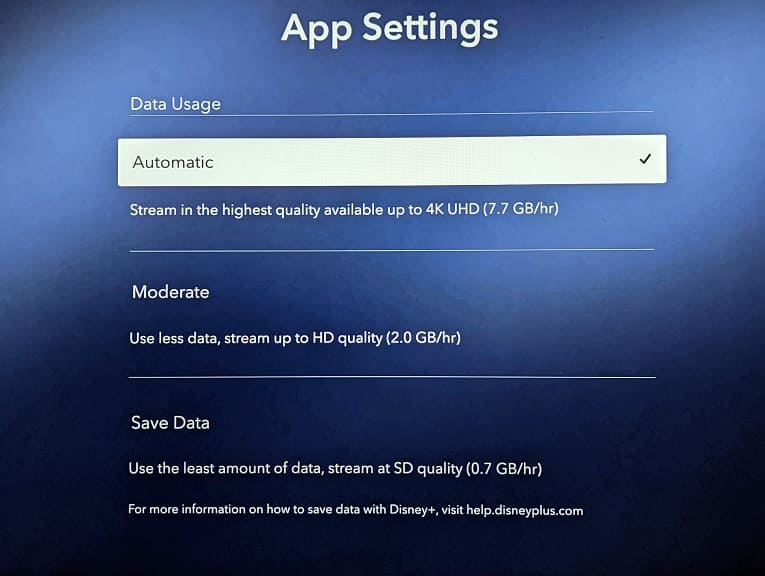
  • By default, the bandwidth usage for the Disney App is set to Automatic. You may want to lower it to Moderate or Save Data to see if you are able to get smoother playback.  
  • Keep in mind that dropping the bandwidth to Moderate will limit streams to 1080p while dropping it to Save Data will limit streams to standard definition. 

4. Power cycling your home network may also fix the buffering issues on the Disney+ PS5 App. You can do so by taking the following steps: 

  • Turn off and unplug the modem and routers from the home network. 
  • Unplug the modem and routers from the power outlet. 
  • Wait for a minimum of two minutes before plugging the devices back into the power outlet and then turning them back on again.  
  • Wait for the home network to boot back up again.  
  • Try streaming a video in the Disney Plus App to see if you can get a smoother experiencing without any buffering or stuttering.

How to fix out of sync audio in the Disney Plus PS5 App

When watching videos on the Disney Plus application on your PlayStation 5 or PlayStation 5 Digital Edition system, you may notice that the audio is not in sync which what is being shown on screen.  

To see how you can potentially get the sound output to match perfectly, you can follow the steps laid out in this article from Seeking Tech. 

1. For the first step, we recommend taking a look at the settings of your television set or monitor.  

You should turn off anything that uses A.I. processing to the sound and picture as these may cause the audio delay and/or video delay to occur. 

Some TVs may also let you adjust the audio delay so that you may be able to sync it up with the videos on Disney+. 

2. You should also look into your listening device. If it is connected to the PS5 or PS5 Digital Edition wirelessly, including connecting a wired device on the controller, then there will be more audio delay. 

Thus, if possible, we recommend using your television speaker or connecting the earbuds, earphones, headphones, headset or speakers directly to the game console by using a wired connection. 

3. If the wired cable is too long for your listening device, then it may also cause the audio to be delayed for Disney Plus streams. In this case, you can try using shorter cables. 

4. Restarting your PlayStation 5 console may also fix the audio delay.  

In order to do so, press the PS button on your controller and then select the Power option located at the bottom right side of the quick menu. From the small Power menu, you then need to select the Restart PS5 option. 

By restarting the console, the Disney Plus App will be closed. This process should also free up hardware resources and get rid of any temporary bugs that may have been causing the audio to be faster or slower than the video. 

5. If you haven’t done so already, make sure you keep the video streaming application, as well as the system software of your PlayStation 5, updated to the latest versions. New updates may fix the sound sync problems. 

6. If your earbuds, earphones, headphones, headset or speakers can also be updated, then we recommend that you download the latest firmware versions for these listening devices as well. 

7. You can also try using a different screen and/or listening device to see if the audio will be better lined up when watching Disney Plus streams. 

8. The sound sync problems may be limited to a single video. 

To test this out, try to stream other videos on the service. If the audio is synced perfectly on other videos, then try to test the problematic video on another device.  

If you are also experiencing out of sync sound on the same video on another device, then you can report it to Disney so that they can get it fix in the future.

What to do if the Disney Plus PS5 App subtitles are too big

If you have subtitles enabled when watching videos on the Disney Plus application for your PlayStation 5 or PlayStation 5 Digital Edition console, then you may find the text to be too big. As a result, the captions may end up being overly distracting. 

To see how you can make the subtitles smaller in the Disney+ PS5 App, you can follow this tutorial from Seeking Tech.  

Can you change the subtitle size in the Disney Plus PS5 App? 

Unfortunately, you aren’t able to change the subtitle size directly from the Disney Plus PS5 App. Instead, you need to use the menus of the game console to adjust the font size. 

How to change the caption size on PlayStation 5 

In order to change the size of captions and subtitles when watching Disney Plus on your PS5, you need to take the following steps: 

1. To start off, you need to head over to the home screen of your console.  

In order to do so, you can press and hold the PS button from the controller. An alternative way to go home is to press the PS button and then select the house icon located at the bottom left side of the quick menu screen.  

2. From the home screen, navigate to the top right side of the screen where you can find and select Settings. 

3. After getting to the Settings menu of your PS5, you need to select Accessibility.  

4. In the Accessibility menu, you first need to select Closed Captions of the left side. 

5. On the right side of the same screen, make sure that the Display Closed Captions setting is enabled. 

6. Once Display Closed Captions has been turned on, select Closed Captions Settings. 

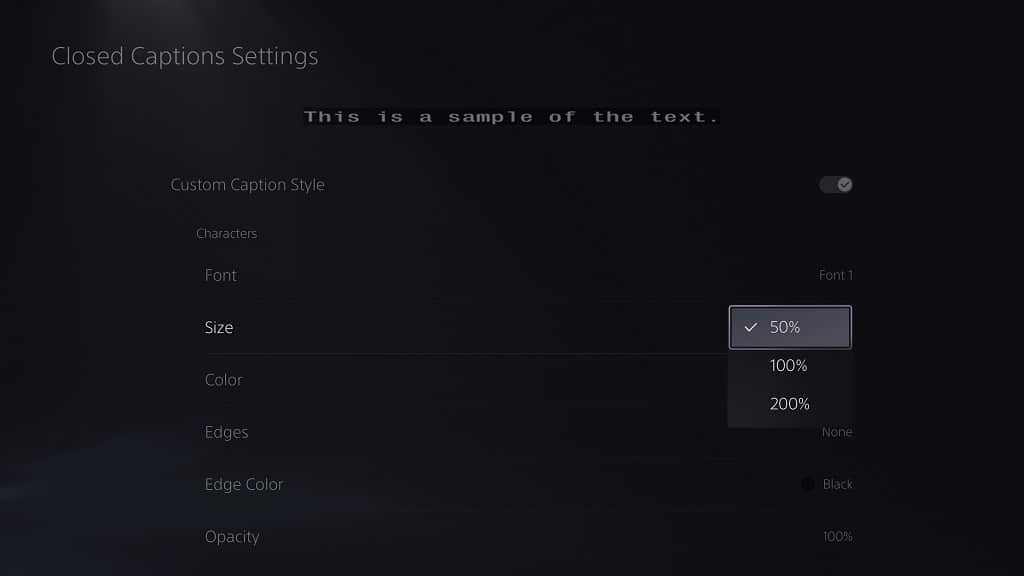
7. In the Closed Captions Settings menu, you will see a preview of the captions and subtitles for any changes you decide to make located at the top. 

Here, you first need to make sure that the Customization Caption Style setting is enabled.  

8. Afterwards, we recommend selecting Font. 

9. In the pop-up menu, you will be able to select the following: 

  • Font 1 
  • Font 2 
  • Font 3 
  • Font 4 
  • Font 5 
  • Font 6 
  • Font 7 

After making your selection, you should see a preview of the change at the top of the Closed Captions Settings menu. 

10. Next, you can select Size.  

11. In the pop-up window, you should see the following option: 

  • 50% 
  • 100% 
  • 200% 

By default, the captions and subtitles for the Disney Plus PS5 App is 100%. To make it smaller, you need to select 50%.  

12. After changing the font style and size, open the Disney Plus App again.  

13. When you open the streaming application, you may head directly into the previously playing video, which may still be using the original font style and size for captions and subtitles. 

In this case, press the circle button to exit out of the video and then start playing it again afterwards. The captions and subtitles should then reflect the changes you made to the font style and size.

How to improve Disney Plus quality and resolution on PS5

When watching Disney Plus videos on your PlayStation 5 or PlayStation 5 Digital Edition, you may notice that the quality and/or resolution is lower than what you are expecting.  

To see how you can improve the streaming quality when it comes to this application, you can take a look at this article from Seeking Tech.  

1. For the first step, we recommend checking the resolution output of your PS5.  

In order to do so, you need to open the Settings menu of the game console and then select Screen and Video > Video Output > Resolution.  

Since Disney Plus supports up to 4K, make sure you set the resolution of the gaming system to 2160p. 

2. Next, you should make sure that the download speed is fast enough on your PlayStation 5.  

To do so, open the Settings menu again and then select Network > Connection Status > Test Internet Connection. 

Once the test has been completed, make sure you pay attention to the Connection Speed (Download) category.  

Disney recommends that your download speed should be at least 5.0 Mbps when streaming videos at 1080p (HD). For 4K (UHD) videos, the speed needs to be a minimum of 25.0 Mbps. 

3. You should also make sure that you have the right App Settings on Disney Plus.  

In order to check, you need to take the following steps: 

  • To start off, open the Disney Plus PS5 App if you haven’t done so already. 
  • Next, you need to press the circle button on the DualSense controller until you open the left column menu.  
  • From the left column menu, you should select Settings.  
  • After getting to the Settings menu, you then need to select App Settings.  
  • Finally, make sure that Data Usage is set to Automatic. 

4. It is very important to note that the quality and resolution are different depending on which videos you are watching.  

Some videos are available in 4K while others can only be viewed in 1080p. A few classic contents can only be played in SD. 

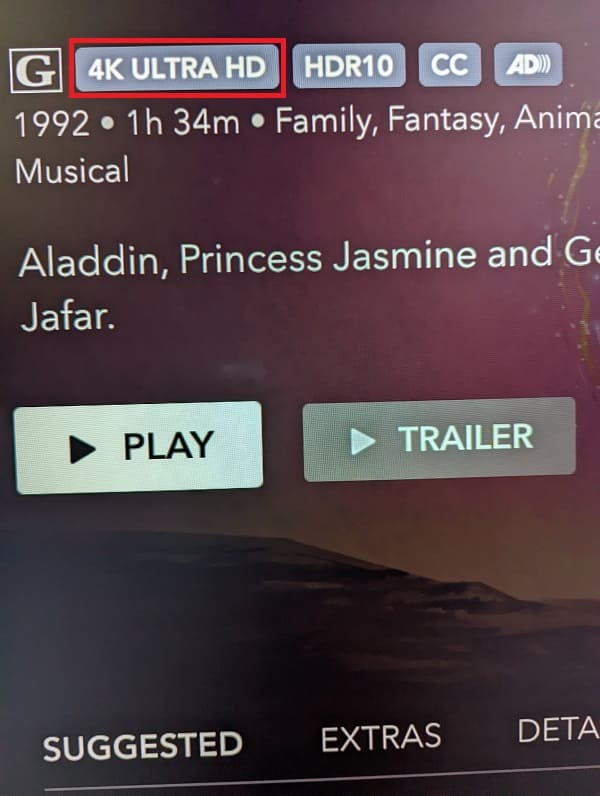
You can find the resolution label on the video page as 4K Ultra HD or HD. If you don’t see any resolution labels, then it indicates that the video will only be streamed at standard definition.  

5. If you are still getting poor video quality and/or resolution, then your internet may not be stable.  

If you are using Wi-Fi, then you can try moving the PS5 closer to the Wi-Fi access point. You should also make sure that there aren’t any physical objects and/or other wireless devices that may be weaken the Wi-Fi connection. 

If possible, we recommend using a wired Ethernet internet connection for your console. 

6. If you have any other streams or downloads taking up bandwidth on your home network, you might want to consider pausing or stopping them to see if doing so will improve the quality and resolution of the Disney Plus App on your PlayStation 5.

What to do if Disney Plus 4K playback is not working on PS5 

Thanks to a recent update, you should now be able to watch videos from the Disney Plus App in 4K on your PlayStation 5 or PlayStation 5 Digital Edition console.  

If you are still stuck watching these streams in 1080p instead, then you can take a look at this troubleshooting guide at Seeking Tech to see how you can get them to display in 2160p. 

1. As we stated above, 4K support for the Disney Plus PS5 App was only added through a recent firmware update. Therefore, the first step we recommend taking is to check to see if you have the latest version.  

In order to do so, you should take the following steps: 

  • To start off you need to head over to the home screen of your PlayStation 5. To do so, press the PS logo button on the DualSense controller and then select the home icon that is located on the bottom left side.  
  • In the home screen of your console, switch over to the Media tab if you aren’t there already. To switch, you need to press the R1 button. 
  • In the Media tab, hover over the Disney+ icon. 
  • With the icon highlighted, press the Options button. 
  • Inside the small window menu, you then need to select the Check for Update option. 

2. If the Disney Plus App is up to date but you aren’t getting 4K streams, then the next step you should take is to check the output resolution of your PS5 by doing the following: 

  • Go back to the home screen of your console. 
  • From there, head over to Settings by selecting the gear icon that can be found on the top right corner. 
  • In the Settings menu, you should select Screen and Video. 
  • You then need to select Video Output in the Screen and Video menu. 
  • On the right side of the same screen, make sure that the Resolution setting is set to output at 2160p.
  • If you changed the Resolution, you may need to restart the Disney App on your PS5 for the changes to take effect. 

3. Even if you have 4K support set up properly, you won’t be able to stream 4K videos on the Disney Plus App if you download speed is too slow. 

To watch 4K UHD with this application, you will need a minimum of 25.0 Mbps. Anything less will result in the videos topping out at 1080p when it comes to quality. 

To check the current download speed of your game console, go back to its Settings menu. From there, you need to select Network > Connection Status > Test Internet Connection. 

If your internet is too slow then you can try doing the following: 

  • Stop any ongoing downloads or other streams as they may causing the download speed to be slow. 
  • If you are using Wi-Fi, then you can try to get a stronger signal by moving the console closer to the Wi-Fi access point and making sure that there aren’t too many obstacles along the way. 
  • If possible, we recommend using a wired Ethernet connection over Wi-Fi. 

4. It is important to note that not all videos are available in 4K. To make sure that you are actually watching a 4K stream, go to the video content page in the Disney Plus PS5 App.  

On the page, you should see the 4K Ultra HD wording next to the age rating of the content. This indicates that the stream will be in 4K resolution once you start to play it.  

If you don’t see the wording, then the stream will top out at 1080p instead.