How to change control layout in GoldenEye 007 on Xbox Series X and S

The Xbox Series X and Xbox Series S versions of GoldenEye 007 supports multiple control layouts. You can also use your own custom button layout as well as set the dead zone and sensitivity level to your liking. To find out how you can change the control scheme for this classic first-person shooter, you can take a look at this article from Seeking Tech.

1. While playing GoldenEye 007, press the Menu button on your Xbox controller. If done correctly, James Bond should look down on his watch, which acts as the pause screen for the game.

2. In the pause screen, use the analog stick of direction pad to switch menus until you see Control Style.
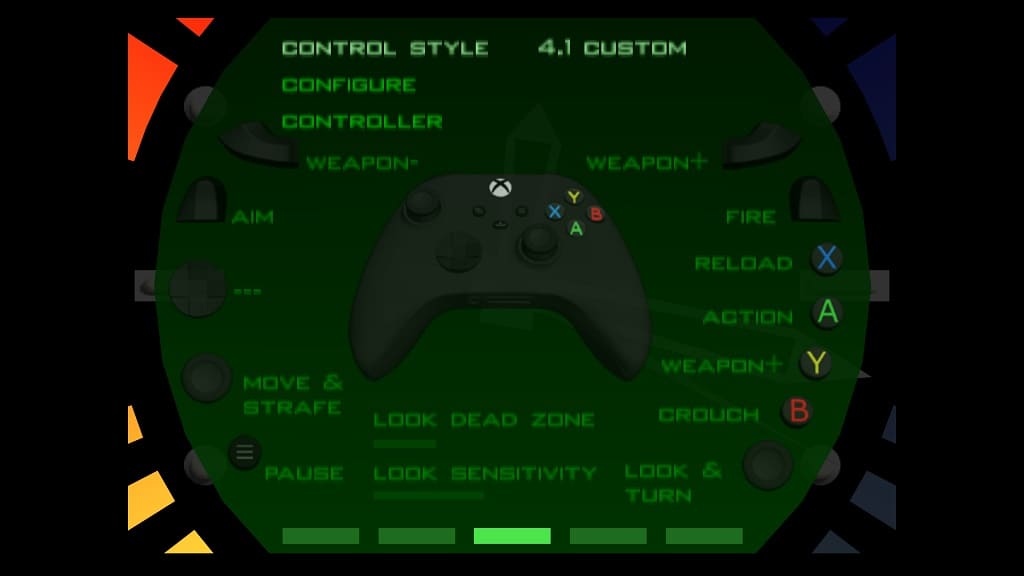
3. By default, the Control Style should be set to 3.1 Diamond.

In order to change it, you need to select the Control Style option and then use the press up or down on the left analog stick or directional pad in order to switch to a different style. You should see the following choices:

  • 1.1 Honey
  • 1.2 Solitaire
  • 1.3 Kissy
  • 1.4 Goodnight
  • 2.1 Plenty
  • 2.2 Galore
  • 2.3 Domino
  • 2.4 Goodhead
  • 3.1 Diamond
  • 4.1 Custom

4. If you want use your own custom layout, then you need to select 4.1 Custom for Control Style. Afterwards, you can select any of the buttons below and then use the left analog stick or directional pad to change their functionality.

5. At the bottom of the same screen, you can also adjust the Look Dead Zone and Look Sensitivity.

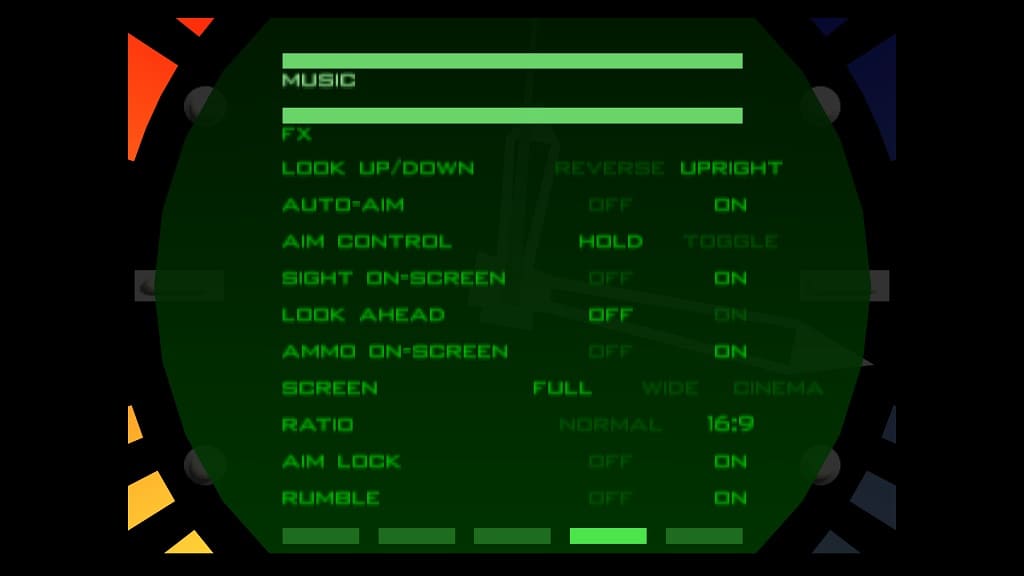
6. Once you are done making your adjustments in this screen, we recommend switching over the screen that shows the music volume at the top.

Note: If you can switch menus, then you need to press the Menu button to back out into the game and then the same button again to go back to the pause menu. You should then be able to change to a different menu from the watch.

From the screen with the music volume located at the top, you will be able to adjust the following control settings:

  • Look Up/Down
  • Auto-Aim
  • Aim Control
  • Sight On-Screen
  • Aim Lock

7. To return to the game with your customized control settings, you need to press the Menu button again.

By doing so, James Bond stop looking at his watch and resume his mission.

How to fix quick resume issues with Monster Hunter Rise

With the quick resume feature for the Xbox Series X and Xbox Series S versions of Monster Hunter Rise, you should be able to boot back into the game to exactly where to left off. However, many players have found that the game will often crash instead, causing it to restart. As a result, they may end up losing their progress.

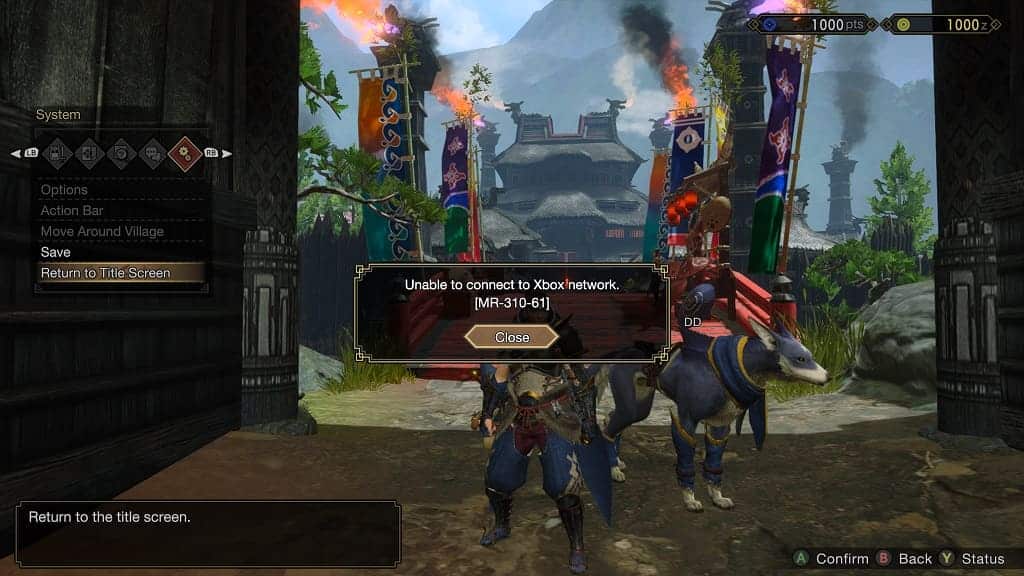
Furthermore, they may get signed out of the game and see the following message:

  • “Unable to connect to Xbox network. [MR-310-061].”

To see how you can potentially fix the quick resume issues in Monster Hunter Rise, you can take a look at this troubleshooting article from Seeking Tech.

Before we begin, it is important to note that Monster Hunter Rise features an online component. Therefore, you will most likely experience some issues when trying to use the quick resume feature while connected to an online lobby in the game.

1. So, if you are playing Monster Hunter Rise by yourself at the moment, then we recommend that you leave the current online lobby.

Once you are playing the game offline, you can try putting it into Quick Resume and the open it again to see if you are still getting a full reboot and/or disconnections.

2. If you have other games on your Quick Resume queue, then you can also try closing them.

In order to do so, you need to take the following steps:

  • Press the Xbox button to bring up the Guide menu.
  • From there, select My games & apps.
  • In the Quick Resume section, hover over icon of the other game and then press the Menu button on your controller.
  • Finally, select the Remove from Quick Resume option from the pop-up menu.
  • Follow the previous steps to remove any other games, expect for Monster Hunter Rise, from the Quick Resume queue.

3. If you don’t want to lose your progress, then we recommend that you manually save your game before putting it in quick resume.

To manually save, press the Menu button while actively playing the game. Next, you need to press the RB buttons several times to switch over to the System tab. From there, you should be able to select the Save option.

You should then be able to safely put Monster Hunter Rise into quick resume. Even if the game ends up restarting instead of booting back to exactly where you left off, you shouldn’t lose any progress as you already saved.

Unfortunately, it is not likely that this issue will be patched in Rise as previous games that don’t quite work with the Quick Resume feature never got new updates to fix this particular problem.

How to fix Hi-Fi Rush audio sync issues on Xbox Series X and S

Hi-Fi Rush is an Xbox Series X and Xbox Series S action game that requires you to time your actions based on the rhythm of the background music. As a result, the music needs to be in synched or you may have a difficult time creating attack combos as well as dodging incoming attacks.

To see how you can potentially get the audio to sync correctly, you can take a look at this troubleshooting article from Seeking Tech.

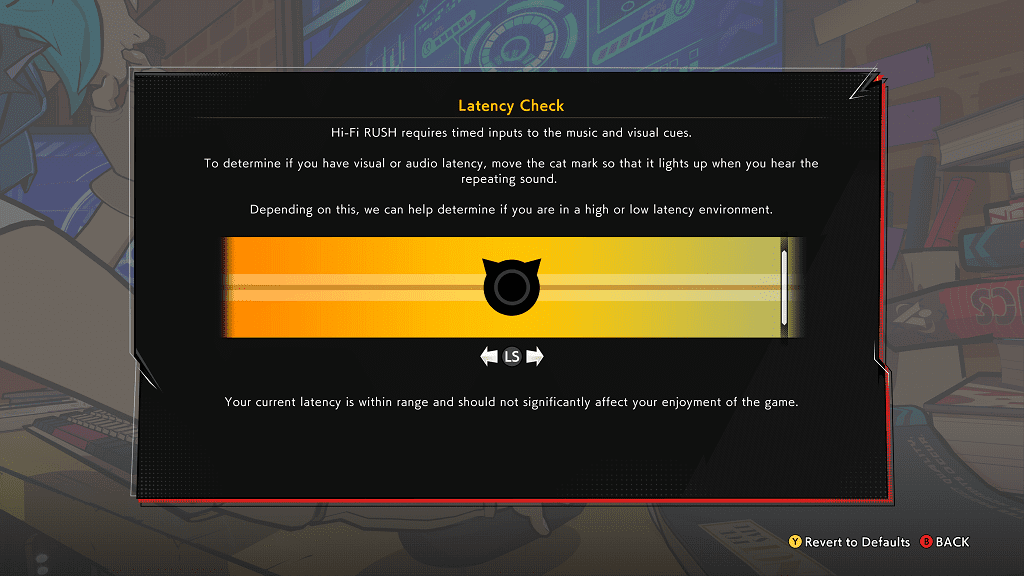
1. To begin, we recommend using the Latency Check from Hi-Fi Rush.

To access it, go back to the Title menu. If you are inside the game, you need to press the Menu button on your Xbox game pad in order to open the Pause menu, where you can select Return to Title option.

From the Title menu, select Options and then switch over to the Sound tab by pressing the RB buttons. In the Sound tab, you need to select Latency Check with the Sync button.

Follow the on-screen instructions in the Latency Check menu to see if you are getting a significant delay when it comes to audio sync.

If there is, then you should see an orange text saying that the gameplay and enjoyment may be impacted.

2. If there is a significant delay when it comes to the sound output, then we recommend that you connect your Xbox Series X or Xbox Series S console directly to your television set.

If you are using a HDMI pass-through or splitter in between, then these may be causing the audio to go out-of-sync.

3. If possible, you should also try using a wired connection for the listening device. Using a Bluetooth or wireless connection will add latency when it comes to sound output. Using your television speakers may be helpful as well.

To change the sound output device, as well as other settings, you need to go to the Settings menu of your console. From there, select General > Volume & audio output.

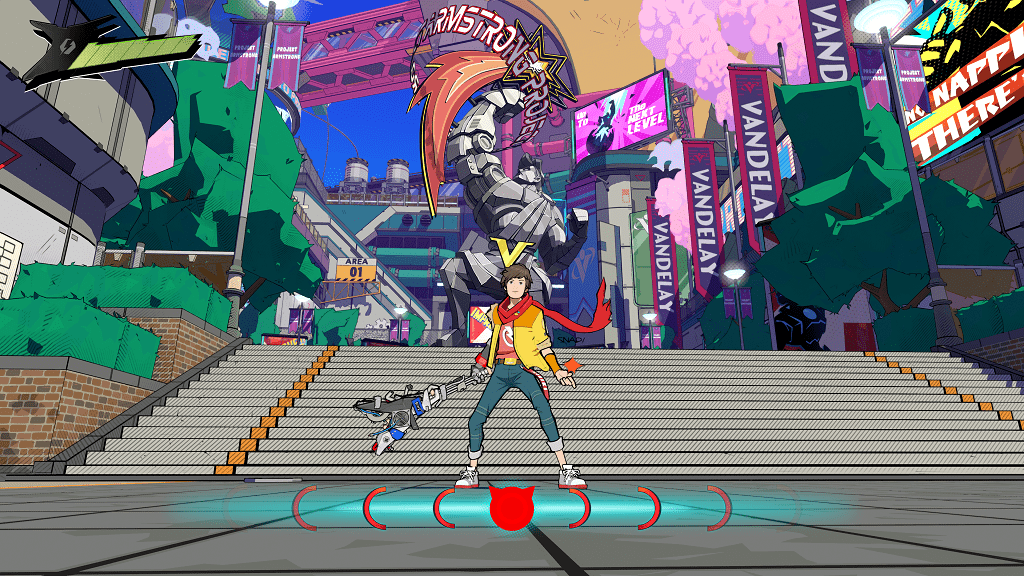
4. While playing the game, you can also bring up the Rhythm Assist meter that will appear at the bottom of the screen. This will provide you a visual reference, which should make it easier to complete attack combos.

To use this meter, you need to press the View button on your controller during active gameplay.

How to fix Hi-Fi Rush input lag issues on Xbox Series X and S

Hi-Fi Rush is a brand new first-party game for the Xbox Series X and Xbox Series S. In this action title, you need to attack and dodge enemies based on the rhythm of the music. As a result, having low latency is crucial.

If you find that you are experiencing a lot of input lag when playing Hi-Fi Rush, then you can take a look at this troubleshooting article to see how you can potentially reduce the delay.

1. For the first step, we recommend using the Latency Check feature to see whether or not there is significant input lag that may severely affect your experience.

In order to do so, you first need to head back to Title menu. If you are currently playing the game, then you can go back by pausing the action by pressing the Menu button and then select the Return to Title option in the Pause menu.

From the Title menu, select Options and then move then press the RB buttons two times to switch to the Sound tab. From there, move the cursor to Latency Check and then press the X button.

In the Latency Check menu, you need to move the cat symbol so that it will be lit up when you hear the sound.

If you the symbol gets moved too far in one direction, then you should see the following message:

  • “Your current setup has significant latency which will affect your gameplay and enjoyment of the game. Please check how your devices are setup to avoid a lag between video and audio.”

2. If you think you are experiencing high input lag when playing Hi-Fi Rush, then you should make sure that your Xbox Series X or Xbox Series S is connected directly to your television set or monitor.

If you connect the console first through a HDMI Splitter or HDMI pass-through device, then it may be adding more latency.

3. Most modern television sets have a Game Mode, which is designed to reduce the input latency. Therefore, you should make sure that you have this specialized mode enabled if your TV supports this feature.

4. You can also try using the Xbox controller as a wired gameplay as it may help reduce the input delay.

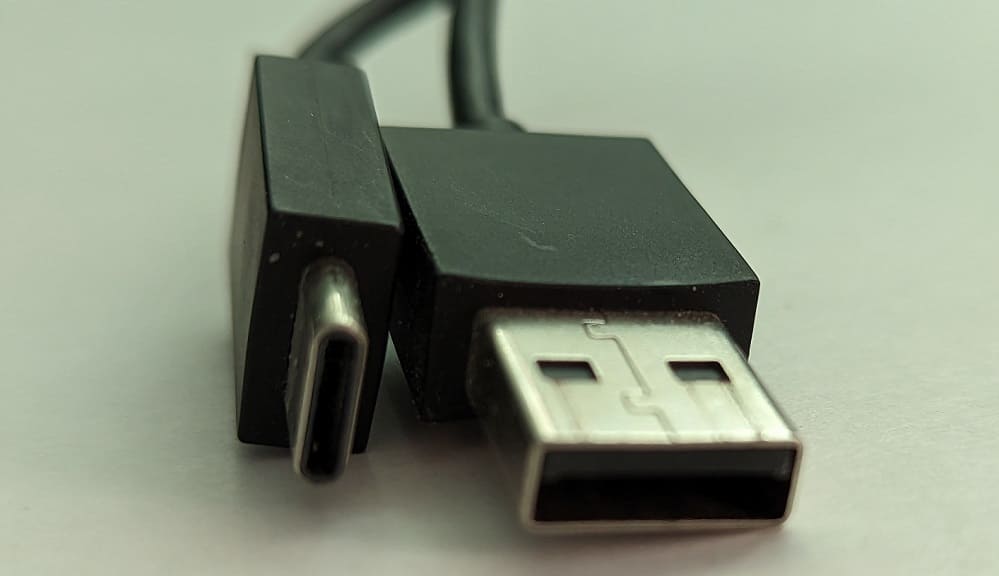
In order to do so, you can simply use a USB Type-C to USB Type-A cable. You plug the smaller USB Type-C end of the cable to the USB Type-C port of the Xbox controller and the USB Type-A end of the cable to one of the USB Type-A ports on your Xbox Series X or Xbox Series S console.

5. You can enable Rhythm Assist meter to help you get better timing by pressing the View button on your Xbox controller when playing the game.

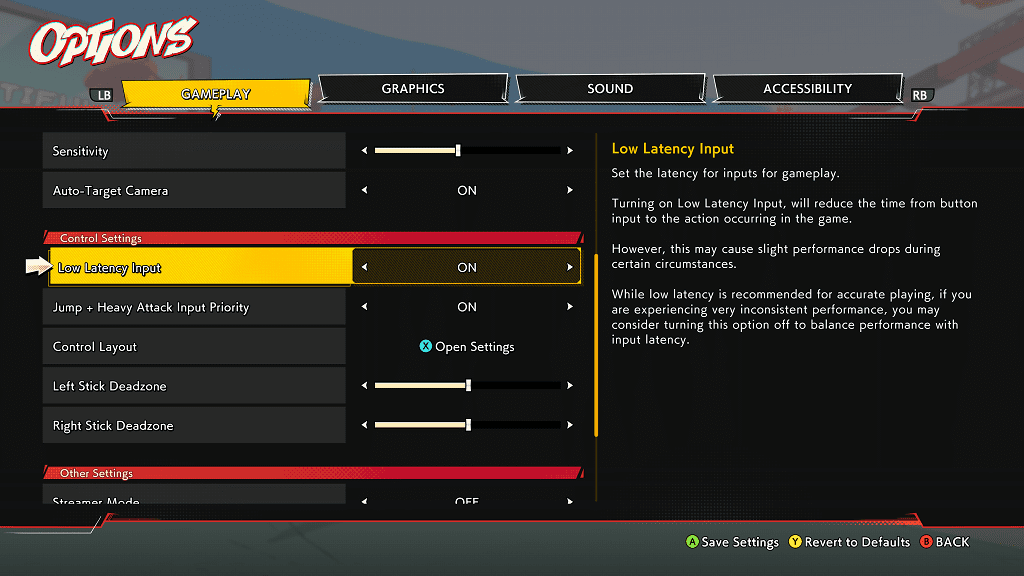
6. Moreover, you need to make sure that you have Low Latency Input enabled.

In order to do so, press the Menu button to open the Pause screen, where you need to select Options. From the Options menu, make sure that the Low Latency Input setting is set to On.

7. There is a possibility that you may be experiencing audio delay instead of input lag.

In this case, you can try using a different audio output device to see if doing so will make the input more in synced with the music notes.

8. If possible, you can also try connecting your game console to another screen. Some television sets or monitors are better at handling latency when compared to others.

How to change the DualSense Edge adaptive trigger intensity

Like the normal DualSense, the new DualSense Edge also features adaptive triggers. When used, the L2 and R2 buttons will require more pressure to press down. If you would rather use these triggers normally and/or would like to save on the battery life of the controller, then you can make this effect weaker. You can also completely disable this feature.

To find out how to do so, you can check out this walkthrough at Seeking Tech.

1. The first step is to turn on both your controller and your PlayStation 5 or PlayStation 5 Digital Edition console if you haven’t done so already.

2. With both devices turned on, you need to hold one of the Fn buttons on the DualSense Edge and then press the Options button in order to open the Custom Profiles menu on your PS5.

3. Inside the Custom Profile menu, you can either select an existing profile or create a new one.

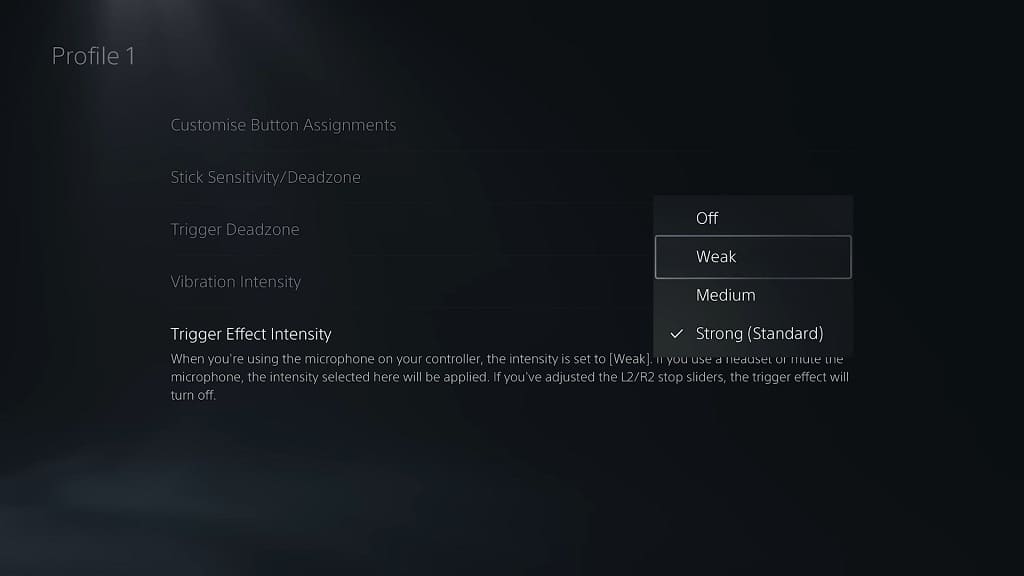
4. Once you get to the Profile menu, you should be able to find the Trigger Effect Setting with the following description:

  • “When you’re using the microphone on your controller, the intensity is set to [Weak]. If you use a headset or mute the microphone, the intensity selected here will be applied. If you’ve adjusted the LR/R2 stop sliders, the trigger effects will turn off.”

5. Select the Trigger Effect Setting to bring up a pop-up menu.

6. From the small window, you can choose to reduce the adaptive trigger effects to Weak or Medium.

7. If you want to turn off this feature completely, then you can select Off from the aforementioned small window.

8. To keep using your customized trigger intensity level, make sure you need to have the right profile selected when using the DualSense Edge.

9. Keep in mind that the adaptive trigger effect will always be set to Weak if you have the built-in microphone turned on for your DualSense Edge. Therefore, you may have to mute the mic to get to your desired intensity level.

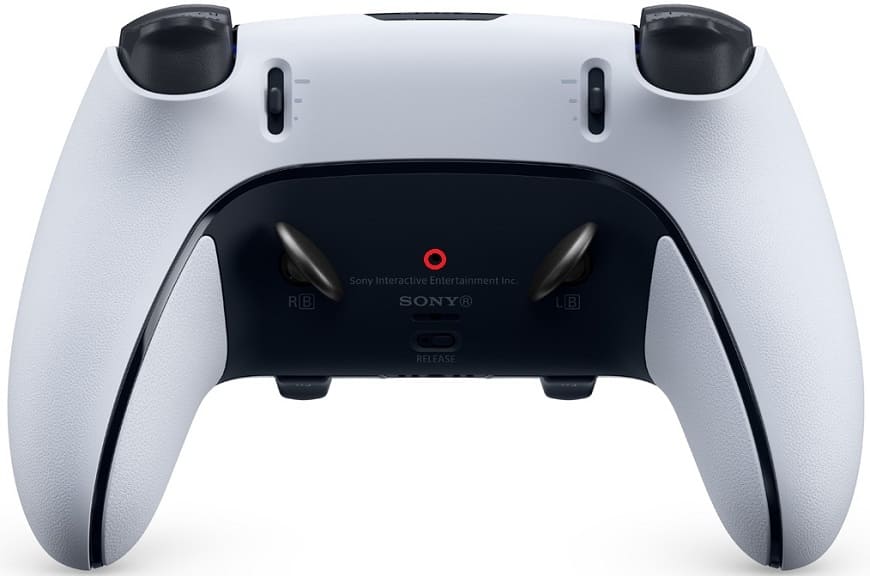
10. Furthermore, the trigger intenstiy level will be set to Off if you move the trigger stop sliders located at the backside of the DualSense Edge to either Medium or Short. Instead, you need to keep the sliders in the Long position, which is the top-most option.

How to change the DualSense Edge vibration intensity

Just like the regular DualSense, you are able to change the haptic feedback intensity of the premium DualSense Edge controller. This is helpful if you don’t find the default intensity level suitable and/or want to extend the battery life of the game pad before needing to recharge it again.

To find out how to do so with the Edge. you can follow the steps laid out in this tutorial at Seeking Tech.

1. For the first step, you need to turn on both the controller and your PlayStation 5 console if you haven’t done so already.

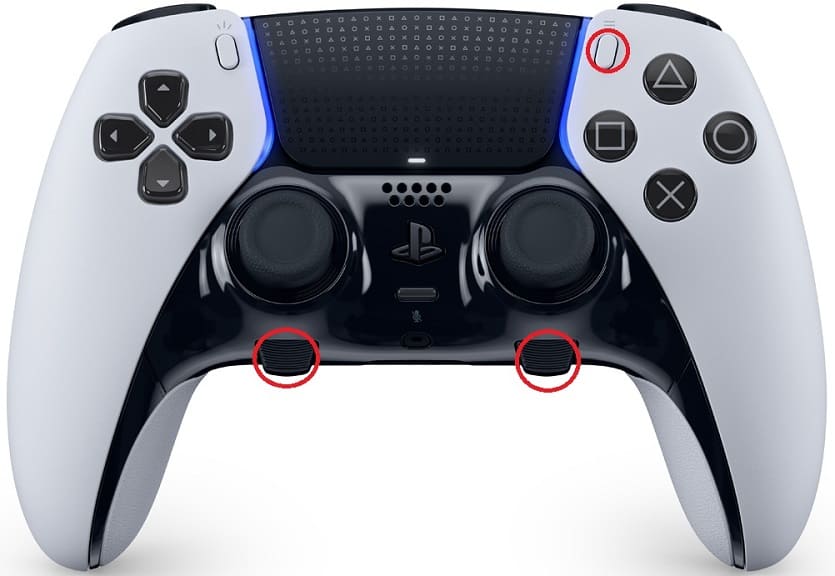
2. Next, you need to hold down one of the two Fn buttons that are located below the two analog sticks.

3. With one of the Fn buttons held down, press the Options button on the controller to go into the Custom Profiles menu.

4. From there, select a profile that you want to edit or create a new one.

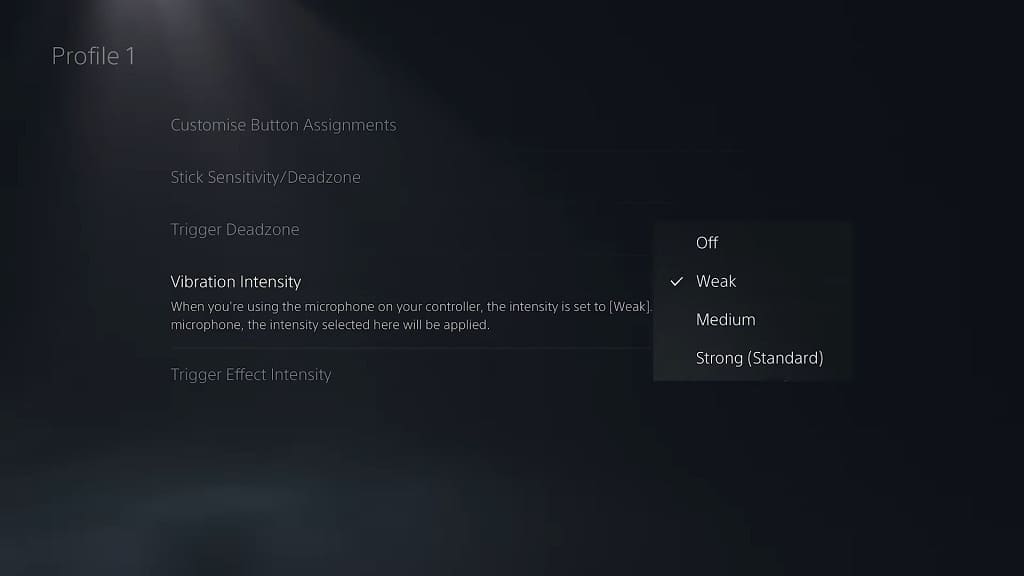
5. You should eventually get to the Profile menu, where you should see the Vibration Intensity setting with the following description:

“When you’re using the microphone on your controller, the intensity is set to [Weak]. If you use a headset or mute the microphone, the intensity selected here will be applied.”

6. Select the Vibration Intensity setting. By default, it should be set to Strong (Standard).

7. In the small pop-up window, you can change lower the haptic rumble to Medium or Weak.

If you want to turn off vibration completely for the DualSense Edge, then you need to set the Vibration Intensity setting here to Off.

8. Make sure that you use the same profile where you made your Vibration Intensity changes when using the DualSense Edge. Otherwise, the level will be changed back to Strong (Standard).

Furthermore, as stated above, if you the built-in microphone is turned on, then the intensity level will be set to Weak no matter what. Therefore, you may need to mute the mic on the controller.

How to adjust headset volume and game/chat audio balance with the DualSense Edge

With the DualSense Edge, you are able to adjust the volume and game/chat audio balance for the headset, headphones or ear phones you have directly connected to the premium controller without pausing the game session and opening the system menu on your PlayStation 5. To see how you can do so, you can take a look at this tutorial from Seeking Tech.

How to raise or lower the headset volume by using the DualSense Edge

In order to change the volume level of your listening device by using the DualSense Edge, you need to take the following steps:

1. To start off, make sure that your headset, headphones or ear phones are connected directly to the headphone jack of the controller. Otherwise, you won’t be able to adjust the volume by only using the game pad.

2. With your listening device connected, press and hold one of the Fn button on the controller.

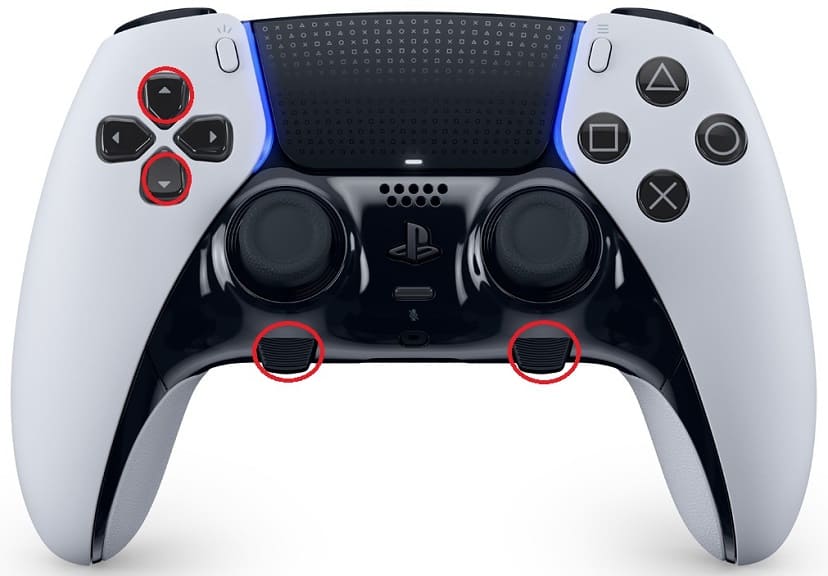
3. With one of the Fn button held down, you can increase the volume of the headset, headphones or ear phones with the up directional button.

To decrease the volume, you need to press the down directional button instead.

How to adjust the game/chat audio balance with DualSense Edge

If you are using a headset with the microphone enabled, then you can also adjust the audio balance between the game and voice chat with this premium controller. You can do so by taking the following steps:

1. To begin, the headset needs to be connected directly to the headphone jack of the game pad. Otherwise, you won’t be able to use the shortcut.

2. With the headset connected, you need to press and hold one of the Fn buttons on the DualSense Edge.

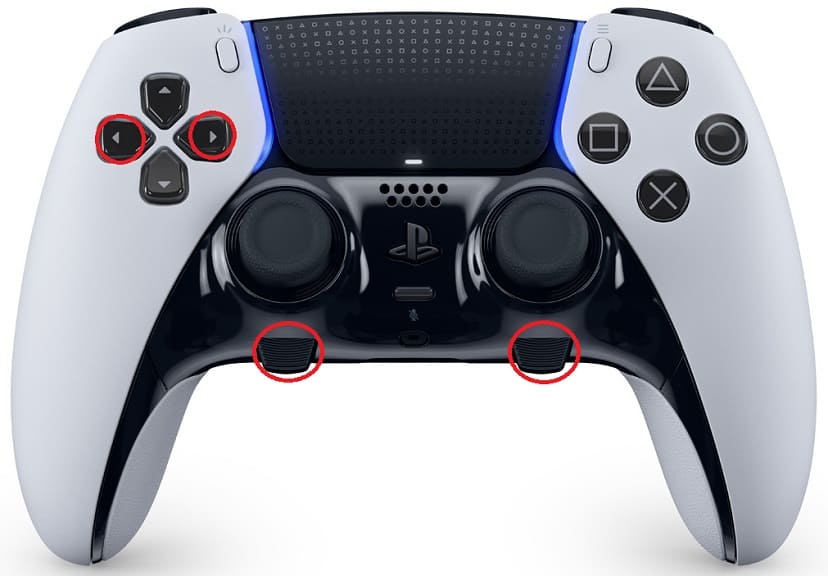
3. With one of the Fn buttons held down, you can press the right directional button to make the voice chat volume louder than the game audio.

If you want to make the game audio louder than the chat audio, then you need to press the right directional button instead.

If your headset, headphones or ear phones are connected through the headphone jack of your DualSense Edge, then you would need to adjust the volume and game/chat audio balance by using the Control Center menu on your PlayStation 5 or PlayStation 5 Digital Edition console.

You can open this quick menu by pressing the PS button on the Edge. Afterwards, you need to select the Sound option at the bottom-side menu. You should then be able to adjust the volume and game/chat audio balance from there.

How to disable the touch pad for DualSense Edge

One of the new features added to the DualSense Edge, when compared to the standard DualSense, is the ability to disable and turn off the touch pad. This is helpful if you prevent yourself from accidentally triggering any unintended action by touching the pad. Furthermore, you may be able to extend the battery life of the Edge as well.

To see how you can disable and turn off the touch pad, you can follow the steps laid out in this tutorial at Seeking Tech.

1. If you haven’t done so already, make sure you turn on your DualSense Edge and PlayStation 5 console.

2. Next, you need to set up a custom profile for your controller.

In order to do so, you first need to press and hold one of the Fn buttons on the gamepad and then press the Options button.

3. If done correctly, you should be brought to the Custom Profiles menu.

Here, you can either select one of the three custom profiles you have stored on the controller or create a new one.

4. In the Profile menu, you need to head over to Customize Button Assignments.

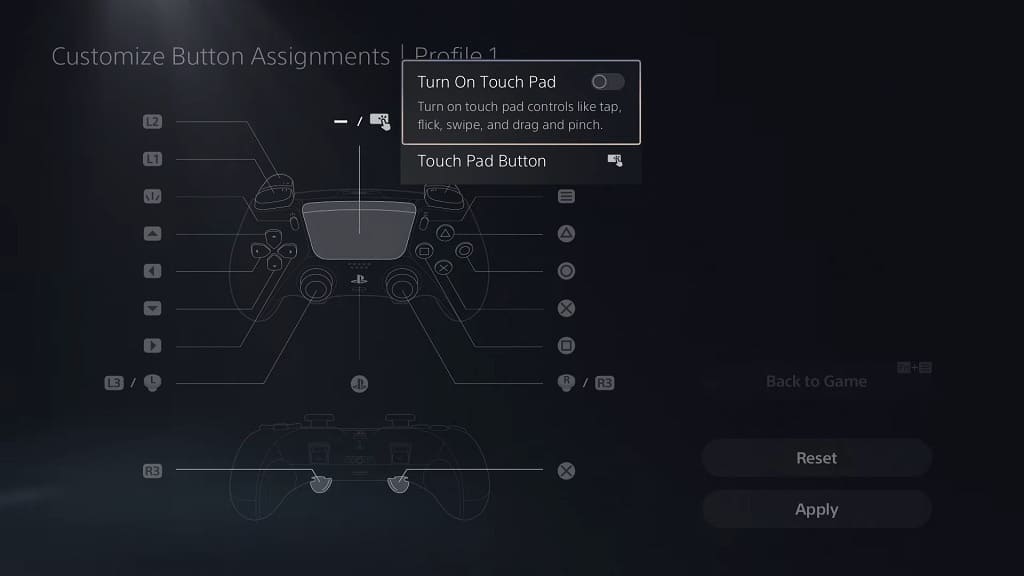
5. After getting to the Customize Button Assignments menu for your current profile, select the touch pad icon. It should be located on the top middle of the layout.

6. In the pop-up menu, you should see the Turn On Touch Pad option with the following description:

“Turn on touch pad controls like tap, flick, swipe, and drag and punch.”

To turn off these features, make sure you select the Turn On Touch Pad option in order to move the circle to the right of the wording to the left. The same circle should also become black instead of white.

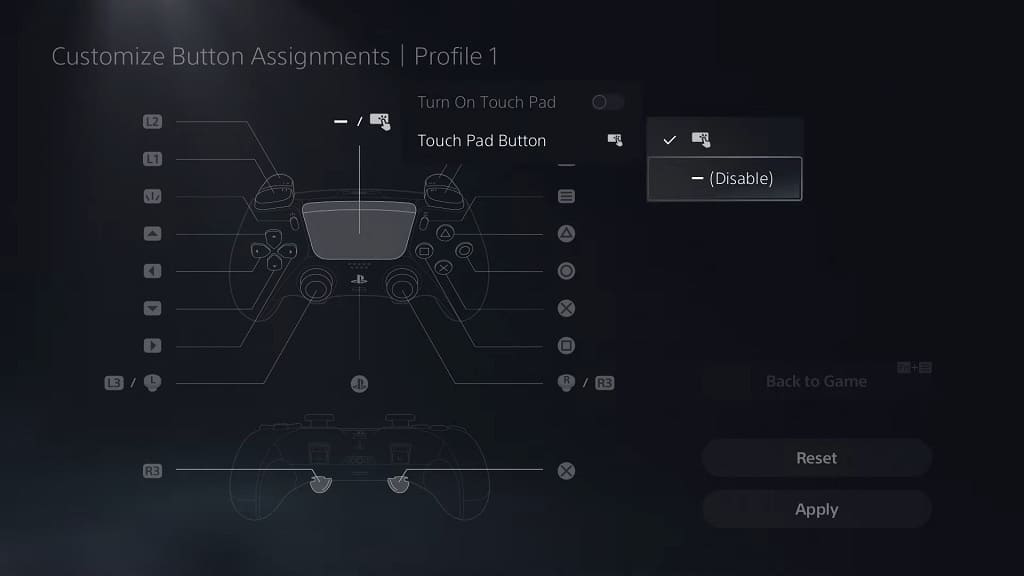
7. In order to completely disable the touch pad, select the touch pad icon from the aforementioned Customize Button Assignments menu.

In the small pop-up menu, you then need to select the Touch Pad Button option and then Disable.

8. Once you are done with making changes to the touch pad functionality, select the Apply option located on the bottom right side of the menu.

The touch pad should now be disabled on your DualSense Edge. Make sure you use the same custom profile in the future if you want to keep the pad turned off.

How to reset the DualSense Edge

If you are experiencing problems with the DualSense Edge, then a common troubleshooting step you can take is to reset the controller. To find out how to do so, you can follow this Seeking Tech guide.

1. To start off, we recommend that you turn off the controller and disconnect it from the connected device.

In order to turn off the DualSense Edge, you can hold the PS button until you no longer see any lights coming out of it.

To disconnect the controller from the other device, you can try temporary turning off the device and disabling its Bluetooth connection. If the other connected device is a PlayStation 5 or PlayStation 5 Digital Edition console, then you can simply unplug the power cord from the power outlet.

By disconnecting the controller, it should prevent you from accidentally turning on the gamepad when you are trying to reset it.

2. Once you are ready, turn the DualSense Edge over to the back side, preferably on a flat and smooth surface so that you don’t end up scratching or damaging it.

You should be able to find a small hole in the middle of the black bottom part. The reset button is located at the bottom of the hole.

3. In order to press the Reset button, you need to use a pin that is thin enough to fit into the hole.

In our case, we used a thin sewing pin, which we were able to fit into the small hole in the back of the controller without any problems.

4. Push the pin down until you feel a little bit of resistance, which indicates that you reach the reset button. Keep pushing the pin to press the button down.

5. Once you have reset your DualSense Edge controller, you need to pair it again to the connected device

How to update the DualSense Edge firmware on PS5

Just like the regular DualSense, the new DualSense Edge controller can be updated to a new firmware when it is connected to your PlayStation 5 or PlayStation 5 Digital Edition console. A new software version of the gamepad may fix glitches, improve performance and/or add new features.

To see how you can download and install the update, you can follow the steps laid out in this tutorial at Seeking Tech.

1. For the first step, you need to connect the DualSense Edge to your PS5 console via a USB cable.

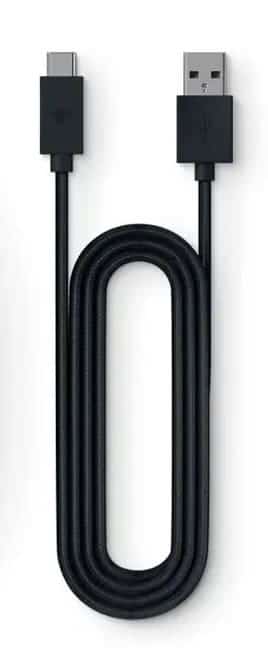
Sony recommends that you use the braided USB cable that comes included with the carrying case of the premium controller.

With that said, the USB Type-C to USB Type-A cable that you got with your PlayStation 5 or PlayStation 5 Digital Edition should work as well.

You should also be able to use third-party cables although some may not work when it comes to updating the gamepad.

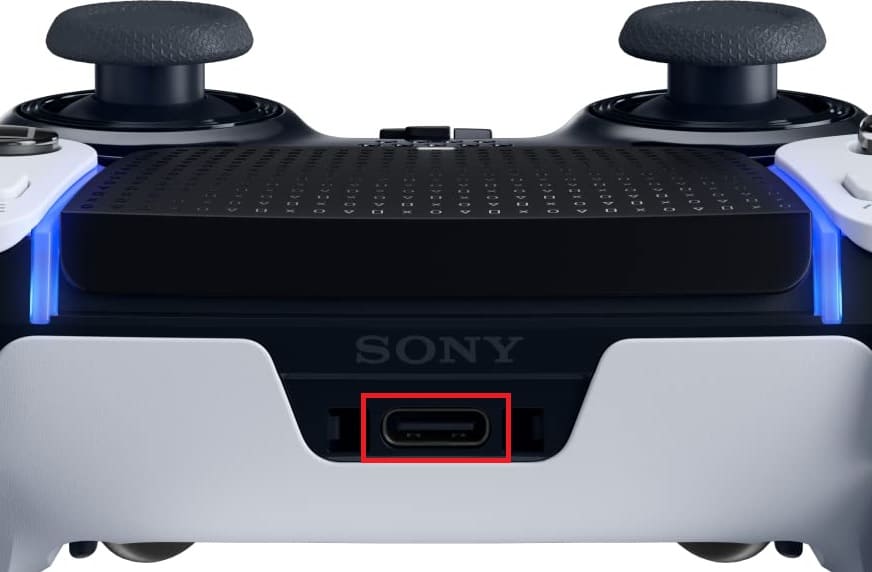
2. Connect the USB Type-C end of the cable to the top of the DualSense controller and then the USB Type-A end of the same cable to any of the available USB ports of your PS5.

3. Turn on your PlayStation 5 if you haven’t done so already.

4. When there is a new update for the DualSense Edge available, you will most likely get a notification that appear on the top right corner of the screen right after you download and install the latest firmware for your PlayStation 5.

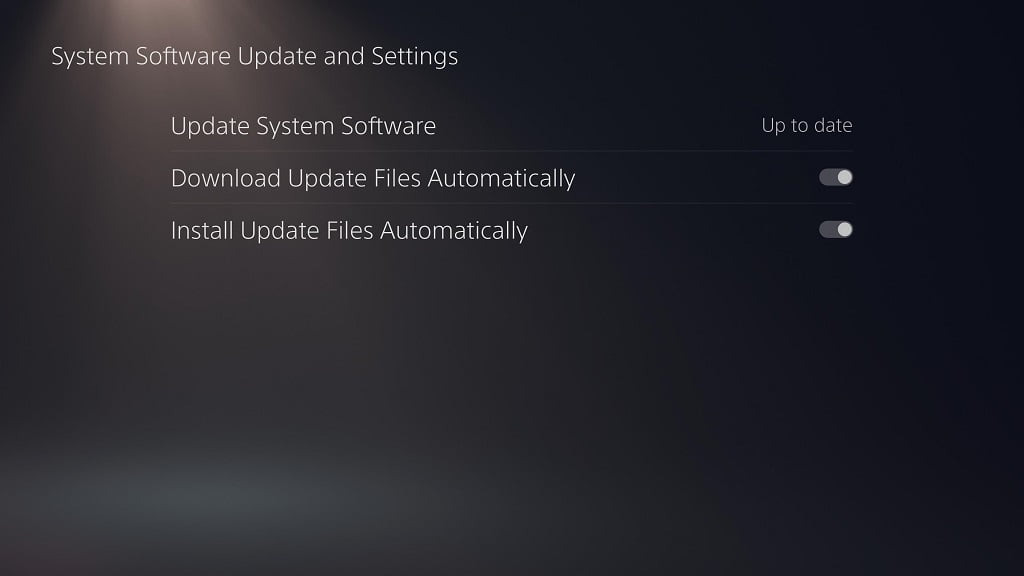
In order to manually update your PlayStation 5, you need to head over to the Settings menu on your console. From the initial page of Settings, you then need to select System > System Software > System Software Update and Settings > Update System Software > Update Using Internet.

5. Once your system has been updated, you may see a notification pop up on the upper right corner that notifies that a new update is available for the DualSense Edge. If you press the PS button while the notification is on screen, then you should be taken to the update page immediately.

6. If you don’t see the message, or did not press the PS button on time, then you can still get to the update page by first opening the Settings menu of your PS5. From there, you need to select Accessories > DualSense Edge Wireless Controller > DualSense Edge Wireless Controller Device Software.

7. During the update process, don’t disconnect the USB cable connecting the gamepad to your console.

You should be able to unplug the cable once the download and installation has been completed.