How to fix Disney Plus PS5 App Error Code 42

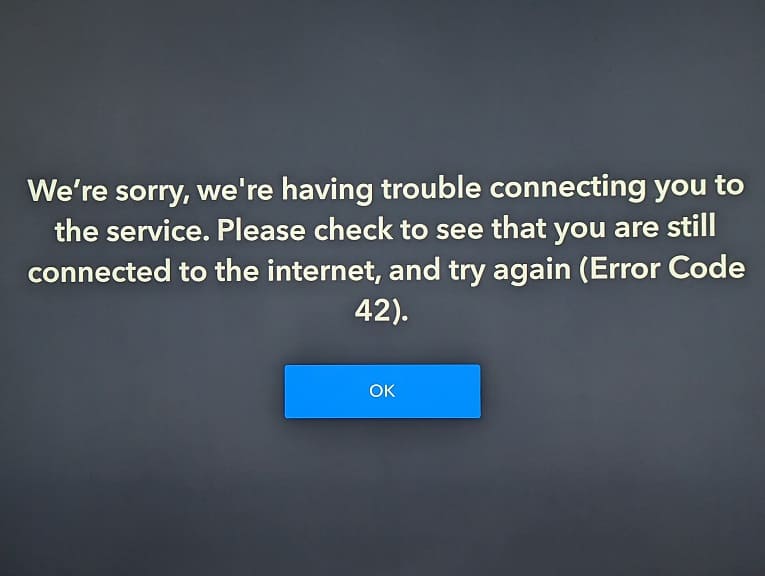
When watching a video by using the official Disney Plus streaming application on your PlayStation 5 or PlayStation 5 Digital Edition console, you may see the following error message:

  • “We’re sorry, we’re having trouble connecting you to the service. Please check to see that you are still connected to the internet, and try again (Error Code 42).”
To see how you can potentially fix this problem, you can take a look at this troubleshooting article from Seeking Tech.

1. The Error Code 42 popped up when we left the video we were watching paused while we needed to do something else for a couple of minutes.

In our case, we select the OK option to exit the error message and then re-select the same video. By doing so, the video was able to play without any issues.

2. If you are still getting the same error after re-trying, then you can try restarting the application.

In order to do so, you need to press and hold the PS button on the controller to bring up the home screen of your PlayStation 5. From there, move the cursor over to the Disney+ app icon and then press the Options button on the controller. Finally, select Close App from the pop-up window.
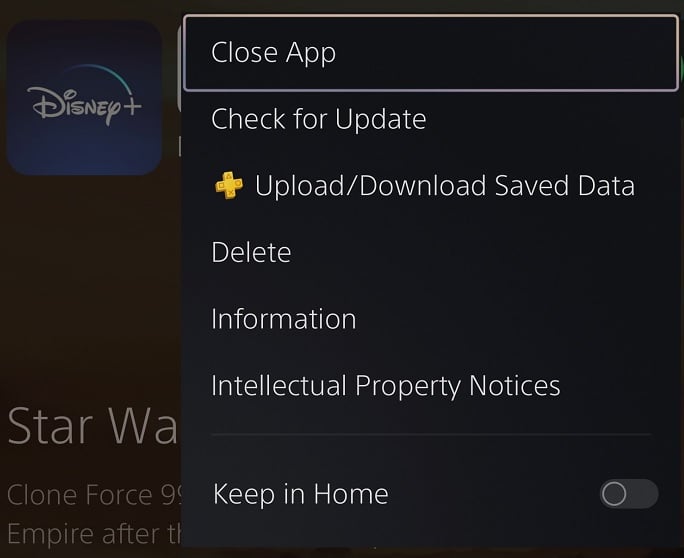
After closing the Disney Plus PS5 App, you can try opening it again.

3. You can also try restarting your game console as doing so will close the application as well as refresh your internet connection.

4. If you are downloading and/or streaming at the same time you are watching a video on Disney Plus, then you may not have enough bandwidth.

In this case, you can try pausing or cancelling other downloads and streams to see if the Error Code 42 message goes away.

4. You may also want to consider power cycling your internet connection.

To do so, turn off your PS5 and then shut down/unplug the modems and routers from your home network. After waiting for at least two minutes, turn the modems and routers back on again.

Once your home network is back online, you can turn on your game console and then open the Disney Plus App.

5. There is a possibility that the issues may be related to the Disney Plus servers. In this case, there is nothing you can do aside from waiting until the servers are fixed before watching a video.

DualSense Edge settings for Call of Duty: Modern Warfare II and Warzone 2.0

The DualSense Edge is a new premium controller created by Sony. To see what are the best settings for the gamepad when it comes to playing Call of Duty: Modern Warfare II and Call of Duty: Warzone 2.0 on your PlayStation 5 console, you can take a look at this guide from Seeking Tech.

Analog Caps

When it comes to the analog caps, we recommend going with whatever gives you the best grip. For us, we found that the standard caps work the best.

Keep in mind that you will be able to mix and match between the standard, high dome and low dome caps for the left and right analog sticks.

Back Buttons Attachments

For the back button attachments, we recommend using the levers if you have smaller hands or half domes if you have bigger ones. Or you can do with whichever feels the most comfortable and give you the quickest response.

You can also mix and match for the left and right back buttons.

Trigger Stops

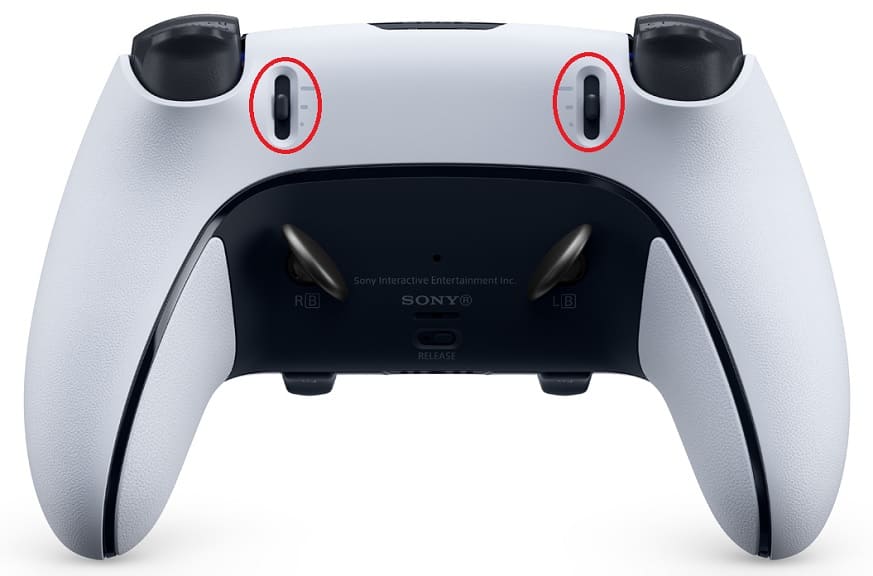
We recommend that you move the trigger stop sliders located on the back of your DualSense Edge all the way to the bottom. By doing so, the controller will be able to register your L2 and R2 buttons quickly.

This will also disable the adaptive trigger effects in the game.

Customize Button Assignments

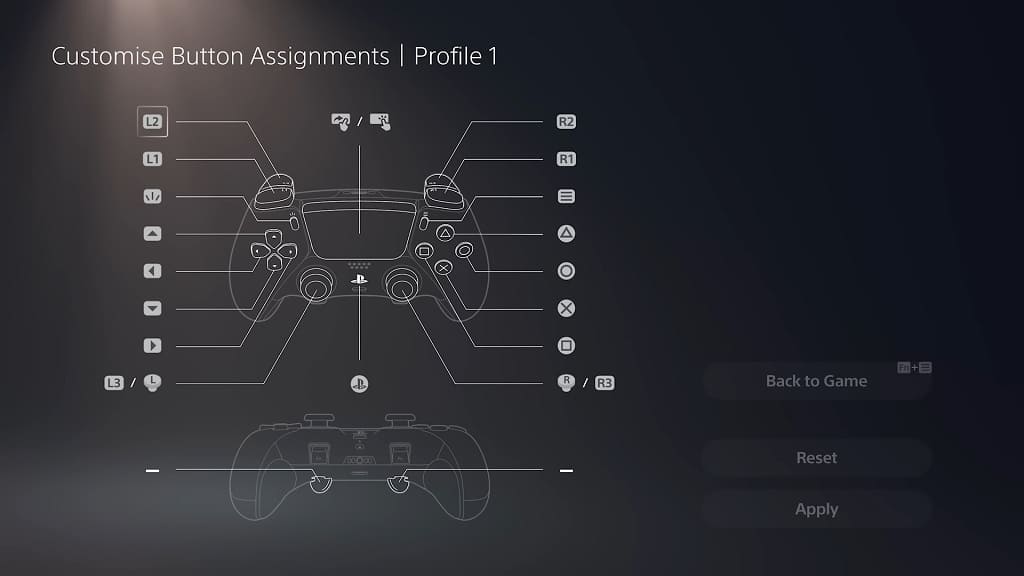
When customizing your Button Assignments for one of your profiles that is stored on your DualSense Edge, we suggest setting the left back button to L3 and the right back button to R3. You can then disable both the L3 and R3 buttons.

We tend to have problems when it comes to pressing these two buttons. Not to mention that it is very easy to trigger these if you accidentally press down too hard on the left and right analog sticks.

Stick Sensitivity/Deadzone and Trigger Deadzone

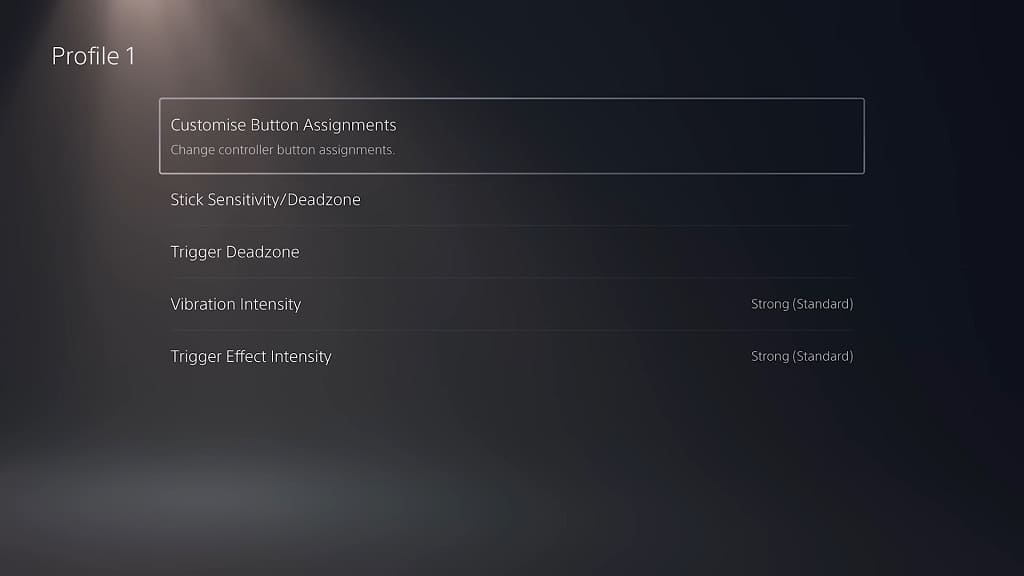
You can also use the Stick Sensitivity/Deadzone and Trigger Deadzone menus from your DualSense Edge profile to fine tune the sensitivity of the analog sticks and triggers to your liking.

This may be helpful if you start to notice some drift in the left, right or both analogs.

Using the DualSense Edge as wired controller

We highly recommend that you use the DualSense Edge as a wired controller as it will reduce the input lag.

Call of Duty: Modern Warfare II and Warzone 2.0 Controller Menu

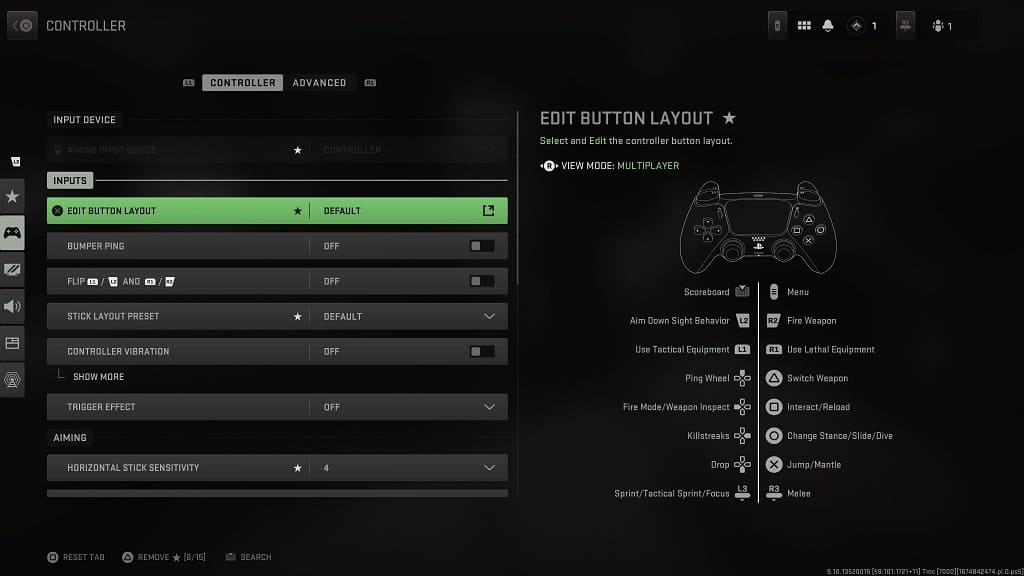
Next, you can go to the Controller menu from inside Call of Duty: Modern Warfare II and Call of Duty: Warzone 2.0.

From there, we recommend that you turn off Controller Vibration as it can be distracting when it comes to multiplayer matches. In the same menu, you can also change the button layout and add gyro aiming if you prefer using motion to help fine tune your accuracy.

We suggest playing around with all of the available settings in this Controller menu until you find the right combinations to boost your performance in multiplayer.

How to fix DualSense Edge battery drain issues

If you haven’t heard already, the DualSense Edge has a shorter battery life than the regular DualSense. This is because the premium version added several new features while maintaining the same shape as the normal model. Not to mention that the battery capacity of the Edge is 1050 mAh, which is 30% less than the 1560 mAh battery of the standard version.

To see how you can extend the battery life of the DualSense Edge so that you won’t have to recharge it as often, you can take a look at this article from Seeking Tech.

1. For the first step, we recommend using the Power Saving option on your PlayStation 5 or PlayStation 5 Digital Edition console.

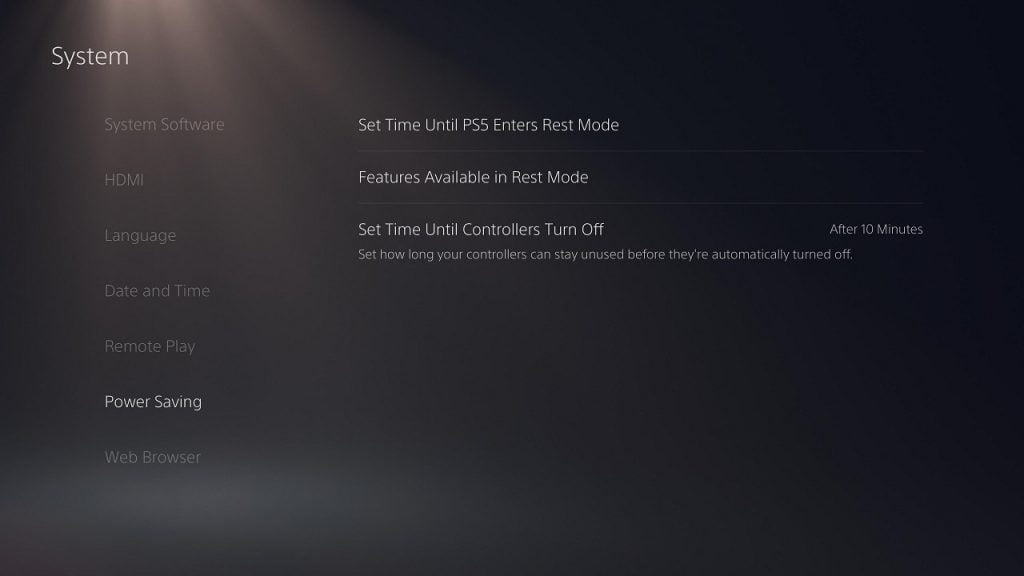
In order to do so, you need to go to the Settings menu of the gaming system and then select System > Power Saving > Set Time Until Controllers Turn Off. In the drop-down window, we recommend selecting After 10 Minutes.

So, if you left your DualSense Edge idle for 10 minutes, then it will turn off on its own, conserving the battery charge as a result.

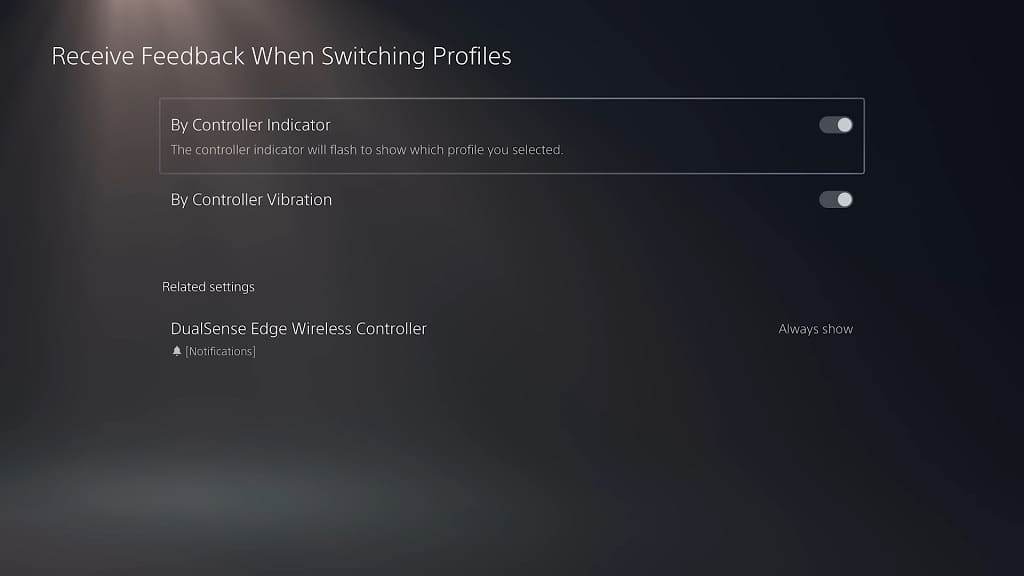
2. You can also turn off the feedback features while switching profiles. In order to do so, head back to the Settings menu of your PS5 and then select Accessories > DualSense Edge Wireless Controller > Receive Feedback while Switching Profiles.

Next, you need to disable By Controller Indicator and By Controller Vibration from the Receive Feedback When Switching Profiles menu.

3. We recommend turning down the brightness of the controller lights as well.

To do so, go to Settings > Accessories > DualSense Edge Wireless Controller. From there, you need to select Brightness of Controller Indicators. Finally, select Dim from the drop-down menu.

4. If you aren’t using the built-in microphone, then you should mute it. To do so, you need to press the mute button located directly below the PS button.

The mute button should light up when the built-in microphone of the gamepad is muted.

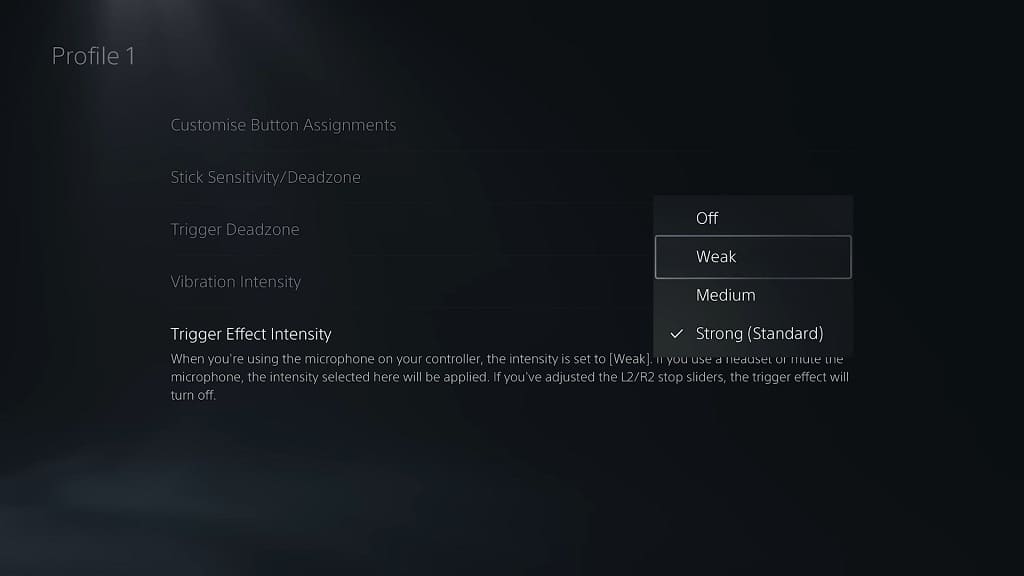
5. The DualSense Edge comes with the same adaptive triggers as the DualSense. If you aren’t planning on using this feature, then you can disable it by following the steps laid out in this detailed guide.

6. We also suggest turning off the haptic feedback of the controller to stop it from draining more battery charge. To find out how to do so, you should check out this previous post.

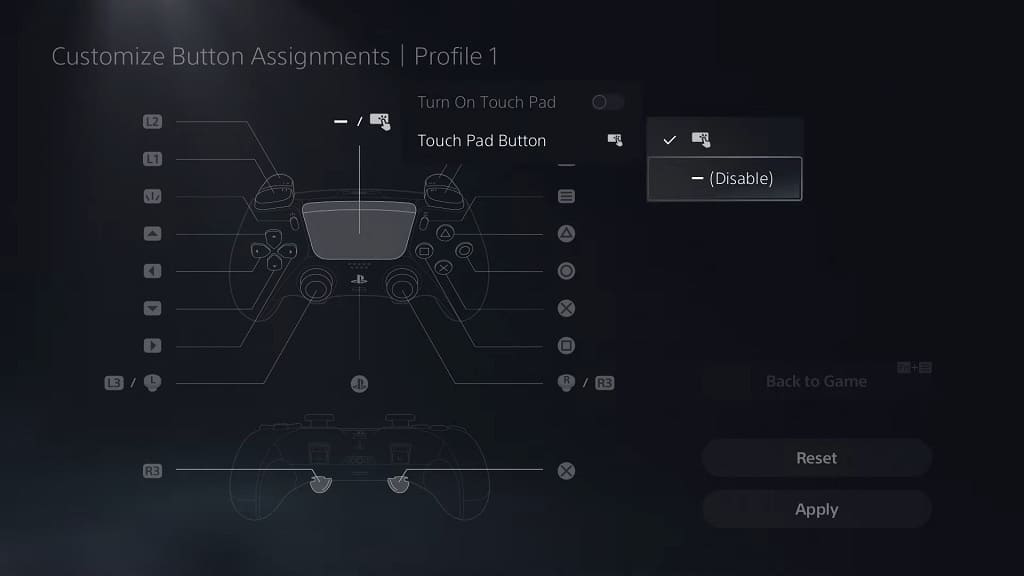
7. The touch pad of the DualSense Edge is also a massive battery drain. Thankfully, you are able to disable it with the premium controller. In order to do so, you need to follow these steps.

8. If you don’t want to worry about the battery life of the Edge, then we recommend that you use it as a wired controller. The gamepad comes with a length USB cable, which should give you plenty of room to play over a wired connection. Not to mention that you will most likely end up getting lower input lag as well.

Can you fix the texture issues in Xbox Series X and S versions of GoldenEye 007?

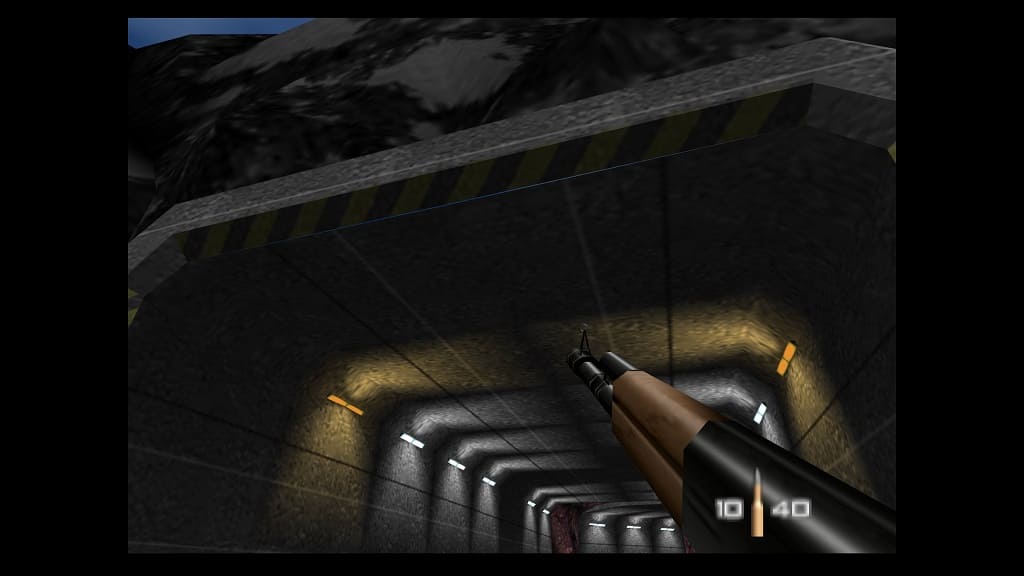
When playing GoldenEye 007 on your Xbox Series X or Xbox Series S, you may notice that some of the textures don’t stay in place and often end up overlapping. Furthermore, some don’t stay connected to each other as you may find seams in certain geometry in the levels.

So, can these texture issues be fixed? You can find out in this article from Seeking Tech.

According to Code Mystics, the development team behind the Xbox Series X and Xbox Series S versions of GoldenEye 007, the game is emulated from the original Nintendo 64 release. The studio stated on Twitter that the N64 release also have the same seams and Z fighting problems. However, since the original was rendered at a low resolution, these visual glitches were harder to spot.

Since the internal rendering of GoldenEye 007 has been up-rendered for the Xbox Series X and Xbox Series S versions, the same graphical bugs are easier to spot when compared to the N64 title.

You can find the comments made by Code Mystics regarding the texture issues below:

  • “For better or worse, the occasional seams and Z fighting are authentic, not an emulation glitch. It’s just easier to see in HD. But glitches were checked against a real N64 during development. What remains were there too, just blurrier.”

So, unfortunately, there is not much you can do on your end when it comes to potentially fixing these problems as the Xbox Series X and Xbox Series S versions were emulated based on the Nintendo 64 release.

We tried changing the resolution in the system menu of your Xbox Series X along with also adjusting the aspect ratio and field of view by using the in-game menus. None of these actions have any effects at reducing the seams and Z fighting.

This situation is similar to the recent PS1 games that were released for the PlayStation 4 and PlayStation 5. Since the resolution of these retro games were internally up-rendered, the stitching and Z fighting were more apparent at higher resolutions.

How to fix GoldenEye 007 input lag issues on Xbox Series X or S

You may notice that the Xbox Series X and Xbox Series S versions of GoldenEye 007 may be somewhat unresponsive to your control inputs at specific times. To see how you can fix these input lag issues for this classic game, you can take a look at this troubleshooting guide from Seeking Tech.

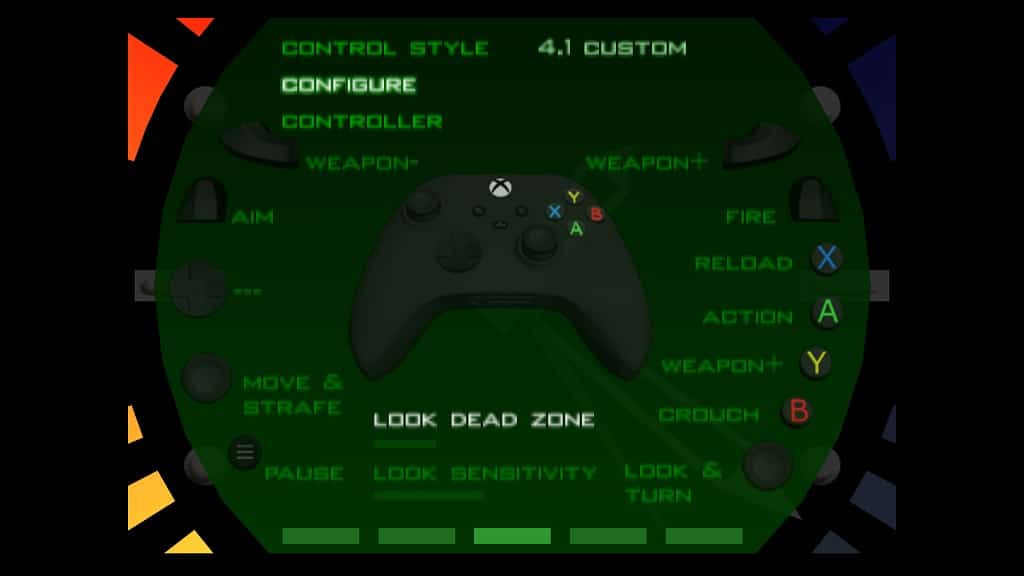
1. For the first potential fix, you can try changing the Look Dead Zone and Look Sensitivity Settings in the game.

To do so, you need to take the following steps:

  • While playing GoldenEye 007, press the Menu button on the Xbox controller to open the pause menu.
  • Inside of the pause menu, use the left and right directional pad buttons, or move the left analog stick to the left or right, until you get to the screen that shows Control Style located at the top.
  • From there, you need to select Configure.
  • Afterwards, you should be able to move down to the Look Dead Zone and Look Sensitivity sliders.

  • You can move these sliders to the right to improve the responsiveness for the right analog stick.
  • Once you are done making changes, press the Menu button on the controller to return to your game.

2. You can also try enabling Variable Refresh Rate on your television set or monitor as it may help reduce the input latency in this game.

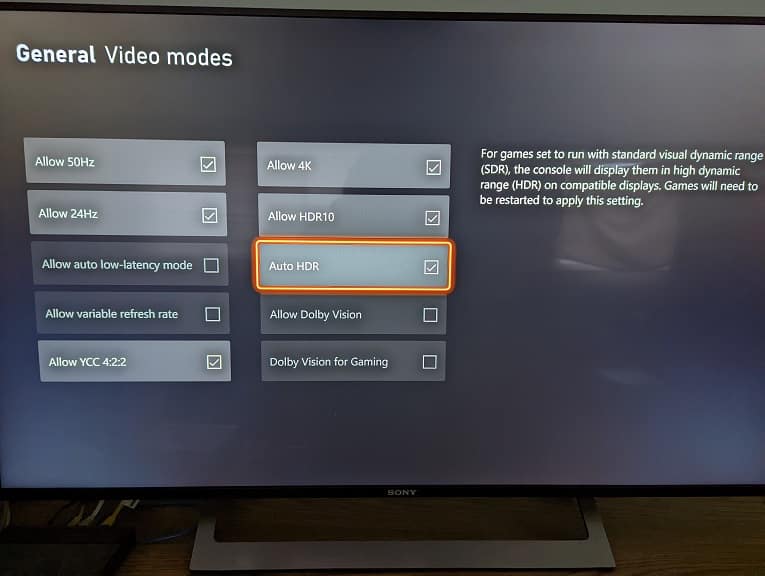
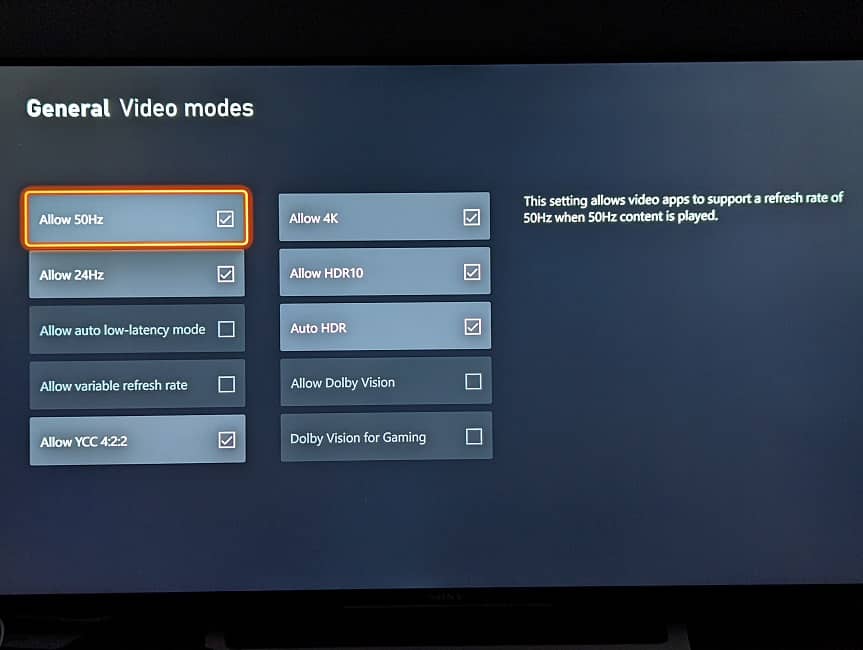
To do so, you may need to enable VRR in the Settings of your screen. Afterwards, go to the Settings menu of your Xbox Series X or Xbox Series S and then select General > TV & display options > Video modes. From there, make sure you enable the Allow variable refresh rate setting.

3. The Quick Resume features of these consoles have been known to cause performance and other issues in games. Therefore, you may want to try restarting GoldenEye 007 to see if you can get lower latency.

To do so, press the Xbox button and then move the cursor over to the game’s icon. Next, press the Menu button and then select Quit.

After quitting the game, open it again to see if your controls are more responsive.

4. You can also try playing by having your Xbox controller tethered to your console. A wired connection should result in lower input lag when compared to using the same gamepad over a wireless connection.

Therefore, you should connect your controller to the Xbox Series X or Xbox Series S through a USB connection to see if the game becomes more responsive.

How to enable or disable HDR for GoldenEye 007 on Xbox Series X or S

Depending on how you set up your Xbox Series X or Xbox Series S console, you may be able to play GoldenEye 007 in HDR. To find out how can enable or disable this display format, you can take a look at this tutorial from Seeking Tech.

How to enable HDR for GoldenEye 007 on Xbox Series X and Xbox Series S

In order to enable HDR for GoldenEye 007 on your Xbox Series console, you need to take the following steps:

Before we begin, it is important to note that this classic game does not natively support HDR. Instead, you will need to use a setting from the system menus of your console in order to convert the SDR image to HDR.

1. So, to start off, press the Xbox button to open the Guide menu.

2. In the Guide menu, press the RB button a few times to get to the Profile & system tab, which is where you will be able to select Settings.

3. From the Settings menu, you need to select TV & display options.

4. Afterwards, head to Video modes, which is below the Advanced column in the General – TV & display options menu.

5. You should now be in the General – Video modes menu. Here, you need to make sure that Auto HDR is enabled.

6. After enabling Auto HDR, you will need to restart GoldenEye 007.

In order to do so, press the Xbox button to bring up the Guide menu. Next, move the cursor to the game’s icon and then press the Menu button. In the pop-up window, you need to select Quit to close the game.

With the game closed, you need to open it again in order to play in HDR.

Some modern television sets and monitors may also support converting SDR to HDR. So, instead of using the Xbox Series system menus, you can try enabling this feature on your screen instead.

How to disable HDR in Xbox Series X and Xbox Series S of GoldenEye 007

If you don’t like how the game looks in the converted HDR format, then you can disable Auto HDR by going back to the Settings > General > TV & display options > Videos menu. Afterwards, you need to restart the game.

If you are using the HDR conversion via your television set or monitor, then you need to disable it from there.

How to fix Monster Hunter Rise input lag issues on PS5, Xbox Series X and S

Monster Hunter Rise was recently released for the PlayStation 5, Xbox Series X and Xbox Series S. When playing this monster hunting title, you may notice that there is a bit of input lag. To see how you can potentially reduce latency, you can take a look at this troubleshooting article from Seeking Tech.

1. You should get shorter input delay when playing at a higher frame rate.

By default, Monster Hunter Rise will run at 60 frames per second on your PlayStation 5, PlayStation 5 Digital Edition, Xbox Series X or Xbox Series S.

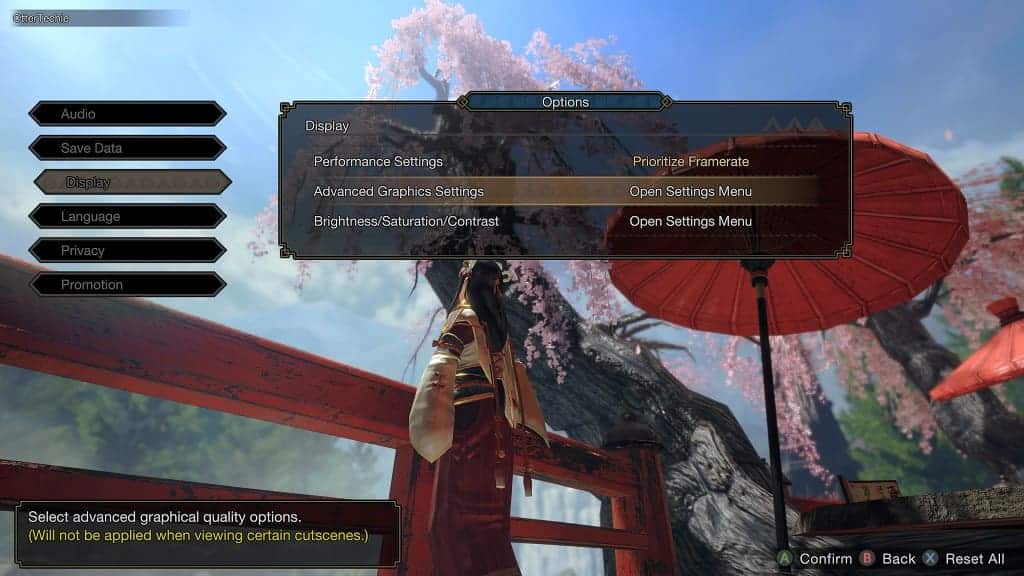
With that said, the frame rate may drop during more intensive sequences. To make sure that is stays at 60 fps as much as possible, we suggest switching over to the Prioritize Framerate mode.

In order to do, you need to go to the Options menu in Monster Hunter Rise. From there, select Display and then Performance Settings. With Performance Settings selected, you need to move to the left to change to Prioritize Framerate.

2. If you have a 120 Hz television set or monitor, then you are able to play this game at up to 120 frames per second on your PS5, PS5 Digital Edition, Xbox Series X or Xbox Series S. By doing so, you should be able to lower the input lag.

To enable 120 Hz on the PlayStation 5, you need to go to the console’s Settings menu and then select Screen and Video > Video Output. From there, set the 120 Hz Output Setting to Automatic.

On the Xbox Series X and Xbox Series S, you need to go to the system’s Settings menu and then select General > TV & display options > Refresh rate. In the small drop-down menu, you then need to select 120 Hz.

Once you are done setting up your console, make sure you change the aforementioned Performance Settings in Monster Hunter Rise to Prioritize Framerate.

3. Enabling Variable Refresh Rate should help as well if your TV or monitor supports this feature.

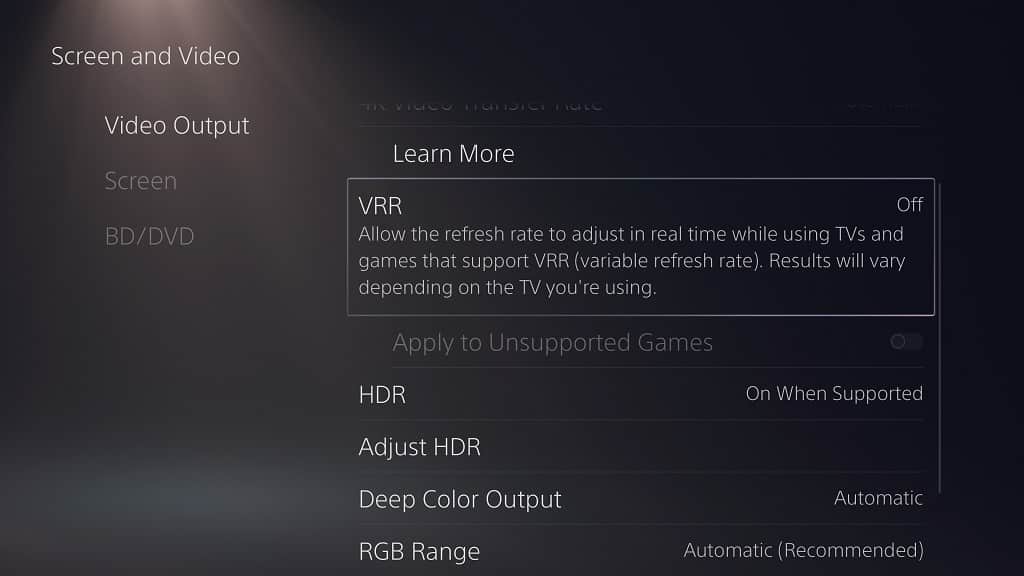
You can turn on VRR on the PS5 by going to Settings > Screen and Video > Video Output. From there, set VRR to Automatic.

On the Xbox Series X and S, you need to head over to Settings > General > TV & display options > Video modes. Afterwards, make sure that Allow variable refresh rate is enabled.

4. You can also try using your controllers as wired gamepads as doing so should also help in lowering the input delay in Monster Hunter Rise.

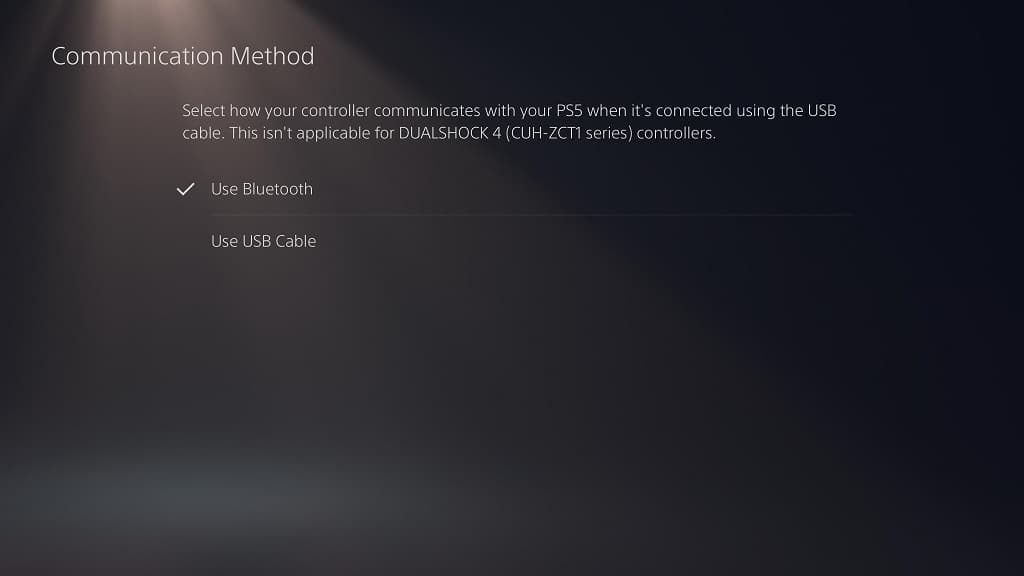
For the PS5, you need to connect the DualSense to the console via a USB cable. Afterwards, you need to go to Settings > Accessories > Controller (General) > Communication Method. Finally, select Use USB Cable from the Communication Method menu.

For the Xbox Series X and S, you can simply plug in the controller to the console via a USB cable.

5. If you haven’t done so already, make sure you have the latest patch installed for Monster Hunter Rise as a new update may help with improving the responsiveness of the game when it comes to controls.

How to fix GoldenEye 007 frame rate issues on Xbox Series X and S

When playing GoldenEye 007 on your Xbox Series X or Xbox Series S, you may notice that there is a lot of stutters. To see how you can potentially fix this issue, you can take a look at this troubleshooting article from Seeking Tech.

1. To start off, you can try enabling Variable Refresh Rate if your television set or monitor supports this feature.

This may help with the minor stutters in GoldenEye 007 as the Xbox Series consoles support low frame rate compensation (also known as LFC).

To use this feature, make sure that you enable VRR support on your television set or monitor. On your Xbox Series X or Xbox Series S, you then need to do the following:

  • Go to the Settings menu of your game console.
  • From there, select General on the left column and then select TV & display options on the right side of the same screen.
  • Next, you need to select Video modes in the Advanced section of the General – TV and display options menu.
  • In the General – Video modes menu, you should then make sure that the Allow variable refresh rate box is checked.

2. The Quick Resume feature for the Xbox Series X and Xbox Series S can cause performance issues in some games.

Therefore, you may want to remove GoldenEye 007 from the queue to see if it ends up running better from a fresh reboot. You can do so by taking the following steps:

  • Press the Xbox button on the controller to bring up the Guide menu.
  • Select My games & apps from the Guide menu.
  • In the My games & apps tab. Move the cursor to the GoldenEye 007 icon and then press the Menu button.
  • Finally, select the Remove from Quick Resume option in the pop-up menu.

3. You can also try to manually update the game to see if there is a new patch available that may fix the frame rate problems.

In order to do so, you can try taking the following steps:

  • Press the Xbox button to bring up the Guide menu and then select Home.
  • In the Home screen, move the cursor over to the GoldenEye 007 icon and then press the Menu button on your Xbox controller.
  • Afterwards, select manage game and add-ons from the pop-up menu.
  • You should now be in the Manage – GoldenEye 007 menu. Here, you need to select Updates on the right side of the screen.
  • If there is a new patch to download, then you should be able to see it in the GoldenEye 007 – Updates menu.

Keep in mind that, Code Mystics, the developer behind the Xbox Series X and Xbox Series S port of the game, has stated that the frame rate is limited to the original ROM code. As a result, it is unlikely that the performance will get improved in a new patch update as they most likely won’t have permission when it comes to changing the original code.

How to change aspect ratio and filed of view in GoldenEye 007 on Xbox Series X and S

You can adjust the aspect ratio and filed of view in the Xbox Series X and Xbox Series S versions of Goldeneye 007. To see how you can change the display area for this classic game, you can follow the steps laid out in this article from Seeking Tech.

1. To begin, make sure you are currently playing GoldenEye 007 if you aren’t doing so already.

2. During gameplay, you need to press the Menu controller on your Xbox controller. This button has three horizontal lines.

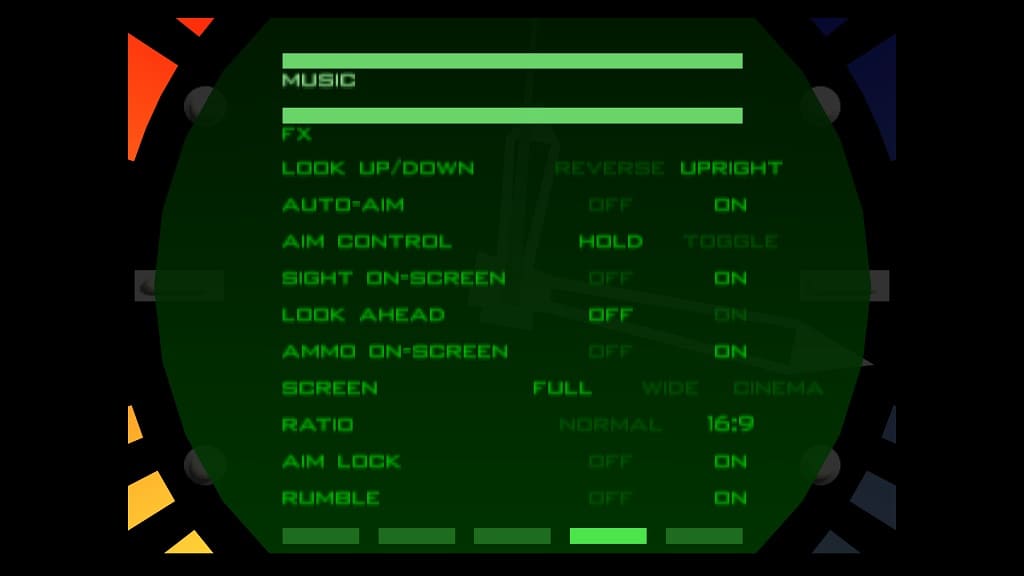
3. If done correctly, you should be in pause screen of the game, which is designed to look like James Bond’s watch. Here, you need to switch over to the menu that shows the Music and FX volume sliders located at the top.

In order to switch tabs in the pause menu, you need to press the left or right directional pad. Alternatively, you can use the left analog stick to move to the left or right.

If you can’t switch tabs, then it indicates that you currently have something selected. To un-select, press the A button. You should then be able to switch tabs. If you are still stuck, then you can press the Menu button to exit the pause screen and then the same button again to return.

4. Once you get to the correct tab, you need to scroll down and select Screen.

5. In the Screen setting, you will be able to select the following:

  • Full
  • Wide
  • Cinema

Full is the normal field of view for the game. If you want to view more of the surround area, then you can use Wide or Cinema instead.

5. In the same screen, you can also select Ratio.

6. Afterwards, you will be able to switch between Normal or 16:9.

If you want to mimic the original game on the Nintendo 64 console, then you should set Screen to Full and Ratio to Normal.

7. Once you are done making changes to the field of view and aspect ratio, press the Menu button to resume your play session.

Any customization you previously made from the pause screen should now be applied in-game. If you need to make more changes, then you need to return to the aforementioned menu with the Screen and Ratio settings.

How to invert controls in GoldenEye 007 on Xbox Series X and S

The classic GoldenEye 007 can be played with inverted controls on your Xbox Series X or Xbox Series S console. To find out can change it so that you will look down while moving the analog sticks upwards, as well as look up when moving the stick downwards, you can take a look at this tutorial at Seeking Tech.

1. To start off, you need to bring up the pause screen while playing the game. To do so, you can just press the Menu button (which is the one with the three horizontal lines), on your Xbox controller during gameplay.

GoldenEye 077 has a unique pause menu as it uses James Bond’s watch. You will see a short animation of the character looking down at it when hitting the Menu button.

2. Once you get to the pause menu, use the left or right directional pad buttons, or push the analog stick to the left or right, in order to switch tabs. You need to head over to the tab that shows the Music and FX sliders at the top.

3. After getting to the correct tab, move down and then select Look Up/Down.

4. With the Look Up/Down setting selected, press left or right on the directional pad (you can also move left or right on the left analog stick), to change this setting from Upright to Reverse.

5. Once you are done, press the Menu button to exit the pause screen and return to the game with inverted controls enabled.

Alternate Method

There is also an alternate way that you can invert the controls for GoldenEye 007 on your Xbox Series X or Xbox Series S.

In order to do so, press the Xbox button to open the Guide menu. From there, press the RB button several times to switch over to the Profile & System tab, where you then need to select Settings.

Inside of Settings, select Devices & connections > Accessories. From the Xbox Accessories menu, select the Configure option underneath your controller graphic. Next, you need to either create a new profile or select a current one. Afterwards, select the pencil icon.

You should arrive in the menu that says the following:

“Choose a button to map. Or press and hold a button”

Here, you can select the “Invert right stick Y axis” option. If you would like, you can also swap the left and right stick functions, invert the left stick Y axis as well as swap triggers.

The changes you made will be applied to all games being played on your Series X or Series S.